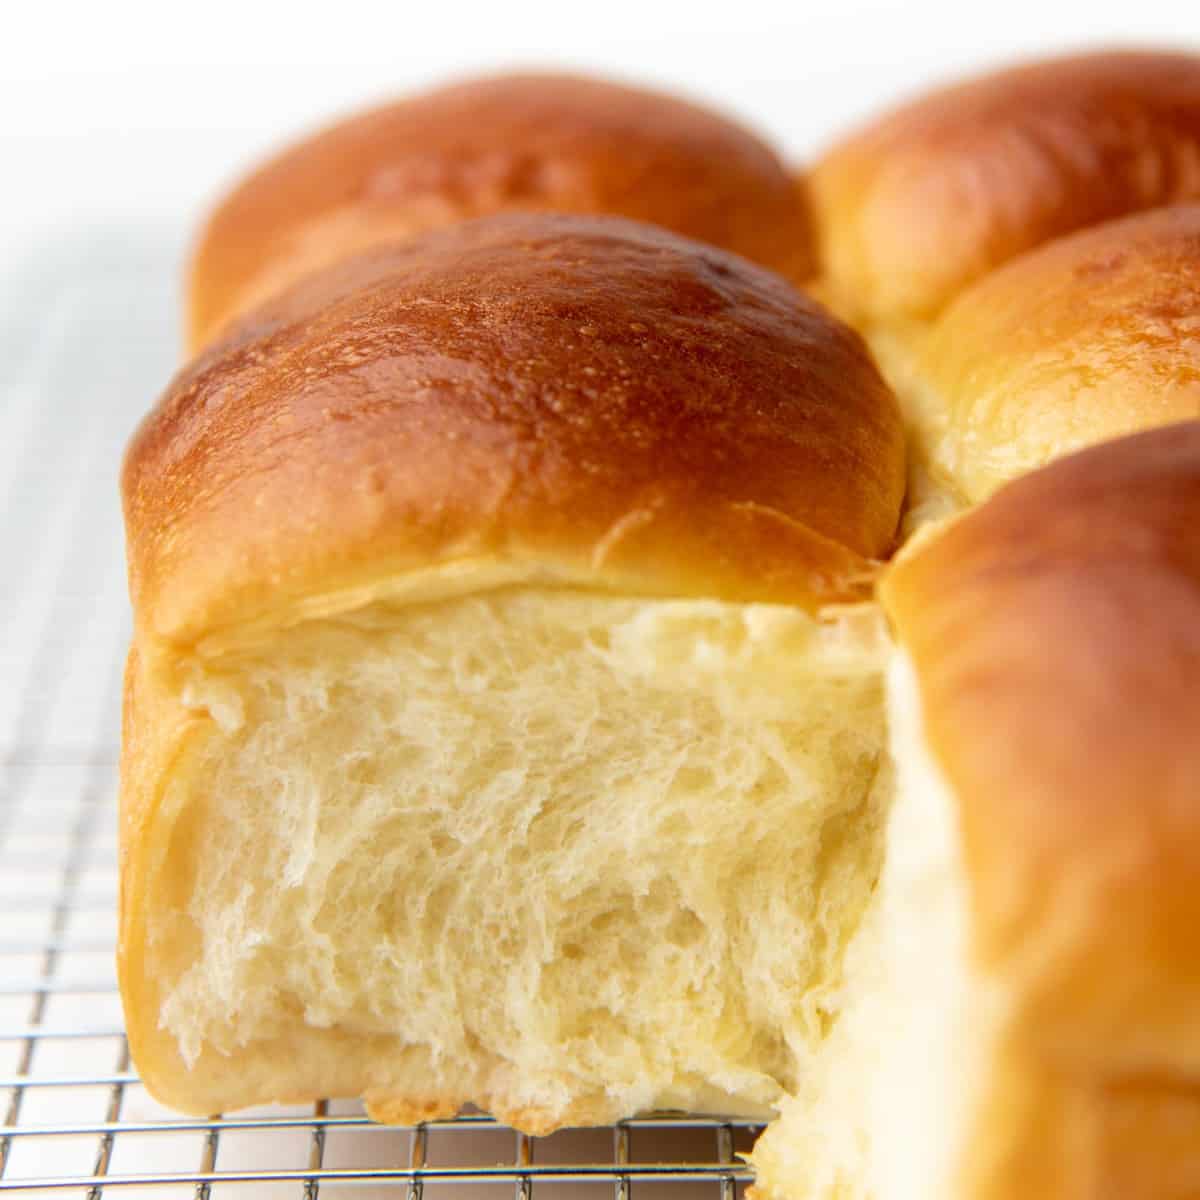
Japanese Milk Bread
Servings: 18 slices (1/2 inch)
Calories: 118kcal
The softest, milkiest Japanese milk bread, that makes the best sandwiches and dinner rolls! This is a step by step guide to help you make the perfect milk bread loaf. EASY - This is an easy bread recipe that yields spectacular results. There is an extra step to make the tangzhong, but this is also easy. US based cup, teaspoon, tablespoon measurements. Common Measurement Conversions
Print Recipe
Ingredients
Tangzhong
- 60 mL water ¼ cup
- 60 mL milk ¼ cup
- 23 g bread flour 2 tbsp
Japanese Milk Bread
- Tangzhong room temperature
- 120 mL milk ½ cup, lukewarm
- 7 g active dry yeast 2 - 2 ¼ tsp
- 50 g sugar ¼ cup
- 15 g dry milk powder 2 tbsp
- 1 egg
- 350 g bread flour about 2 ⅔ cups, spoon and leveled
- 1 tsp sea salt
- 58 g unsalted butter softened, 4 tbsp / ½ stick
Instructions
Tangzhong
- Place the water in a small saucepan. Add the bread flour and whisk until you have a smooth mix with no lumps. Add the rest of the milk and whisk to combine.
- Heat over medium heat while whisking constantly until the mixture thickens. The resulting mixture should have a thick, pudding-like consistency.
- Scrape the mixture into a bowl and then cover with plastic wrap. Make sure the plastic wrap is touching the surface of the tangzhong to prevent a skin from forming on top.
- Allow the tangzhong to cool to room temperature.
Japanese milk bread dough
- In your mixing bowl, place the lukewarm milk and dissolve about 1 tsp of the sugar in the liquid. Sprinkle the yeast over the milk and stir gently to mix. Allow the milk + yeast mixture to stand for about 10 - 20 minutes until the yeast is activated. The mixture should become bubbly and frothy on the surface.
- Once the yeast is activated, add the milk powder (if using), the rest of the sugar, tangzhong, the egg, flour, and finally the salt.
- Using a spatula, mix the dough to combine the ingredients and to help form a scraggly dough.
- With the dough hook attached to your mixer, knead the dough for about 5 minutes on a low speed (speed 2 or 3). The dough will be very sticky and stick to the sides, but continue mixing and the dough will start to come together.
- After 5 minutes of kneading, add the butter in 3 - 4 additions, mixing for about 20 seconds in between. Scrape down the sides and the bottom of the bowl to make sure the dough mixes well.
- Once all the butter is incorporated into the dough, turn up the speed to 4 - 5 (medium speed) and knead for a further 5 - 7 minutes. Scrape the bowl once or twice while kneading.
- The dough should become smooth, satiny and pull off cleanly from the sides of the bowl.
- Place the dough on a lightly floured surface and shape the dough into a ball. Then place the dough back in the mixing bowl and cover with plastic wrap.
- Keep the bowl in a warm place and allow the dough to double in size (about 1 - 2 hours, depending on the weather/ambient room temperature).
- When the dough has proofed in a warm place, you can transfer it to the fridge for a couple of hours just to make it a little easier to handle. THIS IS AN OPTIONAL STEP.
- Alternatively, place the bowl in the fridge and let it slow proof for about 12 hours. The dough will also be easy to handle when chilled.
- Once the dough is proofed and you’re ready to shape the dough, prepare the loaf pan. Butter 1 - 4.5 x 8.5 inch loaf pan and dust the pan with flour. If making dinner rolls, butter a 9 or 8 inch square cake pan, and dust the sides with flour. Set aside until needed.
- Turn the dough out onto a lightly floured surface and press all the excess air out of the dough.
Japanese milk bread loaf
- Weigh the dough, and divide it into 4 equal portions.
- Roll out each dough portion into a six inch (approximately) square.
- Fold the opposite corners of the square in towards the middle.
- Roll up this piece of dough, starting from the pointed end. Make sure you roll up the dough firmly, and a little tightly. If it’s too loose, you may end up with large holes in the baked bread.
- Once you’ve rolled up the dough to the top, fold the pointed edge in and pinch the seam to seal.
- Place the rolled up dough in the dough pan, seam side down. There will be 4 rolls per loaf pan.
- Repeat with all the dough portions and place them in the loaf pan.
- Cover the loaf pan with plastic wrap and let the dough proof in a warm place, until doubled in size. This can take about 1 - 2 hours depending on the ambient room temperature. The dough should rise to just below the top of the loaf pan.
Japanese milk bread rolls
- Divide the dough into 9 equal pieces.
- Roll each piece into smooth, round dough balls and place them in the square baking pan, with about ¼ - ½ inch of space between each ball. Each square baking pan should have 9 rolls each.
- Cover the baking pan with plastic wrap and let the dough proof in a warm place, until doubled in size. This can take about 1 - 2 hours, depending on the ambient room temperature.
Baking the bread
- Preheat oven to 350°F / 180°C. Once preheated, AND the bread is proofed, brush the top of the bread dough with a milk wash (for a more matte crust), or an egg wash (for a glossy crust). Bake in the preheated oven for 30 - 35 minutes (for the loaf), or 20 - 30 minutes (for the bread rolls). If the bread starts to caramelize too much in the oven, place a piece of foil over the surface of the bread to prevent it from burning.
- If you have a thermometer, bake until the internal temperature is about 190 - 205°F (88 - 96°C).
- Remove the loaf pan / baking pan from the oven and let it cool for a few minutes.
- Turn the dough out onto a wire rack and let it cool down further.
- This bread is easier to slice when at room temperature, but can be enjoyed warm too.
Notes
Notes on proofing
In winter, or if you don't have a warm place to proof the dough in your house, turn on the oven light, and keep the bowl inside the oven. The heat from the light will warm the oven sufficiently to help with the proofing. You can use a metal bowl to make this proofing process go faster.
Proofing times will vary depending on the temperature of the dough, environment and the type of yeast you use. So rather than going by time, go by sight and feel.
- If you make a small indent on the dough with your finger tip and it bounces back slightly, then it's ready to be baked.
- If the indentation stays, it's starting to over-proof, so bake it as quickly as possible.
- If the bread deflates when poked with a finger, then it has definitely over-proofed and may need to be re-done.
Nutrition
Serving: 1slice | Calories: 118kcal | Carbohydrates: 18g | Protein: 3g | Fat: 4g | Saturated Fat: 2g | Cholesterol: 17mg | Sodium: 143mg | Potassium: 53mg | Fiber: 1g | Sugar: 4g | Vitamin A: 128IU | Vitamin C: 1mg | Calcium: 27mg | Iron: 1mg