Roasted Garlic (Oven Recipe + Dutch Oven Method)
Servings: 10 servings
Calories: 414kcal
Roasted garlic is the simplest way to make garlic taste even better! It adds SO much flavor, and elevates your dishes! And you can use roasted garlic in recipes in place of raw garlic. Substitute 1 tsp for 1 large clove or 2 small cloves. EASY - This is an easy, beginner-friendly recipe. The yield will vary greatly depending on the size of the garlic heads and the size and amount of cloves. As a rule of thumb, 1 tsp = 2 small cloves / 1 large clove.
Print Recipe
Ingredients
- 3 - 4 garlic bulbs
- 2 - 3 tbsp oil olive oil or a neutral-tasting oil such as vegetable oil or canola oil
- Foil
Instructions
- Preheat the oven (conventional oven) to 375°F. If you're using an air-fryer, preheat the air-fryer to 350°F.
- When choosing garlic bulbs, use garlic bulbs that are firm, with no blemishes or discolored patches. You can remove any loose white papery skin on the surface, but make sure that the whole bulb is still intact.
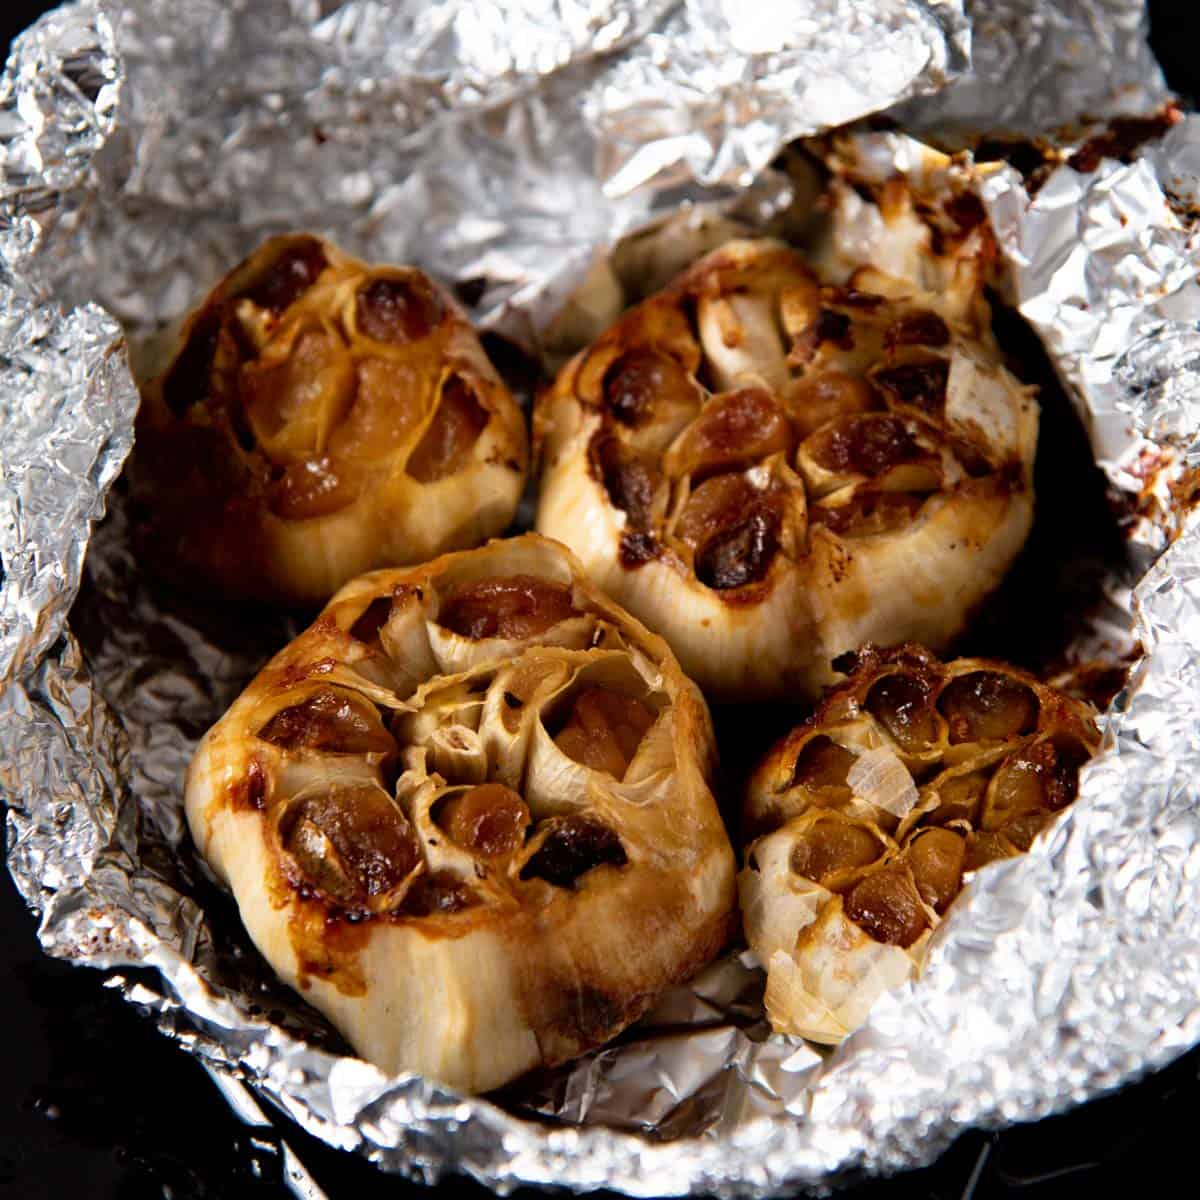
- Slice ½ inch off the top of the garlic bulbs to expose the cloves inside the bulb.3 - 4 garlic bulbs
- Place the garlic bulbs on a large piece of foil. Drizzle the oil over the exposed cloves in the garlic bulb. I like to use about 2 tsp oil per garlic bulb.2 - 3 tbsp oil
- Close the foil around the garlic to create a “packet” so that the garlic is not exposed.
- You can make as many of these foil packets as you like to make a large batch of roasted garlic.
- Place the foil wrapped garlic on a baking tray.Foil
- Alternatively, you can place the garlic in a dutch oven without using foil. Add a drizzle of oil at the bottom of the pot or pan. Place the garlic bulbs at the bottom of the pot. Make sure to add enough to cover more than half of the bottom of the pot. Drizzle more oil over the garlic bulbs and cover the dutch oven with the lid.
- When the oven is preheated, place the baking tray with the foil wrapped garlic OR the dutch oven inside the preheated oven.
- Let the garlic cook for at least 45 - 60 minutes. The time for the garlic to roast will depend on the size of the garlic. A medium-sized garlic usually takes about 1.5 hours for a light golden brown, and 2 hours for a deeper golden color.
- Check on the garlic around 45 minutes and let it cook longer until the garlic cloves have softened, and have turned a deep golden color. The husks may have some black spots, but as long as the cloves are not burnt, you’re good!
- Remove the garlic from the oven and let it cool completely.
- This next step can get messy. Make sure to clean your hands well and dry completely with a clean paper towel or napkin.
- Take the garlic bulbs out of the foil packets and squeeze the softened cloves out of the bulbs into a bowl.
- Keep the roasted garlic in an air-tight jar or container for about a week in the fridge. You can pour a generous layer of oil on top of the roasted garlic to extend the shelf life (in the fridge) if you like. However, I prefer to freeze the paste in small packets or ice cube trays instead.
Video
Notes
Don't throw away the empty garlic heads after squeezing out the cloves. There's still plenty of flavor there!
You can freeze these for up to 4 months, and then whenever you're making stock, just throw in 1 - 2 of the garlic bulb "husks" to add amazing garlic flavor to your stock!
Nutrition
Calories: 414kcal | Carbohydrates: 37g | Protein: 7g | Fat: 29g | Saturated Fat: 2g | Polyunsaturated Fat: 8g | Monounsaturated Fat: 18g | Trans Fat: 0.1g | Sodium: 19mg | Potassium: 449mg | Fiber: 2g | Sugar: 1g | Vitamin A: 10IU | Vitamin C: 35mg | Calcium: 203mg | Iron: 2mg