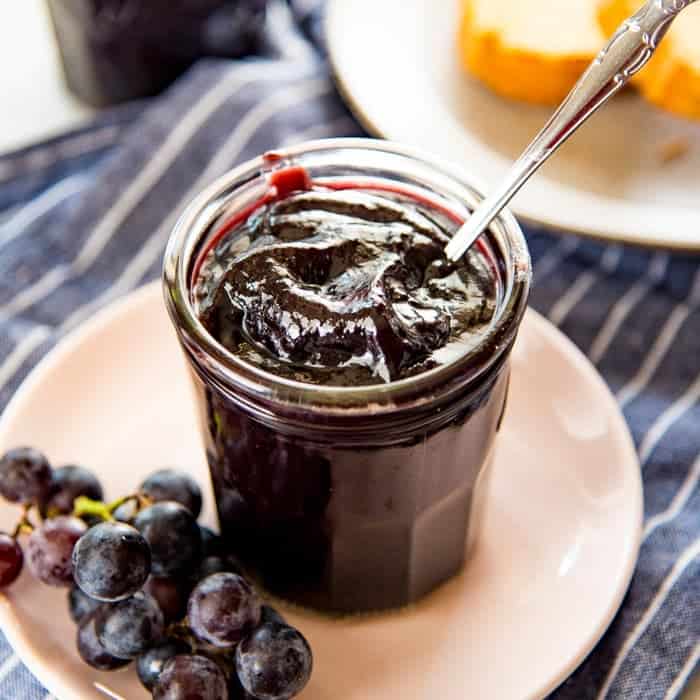
Concord Grape Jelly / Jam
Servings: 40 servings (1 tbsp / 15 ml)
Calories: 81kcal
This Homemade Concord Grape Jelly Recipe (Concord Grape Jam) is smooth, luscious, and easy to make! Perfectly tart and sweet, and it honestly pairs well with everything, from toast to crumpets, to cookies and appetizers. A delicious way to preserve all your excess grapes this autumn! EASY - This recipe is easy to make for beginners, and I have provided instructions to store the jam in the freezer. However, if you're looking to can the jam, the process might be more complicated and special equipment may be needed as well. Makes about 2 ½ cups (1¼ pints).US based cup, teaspoon, tablespoon measurements. Common Measurement Conversions. Weight measurements are recommended for accurate results. You can switch between the measurement types using the toggle button below the ingredients list.
Print Recipe
Ingredients
- 3 lbs concord grapes about 6 - 7 cups
- 3 cups granulated sugar
- Lemon peel (from ½ lemon)
- Pinch of salt
Instructions
- Place a few small saucers in the freezer before you start cooking the jam.
- Rinse the concord grapes.3 lbs concord grapes
- Remove the pulp from the grapes by squeezing one end of the grape (opposite from the stem side). This will pop the pulp right out (see picture in post).3 lbs concord grapes
- Place the pulp in one bowl, and the skins in a separate bowl.
- Mix the pulp, sugar, lemon peel and salt in a saucepan. Cook the pulp for about 5 - 10 minutes until softened, and the sugar is dissolved.3 cups granulated sugar, Lemon peel, Pinch of salt
- Pass the softened pulp through a sieve to remove the seeds (doesn’t need to be a fine sieve, just small enough to catch all the seeds) and place it back in the saucepan.
- The lemon peel will also be caught in the sieve. Remove this and add it back into the saucepan.
- Add the concord grape skins into a blender and add about 1 - 2 cups of the pulp. Blend until smooth.
- OPTIONAL - You can pass this grape skin mixture through a sieve as well to have a super smooth jam, but it's not necessary.
- Add the concord grape skin mix (sieved or not), to the rest of the pulp in the saucepan.
- Cook over medium heat, and bring the mix to a boil. Stir frequently to make sure that the jam doesn't stick to the bottom of the pan.
- Cook for about 45 -50 minutes. Do the jelly test (as described below) at around 45 minutes - place a small amount of jam on a freezing cold saucer. Put it back in the freezer for about 1 minute (until the grape jam has cooled down, but not frozen). Then track your finger through the jam to test the consistency.
- If the parted jam flows back easily and meets in the middle again, then it’s too runny. A slightly thicker consistency where the jelly/jam flows back a little, but it's slow and doesn't meet in the middle again, is the perfect consistency for me.
- If the grape jelly is still a tad too runny, cook for a few minutes longer. Test the jelly every 5 - 10 minutes until you get the desired consistency. I don’t cook for longer than 60 minutes because this overcooks the jelly/jam on my stove. The time may change according to your stove and pan that you use.
- Remove the lemon peel, and let the jam cool down slightly.
- While the jam is still hot, ladle the jam into hot sterilized jars. Leave a ½ inch headspace in all the canning jars. Wipe the rims of the jars and place the sterilized lids and close it tightly. Allow the jam to cool down to room temperature.
- FRIDGE - Store in the fridge for up to 3 months. But once opened, use within 2 weeks.FREEZER - Store in the freezer for up to 1 year.See recipe notes below for canning information.
Sterilizing jars
- Wash the jars and lids before sterilizing them. Place the jars and lids on a steaming rack, and fill the pot with water. Bring the water to a boil, and allow the jars and lids to boil for 10 minutes in the water. Remove the jars from the pot (use tongs), and place them on a tray. Fill the jars immediately with the hot jam and close with the lids.
- You can start sterilizing the jars while the jam is cooking. Then leave the jars in the hot water, until you’re ready to store the jam.
Notes
Canning information
I am not a canning expert. However, when I do can jam, this is the method I follow.- Use jars that have specifically been made for canning, like ball mason jars with the lid and screw bands. I also sterilize the jars, lids, and bands before using them.
- Fill the sterilized (and still hot) 1/2 pint jars with the hot jam, leaving a 1/2 inch headspace, making sure not to get the jam all over the sides of the jar.
- Use a clean knife or chopstick and run it through the jelly and glass jar to make sure there are no big bubbles trapped inside.
- Clean the headspace rim and threads of the jar, with a clean napkin.
- Place the lids, and screw on the threads until just tight. You do not want to overtighten the lids.
- Place a rack in the bottom of the largest pot you have in your kitchen, which will comfortably fit the jars.
- Carefully place the jars on the rack, making sure they aren't touching each other. Fill the pot with water, making sure the water level is about 1 inch above the tops of the jars.
- Bring the pot to a boil. Start the timer when the water comes to a boil. Boil the cans for about 10 minutes (for 1/2 pint jars).
- Turn off the heat, and let the jars cool in the water for another 5 - 10 minutes.
- Carefully remove the jars from the water using a rubber spatula (so that it grips better), or a canning jar lifter. Let it cool and settle for 12 - 24 hours at room temperature on a wire rack.
- Once cooled completely, check if the jars have sealed. If the middle of the lid isn't popping or moving when pressed, the cans have been successfully sealed.
- You can remove the bands, wipe the jars, and store the jams in a dry, cold, and dark place.
Nutrition
Serving: 1tbsp | Calories: 81kcal | Carbohydrates: 21g | Potassium: 64mg | Sugar: 20g | Vitamin A: 20IU | Vitamin C: 1.1mg | Calcium: 3mg | Iron: 0.1mg