Coffee Layer Cake
Servings: 12 slices
Calories: 823kcal
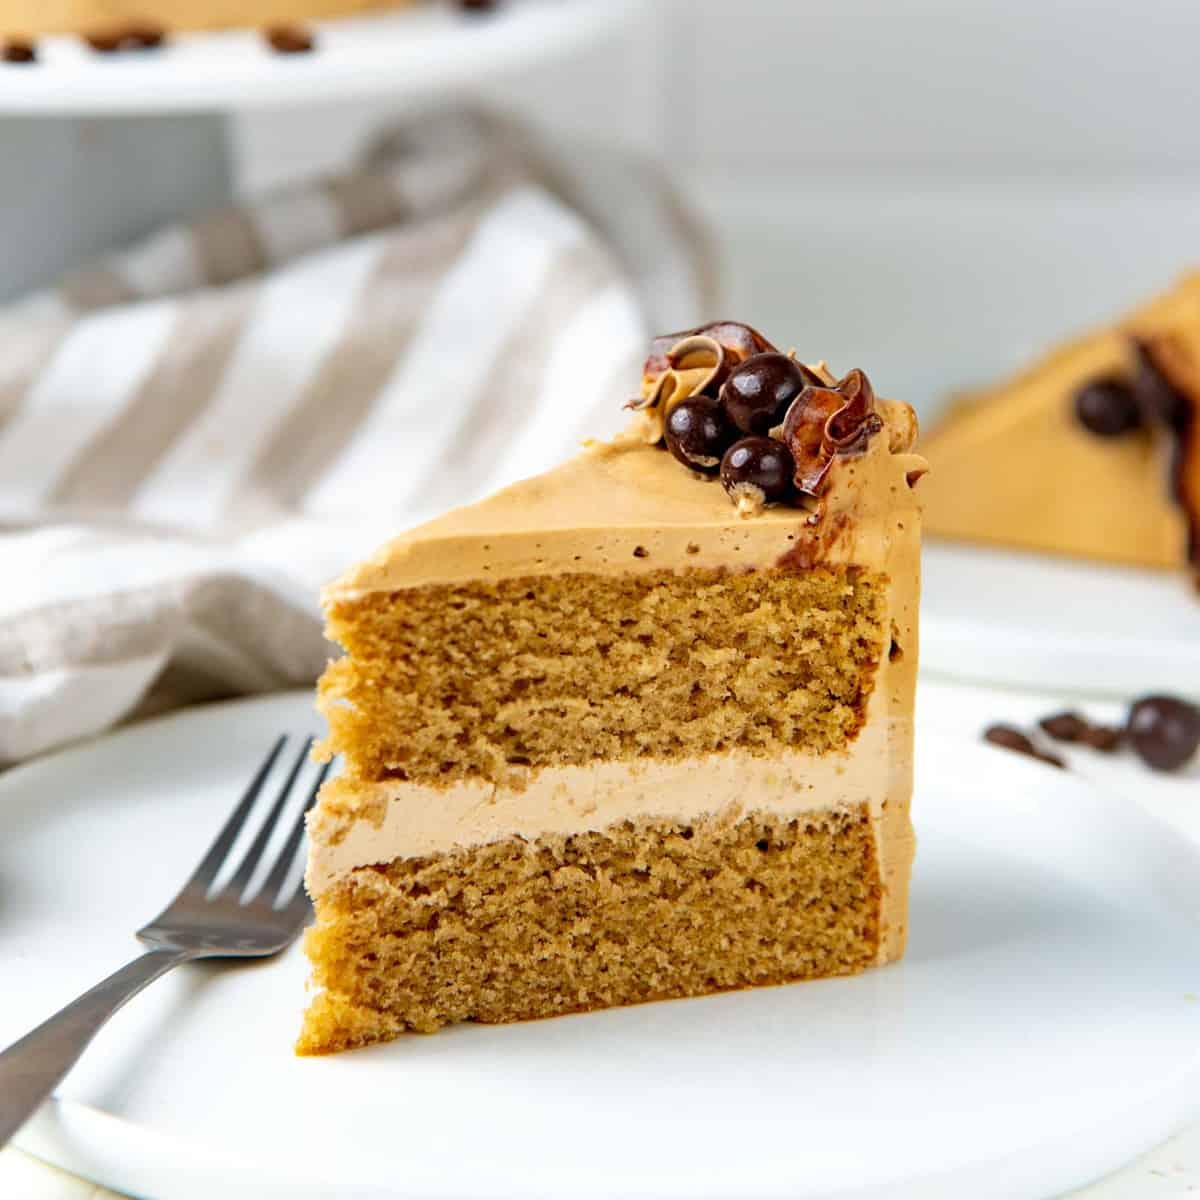
Delicious Coffee Layer Cake with soft coffee flavored cake layers, and a creamy, fluffy coffee buttercream! Perfectly sweet Coffee Cake for all coffee lovers! EASY / INTERMEDIATE - This recipe has two components (cake and frosting). The cake recipe itself is easy. Frosting the cake is also easy, if you adopt a rustic look for your cake. Smoother frosting and piped decorations will bump up the recipe to intermediate level, since this will require some experience to get it right. US based cup, teaspoon, tablespoon measurements. Common Measurement Conversions. Weight measurements are recommended for accurate results. See my cake pan conversion chart to adjust the recipe to the type of cake pans you have, if needed.
Print Recipe
Ingredients
Coffee cake layers
- 226 g unsalted butter 2 sticks, softened at room temperature
- ½ tsp salt
- 300 g white sugar 1 ½ cups
- 4 large eggs at room temperature
- ¾ cup milk
- 4 tsp instant coffee granules I used Nescafe
- 2 tsp vanilla extract
- 315 g AP flour 2 ½ cups, measured by spoon and level method
- 2 ½ tsp baking powder
Coffee buttercream
- 455 g unsalted butter 4 sticks (cool but not cold; about 70°F)
- ½ tsp salt or ¾ tsp
- 80 mL cold whipping cream ⅓ cup
- 4 - 6 tsp instant coffee granules use 6 if you want a robust coffee flavor
- 1 tbsp vanilla extract
- 500 - 567 g confectioner’s sugar 4 – 5 cups (measured by spoon and level method)
To decorate (optional)
- Chocolate fudge sauce
- Chocolate covered coffee beans
- Chocolate sprinkles
- Speculoos cookies crushed
Makes: 8inch round
Instructions
Coffee Cake layers
- For best results, make sure all the ingredients are at room temperature.
- Preheat the oven to 325°F. Line the bottom of two 8 inch pans with parchment paper, and butter and flour the sides. Set aside.
- Cream the softened butter until the mix is creamy and fluffy. This can take about 5 - 10 minutes with a stand mixer, depending on how soft the butter is.226 g unsalted butter
- Add the sugar and salt, and cream the butter and sugar further until the mixture is creamy and fluffy.300 g white sugar, ½ tsp salt
- Add the eggs, one at a time, mixing well between each addition.4 large eggs
- Dissolve the instant coffee granules in the milk, and stir in the vanilla. Set it aside until needed.¾ cup milk, 4 tsp instant coffee granules, 2 tsp vanilla extract
- In a separate bowl, sift the flour and baking powder together and whisk to combine.315 g AP flour, 2 ½ tsp baking powder
- Fold the dry ingredients into the cake batter in 3 - 4 additions, while alternating with the coffee-milk mixture. The dry ingredients should be added first and last. Fold in the dry ingredients until just combined.4 tsp instant coffee granules, 315 g AP flour
- Divide the batter into the two prepared cake pans. You can either weigh the batter and divide it equally by weight, OR use an ice cream scoop to evenly portion the batter into the cake pans. Spread the batter evenly in the pan using a small offset spatula or small rubber spatula.
- Knock the cake pans on your kitchen counter 3 - 4 times to flatten the batter and to remove any large gas pockets.
- Bake the cakes in the preheated oven for about 25 - 30 minutes, rotating the pan once halfway through the baking time.
- The cake should be springy to the touch when done (when you gently poke the middle of the cake, it should spring back up). Remove the cake from the oven and let it cool slightly in the pan. While still warm, turn the cake out onto a wire rack and let it cool down completely.
- If you’re assembling the cake the following day, wrap the cooled cake layers in plastic wrap and leave them in the fridge or at room temperature.
Coffee buttercream
- Place the butter in the bowl of your stand mixer. With a whisk attachment, whip the butter until creamy and white in color - about 3 to 7 minutes on high speed (not maximum speed). Take as long as you need to make the butter very creamy.455 g unsalted butter
- Dissolve the instant coffee in 1 - 2 tbsp of water and stir it into the cream.4 - 6 tsp instant coffee granules, 80 mL cold whipping cream
- Add the salt, coffee cream, and vanilla into the butter, and whisk further until the butter-cream mix is light and fluffy (for a few minutes).½ tsp salt, 80 mL cold whipping cream, 4 - 6 tsp instant coffee granules, 1 tbsp vanilla extract
- Lower the speed and add 500 g (4 cups) of the confectioner’s sugar – a little at a time, and incorporate the confectioner's sugar into the butter. Make sure to scrape the sides of the bowl as you go.500 - 567 g confectioner’s sugar
- Once the sugar is incorporated into the butter, increase the speed, and whisk on high for 1 - 3 minutes. Taste and add the rest of the confectioner’s sugar if you want a sweeter buttercream. Whisk for a further 2 – 3 minutes until you have a light, fluffy, soft, spreadable frosting.500 - 567 g confectioner’s sugar
- If the frosting is too stiff, you can add extra cream (1 tbsp at a time) to get an even softer buttercream. If you want the buttercream to have a stronger coffee flavor, you can also dissolve any extra coffee granules into 1 tbsp of water and whisk in that as well.
Assembling the cake
- Level the top of the cake layers (if they are domed).
- Place one cake layer on a cake serving plate or decorating plate. Make sure the bottom of the cake is facing down.
- Place about ¾ cup of the frosting on top of this cake layer and spread it evenly. You can add more or less of the frosting as you like.
- Now place the second cake layer on top. Make sure the bottom of the cake is facing up this time, so that you have a level surface on top to frost. Gently press the cake down to make sure the cake layer sticks to the buttercream below.
- Apply a thin coating of the frosting to completely cover the cake. This is the crumb coating. The crumb coating will help make the sides and top of the cake even, and make it easier to frost the final layer of buttercream.
- Allow the crumb coating to set in the fridge (or a cool place in your kitchen) for a few minutes.
- Evenly spread the rest of the frosting over the cake. Use an offset spatula to create swirls for an old fashioned cake look, OR use a bench scraper or spatula to smooth out the frosting.
Decoration
- Decorate the cake however you like. Here, I applied one strip of soft chocolate fudge sauce inside a pastry bag, and then filled the pastry bag with the coffee buttercream. This creates a chocolate marble effect in the buttercream when piped (as you can see in the pictures).Chocolate fudge sauce
- Alternatively, you can pipe a plain buttercream border, or use the sprinkles or crushed cookies to decorate the cake.Chocolate covered coffee beans, Chocolate sprinkles, Speculoos cookies
Notes
Note about the coffee
I used coffee granules that dissolve in room temperature water. So you don’t need to heat the water to dissolve the coffee.If you're using instant coffee powder, you will need to reduce the amount of coffee that you use.
Note about making the buttercream
The coffee cream mixture can be added to the whisked butter at the beginning. But it can also be added at the end after adding the confectioner's sugar. There won't be much of a difference between these two methods. Just make sure to mix everything well.Nutrition
Calories: 823kcal | Carbohydrates: 89g | Protein: 6g | Fat: 51g | Saturated Fat: 31g | Polyunsaturated Fat: 2g | Monounsaturated Fat: 13g | Trans Fat: 2g | Cholesterol: 187mg | Sodium: 233mg | Potassium: 199mg | Fiber: 1g | Sugar: 67g | Vitamin A: 1620IU | Vitamin C: 1mg | Calcium: 85mg | Iron: 2mg