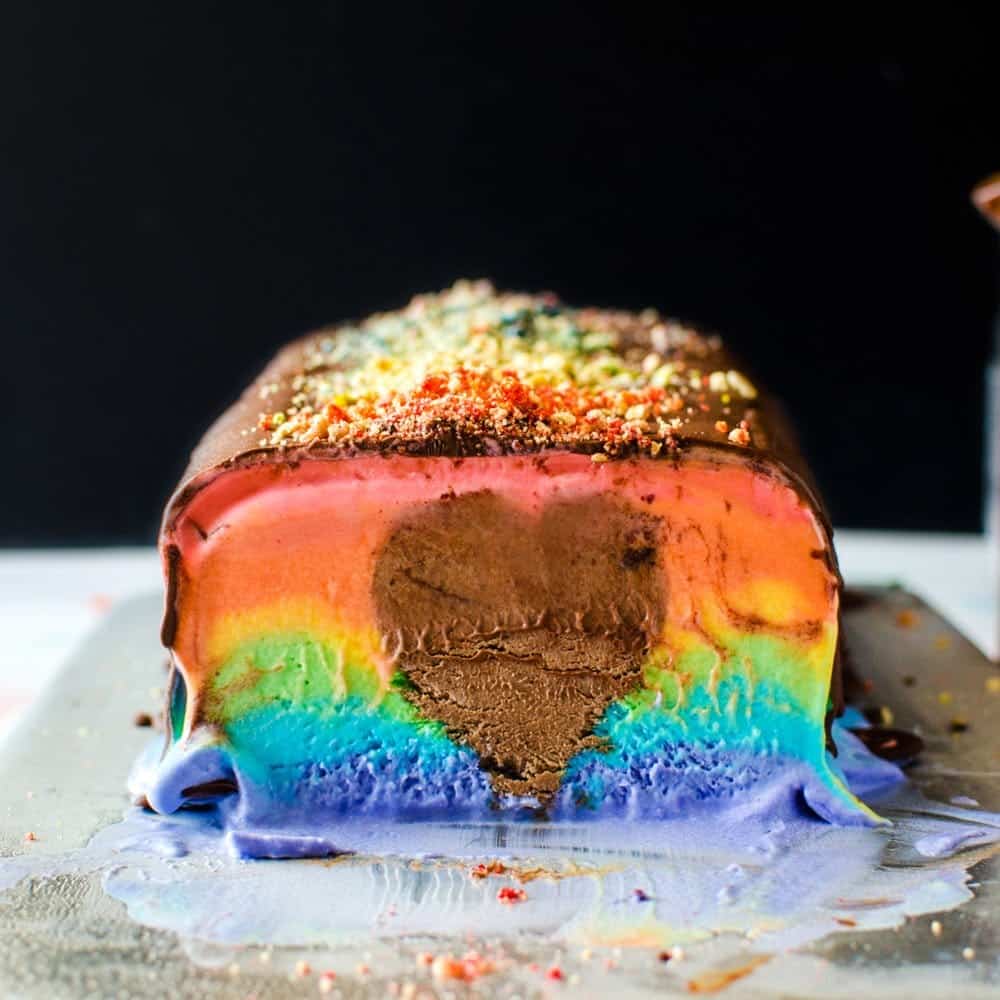
Rainbow Ice Cream Slice (with a Hidden Surprise)
Servings: 10 servings
Calories: 638kcal
A deliciously creamy rainbow ice cream slice in bright rainbow colors with a rich, creamy, heart-shaped chocolate mousse center! And topped with a chocolate magic shell sauce for a touch of extra decadence. EASY PLUS - This recipe is easy, as it's no churn ice cream, but does require some planning ahead and quite a bit of prep time. But it's a fun recipe with incredible results.
Print Recipe
Ingredients
Chocolate Mousse Heart Center
- 140 g semi-sweet chocolate 5 oz
- ⅛ tsp salt
- 58 g unsalted butter 4 tbsp / ½ stick
- 2 large egg yolks
- 300 mL heavy cream 1 ¼ cups. Whipped till soft peaks.
- 1 tsp vanilla
No-churn Ice Cream layers (leftovers can be frozen to make vanilla ice cream)
- 2 cans condensed milk 400g x 2
- 960 mL heavy cream 4 cups
- ⅛ tsp salt optional
- 2 tbsp vanilla extract
- Gel food coloring - Red, Orange, Yellow, Green, Blue, Purple
- 1 quantity of Chocolate Magic Shell Sauce
Instructions
Chocolate Mousse Heart Center
- Melt the chocolate, salt and butter in a small saucepan over low heat until just melted. Add the egg yolks while the chocolate is warm and mix well. Set aside to cool completely.140 g semi-sweet chocolate, ⅛ tsp salt, 58 g unsalted butter, 2 large egg yolks
- Line a 8 x 8 inch square pan with plastic wrap (you can use a little butter or oil to make sure it sticks to the bottom of the pan. Set aside until the chocolate mousse is ready).
- Add the vanilla to the whipped cream, and then the cooled, thickened chocolate and gently fold in until thoroughly mixed.300 mL heavy cream, 1 tsp vanilla
- Scrape this chocolate mousse mix into the prepared pan and spread it evenly. Keep this in the freezer until completely frozen (a few hours).
- Use a heart cutter to cut out 12 hearts from the frozen chocolate mousse (choose a heart cutter that will fit inside the loaf pan that will be used for the rainbow ice cream cake - about 2 inches in height, in this case).
- Place the cut out hearts in a plastic wrap lined tin and store in the freezer until needed.
No-churn Ice Cream Slice
- Line a 9 x 5 inch loaf pan with plastic wrap.
- In a large bowl, whip the heavy cream until you have mid peaks (just beyond soft peaks).960 mL heavy cream
- Add the 2 cans of condensed milk, to the whipped cream, with the salt (if using) and vanilla. Fold gently until the condensed milk and cream have mixed well. This is the vanilla ice cream base.2 cans condensed milk, ⅛ tsp salt, 2 tbsp vanilla extract
- Measure 1 ½ cups of this ice cream base into a smaller bowl. Keep the rest of the vanilla base in the fridge until needed for the next portion.
- Color the small portion of vanilla base with some red gel coloring. Pour this to the bottom of the lined loaf pan. Spread evenly and place it in the freezer until set - not frozen solid (about 1 - 2 hours, depending on your freezer).Gel food coloring -
- Once set, place the chocolate mousse hearts upside down, along the middle of the loaf pan (see video). Place in the freezer until you have the other layers ready.
- Remove the vanilla ice cream base from the fridge and divide mixture into 5 portions according to the amounts below.
- Mix 1 cup of ice cream base with orange coloring.Gel food coloring -
- Mix 1 cup of ice cream base with yellow coloring.Gel food coloring -
- Mix 1 cup of ice cream base with green coloring.Gel food coloring -
- Mix 1 ¼ cup of ice cream base with blue coloring.Gel food coloring -
- Mix 1 ½ cup of ice cream base with purple coloring. You should have 5 different colors.Gel food coloring -
- Layer each of these in order, around the chocolate mousse heart center, ending with the purple ice cream layer which will cover the chocolate mousse center completely (see video).
- Cover the top with the plastic wrap and freeze overnight until completely frozen.
- An hour or so before serving, dip the sides of the loaf pan in warm water to loosen the ice cream slice from the pan. Unmold it onto a serving tray and smoothen the wrinkled surface using a warm spatula.
- Keep it in the freezer until ready to serve.
- Drizzle Chocolate Magic Shell Sauce on top and decorate with rainbow funfetti, nuts, or crushed colored cookie crumbs (optional).1 quantity of Chocolate Magic Shell Sauce
- Slice with a warm knife. Enjoy!
Nutrition
Serving: 1inch slice | Calories: 638kcal | Carbohydrates: 46g | Protein: 10g | Fat: 47g | Saturated Fat: 29g | Polyunsaturated Fat: 2g | Monounsaturated Fat: 12g | Trans Fat: 0.2g | Cholesterol: 184mg | Sodium: 187mg | Potassium: 395mg | Sugar: 46g | Vitamin A: 1805IU | Vitamin C: 3mg | Calcium: 295mg | Iron: 0.3mg