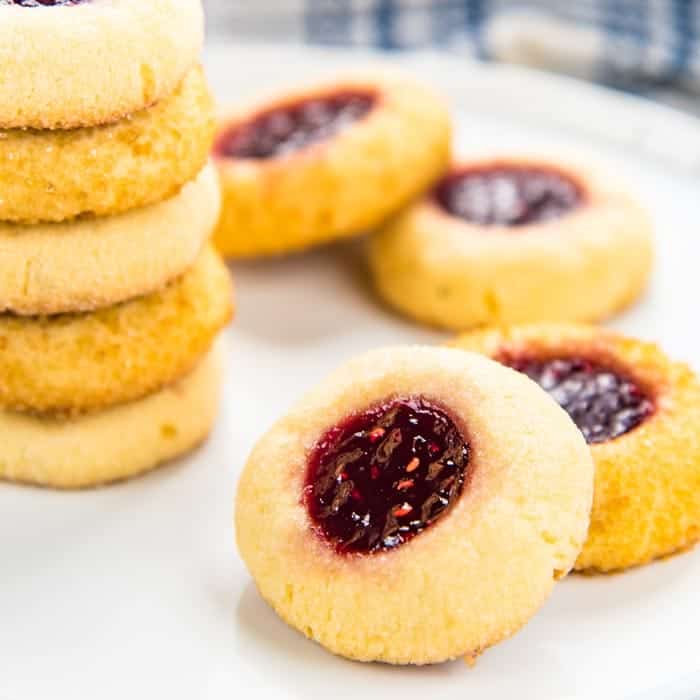
Thumbprint Cookies
Servings: 30 cookies
Calories: 131kcal
Easy Thumbprint Cookies - These cookies are a classic holiday favorite and so easy to make! Get step by step instructions with tips on how to make PERFECT thumbprint cookies.
Print Recipe
Ingredients
For the cookies
- 8 oz unsalted butter softened to room temperature (1 cup)
- ¼ tsp sea salt
- 4 oz caster sugar (½ cup + 1 tbsp) see notes
- 2 egg yolks
- 2 tsp vanilla
- 2 oz cornstarch (5½ tbsp) or rice flour, see notes
- 10 oz AP flour (about 2⅓ cups, spoon and level)
For coating
- ½ cup granulated white sugar or demerara sugar (about 100 g), use more as needed
To fill
- ½ cup raspberry jam or any fruit jam of your choice
Instructions
Cookie dough
- Place the butter and salt in a large bowl or mixing bowl.
- Using a hand mixer, or the paddle mixer on your stand mixer - cream the butter, without making it fluffy - about 1 minute. Then add the sugar, and cream the sugar-butter mixture until smooth (just for about a minute or two).
- Add the egg yolks and vanilla and mix to combine, for no more than 20 seconds, until the yolks are completely incorporated into the mix. Avoid over-mixing.
- In a separate bowl - sift the cornstarch and flour together and mix well. Add the flour to the butter mixture, and mix together on the lowest setting on your stand mixer, or use a mixing spoon. Only mix until most of the flour has been moistened with the butter mix, and the dough forms clumps.
- Stop mixing, and bring the dough together to form a smooth ball. You can use a mixing spoon and/or lightly dusted hands to do this. The dough will be sticky.
- Cover the bowl with plastic wrap, and let it rest for at least 15 minutes.
Preparing the cookies
- Line a half sheet pan or cookie sheet with parchment paper.
- Place the sugar for coating in a small ziploc bag, or small bowl.
- Take a 1½ - 2 tbsp cookie scoop and scoop a portion of the cookie dough. Roll this portion into a smooth, round ball. Immediately place the ball in the sugar filled bag and gently shake to coat.
- Place the sugar coated cookie ball on the parchment paper and use a rounded handle of a wooden spoon, or your thumb or finger (with short nails!) to create a well in the middle of the cookie. Press straight down to create a narrow well, rather than a wide well.
- Repeat with the rest of the cookie dough. Maintain about an inch of space between the cookies on the baking tray.
- Fill a second baking tray with the remaining cookie dough.
- Fill the wells to the brim with raspberry jam. If the jam is too stiff, microwave it for about 5 - 10 seconds to soften it, but not make it warm. If you want to store the cookies for later, DO NOT FILL THEM WITH JAM. See notes for storing cookies to bake later.
- Refrigerate the thumbprint cookies for at least 30 minutes, preferably overnight, until the cookies have been chilled well.
Baking the cookies
- While the cookies are chilling in the fridge, preheat oven to 375°F.
- Place the cookie tray in the oven and bake for 12- 15 minutes, until the edges start to turn golden brown in color.
- Remove from the oven and let the cookies cool completely.
- Serve at room temperature.
Notes
NOTE 1 - If you don’t have access to caster sugar (also known as baker’s sugar), then you can weigh out regular granulated sugar and process it in a food processor or blender for a couple of minutes until it becomes fine like caster sugar. Alternatively, you can use confectioner’s sugar, but you will need to use about 4.5 oz of confectioner's sugar to match the same sweetness.
NOTE 2 - If you don’t have cornstarch or rice flour, you can use regular AP flour instead. Remember to match ingredients by WEIGHT and not by VOLUME.
NOTE 3 - If you want to FREEZE these thumbprint cookies for later, you can freeze them AFTER a well has been created, but BEFORE filling them with jam. Place the cookies in a single layer on a parchment paper-lined tray and freeze them first for about 30 minutes. Once frozen, you can place the frozen, unfilled cookies in sealable freezer bags. To bake, remove the cookies from the bag, and place them on a parchment paper-lined sheet pan and fill the wells with jam. Bake in a preheated oven until the edges start to turn a golden brown in color - about 15 - 17 minutes.
Nutrition
Serving: 1cookie | Calories: 131kcal | Carbohydrates: 17g | Protein: 1g | Fat: 7g | Saturated Fat: 4g | Cholesterol: 29mg | Sodium: 23mg | Potassium: 18mg | Fiber: 1g | Sugar: 7g | Vitamin A: 206IU | Vitamin C: 1mg | Calcium: 6mg | Iron: 1mg