

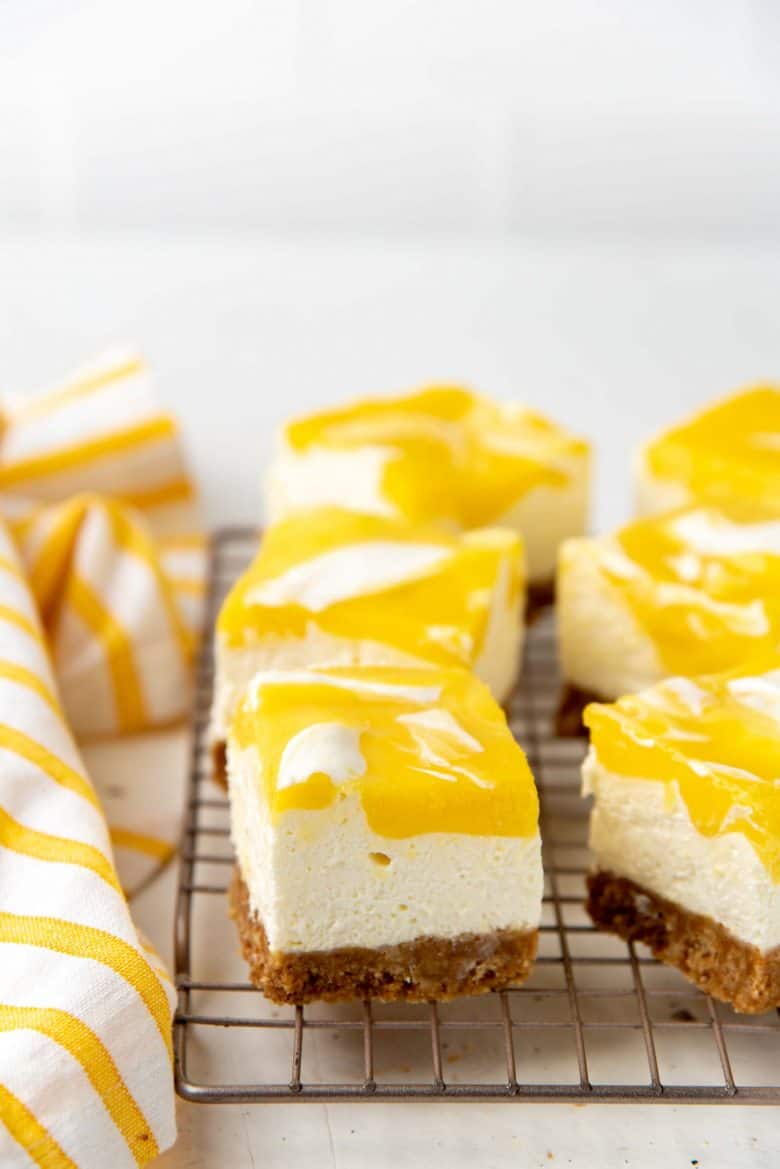
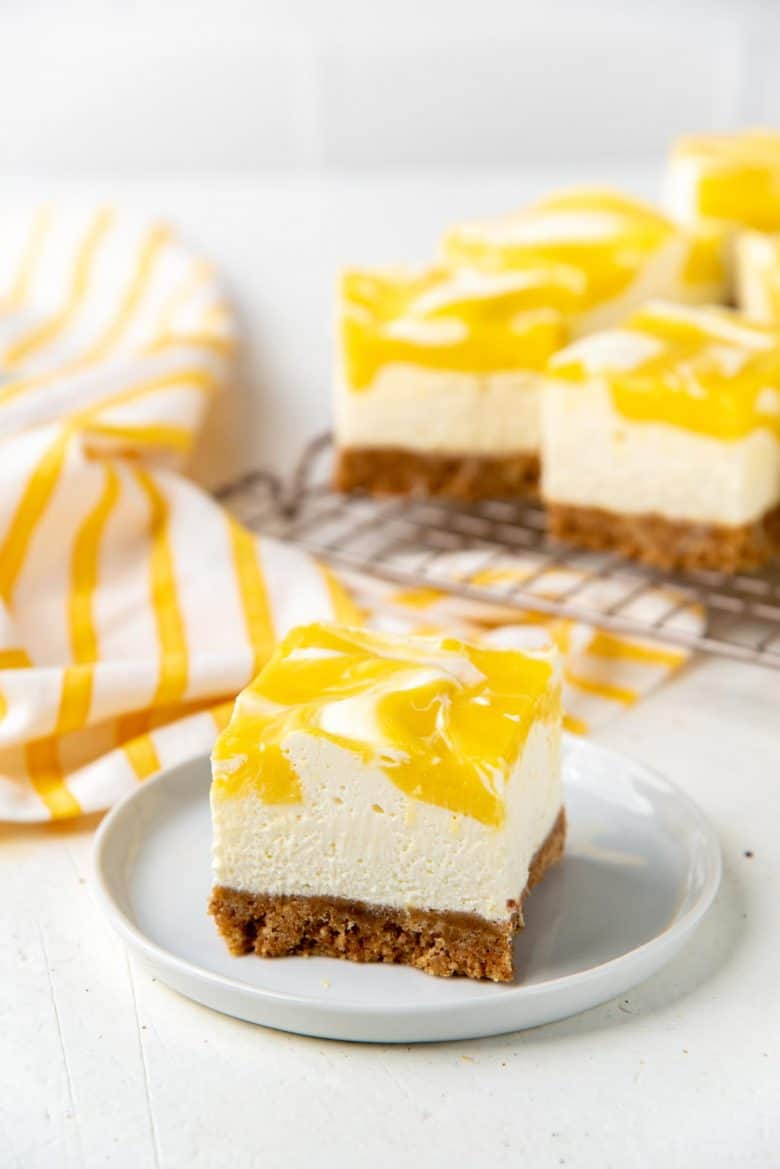
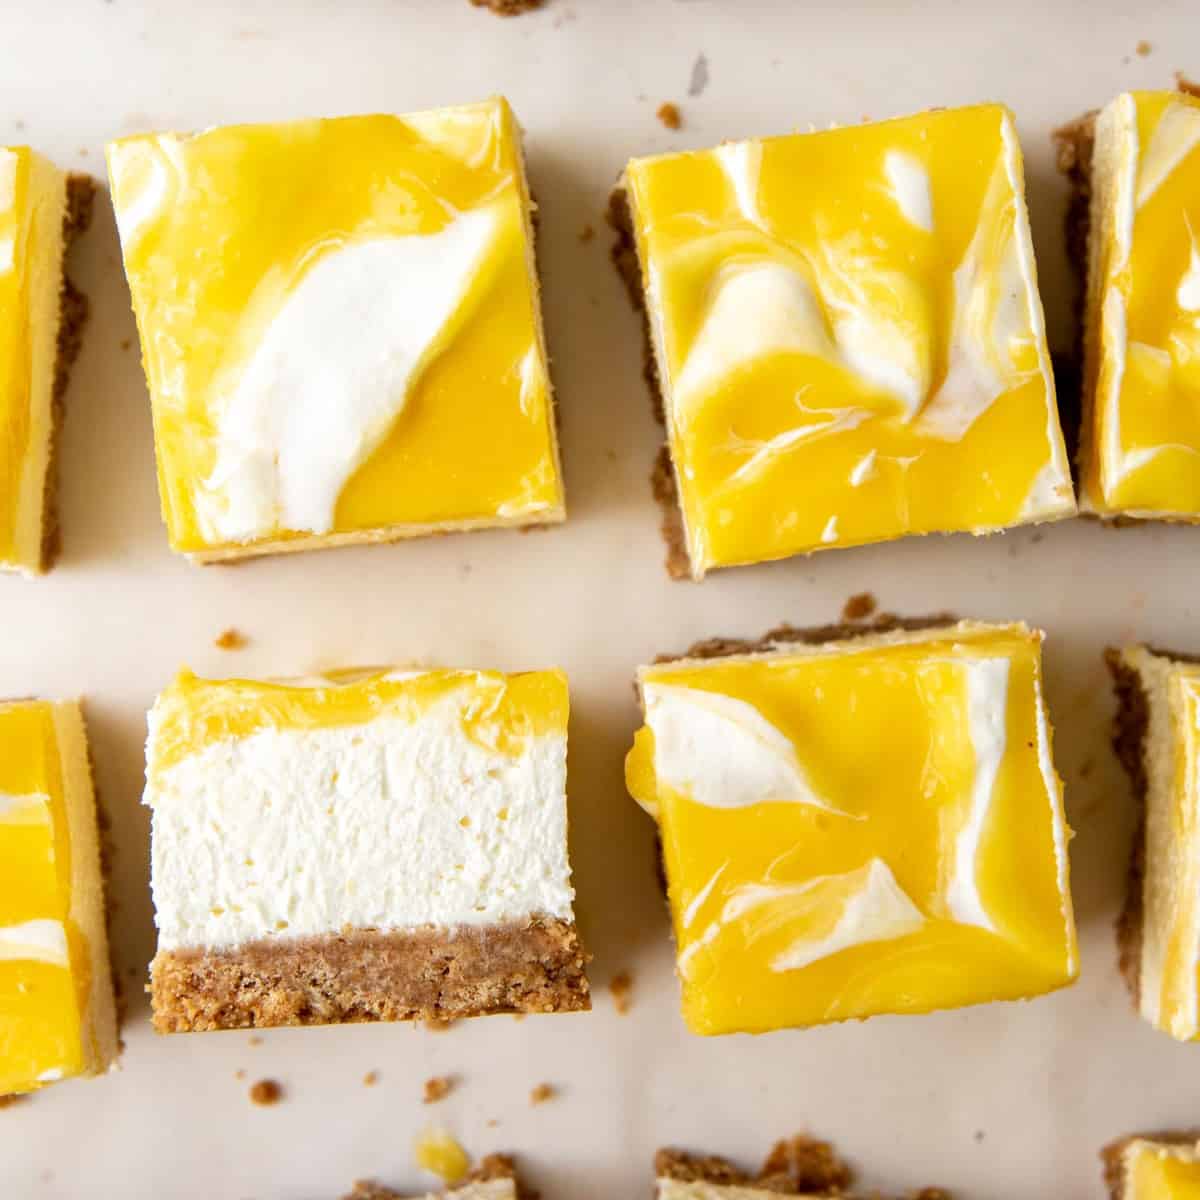
Delicious no bake lemon cheesecake bars with a creamy and light cheesecake layer, an easy and buttery graham cracker crust, and a tangy swirled lemon curd on top! Easy to make and so beautiful to serve.
The no bake lemon cheesecake is light, but with the same dense and creamy texture as baked cheesecake because of how I make it. That’s what sets this recipe apart!

I ADORE citrus desserts. Lemon curd and lime curd are a frequent occurrence in our house all throughout spring and summer. And I make lemon syrup and lemon ice cream whenever there’s a cookout or summer potluck.
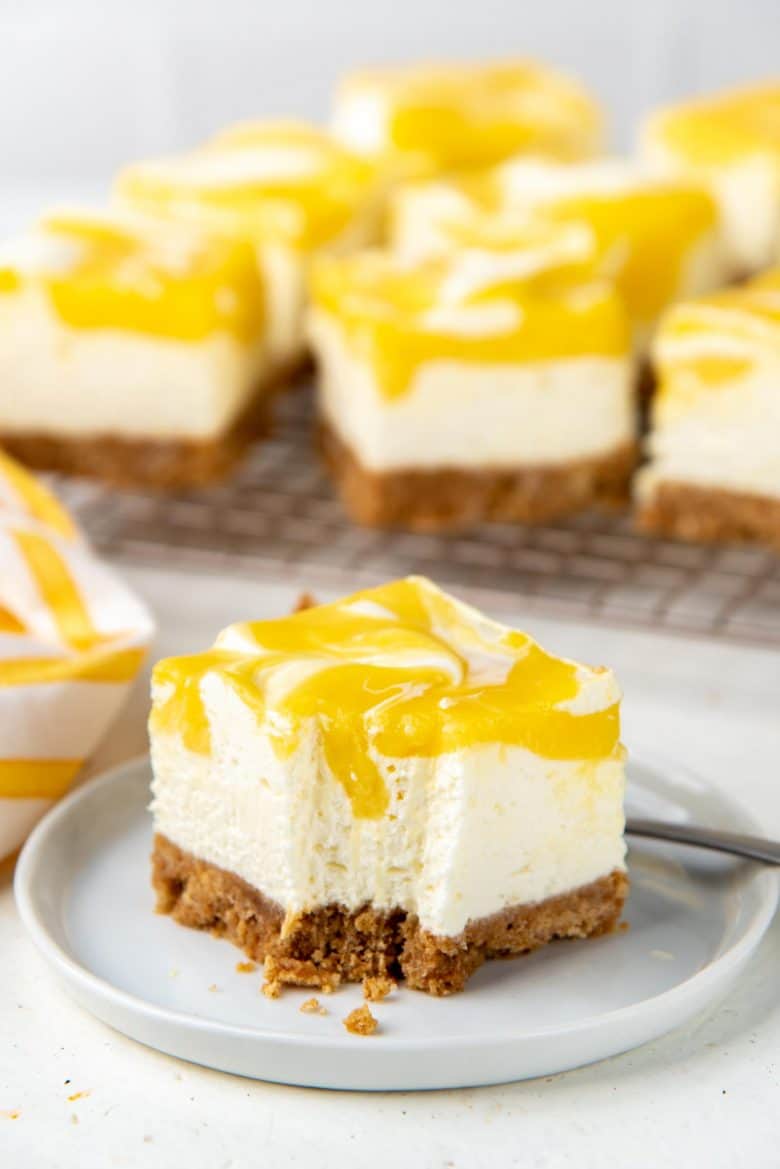
So, these no bake lemon cheesecake bars are another irresistible summer treat for me! A buttery graham cracker base, topped with a creamy, lemony cheesecake base. And then for some extra jazz, they are topped with swirls of bright lemon curd.
I am usually a fan of baked cheesecake. I find that no bake cheesecakes are too much like cream cheese mousse, which I do not like. Which is why I came up with this recipe for no bake cheesecake that is still light, but has the same dense, creamy texture of regular baked cheesecake.
Components of no bake lemon cheesecake bars
- Graham cracker crust – Allowed to set in the fridge. However, if you want a crispier base, you can bake it for a few minutes (optional).
- Lemon cheesecake – This is the main layer. Flavored with lemon juice and lemon zest.
- Lemon curd topping – This incredibly tangy lemon curd tops the cheesecake and is gently mixed in to create the beautiful swirls on top.
Graham cracker crust
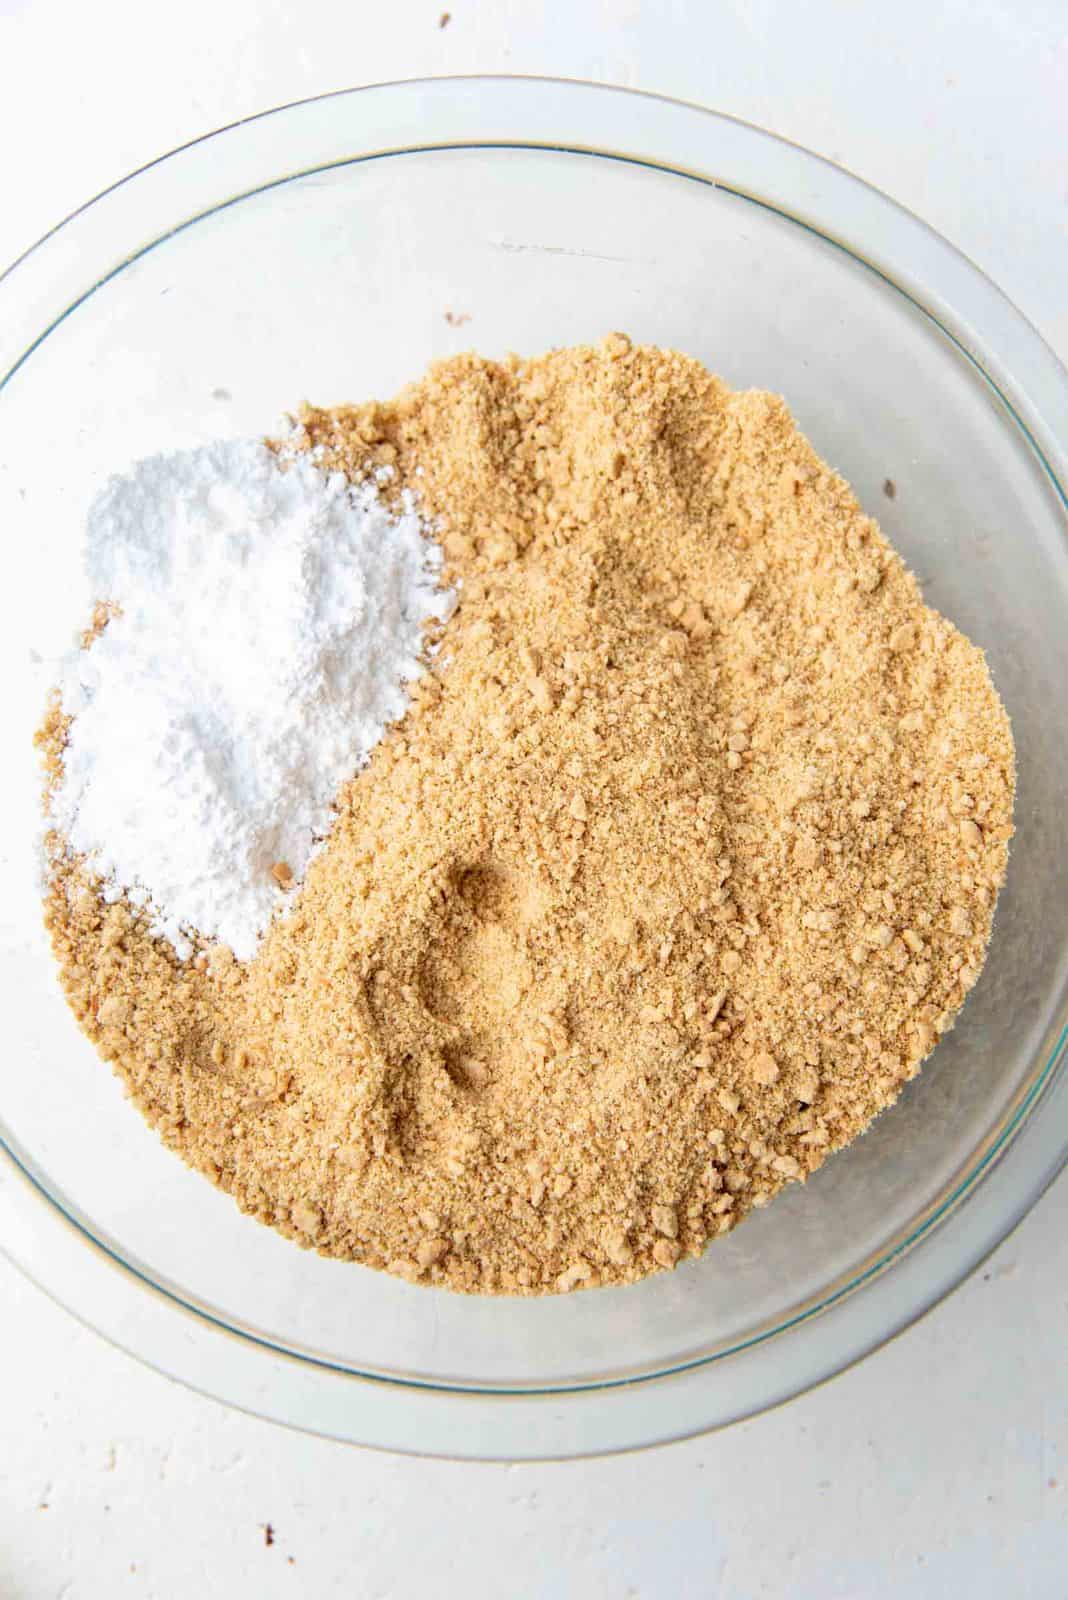
This crust is easy. Simply mix crushed graham crackers with confectioner’s sugar, butter, and a little lemon zest.
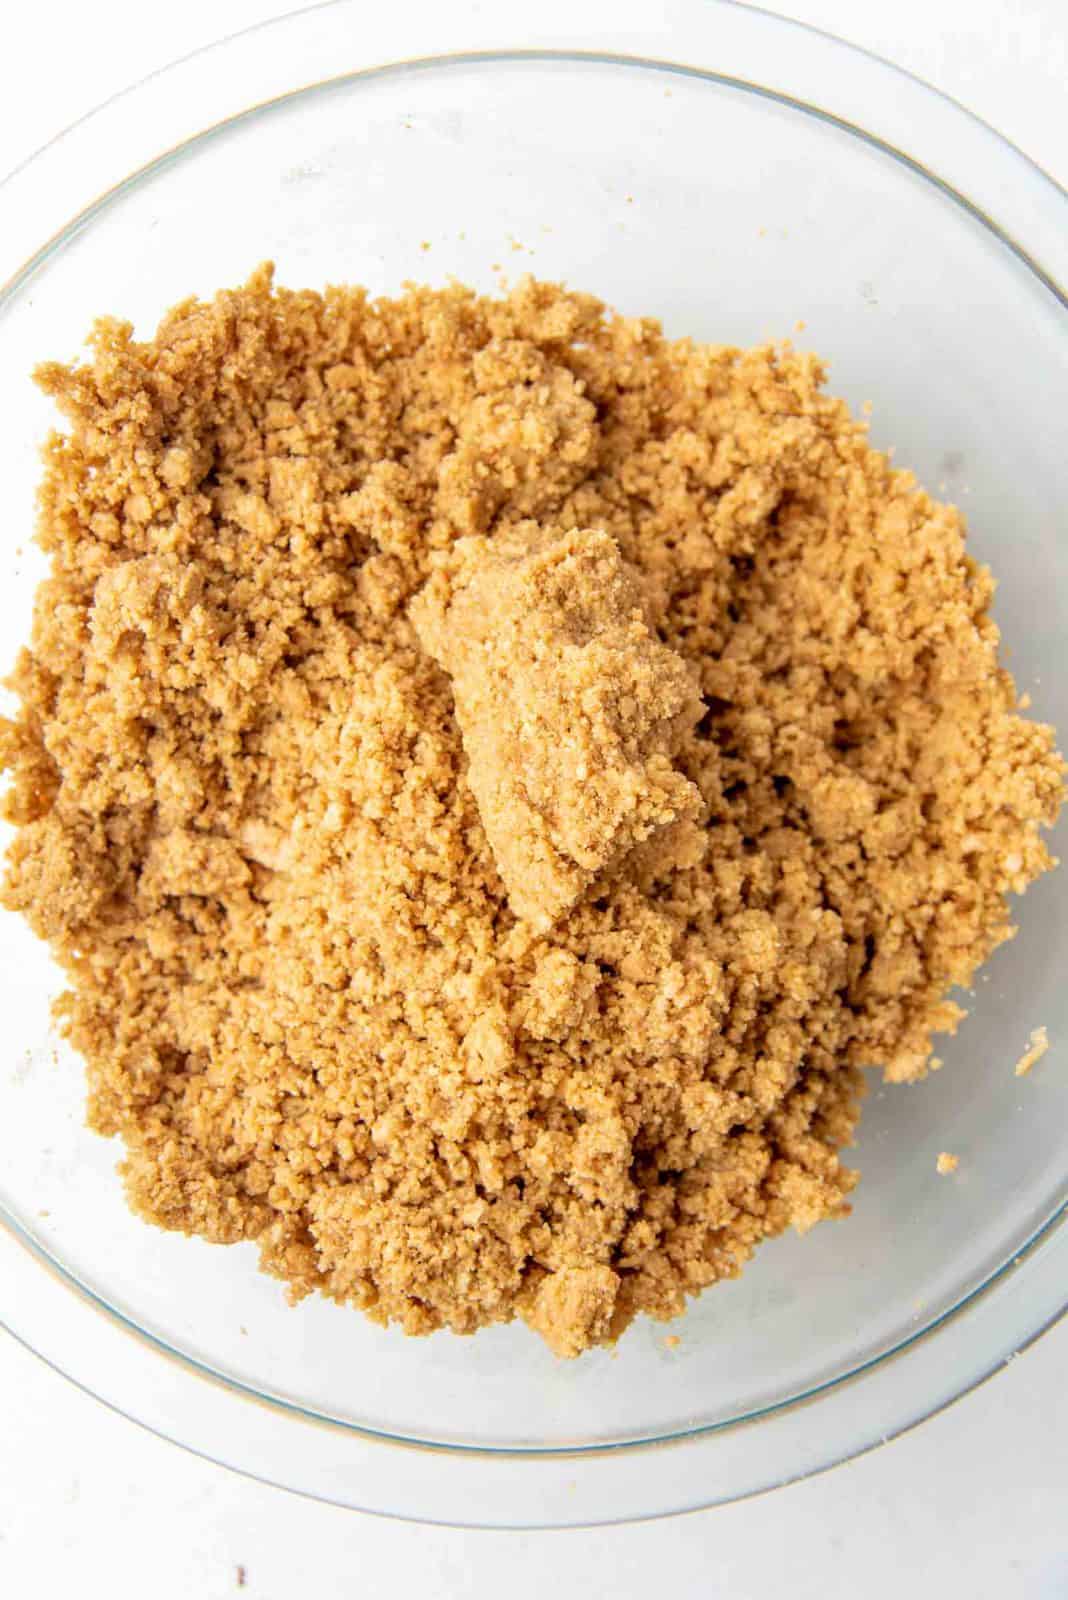
The crust mixture is then pressed into the bottom of an 8 inch or 9 inch square pan. The crust is then kept in the fridge until chilled and hardened.
You also have the option of baking the crust for about 10 minutes, if you’d like a crispier crust. I don’t usually do this, so it’s entirely optional.

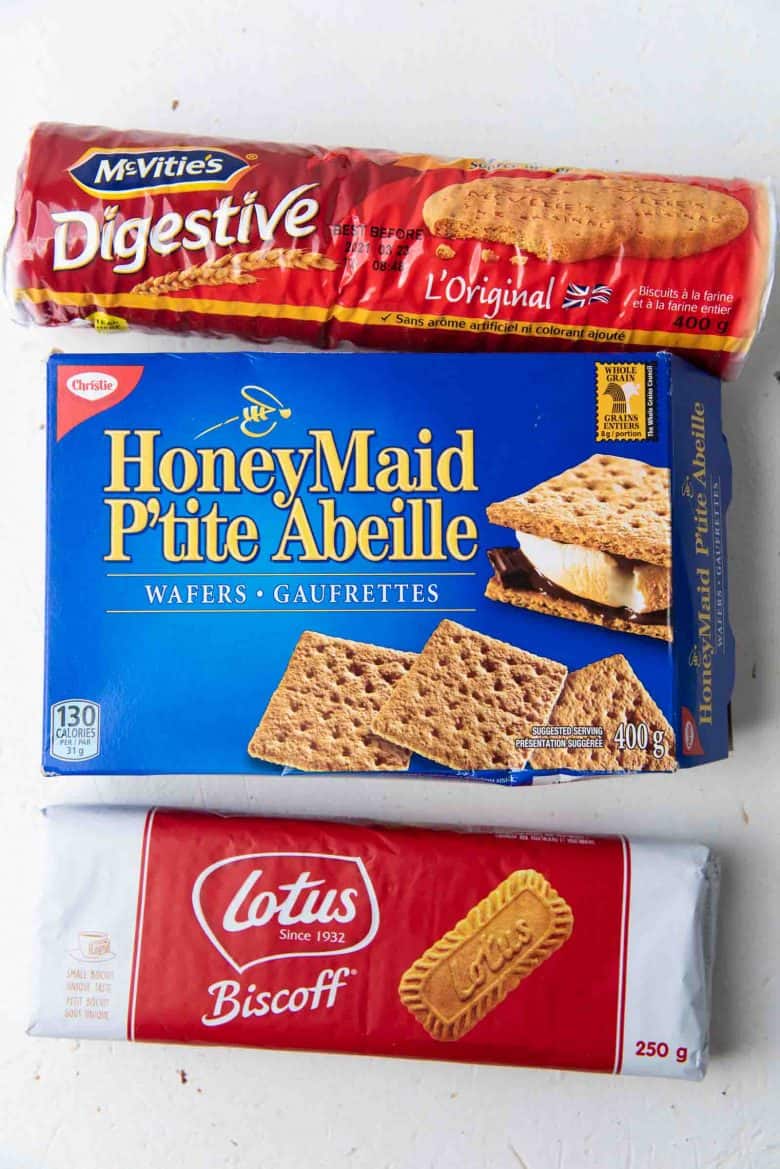
If you don’t have access to graham crackers, you can use digestive biscuits. Biscoff cookies are also a good substitute, but they will yield a more distinct flavor than the more neutral graham crackers or digestives.
Lemon cheesecake filling
The ingredients you’ll need to make this no bake lemon cheesecake filling are,
- Cream cheese
- Heavy cream (whipped to soft peaks)
- Sugar
- Lemon juice and zest
- Gelatin
- Vanilla
How to make no bake lemon cheesecake bars
Lemon cheesecake filling
Much like a baked cheesecake, the filling is made by whipping cream cheese and sugar together, with the lemon and flavoring.
Quickly whisk the bloomed and melted gelatin into the cream cheese base, along with the whipped cream.
The small amount of whipped cream makes the no bake cheesecake lighter, without making it taste like a mousse. Although gelatin is used to set the no bake lemon cheesecake mixture, I only use just enough for the filling to set. So it’s not going to have a jello-like texture.
Lemon curd topping
In my opinion, this lemon curd is what sets this no bake lemon cheesecake apart from all other lemon cheesecake recipes out there.
It adds a wonderfully tangy sweetness to the cheesecake bar. Plus those bright yellow swirls are pretty! It’s a summer staple for me. This lemon raspberry cake that uses the same lemon curd recipe is an absolute family favorite too for the same reason.
This is the only component that requires cooking, but it’s very easy. I promise!
- The lemon curd is made by cooking a mixture of lemon juice, sugar, cornstarch, and water.
- Then the egg yolks are mixed in, and thickened further.
- Finally, a mixture of bloomed gelatin is melted in the hot lemon curd mixture.
- Allow the lemon curd mixture to cool down to room temperature, and then swirl it through the cheesecake layer, BEFORE refrigerating the whole pan.
This gelatin will help to set the lemon curd, and will also make sure that the lemon curd swirls set properly within the cheesecake layer.
Assembling the dessert
Once the crust is chilled, the freshly made cream cheese mixture can be evenly spread on top.
The lemon curd mixture may set a little as it cools because of the gelatin. But don’t worry, just whisk it to make it smooth again, and pour it over the surface of the cheesecake layer.
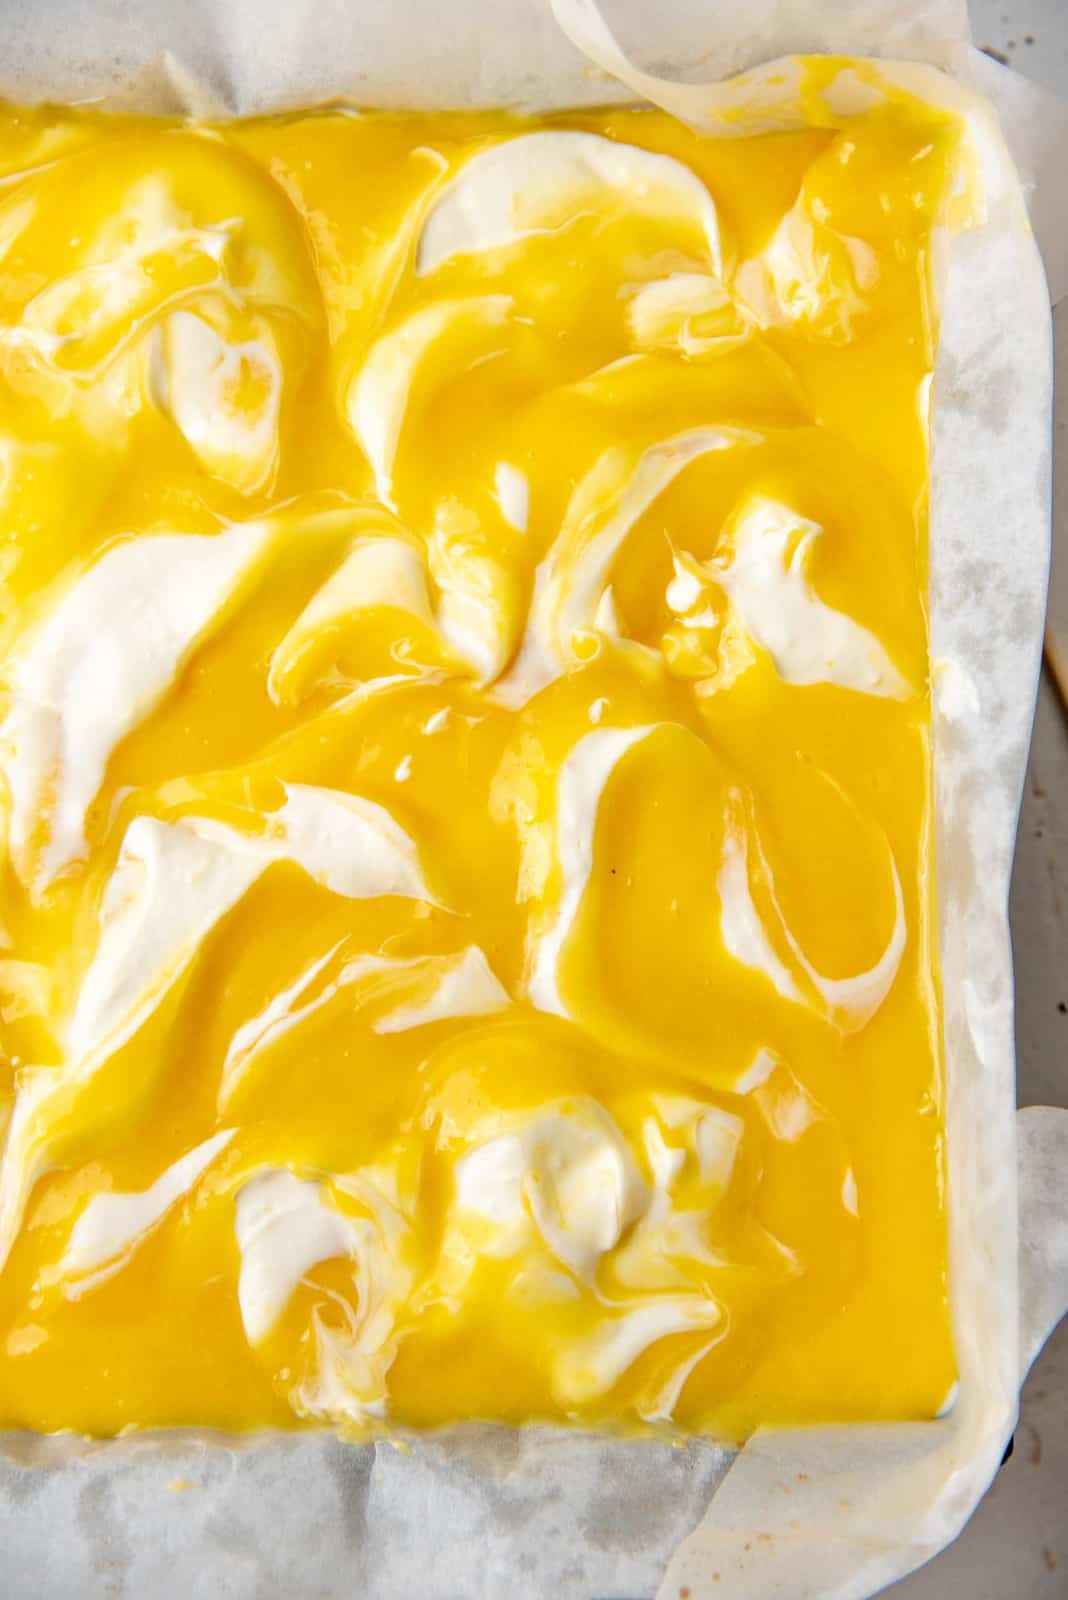
Use a knife or spatula to swirl the lemon curd layer into the cheesecake layer. You don’t want to go too deep, just have the swirls close to the surface.

Finally, once everything is assembled, refrigerate the no bake lemon cheesecake overnight.
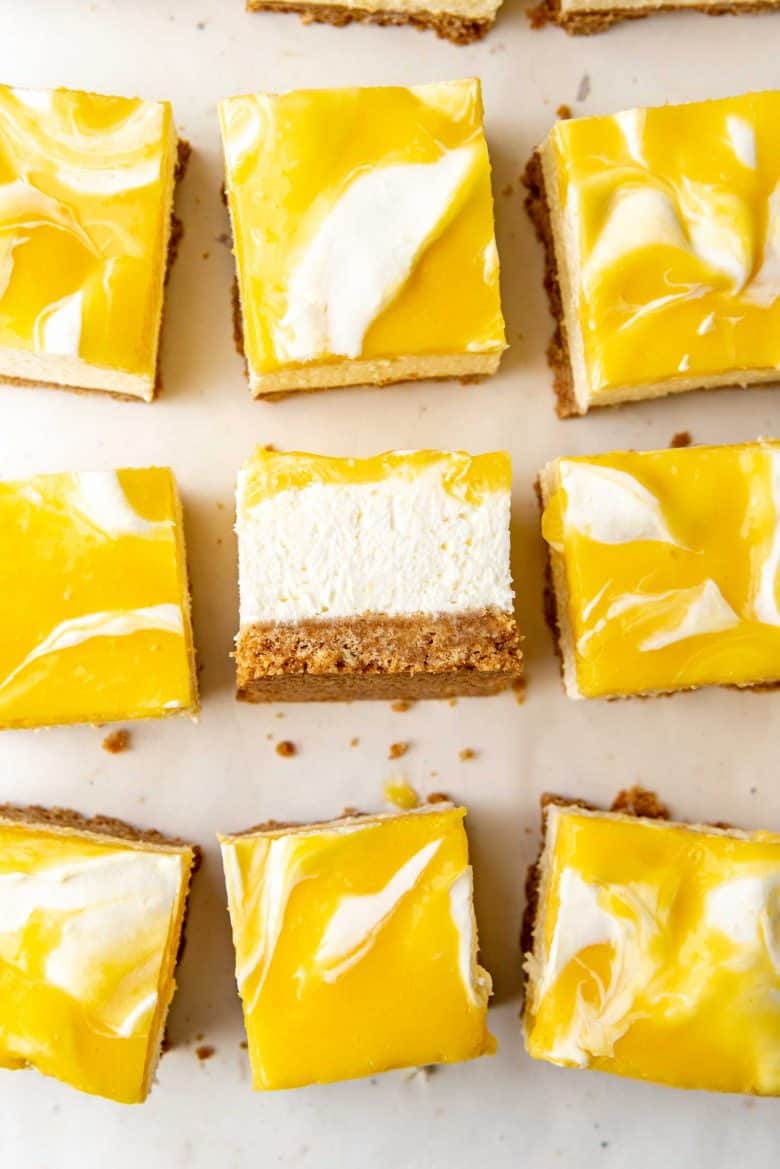
How to get clean cuts in your cheesecake
If you just cut into your lemon cheesecake without any precautions, you may find that the cuts are quite rough. But this is easily preventable!
- First, start with a nicely chilled cheesecake.
- Second, use a sharp knife (not a bread knife or butter knife). I use a chef’s knife.
- Third, make sure your knife is warm when you slice through the cheesecake. You can warm it by running it under hot tap water, or dipping it in hot water (remember to wipe off the blade though). You can also use a kitchen torch to lightly warm the blade.
- Finally, wipe the knife blade clean between each cut.
Storage tips
These slices can be stored in an air-tight container for up to 5 days in the fridge. Make sure the cream cheese and cream that you use are fresh and won’t expire very soon.
I haven’t tried to freeze this no bake cheesecake though. Freezing could have an effect on the cream cheese / heavy cream and the gelatin, causing it to weep as it thaws out.
Why I love this recipe
Lemon is my favorite flavor after chocolate. So I find these lemon cheesecake bars to be pretty irresistible!
And of course it’s super easy because there’s no baking involved. It’s a great recipe to make with kids (as long as there’s adult supervision when making the lemon curd).
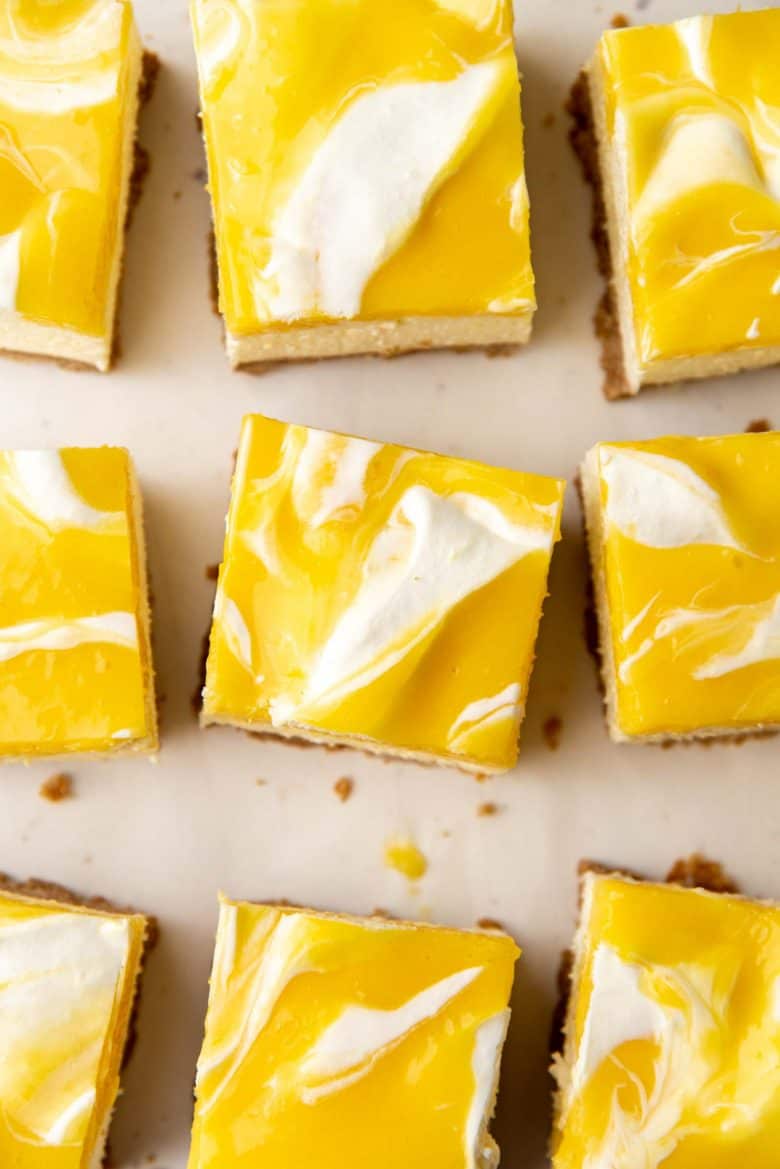
It’s simple enough for a family dessert, but impressive enough for a dinner party too. Those lemon curd swirls are a total winner!
And the beautiful contrast of the buttery crust, the creamy cheesecake layer, and the tangy curd, makes this a perfectly balanced dessert in terms of flavor.
The texture of this no bake lemon cheesecake is still very similar to a baked cheesecake. It’s not like a mousse, but creamy and a little dense like a cheesecake is supposed to be. Just the way my family and I love it! And I hope you like it too. 🙂
Recipe
No Bake Lemon Cheesecake Bars
US based cup, teaspoon, tablespoon measurements. Weight measurements are recommended for accurate results whenever available.
Common Measurement ConversionsIngredients:
Crust
- 300 g graham crackers
- 28 g confectioner's sugar ¼ cup
- 145 g butter (salted or unsalted) 10 tbsp, melted
- Generous pinch of sea salt (leave out if using salted butter)
Lemon curd topping
- 2 tbsp water 30 mL
- 1 tsp powdered gelatin
- 240 mL lemon juice 1 cup
- 2 tbsp lemon zest
- 150 g white sugar 1 ½ cups
- 2 tbsp water 30 mL
- 5 egg yolks from large eggs
- 25 g cornstarch 2 ½ tbsp
- 2 tbsp water
- 50 g butter 3½ tbsp
Lemon cheesecake layer
- 45 mL water 3 tbsp
- 2 tsp powdered gelatin
- 450 g block cream cheese (softened at room temperature) 16 oz / 2 blocks
- 100 g white sugar ½ cup
- 80 mL lemon juice ⅓ cup
- 2 tbsp lemon zest
- 1 tsp vanilla
- ¼ tsp sea salt
- 180 g chilled heavy cream ¾ cup
Instructions:
Crust (needs to be frozen for at least 3 hours)
- Prepare a 8 or 9 inch square pan by lining it with parchment paper. I butter the pan first to make sure that the parchment sticks to the pan.
- Crush the graham crackers and place it in a bowl.300 g graham crackers
- Mix in the confectioner's sugar and salt.28 g confectioner's sugar , Generous pinch of sea salt
- Add the butter and mix it well until the butter is completely absorbed by the graham cracker crumbs. The crumbs should clump together when squeezed in the palm of your hand.145 g butter
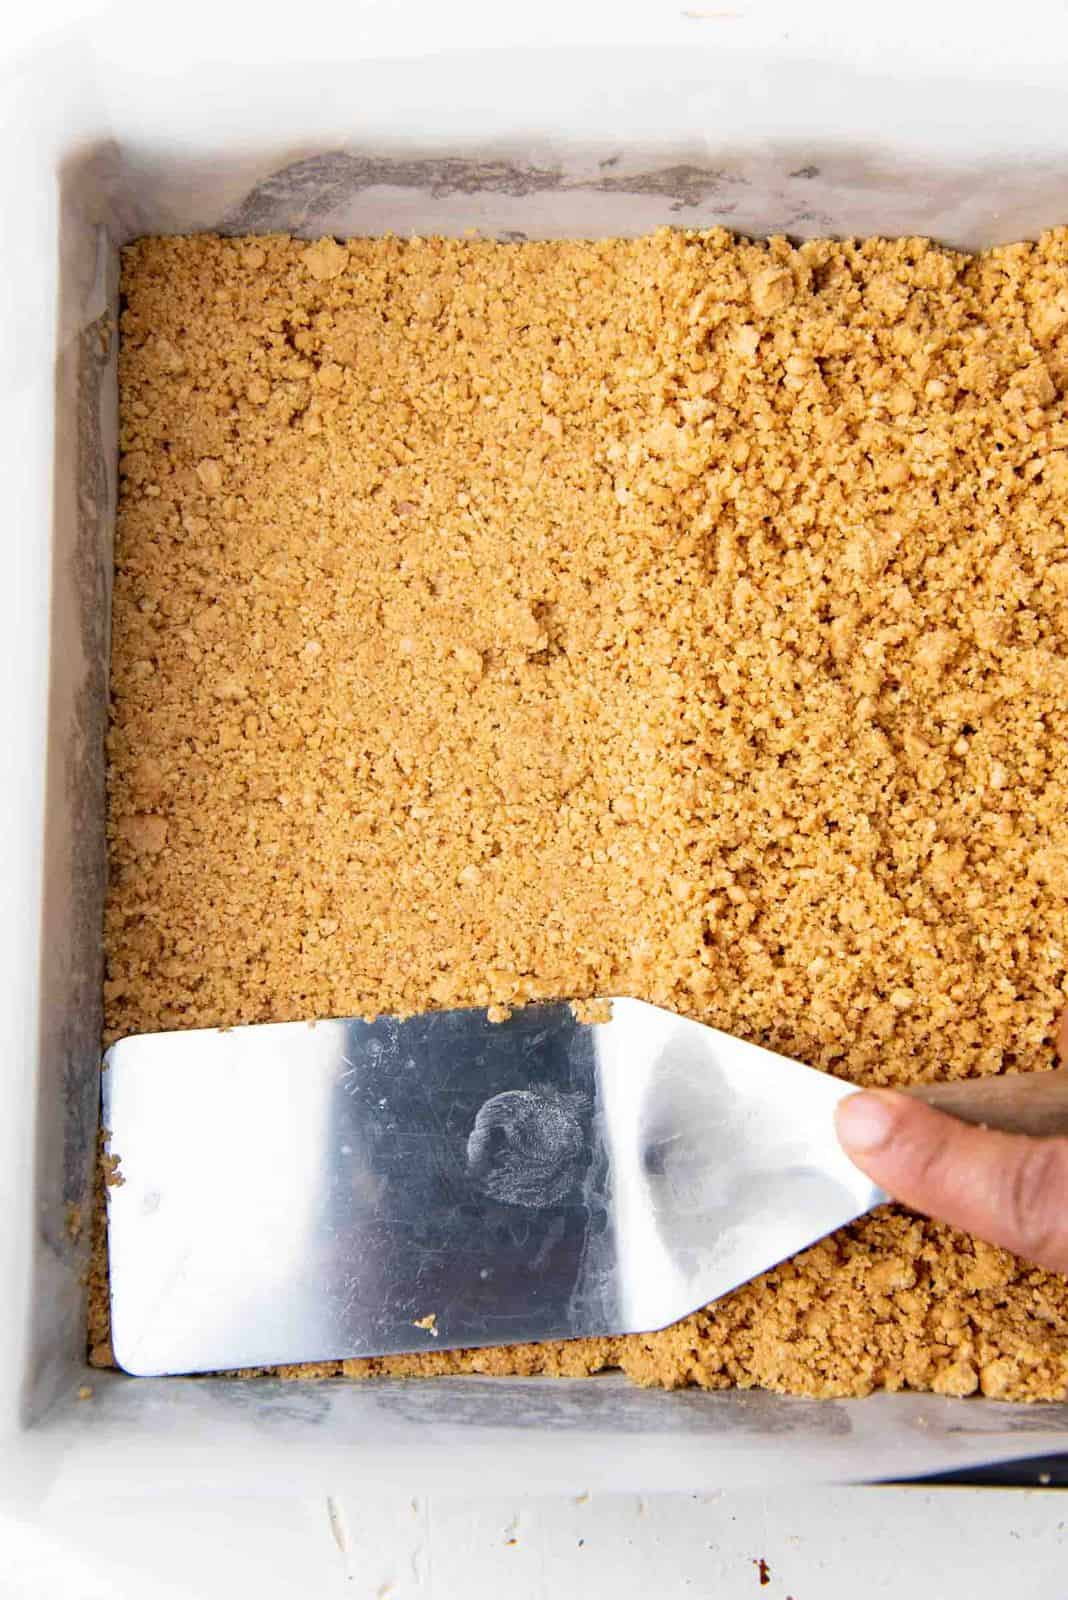
- Scrape the crumb mixture into the bottom of the prepared pan. Using a flat utensil (I use a flat spatula, but you can use a flat bottomed glass too), flatten the crumb mixture into the bottom of the pan to form an even layer of the cheesecake crust. Freeze the crust for at least 3 hours until completely chilled. Cover the pan with plastic wrap if you’re going to leave it in the freezer for over 3 hours.
Lemon curd topping
- The lemon curd topping needs to be cooled before using, so prepare this layer while the crust is chilling in the freezer.
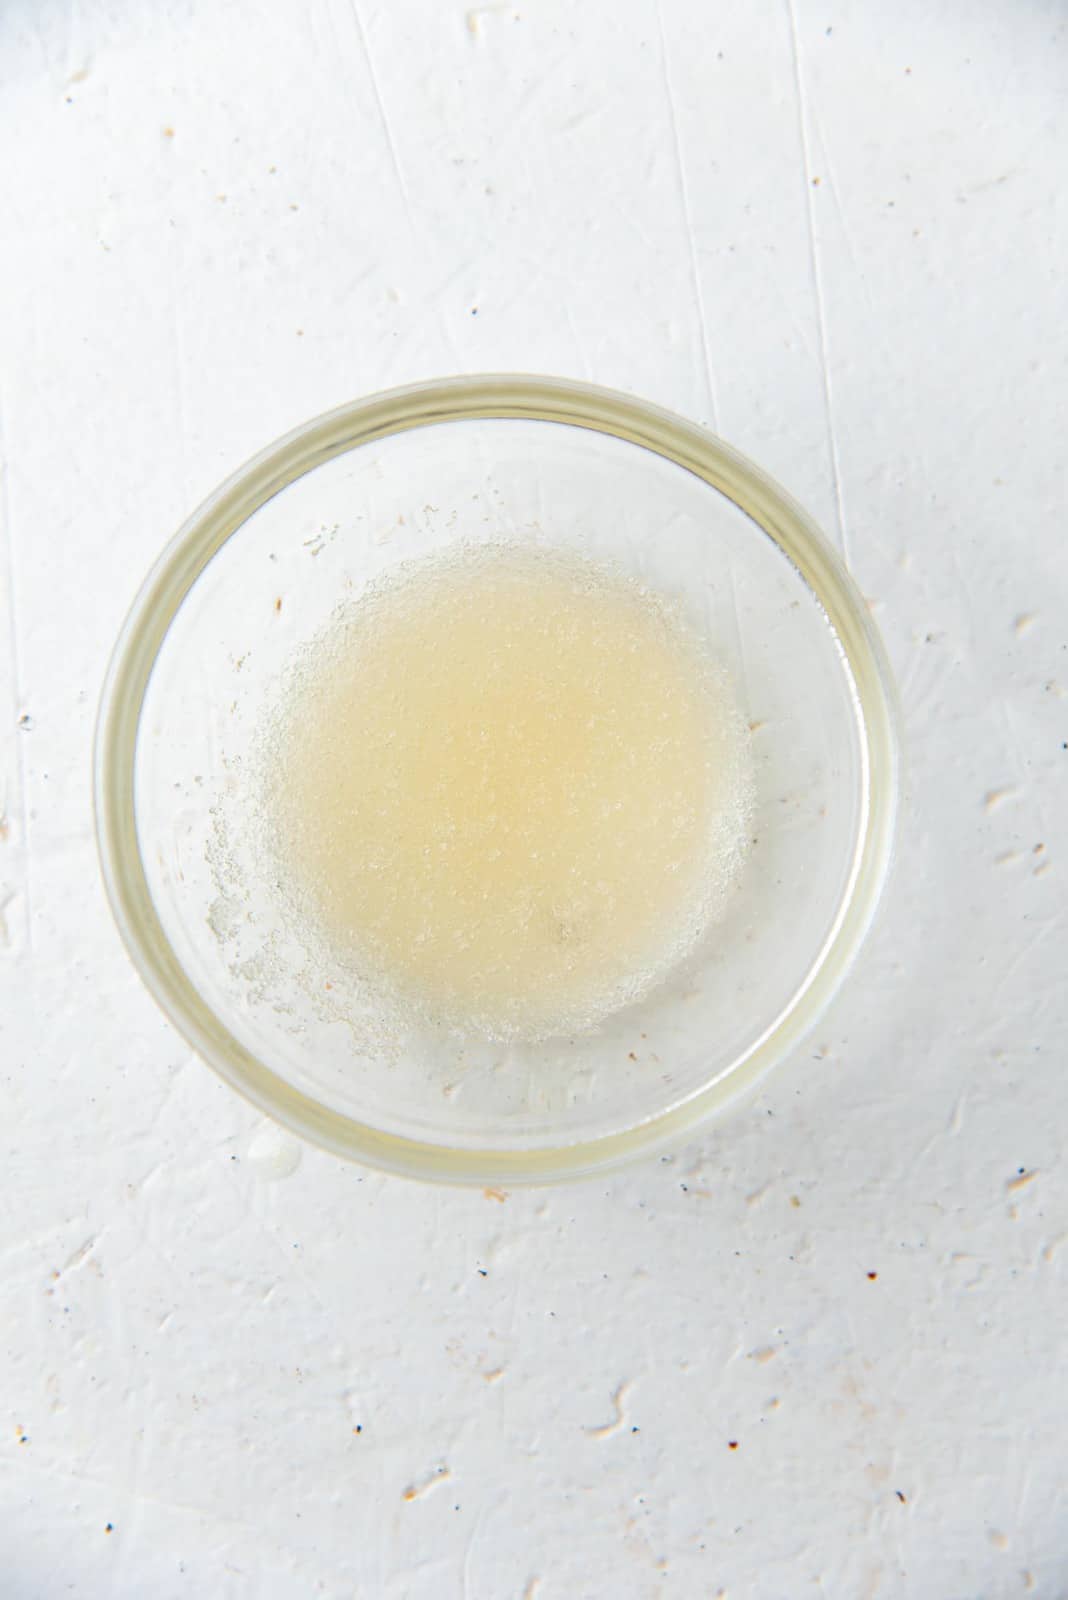
- Place the water in a small bowl, sprinkle in the gelatin, and gently stir to saturate the gelatin. Set aside to let the gelatin bloom.2 tbsp water, 1 tsp powdered gelatin
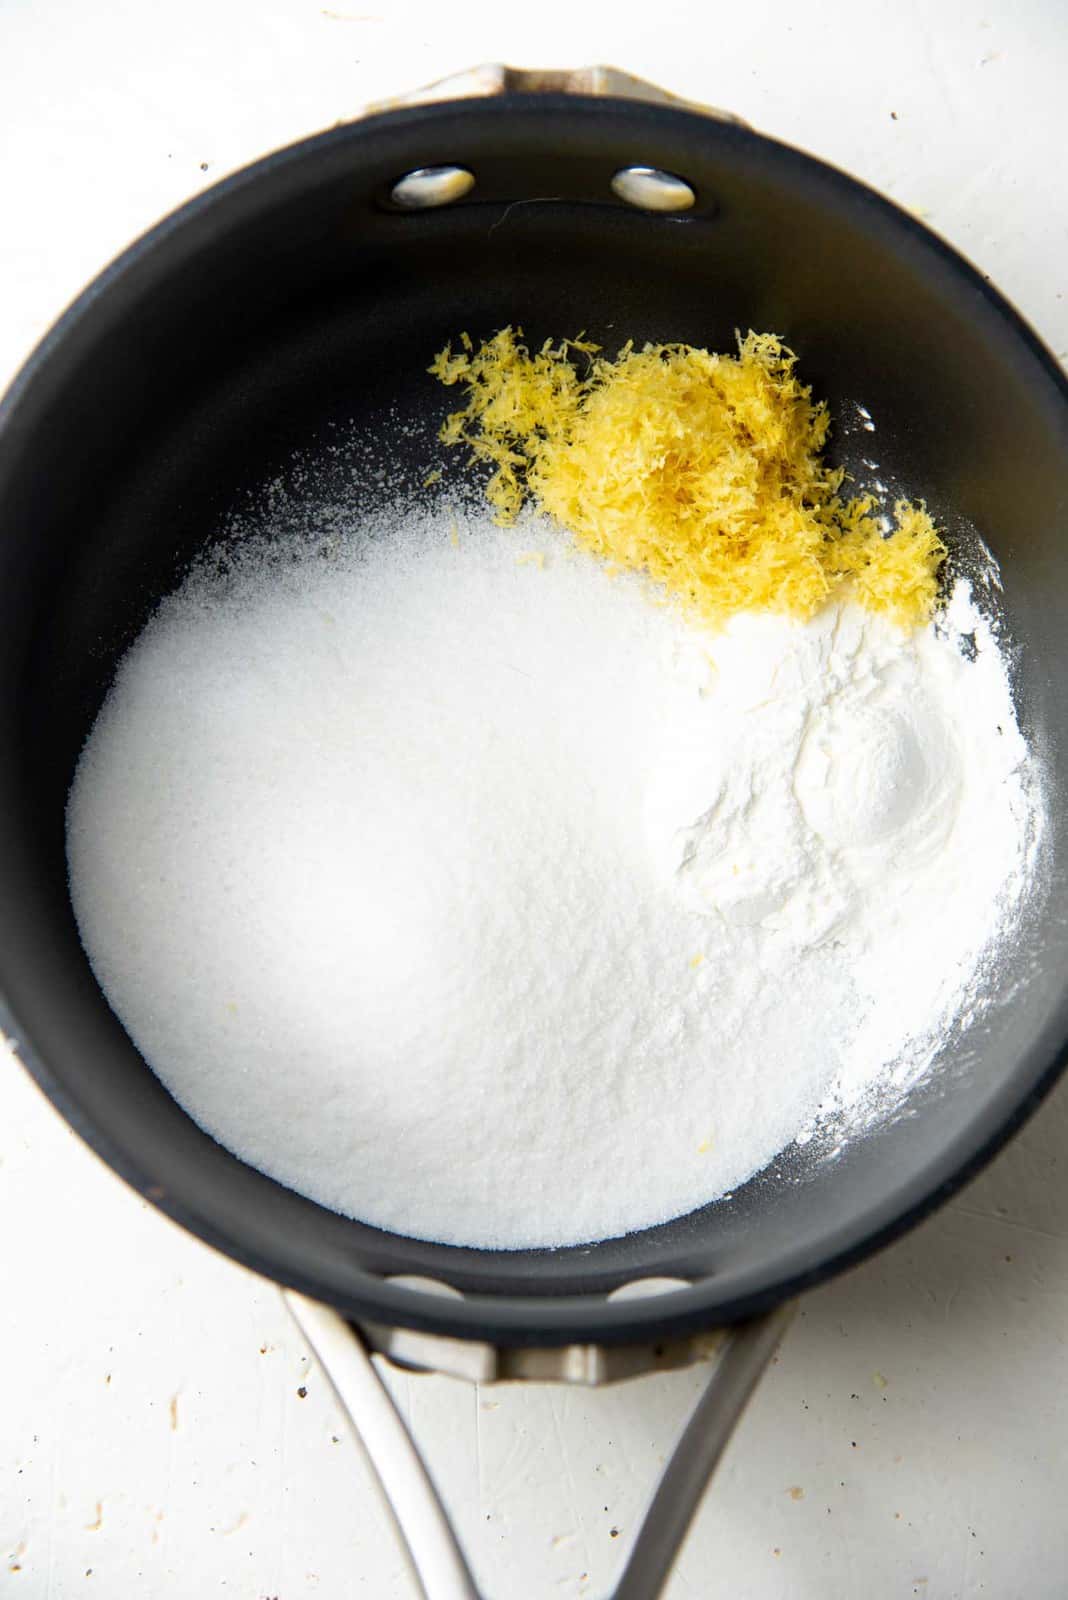
- In a non-reactive saucepan, place the sugar, zest, cornstarch, and water. Add a little of the lemon juice and whisk the mixture until the cornstarch is smooth. Then add the rest of the lemon juice and whisk to combine.2 tbsp lemon zest, 150 g white sugar, 2 tbsp water, 25 g cornstarch, 240 mL lemon juice
- In a separate heat-proof jug / bowl, place the egg yolks and water, and whisk to combine. Set aside.5 egg yolks, 2 tbsp water
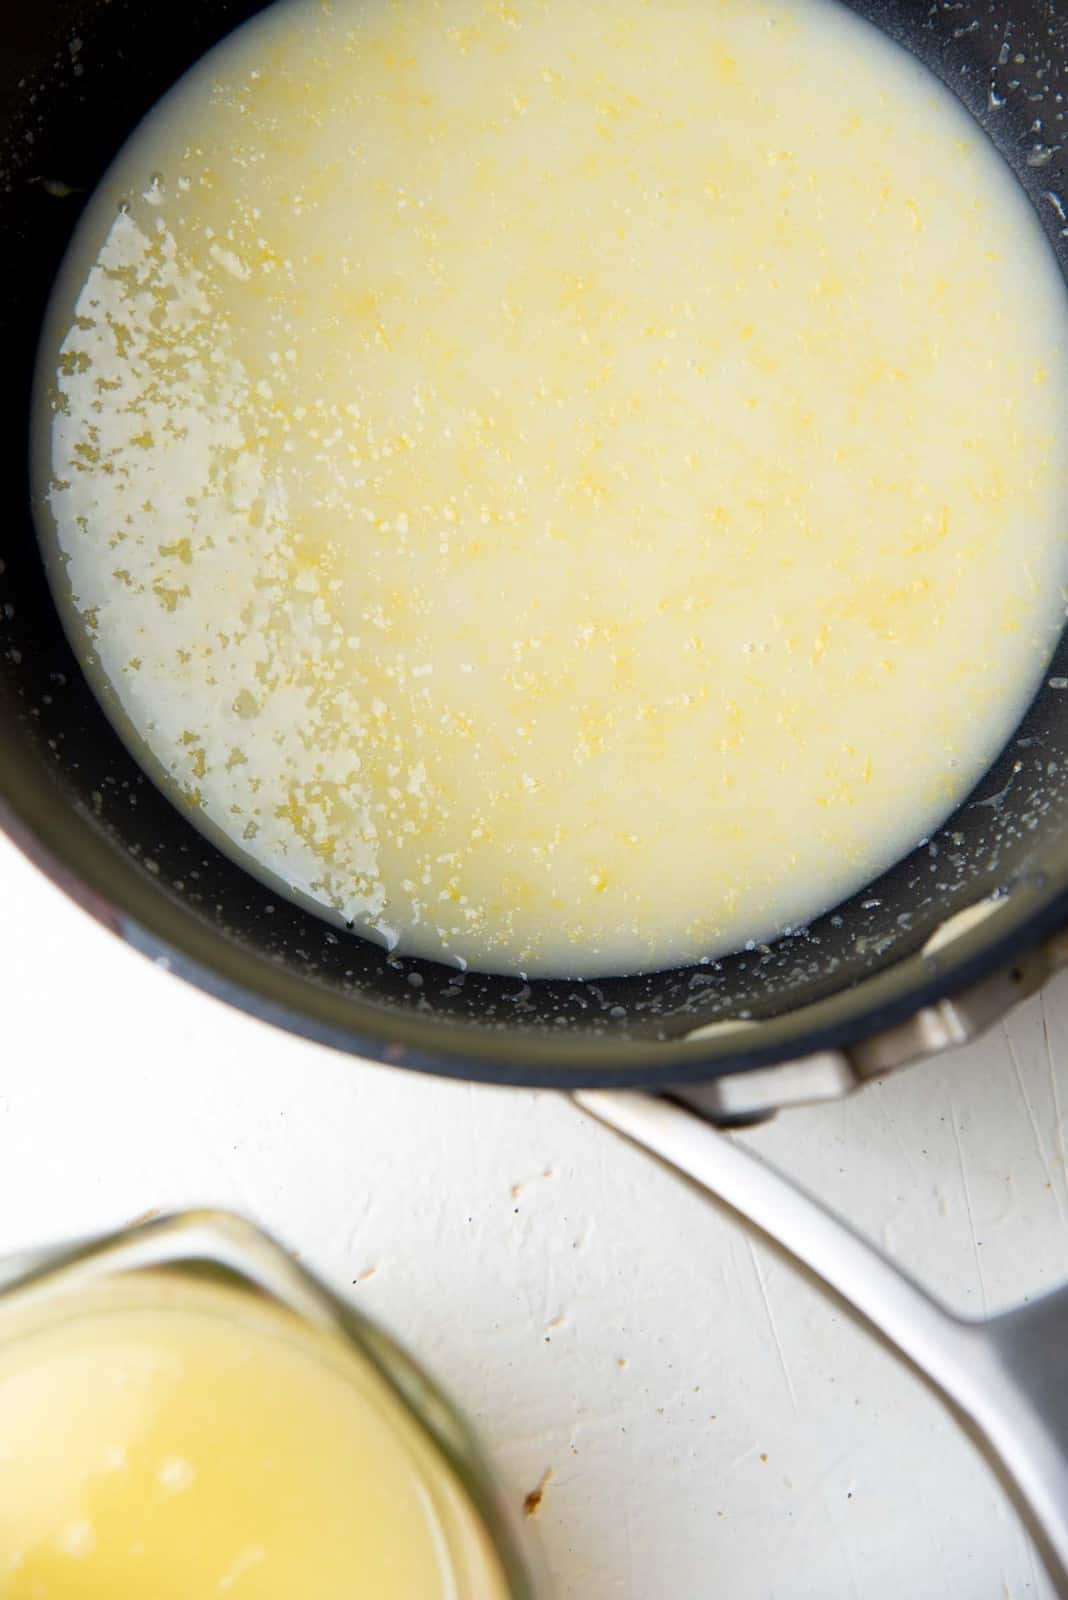
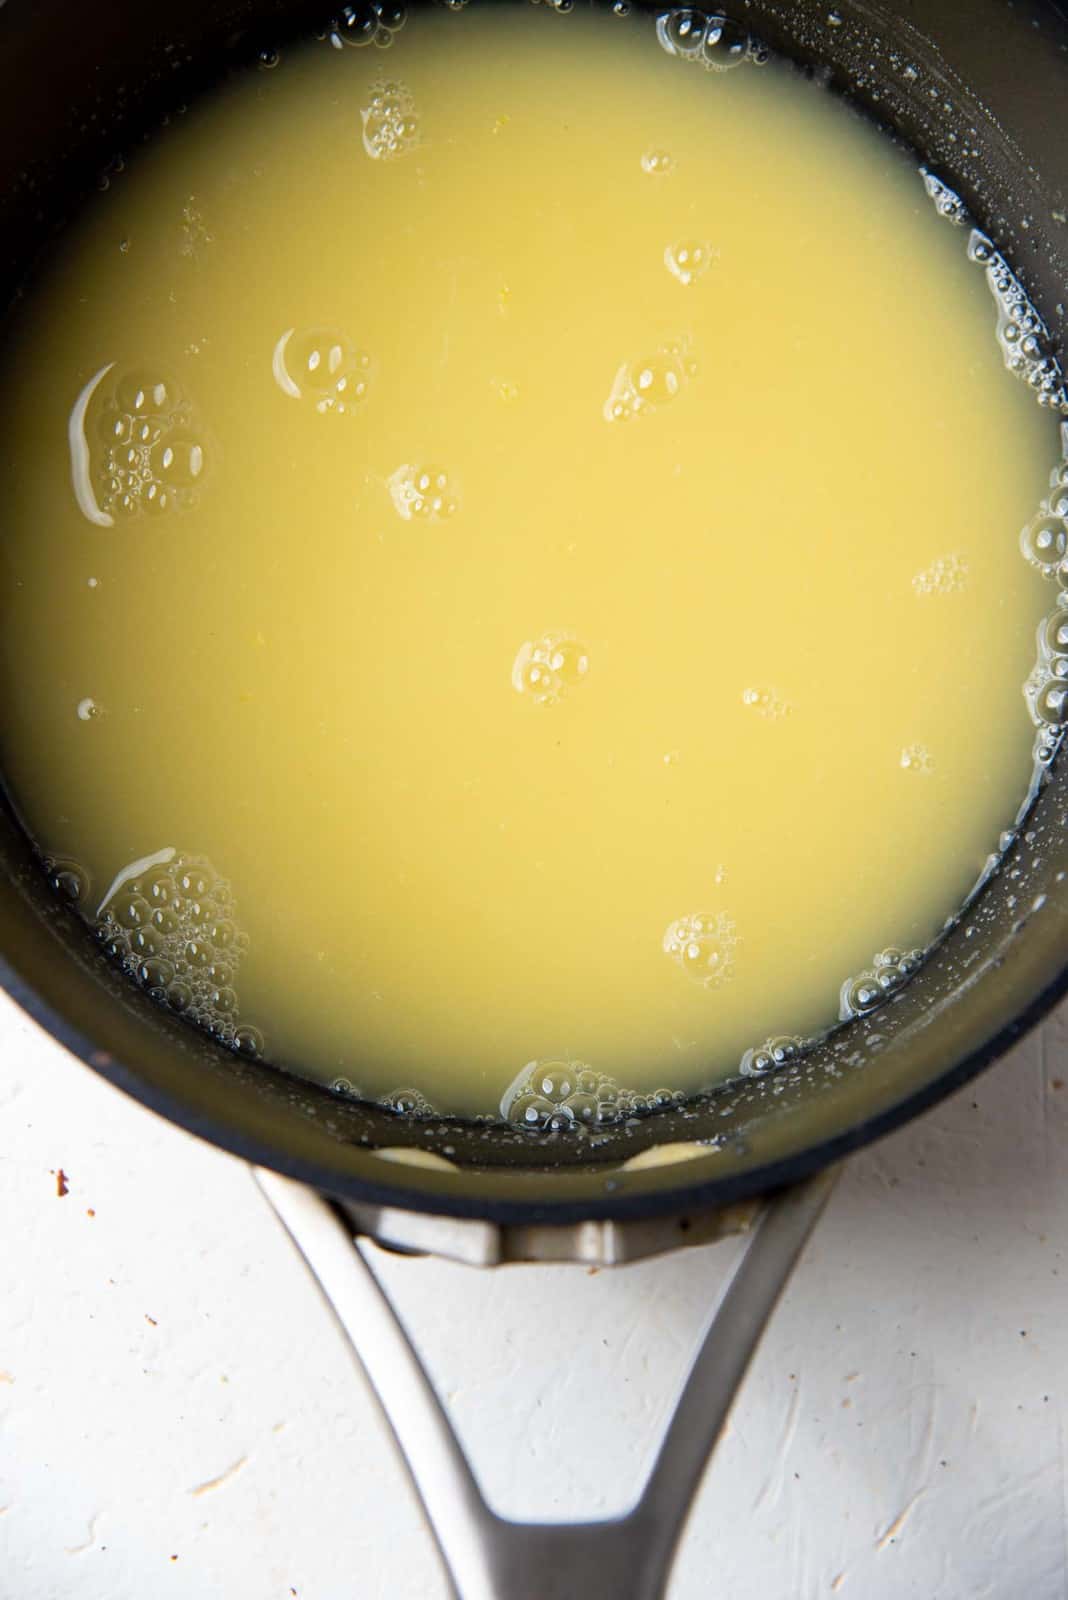
- Heat the lemon juice sugar mixture over medium high heat, while stirring frequently until the mixture comes to a boil. Boil the mixture for about 2 minutes while stirring. Remove from the heat.
- Add spoonfuls of this hot, thickened lemon mixture into the egg yolk mixture, while constantly whisking the egg yolks. This is to temper the egg yolks.
- Once you've added enough of the hot lemon mixture to warm the eggs, add the tempered egg mixture into the saucepan with the remaining hot lemon mixture. Whisk to combine.
- Return the mixture to medium – medium high heat and cook the mixture while stirring frequently until it starts to simmer again and thickens. This can take about 5 minutes.
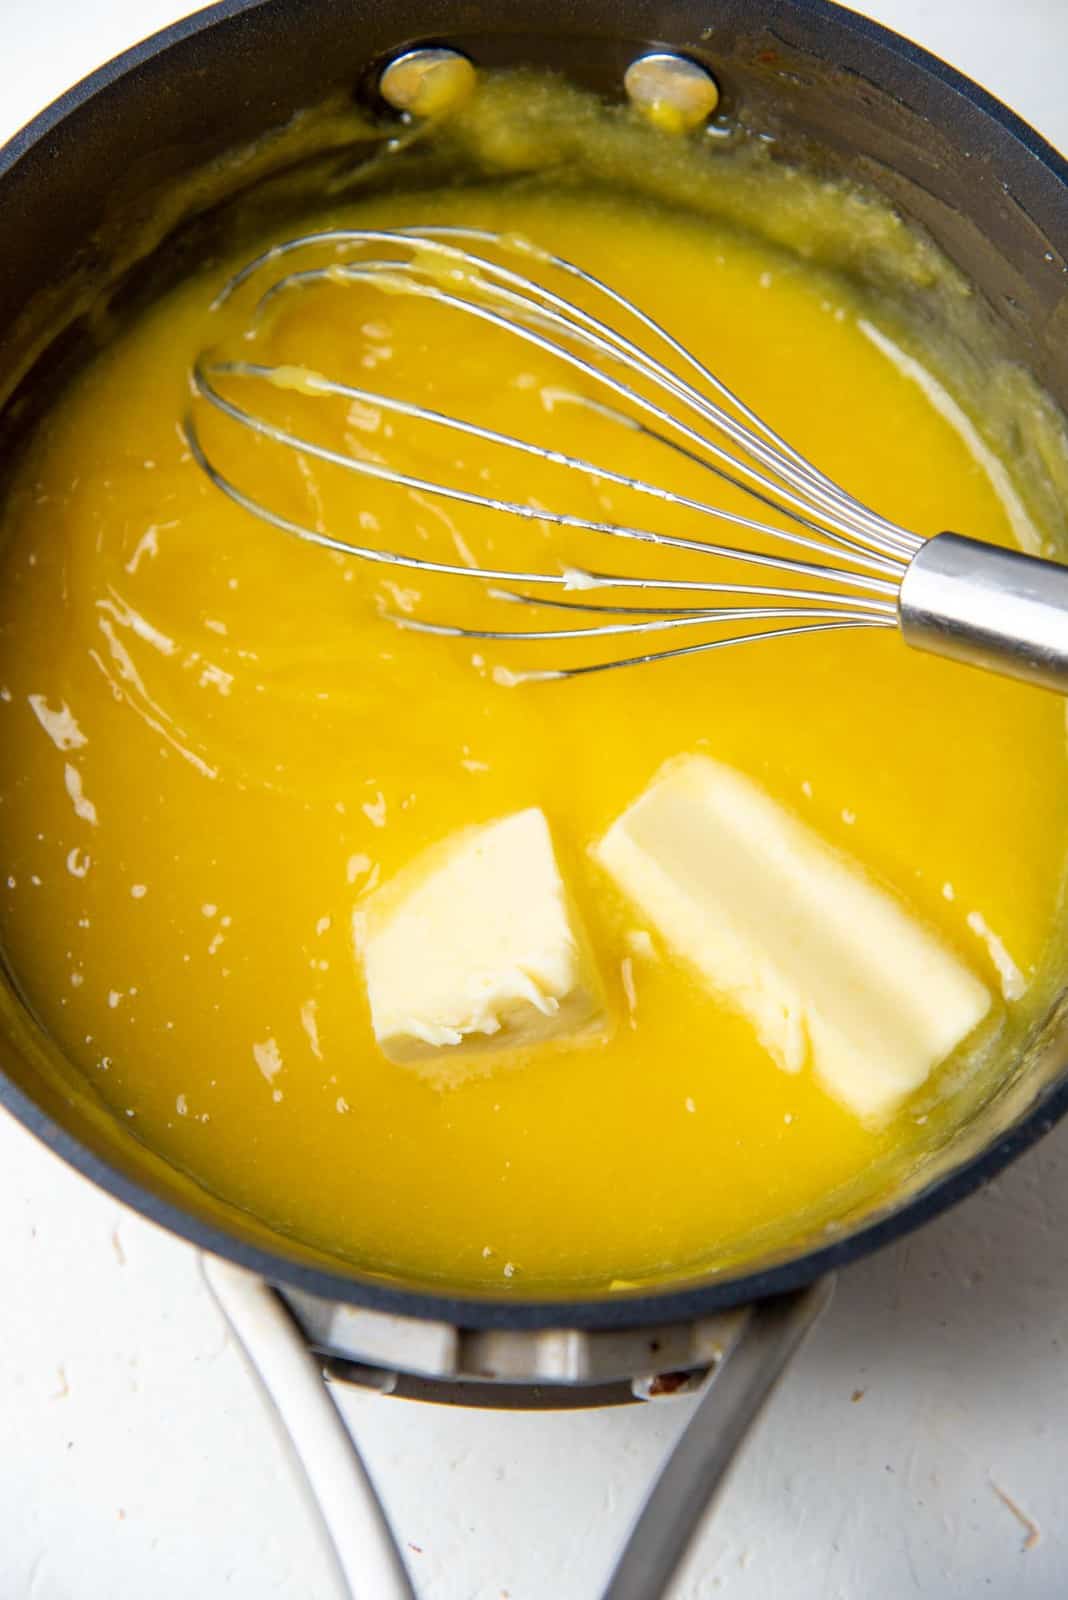
- Remove from the heat, and whisk in the butter.50 g butter
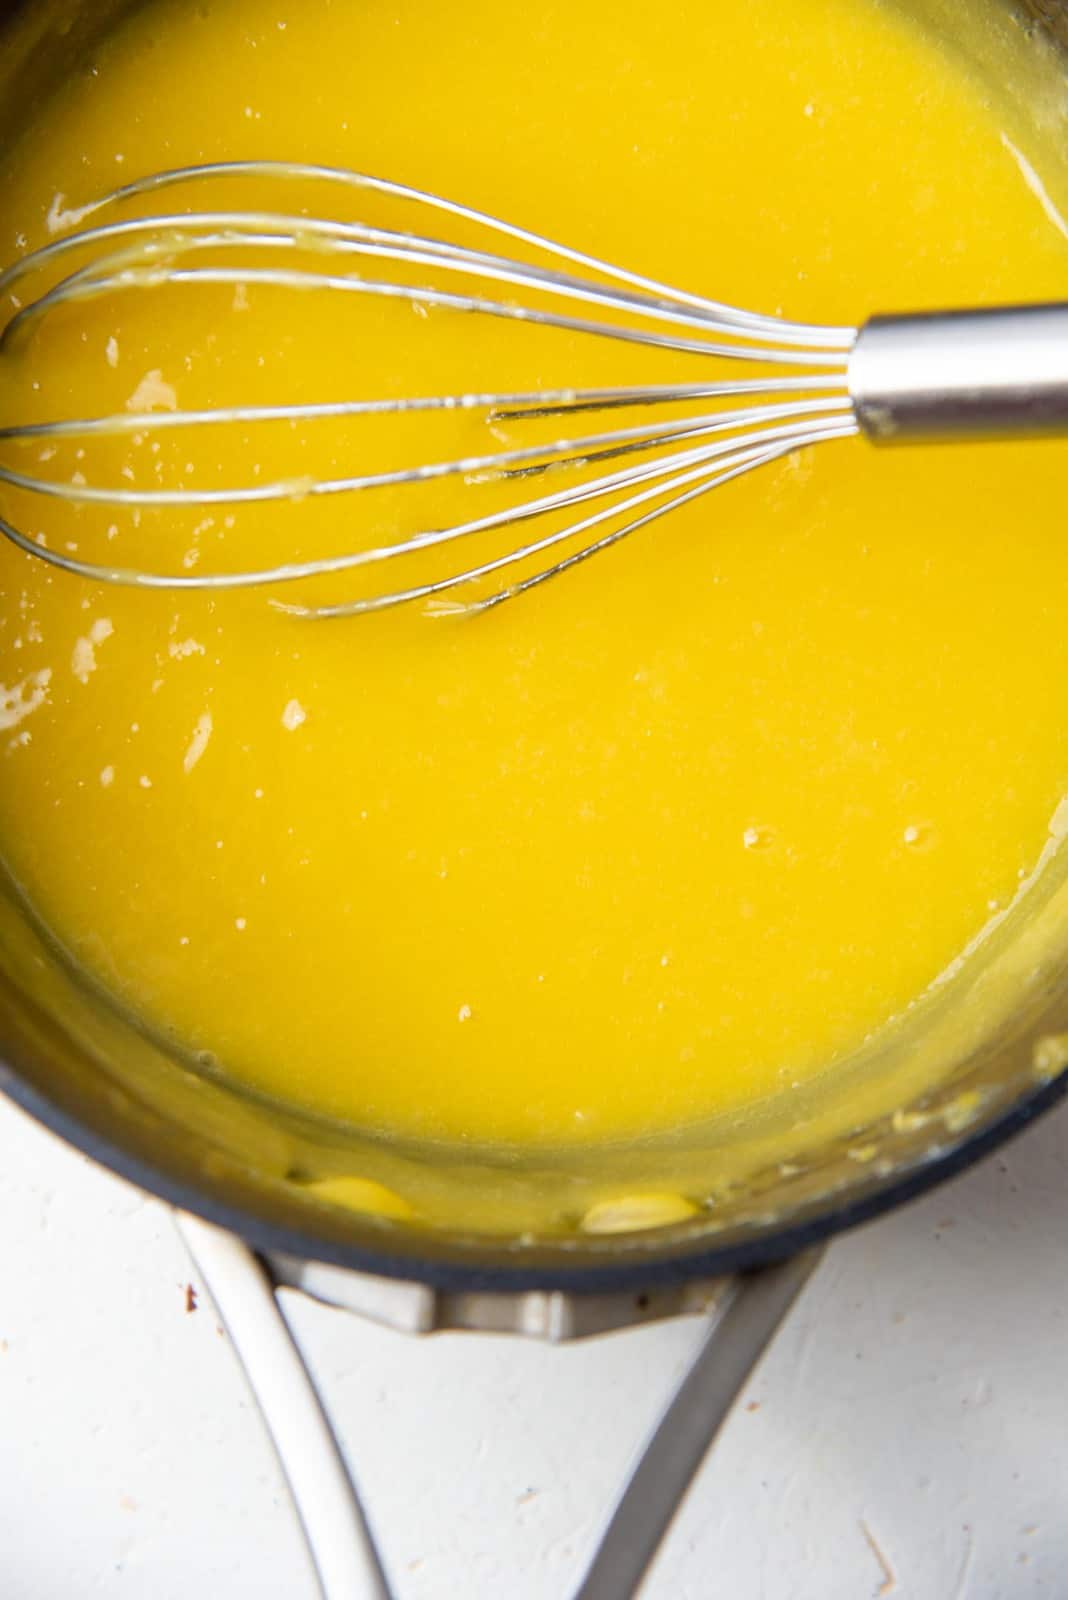
- Finally, stir in the bloomed gelatin until it’s dissolved. Set the lemon curd aside to cool, but make sure to occasionally whisk the mixture to prevent a skin from forming (see recipe notes).
Lemon cheesecake layer
- Make this layer when the lemon curd layer has cooled down a bit and is only slightly warm.
- Place the 3 tbsp water in a small heat-proof bowl. Sprinkle the gelatin over the surface and gently stir to completely saturate the gelatin. Set aside to bloom (at least 10 minutes).45 mL water, 2 tsp powdered gelatin
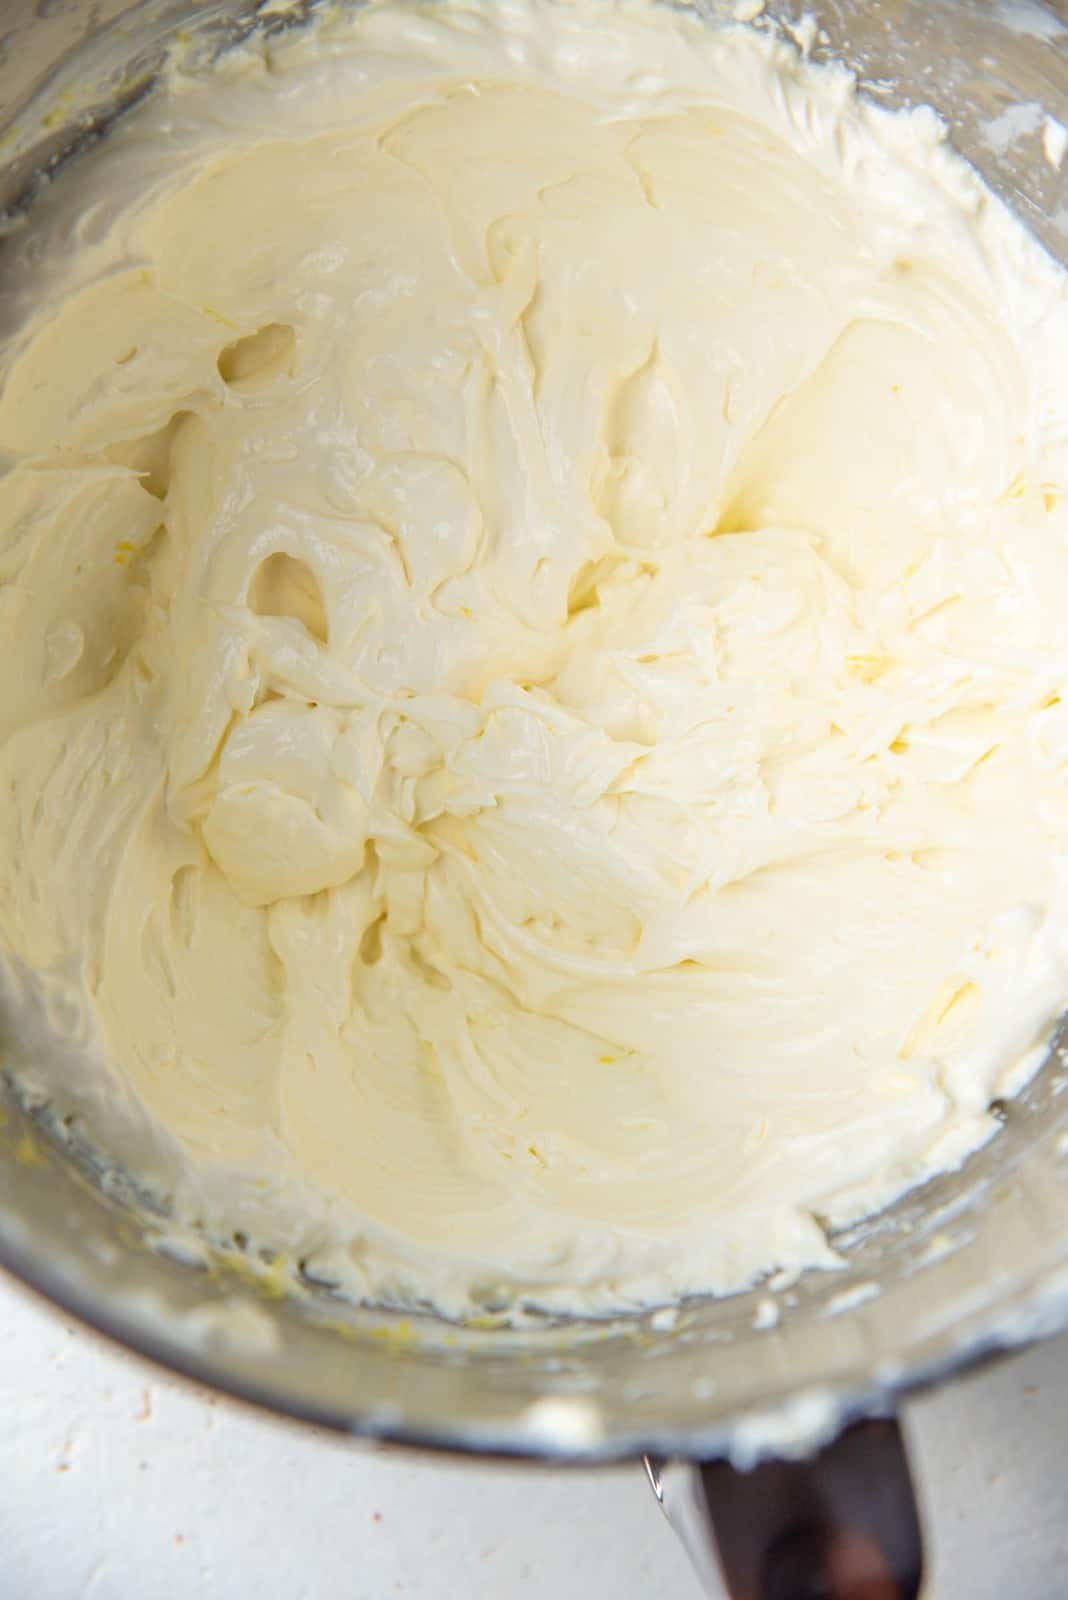
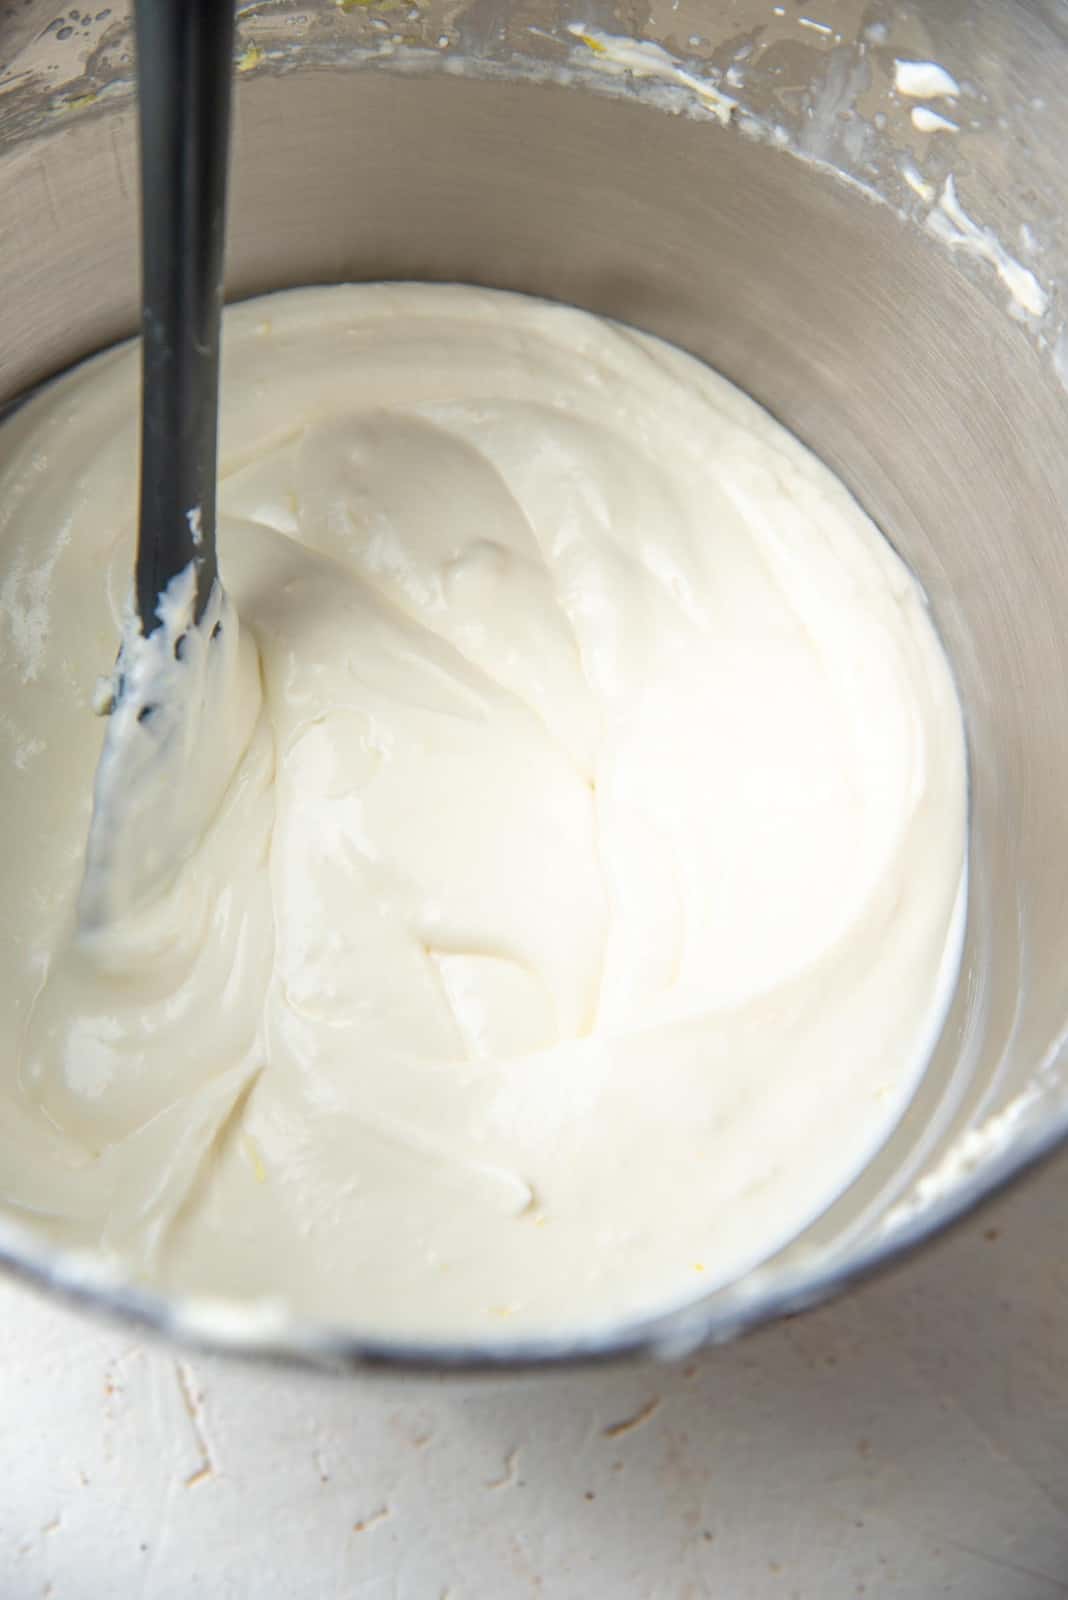
- In a large mixer bowl, place the cream cheese and sugar. Using the paddle attachment, mix the cream cheese over medium / medium high speed until creamy and smooth. Scrape down the sides of the bowl and mix again until everything is smooth and creamy.450 g block cream cheese, 100 g white sugar
- Add the lemon juice, zest, vanilla, and salt, and mix for a further few minutes until the mixture is smooth and all the ingredients are mixed through.80 mL lemon juice, 2 tbsp lemon zest, 1 tsp vanilla, ¼ tsp sea salt
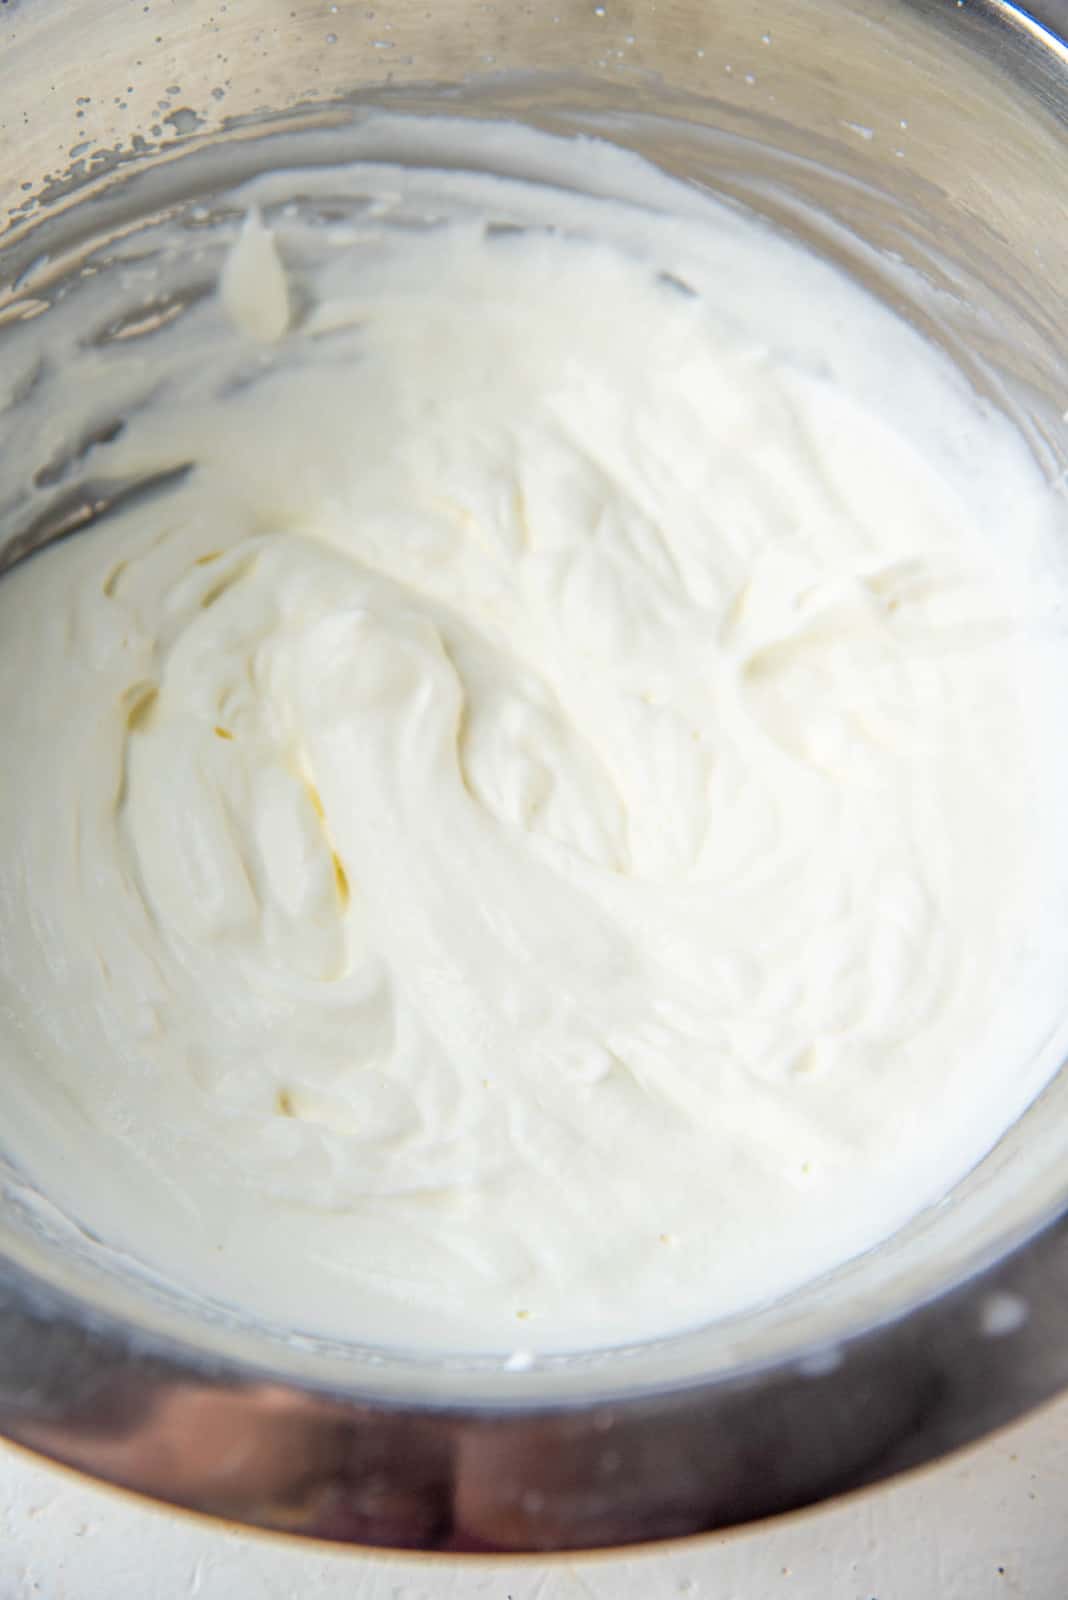
- In a separate bowl, whisk the chilled heavy cream until you have soft peaks. You can use an electric mixer or a hand whisk for this. Fold the cream into the cream cheese mixture.180 g chilled heavy cream
- Replace the paddle attachment in your mixer with the whisk attachment.
- Once the gelatin is bloomed, microwave the mix for about 10 – 20 seconds until the gelatin is dissolved but NOT boiling. Add about 1 tbsp of cream while stirring the gelatin mix, to temper the mixture.
- While running the mixer on high speed (with the whisk attachment), whisk the cream cheese mixture, and immediately add the tempered gelatin mixture. Make sure the gelatin mixture is added close to the whisk, but without touching the whisk, to avoid clumping.
- As soon as the gelatin is mixed through (should only take about 1 minute), stop mixing the cream cheese layer. Then whisk the mixture by hand to make sure everything is smooth.
Assembly
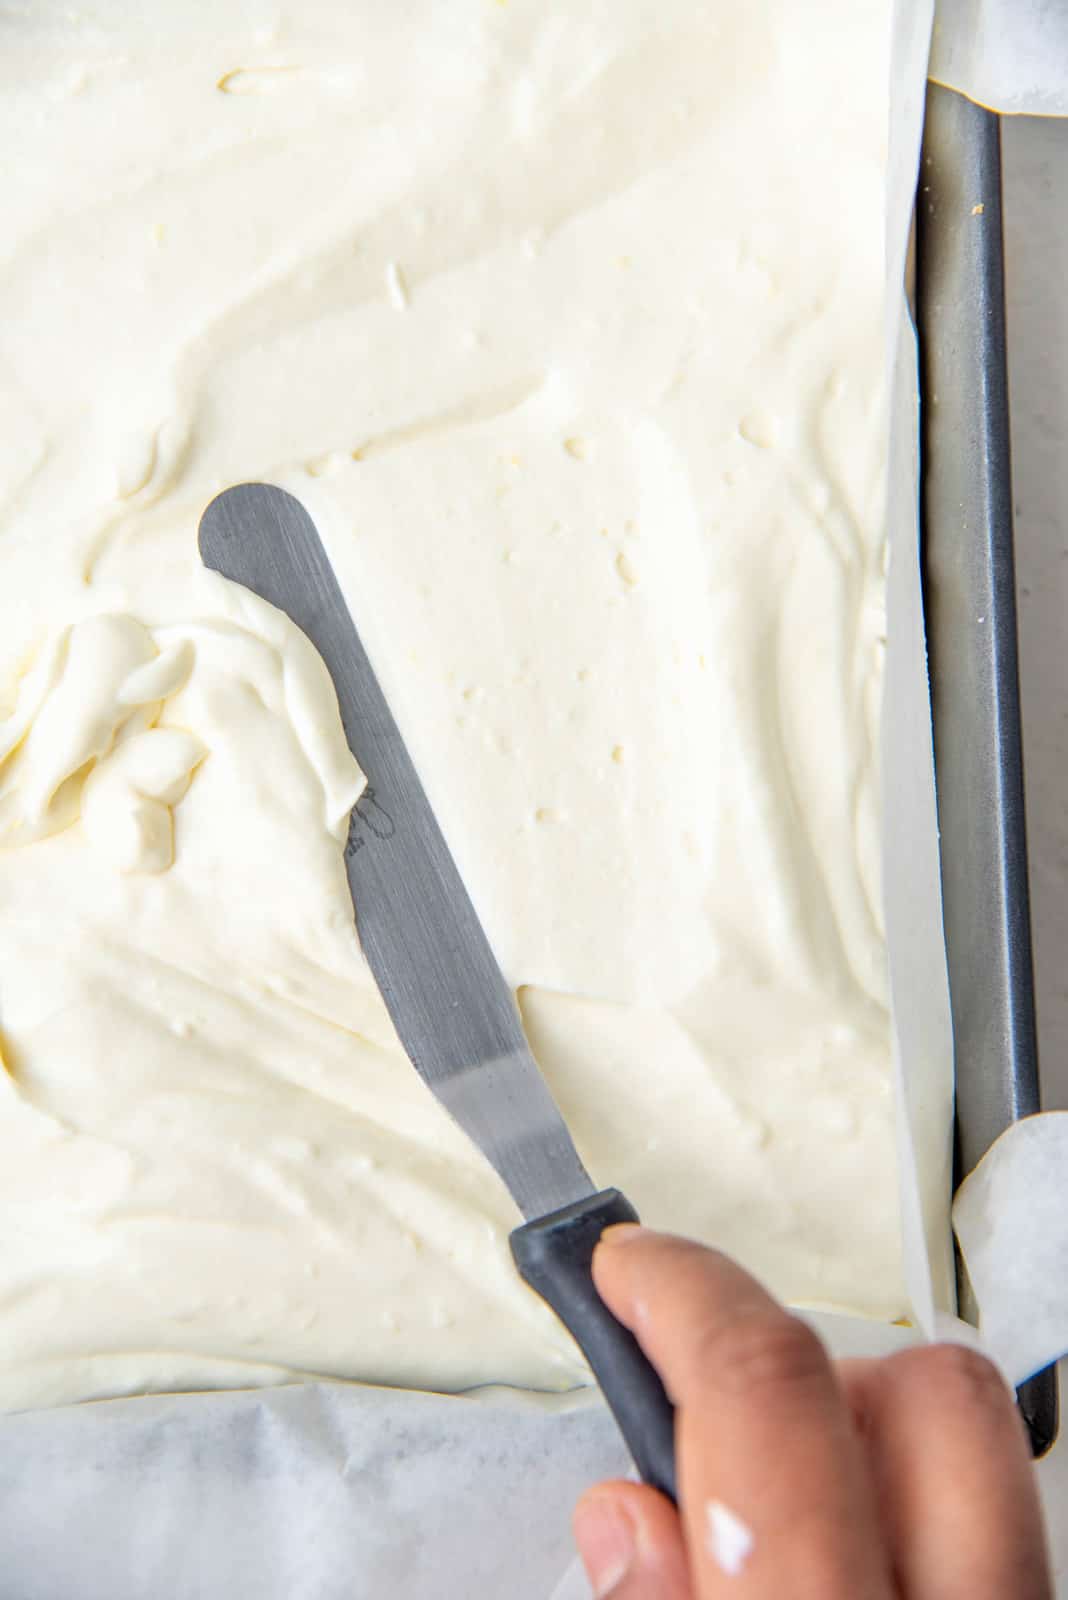
- Scrape the lemon cheesecake layer into the prepared pan, over the frozen crust. Spread it evenly using an offset spatula or regular spatula.
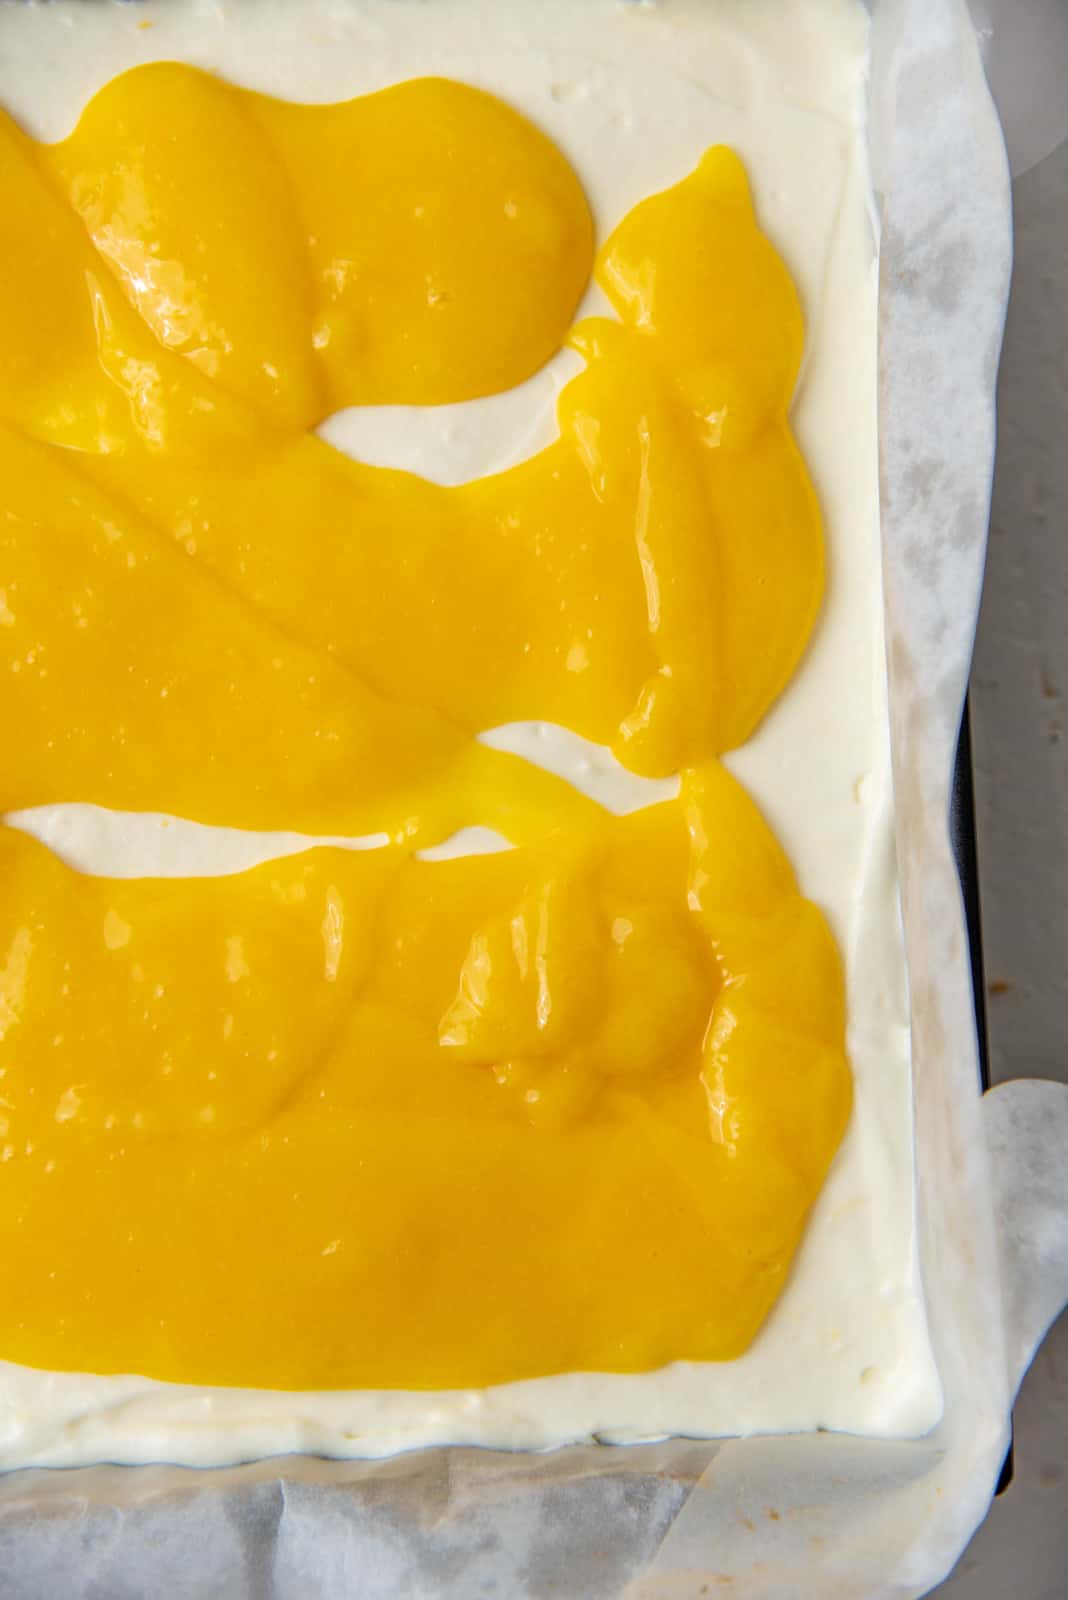
- Whisk the cooled lemon curd topping with a whisk, and make sure it’s smooth. Also make sure it’s not hot at this stage (it can melt the cheesecake layer and sink to the bottom if hot).
- Pour the lemon curd over the surface and spread it evenly. Using a knife or offset spatula, create swirls on the surface of the cheesecake.
- Cover the pan and refrigerate for at least 6 hours. I like to keep it in the fridge overnight to allow the layers to completely set.
- Once set, remove the cheesecake from the pan by lifting the parchment paper out of the pan. Cut into squares or bars using a clean, warm knife.
Recipe Notes
Note about the lemon curd
The lemon curd should be close to room temperature when it’s poured over the cheesecake layer. I prefer not to let it cool in the fridge since I don’t want it to set. Instead, I let the lemon curd cool down at room temperature.When the lemon curd has cooled down significantly, only then do I make the lemon cheesecake layer. Make sure to whisk the lemon curd before using. Any gelatin that is set will be broken down when whisked. You may not use ALL of the lemon curd for the topping. Add as much or as little as you like. You will also use more with a 9 inch pan, and less with an 8 inch pan.
Note about adding gelatin to the cheesecake base
In this recipe, I whisk in the melted gelatin into the final gelatin base. You can also whisk in the gelatin into the whipping cream as well.Nutrition Information:
“This website provides approximate nutrition information for convenience and as a courtesy only. Nutrition data is gathered primarily from the USDA Food Composition Database, whenever available, or otherwise other online calculators.”


Leave a Reply