• Skip to primary navigation
  • Skip to footer navigation
  • Skip to header navigation
  • Skip to privacy navigation
  • Skip to recipes navigation
  • Skip to main content
  • Skip to primary sidebar
  • About
  • My Cookbooks
  • Work With Me
  • Shop
  • Contact

The Flavor Bender

Master the Science of Delicious

  • Recipe Index
    • All Recipes
    • Desserts
      • Cakes & Cupcakes
      • Candy & Bite Sizes
      • Chocolate
      • Cookies, Brownies & Bars
      • Frozen Desserts
      • Fruit Desserts
      • Puddings & Custards
      • Dessert drinks
      • No Bake
      • Pastries & Breads
      • Sweet Syrups & Spreads
      • Tarts & Pies
      • Cheesecakes
      • Healthy sweets
    • Breakfasts
      • Tarts, Quiches, & Pies
      • Waffles, Pancakes & Crepes
      • Quick Breads, Scones & Muffins
      • Breakfast Sandwiches
      • Pastries & Breads
      • Eggs
      • Breakfast & Brunch Drinks
      • Make Ahead Breakfasts
      • Healthy Breakfasts
      • Coffee and Tea drinks
      • Breakfast Smoothies & Juices
      • Breakfast Sides
      • Casseroles
    • Courses
      • Main Meals
        • Bread, Sandwiches & Burgers
        • Curries
        • Salads
        • Roasts & BBQ
        • Soups & Stews
        • Casseroles
      • Bread
      • Lunch
      • Beverages
      • Appetizers & Tapas
      • Sides
      • Dips & Condiments
      • Tea Time & Snacks
      • Desserts
      • Meal Prep
      • Cocktails
    • Cuisines
      • American
      • European
      • Australasian
      • Sri Lankan
      • East Asian
      • Mexican
      • Middle Eastern
      • South Asian
    • Sri Lankan
      • Main Meals
      • Drinks
    • Skill Level
      • Easy
        • Easy Desserts
        • Easy Cooking
        • Easy Breads
        • Easy Breakfasts
        • Easy Dinners
      • Intermediate
        • Intermediate Desserts
        • Intermediate Cooking
        • Intermediate Breads
        • Intermediate Breakfasts
        • Intermediate Dinners
      • Advanced
        • Advanced Desserts
        • Advanced Cooking
  • New? Start Here
  • Measurement Conversions
  • How-To Posts
The Flavor Bender Recipes All Dessert Recipes Cookies, Brownies & Bars Brown Butter Rice Krispie Treats

Brown Butter Rice Krispie Treats

35 mins
Easy
Cookies, Brownies & Bars
Jump to Recipe Print Recipe
184 shares

Disclaimer: The Flavor Bender is a participant in the Amazon Services LLC Associates Program, an affiliate advertising program. There are links on this site that can be defined as “affiliate links”. As an Amazon Associate I earn from qualifying purchases (at no cost to you) that will help support this website.

Author: Dini K.
Posted: 4/9/2021
Updated: 4/9/2021
Homemade rice krispie treats social media

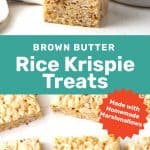
Brown butter rice krispie treats made with homemade marshmallows are infinitely better than anything you can buy from the store! Gooey, buttery, and all round delicious, and you know and can control exactly what goes into these treats! No corn syrup and no preservatives.

Rice krispie treats made with homemade marshmallows, so you can make them just the way you like!

one square of homemade rice krispie treats

I’ll be honest, I never enjoyed rice krispie treats, growing up. BUT, that all changed when I made rice krispie treats with homemade marshmallows! Turns out, my aversion to store-bought marshmallows was the one thing that kept me from enjoying these delicious little treats.

So if you’re like me, and don’t much care for store-bought marshmallows or rice krispie treats made with store-bought marshmallows, then this recipe is for YOU! It’s also for anyone who wants to know and control what goes into their homemade rice krispies treats. Because store-bought ones are often chock-full of awful stuff. These homemade brown butter rice krispie treats have,

  • No corn syrup
  • No additives or preservatives
  • You can make them corn free (using cornstarch free confectioner’s sugar)
  • You can also make them gluten free using gluten free rice krispies
Cutting rice krispie treats into squares

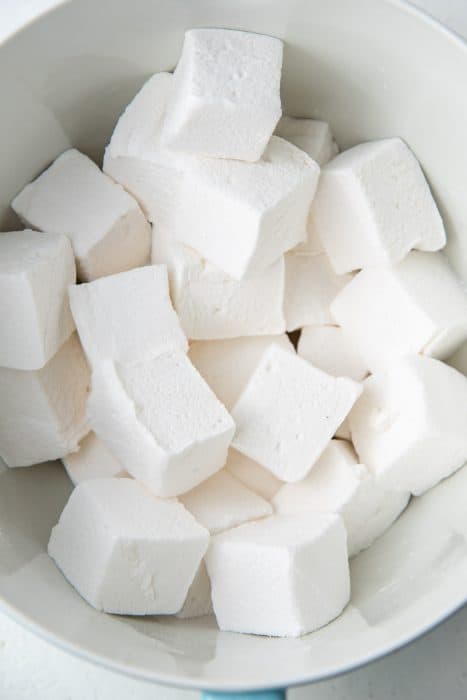
How to make homemade marshmallows

I have a detailed post on how to make homemade vanilla marshmallows that is much loved by all my readers. Everything you need to know about making marshmallows can be found in that post.

The post will show you how to make marshmallows from scratch, with or without corn syrup. And I share lots of tips, so you know exactly what to look for at each stage of the process, and how to guarantee perfect results.

Homemade marshmallows in a large bowl

Can I make these rice krispie treats with any type of homemade marshmallow?

Yes, you can.

However, depending on the texture of your marshmallows, there could be slight variations in the texture of your rice krispie treats as well. You can also use store-bought marshmallows if that’s all you have. Because of the extra marshmallows and the butter in this recipe, these rice krispie treats will be more gooey than regular rice krispie treats.

How to make Brown Butter Rice Krispie Treats with homemade marshmallows

The process of making these brown butter rice krispie treats is similar to the regular version. But there are a few differences in terms of the ingredients.

  • Homemade marshmallows – Softer, with a more silky texture when melted.
  • Brown butter – You can certainly make these treats with regular butter, but browning the butter first will give these rice krispie treats incomparable flavor!
  • Salt and vanilla – Absolutely crucial. The salt balances the sweetness, and the vanilla adds depth of flavor to the sweetness.

Make the brown butter

Making brown butter is easy. It’s only a few extra minutes added to the cook time, but the resulting depth of flavor you get from the brown butter is just glorious!

Place the butter in a small stainless steel pot. You can also use a non-stick pot, or a pan. But you need to make sure you can see the color of the milk solids as they caramelize. If you use a dark bottom pot, then you can use a spatula or spoon to check the milk solids from time to time, so that you can stop cooking the butter on time.

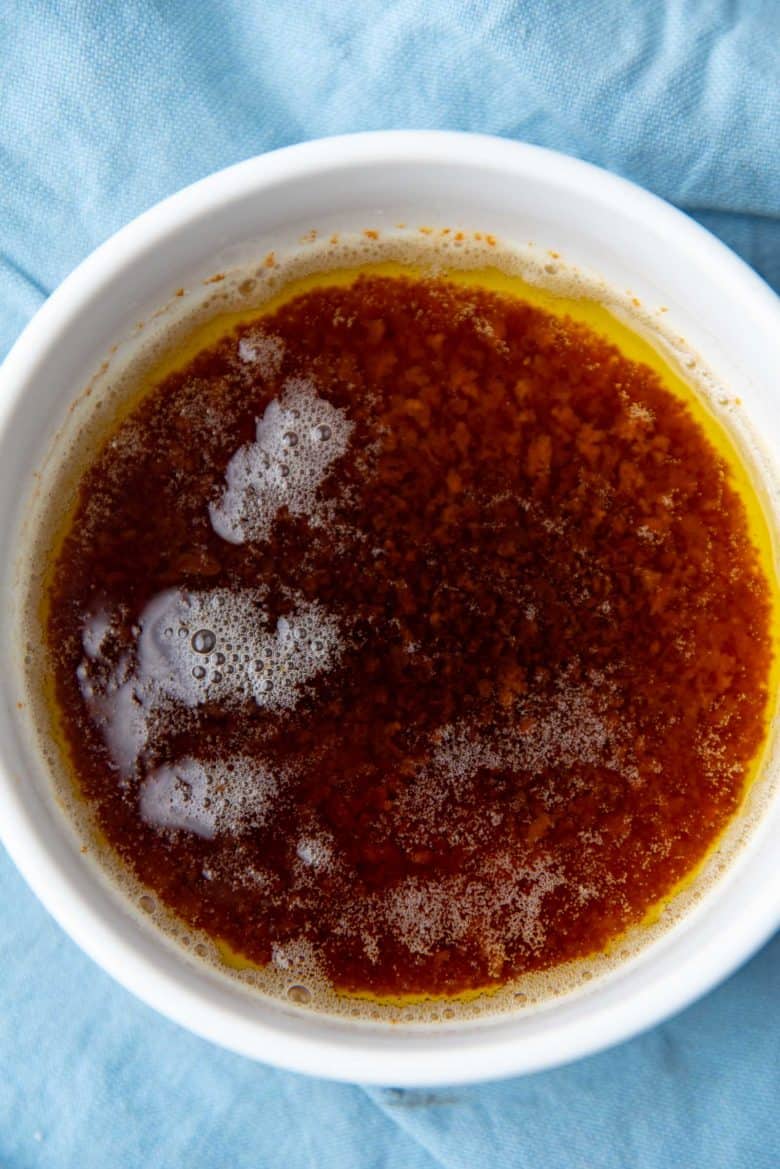
Heat the butter until melted. As you cook the butter, the milk solids will separate and settle on the bottom of the pot. So whisk the butter frequently to prevent the milk solids from sticking to the bottom.

These milk solids will discolor a little at first, and then start to turn golden in color. Next, the milk solids will quickly go from light golden to dark golden to amber in color, and finally black (when burned!).

Remove the butter from the stove as soon as the milk solids start turning amber in color, and pour it into a bowl. The residual heat will continue to cook the butter until it turns a beautiful amber color. Now you can use the brown butter right away to make these delicious rice krispie treats!

Brown butter in a bowl

Making the marshmallow base

This step is so easy it’s embarrassing!

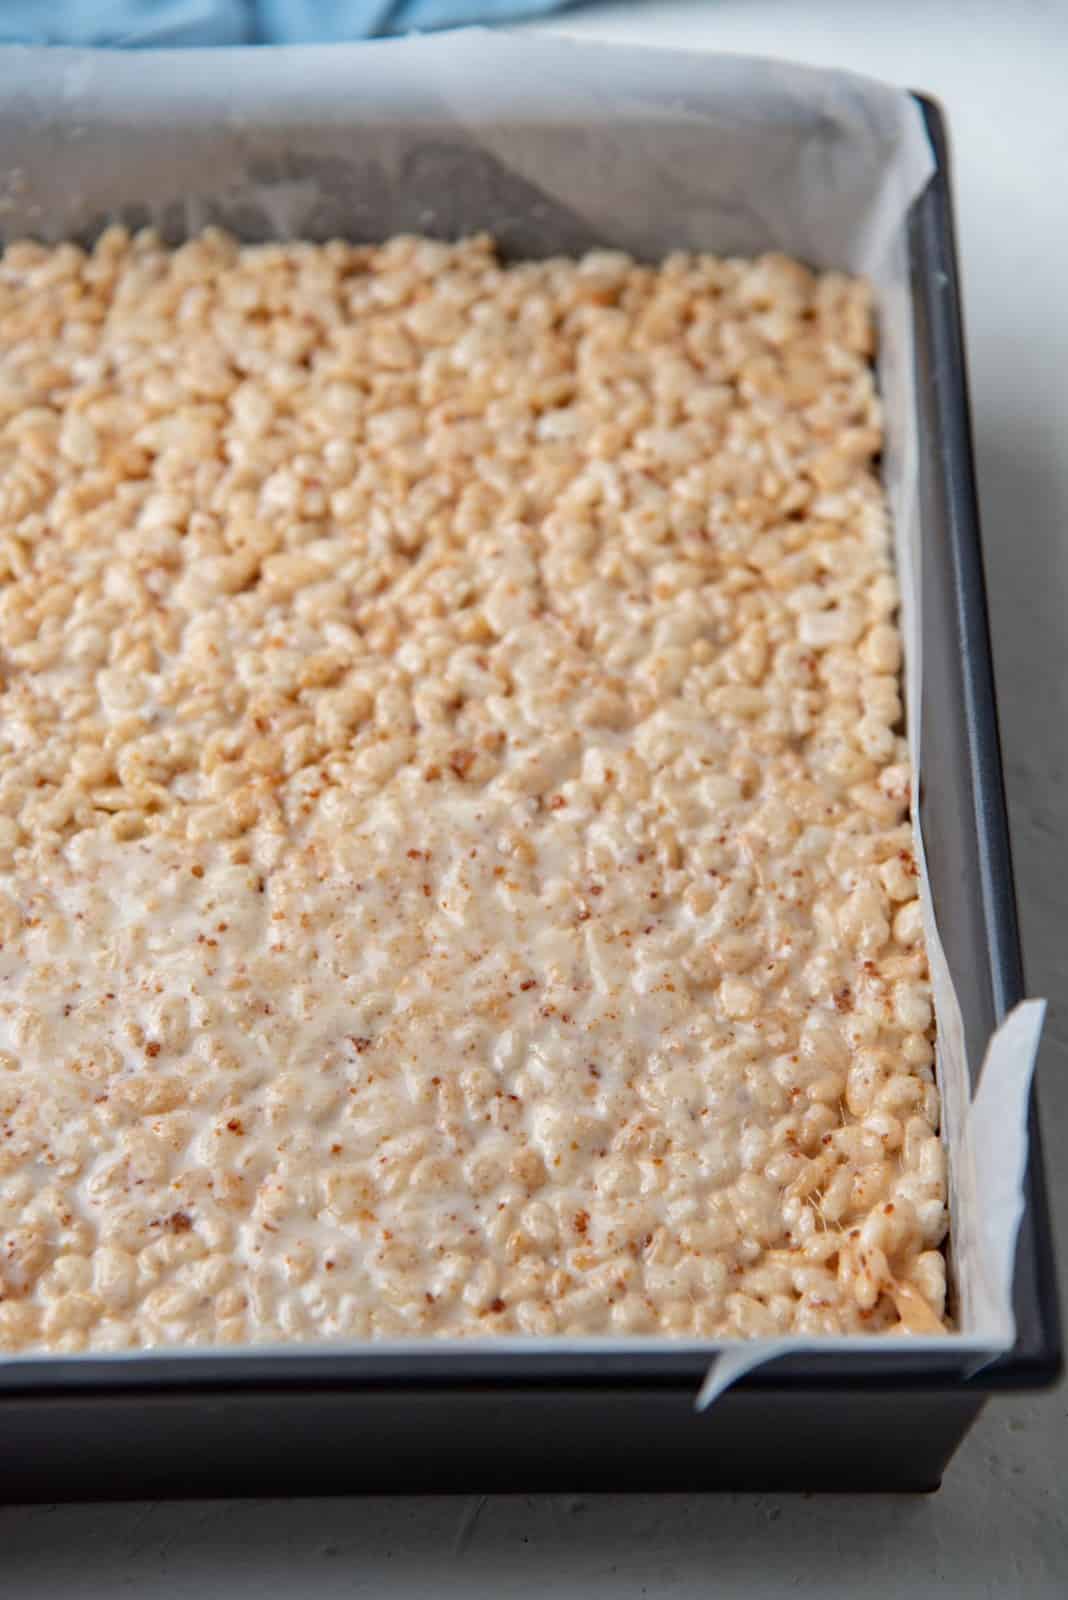
Line a baking pan or any pan (8 x 8 inch or 9 x 9 inch square pan) with parchment paper. This simply makes clean up easier. You can also use foil if you prefer.

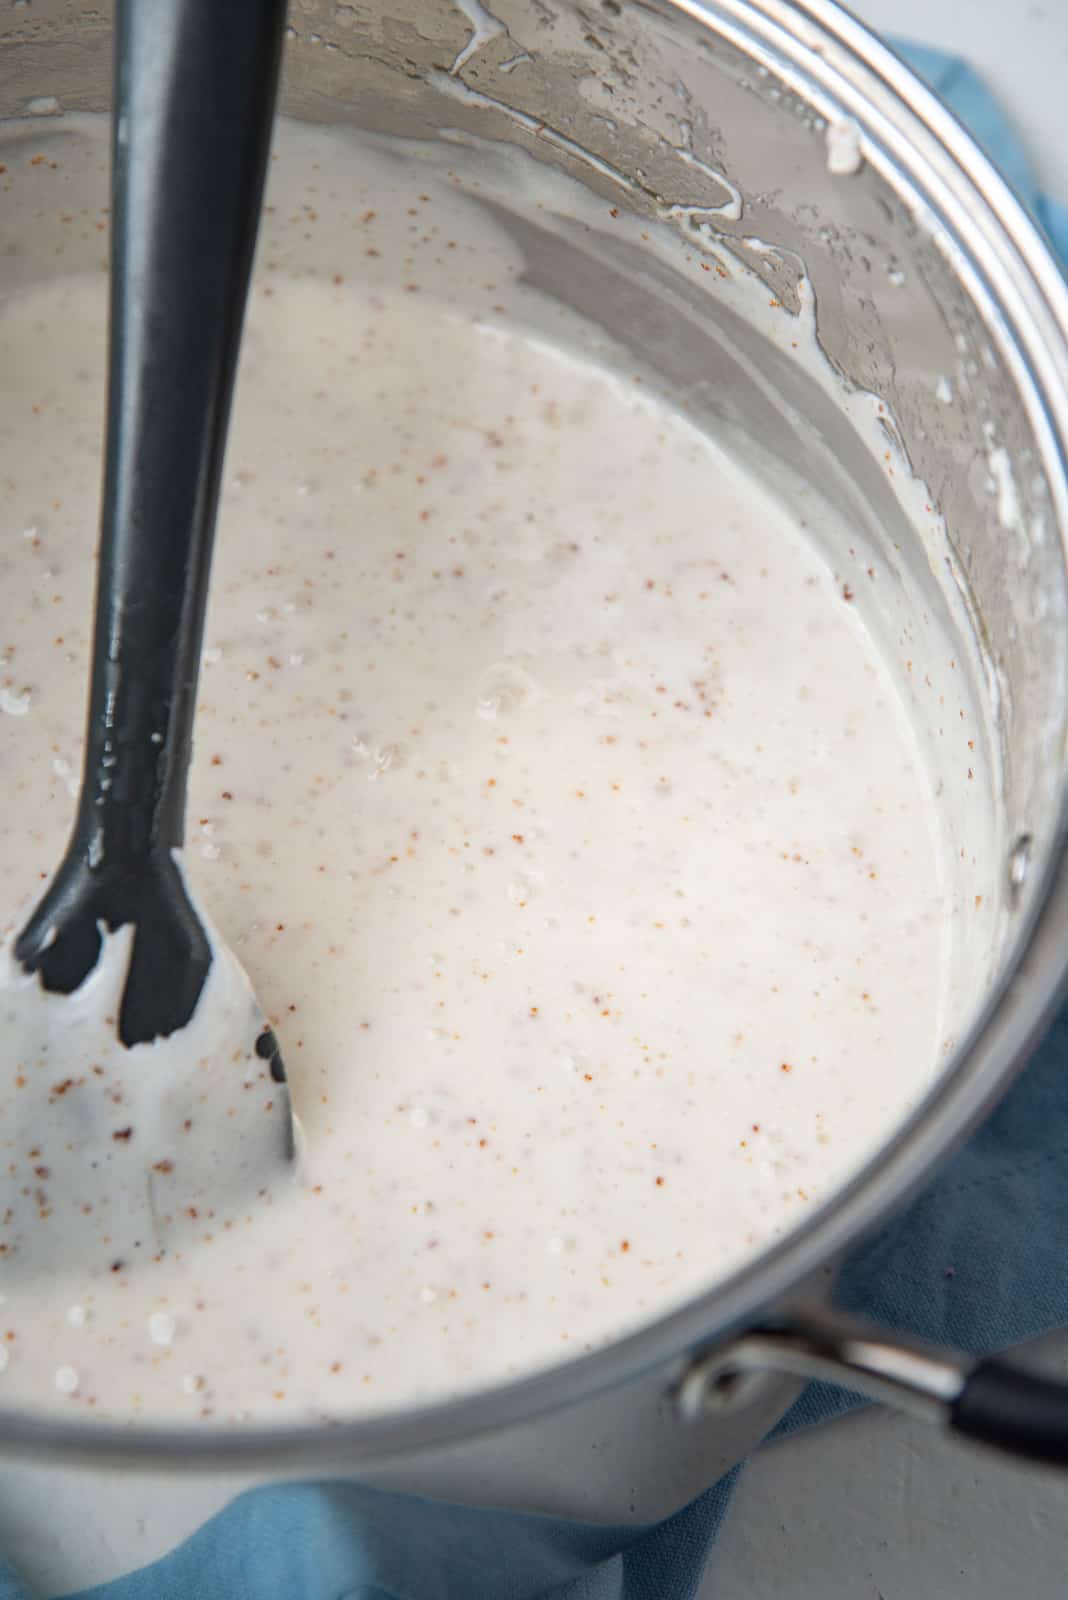
Place the homemade marshmallow in a large pot, along with the brown butter and salt. Make sure the pot is large enough to hold all of the rice krispies.

Heat over low-medium heat until the marshmallows are melted. The marshmallows melt pretty fast, since homemade marshmallows have a nicer, more gooey consistency.

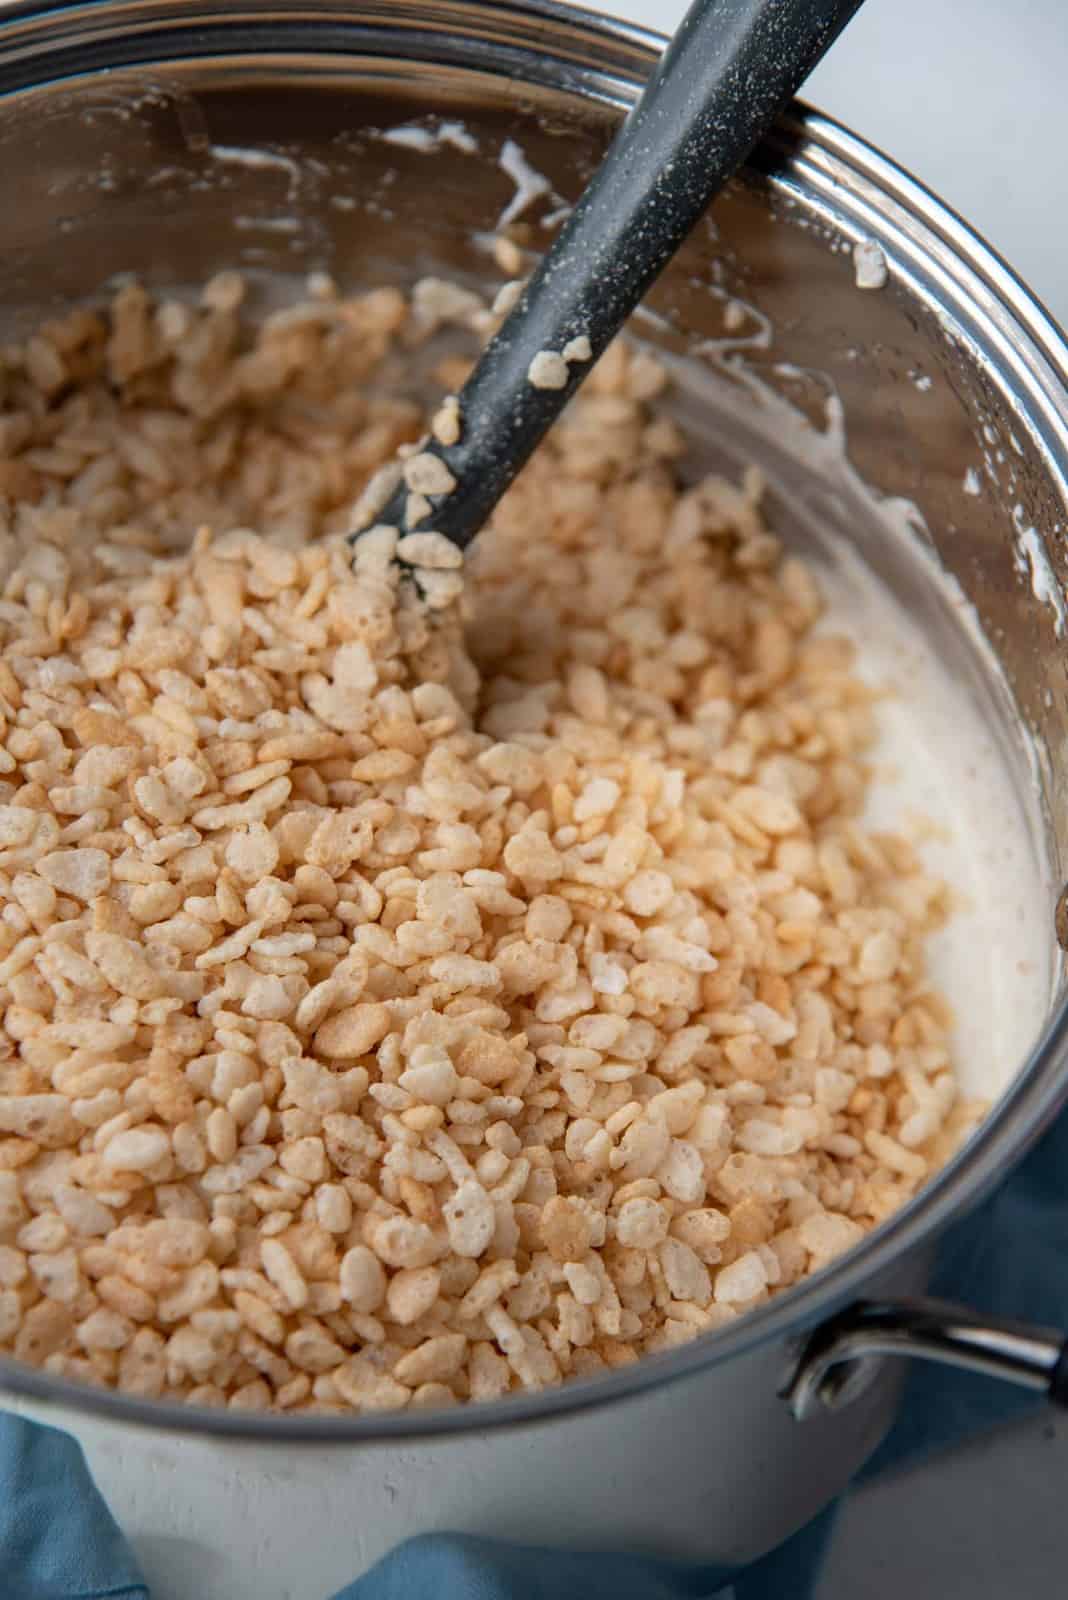
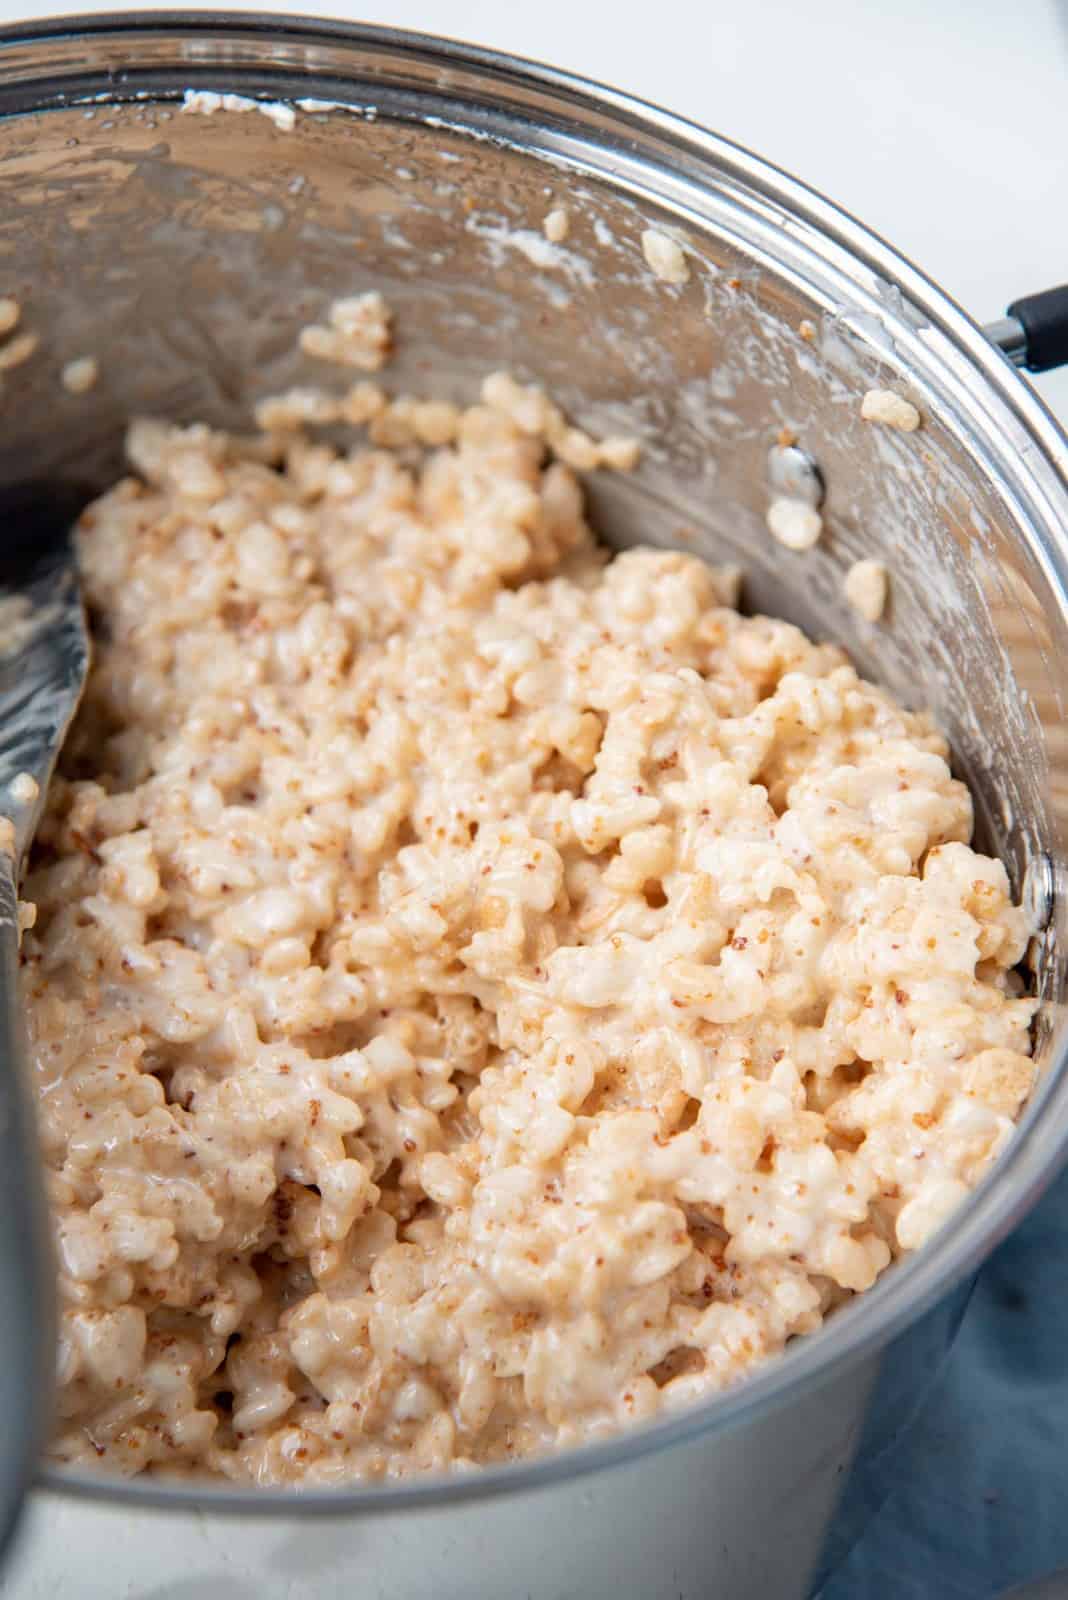
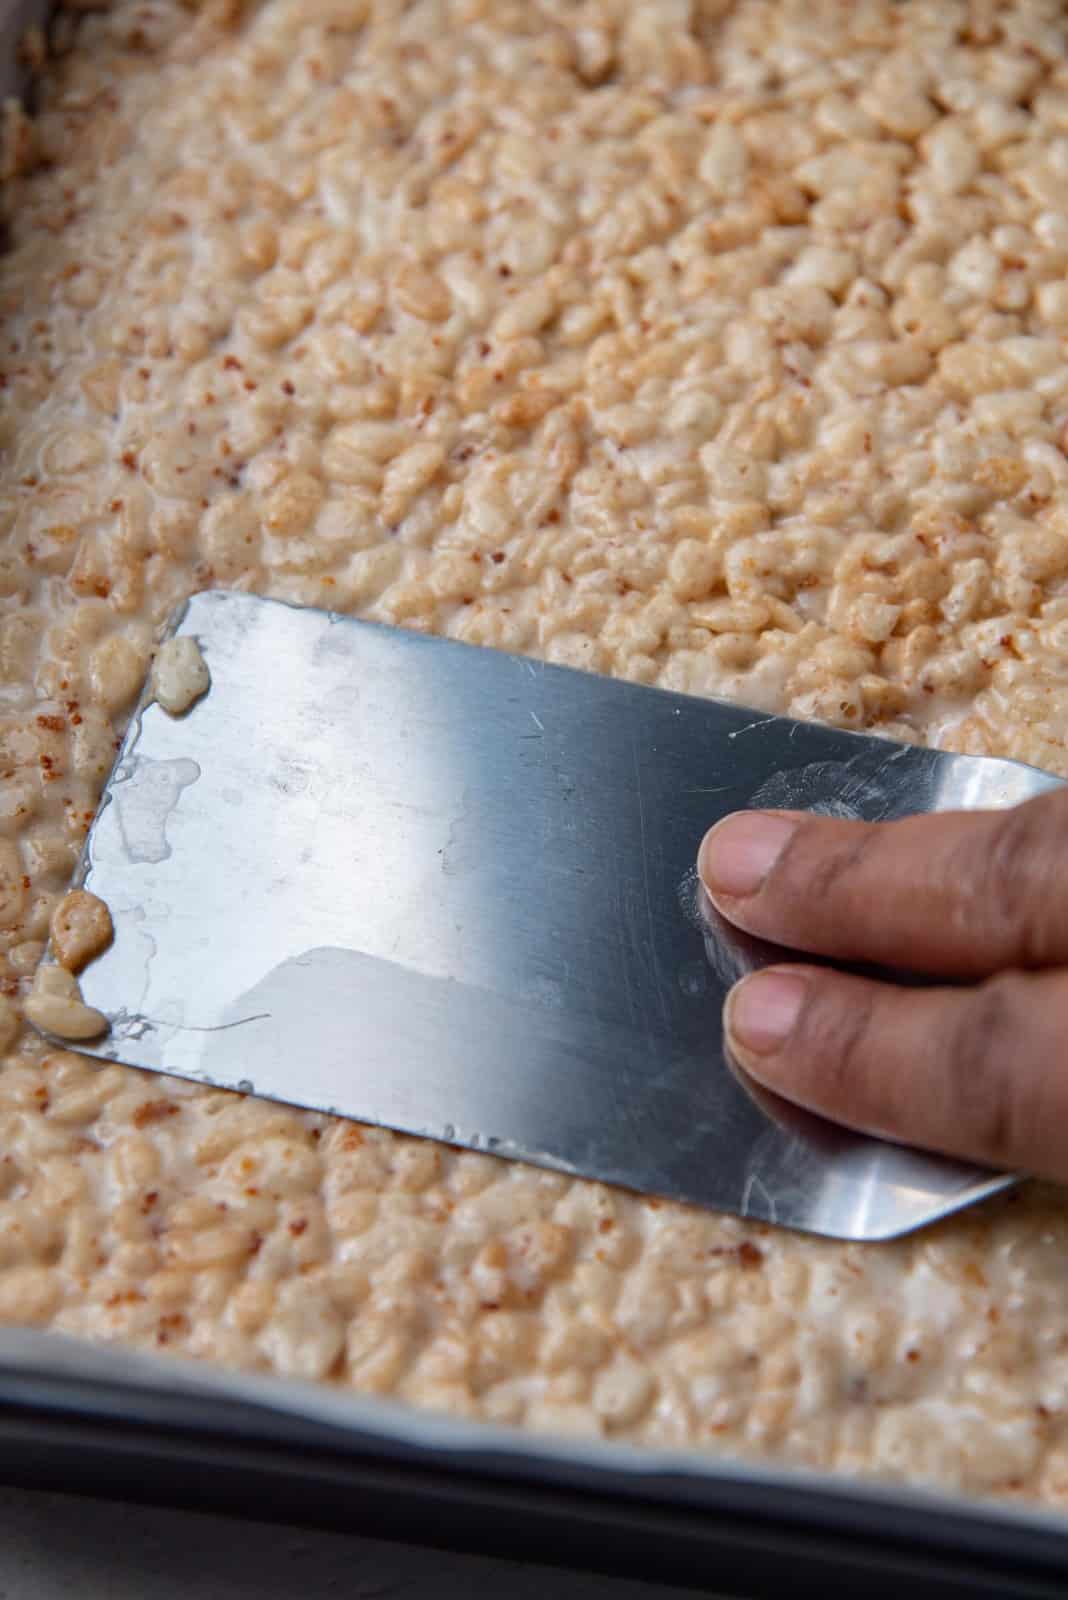
When the base is ready, remove it from the heat. Add the vanilla and stir it in. Next, add the rice krispies into the brown butter marshmallow mix and fold it in gently, but quickly. The marshmallow base will become stickier and thicker as it cools down. As soon as the rice krispies are evenly coated, transfer the mix into the prepared baking pan.

Spread the mix and gently press it down to create an even layer of the rice krispies. Allow the brown butter rice krispie treats to cool down completely to room temperature.

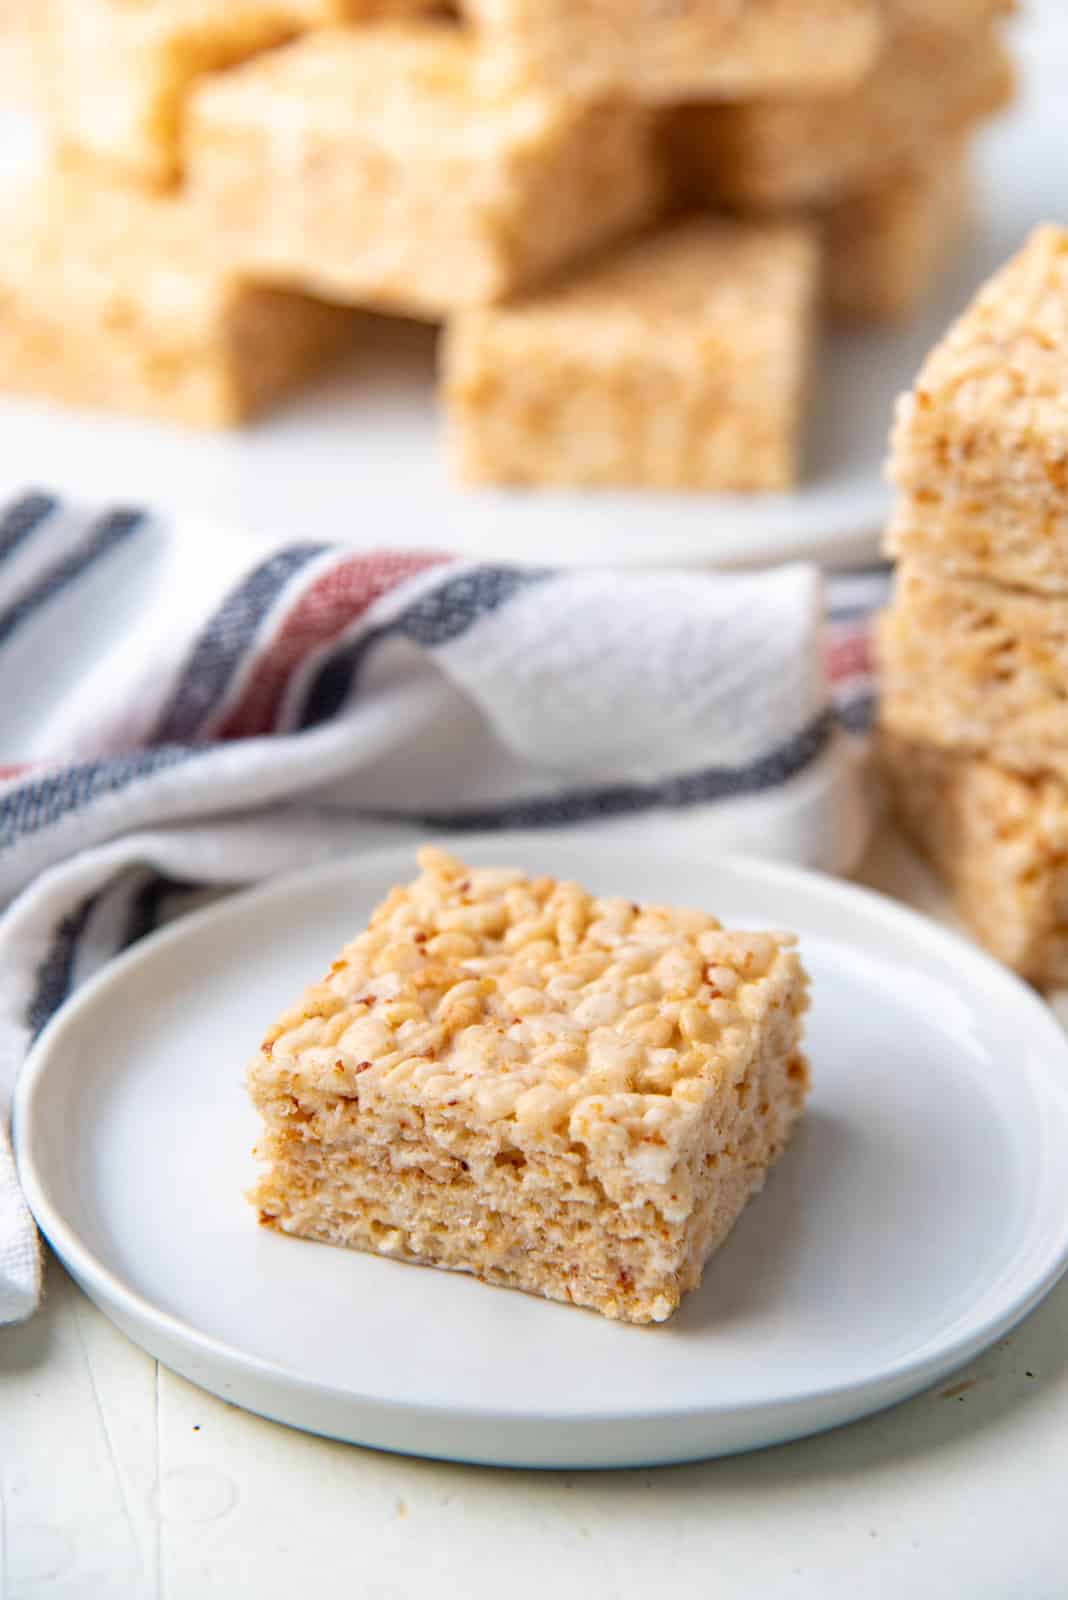
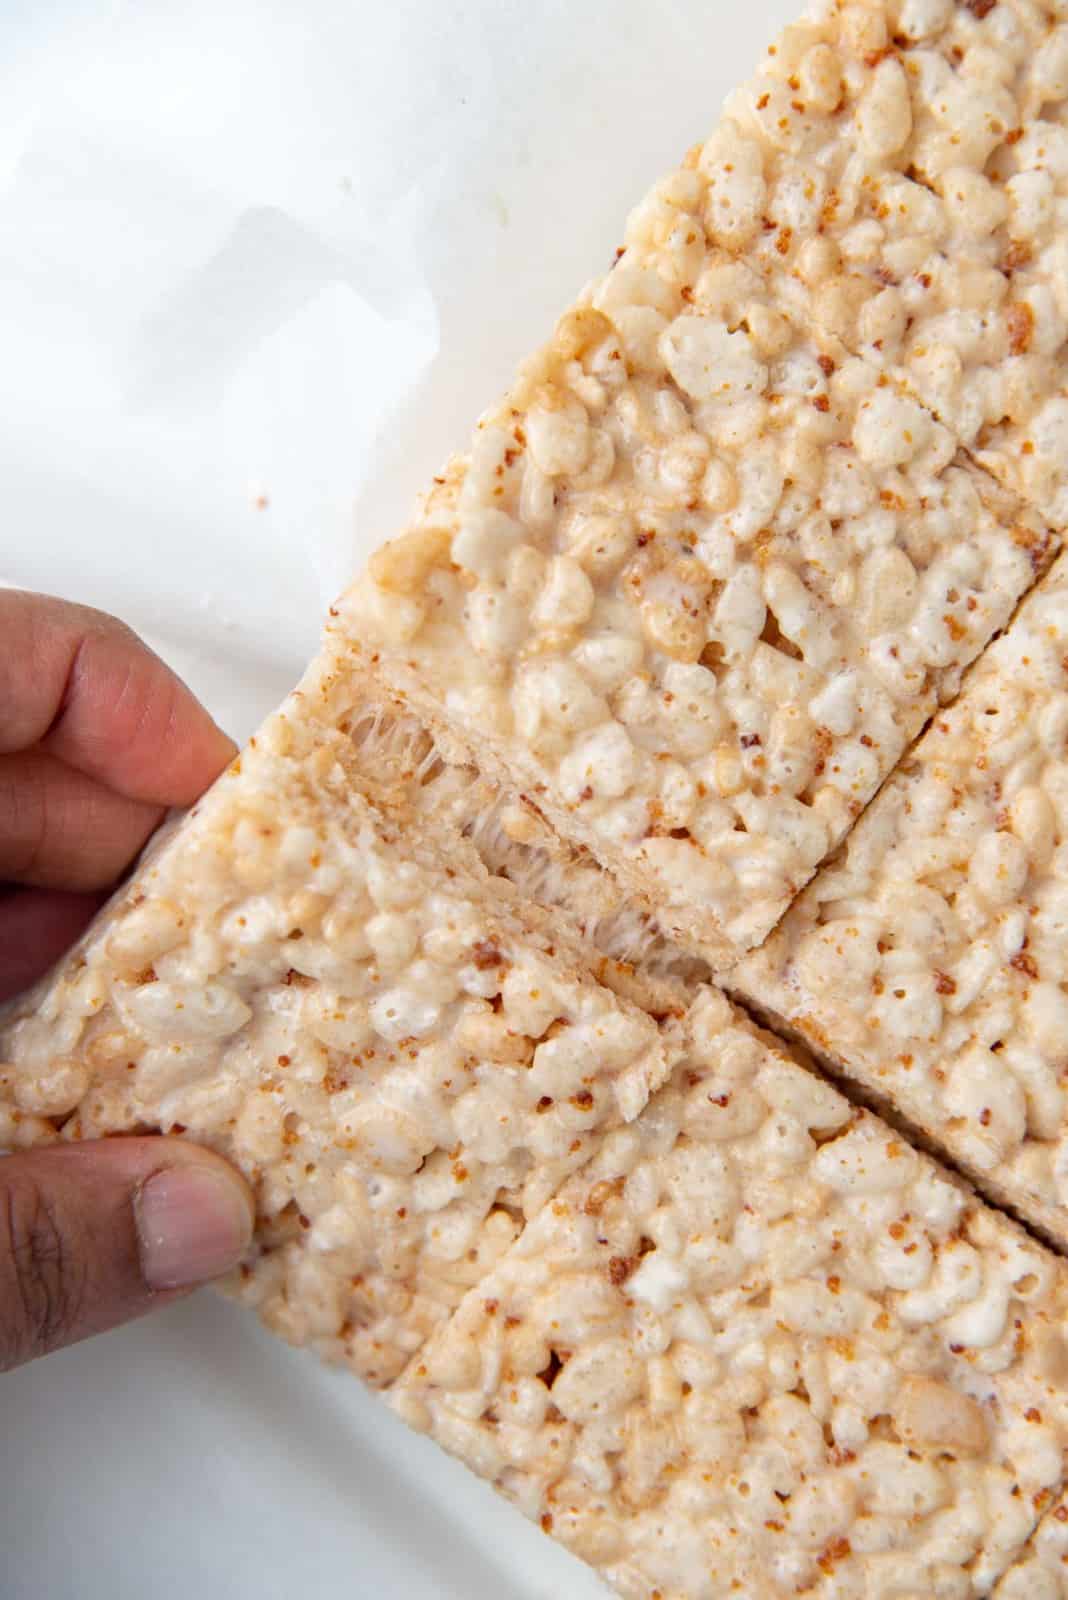
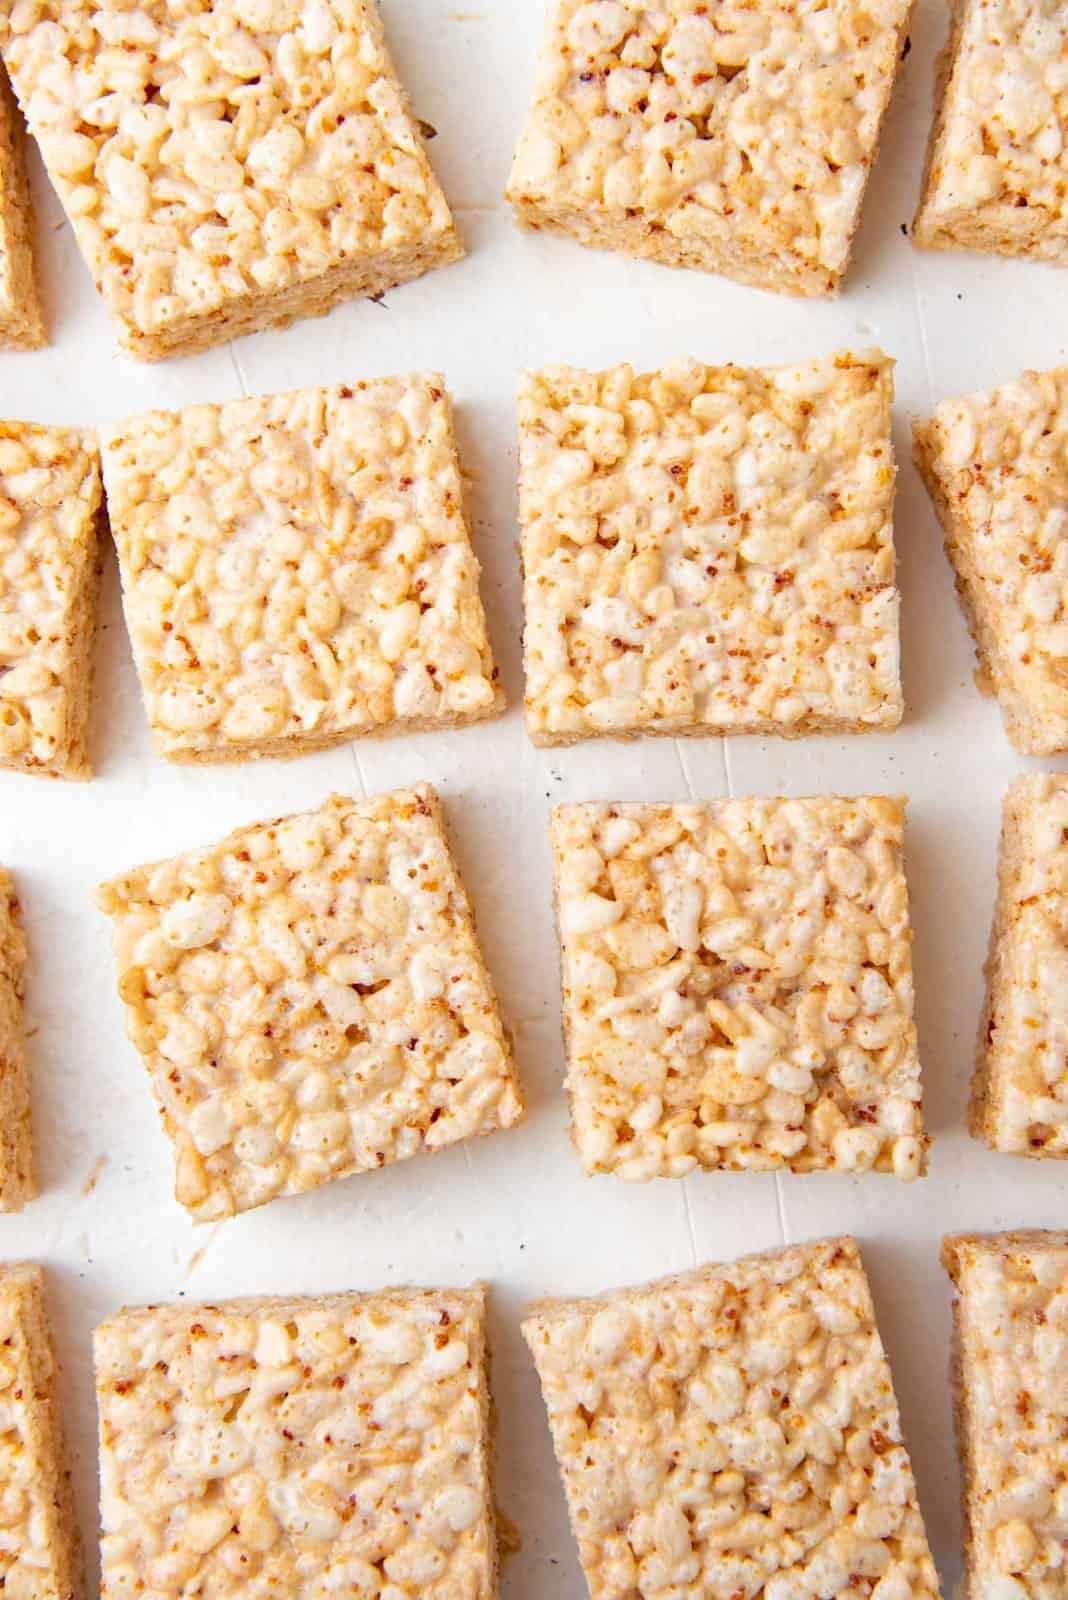
Once cooled down, and set, remove your homemade rice krispie treats slab onto a cutting board, and cut into squares.

  • The marshmallows and brown butter in a large pot
    Marshmallows + brown butter
  • The marshmallow and butter mixture melted
    Melted marshmallow base
  • Adding the rice krispies into the melted marshmallow and butter pot
    Adding rice krispies
  • The rice krispies mixed with the marshmallow base
    Mix the rice krispies
  • Using a flat spatula to smooth the mixture and press it gently into the pan
    Evenly spread it inside the prepared pan
  • The rice krispie treats base pressed into a pan
    Let it set

How to store rice krispie treats

Rice krispie treats can be stored at room temperature for about 2 days, in an air-tight container. They will keep longer in the freezer, for up to about 6 months. To store them in the freezer, wrap each rice krispie square with freezer paper / parchment paper and store in an air-tight container / freezer bag.

Overhead view of brown butter rice krispie treats

Why I love this recipe

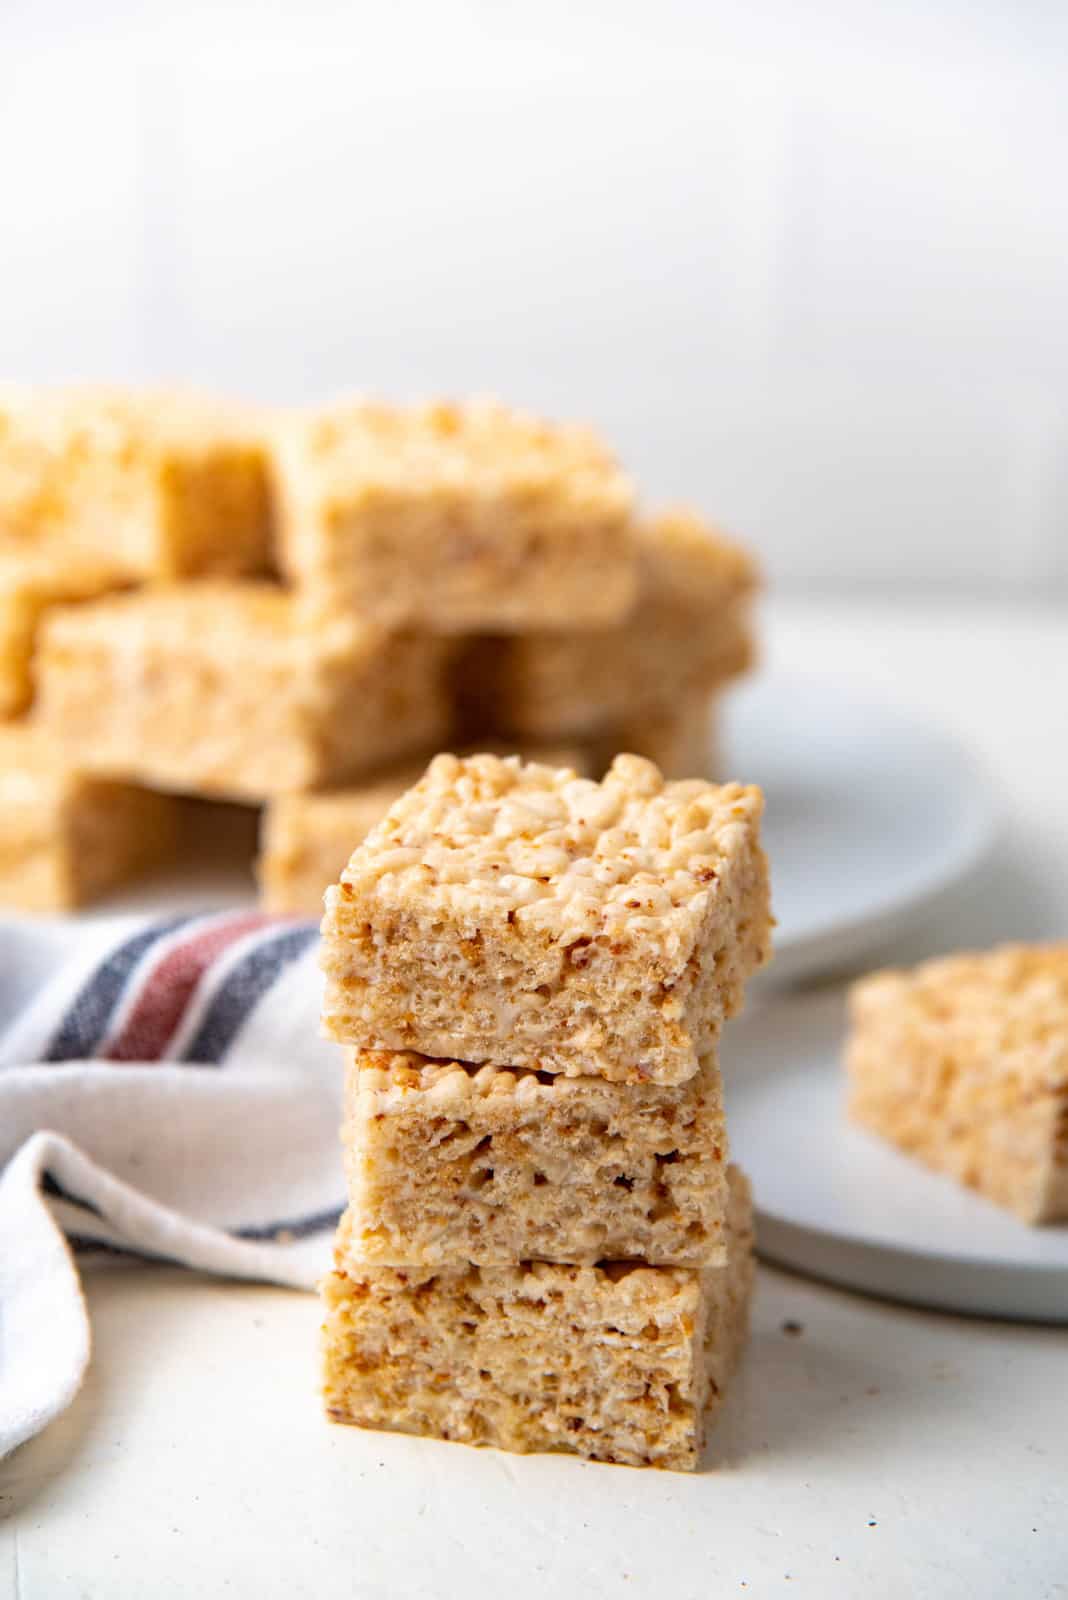
These homemade brown butter rice krispie treats are infinitely better than store-bought. That’s straight up just a fact. They are softer, with a more gooey texture. The marshmallow flavor is so much better. The salt and vanilla add even more flavor to the rice krispie treats. But most of all, the brown butter takes these babies to a whole new level!

I like to drizzle some extra dark chocolate on top, because I love the bittersweet flavor of the chocolate against the sweet rice krispie treats.

I was a true convert after making my own homemade rice krispie treats. They are incomparable to store-bought ones on so many levels. And there’s no going back once you’ve tried these brown butter rice krispie treats made with homemade marshmallows!

homemade rice krispie treats stacked ontop of each other

Looking for more recipes?Sign up for my free recipe newsletter to get new recipes in your inbox each week! Find me sharing more inspiration on Pinterest and Instagram.

Homemade rice krispie treats social media
5 from 3 votes

Brown Butter Rice Krispie Treats

Author: Dini K.
Yield: About 16 squares
Cuisine: American, Canadian, North American
Brown butter rice krispie treats made with homemade marshmallows! So easy, gooey, and taste infinitely better than store-bought! Plus with my homemade marshmallows, you know exactly what goes into these homemade family favorites. No corn syrup and no preservatives.
EASY – The recipe is easy! However, do note that homemade marshmallows is an extra step. You can use store-bought marshmallows instead for convenience. Making brown butter is also an extra step, but absolutely worth it and recommended.
US based cup, teaspoon, tablespoon measurements. Common Measurement Conversions. Weight‌ ‌measurements‌ ‌are‌ ‌recommended‌ ‌for‌ ‌accurate‌ ‌results.
Prep: 15 minutes minutes
Setting time: 2 hours hours
Cook: 20 minutes minutes
Total Time: 35 minutes minutes
Difficulty: Easy
Servings: 16 squares
Print Rate

Ingredients:

  • 115 g unsalted butter 1 stick, cut into tbsp sized pieces
  • 340 – 455 g homemade marshmallows 12 – 16 oz (see recipe notes)
  • 180 g rice krispies about 6 cups (see recipe notes)
  • ¼ tsp sea salt generous ¼ tsp, use less if you're using table salt
  • 2 tsp vanilla extract 10 mL

Instructions:

Making brown butter (optional step, but recommended)

  • Place the butter in a saucepan, and heat over medium high heat.
  • Stir the mixture occasionally, while allowing the butter to melt.
  • The butter will start to foam, and then the milk solids will start to separate. First they will float to the top, and then sink to the bottom of the pan.
  • Make sure to whisk or stir the saucepan well – more frequently as the milk solids sink to the bottom.
  • Keep heating the butter while stirring, as the milk solids turn golden in color, and then amber.
  • As soon as the milk solids turn a dark golden or amber color, remove the pot from the heat, and transfer the butter into a bowl. The residual heat will keep cooking the milk solids, turning them slightly darker in shade, but they should NOT burn.

Rice krispie treats base

  • Line an 8 x 8 inch square pan or 9 x 9 inch square pan with parchment paper. Set aside.
  • In a large pot (large enough to generously fit and mix 6 cups of rice krispies), place the marshmallows, brown butter (or regular butter), and salt.
  • Heat the mixture over medium heat, while stirring to melt the marshmallows and to mix the butter, to make a smooth mixture. Stir in the vanilla.
  • Remove the pot from the heat and stir in the rice krispies. Make sure to carefully fold them in so that you don't crush the rice krispies.
  • As soon as the rice krispies are mixed through, transfer the mix into the prepared pan.
  • Spread the rice krispie treats base in the pan and gently press it in. Take care not to press down too hard.
  • Allow the rice krispie treats to cool down to room temperature and set.
  • Once set, remove it from the pan using the parchment paper, and cut it into squares. I like to cut 16 pieces (4 x 4), but you can cut smaller pieces to get 25 (5 x 5) as well.

Tips & Tricks

Note on marshmallows
I made 1 batch of my homemade marshmallows for this recipe. You can use fewer marshmallows to make this less sweet, OR more to make it sweeter. The more marshmallows you use, the more gooey your rice krispie treats will be.
Note on rice krispies
If you want to make this treat gluten free, use gluten free rice krispies / puffed rice cereal.
Storage information
Rice krispie treats can be stored at room temperature for about 2 days, in an air-tight container.
They will keep longer in the freezer, for up to about 6 months. Wrap each rice krispie square with freezer paper / parchment paper and store in an air-tight container / freezer bag.

Nutrition Information:

Serving: 1squareCalories: 175kcal (9%)Carbohydrates: 30g (10%)Protein: 1g (2%)Fat: 6g (9%)Saturated Fat: 4g (25%)Trans Fat: 1gCholesterol: 15mg (5%)Sodium: 116mg (5%)Potassium: 18mg (1%)Fiber: 1g (4%)Sugar: 16g (18%)Vitamin A: 928IU (19%)Vitamin C: 7mg (8%)Calcium: 3mgIron: 3mg (17%)

“This website provides approximate nutrition information for convenience and as a courtesy only. Nutrition data is gathered primarily from the USDA Food Composition Database, whenever available, or otherwise other online calculators.”

Course:Dessert, Desserts, No Bake Dessert, Tea / coffee break
Cuisine:American, Canadian, North American
Keyword:Bars Brownies Blondies, Easy Desserts, No bake desserts, Rice Krispies, Slices
Did you make this?Tag me on Instagram!I love seeing what you’ve made! Tag me on Instagram at @TheFlavorBender or leave me a comment & rating below.

More Recipes You'll Love...

  • Chocolate Peppermint Rice Krispie Treats - These Rice Krispie Bars have a crunchy, cripsy dark chocolate rice krispie base with a soft refreshing peppermint center and topped with a thin layer of dark chocolate! An addictive Chocolate peppermint treat that's perfect for the holidays and for gift giving! Easy to make and kid-friendly. Gluten free and vegan!
    Chocolate Peppermint Rice Krispie Treats (GF, Vegan friendly)
  • How to make brown butter
  • Chocolate dipped No bake Pecan Pie Cookies with Rice Krispies - pack all the nutty deliciousness of your fall-favorite pecan pies! Plus they make excellent gifts for the holidays too. Dairy-free friendly and vegan-friendly.
    No bake Rice Krispie Pecan Pie Cookies

Reader Interactions

Leave a Review Cancel reply

I love hearing from you! Submit your question or recipe review here.

Your email address will not be published. Required fields are marked *

Made this? Rate this recipe:


This site uses Akismet to reduce spam. Learn how your comment data is processed.

  1. Mckayla H says

    March 7, 2022 at 11:45

    5 stars
    Made these after making your vanilla marshmallows and I can honestly say these are the best rice krispie treats I’ve ever tasted omg! They are so addictive haha. Now to try your brown butter choc chip cookies next! Thank you!

    Reply
  2. Helena says

    January 27, 2022 at 18:42

    5 stars
    I love this recipe and am a huge fan of your homemade marshmallows too. Im wondering, is it necessary to let the marshmallows set if adding them to this recipe? That way you wouldn’t need to let them sit for the 6+ hours to set? Just a thought.

    Reply
    • CandyAppleRed says

      November 13, 2022 at 08:13

      Hi Helena, I was wondering the same thing. Did you ever try it? Thinking of doing it that way – but wanted to know if it was a success before I do

      Reply
  3. x says

    November 11, 2021 at 17:33

    You don’t have a problem with the Rice Krispies getting soggy? I have tried multiple times with homemade marshmallows and the cereal always gets soft. As soon as I add it to the melted marshmallow, it starts crackling.

    Reply
    • Dini says

      November 15, 2021 at 09:29

      Hi X
      They do get a little soggy because of the moisture in the marshmallow mix. They can be even soggier IF you use marshmallows made with syrup that wasn’t heated to the right temperature as well (low temperature = more moisture).
      This happens with regular marshmallows too.

      Reply

Primary Sidebar

Hey there!

Hi! I’m Dini, a third culture kid by upbringing and a food-geek by nature. I was born in Sri Lanka, grew up in New Zealand and lived in Australia, and then the US, before moving to Canada in 2019! My food is a reflection of those amazing experiences!

Read More
Secret Layer Cakes Cookbook
The flavor bender
cookbook
Buy now on Amazon!

Recipe Basics

Learn how to make Perfect Choux Pastry (Or Pate a Choux!) - The only recipe guide you will ever need to make choux pastry, with perfect results every time. Plus a troubleshooting guide for your choux pastry recipe.  Fool proof choux pastry to make profiteroles, eclairs, cream puffs and more.  #ChouxPastry #Profiteroles #Eclairs #Pastry #CreamPuffs

How to make Perfect Choux Pastry

Classic Chocolate Eclairs - A foolproof recipe for making perfect eclairs that are crisp and puffy and filled with chocolate or vanilla pastry cream. 

Perfect Classic Chocolate Eclairs (Foolproof Recipe)

How to make Marshmallows - Learn the art of making fluffy, soft homemade marshmallows with or without corn syrup! With tips and information to make the perfect Marshmallows in many flavors. 

How to make Marshmallows (tips and tricks for homemade marshmallows)

How to make the best Homemade White Bread that is soft and delicious. An easy to follow recipe for perfect homemade bread with step by step instructions.

The Best Homemade Bread (White Bread Recipe)

Homemade French Croissants (step by step recipe)

Classic Pound Cake - A complete guide on how to make perfect, delicious and moist Pound Cake even if you're a baking novice! Tips + Tricks and Troubleshooting guide. 

The Best Classic Pound Cake Recipe

Chocolate
Cakes
Bread
Sri Lankan
Breakfast
Drinks
Candy
Pastries
All Recipes
Featured On
taste of the World
Free recipe ebook

Get my curated collection of the Top 10 Flavor Bender recipes!

  • 10 delicious chocolate recipes
  • Creative ways to use chocolate
  • Desserts and savory recipes
Download now!

Reader Faves

How to make Instant Pot Short Ribs - This easy recipe makes delicious, tender and succulent short ribs with classic flavors!

How to make the Best Instant Pot Short Ribs

Buttery Lemon Slow Roasted Salmon with Lemon Butter Sauce - Perfectly cooked, juicy slow roasted Salmon with a buttery tangy sauce! Delicious and versatile for any meal and occasion. 

Slow Roasted Salmon with Lemon Butter Sauce

Unbelievably easy Rough Puff pastry - Quick and easy to make and tasted infinitely better than store bought (30 -45 minutes only)! No long waiting times, to make this amazing pastry and NOONE will know you took a shortcut!

Perfect Quick and Easy Rough Puff Pastry

Spicy Sweet Chilli Sauce Easy to make, absolutely delicious, with an extra kick of spice this is the BEST Sweet chilli sauce you will EVER have!

The Best Spicy Sweet Chili Sauce (Easy Recipe!)

The flavor bender

I love baking, and I love cooking. I experiment with flavors, textures and ingredients, and I love passing on all my tips and tricks to you!

Read More
  • About
    • Meet Dini
    • My Book
    • Work With Me
    • Contact
  • Browse
    • Recipes
    • Measurement Guide
    • Baking How-To’s
    • Shop My Faves
© The Flavor Bender
  • Privacy
  • Disclosure
  • Terms
Site Credits Designed by Melissa Rose Design Developed by Once Coupled

Join the flavor bender tribe!

Join my FREE recipe challenge to receive new recipes and dinner ideas straight to your inbox!
184 shares