

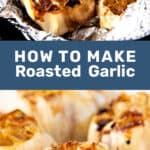
Roasted garlic is by far my favorite way to prepare garlic. It’s such a simple way to make garlic taste even better! And what I love even more is that I add roasted garlic into so many different things to add so much flavor and make everything taste absolutely amazing.
Roasted garlic adds SO much flavor and elevates your dishes, and it’s the simplest way to make garlic taste even better!
Roasted garlic is the process of “caramelizing” the garlic with slow, steady heat until the garlic bulbs become soft, creamy, and turn a beautiful golden brown in color. Technically this occurs due to the Maillard reaction, and not exactly caramelization, but I’m not going to get into the science of the Maillard reaction here.
There are a few ways to make roasted garlic and all these ways are correct, and you can choose whichever way works best for you.
Different methods to make roasted garlic
Roasted garlic in the oven
This is my favorite way to make roasted garlic. It’s just so simple and easy. You could choose to wrap garlic bulbs in foil, OR you can place the garlic in a small oven-safe dish with a lid. You can also buy specific garlic roasting pans, but I think those are a waste of money when you can use a small dutch oven or cocotte dish and get the same results without using foil.
Some recipes use a very high heat of 400 F or 425 F. But I prefer to go a little lower for when I’m roasting garlic for myself. I prefer to roast garlic at 350 F or 375 F, and roast it for longer. I find that the Maillard reaction is more controlled this way and I end up with garlic that is deeply roasted and so creamy and sweet! However, if I’m making a roast at a high temperature, I’ll be more than happy to throw in some garlic bulbs wrapped in foil in there to make some roasted garlic at the same time!
Using the air fryer
You can certainly use an air fryer too. An air fryer is like a smaller convection oven with better circulation. So you can wrap the garlic in foil and let it roast in the air fryer.
Using a pan
This is probably the only method I wouldn’t want to follow. You will need to place the garlic bulbs on a pan over very low heat. Then cook it while turning the garlic over and over to prevent it from burning. It’s just too time consuming, with too much room for error, and I don’t want to stand over the stove to keep watch either. Especially when the other two methods are essentially hands free.
Ingredients
You only need two ingredients.
- Raw garlic bulbs (complete with the white husks – do not buy cloves that are already peeled).
- Oil. You can use olive oil, but vegetable oil or canola oil works just as well too.
How to roast garlic in the oven
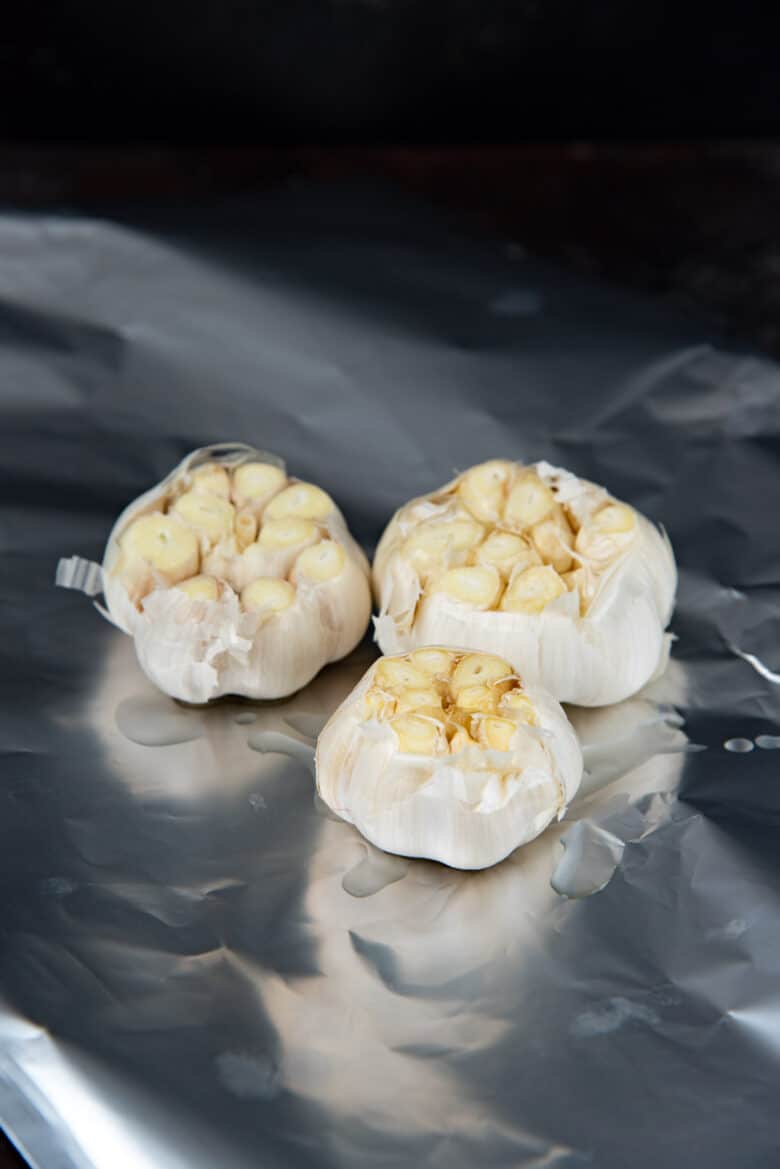
The first step is to cut the tops off the garlic bulb. This is just to expose most of the garlic cloves inside the bulb. I only cut off just a small section – about ½ inch off the top of the bulb – the outer bulbs may not even be completely exposed and that’s OK.
Cutting the tops allows the oil to get into the cloves and help with the Malliard reaction. It also makes it easy to take out the soft roasted garlic cloves after roasting the garlic.
If there’s too much of the papery skin, you can remove the extra that is flaky and loose. But you do not want to remove all of it. The bulb must be contained inside the white husk.
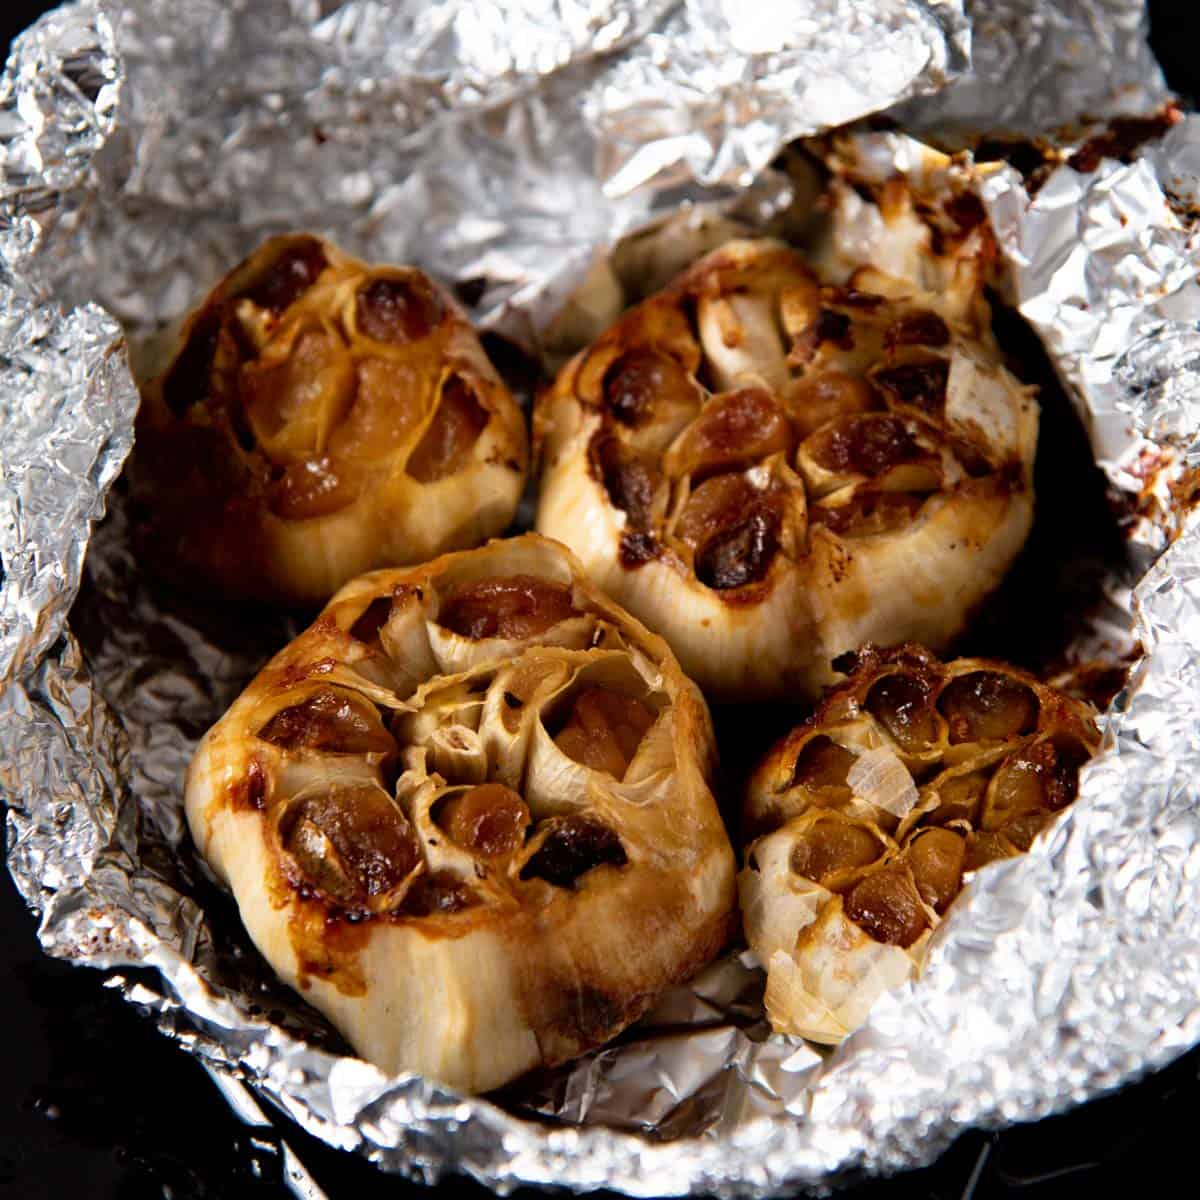
Place the garlic on a large piece of foil. Keep in mind that you’ll be making a package with this foil, so it needs to be large enough to form a package with the garlic inside. The more bulbs you add, or larger the bulbs, the larger the piece of foil you will need.
I try to limit it to about 4 bulbs per package, and make multiple packages when making large batches. I do prefer to use nonstick foil, but that’s not necessary.
Form a sealed package with the foil to make sure the garlic bulbs are nicely sealed in without being exposed to the outside.
Preheat the oven and place the foil packets inside the oven. I prefer to place the foil packages on a baking tray first to prevent any oil from seeping out and dripping inside the oven.
How long should the garlic be in the oven?
It depends on the size of the garlic bulbs.
A medium sized garlic bulb can take about 60 – 90 minutes.
A small bulb of garlic will take about 60 minutes, while a large garlic bulb can take up to 2 whole hours.
This is why I roast several garlic bulbs at the same time, so I have a huge batch in one go.
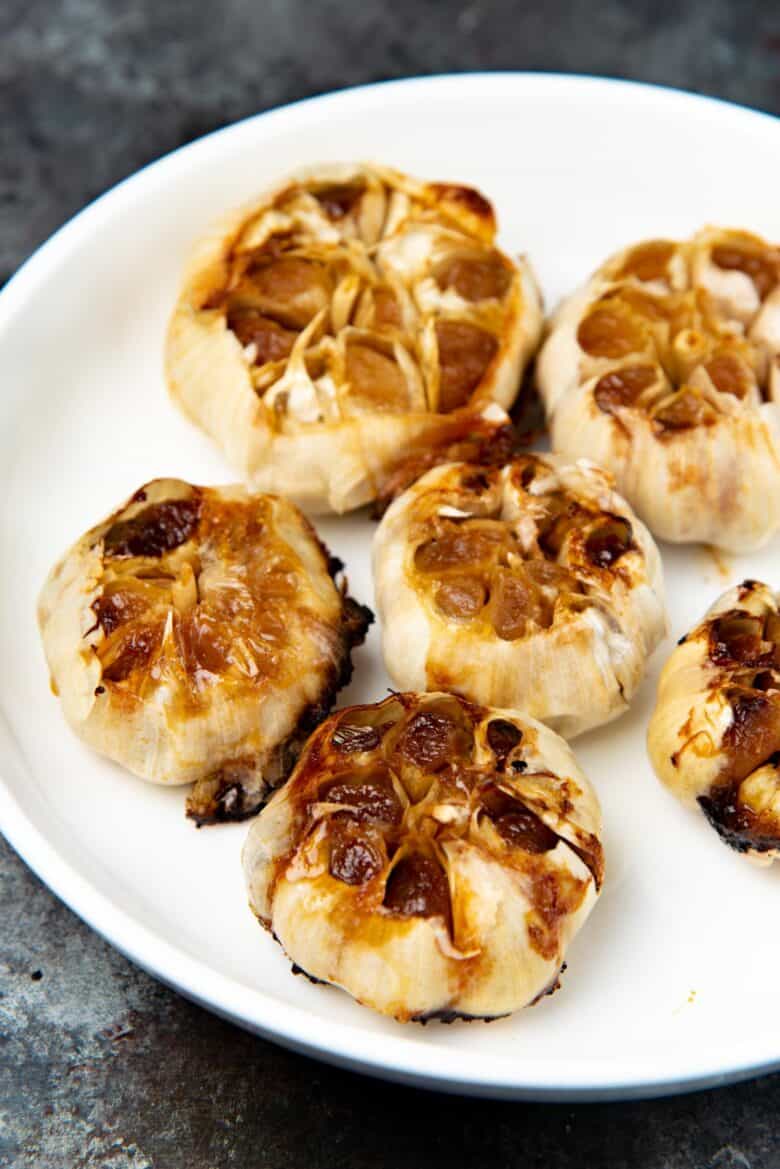
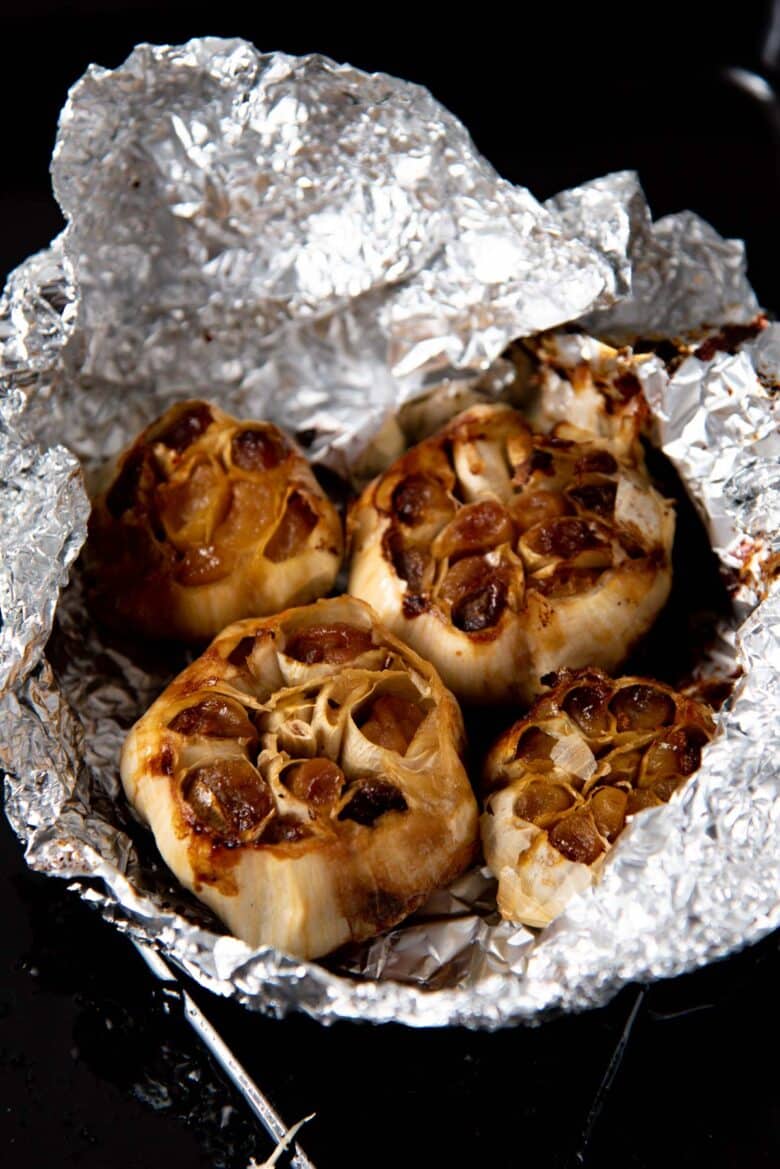
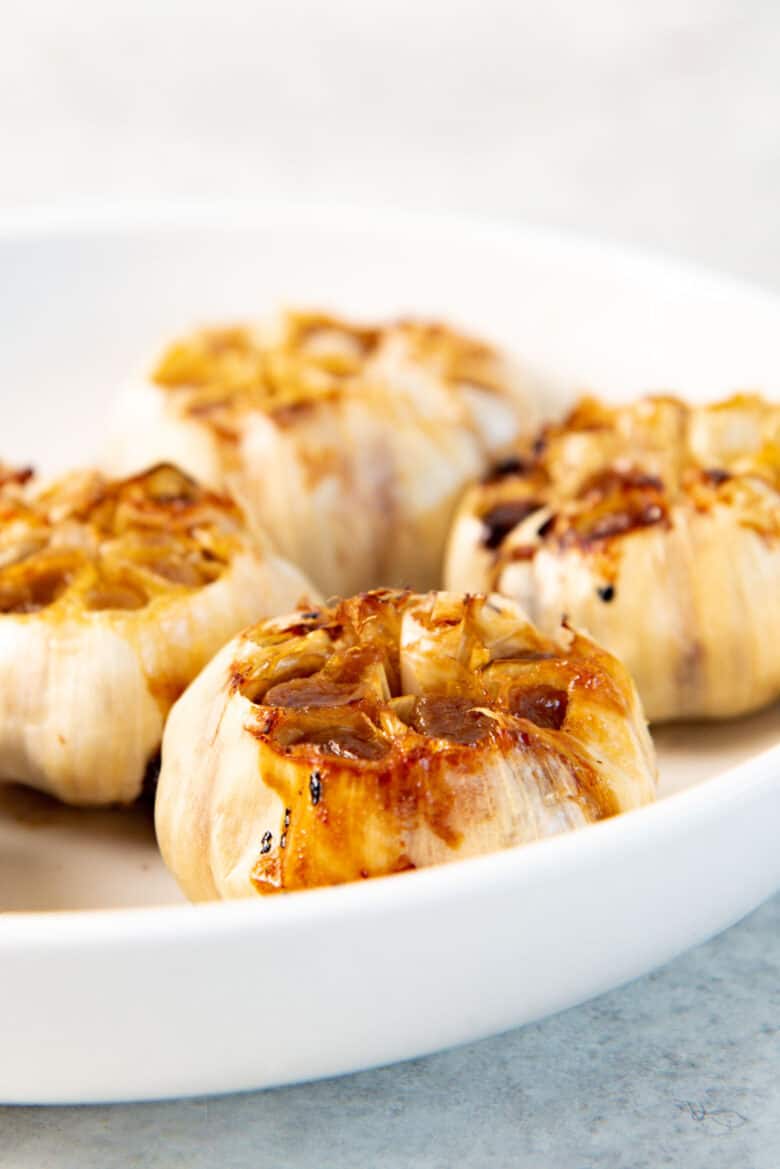
I usually check on the garlic at the 1 hour mark, and leave it longer if needed. The garlic should be squishy to the touch, and turn golden brown in color. I like to let it darken just a little bit beyond that golden brown so I tend to roast the garlic in the oven a little longer.
Remove the roasted garlic from the oven and let it cool down enough to handle.
Storage
When the roasted garlic has cooled down, it’s ready to be used!
The garlic cloves will be super soft in the bulb and it would be too difficult to extract individual cloves one at a time. The easiest way to access all the garlic is to squeeze them out of the bulb. If the tops have been sliced off, a simple squeeze from the root side should push out all the soft garlic. Make sure to use clean, dry hands to squeeze the garlic and to collect all of it in a bowl.
Mix the roasted garlic to form a smooth paste. In recipes, I use about 1 tsp of this roasted garlic paste in place of 1 large clove of garlic or 2 small cloves of garlic.
Obviously you will have more than enough to store for later. So this is how you store roasted garlic for later.
Storing in the fridge
You can store the garlic paste in the fridge OR store the roasted garlic as whole bulbs as well. I prefer to store them as a paste.
Make sure to keep the garlic in a jar or container that is air-tight. You don’t want to use a jar that is too large for the quantity of the paste either. They can last about 1 week in the fridge, but please also use your discretion to make sure that the garlic isn’t spoiled when you’re using it. Look for signs of discoloration, weird smells, mold, or any slimy residue.
I personally prefer to use up roasted garlic within 4 days if I store it in the fridge. You can also store them like confit, by completely submerging the paste with olive oil or vegetable oil. This could extend the life of the roasted garlic for a few more days, but I really do prefer storing it in the freezer.
Storing in the freezer
If you’re like me and make big batches, you can absolutely store it in the freezer so that the roasted garlic will last much longer! Place the roasted garlic paste in freezer bags or freezer-safe containers. These can be stored for up to 4 months. Then let it thaw out in the fridge before you use the roasted garlic.
Alternatively, you can press the paste into ice cube trays (small ice cubes), so that you can simply take out one cube at a time for your culinary needs! Just make sure to keep that ice tray in an air-tight container. And maybe not use it to make ice after for your drinks either! 🙂 I usually have herb and spice ice cube trays just for this purpose.

How to use roasted garlic
You can use roasted garlic for any application in your cooking where you might add raw garlic. The beauty of roasted garlic is that this process changes raw, pungent, sharp-tasting garlic into sweet, creamy, mellow-tasting garlic with a deep, savory flavor! It’s so good, you can spread it directly on toast or crackers and enjoy it.
In recipes, I use about 1 tsp of this roasted garlic paste in place of 1 large clove of garlic or 2 small cloves of garlic.
But adding roasted garlic into marinades, roasts, stews, soups, and broths instead of raw garlic will add such depth of flavor to your meals!
Since it’s already cooked, you can even add it to your favorite recipes like mashed potatoes, garlic butter, dips, salad dressings, and even sauces! My favorite, and most frequent ways to use this roasted garlic are to,
- Mix it with butter to make garlic butter for breakfast toast.
- Add it to store-bought or homemade mayonnaise to make the best aioli ever, for all kinds of dips and sandwiches!
- Add it to stir fries instead of raw garlic.
- Use it for curries instead of raw garlic.
- Add it to sour cream with some herbs to make an amazing sour cream dip.
- Make hummus with roasted garlic to make the best garlic hummus.
- And chili butter pasta. So good!
Do not throw away the garlic skins! The roasted empty “garlic skin” still has SO MUCH flavor. Freeze these in freeze-safe bags and then add it to your stocks when you’re making any type of stock – from vegetable stock to chicken stock.
Recipe
Roasted Garlic (Oven Recipe + Dutch Oven Method)
US based cup, teaspoon, tablespoon measurements. Weight measurements are recommended for accurate results whenever available.
Common Measurement ConversionsVideo
Ingredients:
- 3 – 4 garlic bulbs
- 2 – 3 tbsp oil olive oil or a neutral-tasting oil such as vegetable oil or canola oil
- Foil
Instructions:
- Preheat the oven (conventional oven) to 375°F. If you're using an air-fryer, preheat the air-fryer to 350°F.
- When choosing garlic bulbs, use garlic bulbs that are firm, with no blemishes or discolored patches. You can remove any loose white papery skin on the surface, but make sure that the whole bulb is still intact.
- Slice ½ inch off the top of the garlic bulbs to expose the cloves inside the bulb.3 – 4 garlic bulbs
- Place the garlic bulbs on a large piece of foil. Drizzle the oil over the exposed cloves in the garlic bulb. I like to use about 2 tsp oil per garlic bulb.2 – 3 tbsp oil
- Close the foil around the garlic to create a “packet” so that the garlic is not exposed.
- You can make as many of these foil packets as you like to make a large batch of roasted garlic.
- Place the foil wrapped garlic on a baking tray.Foil
- Alternatively, you can place the garlic in a dutch oven without using foil. Add a drizzle of oil at the bottom of the pot or pan. Place the garlic bulbs at the bottom of the pot. Make sure to add enough to cover more than half of the bottom of the pot. Drizzle more oil over the garlic bulbs and cover the dutch oven with the lid.
- When the oven is preheated, place the baking tray with the foil wrapped garlic OR the dutch oven inside the preheated oven.
- Let the garlic cook for at least 45 – 60 minutes. The time for the garlic to roast will depend on the size of the garlic. A medium-sized garlic usually takes about 1.5 hours for a light golden brown, and 2 hours for a deeper golden color.
- Check on the garlic around 45 minutes and let it cook longer until the garlic cloves have softened, and have turned a deep golden color. The husks may have some black spots, but as long as the cloves are not burnt, you’re good!
- Remove the garlic from the oven and let it cool completely.
- This next step can get messy. Make sure to clean your hands well and dry completely with a clean paper towel or napkin.
- Take the garlic bulbs out of the foil packets and squeeze the softened cloves out of the bulbs into a bowl.
- Keep the roasted garlic in an air-tight jar or container for about a week in the fridge. You can pour a generous layer of oil on top of the roasted garlic to extend the shelf life (in the fridge) if you like. However, I prefer to freeze the paste in small packets or ice cube trays instead.
Recipe Notes
Nutrition Information:
“This website provides approximate nutrition information for convenience and as a courtesy only. Nutrition data is gathered primarily from the USDA Food Composition Database, whenever available, or otherwise other online calculators.”


Leave a Reply