
A Classic New York Cheesecake is a delightfully creamy and decadent dessert! Perfect for any celebratory or crave-worthy occasion. Learn how to make an absolutely perfect, gorgeous cheesecake with no cracks, WITH or WITHOUT a water bath with this easy, step by step recipe!
This guide will help you perfect your cheesecake, and NEVER worry about cracks again!
- What causes cracks in a cheesecake?
- What to do if my cheesecake cracks on the surface?
- Ingredients needed to make a classic cheesecake
- Does New York Cheesecake have a topping?
- Step by step recipe to make New York Cheesecake (or any classic cheesecake recipe)
- Baking the New York Cheesecake
- Serving suggestions for a classic New York Cheesecake
- Why I love this recipe!
I loooove cheesecake. So much so that my Secret Layer Cakes cookbook features 28 inventive, flavor-bending cheesecake recipes. Like this cookie monster cheesecake for example! My favorite cheesecake was a chocolate swirled cheesecake that I used to eat during my university years in New Zealand. I realized my part time job couldn’t fund my cheesecake obsession, so I taught myself how to bake the perfect cheesecake.
After years of baking cheesecake, and experiencing numerous failures (and successes!), I’m going to share one of my favorite cheesecake recipes – a New York Cheesecake, with all the tips and tricks to get PERFECT results, every time!
What causes cracks in a cheesecake?
The most common problem when making cheesecake, be it New York Cheesecake or any other type, is cracks on the surface. These are caused by,
Too much air in the batter
With too much air in the batter, the cheesecake expands too much during baking, and crack as it deflates. This is why you must be careful during the mixing phase. To ensure a creamy, well-mixed batter, instead of an overmixed batter.
There are a couple of ways to reduce the amount of air in the batter before you bake the cheesecake.
- Knock the mixing bowl (with the cheesecake batter) on your kitchen counter to remove some of the air.
- After pouring the batter into the dish, you can smack the surface of the cheesecake batter with the back of a spoon to release some of the air bubbles trapped inside as well.
Rapid temperature changes
This could be another reason for cracks in your cheesecake. This happens if the cheesecake is heated too quickly at a high temperature. The high temperature causes the cheesecake to expand quickly, which then leads to cracks as the cheesecake cools and deflates.
This is why most cheesecakes are baked in a water bath (except basque cheesecake). The water bath helps regulate the temperature of the cheesecake as it bakes, making sure the cheesecake bakes slowly and evenly.
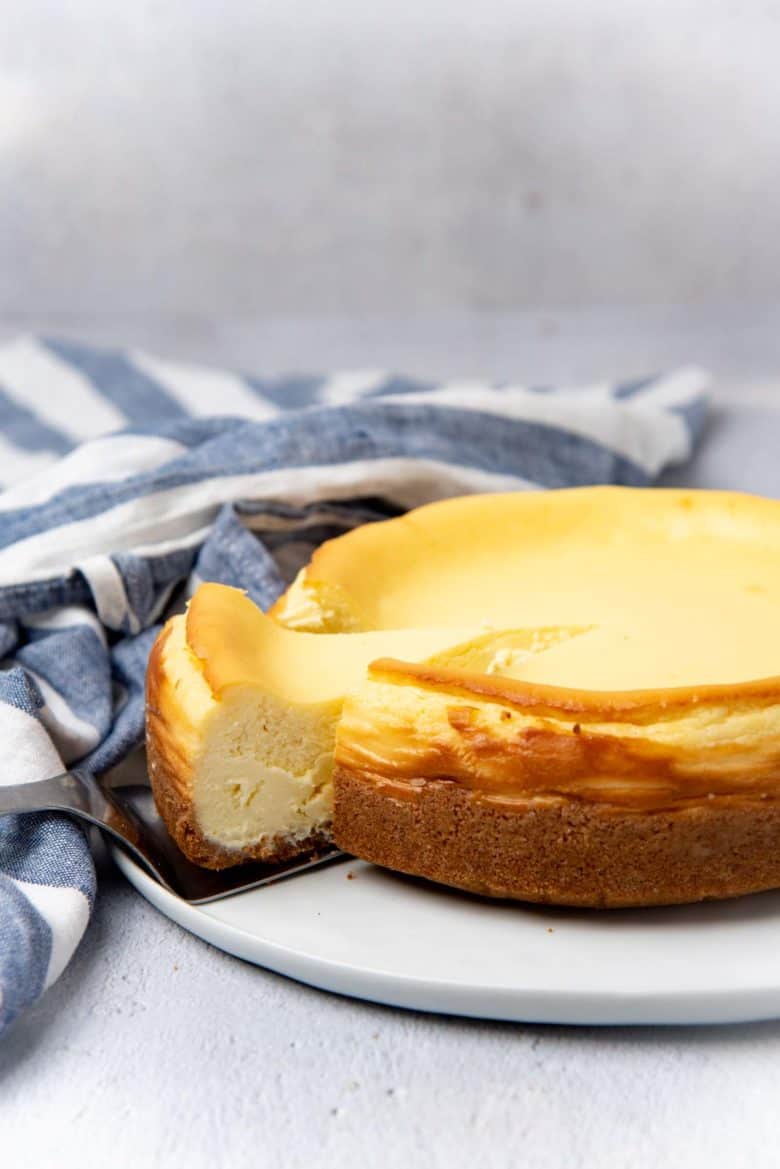
But I also love cheesecakes baked without a water bath as well! This creates caramelization on the outside, and a more dense texture which I really love. If you knock out as much of the air as possible, the risk of cracks on the surface of the cheesecake is quite minimal. However the cheesecake will collapse slightly in the center as it cools.
Another trick is to add a starch that will help prevent cracking. The starch can be flour or cornstarch. I add cornstarch to my New York Cheesecake, but you can easily substitute this with flour. The starch molecules will absorb liquid and create a matrix, which will help buffer and maintain the texture of the New York cheesecake. This matrix provides some structural stability that keeps large cracks at bay.
How to bake a New York Cheesecake if I can’t find large foil?
Unfortunately, it can be hard to find a material that is heatproof, which will also wrap snugly around a cheesecake pan. I’ve tried baking a classic cheesecake with multiple smaller foil pieces, but the water will invariably get in and ruin the cheesecake.
Parchment paper isn’t a good choice either because it doesn’t wrap around the cake pan snugly, and requires cotton twine to tie it securely.
So you’ve got two choices;
- Bake the cheesecake WITHOUT a water bath.
- Find a disposable pie tin/foil pan that the cheesecake pan will comfortably fit inside, and then mold the foil pan around the cake pan.
I prefer to bake cheesecake without a water bath. This way, the sides are baked a little more, creating a caramelized crust, and the center sinks in a little bit. The texture is more dense (compared to cheesecake baked in a water bath), which I personally love!
What to do if my cheesecake cracks on the surface?
Cracks on your cheesecake surface are not at all a sign of failure or a less-than-desirable result. It’s still a darn cheesecake after all, so it’s going to be deee-licious! 🙂
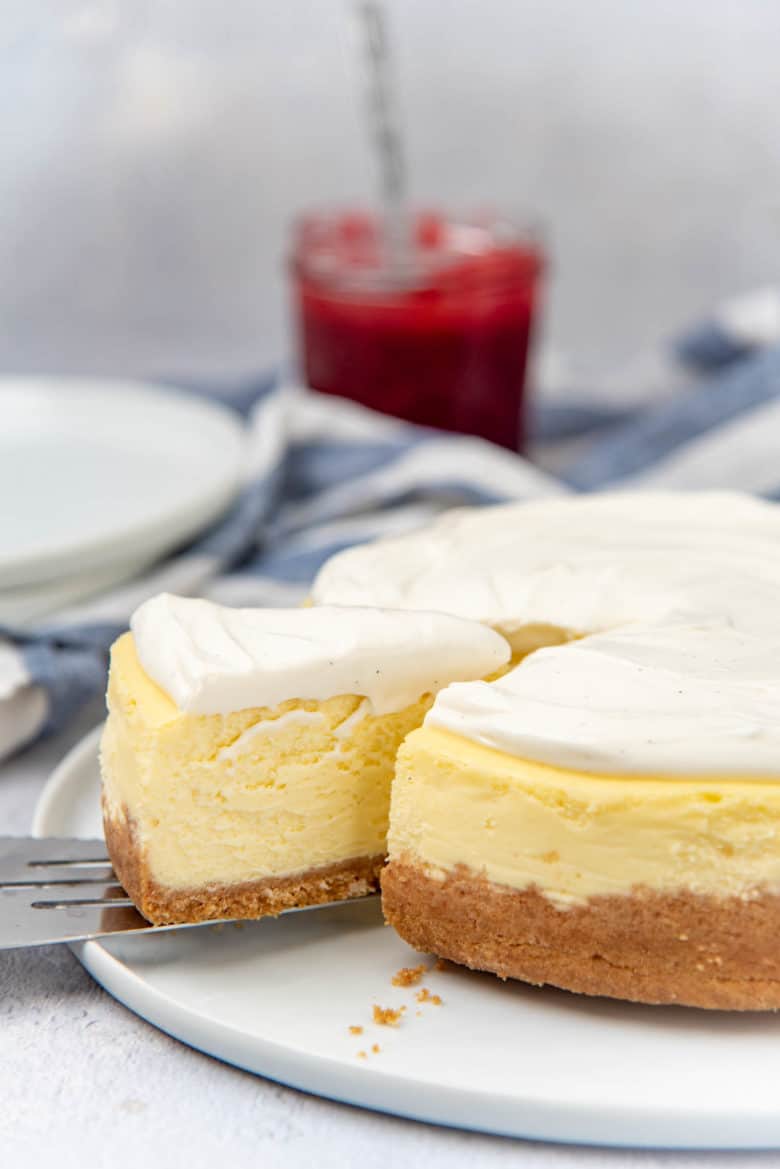
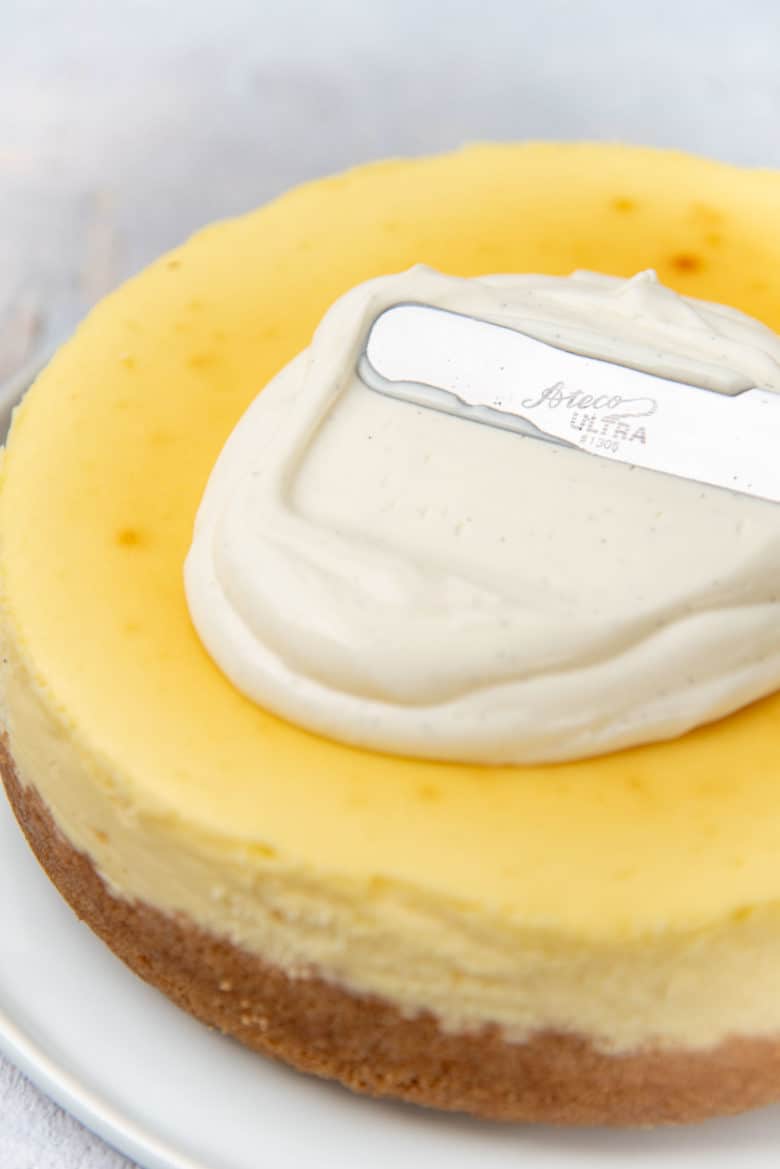
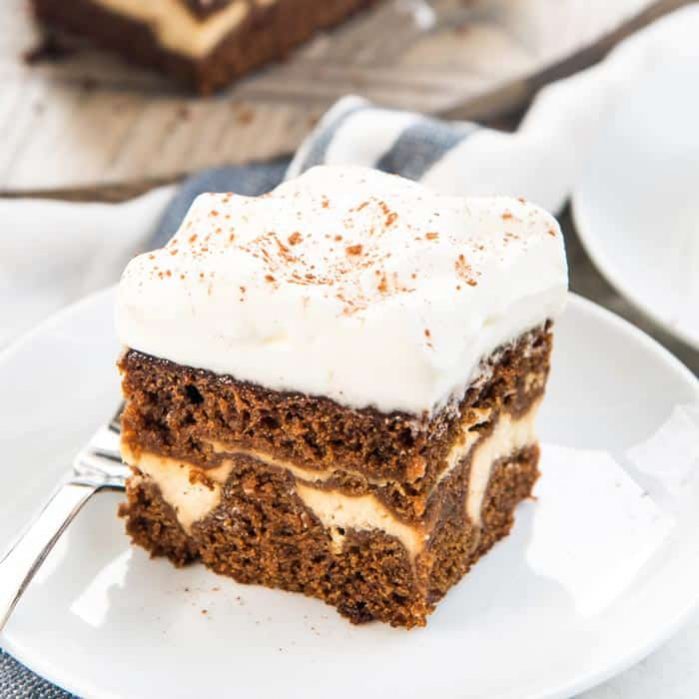
You can simply cover the surface with a topping, if you’d like to cover up the cracks. Sour cream topping, whipped cream topping, or even chocolate ganache will do the trick.
Ingredients needed to make a classic cheesecake
For the crust,
- Graham crackers (or digestive biscuits)
- Melted butter
- Salt
For the cheesecake filling,
- Cream cheese
- Cream and/or sour cream
- Sugar
- Eggs
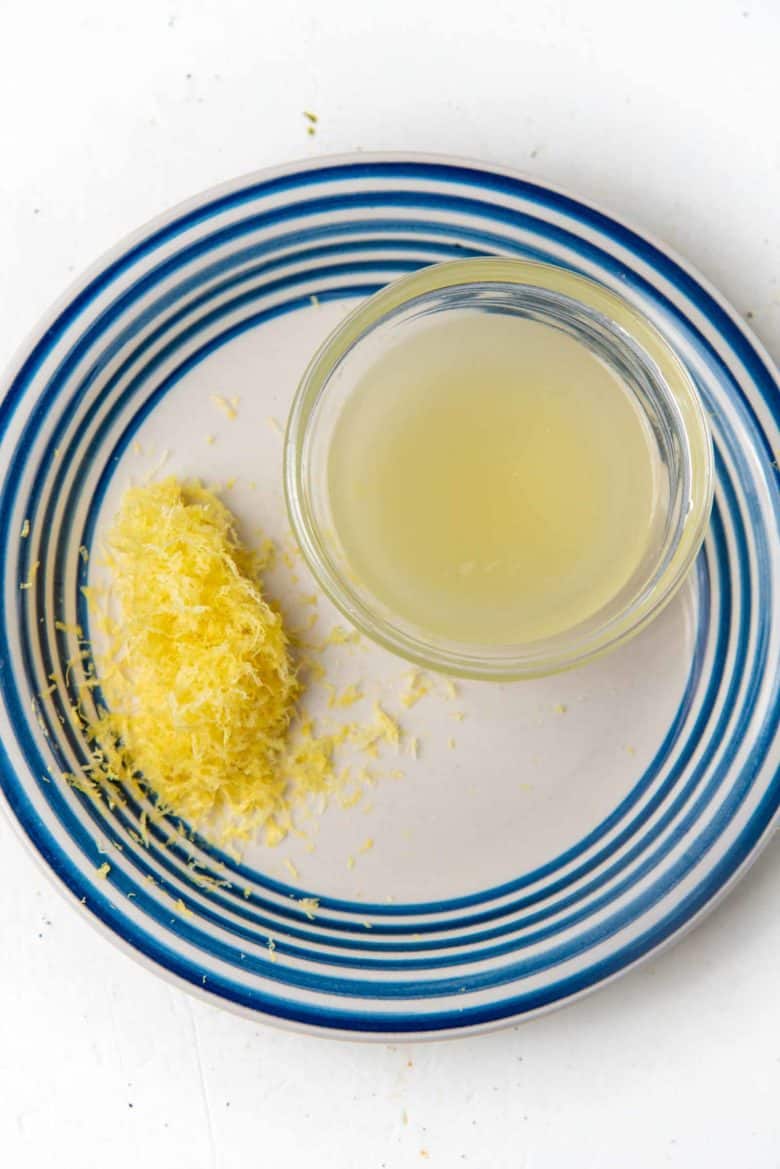
- Lemon and vanilla
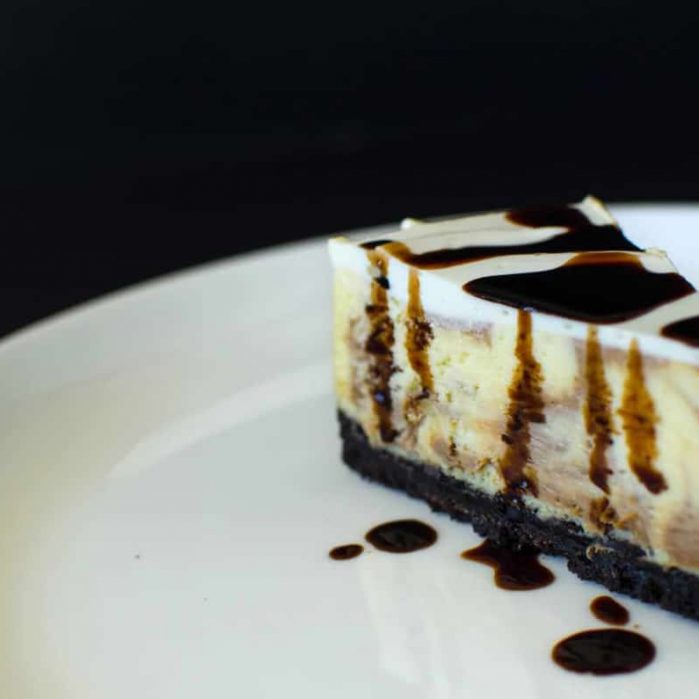
Graham crackers aren’t readily available outside of North America. So if you can’t find graham crackers, you can use digestive biscuits. I used to use chocolate thins when I lived in New Zealand, but Oreo cookies are also a great option (for a chocolate crust).
I also like to use a combination of heavy cream and sour cream. The sour cream adds a lovely tanginess (along with the lemon). But you can also use plain heavy cream (or a combination of both).
Does New York Cheesecake have a topping?
Not necessarily. But nothing’s going to stop you from adding one if you’d like to! 🙂
So you can either leave the cheesecake plain on top, or top it with whatever you like. A few options are,
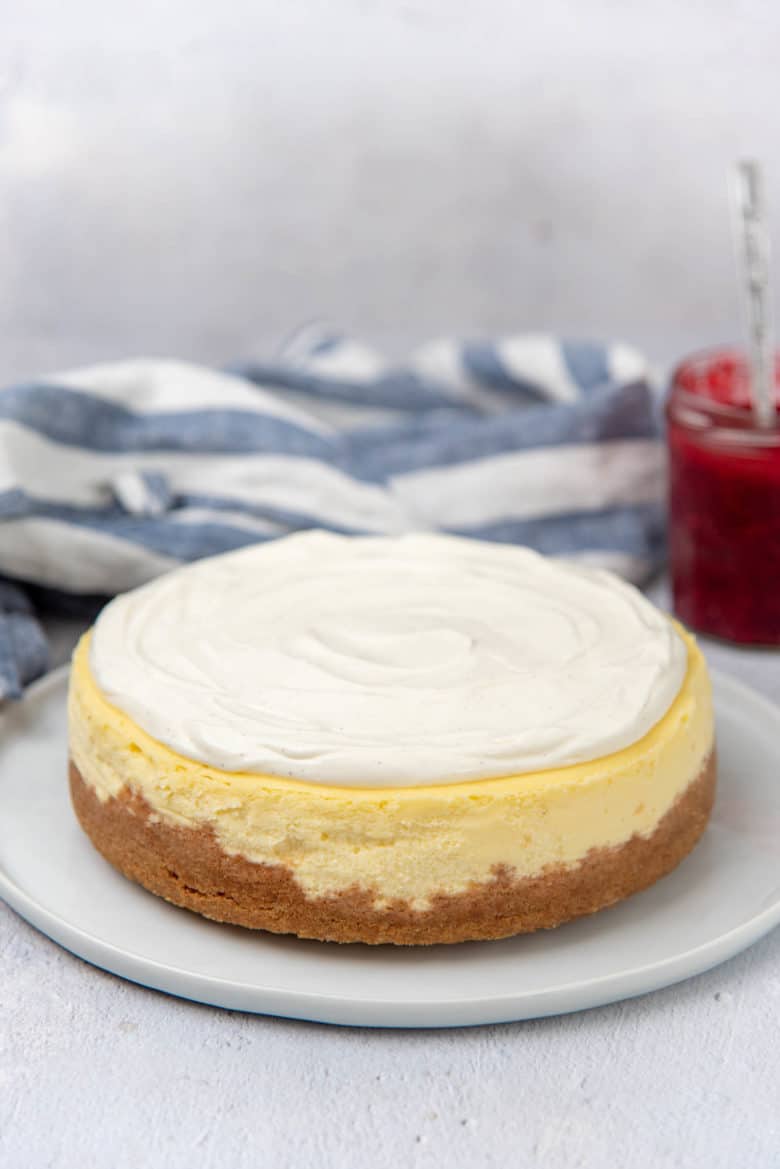
- Sour cream topping
- Whipped cream
- Fruits
Step by step recipe to make New York Cheesecake (or any classic cheesecake recipe)
How to prep the cheesecake pan
Prep an 8 inch or 9 inch cheesecake pan. You can use either a springform pan or a loose bottom pan. Most cheesecake pans are about 3 inches in height.
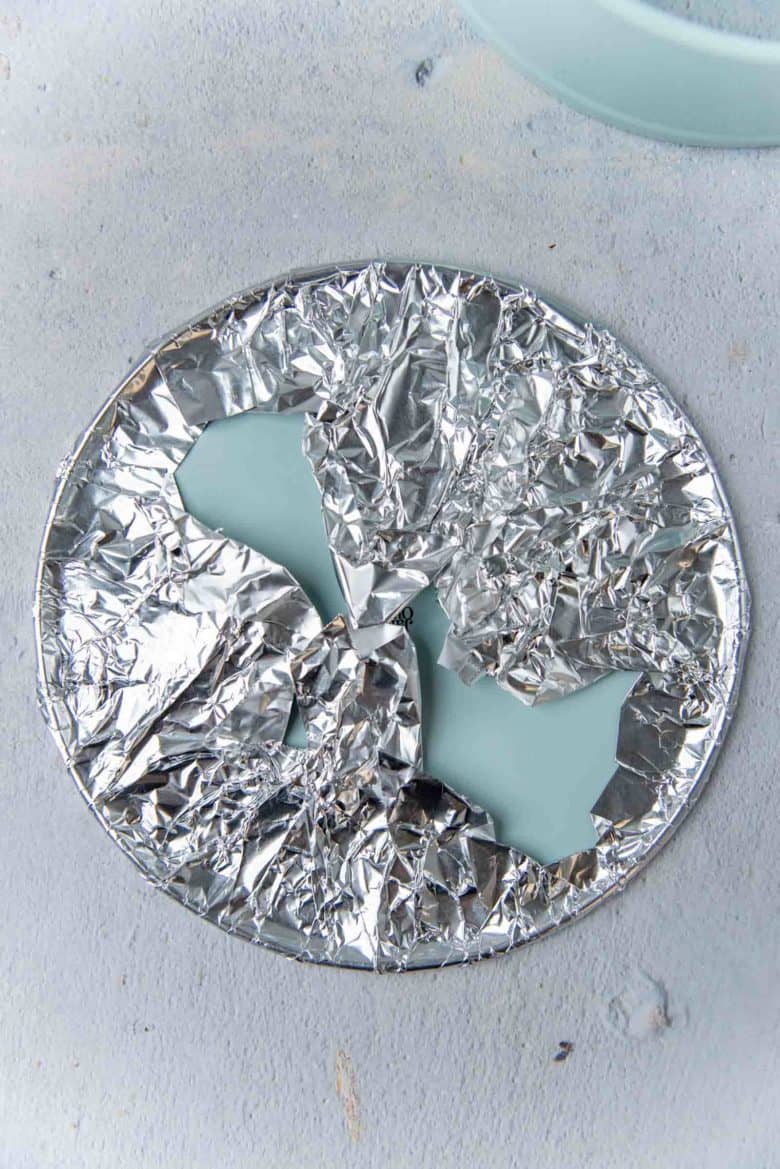
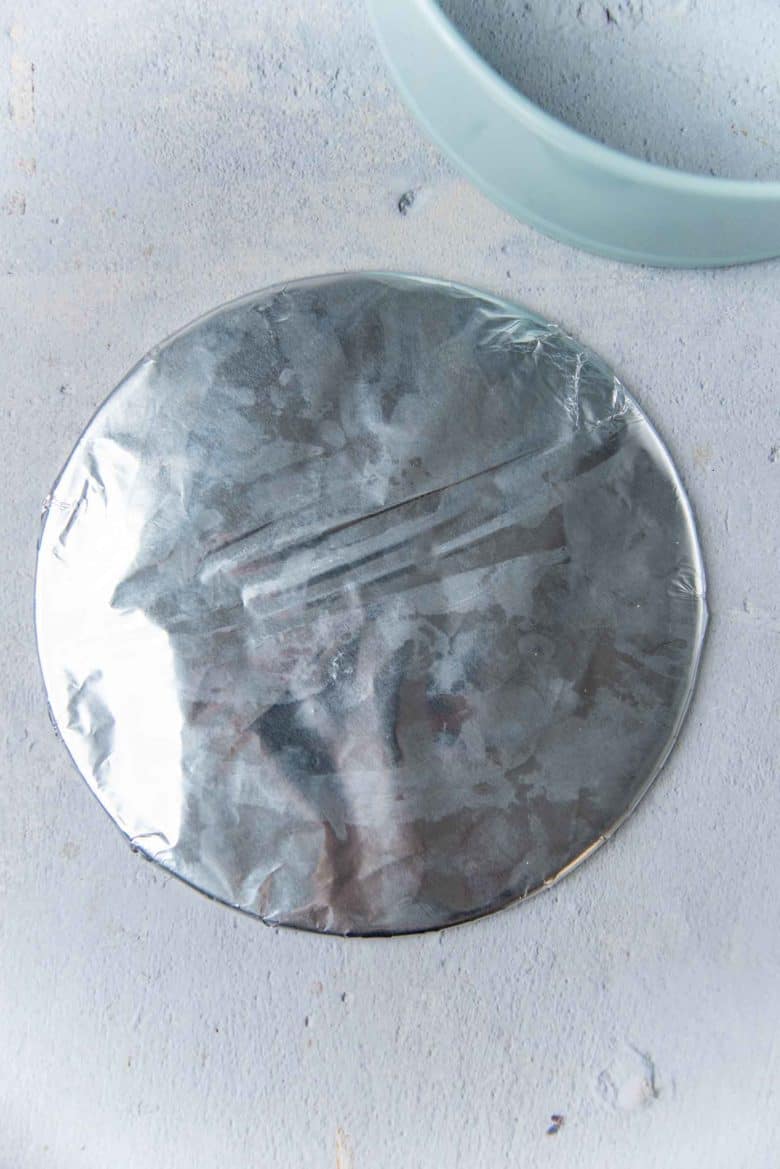
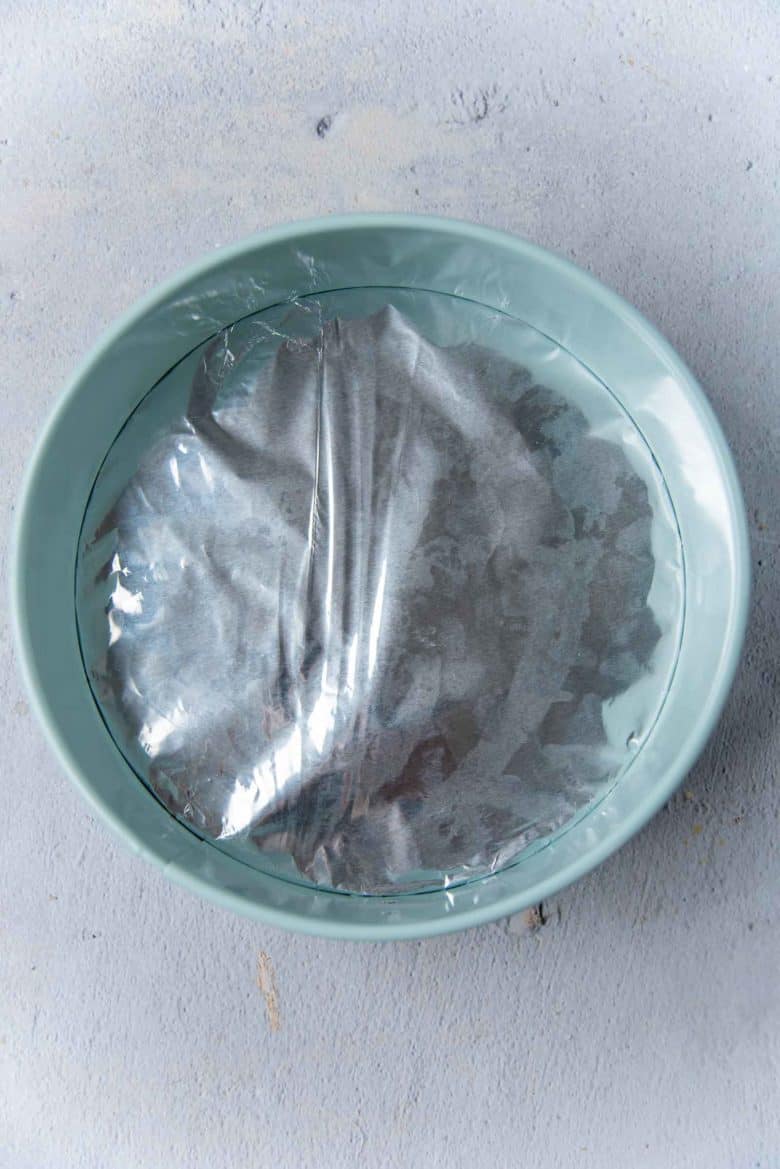
Wrap the bottom of the baking pan in a layer of foil. To do this, place the foil on a clean and flat surface, and place the cake pan bottom on it upside down. Fold the foil over the edge of the pan bottom (about 1 – 2 inches towards the middle), and cut the excess. Make sure the foil is stretched over the edge and neatly folded over. This step will help flatten the cake pan bottom for the cheesecake crust.
This is an optional step, so you can skip it and continue on from the step below.
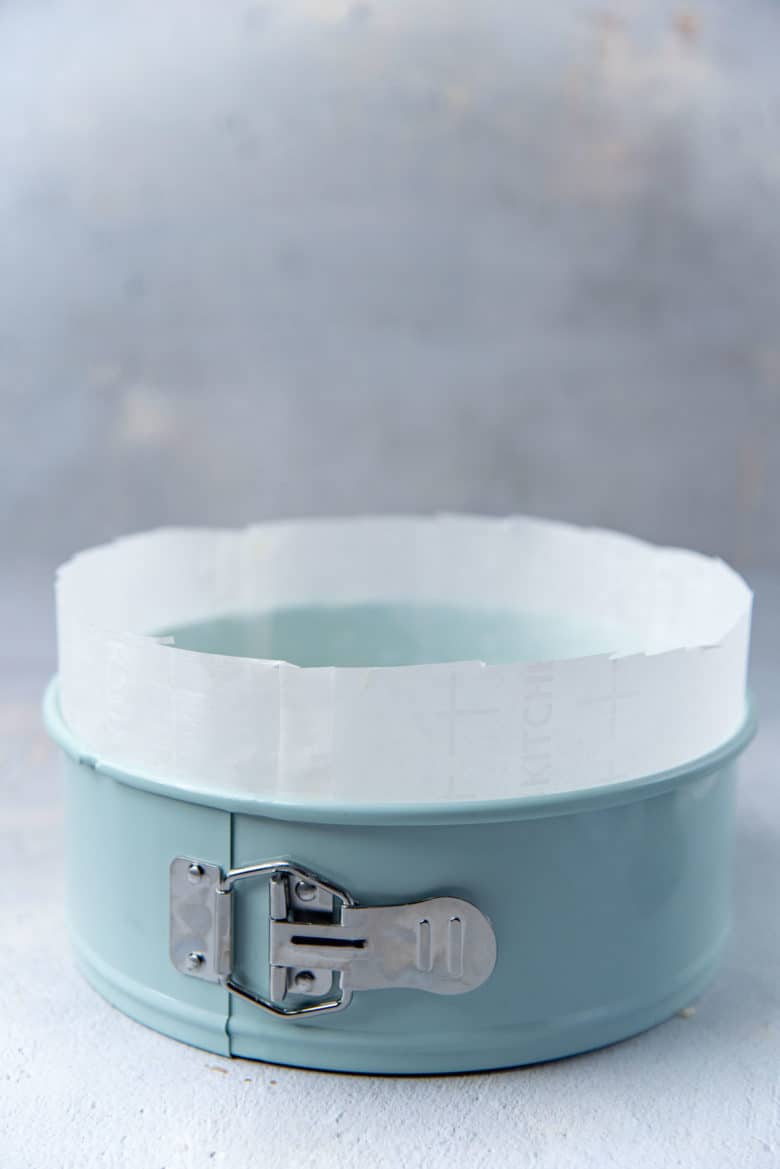
Place the cake pan bottom in the cake pan (with or without foil). Make sure it’s secure and flat.
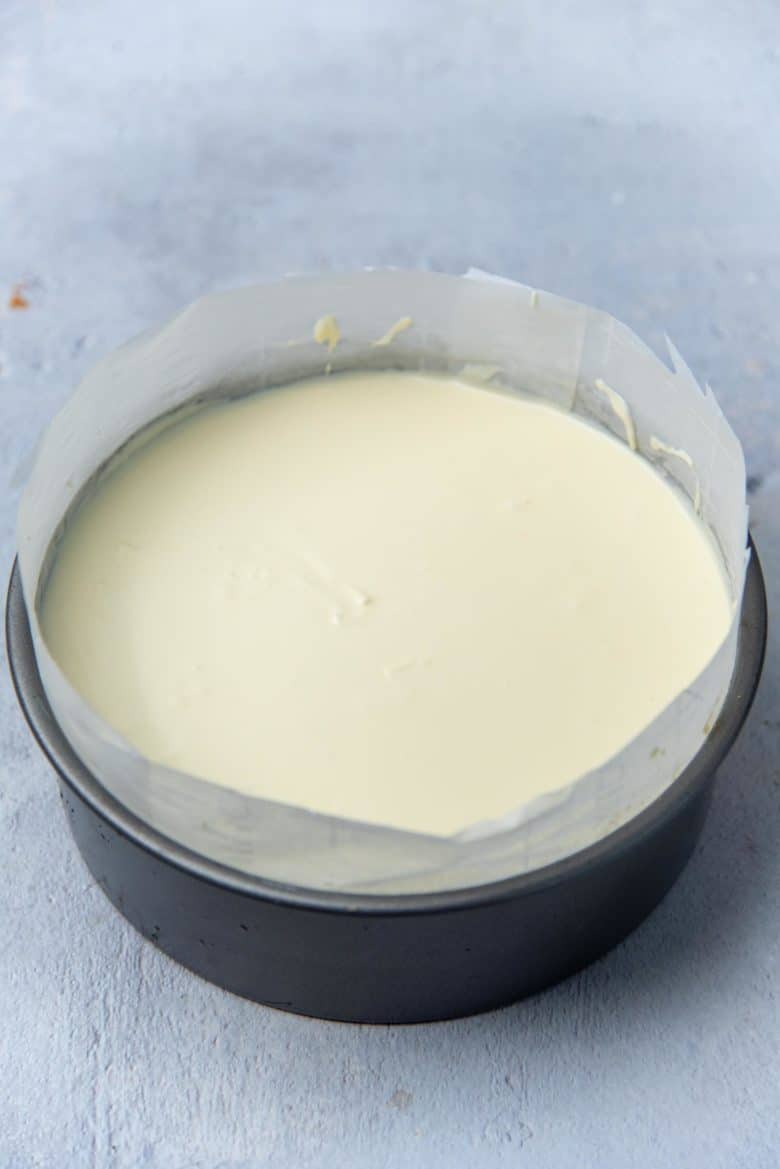
Grease the pan, and line the bottom with parchment paper. I also prefer to cut strips of parchment paper and line the sides of the cheesecake pan. This will be helpful when removing the cheesecake from the pan, while ensuring smooth sides. The butter on the side of the pan will help stick the parchment paper to the pan.
Making the crust
Measure the graham crackers you’ll need for the crust. If you’d like to have a crusted side, you will need more graham crackers (up to double the amount). A New York cheesecake can be made either with just the bottom crust, or with a crust on the bottom and sides as well.
To make things easier, you could also buy graham cracker crumbs that are ready to be used. OR you can buy graham crackers whole and crush them yourself. Use a food processor to pulse the cookies until they resemble bread crumbs.
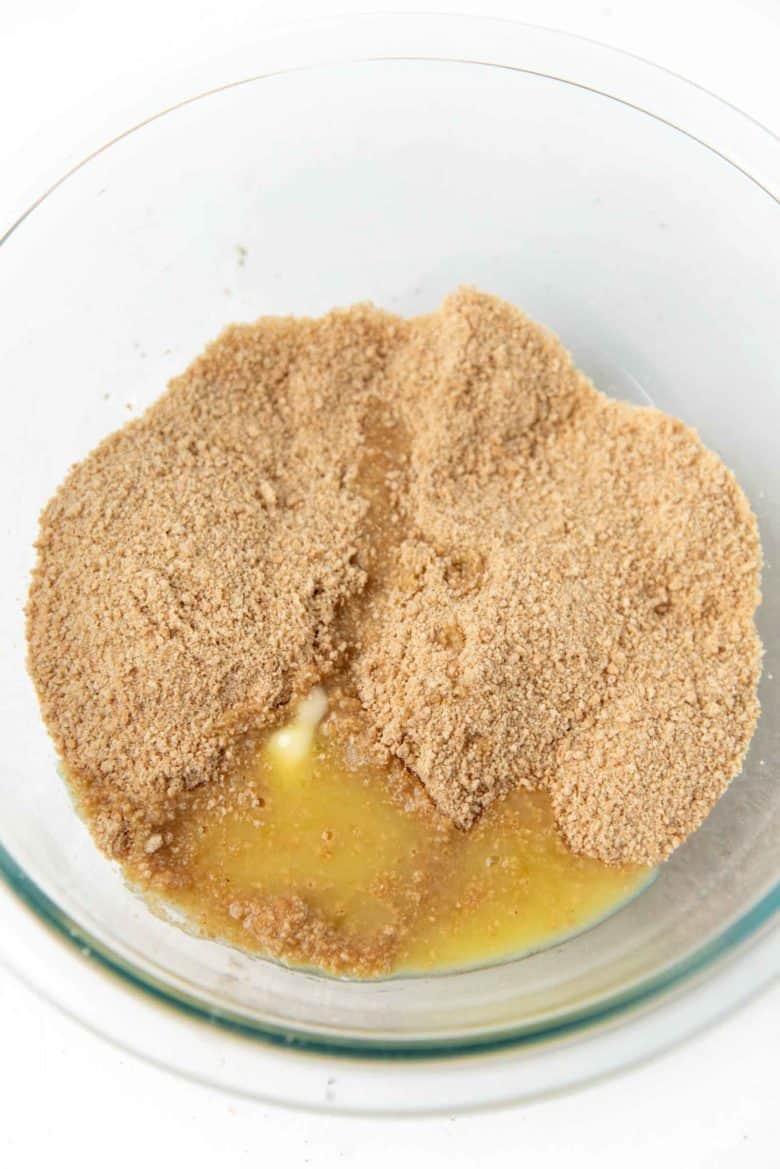
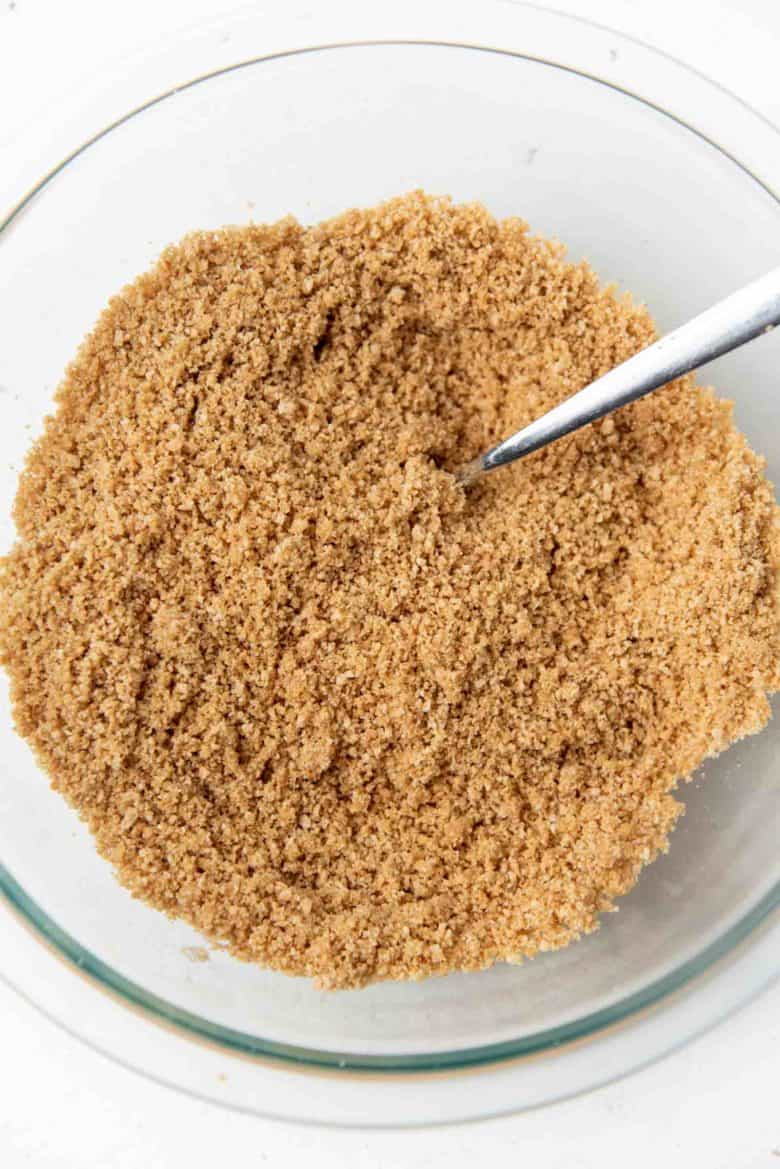
Instead of sugar, I prefer to add a little salt to the graham cracker crumbs, but you can leave that out if you like. Pour in the melted butter until you have a mix that still looks dry, but forms clumps when you squeeze it in your hands.
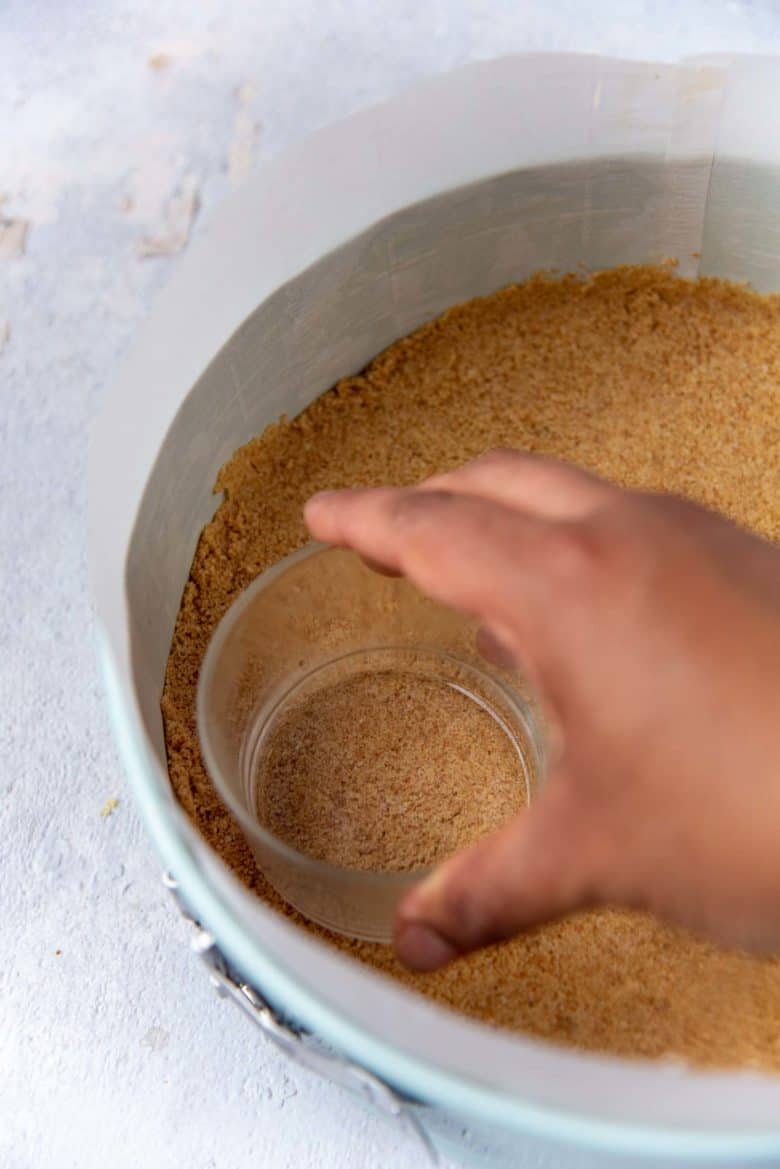
Press the cookie crumbs into the bottom of the cake pan using a flat-bottomed glass (or something similar). Make sure the crust is pressed in well and evenly. I don’t like to create a crust that goes all the way up the sides, instead I bring the crust about 1 inch up the sides.
Should I pre-bake the cheesecake crust?
This is also not necessary, but it does create a slightly crunchier final result. The cheesecake will come out just fine even without pre-baking the crust. It’s just that the crust will be a little more crumbly.
Preheat the oven to 350 F / 180 C and bake the crust for about 10 minutes. This is all that’s needed if you choose to pre-bake the crust of your New York cheesecake. Then allow the pan to cool completely before adding the cheesecake batter.
How to prepare the cake pan to bake a cheesecake
One of the major issues that comes with baking cheesecake is keeping the water bath from leaking into the cake pan. So it’s crucial to line the cheesecake pan with foil on the outside.
To do this, you will need to use heavy duty foil, or any type of sturdy piece of foil that has a width of at least 16 – 18 inches. That’s because you need to wrap the entire cake pan with one piece of foil. Avoid using multiple pieces of foil that overlap to cover the base of the pan. This is simply not going to keep the water out.
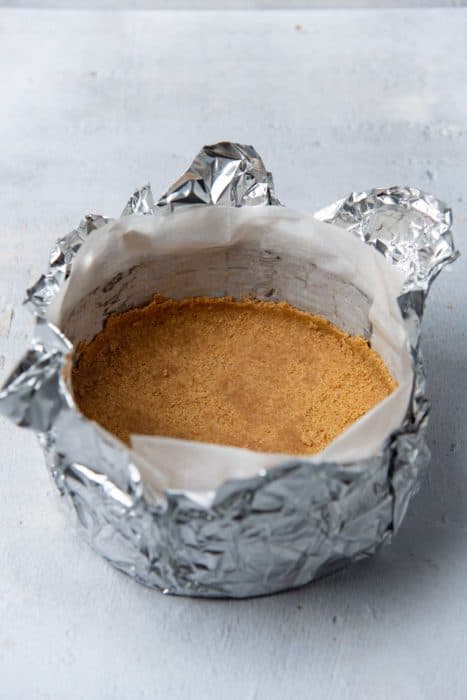
Place the cake pan in the middle of the piece of foil, and cover the entire bottom and sides with it. Make sure NOT to tear or rip the foil. Fold and bunch up the excess foil near the top of the cheesecake pan as shown below.
However, you also have the choice of baking your cheesecake WITHOUT a water bath.
How to make the cheesecake batter
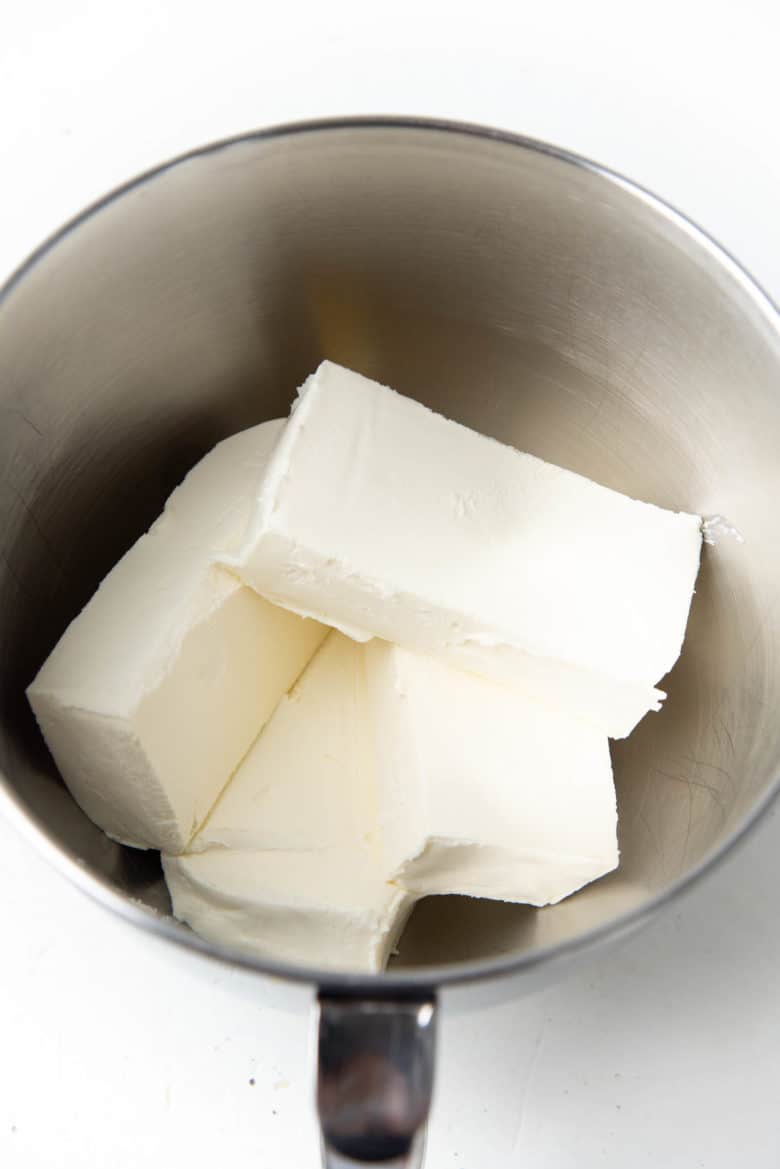
Have all the ingredients to make your New York cheesecake measured, and roughly at room temperature. This is especially important for the cream cheese. Softened cream cheese will be easier to beat into a creamy mixture.
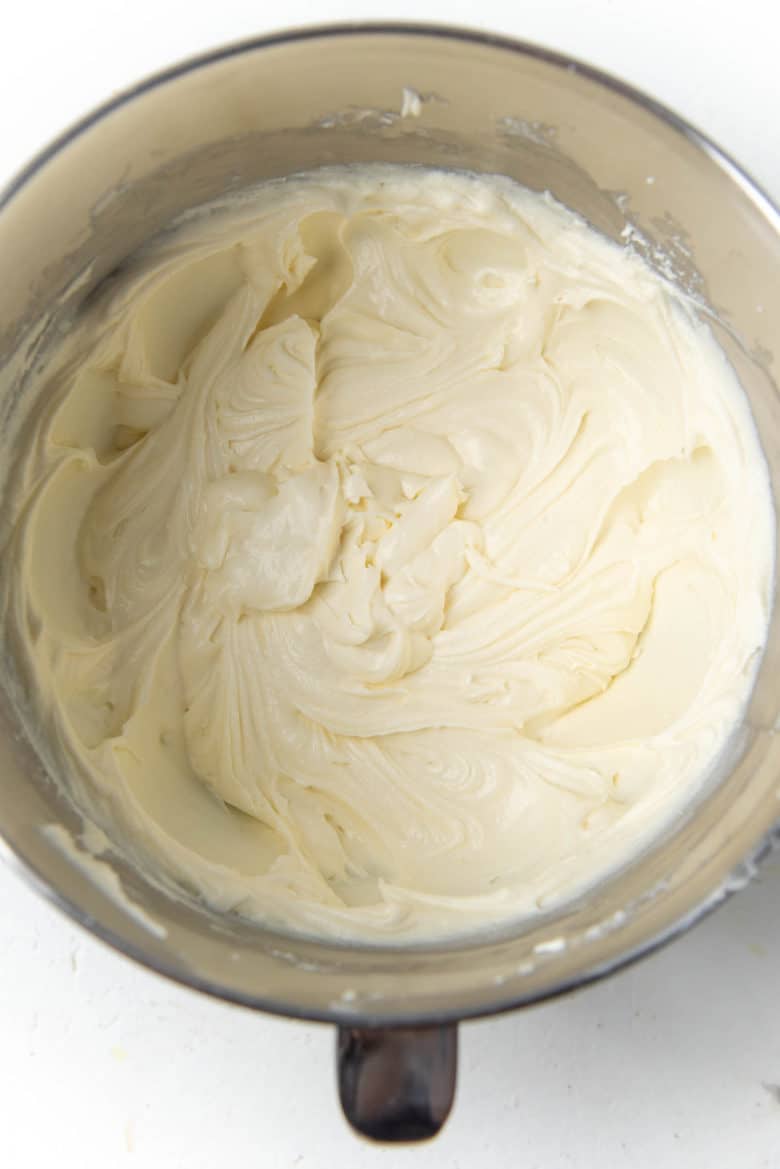
First, place the cream cheese in the bowl, along with the cornstarch and sugar. Cream the ingredients together to make the cream cheese soft and creamy. Make sure to scrape the sides of the bowl so that the whole mix is creamy and well incorporated. You only need to cream the mixture until you get a smooth mix with no lumps.
Whisk in the cream and/or sour cream.

Add the eggs to the cheesecake mixture.
It is during this step of the recipe that the cheesecake batter will become airy. The eggs will incorporate air as they are beaten. There are a couple of things to remember when adding the eggs.
- Either add the eggs one at a time – only adding the next egg once the previous egg is mixed in. This is how I used to make cheesecake.
- OR, you can whisk the eggs in a bowl and pass the mixture through a sieve before adding it to the mix. Beating and passing the eggs through a sieve ensures that the egg whites are broken (no lumps), and the white coils in the egg won’t be mixed in. This loose egg mixture will mix into the cheesecake batter a lot more easily. This is what I prefer to do now.
You can choose either of these options, but just make sure you’re not overmixing the eggs.
Always make sure that you’re scraping the sides and bottom of the bowl, so that no cream cheese is stuck to the bowl.

How to remove excess air from the batter
Knock the mixing bowl on a hard surface (like your kitchen counter). This will help any air bubbles rise to the top and escape the batter. Do this a few times to knock out as much air as possible.
Once you pour the cheesecake batter into the prepared pan, knock or slap the surface of the batter with the back of a spoon. This will also help air bubbles escape. But don’t knock the cake pan on a surface though, because this might cause the crust on the bottom to crack.
Knocking out as much air in the batter is very important. This reduces the chances of cracks in your New York cheesecake.
Baking the New York Cheesecake
With a water bath
To create the water bath, you will need a large baking pan that will easily fit the cake pan inside. Place the cheesecake filled, and foil wrapped cheesecake pan inside the large baking pan, and then place it in the oven. Fill the large baking pan with very hot water (or boiled water), until it comes about halfway up the sides of the cheesecake pan.
Bake in the preheated oven. The cheesecake is done when the edges are set, but the middle is slightly jiggly. Because the cheesecake is baked in a water bath, the oven temperature will be higher. The oven heats up the water which gently bakes the cheesecake.
Once baked, remove the New York cheesecake from the oven and let it sit in the water bath for a while to cool down slightly. Then remove the pan from the water bath and the foil, and let it cool down to room temperature. Then chill the cheesecake overnight in the fridge.
Without a water bath
When baking the cheesecake without a water bath, you’ll be baking it at a lower heat, and for longer.
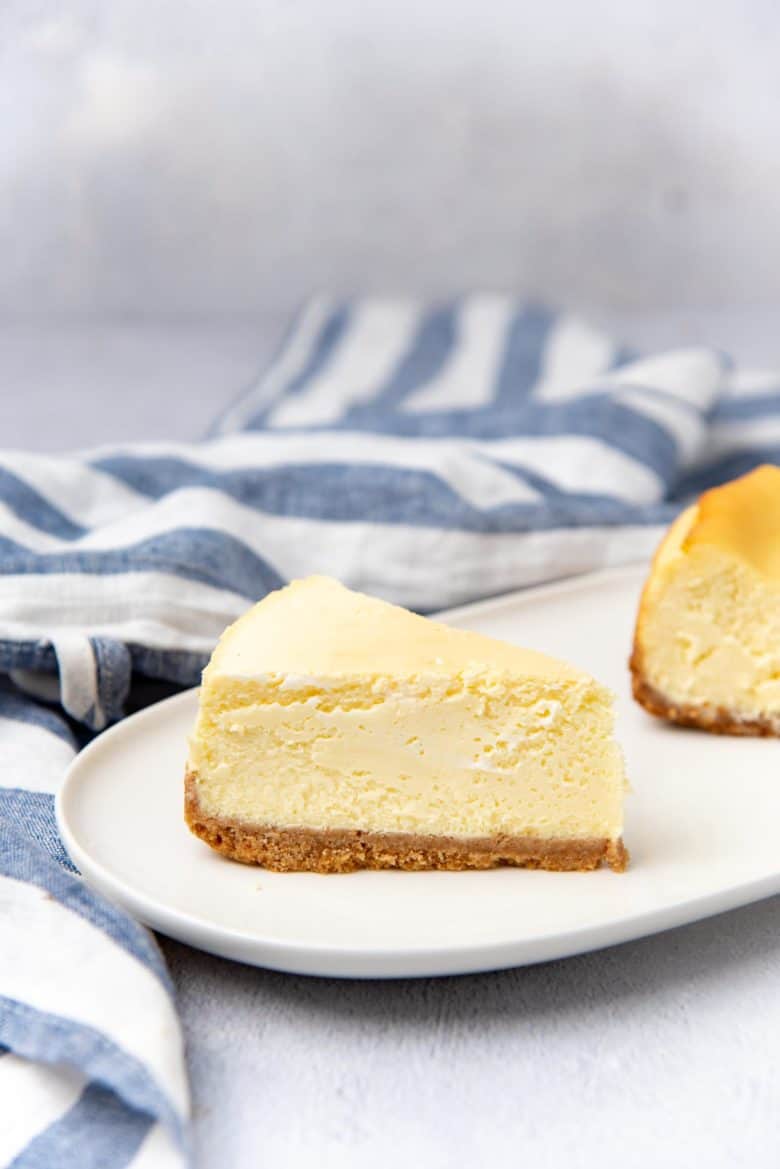
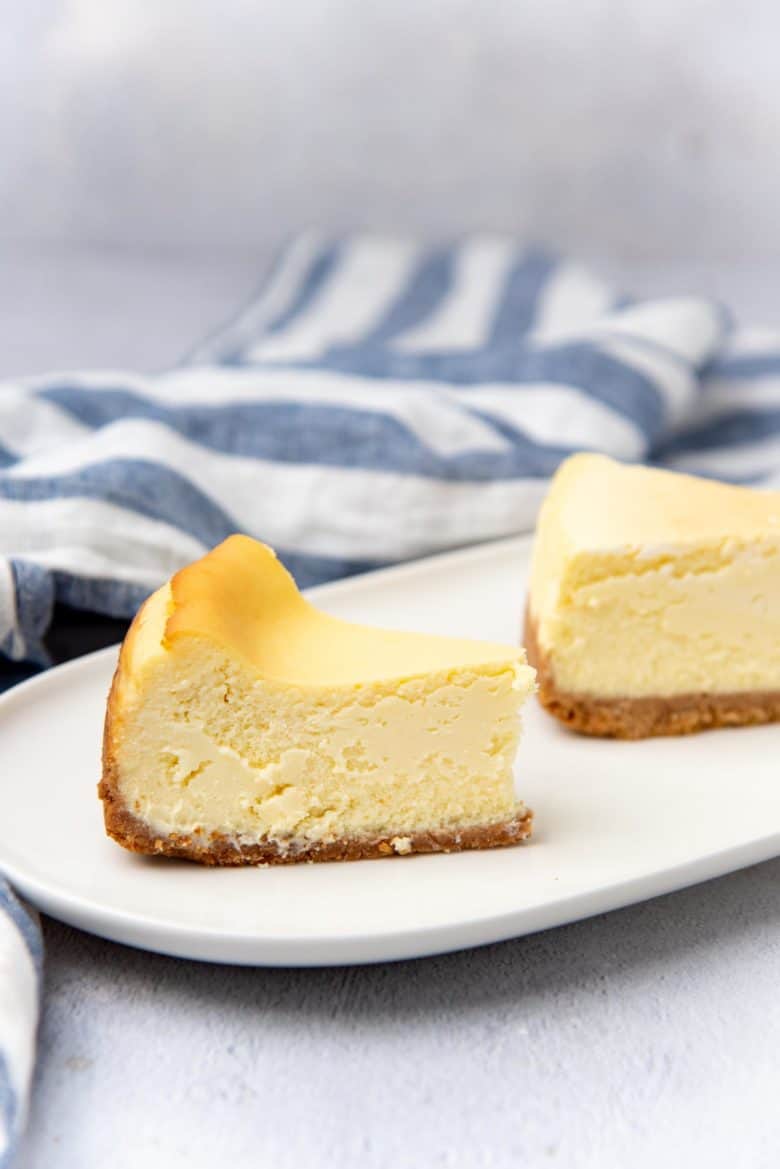
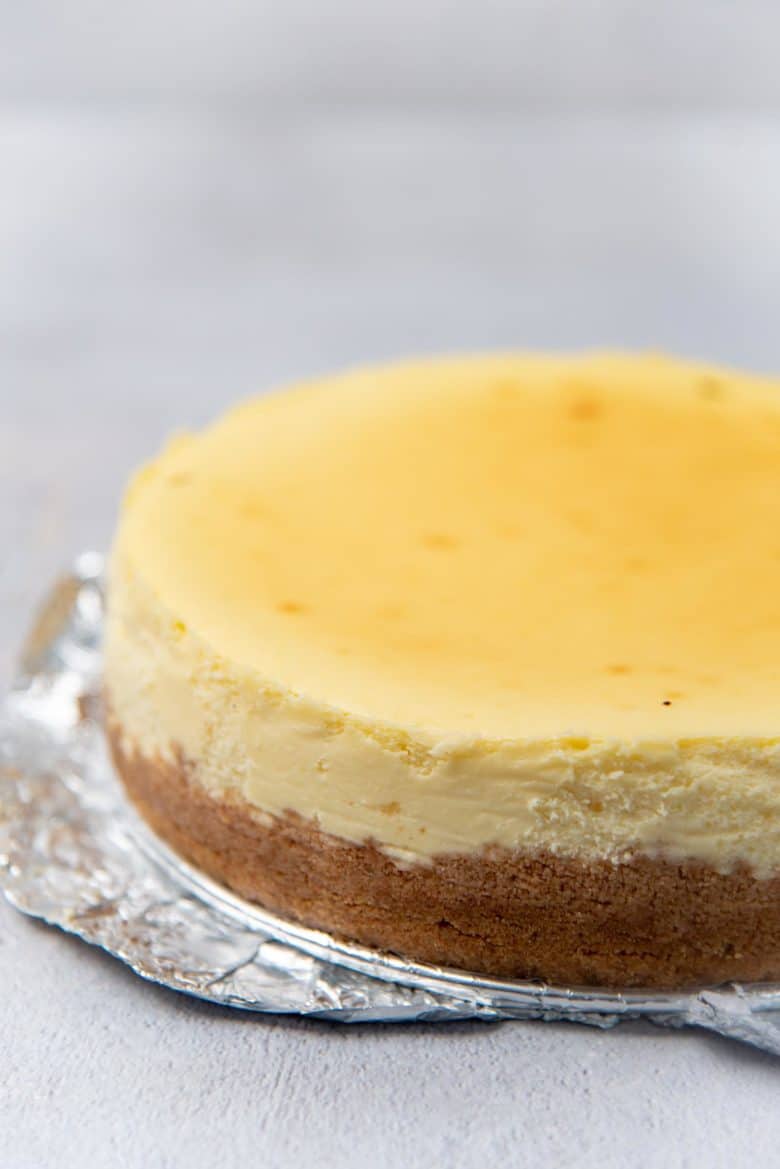
The cheesecake will also brown more. The edges will puff up as they bake, and the center will be slightly jiggly. The middle will collapse a little, and become firm as it cools down, creating a slightly sunken center (see photos in the post).
Allow the cheesecake to cool to room temperature and then chill in the fridge, preferably overnight.

How to remove the cheesecake from the pan
If you lined the sides of the pan with parchment paper, then it’ll be very easy to remove the cake from the pan once chilled. Since the parchment paper will peel off the cheesecake easily, there shouldn’t be a problem with the cheesecake sticking to the pan. You can chill the cake, and then remove the cheesecake from the pan.
If you baked the cheesecake without parchment paper, you will first need to loosen the cheesecake from the pan.
To do this, run a thin, flexible knife or offset spatula along the edge of cake (while the cheesecake is still slightly warm but not hot) to loosen it from the pan. Then, very gently, unlock the springform pan to release the sides of the cheesecake. The cheesecake should be mostly cooled down, so it should still be able to hold its structure.
Alternatively, you can chill the cheesecake first, and then run a warm, flexible knife or offset spatula along the edge of cake to loosen it from the pan. Then gently unlock the pan to loosen the cheesecake.
Serving suggestions for a classic New York Cheesecake
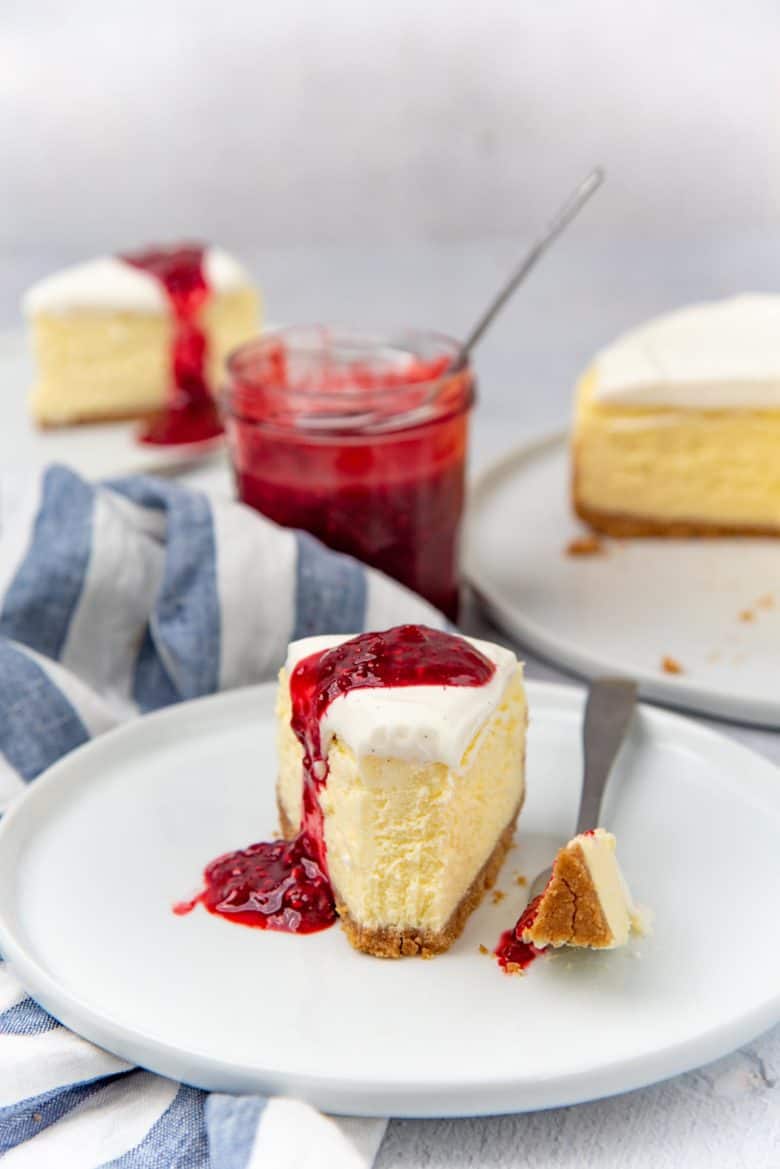
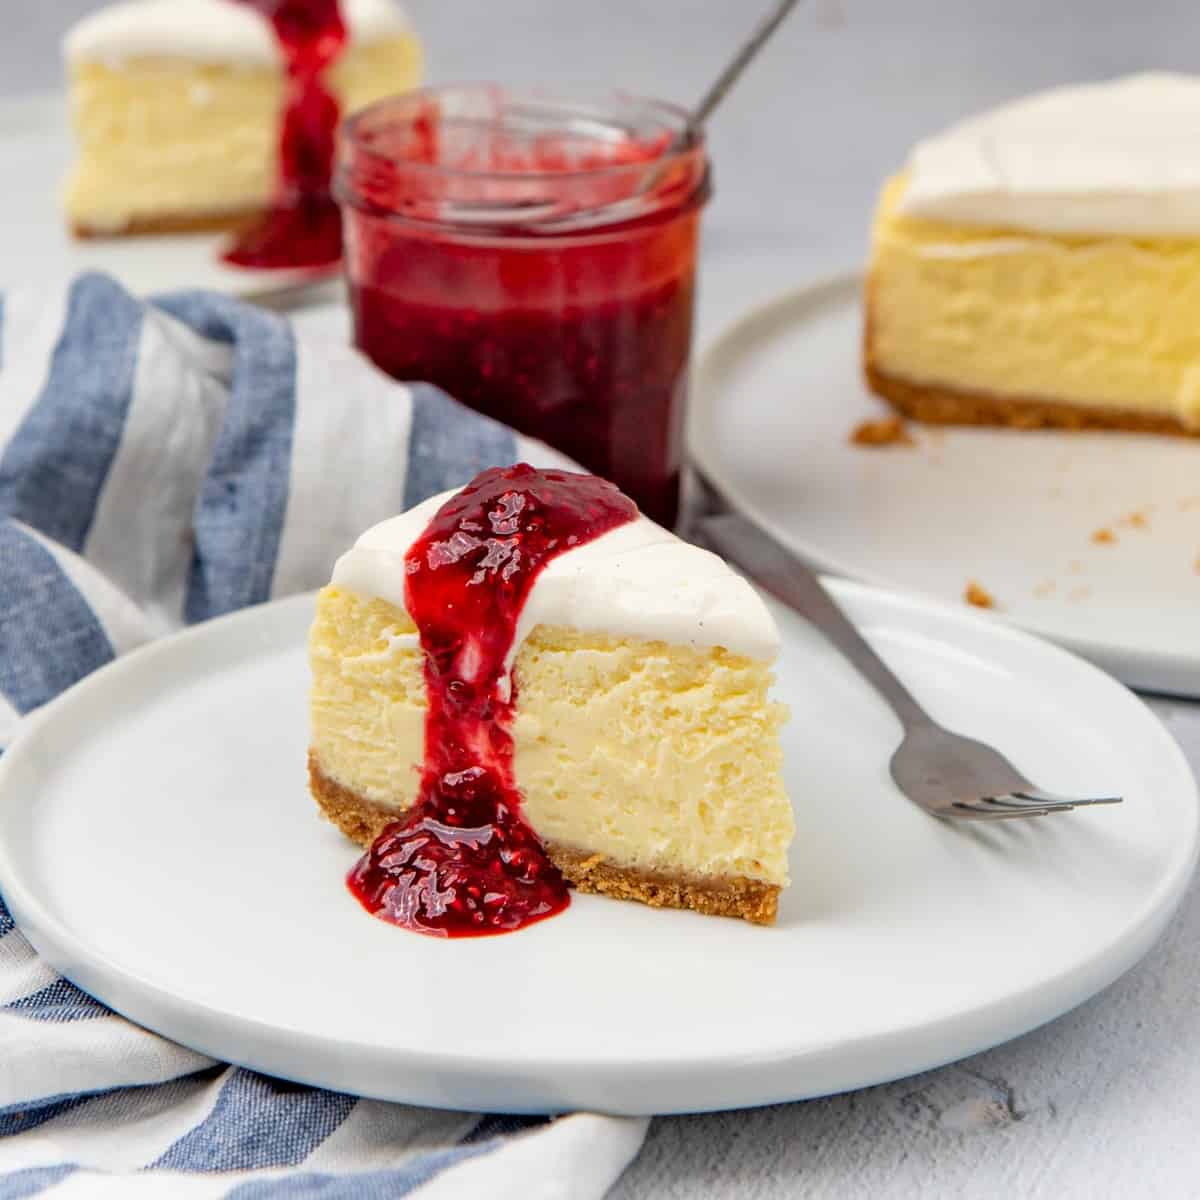
This New York Cheesecake needs no dressing up. It’s decadent and delicious as is. But you can just as easily top it with either sour cream, whipped cream, or fruits for an even fancier result!
You can also serve it with fruit compotes, berry coulis, or fruit curds like lemon curd, passion fruit curd, or pineapple curd. Or for an even more decadent dessert, you can serve it with chocolate ganache, caramel sauce, or a sweet balsamic sauce.
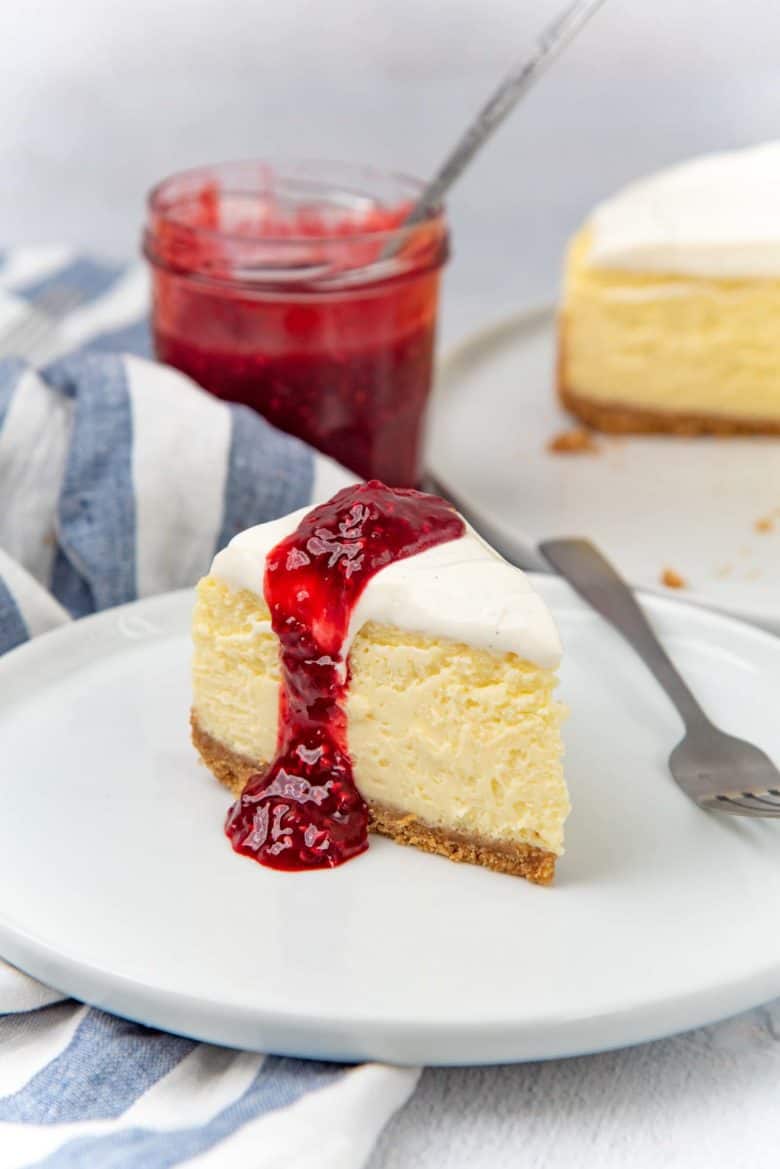
I prefer to serve this New York cheesecake with raspberry coulis, since the sour sweetness of berries is the perfect pairing with a classic cheesecake!
Why I love this recipe!
Cheesecake is a universally loved dessert. And it’s one of my absolute favorites too. It was that fondness that drove me to perfect this recipe.
This classic cheesecake is super creamy and rich. I love the pairing of the creaminess, with a slight sourness and sweetness. That makes for an all around delicious dessert.
Making a New York cheesecake may seem daunting, but this recipe guide is guaranteed to help you perfect this dessert! I have not only shared all the ways to minimize cracks, but also how to make a classic cheesecake WITHOUT a water bath as well.
Looking for more recipes?Sign up for my free recipe newsletter to get new recipes in your inbox each week! Find me sharing more inspiration on Pinterest and Instagram.
Classic New York Cheesecake Recipe
Ingredients:
Crust
- 215 g graham crackers about 14 sheets
- 65 g melted butter slightly cooled (about 4.5 tbsp)
- Generous pinch of salt
Cheesecake
- 907 g cream cheese softened (4 blocks / 32 oz)
- 225 g white sugar 1 ¼ cup
- ¼ tsp fine sea salt I personally like to use a little extra salt than this.
- 15 g cornstarch 1 ½ tbsp packed
- 2 tbsp lemon juice
- 1 tbsp lemon zest finely grated, loosely packed
- 2 tsp vanilla extract
- 120 g sour cream ½ cup
- 120 g heavy cream ½ cup, see recipe notes
- 6 large eggs
Sour cream topping (optional)
- 360 g sour cream 1 ½ cups
- 28 g confectioner’s sugar ¼ cup, spoon and leveled
- 1 tsp vanilla extract
- Pinch of salt
To serve
- Fresh berries
- Berry coulis
- Whipped cream
Instructions:
Preparing the cheesecake pan
- This step is optional, and is mainly for cheesecake pans where the bottom is not flat. First, remove the bottom from a 9 inch cheesecake pan. Place it upside down on a large piece of foil, and fold the foil over the edge of pan bottom. Make sure the foil is tightly folded over and flattened.
- Then flip it over and place it in the cheesecake pan. The bottom of the cake pan should now be covered with a flat piece of foil, creating a flat surface.
- Butter the pan, and line the bottom with parchment paper. Cut strips of parchment paper and line the sides of the pan as well. Set aside.
Making the crust
- Preheat oven to 375°F / 190°C.
- To make things easier, you can buy graham cracker crumbs. OR you can buy whole graham crackers and crush them into crumbs in a food processor. If you'd like to create a crust for the sides of your cheesecake as well, then you'll need more graham cracker crumbs and butter.215 g graham crackers
- Place the crumbs in a bowl and mix in the salt and melted butter well. The mixture should be just moist enough to be held together when you squeeze a handful of it in your hands.65 g melted butter, Generous pinch of salt
- Place the crumbs in the prepared cheesecake pan, and spread it as evenly as possible. Flatten the crumbs using a flat-bottomed glass (or something similar). Press the crumbs along the sides of the cake pan if you'd like to create a crust on the side of your cheesecake as well.
- Bake the crust in the preheated oven for about 7 – 10 minutes. Remove from the oven and allow the cake pan to cool completely.
Cheesecake filling
- First prepare the cake pan. Once the crust is cooled down, take a piece of heavy duty foil that is big enough to fully encase the cheesecake pan, and wrap it around the pan.
- To do this, place the pan in the center of the foil, and fold it up along the sides of the pan. Mold the foil so that it's flush against the sides of the pan. The foil should come up to at least the top edge of the cake pan, to prevent water from flowing in. It's crucial that the cake pan is covered with a single piece of foil (instead of multiple, overlapping pieces of foil). Set aside until needed.
- Preheat the oven to 350°F / 180°C. Make sure you've got a large roasting pan or something similar that is large enough for the water bath for your cheesecake pan. Heat some water in a kettle to use for the water bath. You can also use very hot water from the tap. See notes for how to bake cheesecake without waterbath.
- Make the batter – Place the softened cream cheese, cornstarch, salt, and sugar in the mixing bowl. With a paddle attachment, mix the ingredients until the cream cheese is creamy and has no lumps. Remember to scrape the sides and bottom of the bowl so that all the cream cheese is properly mixed in.907 g cream cheese, 225 g white sugar, ¼ tsp fine sea salt, 15 g cornstarch
- Once the cream cheese is creamy and free of lumps, add the vanilla, lemon, and lemon zest. Briefly mix them in.2 tbsp lemon juice, 1 tbsp lemon zest, 2 tsp vanilla extract
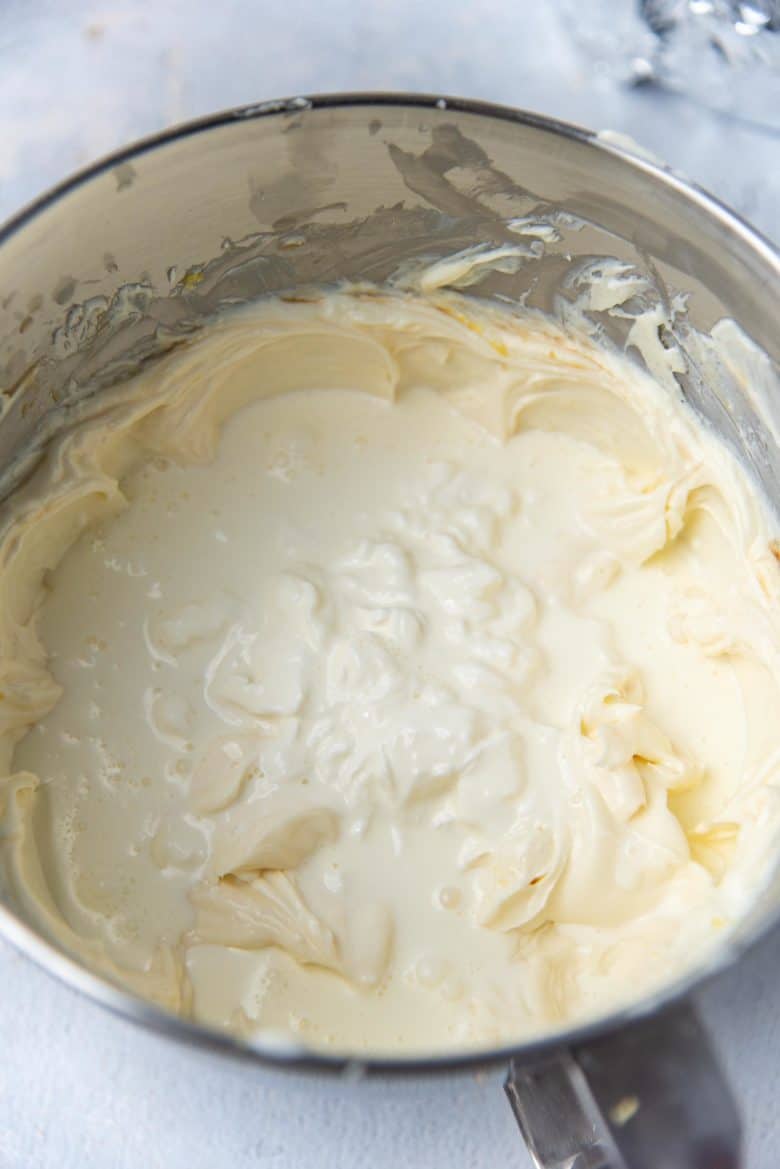
- Add the cream and sour cream. Scrape the sides and bottom of the mixing bowl, and mix the cream cheese mixture on medium speed until you have a smooth mixture. There should be no lumps, and everything should be well mixed. But be careful not to overmix either.120 g sour cream, 120 g heavy cream
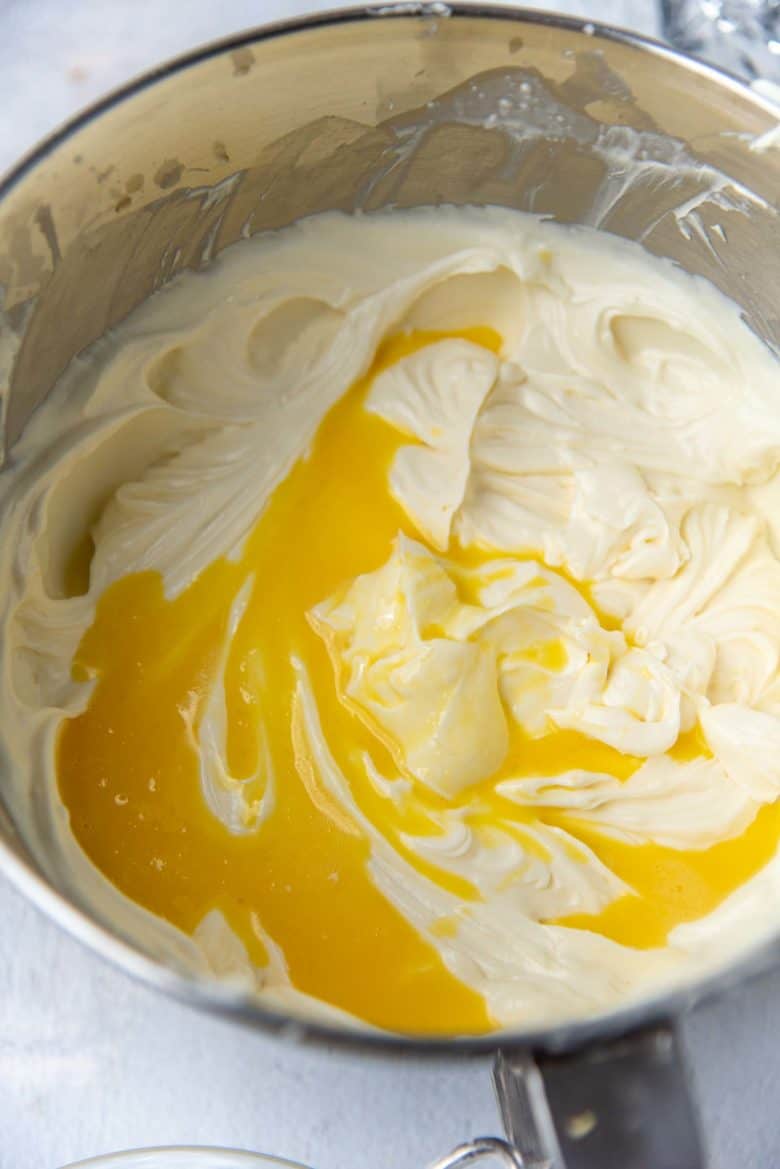
- In a separate bowl, whisk the eggs together well. Pass this egg mixture through a sieve to remove any lumps.6 large eggs
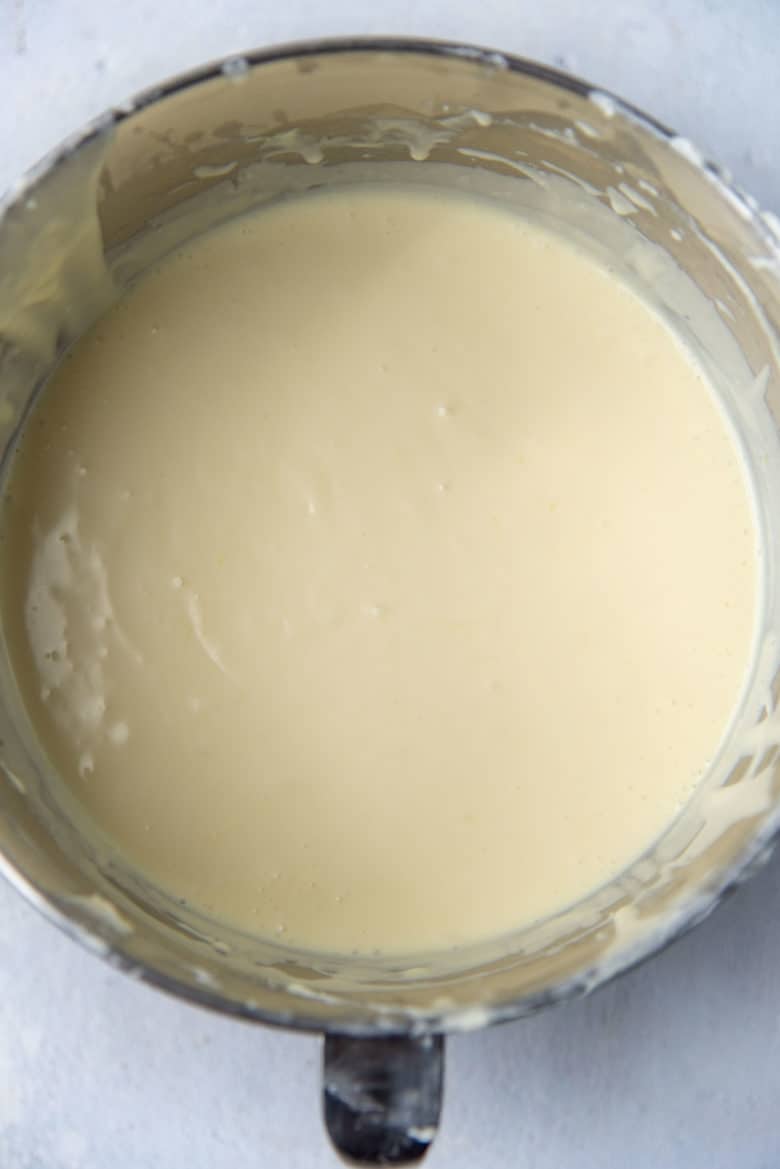
- Add this egg mixture to the cream cheese batter and stir it in on low speed until it’s mixed through well. Scrape the sides and bottom to make sure the batter mixes evenly. You can also do this step manually.
- To remove excess air, firmly knock the mixing bowl on a hard surface (i.e. your kitchen counter). Do this a few times to remove as much air as possible.
- Pour the batter into the prepared cheesecake pan. Then, using the back of a spoon, slap the surface of the batter. You will see air bubbles moving up to the surface. Do this a few times to remove more excess air.
- Place the cheesecake pan (wrapped with foil) inside the pan that you will be using for the water bath. Then transfer this set up to the preheated oven, and pour hot water into the water bath pan. Take care not to splash any water into the cheesecake pan. The water should come halfway up the sides of the cheesecake pan.
- Bake in the preheated oven for about 75 – 90 minutes. The cheesecake is baked when the edges are set, but the center is a little jiggly.
- Remove the pan (with the water bath) from the oven, and let it sit for a few minutes to slowly cool down.
- Then remove the pan from the water bath, and let it cool completely to room temperature.
- Place the cooled cake pan in the fridge. Refrigerate until completely chilled. Preferably at least 6 hours.
- Once chilled, unlatch the cheesecake pan ring to loosen the cheesecake from the pan. This will be very easy, since there is parchment paper along the sides of the cheesecake pan. The parchment paper should peel off the sides of the cheesecake with ease.
- Spread a layer of sour cream topping (optional), or whipped cream (optional), or top the cheesecake with fresh berries (optional). You can also simply serve the cheesecake as is.Fresh berries, Berry coulis, Whipped cream
- To cut clean, straight slices of cheesecake, dip a sharp knife (no jagged edges) in hot water to warm the blade. Wipe the blade, and cut the cheesecake with the warm blade. Warm and clean the blade between each slice to get clean, straight edges for all the slices.
- Serve with berry coulis.
Sour cream topping
- Place all the ingredients in a bowl.360 g sour cream, 28 g confectioner’s sugar, 1 tsp vanilla extract, Pinch of salt
- Whisk together until combined. Spread it over the chilled cheesecake be°fore serving.
Tips & Tricks
Note on heavy cream and sour cream
You will need a total of 1 cup of liquid. I use 50:50 heavy cream and sour cream here. But I’ve also used 100% heavy cream and 100% sour cream. You can substitute or change the ratios, as long as the final amount is 1 cup of liquid.Note on avoiding cracks in your cheesecake
The longer you mix the cheesecake batter, the more air is added to it. So make sure to frequently scrape the sides and the bottom of the mixing bowl, so that you mix all the ingredients in as little time as possible, without incorporating too much air. Also make sure to knock the mixing bowl on a hard surface to remove any excess air.Baking the cheesecake without a water bath
You can also bake the cheesecake without a water bath. Preheat oven to 300 F / 150 C. Bake the cheesecake for about 105 – 120 minutes. The cheesecake edges will rise and brown more, and the middle will be a little sunken in. This is how it should be. The middle should also still be a little jiggly. Remove from the oven and let it cool to room temperature, before refrigerating it until completely chilled. Instead of foil, you can also use a disposable aluminum / foil pie tin, which will fit the cheesecake pan and mold around the pan.How to adjust ingredients to make an 8 inch cheesecake
If you only have an 8 inch cheesecake pan, that is 3 inches in height, you will need to scale the ingredients to 75% of the amount provided here. However, I’ve made some changes, since it’s hard to measure 75% of the eggs accurately. 680 g cream cheese, softened (3 blocks / 24 oz) 168 g white sugar 10 g cornstarch (1 tbsp packed) 2 tsp lemon juice 2 tsp lemon zest, finely grated and loosely packed 1 ½ tsp vanilla 120 g sour cream, ½ cup 60 g heavy cream, ¼ cup 2 large eggs 2 egg yolks Bake for about 75 minutes at 350 F / 180 F with a water bath. Bake for 105 minutes at 300 F / 150 C without a water bath.Nutrition Information:
“This website provides approximate nutrition information for convenience and as a courtesy only. Nutrition data is gathered primarily from the USDA Food Composition Database, whenever available, or otherwise other online calculators.”
Joanne Morais says
I was always intimidated by cheesecakes. But your instructions made it a breeze, and I must say, I nailed it on my very first try! The end result was a sensational hit with my family and it left us craving for more! Looking forward to more wonderful recipes, Dini!
Dini says
Yay, that’s fantastic, I’m so glad to hear Joanne! 🙂
Mara says
Argh I just made this and it puffed up like a soufflé, all the way to the top of my parchment collar!
I followed all the directions and used the no-water-bath method to get the denser cheesecake. It’s cooling now and will have to do because there’s no way to make a new one now but what on EARTH happened?!
Dini says
Hi Mara
It is normal for a cheesecake to puff up when cooking without a water bath because the edges heat up faster than the middle. The water helps to even out the heat conduction, and without it the cheesecake will puff up a little. It will still rise a little with a water bath and will rise higher without a water bath. If it puffed up too much and cracked, then there was too much air in the cheesecake batter and it rose too much, splitting the cheesecake.
However, if you look at my photo of the cheesecake that was cooked without a bain-marie, the edges of the cheesecake are higher than the middle. This is because it puffed up, and then the middle settled as it cools (still without cracks).
You can reduce the heat of the oven even further and cook it longer if you do not want it to puff up at all (at about 250 F). I like that the cheesecake browns a little bit at the edges, so I like to bake it at 300 F.
Hope that helps!
Mara says
Update: it was great! I just didn’t realize the degree to which it would rise and fall. Was panicking a bit because it was for a birthday celebration, but it was all good! Thanks for all the recipes ❤️
A Matthews says
Hi Dini, you deserve an award for providing not just easy to follow recipes but for your know how to creating great results! I have baked cheesecakes on and off for 30 years but still find myself constantly tweaking the recipes. I had one that used only heavy cream and one that used only sour cream but neither was satisfying. Interestingly, you combine both the heavy cream and the sour cream! It was a great hit! Granted I used a quarter of the zest because I didn’t want it to be too lemony yet I didn’t detect it at all. I think I can add a bit more next time. I followed the 8” recipe in your notes and baked it without the side parchment cause I was in a hurry and couldn’t get it to stick to the buttered sides. I baked it without the bath. Also I hand never pre baked the crust before and we all liked the slight crunch it gave. Thank you thank you!
FYI- both the main recipe and the 8” recipe are missing the salt amount
Dini says
Thank you so much for your lovely comment!
I’m so glad that you liked this recipe. I do like my cheesecake to be a little tart, which is why I like adding a little extra lemon or lime. But you can absolutely adjust this to your taste!
Thank you for letting me know about the salt as well. I have fixed this in the recipe 🙂
Denise says
Dini, I see the tops of the cheesecakes are flawless so assume you do not check internal temp with an instant read. I see many different temps when I search online. Also, some suggest test center others test 1 in. from side of pan. Would you know the target internal temp and what area of cake it should be tested. I was hoping you would know as I would be confident following your input. Thank you.
Dini says
Hi Denise
That is a good question! I don’t ever check the internal temperature of my cheesecakes and never wondered about it either! The visual cues for the cheesecakes (the jiggle in the middle) haven’t failed me so far. Since I don’t usually cover the top of the cheesecake, I try not to poke it 🙂
The next time I make cheesecake, I will definitely check the internal temperature of the cheesecake at various stages so that I can find out what works best! I’m pretty sure I’ll be doing this soon because I want to know too. Thank you for sharing this with me, as I am now intrigued by this!
Denise says
Dini, I am so glad to know you have interest in this request. It is so important for home cooks/bakers to count on the use of a good instant read measurement. I can’t trust my instincts, how it looks or feels. Your perfect cake is the perfect specimen to test the temp on! What invaluable information that will be. I look forward to your results whenever you take the time to pursue this. Thank you for your consideration!
Ruwani Ranamuka says
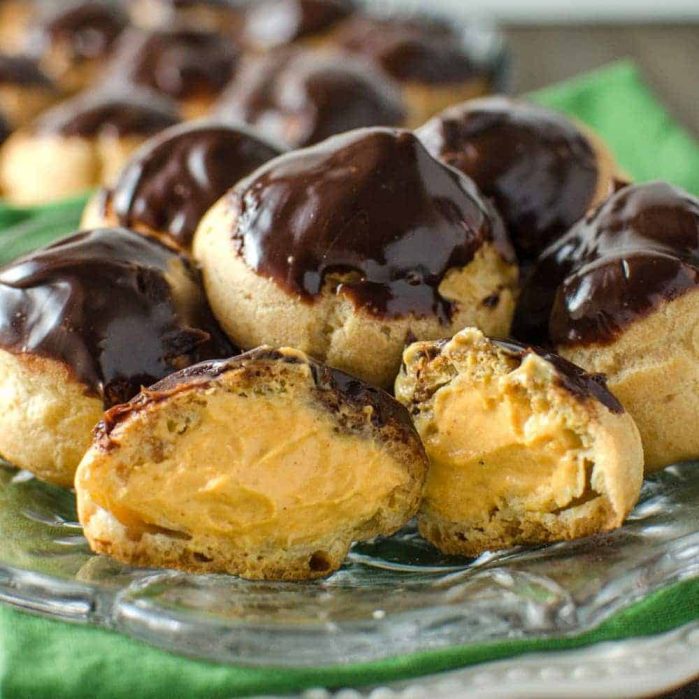
I followed your instructions to the dot and it turned out perfect and so delicious. Also the eclairs came out brilliantly.Thank you soo much. Love from Sri Lanka.
Dini says
I’m so glad you enjoyed both recipes Ruwani! 🙂 Thank you so much for letting me know!