


This Salted Caramel Chocolate Crepe Cake is one spectacular no bake dessert! Made with layers of deliciously soft chocolate crepes, with a creamy but light salted caramel diplomat cream in between. No baking required.
Chocolate crepe cake with salted caramel is simple to make and absolutely stunning!

Crepe cakes are an impressive way to conjure up a spectacular dessert without turning on the oven. When my old oven finally bit the bullet recently, I thought it was a sign from the baking gods to share my recipe for this decadent and delicious crepe cake!
Components of this chocolate crepe cake
This chocolate crepe cake has several components (but overall, the recipe is easy),
- Chocolate crepes
- Salted caramel diplomat cream
- Chocolate ganache (to cover the cake)
- Salted caramel sauce (to pour on top or serve on the side – this is optional).

Making the chocolate crepes
I made this salted caramel chocolate crepe cake with 16 layers of crepes. The crepes were made in a 10 inch pan.
The chocolate crepes were made using my chocolate crepe recipe. I made a double batch because I wasn’t sure how many crepes I would end up using for the final cake, but 1 ½ batches is more than enough for this cake. One and a half batches of that linked recipe will make about 18 – 20 crepes.
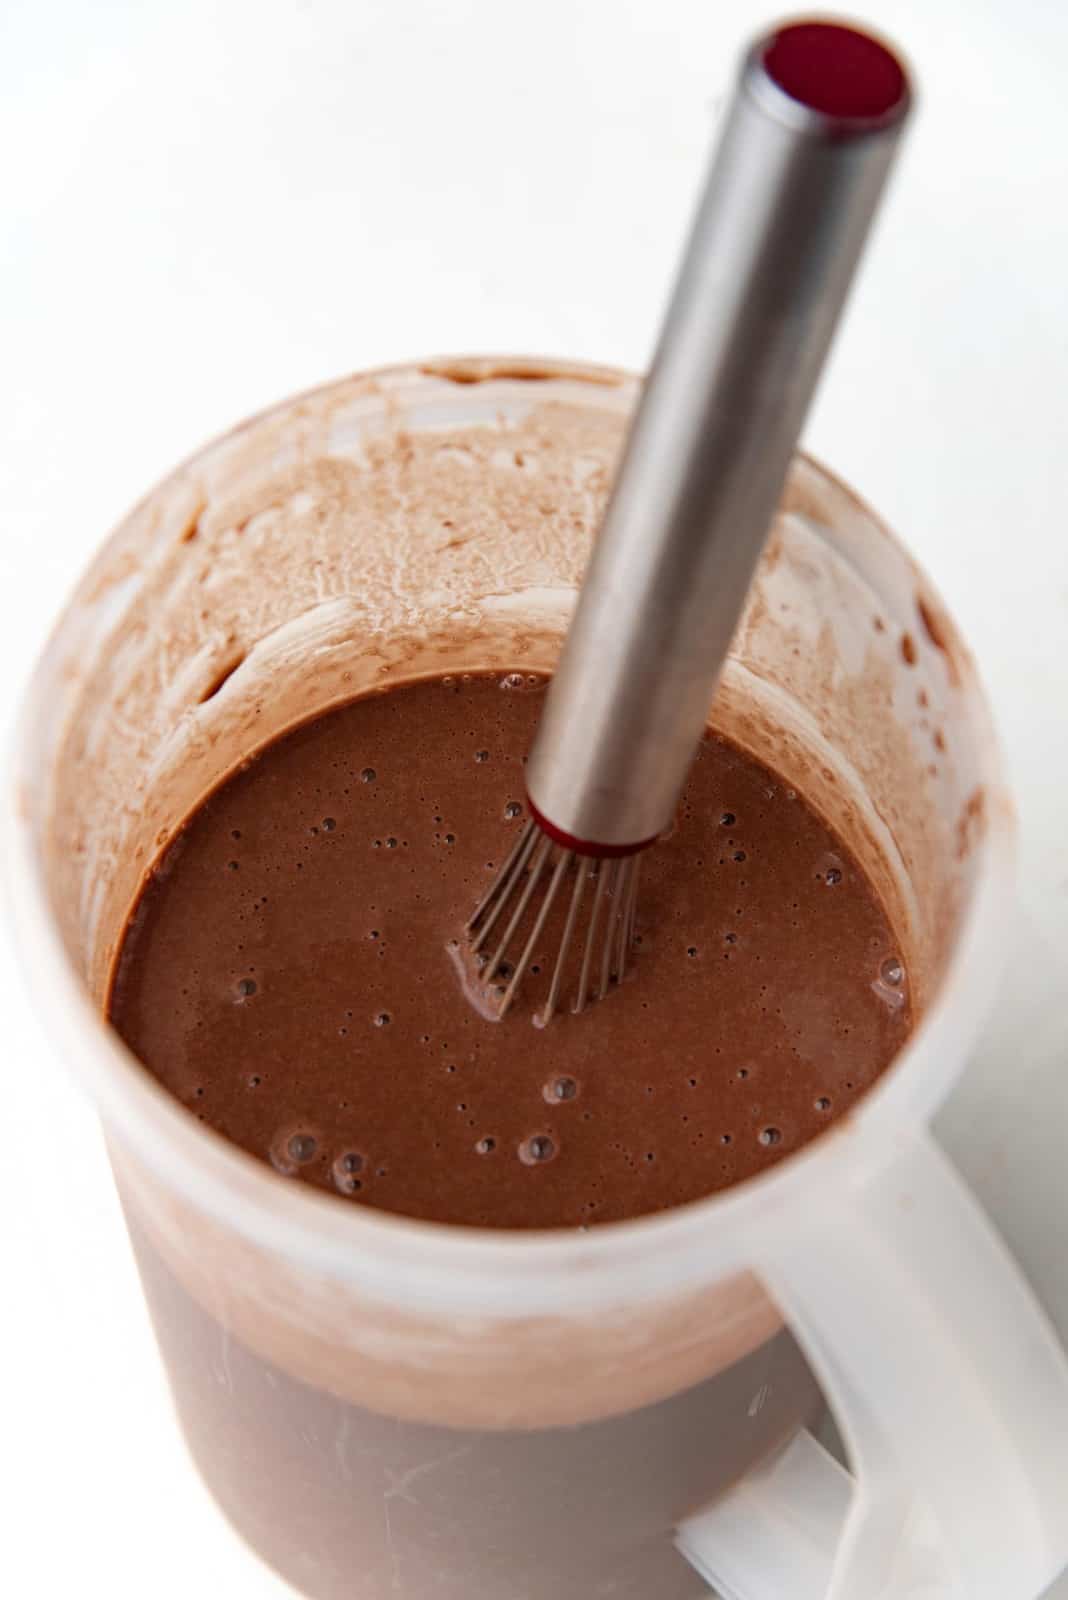
Since I was making a large amount of crepe batter, I made it in a jug, using a stick blender. After a 20 – 30 minute rest time, the crepes are cooked. All the tips and tricks on how to make perfect crepes can be found in my classic French crepes post.
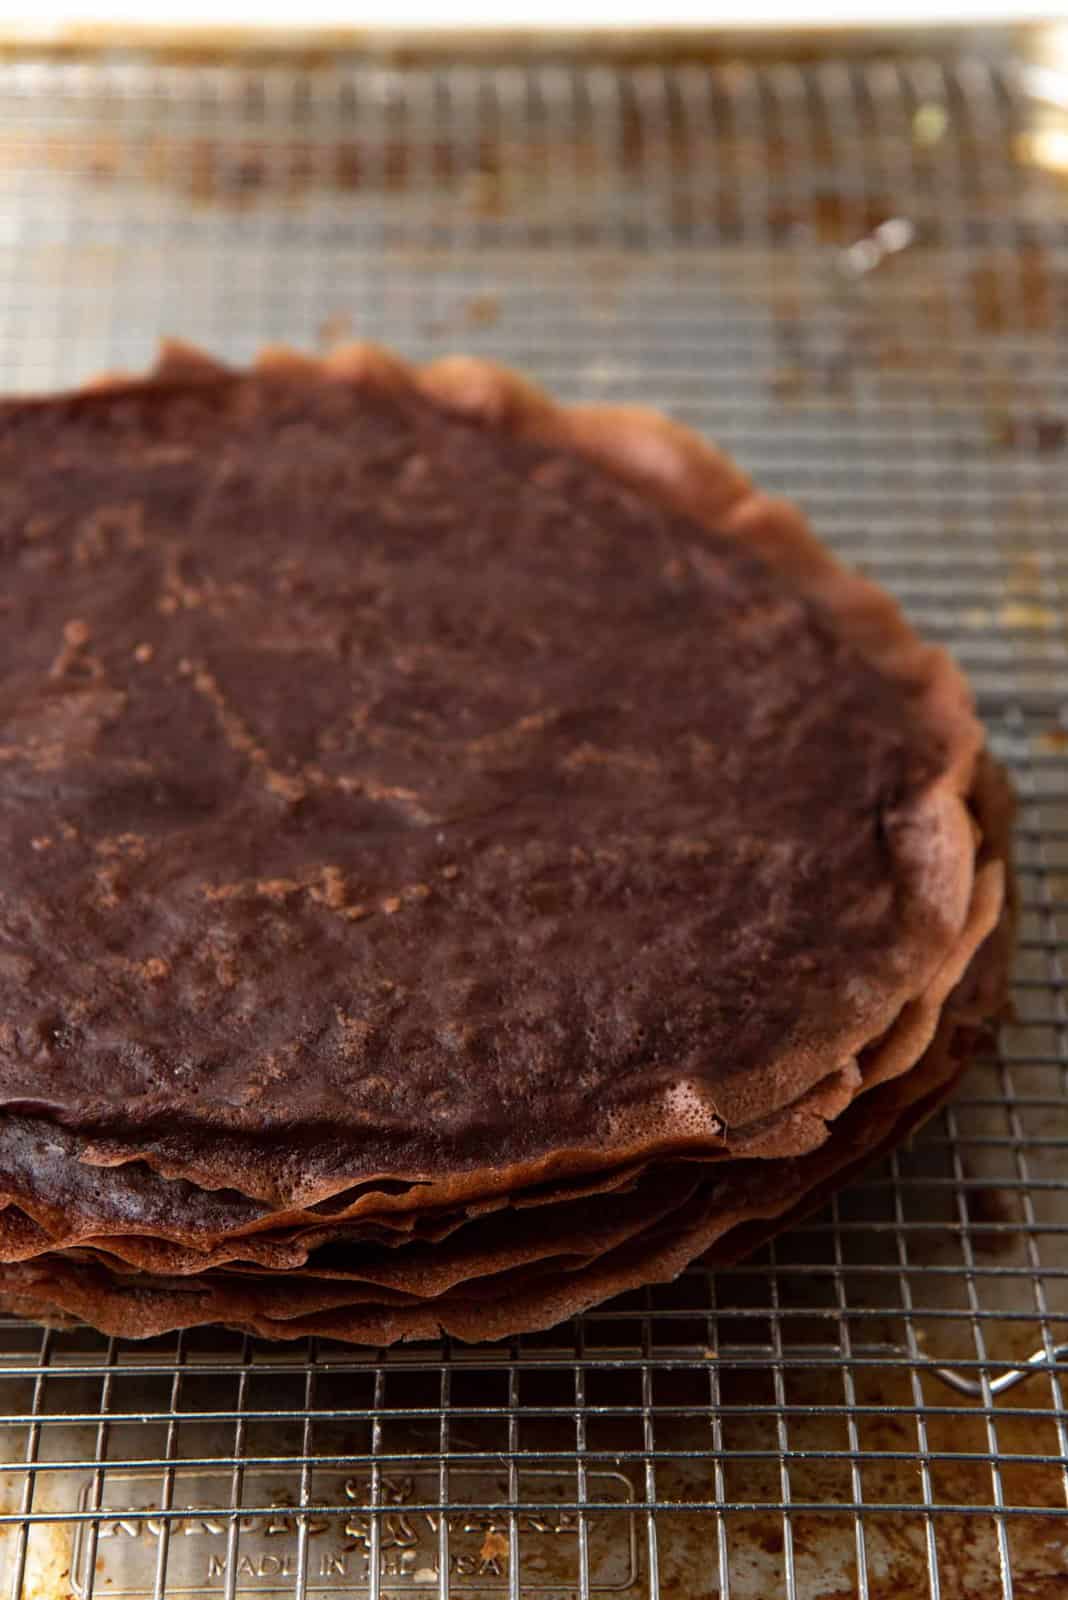
Stack the crepes on top of each other until you get the desired height for your crepe cake.

Why does my crepe cake sag at the edges?
Some crepe cakes have edges that sag. This happens when the edges of the crepes come out thinner than the middle, AND the filling isn’t spread evenly all the way to the edges. Plus, it’s hard to have an even layer of filling with thinner, lacy crepe edges anyway.
To overcome this issue, I trim all of my crepes into 8 inch circles. This gets rid of the lacy edges, keeping the crepes evenly thick. Then evenly spreading the filling to the edges is easier too. This chocolate crepe cake with salted caramel filling won’t sag at the edges when made this way.
This is obviously an optional step, but it does make the crepe cake look more neat and impressive.
How to trim the edges of the crepes
I use my 8 inch tart ring to trim the edges. However, you can simply use an 8 inch plate and use it as a guide to trim the edges with a sharp knife too.

Salted caramel diplomat cream filling
A diplomat cream is a thick custard, lightened with whipped cream. This mixture is also stabilized with a little gelatin. The gelatin can be added to the pastry cream or the whipped cream.
The filling recipe I use for this chocolate crepe cake is from my salted caramel choux au craquelin recipe.
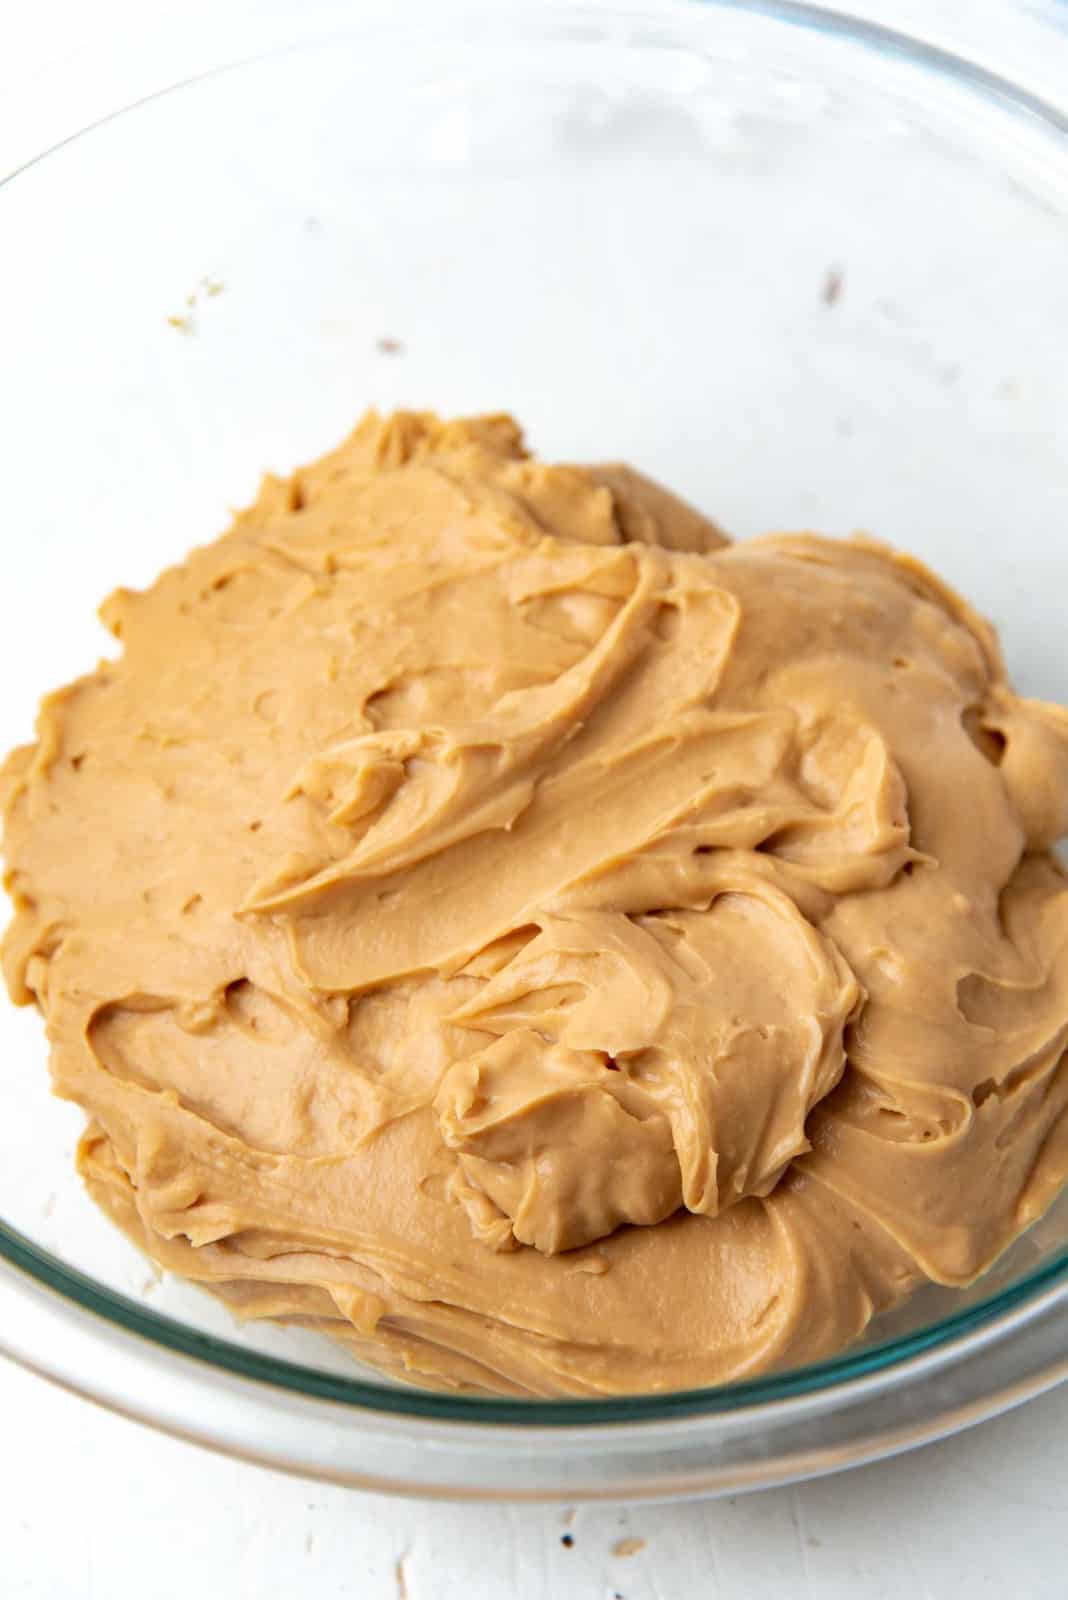
First, a caramel base is made by heating the sugar until you have a deep amber colored caramel. The salted caramel custard is made with this caramelized sugar.
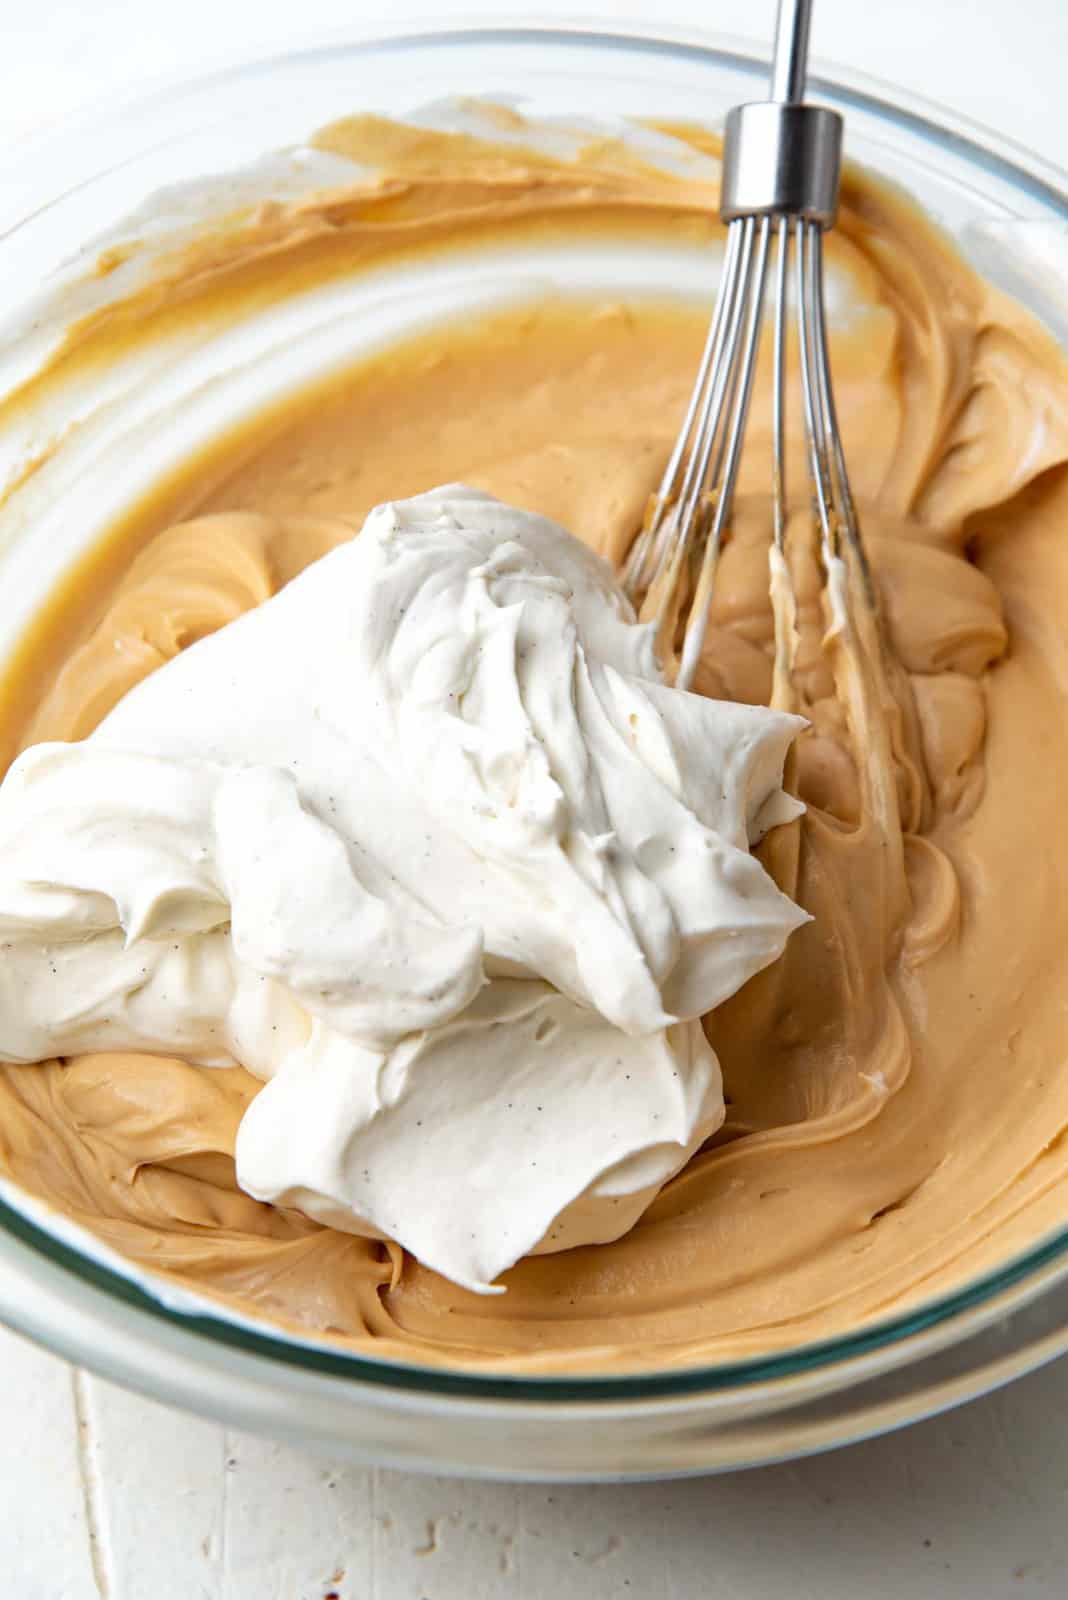
The custard is cooked until thickened, and then cooled down. Finally, the custard is gently mixed with whipped cream to make a creamy, rich, yet light salted caramel diplomat cream.
This salted caramel diplomat cream will be used as the filling for your chocolate crepe cake.


Chocolate ganache coating
The chocolate ganache is very easy.
Steaming hot (not boiling) cream is poured over the chocolate and then whisked until all the chocolate is melted. Now the chocolate ganache is ready.
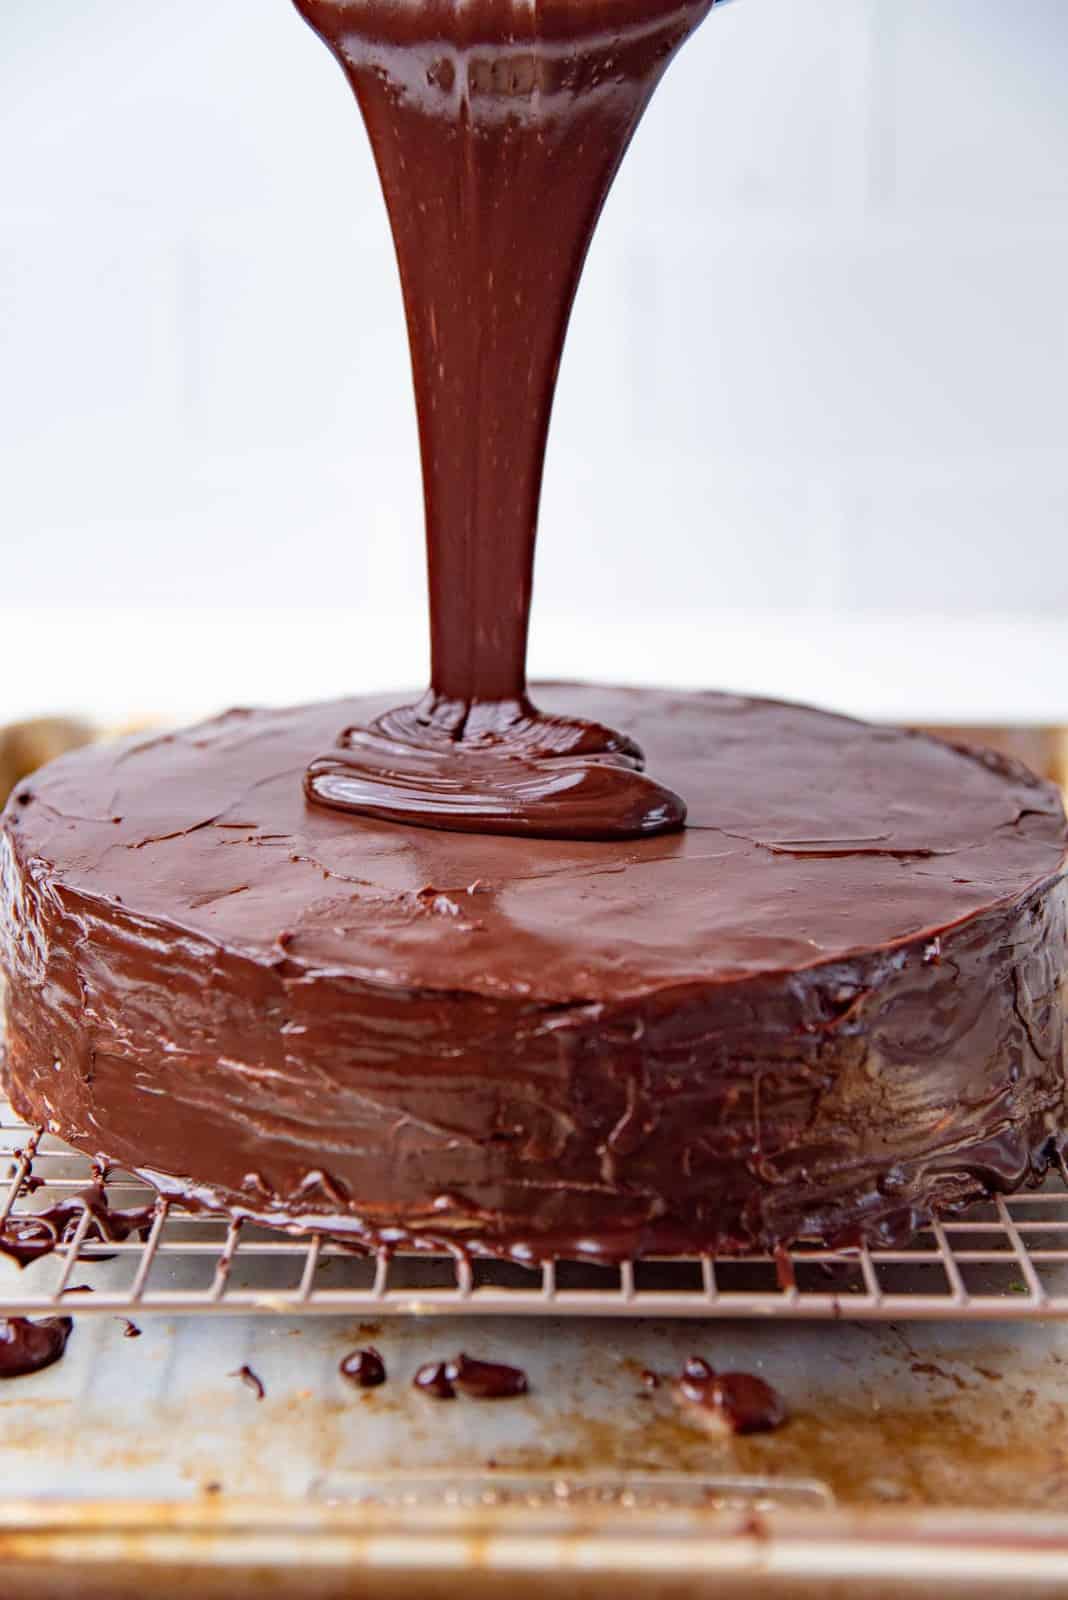
Whiled still warm, it can be poured over the chilled crepe cake. This is because warm ganache flows better.
However, I also like to wait until the remaining chocolate ganache is cooler. Cooled ganache is thicker and therefore more spreadable, so I can spread a nice layer of it over the crepe cake.
This also allows me to create a raised edge at the surface of the cake, where I can fill it with salted caramel. This is an optional step of course.


Salted caramel sauce topping
The salted caramel sauce I use as the topping for this chocolate crepe cake is from my homemade salted caramel sauce recipe.
If the salted caramel sauce gets too thick, I simply add a little bit of water to get it to the consistency that I like. The caramel sauce needs to be thick, but should still flow well once cooled down to room temperature.
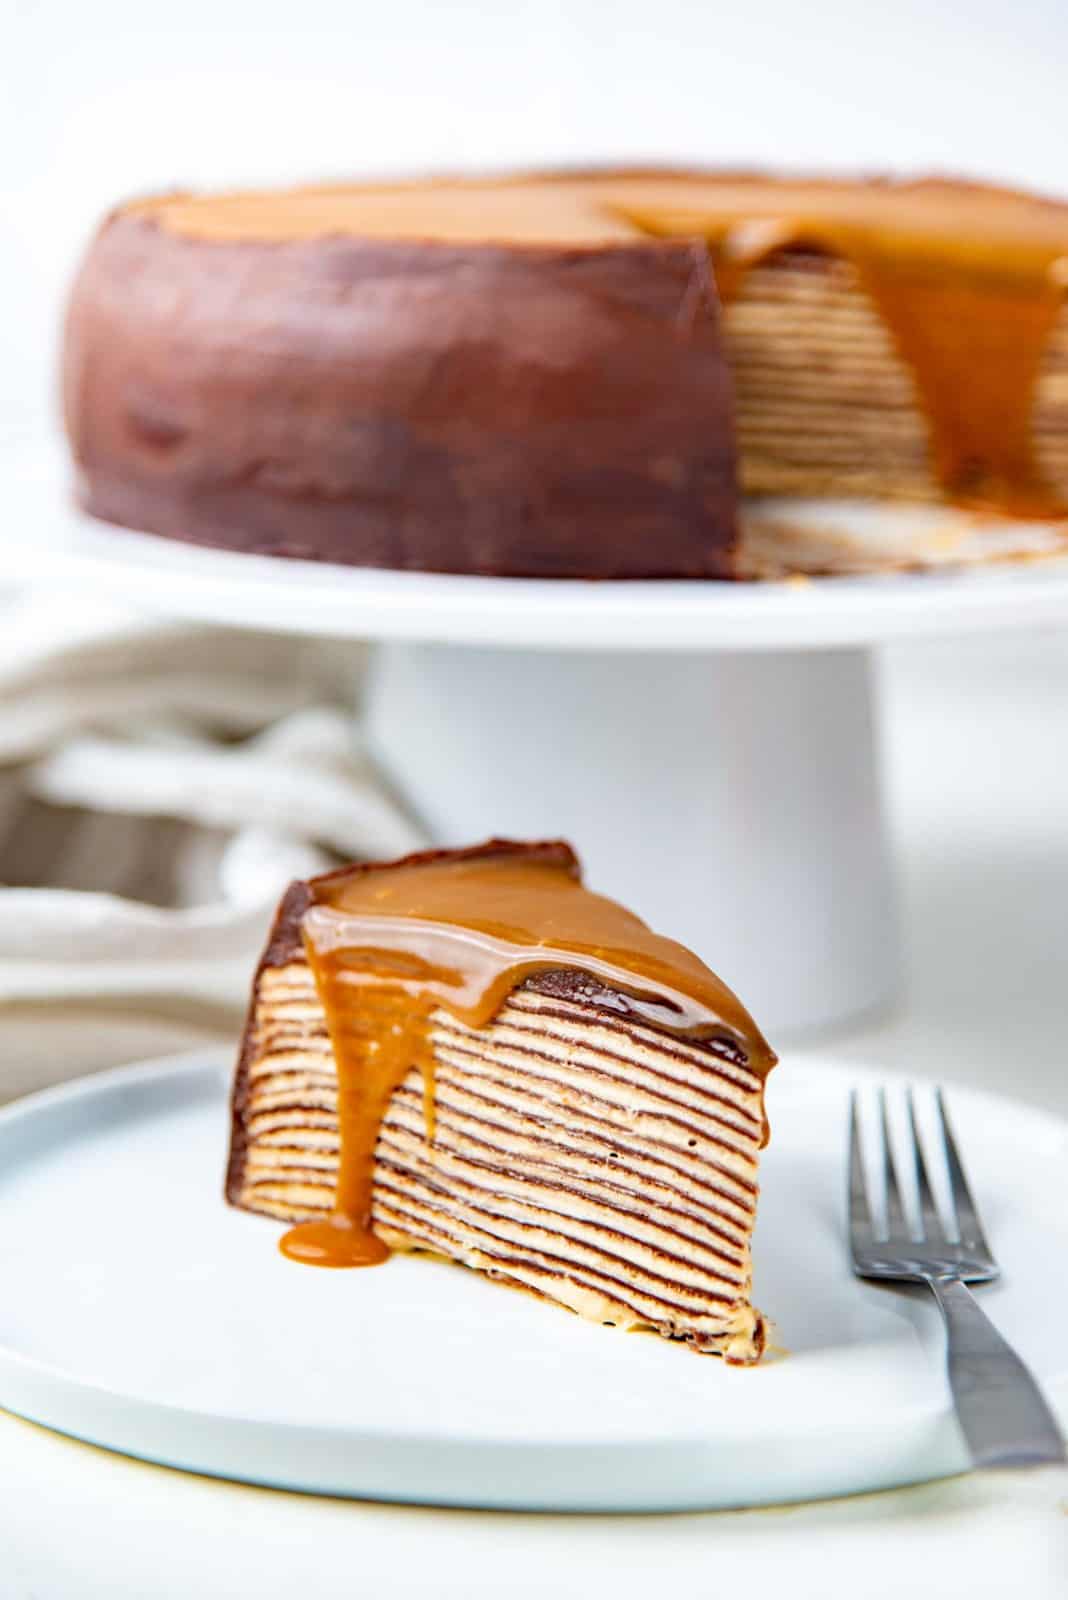
This way the salted caramel sauce will cascade down your slice of chocolate crepe cake when it’s cut into.
How to assemble the salted caramel chocolate crepe cake
When you start to assemble the crepe cake, first make sure the crepes are similar in size. I do like to trim the edges as described above, but you can skip this step if you like.
I place a parchment paper underneath the first crepe, so that it’s easy to transfer the crepe cake whenever needed.
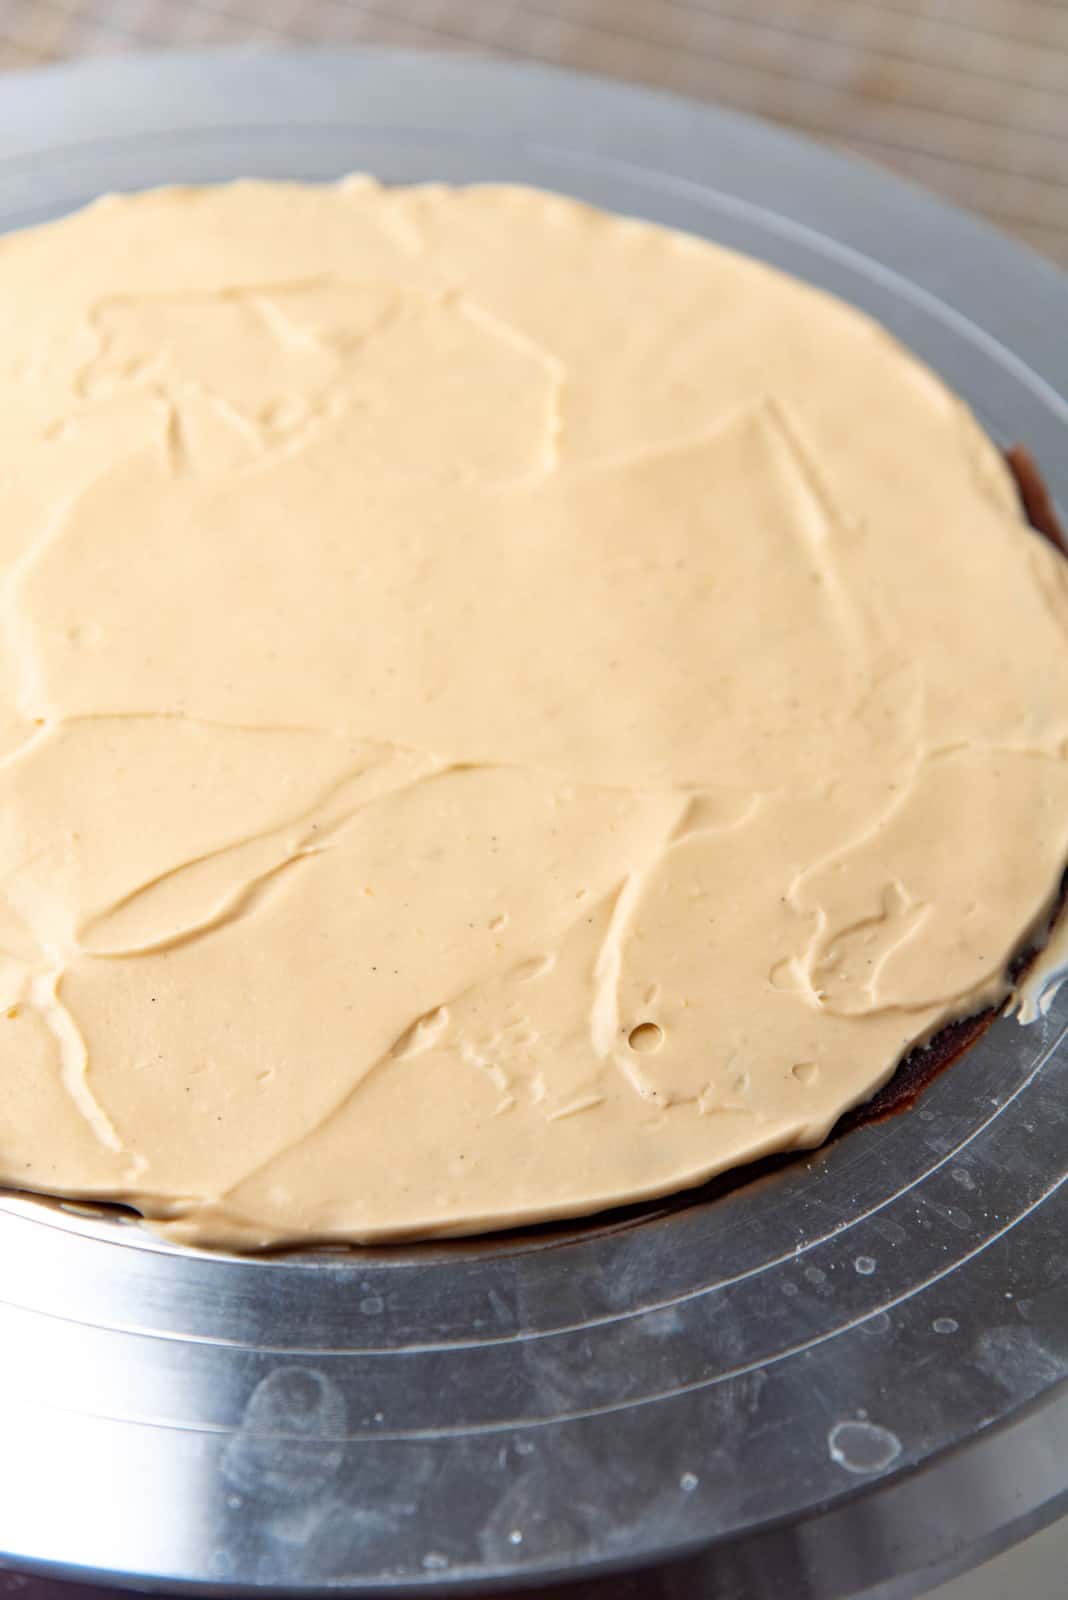
Place the first crepe on the parchment paper. Spread a thin layer of the salted caramel diplomat cream. Top with another chocolate crepe, followed by another layer of salted caramel diplomat cream. Repeat until all of the diplomat cream is used up, and you have one last crepe on top.
Once the chocolate crepe cake is assembled, allow the cake to chill in the fridge for a few hours. This will make the cake more stable for glazing and covering with chocolate ganache.


Coating the crepe cake with chocolate ganache
Once the crepe cake is chilled, warm (not hot) chocolate ganache can be poured on top. Make sure to transfer the crepe cake onto a wire rack before you do this, so that the excess chocolate can drip down through the wire rack.
If the chocolate ganache is too hot it could melt the salted caramel filling in the crepe cake.
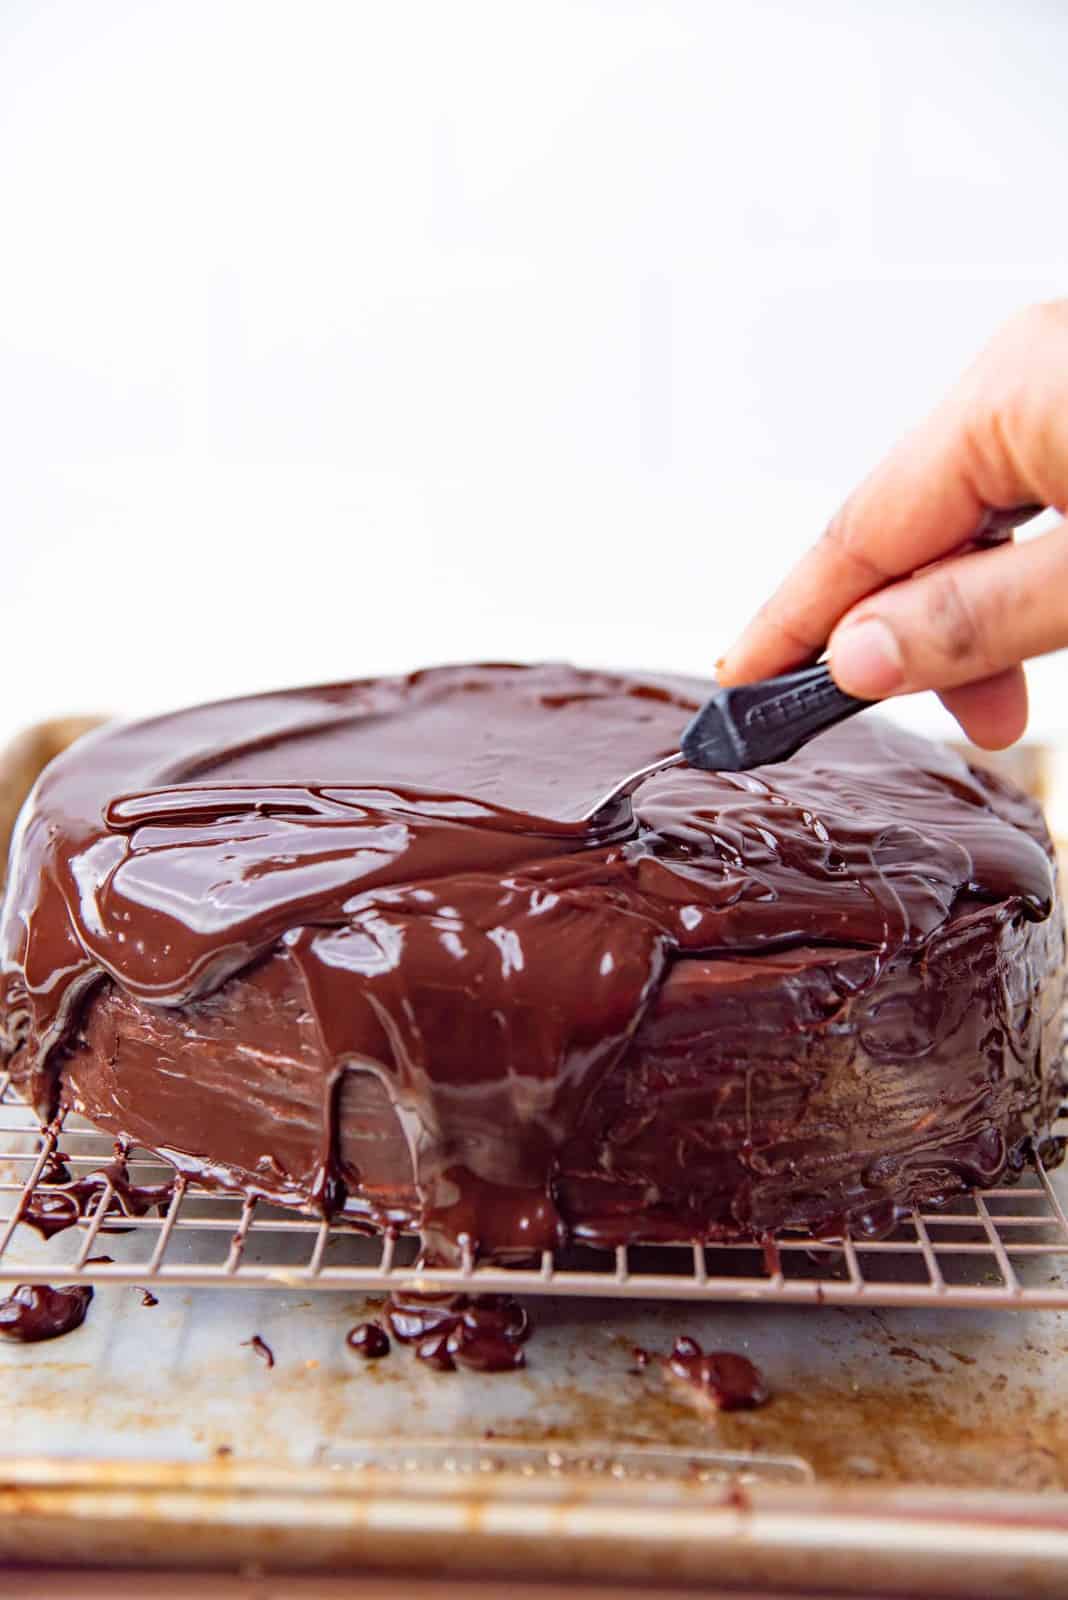
Spread the chocolate with an offset spatula so that the ganache is only a thin, even layer over the crepe cake. After the chocolate layer sets, it’s ready to be served as is, or you can jazz up the chocolate crepe cake with salted caramel sauce as well.


OPTIONAL – After the chocolate has set, you can spread another layer on the sides of the crepe cake, which will create a “dam” with the raised edge on the surface of the crepe cake.
Finally, pour the cooled down salted caramel sauce on top. Pour only enough to fill the top of the crepe cake. The chocolate ganache “dam” will hold the salted caramel in place until you cut into it.
Keep the crepe cake chilled until you’re ready to serve it.


Tips for making the perfect crepe cake
- Allow the crepe batter to rest. This ensures you get soft crepes.
- Work with crepes that are at room temperature. Warmer crepes are too delicate, so wait till they have reached room temperature before assembling the crepe cake.
- Trim the edges of the crepes. This is optional, but this gives the crepes an even thickness, which will result in an even, neat chocolate crepe cake.
- Place a cake board or parchment paper circle under the crepe cake so that it’s easy to move the cake when you need to.
- Use a cookie scoop or ice cream scoop to add the same amount of salted caramel filling between each crepe layer.
- Use a small offset spatula to spread the salted caramel filling on the crepes.
- Chill the crepe cake to make it more sturdy before glazing it.
- Make sure the chocolate ganache is not hot before pouring it over the crepe cake.
- Chill the salted caramel chocolate crepe cake before serving. It’ll be easier then to cut it into slices because the ganache will hold the shape of the cake better.
- Slice into the cake using a warm but dry knife for clean, smooth edges on every slice.

Tips to make this chocolate crepe cake recipe easier
INTERMEDIATE VERSION – What you see in the pictures in this post is the intermediate version. The extra chocolate ganache is used to create a “well” or a “dam” on the surface of the cake to be filled with salted caramel sauce. I also trim the edges of the crepes to make the final cake look neater.
EASY VERSION – You can definitely cut corners to make this cake easier.
- Skip the step where you trim the edges of the crepes.
- Just pour the ganache on top to create a glaze, or to simply cover just the top of the cake.
- Skip the extra chocolate layer to create the “dam” on top.
- Skip the salted caramel sauce on top.
- Instead, you can serve the salted caramel sauce on the side if you prefer.

Why I love this recipe
This cake has the perfect balance of flavors with the sweet and salty caramel filling, and the semisweet chocolate. If you want the chocolate flavor to be even deeper and less sweet, use bittersweet chocolate instead.
I especially love how the salted caramel sauce drips down when I cut the cake into slices!
This crepe cake is a riot of flavors and super addictive! I love the thin layers of crepes, with the thin layers of the salted caramel filling in between. You can add more or less of the filling to your liking as well. It’s the perfect showstopper dessert for Valentine’s Day and other special occasions!
Recipe

Chocolate Crepe Cake with Salted Caramel Filling
US based cup, teaspoon, tablespoon measurements. Weight measurements are recommended for accurate results whenever available.
Common Measurement ConversionsIngredients:
Chocolate crepes (makes about 18 – 20 crepes)
- 540 ml milk 2 ¼ cups (I prefer whole milk or 2 % milk)
- 5 large eggs
- 71 g butter 5 tbsp (melted)
- 1 tbsp vanilla
- 75 g white sugar or brown sugar ¼ cup + 2 tbsp
- ½ tsp sea salt
- 150 g flour 2 ⅛ cups (measured by spoon and level method)
- 60 g cocoa powder ¼ cup + 1 ½ tbsp (I use dutch cocoa powder)
Salted caramel diplomat cream (make the custard the day before you assemble the cake)
- 200 g white sugar 1 cup
- ½ tsp salt
- 240 mL heavy cream 1 cup (35% fat)
- 360 mL milk 1 ½ cups
- 3 egg yolks large
- 1 egg large
- 45 g cornstarch 5 tbsp
- 30 g unsalted butter 2 tbsp
- 1 tbsp vanilla extract
- 1 tsp gelatin powder
- 2 tbsp water at room temperature
- 240 mL heavy cream chilled 1 cup (35% fat)
- 57 g confectioner’s sugar ½ cup
Chocolate ganache (you may not use all of the chocolate ganache)
- 400 g semisweet chocolate
- 400 g heavy cream 1 ⅔ cup (35% fat)
- ¼ tsp salt
- 43 g unsalted butter 3 tbsp (softened)
Salted caramel sauce (you may not use all of the salted caramel sauce)
- 300 g white sugar 1 ½ cups
- 80 mL water ⅓ cup
- 240 mL heavy cream 1 cup (35% fat, at room temperature or warm)
- ½ tsp sea salt more if needed
- 2 tsp vanilla extract
- 172 g unsalted butter 1 ½ sticks
Instructions:
Chocolate crepes
- Make the chocolate crepe batter according to the instructions in my chocolate crepes recipe post. The crepes should be cooked in a 10 inch non-stick pan.540 ml milk, 5 large eggs, 71 g butter, 1 tbsp vanilla, 75 g white sugar or brown sugar, ½ tsp sea salt, 150 g flour, 60 g cocoa powder
- Stack the cooked crepes on a plate or wire rack until needed.
Salted caramel diplomat cream (make this on the day before you assemble the cake, see recipe notes for suggested timeline)
Salted caramel pastry cream (custard)
- MAKING THE CARAMEL – Sprinkle the sugar over the surface of a stainless steel pan or non-stick pan. The sugar should be in a thin layer in the pan, so that it melts faster and is easier to caramelize.200 g white sugar
- Make sure the pan and all the utensils that you're using have no fat or water.
- Heat over medium heat, and stir the sugar as it melts, with a heat-proof spatula. The sugar will stick to the spatula, so use a non-stick silicone spatula if possible.
- Continue heating the sugar, while stirring frequently, until the sugar turns amber in color. Do NOT touch the caramel or get it on your skin as it is very hot! When the sugar starts to turn yellow, it will change color very quickly, so take care not to let the caramel burn.
- When it turns amber colored, add the warm cream into the pan. The caramel will sputter, so PLEASE STAND BACK as you add the cream to avoid any splash back. Stir the caramel soon after adding the cream to dissolve the sugar. This will take a few minutes. The caramel will form clumps when you add the cream. This is OK, just stir to dissolve.240 mL heavy cream
- When the caramel has mostly dissolved in the cream, add the milk, and salt into the pan. Heat and keep stirring the milk frequently to completely dissolve the caramel. When it’s nearly boiling or just starting to simmer, remove from the heat. The caramel flavored milk base is now ready.½ tsp salt, 360 mL milk
- Next, place the eggs and cornstarch in a small jug or bowl, and whisk until you have a smooth mixture.3 egg yolks, 1 egg, 45 g cornstarch
- Temper the egg mixture by adding a little of the hot caramel milk in a slow and steady stream to the egg mixture, while whisking the eggs constantly. Add enough caramel milk to warm the mixture, and then pour the egg-milk mixture back into the pan with the rest of the caramel milk.
- Return the pot with the egg-caramel milk custard mixture back to the stove over medium heat. Heat the custard while whisking/stirring frequently, until it starts to thicken. Stir and whisk well to make sure the eggs don’t curdle and stick to the bottom of the pan as the custard heats and thickens. I like to switch between a whisk and a spatula to make sure the custard stays smooth while thickening.
- In between stirring/whisking, check to see if the custard is starting to come to a boil. Adjust the heat if the custard is sticking to the bottom of the pot or burning.
- Cook the custard until it comes to a boil; i.e. bubbles start breaking through the surface of the custard. Allow the custard to cook for a further minute after it comes to a boil, while whisking constantly.
- Remove the custard from the heat. If there are clumps, pass the custard through a fine sieve to remove them.
- Add the butter to the custard and whisk it in until the butter is incorporated. Pour the custard into a bowl, and immediately cover the surface with plastic wrap, making sure the plastic wrap is touching the whole surface of the custard (to prevent a skin from forming on top).30 g unsalted butter
- Allow the custard to cool down to room temperature, then store it in the fridge for a few hours or overnight until chilled, and it's ready to be mixed with the cream.
- The custard can also be chilled quickly by spreading it out in a thin layer on a baking pan, and then cover with plastic wrap as mentioned above (touching the whole surface). It can then be refrigerated OR placed in the freezer for about 30 minutes (but make sure not to freeze it).
Salted caramel diplomat cream (make this the following day)
- Place the water in a small microwave-proof bowl and sprinkle the gelatin over the surface of the water. Allow the gelatin to bloom for about 10 minutes.1 tsp gelatin powder, 2 tbsp water at room temperature
- After the gelatin has bloomed, microwave the gelatin for about 10 – 20 seconds to dissolve it. Add about 1 tbsp of the chilled cream while stirring the gelatin, to temper the heat of the gelatin mix.
- Place the chilled cream in a clean bowl and add the confectioner’s sugar and vanilla extract. Start whisking the cream with a hand mixer at medium-high speed.240 mL heavy cream chilled, 57 g confectioner’s sugar, 1 tbsp vanilla extract
- Quickly pour in the dissolved gelatin while whisking the cream to make sure the gelatin gets mixed in well. To avoid clumping, do not pour the gelatin mix ON the whisk attachments, and also avoid adding it too far from the whisk. The gelatin mixes in well and quickly when it's introduced to the spot where the cream is moving the fastest.
- Continue whisking until the cream forms soft peaks. Set aside for a few minutes until you get the cooled pastry cream ready.
- Whisk the set salted caramel custard with a hand whisk until smooth. Add about ⅓ of the stabilized whipped cream and gently whisk it into the pastry cream. Add the rest of the cream (or as much as you like), into the custard and fold it in. The more cream you add, the texture will be lighter, and the salted caramel flavor will be more mellow. I prefer to add about ¾ of the whipped cream.
- Cover the bowl with plastic wrap and refrigerate until you’re ready to assemble the crepe cake.
Chocolate ganache (make this once the crepe cake is chilled)
- Place the chocolate in a bowl. If the chocolate is large, chop into smaller pieces.400 g semisweet chocolate
- Add the vanilla and salt into the chocolate.2 tsp vanilla extract, ¼ tsp salt
- In a small saucepan, place the cream and heat until the cream starts to simmer. It should not come to a boil.400 g heavy cream
- Pour the hot cream into the bowl with the chopped chocolate. Cover the bowl with a plate or plastic wrap and let it sit for about 30 seconds.
- Whisk the cream and chocolate mixture until you have a smooth chocolate ganache.
- Add the softened butter and whisk it in until melted and mixed in well.43 g unsalted butter
- Set the ganache aside and let it cool down slightly. Whisk occasionally to prevent a skin from forming on top.
Salted caramel sauce
- Make the sauce according to my salted caramel sauce recipe. If the salted caramel sauce is too thick, add a little water to get it to the consistency you like.300 g white sugar , 80 mL water, 240 mL heavy cream , ½ tsp sea salt, 172 g unsalted butter
Assembling the chocolate crepe cake with salted caramel filling
- OPTIONAL – Using an 8 inch plate or an 8 inch tart ring, cut each of the crepes into neat 8 inch circles. This will remove the thin lacy edges, and make sure each crepe is the same size, and your final cake is more neat.
- Place a parchment paper or cardboard cake round (that is the size of the crepes), on a cake stand or plate. Make sure the cake stand or plate can fit inside your fridge as well, since you will be refrigerating the cake on this plate later on.
- The first crepe will go directly on top of this parchment paper or cake round.
- Next, take about ¼ – ⅓ cup of the salted caramel pastry cream and spread it over the crepe in a very thin layer. The thickness should be similar to the thickness of the crepe.
- Carefully place another crepe over of the filling, making sure to center it properly.
- Repeat with the filling, and then another crepe, until all the filling is used up. End with one last layer of crepe on top. I used 16 crepes here, but you can use anywhere between 14 – 18 crepes, depending on how much filling you use between the layers.
- Make sure the crepe cake stack is not leaning to one side, and stack the crepes neatly as you go.
- When the chocolate crepes and filling have been layered, carefully place the crepe cake in the fridge for a few hours or overnight, until completely set.
After the cake is set
- Now the cake should be set and firm, and can easily be lifted off the plate onto a wire rack. Place the wire rack over a clean baking tray/pan to catch any excess chocolate ganache.
- OPTIONAL – Apply a thin “crumb coat” of chocolate ganache over the crepe cake, especially on the sides so that the glaze will come out smoother. Let it set for a few minutes.
- Pour the cooled (but slightly warm), but still very liquid chocolate ganache over the surface of the crepe cake. Use an offset spatula to spread the chocolate over the surface to cover the cake completely and smoothly on the top and the sides. Transfer the crepe cake into the fridge to set.
- When the ganache has set, the chocolate crepe cake is ready to be served with just that simple glaze. HOWEVER, if you'd like to have the salted caramel sauce on top, you will need to add another layer of ganache on top to create a "well" on the surface of the cake.
- Take the leftover chocolate ganache and let it cool until spreadable. Spread enough ganache on the sides of the crepe cake, and smooth it out using a spatula. Create a "well" with a raised edge on the surface of the crepe cake with the ganache.
- Since the crepe cake is cold, the chocolate ganache should set very quickly.
- Pour the salted caramel sauce on the top. The “well” you created on top will keep the salted caramel sauce in place.
- Refrigerate until you're ready to serve.
- Cut slices using a warm, dry, and clean knife.
Recipe Notes
Day one
Make the salted caramel custard and let it chill overnight. This can be made on day two instead as well, and allowed to cool quickly in the freezer by spreading it out in a thin layer on a baking pan. See recipe instructions on how to do this.Day two (busiest day)
Make the crepes. Make the salted caramel diplomat cream (while the cooked crepes cool down). Assemble the crepe cake layers and let the cake chill overnight. Make the salted caramel sauce (if using).Day three
Make the chocolate ganache. When the ganache has cooled down (but still slightly warm), coat the crepe cake. Pour the salted caramel sauce on top. Refrigerate for a few hours before serving.Nutrition Information:
“This website provides approximate nutrition information for convenience and as a courtesy only. Nutrition data is gathered primarily from the USDA Food Composition Database, whenever available, or otherwise other online calculators.”


Leave a Reply