


We got heaps of strawberries recently. So I decided to turn some of them into this amazing strawberry galette! This extra jammy, sweet and delicious easy strawberry galette, bursting with strawberry goodness is one of my favorite Summer recipes!
If you like strawberry tart, strawberry shortcake, strawberry shortcake ice cream, peach galette etc., then you’ll love this delicious strawberry galette too!

Why this recipe works
- The crust! Incredibly buttery and delicious galette crust.
- The crust is also super easy to make and very forgiving.
- The strawberry filling! Simple and easy to assemble.
- Since it’s a galette, even cracks and leaks just add to the charm of a rustic pie!
- With an extra layer of strawberry jam, this recipe makes for a jammy, sweet galette.
- Easy recipe, perfect for novice bakers who want to try pies but want to start with something easier.

Making strawberry galette with kids
This strawberry galette is perfect to eat with a creamy scoop of vanilla ice cream (or any of my other ice cream recipes you’ll enjoy!). It’s also a very forgiving recipe, so you can make this with your kids too!
That’s a two way win if you want to get your kids involved, while they are stuck at home these days.
The pie crust is mostly butter and flour, and the high fat content will protect the gluten from being overworked too quickly. So you can get your kids to help with mixing the dough, and bring it together. You can check out my pie crust recipe here (or even make a uniquely delicious graham flour pie crust).
They can even help with rolling out the dough because you can make this galette as a circle OR a rectangle.
They can help remove the stems from the strawberries, and mix the sugar and other additions for the filling too. And then let them spread the jam on the dough and place the strawberries on top.
Once you have folded over the dough edges (while making sure not to crack the dough!), the kids can help brush the tops with egg wash and sprinkle sugar on top too.
I’m sure they’ll love being a part of the process! Although you’ll have to deal with a messier than usual kitchen.

Making the pie crust
This crust is a buttery, flaky pie crust recipe made with 1:1 flour and butter. Store-bought pie crust (or shortcrust pastry or even sweet shortcrust pastry) is a great alternative for those who want an easier and quicker option.
Due to the high ratio of butter to flour, the fat prevents the gluten from developing too fast. Keeping the crust flaky and light.
Whisk the dry ingredients together until well-mixed, and add the cubed, cold butter. Using your fingers (or a pastry cutter), rub and cut the butter into the flour. Gently toss or fold the flour, sugar and salt mixture with the butter, to make sure the butter pieces are completely coated. You can also do this in the food processor if it’s easier.
The smaller the pieces of butter, the more “crumbly” the pie crust, and the less water you will need to form a dough. If you keep butter pieces that are larger (1 cm pieces), the pie crust will be flakier, and you will need a touch more water to form a dough.
I prefer a happy medium of pea-sized butter being the largest pieces of butter in the flour mix.


Next, sprinkle in just a touch of ice water to bring the dough together. For me, this is only 2 tbsp of ice water. When you squeeze the dough, it should come together, but not be too wet. If you think you added too much water, just add a little extra flour, and it will be incorporated in the next step.
Turn the dough out onto a work surface and use your hands to bring it in to form a dish of dough. While the dough can handle a little extra squeezing to bring it together, avoid kneading the dough.
Wrap and refrigerate the dough for about an hour until chilled and rested. You can even do this a day ahead and let the dough rest in the fridge overnight.


Making the strawberry filling
It goes without saying that the sweetest, ripest strawberries would be the best for this strawberry galette.
How to pick the best strawberries at the supermarket
Look for strawberries that are bright red. No blemishes, and not squashed. And importantly, you should be able to smell the very distinct, sweet strawberry fragrance (no smell, no good).
When you cut into these, they should be red/pink throughout, and not white in color.

However, if all you have is off season strawberries, or overripe strawberries, that’s OK too. You can add a little extra sugar to the strawberries to compensate for the lack of juicy, fruity sweetness. And since this recipe will be using strawberry jam (or any berry jam), the added sweetness works in your favor.
Plus, overripe strawberries are also perfect for this recipe because the strawberries are going to be roasted in the oven anyway. In fact, if you do have sweet overripe strawberries, use those specifically for this recipe. I love using my roasted strawberries recipe for summer desserts.
Remove the stems from the strawberries and cut them in half. Place them in a medium bowl and sprinkle in the sugar and cornstarch.
You could also add lemon rind or black pepper or vanilla to add more flavor to the strawberries Toss the strawberries to mix.
Let it sit for at least 15 minutes, or at most 30 minutes, while you get the pie crust rolled out.


How to make strawberry galette
The pie crust will roll out better, but still be pliable, when it’s chilled. Place the dough on a floured surface, and lightly flour the top of the dough as well.
Roll the dough out to about a 1/4 inch thickness. You can either make it into a rectangle, square or a circle. Whichever is easiest for you. I like to trim the edges of the dough to get smoother edges, but this is optional.
To make it easy to move the galette later, transfer the rolled out dough onto a parchment paper lined baking tray now. Then you can easily transfer the galette to the oven later on.
Spread a thin layer of jam all over the pie crust dough, leaving a 1.5 – 2 inch border along the edges.


Place the strawberries in the middle of the crust, where there is jam as well, but pile them up towards the middle.
Fold the edges of the galette, and if needed, use a little water to seal the folded over corners of the crust.
What if the crust tears?
If the pie crust tears or cracks, simply dip you finger in some water, and press your finger over the crack in the dough. This can help seal the crack. You can also use any extra pie crust to seal any cracks.
Either way, this is meant to look like a rustic pie, so it doesn’t have to be squeaky clean and neat.


Baking the strawberry galette
If your pie crust has softened while working with it, then return it to the freezer for about 15 minutes, or the fridge for about 30 minutes. If it’s still nice and chilled, you can go ahead and bake it right away.
Before baking, brush the crust with an egg wash. The egg wash can be an egg yolk + cream, or just 1 whole egg. As an optional step sprinkle some raw sugar over the crust.
Preheat the oven to 400°F / 205°C. Bake the the galette at 400°F for about 15 minutes. Then reduce the heat to 325°F and bake for a further 15 – 20 minutes until the crust is golden brown or even a little darker. It’s OK for some parts to be darker because the sugar is going to caramelize at the edges of the galette.

You will be tempted to cut into this free form tart immediately. That bubbling strawberry filling in the middle will be calling out to you. But DON’T!
Let it cool down. As the strawberries are baked, the juices and the jam create an incredibly jammy, intense, strawberry filling.

You may also notice that the strawberries might look a little dry. I like the top of my galette to look shiny or glossy, so I like to glaze the top.
The glaze is just a warm jam mixed with a couple of teaspoons of water. You can also go with a simple syrup, or maybe even a little melted butter.

How to serve this galette
- You can serve this galette while warm, or at room temperature.
- Enjoy it just as is – This tart is so delicious that you don’t really need anything else!
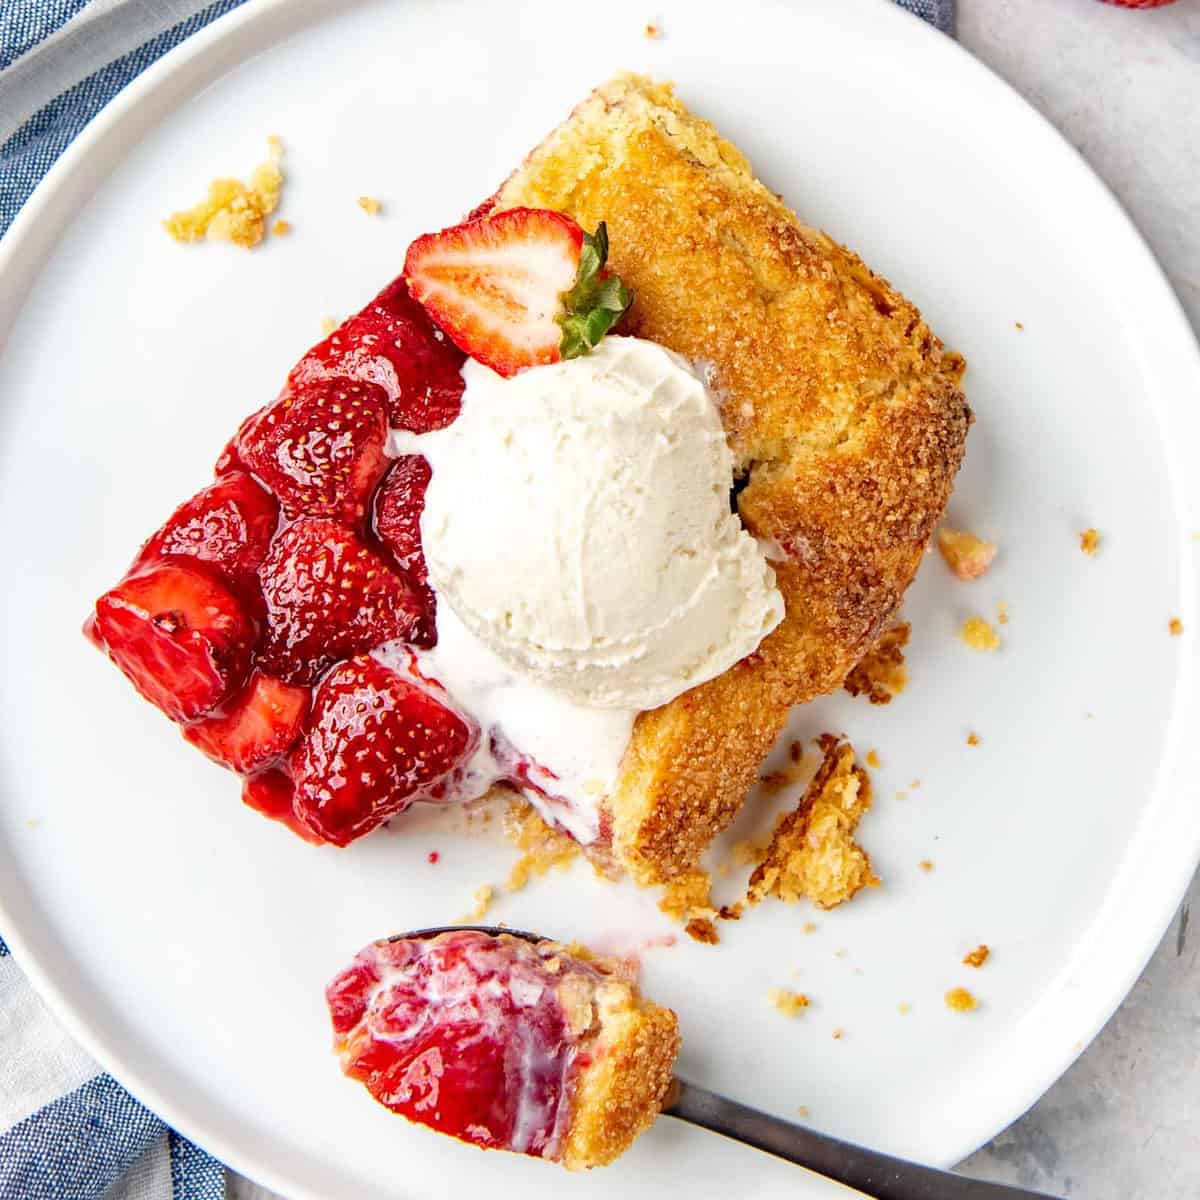
- With ice cream – A scoop of good vanilla ice cream would be the perfect accompaniment with a slice of this strawberry galette. Especially when served warm.
- Whipped cream – A light and airy whipped cream dolloped on top will contrast perfectly with the fruity, sweet strawberries.
The buttery, flaky pie crust with a sweet, fruity strawberry filling and jammy base is the perfect treat for spring and summer, and one of my favorite fruit dessert recipes!

Recipe
The Best Strawberry Galette
US based cup, teaspoon, tablespoon measurements. Weight measurements are recommended for accurate results whenever available.
Common Measurement ConversionsIngredients:
Pie crust
- 285 g AP flour 10 oz / 2 ⅓ cups, spooned and leveled
- 45 – 60 g granulated sugar 3 – 4 tbsp
- ½ tsp sea salt
- 285 g unsalted butter 10 oz / 2½ sticks, cold, and cut into cubes
- Ice water amount varies
Strawberry filling
- ½ cup strawberry or any berry jam
- 455 g fresh strawberries 1 lb, hulled and halved
- 25 g sugar 2 tbsp
- 25 g cornstarch 2 ½ tbsp
- ½ lemon zest from ½ lemon, optional
Egg wash (you can also use 1 whole egg and skip the milk)
- 1 egg yolk
- 30 mL milk or cream 2 tbsp
- Raw sugar to sprinkle on top
Instructions:
Pie crust
- Place the flour, sugar and salt in a large bowl.285 g AP flour, 45 – 60 g granulated sugar, ½ tsp sea salt
- Add the cubed, cold butter and use your fingers to cut/rub the butter into the flour. You can also use a pastry cutter, or even your food processor for this. The butter pieces should be no larger than pea-sized.285 g unsalted butter
- Drizzle ice water (or very cold water), ½ tbsp at a time, while mixing the butter and flour mix with a fork (or pulse it in the food processor). Mix enough water until you get a dough that binds together (when a fistful of the dough mix is squeezed in your hand it should bind together).Ice water
- Turn the dough out onto a parchment paper or work surface, and press the dough together to form a dough. Do not knead the dough. If too dry, drizzle a little ice water. If too wet, add more flour.
- Form the dough into a disc, and wrap it with plastic wrap. Refrigerate for about 1 hour until chilled. Can be refrigerated for up to 48 hours, but let it sit at room temperature for a bit to soften before rolling out.
Strawberry filling
- Cut the hulled (stems removed) strawberries and cut them in half. Place them in a bowl and sprinkle the sugar, cornstarch, and lemon zest over them. Toss to combine. Cover and set aside for 15 – 30 minutes.455 g fresh strawberries, 25 g sugar, 25 g cornstarch, ½ lemon zest
Assembling the tart
- Roll out the dough to about a ¼ inch thickness. It can be a circle, oval, rectangle or square shape.
- Make sure that your work surface is floured to prevent it from sticking to the countertop.
- Transfer the rolled out dough onto a parchment paper-lined half sheet pan. Trim the edges of the parchment paper if needed.
- Spread about ⅓ cup of the strawberry / raspberry jam on the surface of the pie crust. Leave a 1 ½ – 2 inch thick border along the edges.½ cup strawberry or any berry jam
- Place the strawberries in the middle of the tart, on the jam. They don't have to be arranged in any pattern, but they should be piled up more towards the center than the edges.
- Fold the edges of the dough over the strawberries. The folds don’t have to be neat, but should create an enclosed margin for the strawberries. Use a little water to seal overlapped edges together if needed.
- If the pie crust cracks, press the cracks with a damp finger to re-seal. Or use any trimmed, extra dough pieces to seal the cracks.
- Cover with plastic wrap and place in the fridge for about 15 – 30 minute for the crust to re-harden.
- Preheat the oven to 400°F/ 205°C while the galette is resting in the fridge.
- When the oven is preheated, prep the galette for baking.
- Whisk the whole egg (or the egg yolk + milk) in a little bowl. Brush the galette crust with the egg wash. Optional – sprinkle raw sugar over the egg wash brushed margins.1 egg yolk, 30 mL milk or cream, Raw sugar to sprinkle on top
- Bake the galette for about 15 minutes at 400°F/ 205°C, and then reduce the heat to 325°F / 163°C and bake for a further 15 – 20 minutes until the crust has a darker golden color, with some dark spots. The edges of the crust will be very dark in color.
- Remove the galette from the oven and brush the strawberries with a little glaze using a pastry brush (optional – recipe for glaze below). Let it sit for about 10 minutes to cool down. Slide the parchment paper onto a wire rack and let it cool down further.
- This galette can be served while warm, or at room temperature.
Glaze
- Place the remaining jam in a microwave-safe bowl and microwave for a few seconds to warm it. Mix 1 – 2 tsp of water (depending on how thick the jam is) to thin out the jam to a glaze consistency.½ cup strawberry or any berry jam
Nutrition Information:
“This website provides approximate nutrition information for convenience and as a courtesy only. Nutrition data is gathered primarily from the USDA Food Composition Database, whenever available, or otherwise other online calculators.”


Leave a Reply