

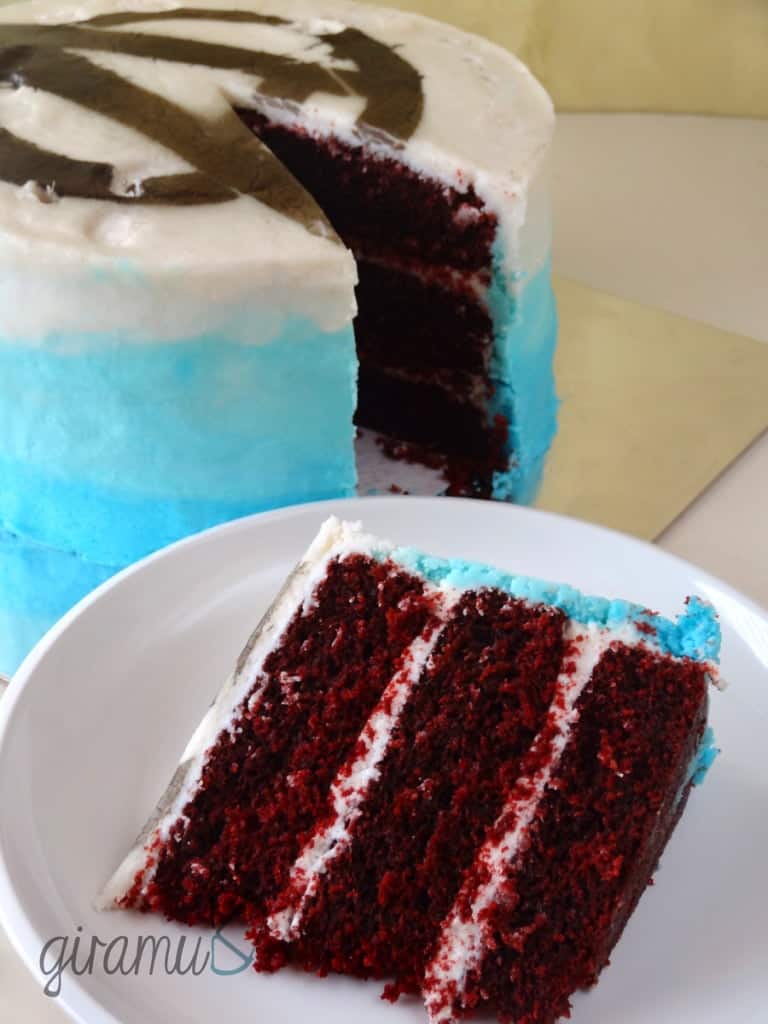
A gloriously delicious Red Velvet Cake with an Ombre Crusting Cream Cheese Frosting! If you want the look of fondant, but not the taste, then this versatile crusting cream cheese frosting is what you need.
I’ve known my husband for over 13 years now, first as a friend who eventually became my husband. Last month was the first time in a long time that we were in the same place on his birthday!
So naturally, I wanted to make him a birthday cake that he would truly love! My idea of a fitting birthday cake was to combine as many of his favorite things as I possibly can in one cake. So I thought about it. Made a quick list of the things he would love to see on his cake. Worked on it for a few days.
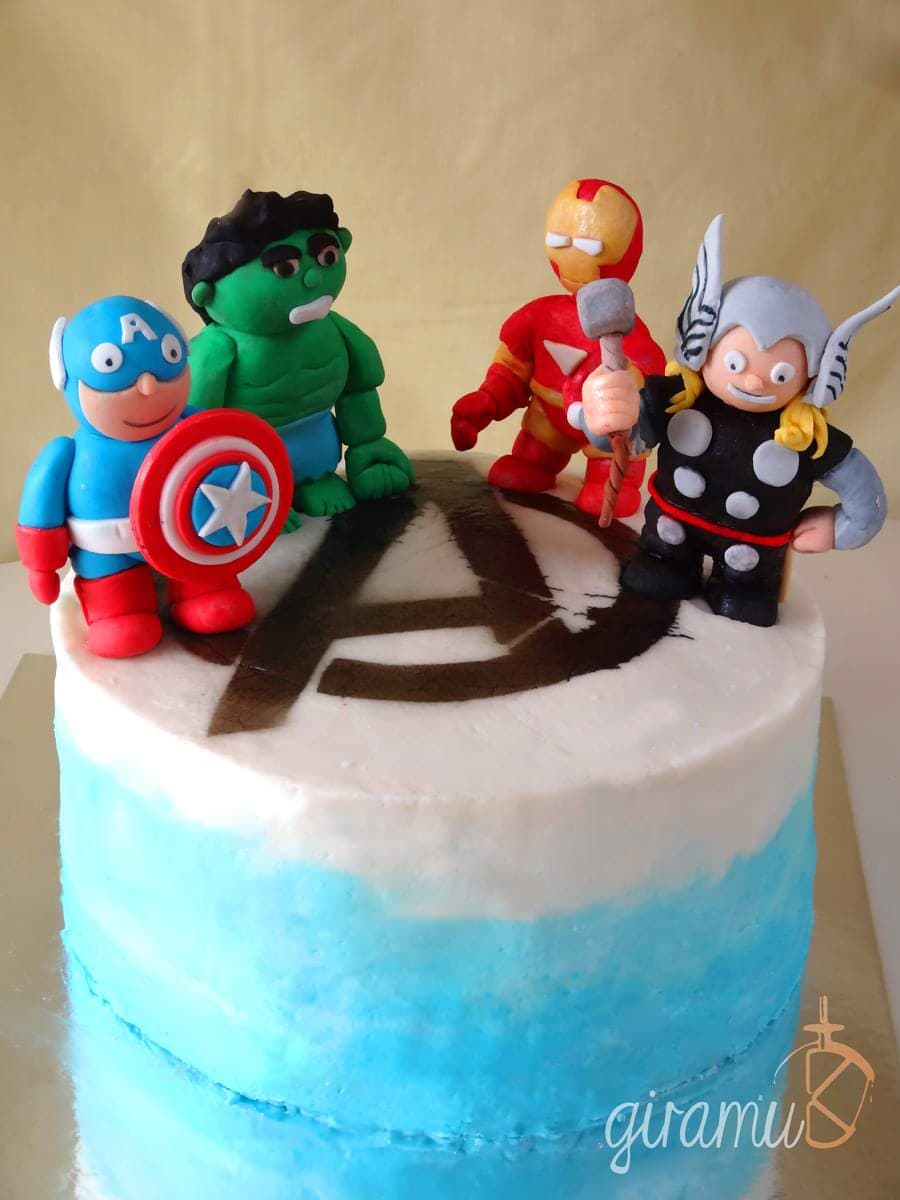
Aaaaaaaand…. the final result was this gloriously delicious Red Velvet Cake with Cream Cheese Frosting! Not just any frosting, but Blue Ombre Crusting Cream Cheese Frosting!
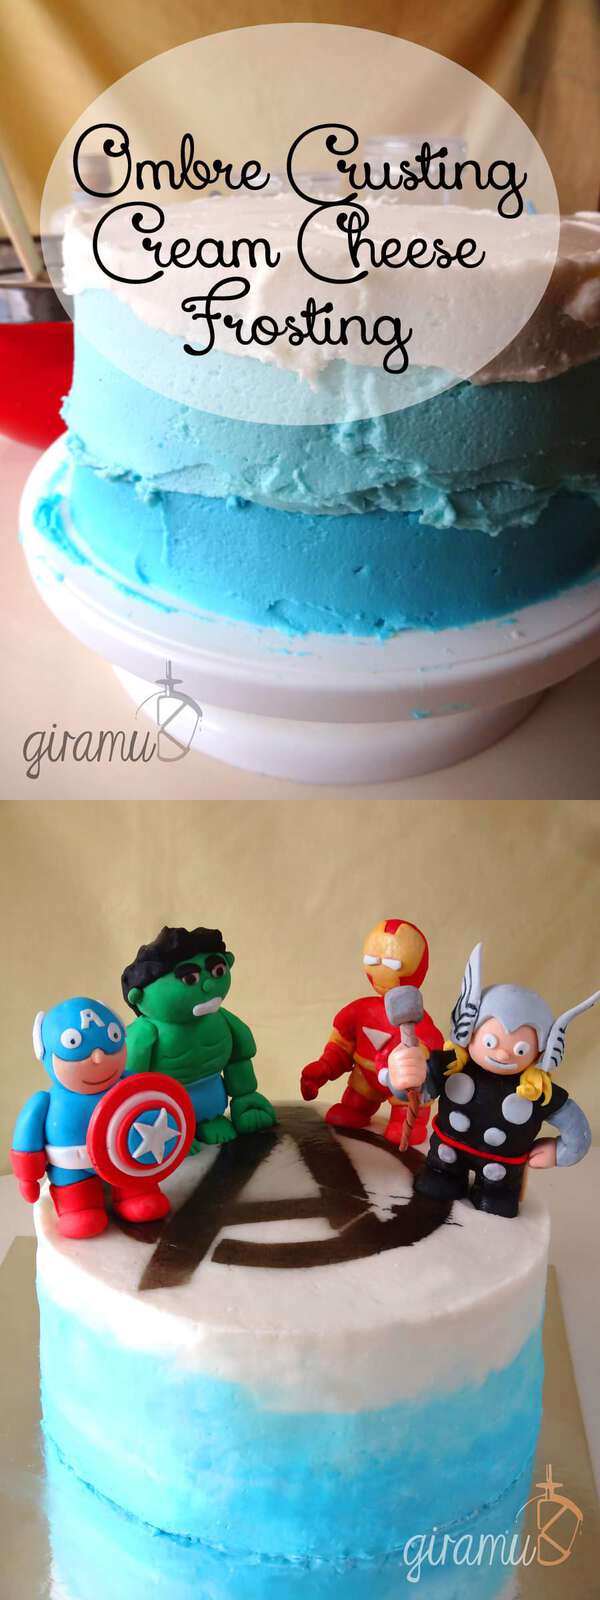
Oh and to customize it even further I threw in some his favorite Avengers in the form of hand-made cake toppers. Yep, you guessed it, he absolutely loved it!

Crusting cream cheese frosting recipe
This recipe post though is specifically about the Ombre crusting cream cheese frosting. I’ve shared a bunch of creamy frosting recipes on the blog before, including classic cream cheese frosting. But it’s not very often that I make crusting cream cheese frosting.
I know a lot of people aren’t ecstatic about the taste of fondant in cakes and Mr. K is the same. So if you’re faced with a similar situation where you need the look of fondant but not the taste, the next best thing is crusting frosting.
What is crusting frosting?
It looks just like fondant and dries out and “sets hard” on the outside (hence called crusting) and you can use a spatula or your smoothing tools with a paper towel or parchment paper to smooth it out. This crusting frosting is made with shortening.
The fact that shortening stays solid at room temperature means the frosting crusts well and remains sturdy at room temperature as well (unlike butter) which is why it works well in crusting frosting. In fact, buttercream that is all shortening or a mix of butter & shortening withstands warmer weather quite well.
However, I personally do not like the taste of shortening in buttercream at all. It leaves a film of fat in your mouth when you eat it which is less than desirable to say the least. So I used a minimal amount of shortening, just enough to achieve the crusting, and made a crusting cream cheese frosting which tasted amazing!
Ombre cake frosting
I also added shades of blue that blended into each other (ombre). It all worked out well because Mr. K is a big fan of red velvet cake, and cream cheese frosting and red velvet cake are a match made in cake heaven!
Recipe

Ombre Crusting Cream Cheese Frosting
US based cup, teaspoon, tablespoon measurements. Weight measurements are recommended for accurate results whenever available.
Common Measurement ConversionsIngredients:
Frosting
- 1/2 cup vegetable shortening softened
- 1.25 lb cream cheese softened
- 4 oz softened butter
- 1 tbsp vanilla extract
- 3 lbs sifted confectioners sugar
- 1 teaspoon salt
- 1 tbsp Lime/Lemon Juice
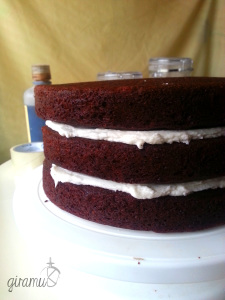
- 3 layers of 8 or 9 inch Red Velvet Cake Chilled
Other Equipment
- Blue gel colouring or any colour of your liking
- Medium sized offset spatula
- Straight edged scraper
- Unpatterned Viva paper towels
- Fondant Smoother
Instructions:
- Beat the butter, shortening, cream cheese, lemon juice and salt till they are creamed well.
- Mix in the vanilla.
- Gradually add confectioners sugar a little at a time while the mixer is on low. Once all the Icing sugar is added and mixed – increase the speed to medium till the mix is smooth and fluffy.
- For a fluffier consistency you can add less sugar, and for a stiffer frosting add more confectioners sugar.
- This cake made just enough icing to fill and frost a 3 layered 9 inch cake. You will need to make more if you want to do decorations on the cake.
- Place the cake on a turntable to make it easier to frost the cake smoothly. Add about 1/2 cup of frosting between each layer of the 3 layered cake.

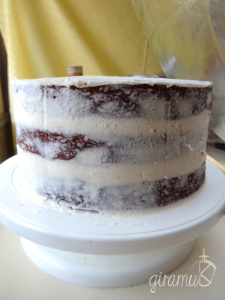
- Apply a crumb coating on the cake and place in the fridge for about 5 minutes, if the cake is cold, the crumb coat will set faster.
- Divide the remaining frosting into two. Divide one half of the frosting further into two bowls.
- Mix in 4 drops of blue gel colouring into 1 small bowl (which has a quarter of the frosting) and mix well. Mix only 2 into the other small bowl (the other quarter of the frosting) and keep the remaining half white.
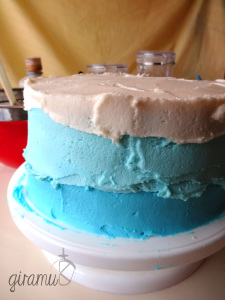
- With a medium offset spatula liberally apply the darker frosting colour around the lower third of the base.
- Apply the lighter shade in the middle part of the cake.
- Apple the white frosting on the top third and the top surface of the cake.
- To smoothen the extra frosting off the cake, place a straight edged scraper along the side of the cake without touching the cake, but touching the frosting. Holding the scraper firm, turn the turn-table to evenly scrape off the extra frosting and smoothen it.
- Once the excess frosting is removed from the sides, smoothen the top as well.
- Leave the cake to “crust” for about 10 minutes. Touch the frosting lightly to check to see if it has crusted. If not, leave it a little longer. Do not leave it for too long however since if it crusts for too long, you will not be able to smoothen it.
- Place an unpatterned Viva towelette over the frosting and lightly rub over the frosting with your Fondant smoother or hand. When you remove the towelette, you will see that the Icing has become smooth. Repeat this process for the entire cake.

- Alternatively you could use a heated metal spatula or cake scraper to smoothen the icing as well. However, you will need to do this before the crusting has set too much.


“This website provides approximate nutrition information for convenience and as a courtesy only. Nutrition data is gathered primarily from the USDA Food Composition Database, whenever available, or otherwise other online calculators.”
Recipe
Red Velvet Cake
US based cup, teaspoon, tablespoon measurements. Weight measurements are recommended for accurate results whenever available.
Common Measurement ConversionsIngredients:
- 3 1/2 cups AP flour the original recipe calls for cake flour, but I used AP
- 1/2 cup unsweetened cocoa not Dutch process
- 1 1/2 teaspoons salt
- 1 cup canola oil
- 1 cup butter softened
- 2 1/4 cups granulated sugar
- 3 large eggs
- 6 tablespoons 3 ounces red food coloring or 1 teaspoon red gel food coloring dissolved in 6 tablespoons of water
- 1 1/2 teaspoons vanilla
- 1 1/4 cup buttermilk
- 2 teaspoons baking soda
- 1 tbsp Vinegar
Instructions:
- Preheat oven to 350°F/180°C degrees. Butter and line 3 x 9 inch round pans with parchment paper.
- Sift flour, cocoa and salt into a bowl.
- Place oil and sugar in bowl of an electric mixer and beat at medium speed until well-blended.
- Beat in the eggs, one egg at a time.
- Once eggs are incorporated, change the mixer speed to low and add the vanilla and red food colouring. The batter might be quite runny, so be careful not to let it splash.
- Add flour and buttermilk alternately in two batches, starting with the flour and ending with the buttermilk. Mix until just combined. (Make sure the sides of the bowl are scraped down too)
- Place baking soda in a small dish, and stir in vinegar. This will immediately start to bubble. Add this to the batter while the mixer is running, and let it run for about 10 seconds until it is incorporated with the batter.
- Divide batter among the 3 pans. Transfer them to the oven and let them bake for about 40 to 45 minutes, until an inserted toothpick comes out clean.
- Once done, let the cakes cool in the pan for about 15-20 minutes and transfer to a wire rack to cool completely before frosting.
“This website provides approximate nutrition information for convenience and as a courtesy only. Nutrition data is gathered primarily from the USDA Food Composition Database, whenever available, or otherwise other online calculators.”
This was actually my first time making crusting frosting, so naturally I was a little nervous. The end result wasn’t too bad and I was very happy with it.
So was my hubby by the way, although he’s not one to fuss over technicalities like crusting frosting. As far as he was concerned this cake had it all. Red velvet? Check. The Avengers? Check. The Hulk? Check. Blue frosting? Check. Delicious? Big Fat Check!

Next time I make this frosting though, I might reduce the amount of confectioners sugar and see if I can still achieve the same level of crusting. It was still deliciously creamy though with the distinct taste of cream cheese coming through.
If you can’t find unpatterened paper towels for smoothing the frosting, you can use parchments paper, and if you can find neither, use a hot straight-edged cake smoother/spatula.
I even spray painted the Avengers logo on the cake which turned out to be a little too big as the fondant superheroes covered part of it when they were placed on top. Mr. K didn’t mind though. For him it was all a portal back to his childhood, a shout out to the boy who enjoyed the comics and the cartoons and for a day he was not just a kid at heart but in soul too.
The cake was incredibly moist and light as well. And most definitely did not taste soapy (YAY!).
His birthday dinner was fantastic too! He specifically asked for my butter chicken recipe with a whole chicken (which also meant plenty of leftovers!), and I also made lentil and potato curries with cooked rice to go with it.
All in all it was a great weekend and I think I succeeded in making up for all the birthdays we missed over the years. The one problem I have now though… I’m not sure I’d be able to top this next year!
So what’s your favourite cake? Mine is most definitely a classic chocolate cake with a classic American chocolate buttercream frosting (or an extra fudgy chocolate cake) which, if you follow my blog, might not come as a surprise at all!


Leave a Reply