

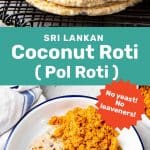
Classic Sri Lankan pol roti is an easy to make, uniquely delicious coconut roti (coconut flatbread)! If you’re bored with your regular flatbreads, then here’s a fun and delicious variation to try, that doesn’t require any leavening agent.
Easy Sri Lankan pol roti, packed with flavor and coconut!

What is Pol roti?
Pol roti (පොල් රොටි) in Sinhalese translates to coconut roti, or coconut flatbread. It’s a very popular type of flatbread made in Sri Lanka. Much like other flatbreads like roti canai or Chinese scallion pancakes, these can also be eaten for breakfast, lunch, dinner, or even as a snack throughout the day. It’s super versatile!
Since it doesn’t use any leavening (yeast or baking powder or baking soda), it’s really simple to make too. Shredded coconut is mixed with flour, and a few other ingredients, and then formed into a dough with water or coconut milk.

If you have access to fresh shredded coconut, use that. But I know it might be harder to access freshly shredded coconut outside of the tropics. I know, because I live about as far from the tropics as civilization gets. So, I make mine with unsweetened desiccated shredded coconut.
So, there is the simple version of coconut roti, then there is the proper version of coconut roti (I call it proper, because that’s the only way I insist on making them).
- Simple version – Flour + shredded coconut, mixed with water or coconut milk.
- Proper version – Flour + shredded coconut + chopped onions and green chilies (green chillies or green peppers), mixed with water or coconut milk.

Pol roti – a part of my Sri Lankan childhood
There are some great memories associated with making coconut roti from my childhood. That’s mostly because I was very fussy about how pol roti was made!
On the days I knew we were having pol roti for dinner, I’d go to the kitchen to watch how it was being made during the day. I would insist (or plead) that onions and chili were also generously added.
Then in the evening, I’d help with making the roti. I’d help roll them out, flip them on the pan, and in return, I’d be given a ball of dough and the privilege of shaping the roti however I wanted. Who wants playdough, when you got the real thing, and you can eat your creations too!
The process of making pol roti is something most kids take part in, because it’s easy and fun. The result is a lot of fond childhood memories.

Using fresh coconut vs desiccated coconut
When I used to live in Sri Lanka, we obviously used freshly grated coconut OR the grated coconut that is leftover after making coconut milk.
But once I left Sri Lanka, I didn’t have ready access to fresh coconut. So I started making this roti with shredded desiccated coconut instead, which was a lot easier to find.
Using desiccated coconut
If you’re using desiccated shredded coconut, PLEASE make sure it’s unsweetened. The sweetened version will definitely not work for this recipe.
Since we’re using desiccated coconut, I like to add a mixture of coconut milk + water to my flatbread. The coconut milk adds more flavor.
If you use freshly grated coconut, you don’t need to add coconut milk. You can just use water to form the dough.
Some recipes call for the desiccated coconut to be re-hydrated with coconut milk before adding it to the flour. But I find this unnecessary, since here you let the dough rest for about 8 hours. This will help re-hydrate the coconut AND the flour.
Coconut roti ingredients
- Flour – I use AP flour here. It’s more readily available, and as the name suggests, it’s a good all purpose flour. If you have bread flour, you can use that too. But you may need to add just a little extra water if you use bread flour.
- Coconut – You can use freshly grated coconut or shredded desiccated coconut. See above for more information.
- Onion – Use an onion with some flavor. I like to use shallots or red onion, because they add some sweetness and color. But you can use yellow onion or sweet onion as well. In Sri Lanka, onions look similar to shallots (they are purple in color and are smaller than red onions).
- Green chili – Not surprisingly, we love using long green chili that pack some heat. The “skin” of the chili is thinner, so when it’s sliced thinly, the pieces of chili are softer and mix better. However, you can use jalapeno or serrano peppers instead as well. If you only want the flavor without the heat, then remove the seeds before chopping the chilies.
- Fresh curry leaves – Chopped finely. This is optional. I didn’t have any at home, so I didn’t use them for the recipe here. Do NOT add basil + lime as a substitute, as it won’t add the same flavor. If you don’t have it, just skip it.
- Salt – Added to season the roti.
- Water + coconut milk – This is added to form the mixture into a dough. The addition of coconut milk keeps the dough a little soft AND adds flavor.


How to make Sri Lankan Pol Roti
For best results, make the dough at least 4 hours ahead of time. The dough can be kept covered, at room temperature, for 8 hours. If you want to keep it longer (and if you also used onions and chili), then cover and keep it in the fridge instead.
Place the flour, shredded desiccated coconut, salt, chopped onion and chopped green chili in a large bowl. Mix to combine.
In a jug or bowl, add the coconut milk and water, and mix to combine.
Add the wet ingredients to the dry ingredients, about 1/4 cup at a time. Here you need to get your hands dirty, and use your fingers to mix the liquid in to the dry ingredients.
As you add water and coconut to the dough, you’ll notice that the dough will form clumps, with some dry spots of flour. Use your fingers to mix the dry spots in as you drizzle the liquid over it, but avoid over-kneading the dough as well.


This is probably not recommended and quite old school (my grandmother used to do this!), but I always taste just the littlest piece of dough to make sure there is enough salt. If not, I would add a little more salt to taste, before finishing the mixing process.
The dough will come together to form a ball, but still have some dry spots. That’s OK! If you do add too much liquid by any chance, you can always add more flour to compensate.
Now, here’s the secret to soft and delicious coconut roti. LET THE DOUGH REST! The rest time will allow the water and coconut milk to hydrate the flour and coconut. It also helps keep the dough soft.


Cooking the roti
Generously flour the dough and your work surface, if needed.
Divide the dough roughly into 8 pieces. Gently form each portion into a ball.
On a floured surface, using a rolling pin, roll out the pol roti. I like mine to be about 0.4 – 0.5 cm thick, which gives me a roti that is about 12 – 15 cm (5 – 6 inches) in diameter.
You can make it thinner or thicker, but you will have to adjust your cooking time accordingly.


Heat up a cast iron skillet, or non-stick skillet or a tawa. You don’t need a lightly oiled pan, since you want to cook the roti on a dry pan.
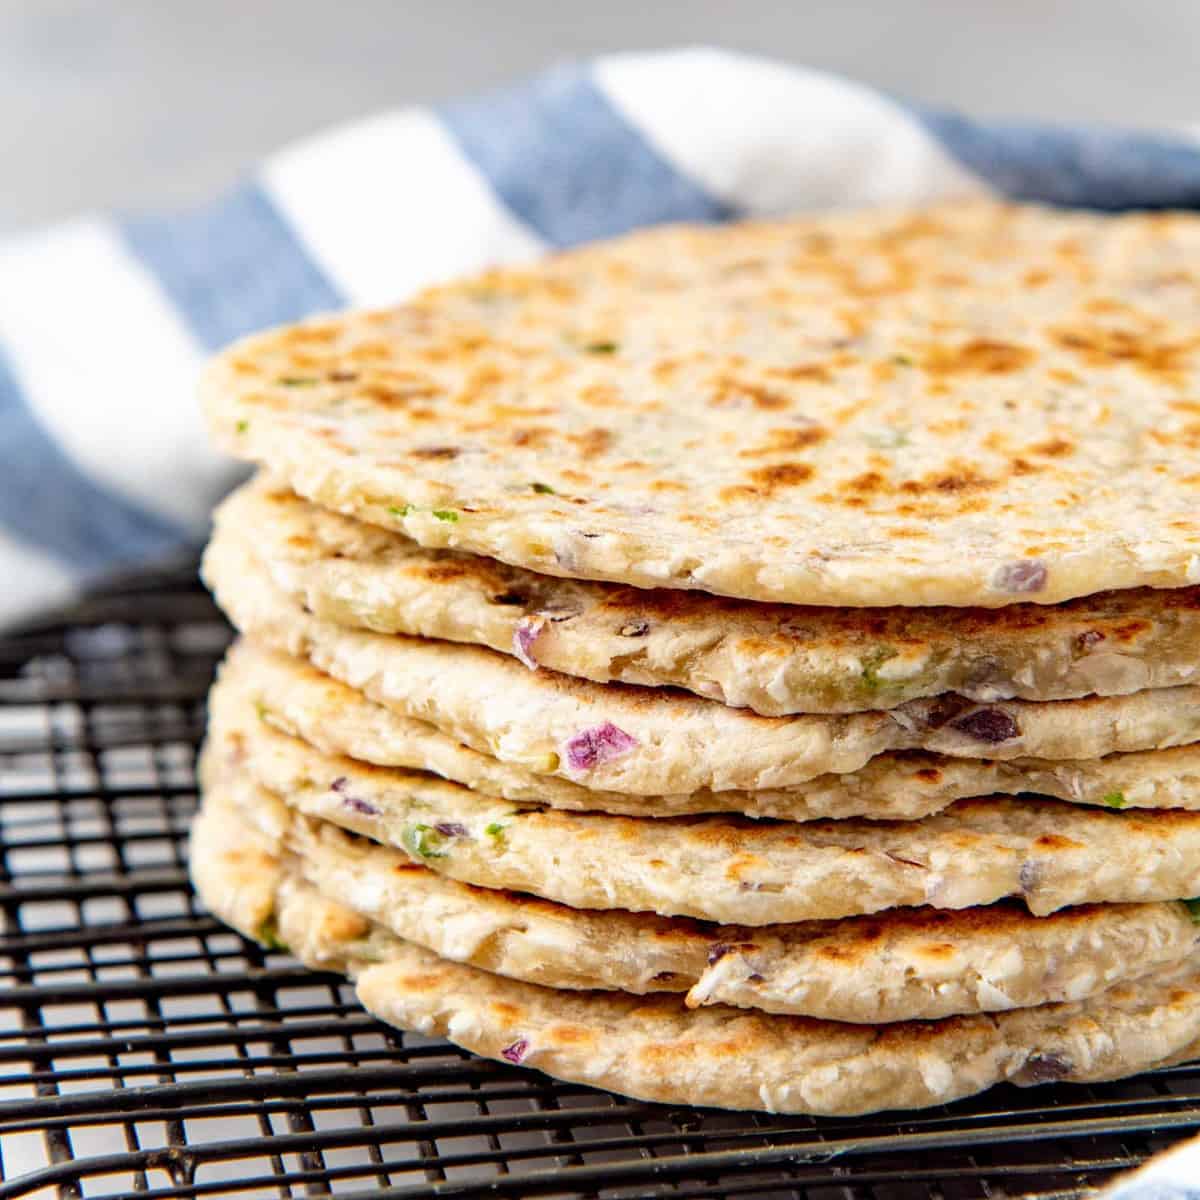
Cook the roti until you see brown – golden brown spots on the side that’s on the pan. Then flip it over and cook the other side. I prefer to cook my roti until they are just little darker than golden brown, but my husband prefers them even darker.
Let them cool on a wire rack. You can serve these at room temperature, or warm.

Cooking times
For pol roti that are about 0.4 – 0.5 cm thick, I cook the roti for about 2 ½ – 3 minutes per side, over medium heat. This gives me roti that are caramelized on the outside, but still soft on the inside.
For pol roti that are thicker – cook the flat breads on medium low heat, since they will need to cook longer, without burning. It can take about 3 – 4 minutes, but it will take some trial and error to get the timing just right.
For very thin pol roti – if you want to roll them out like Indian chapati, then these will be cooked much faster. So you can cook them on medium high heat for 1 – 2 minutes per side.

How to serve Sri Lankan coconut roti
You can serve these with an array of curry recipes! Red lentil curry (dhal curry) or a meat curry such as chicken curry, beef curry, mutton curry (lamb curry), and even fish curry are popular.
But it doesn’t even have to be a Sri Lankan curry. These are so flavorful, they can be eaten with any savory side dish, but would taste just as delicious with a little butter slathered on top too.
We usually make a katta sambola, which is an onion and chili sambal, OR we’d make a coconut sambal (pol sambola). Another option is seeni sambola (seeni sambal, or caramelized onion relish) or a green coconut chutney. These side dishes are a favorite in every Sri Lankan household.
As kids, we’d eat these for breakfast with a type of sambal and whatever curry was leftover from the night before. We make roti sandwiches with curry fillings, by folding the roti in half, or by splitting thicker roti in half.
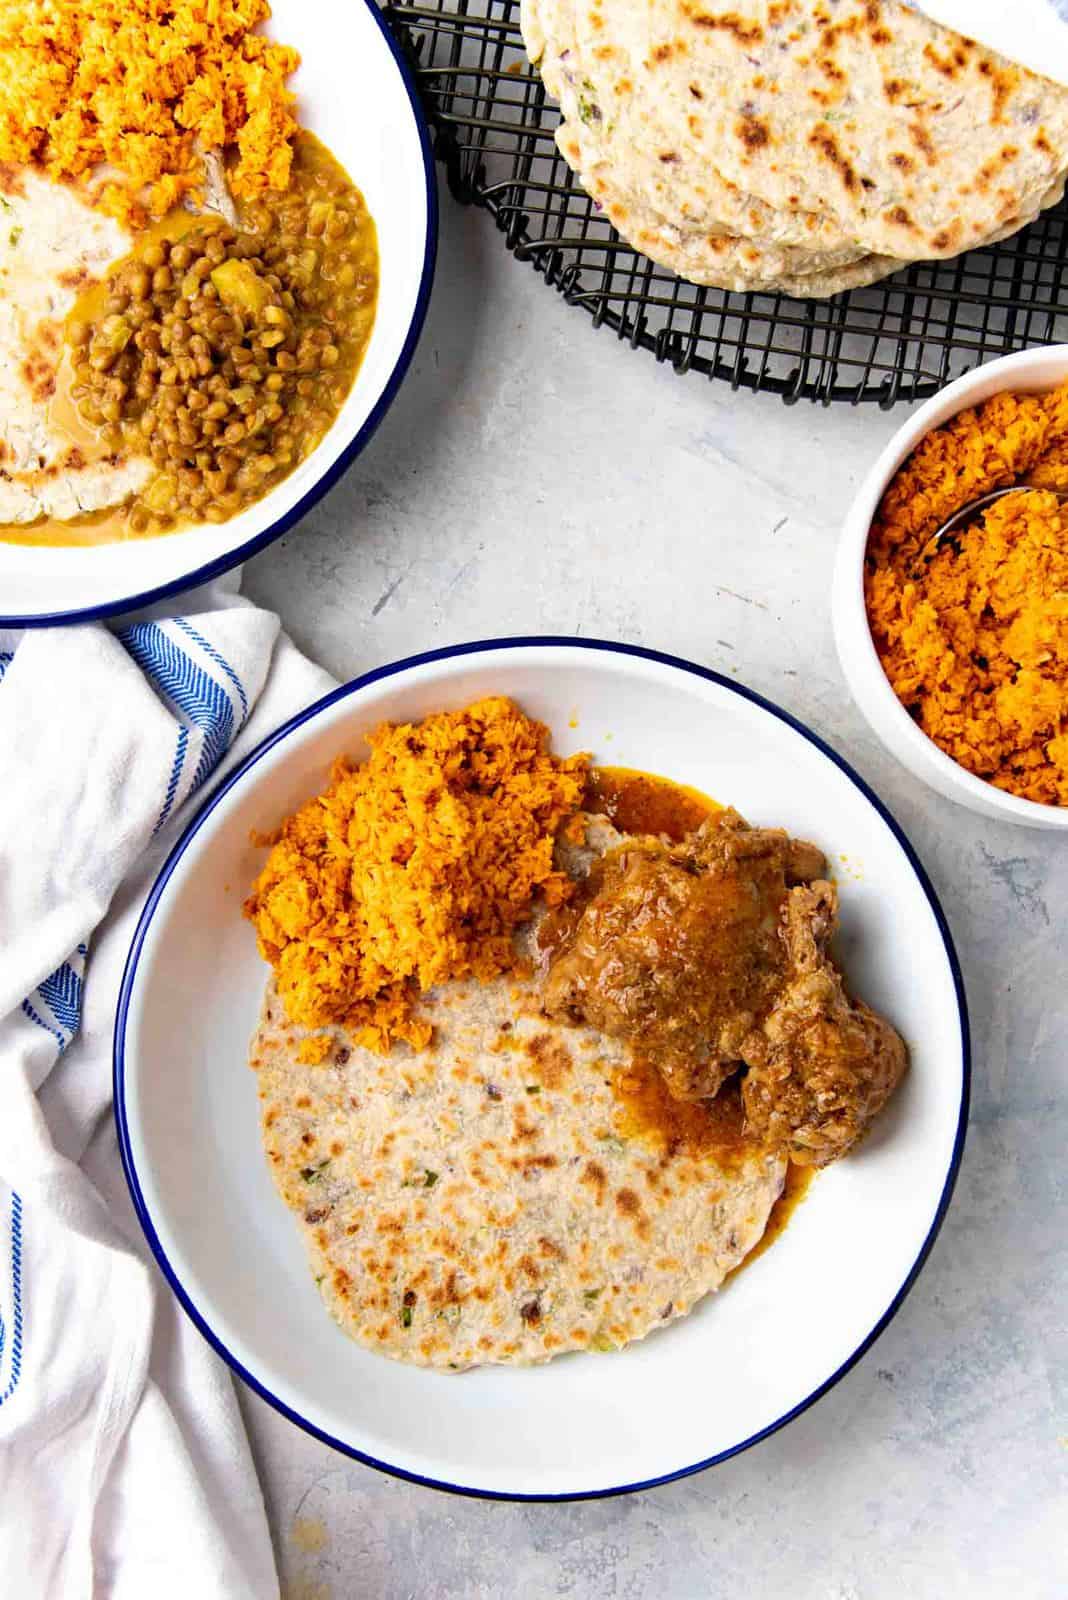
Here I served them with chili coconut sambal (pol sambal), and a lentil curry for a vegan option. And Sri Lankan chicken curry for a meat option.
Because you don’t have to use yeast for this, it’s such an easy flatbread to make. The addition of coconut makes this flatbread soft and uniquely delicious. And the onions and chili take these babies straight to flavortown!


Recipe
Sri Lankan Pol Roti (Coconut Roti)
US based cup, teaspoon, tablespoon measurements. Weight measurements are recommended for accurate results whenever available.
Common Measurement ConversionsIngredients:
- 400 g AP flour Volume measurements measured by spoon and level method, into a cup
- 150 g shredded desiccated coconut unsweetened. OR Freshly grated coconut (which is better!)
- 1 ¼ tsp sea salt
- 1 medium red onion Finely chopped (generous ½ cup)
- 3 long, green chili Halved lengthwise and sliced finely. Use less if you prefer. Also de-seed the green chili, if you don't want the heat.
- 120 mL coconut milk full fat preferred
- 120 mL water
Instructions:
- Place the flour, desiccated coconut, salt, onion, and chili in a large bowl. Mix to combine well.400 g AP flour, 150 g shredded desiccated coconut, 1 ¼ tsp sea salt, 1 medium red onion, 3 long, green chili
- Mix the water and coconut milk in another bowl or jug.120 mL coconut milk, 120 mL water
- Add the liquid to the flour mixture, a little at a time, while stirring the flour with your fingertips (or with a fork).
- After adding about ½ of the liquid, gently stir the mixture. You will have some clumps and dry spots of flour. Drizzle the liquid over the dry parts of the flour, while mixing, to form a dough.
- Add 1 or 2 more tbsp of water ONLY if needed. The dough should come together, but still have dry spots on the surface. This is OK.
- If you add too much water, sprinkle in a little extra flour and lightly knead it into the dough (don’t over-knead!). Shape the dough into a rough ball.
- Cover the dough (or the bowl) with plastic wrap and let the dough rest for at least 4 hours, or up to 12 hours (room temperature is fine). If you want to store the dough for up to 24 hours, then refrigerate it.
- The dough should become really soft after it has rested. If it’s very sticky, generously flour the dough and the work surface to prevent it from sticking to your counter.
- Transfer the dough to your floured work surface. Cut the dough into 8 wedges. Lightly roll up each section into a rough ball. See pictures in the post.
- Take each dough ball and sprinkle some flour on top and on the work surface. Flatten it to a disc, and then roll it out to a circle using a rolling pin. The roti should be about 0.4 – 0.5 cm thick, and about 12 -15 cm (5 – 6 inches) in diameter. Cover the rolled out roti with a cloth napkin or plastic wrap (so that it doesn't dry out), and repeat rolling out all of the dough portions.
- Preheat a cast iron skillet or non-stick skillet over medium or medium high heat.
- When the pan is heated, transfer a roti onto the skillet and cook for about 2 – 3 minutes, until the bottom starts to develop brown spots.
- Flip the roti over and cook the other side for 2 – 3 minutes, until you get brown spots on that side too.
- Place the cooked roti on a wire rack to cool down. Repeat with the rest of the roti.
- Eat the roti warm or at room temperature.
Recipe Notes
Nutrition Information:
“This website provides approximate nutrition information for convenience and as a courtesy only. Nutrition data is gathered primarily from the USDA Food Composition Database, whenever available, or otherwise other online calculators.”


Leave a Reply