

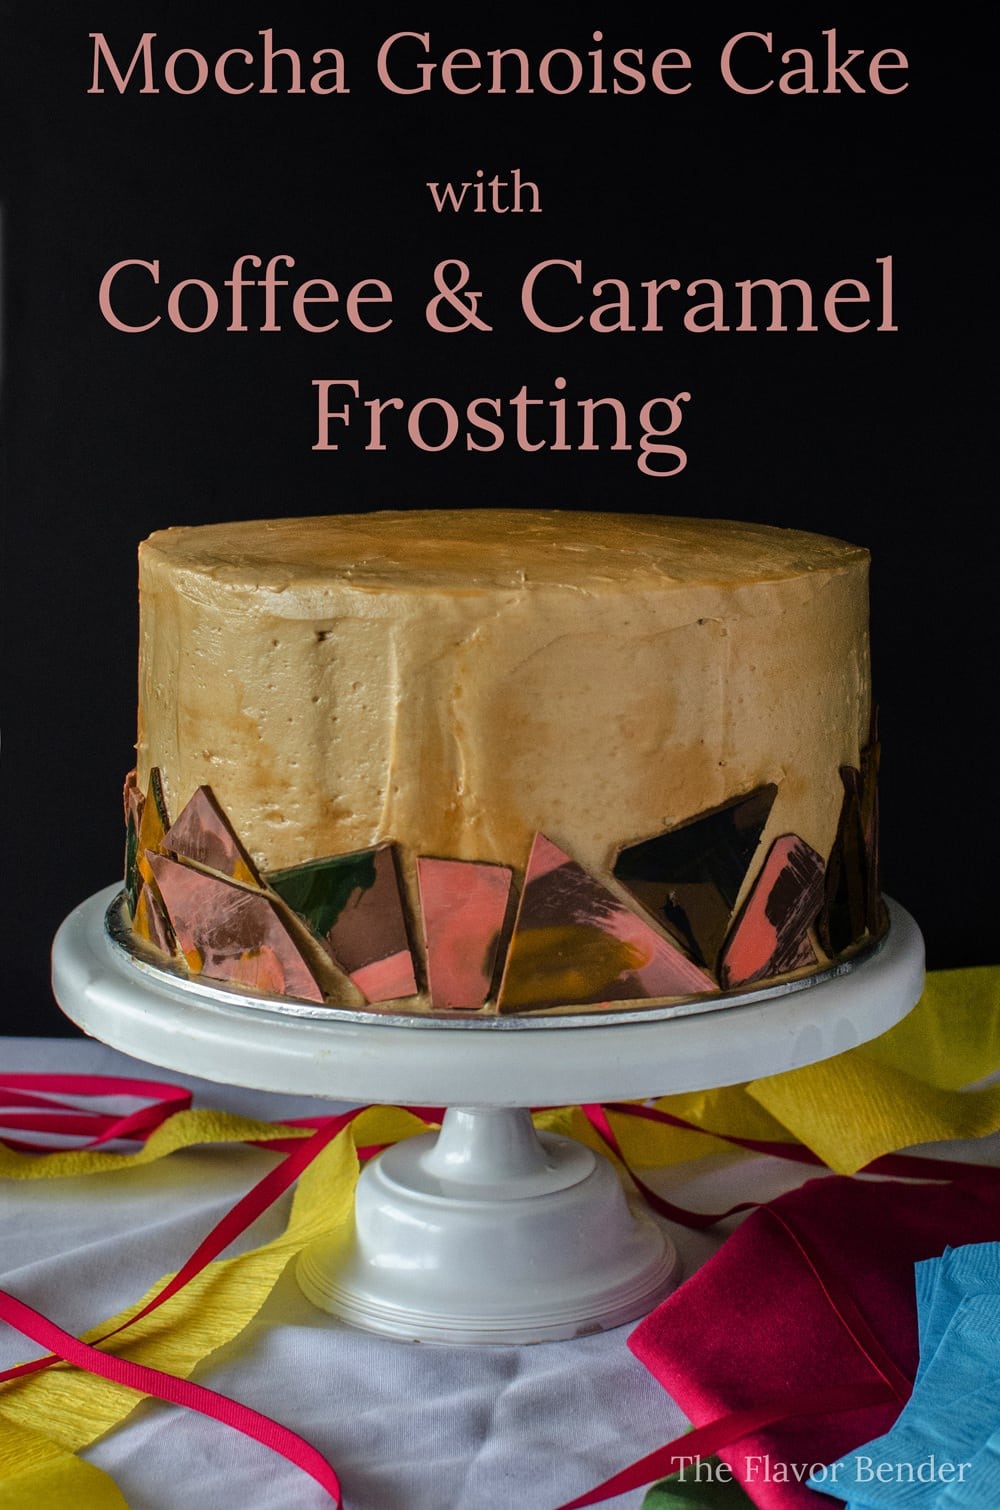
This delicious, light, coffee soaked chocolate genoise cake covered with an incredibly addictive coffee caramel buttercream frosting is the perfect celebratory cake recipe!
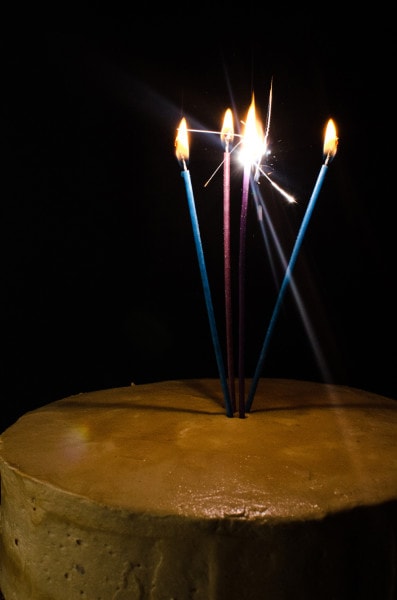
As you may know, I love to bake cakes. Cakes and cupcakes are my forte, and this chocolate genoise cake was whipped up to celebrate the first birthday of this blog back in 2015!
A celebratory cake
And a birthday isn’t really a birthday without a cake now is it? So without further ado, here’s The Flavor Bender’s birthday cake – Coffee soaked Chocolate Genoise Cake with Coffee Caramel Frosting!
Delicious chocolate sponge cake layers soaked in coffee and covered with one of my absolute favorite creamy frosting recipes – AMAZING coffee caramel buttercream frosting!
Before I started this blog an year ago, I had a place on the Internet where I documented things I cooked and baked, but never really shared recipes, just pictures. And awful pictures at that. I knew cooking, baking and experimenting with food was my calling a long time ago, long before I considered anything else as something I would want to do for the rest of my life.
But I never really thought it was something I could realistically pursue until my husband convinced me that I should go for it, probably because he couldn’t take another minute of my talking about it. And maybe also because he absolutely loved every thing I cooked/baked. 🙂
So I owe this to blog to Mr K, my wonderful husband, who encouraged me every step of the way to follow my dream wherever it might take me, and although right now I’m not sure where that might be, I still love doing what I do, and the chance to share it with you all!
And I’m very proud of how far I have come. Especially in terms of food photography. My photos are still far from spectacular, but I’ve learned more in the last year than I did in all the years before that and since I got my very first point and shoot digital camera back in 2006!
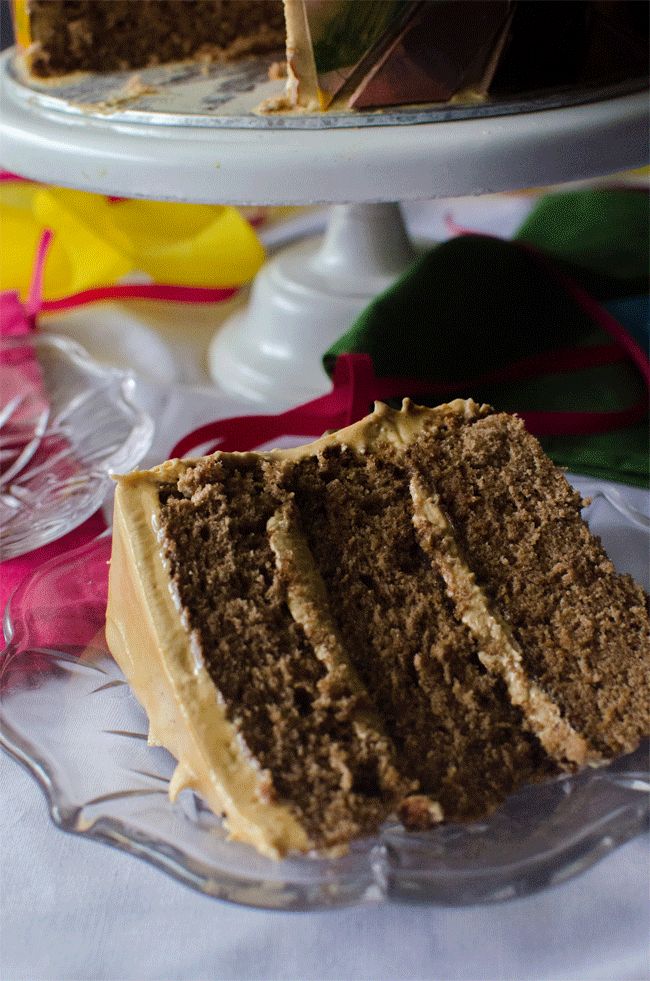
Chocolate genoise cake
I wanted this cake to be light, and this genoise cake recipe is GREAT for victoria sponge cake. It’ll also be delicious in a trifle. If you like, you can use a boxed cake mix for convenience.
The star of this cake however is the buttercream frosting! That deserves its own post, to be honest.
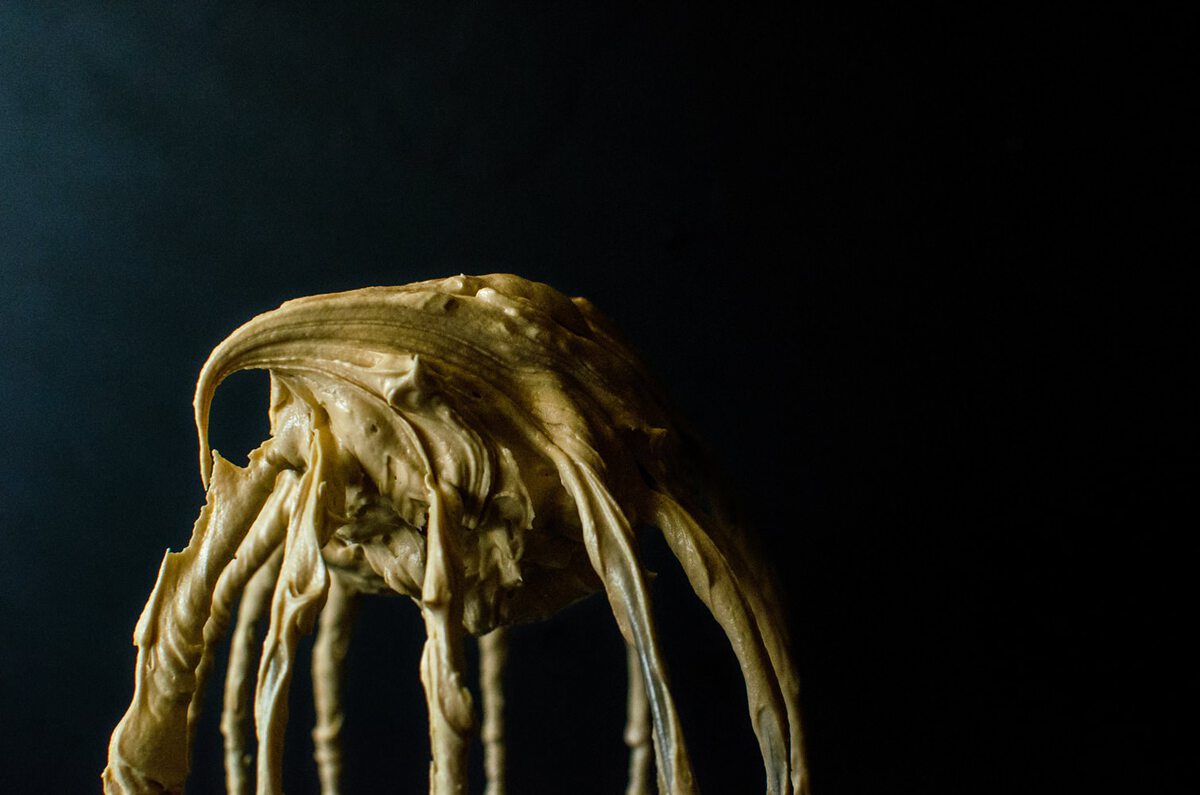
From vanilla buttercream to chocolate buttercream, swiss meringue buttercream, chocolate swiss meringue buttercream etc., I’ve made a lot of buttercream frostings over the years, and this coffee caramel buttercream frosting is truly one of a kind.
It’s seriously addictive, and I’ve had several people comment on how fantastic it was!
Although it sounds like it’s going to be really sweet (caramel buttercream…), the strong coffee flavour mellows it way down. The burnt caramel and coffee give it a rich depth of flavour that ordinary frosting just doesn’t have.
And as bit of a frosting snob/fanatic, I swear, if not for a great deal of self-restraint, I would have eaten the frosting by itself – all of it. 🙂
Recipe notes
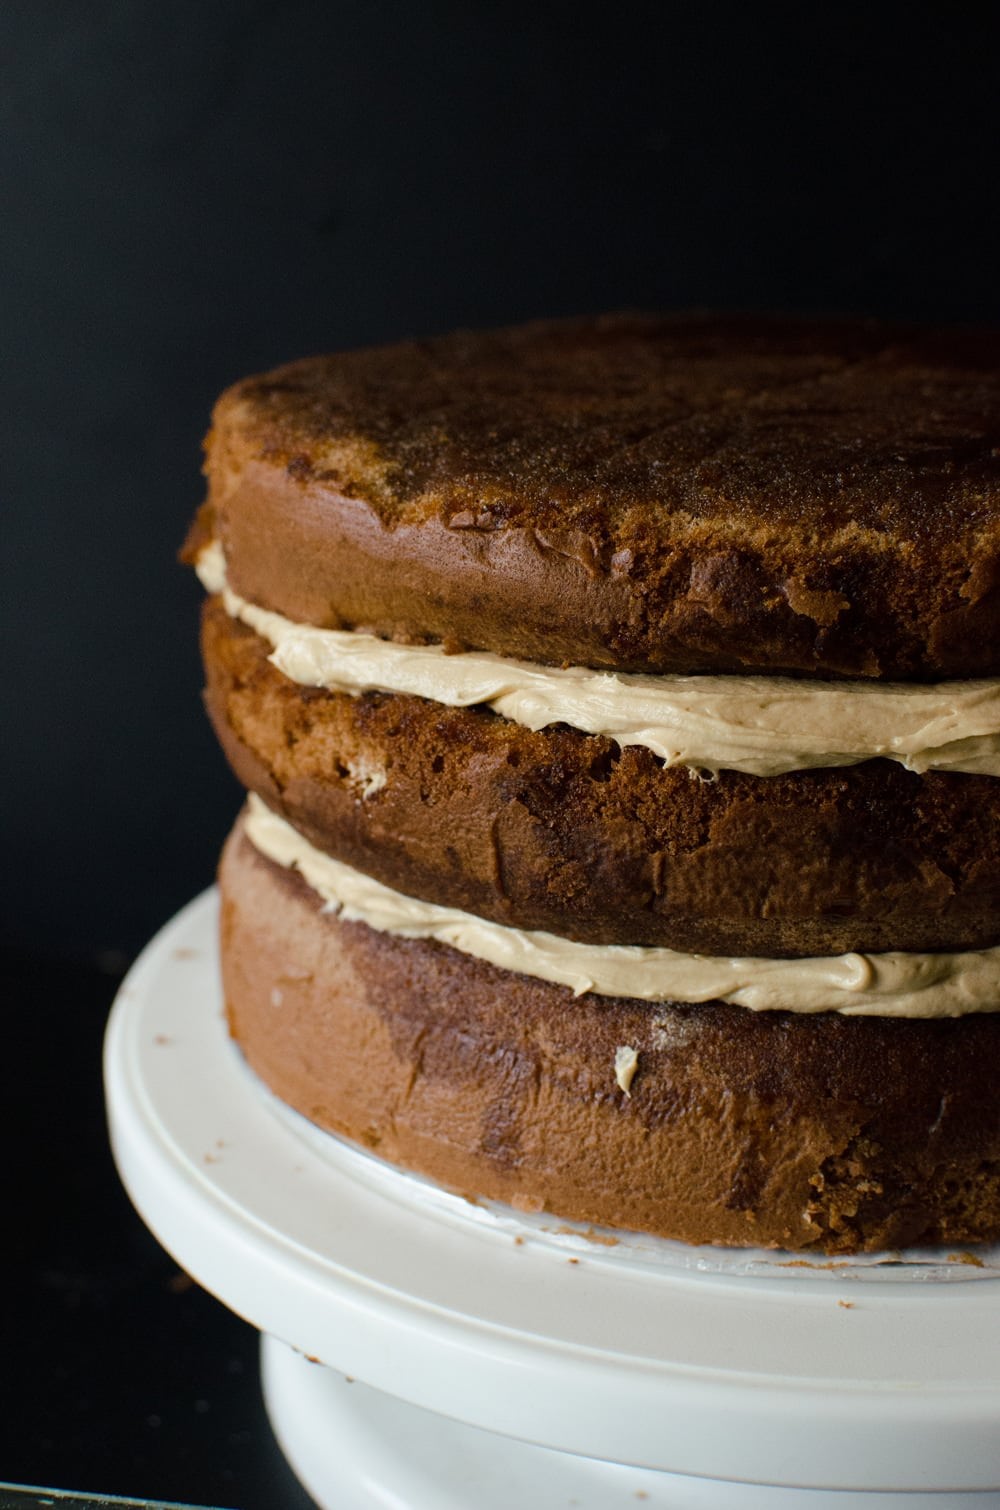
Since it’s a genoise cake, make sure you soak the cake layers well. The cake is light, and it’s called a “sponge” cake for a reason. It can absorb A LOT of flavour!
I soaked my chocolate genoise cake layers with coffee, because I am a coffee junkie – as I’ve mentioned many times before – but you can use a simple syrup as well.
And with the frosting – I make a caramel sauce first. I caramelize white sugar till it turns dark amber in colour. I used the dry caramel method – this way it turns to caramel faster, so you have be near the stove and keep an eye on your sugar the whole time.
I actually prefer this method over the wet caramel method, because I know my caramel won’t crystallize this way. See this how to make perfect caramel guide by David Lebowitz for tips on how to caramelize sugar using the dry method. For more information, you can also check out my guide to types of sugar, and my guide on cooked sugar stages.

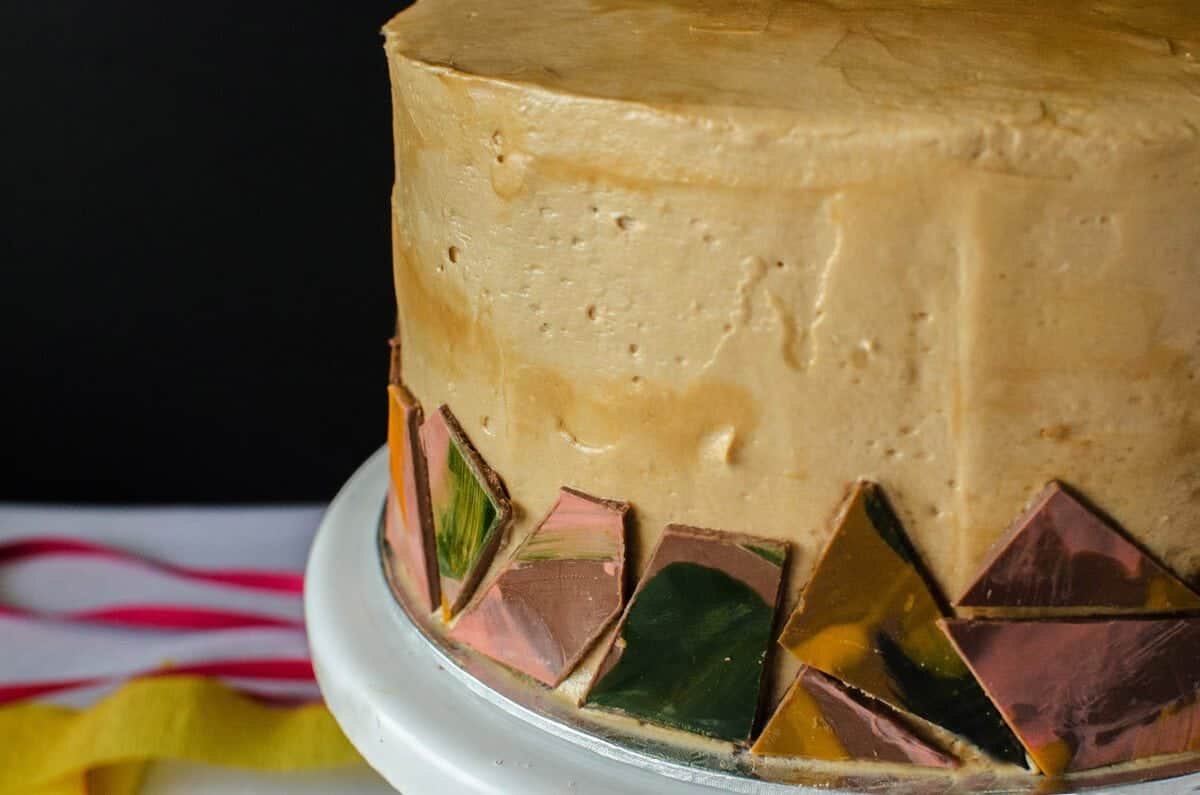
Chocolate shards as decorations
As for the decorations – I made chocolate “shards” that were painted with cocoa butter. I thought about a drip decoration but it’s so overdone these days, so I decided to go for something that looked different and a little rustic.
I love working with chocolate(check out my extensive archive of chocolate recipes!), and even though it’s not the most friendly beast to work with, when you get it right, it gives me a whole lot of satisfaction!
I’m not going to share with you the tutorial for the chocolate shards today, but I definitely will at some point in the near future.
More delicious cake recipes
Recipe

Chocolate Genoise Cake with Coffee Caramel Frosting

Difficulty:
US based cup, teaspoon, tablespoon measurements. Weight measurements are recommended for accurate results whenever available.
Common Measurement ConversionsIngredients:
Mocha Genoise Cake (adapted from Rose Levy Beranbaum)
- 450 g / 15.8oz eggs weighed without the shell (about 8 XL eggs)
- 85 g / 3 oz unsalted butter melted and cooled
- 225 g / 8 oz white sugar
- 100 g / 3.5oz AP flour
- 100 g / 3.5oz corn flour
- 20 g / 0.7oz / 3 tbsp cocoa powder
Coffee Syrup
- 3 cups of brewed coffee
- 3/4 cup of sugar
Coffee Caramel Buttercream Frosting
- 1 cup white sugar about 220g
- 4 tsp instant coffee granules
- 1 cup cream warmed
- ½ tsp salt flakes
- 4 sticks unsalted butter softened
- 1.5 lbs / 680g icing sugar / confectioners sugar sifted
- 2 tbsp cream if needed
Instructions:
Coffee soaked Chocolate Genoise Cake layers
- In a bowl, triple sift the AP flour, corn flour, and cocoa powder, together.
- In another bowl (with a capacity of at least 2 cups), place the melted butter.
- Lightly butter and line three 9 inch cake pans with parchment paper. Alternatively, just line the bottom, and butter and dust the sides with a light coating of cocoa powder.
- Preheat oven to 350°F / 180°C.
- Place all the eggs and sugar in your heat-proof mixer bowl (which is preferably metal) and whisk gently to combine.
- Place the bowl over a pot of simmering water (make sure the water is not touching the bowl), and whisk continuously until the eggs are lukewarm, about 3-4 minutes. Remove from the heat.
- Place this mixer bowl in your bench mixer and with your balloon whisk attachment – whisk the mix on medium high for 5 minutes.
- Transfer about 1 ½ cups of the egg mix into the melted butter and mix the butter through the egg mix. Set aside.
- Sift half of the flour mix into the whipped egg mixture and fold through gently using the same whisk attachment from the bench mixer (the balloon whisk), or a rubber spatula (I use the balloon whisk).
- Now sift the other half of the flour into the whipped egg mixture as well and fold through to mix well.
- Add the butter + egg mix and fold through gently. Take care not to deflate it too much (there will be some deflation after the butter mix has been added).
- Pour the batter equally into the 3 pans and bake in the preheated oven for about 20-30 minutes. (You know the cake is done when you gently press down on the top of the cake in the center and it springs back up and the sides are starting to shrink away from the sides of the pans).
- Leave them to cool for a few minutes and turn them out on to a wire rack to cool completely.
Coffee Syrup
- Combine the coffee and sugar in a small saucepan and heat until the sugar has dissolved. Simmer the mix until it reduces to about 1 1/2 cup of coffee syrup, that is sweet, but not too sweet.
- While warm, brush this over the cake layers, on both sides. The layers need to be generously brushed with the coffee syrup (about ¼ cup per side – 1/2 cup per layer).
- Carefully wrap the cake layers in plastic wrap and chill in the fridge until the buttercream is ready (or overnight). The cakes will be fragile, chilling it makes it easier to handle.
Coffee Caramel Buttercream Frosting
- In a heavy duty saucepan, sprinkle the sugar evenly over the bottom of the pan – the thinner the layer of sugar, the easier and quicker it melts. (Please see Notes)
- Heat it over medium heat, but keep an eye on the sugar AT ALL TIMES. When the edges of the sugar layer start to caramelize and turn light amber in colour, drag your spatula from the edge to the center, moving the caramelized sugar away from the bottom of the pan and replacing it with unmelted sugar. The sugar may clump up at this point, and that is OK.
- Make sure the sugar DOES NOT BURN, by moving the caramelized sugar around.
- If the sugar is dissolving too quickly for you, you can turn down the heat to slow down he caramelization.
- All the sugar will eventually caramelize into a dark amber colour, with no clumping up.
- Take the caramel off the heat and add the warm cream & salt and stir. The caramel will bubble up.
- Return to low heat and stir frequently until the caramel has completely dissolved. Add the coffee granules and stir till they dissolve.
- Simmer for another 6 minutes and pour the caramel into a pyrex or heatproof jug and leave it to cool completely.
- Once the caramel sauce has cooled completely (to room temperature), pour this into your mixing bowl. Whisk with a whisking attachment, and add the butter while whisking. Whisk until the caramel and butter have mixed well (make sure to scrape the sides and bottom of the bowl to ensure proper mixing).
- Add the Icing sugar in 3-4 batches (whipping on low speed upon addition, and increasing it slightly once incorporated). The batches make it easier to whip the buttercream, so that you don’t get a “cloud” of icing sugar when you whip.
- Add the cream and whisk for a few more minutes, until you have a soft, creamy, nicely whipped frosting.
- You can use this immediately, or store it in the fridge – but whip the frosting before use, and let it come to room temperature.
To Assemble
- Place a dab of buttercream on your cake board and secure one layer of the mocha genoise on top of it (smooth base, down)
- Roughly measure ¾ cup of frosting onto this layer and spread it out evenly. Place another cake layer on top (smooth base facing up this time).
- Spread another ¾ cup of the frosting evenly on top.
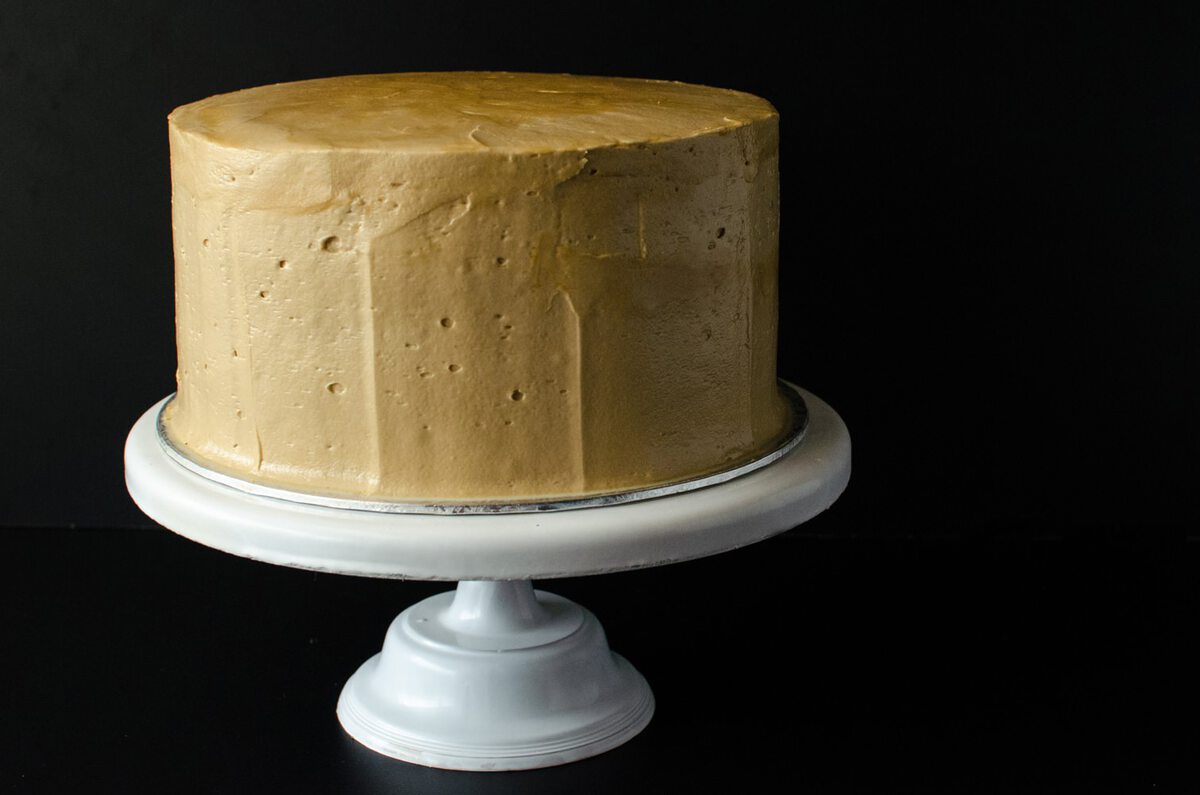
- Place the final layer on top (smooth base facing up again). Apply a thin “crumb coating” of frosting and refrigerate until the frosting sets – about 30 minutes.
- Spread the rest of the frosting evenly over the cake. You can use an offset spatula to smoothen the frosting (or keep it messy – your call!).
- To smoothen the frosting further, let the frosting layer set in the fridge for about an hour, and use a warm spatula to get a smooth surface.
Recipe Notes
“This website provides approximate nutrition information for convenience and as a courtesy only. Nutrition data is gathered primarily from the USDA Food Composition Database, whenever available, or otherwise other online calculators.”
I’m not sure if a cake can be both luxuriously rich and light at the same time, but this one seems to pull it off quite well. The coffee syrup soaked genoise sponge cake has a beautifully moist yet light crumb.
And that frosting… oh that frosting. Smooth, soft, creamy, buttery, sweet…

This is a frosting with character. It’s got layers of flavour, with the coffee and the burnt caramel and the buttery sweetness and all the rest of it. Even my husband – who isn’t a big fan of sweet things and isn’t too into frosting – thought that this was the best frosting I have made so far.

It was a big cake, so there was plenty to go around. 🙂 When it came to the leftover frosting though, Mr K didn’t even stand a chance.


Leave a Reply