Savory Scallion and Sesame Milk Bread makes the most amazing sandwiches! But it’s also incredibly delicious on its own. It’ll be hard to stop at one slice (or three), so make sure to make at least 2 loaves! 😀
With black sesame and scallions, this Japanese Milk Bread is so soft, fluffy and flavorful!
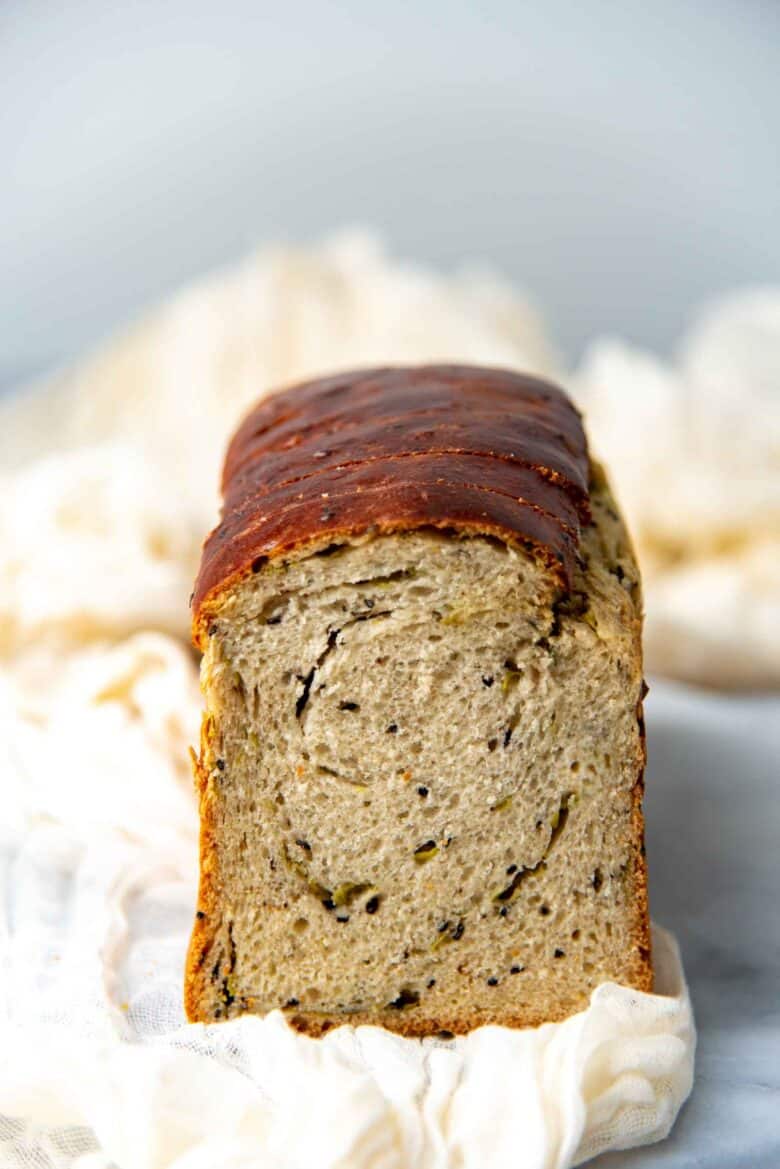
While I do have bit of a sweet tooth, I love making savory bread too. They are a flavorful vehicle for delicious savory sandwiches (like this shrimp katsu sandwich, or this Japanese egg salad sandwich!). This Scallion and sesame milk bread is truly one of my favorites. They make a simple ham and cheese sandwich absolutely sing. Even a grilled cheese sandwich is better when made with this scallion and sesame milk bread.
Basics of Japanese Milk Bread
My Japanese milk bread recipe (Hokkaido milk bread) is popular for a reason. The bread is so milky, a little sweet, ridiculously soft and fluffy! If eating a fluffy, chewy cloud was a thing, this might be a lot like that. Now imagine that same bread with the added savory flavor of scallions and sesame? Ooh-la-la-la.
What makes Japanese milk bread special is the addition of tangzhong to the dough.
What is Tangzhong?
Tangzhong is a water roux, which consists of water (or milk) and flour cooked together to form a paste. Tangzhong is a Japanese technique for baking bread, which yields soft and pillowy textured breads.
When the roux is cooked, the starch is gelatinized at high temperatures by absorbing the liquid, WITHOUT forming any gluten in its structure. Instead, it develops a starch matrix. The starch molecules in tangzhong absorb far more liquid than it would otherwise at room temperature. Tangzhong adds more moisture when it’s added to the bread dough, along with the soft gelatinized starch matrix. This creates bread with a cushion-like, spongy texture in the final baked product.
Ingredients for the recipe
Tangzhong
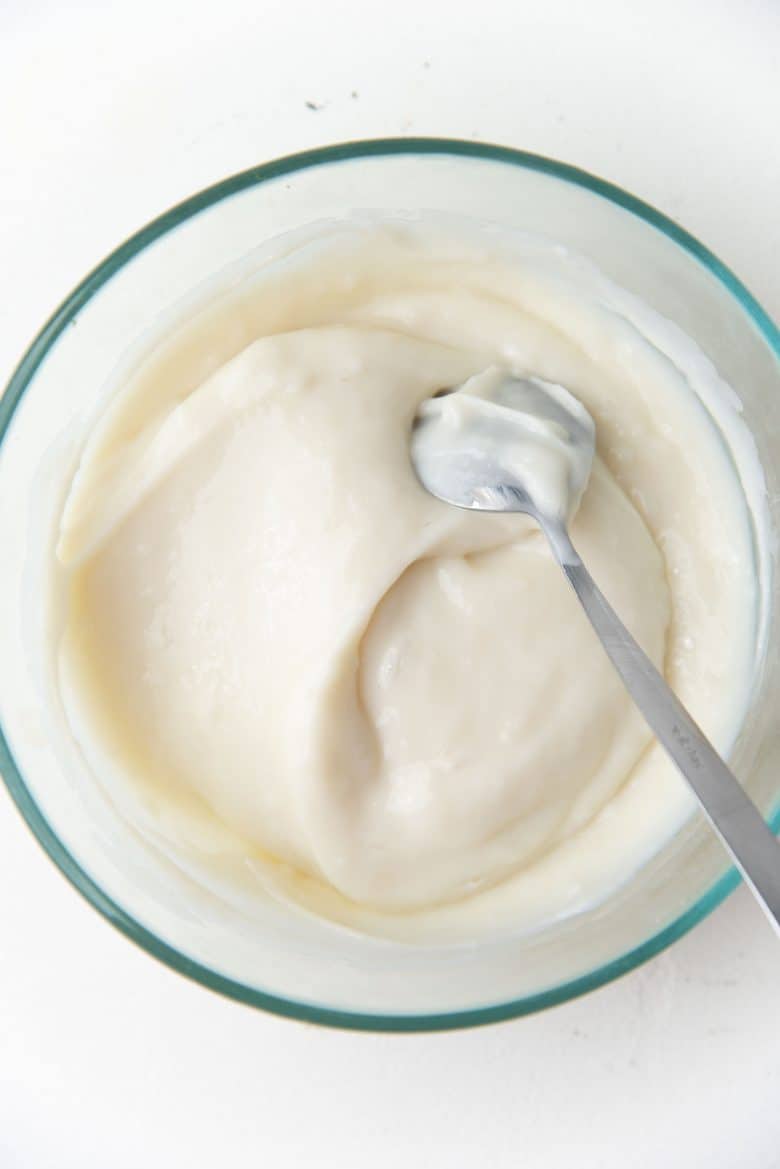
Tangzhong is an ingredient in the recipe, but you need to make this in advance. This is made with bread flour and milk (or water), boiled together to form a thick paste. It must be cooled down to lukewarm or room temperature, before adding it to the scallion and sesame milk bread dough.
Bread flour
To achieve the chewy texture of Japanese milk bread, bread flour is preferred over AP flour. Bread flour has a higher protein content, which results in more gluten. But you can also make this with AP flour, but the resulting bread will have a less chewy texture.
Milk
I use milk instead of water to hydrate the bread because milk adds flavor to the loaf as well. You can substitute the milk with water if you like. For dairy-free options, you can also use almond milk, soy milk, or oat milk.
Yeast
Obviously you need yeast to make bread. I use active dry yeast here. Active dry yeast usually needs to be activated before using it. This is especially true if the yeast that you’re using has larger granules. Activating will help dissolve the granules.
I use Bob’s red mill active dry yeast, where the granules are finer and it dissolves into the dough much easily. I don’t always activate the yeast if I know the yeast is fresh.
You can use instant yeast too, but follow the manufacture’s instructions for accurate substitutions. Do keep in mind that this substitution ratio/amount can vary depending on the manufacturer’s recommendations or the recipe.
Some substitute at a 1:1 ratio, but you will have to keep an eye on the bread as it proofs.
I have also had recommendations to use only 75% (by weight) of instant yeast (compared to active dry yeast). Since it is active you will still need to keep an eye on proofing times.
Milk powder
Milk powder adds even more depth of flavor to this scallion and sesame milk bread, giving the bread that characteristic, delicious milky taste. It also tenderizes the bread. You can now find vegan powdered milk options (coconut, soy etc). If you don’t have milk powder, simply leave it out.
Sugar
Sugar not only adds sweetness to the bread, but it also tenderizes the bread. Japanese milk bread is usually sweet, so you can add up to 75g of sugar for more sweetness. I prefer the sweet and savory balance of my recipe though.
Eggs
I use large eggs for this recipe. Each egg weighing about 2 oz / 56.6 g. The eggs not only add moisture, but richness as well.
Unsalted butter
Butter is also a tenderizer for bread. It adds richness and flavor to the bread.
Flavoring
To flavor the scallion and sesame milk bread, I add,
- Salt – I use sea salt which is fine in texture. This is absolutely needed to prevent a bland tasting bread.
- Sesame seeds – I use black sesame seeds so that I can see the sesame seeds in the bread loaf.
- Roasted sesame oil – Just a little goes a long way, without overwhelming the flavor of the bread.
- Chinese 5 spice powder.
- Finely chopped scallions.
How to make Japanese milk bread with black sesame and scallions
The first day
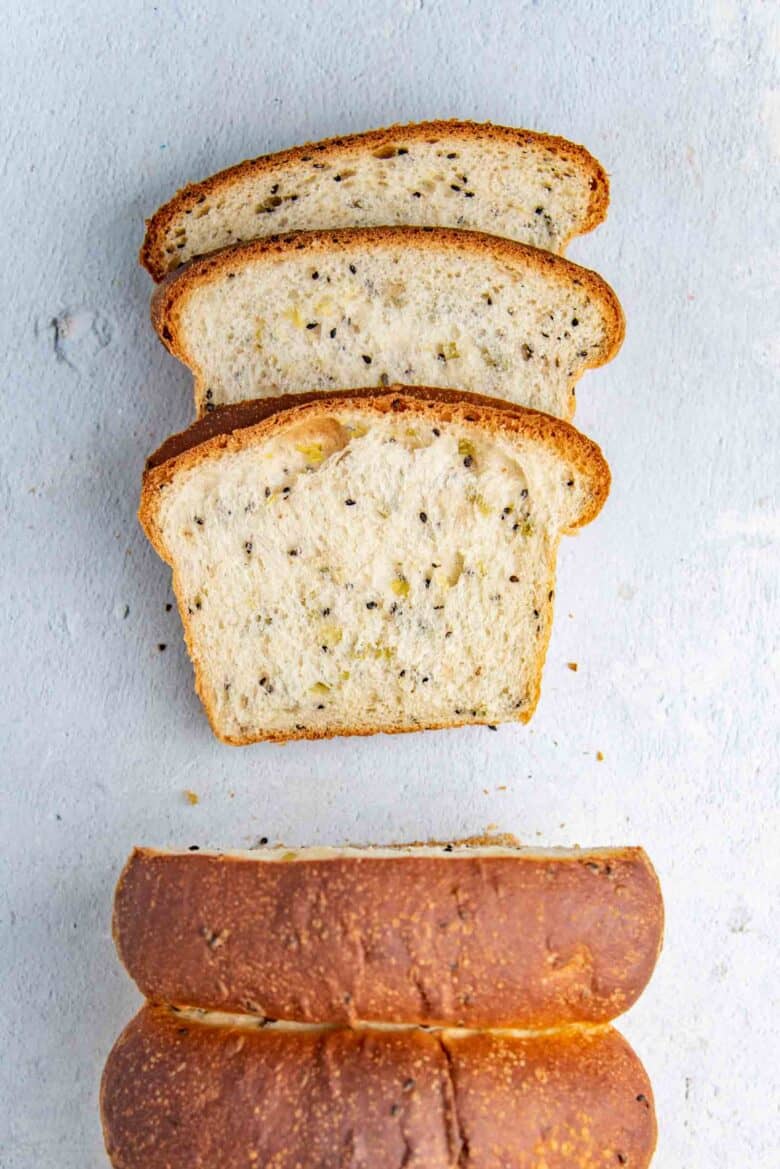
The method for making this flavorful loaf of milk bread is similar to that of classic Japanese milk bread. The only difference is the addition of sesame seeds (and roasted sesame oil), scallions, and Chinese 5 spice.
The first step is to make the tangzhong. Whisk the flour in milk or water until smooth. Heat this mixture, while whisking, until it thickens to form a paste. Transfer the paste to a bowl and cover the whole surface of the paste with plastic wrap. Let it cool to room temperature before you start to make the dough.
Once the tangzhong is cooled to room temperature, start the process of making the scallion and sesame milk bread.
Activate the yeast in the warm milk, inside the mixer bowl.
When the yeast mixture is frothy and bubbly, add the rest of the ingredients, except for the butter. Make sure to not add the salt directly to the activated yeast mixture. The salt could kill the active yeast. To prevent this, I add the flour first, and then the salt, so that the salt is separated from the yeast by flour.
Mix the dough to get a scraggly looking dough. Knead the dough until it starts to look smooth. Finally, add the butter along with the black sesame seeds. Knead the dough until the butter is completely incorporated and the sesame seeds have distributed through the dough.

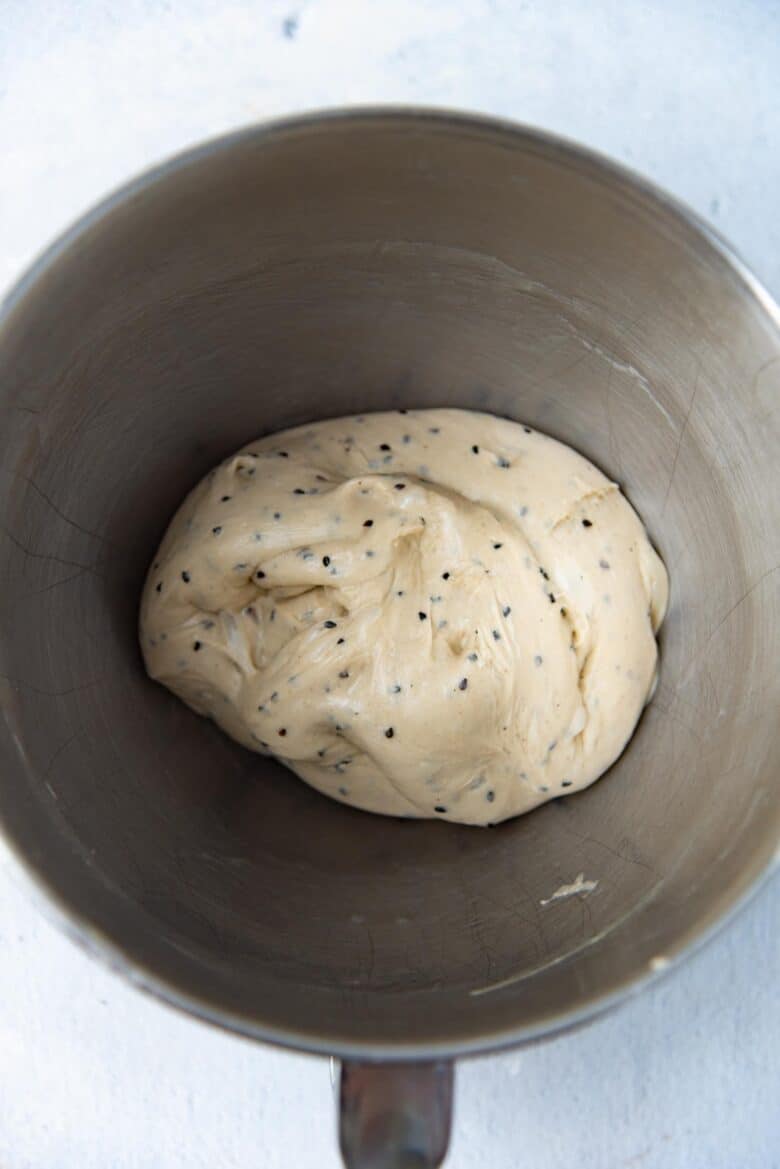
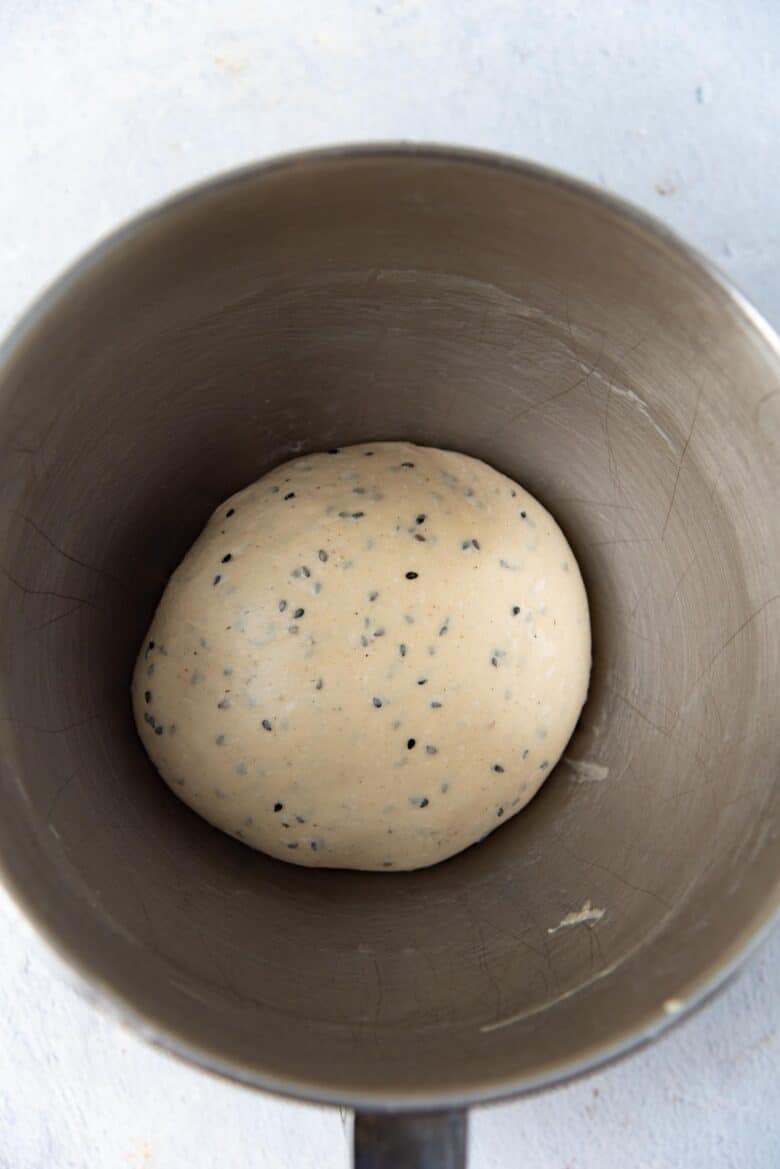
Proof the black sesame milk bread dough until it’s about doubled in size OR you can place the dough in the fridge for about 12 hours for a slow proof. I prefer to proof the dough in the fridge, because this allows me to spread out my work load, but also develops more flavor in the dough, PLUS a chilled dough is much easier to work with. Win-win-win.
The second day (if you do an overnight proof)
Deflate the dough by gently pressing it. The excess gas will release from the dough when you do this.
Shape the loaf – First method (see below for pictures)
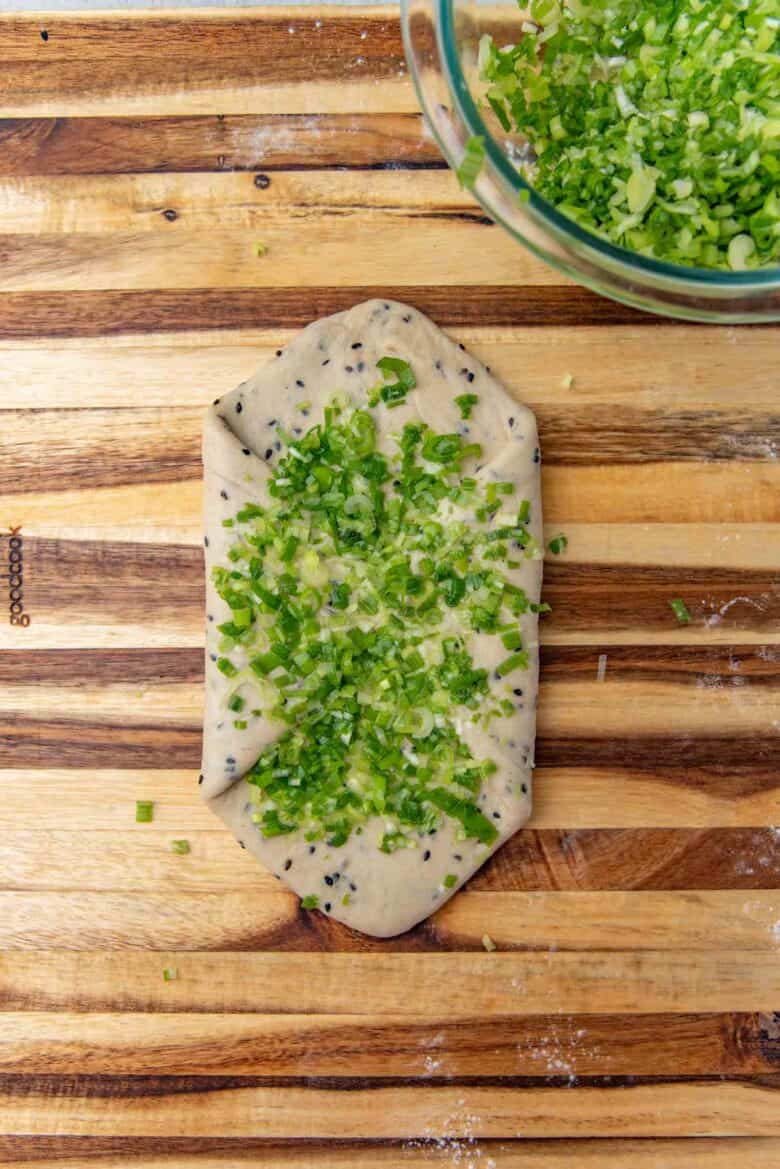
Divide the dough into four portions. Roll out each dough into a square that is about 6 – 7 inches in length. Fold two opposite corners towards the center of the square (as shown in the pictures below). You will end up with a long piece of dough with two points on each end, and should be about 4 inches in width (the width of the loaf pan).
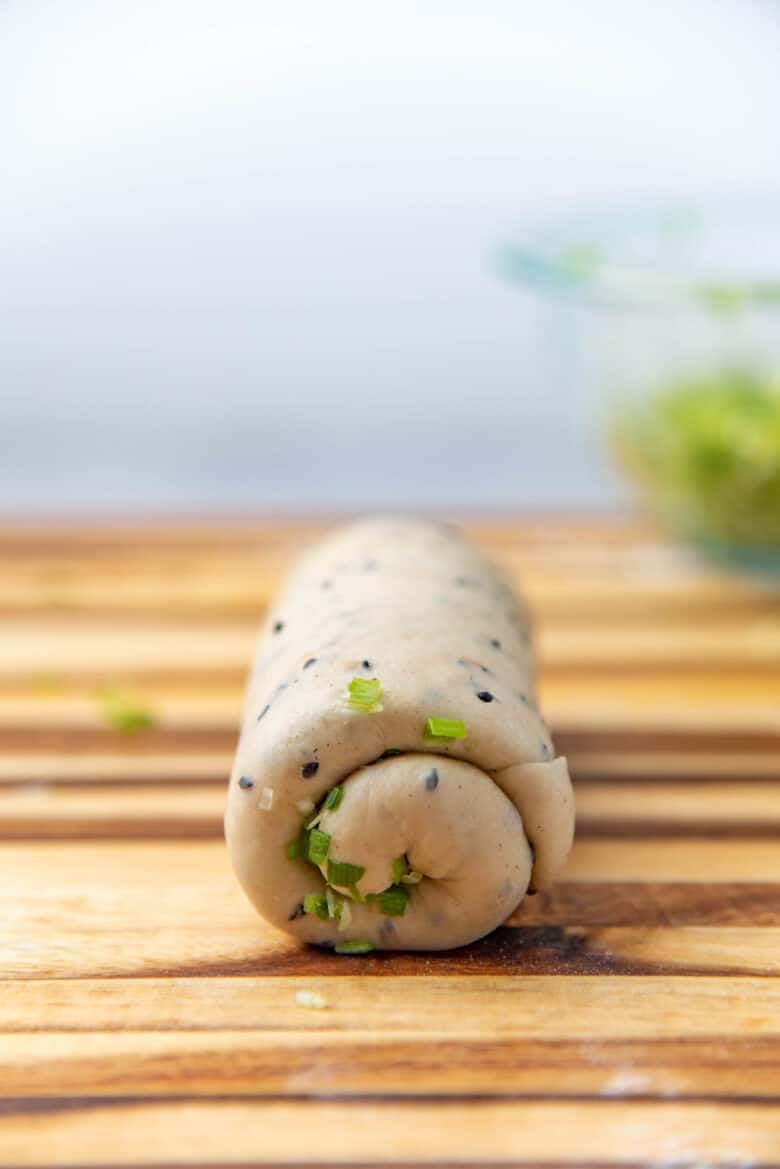
Generously sprinkle the chopped scallions over the dough. Now roll up the dough piece tightly, starting from one point towards the other. Pinch the edge to seal the roll.
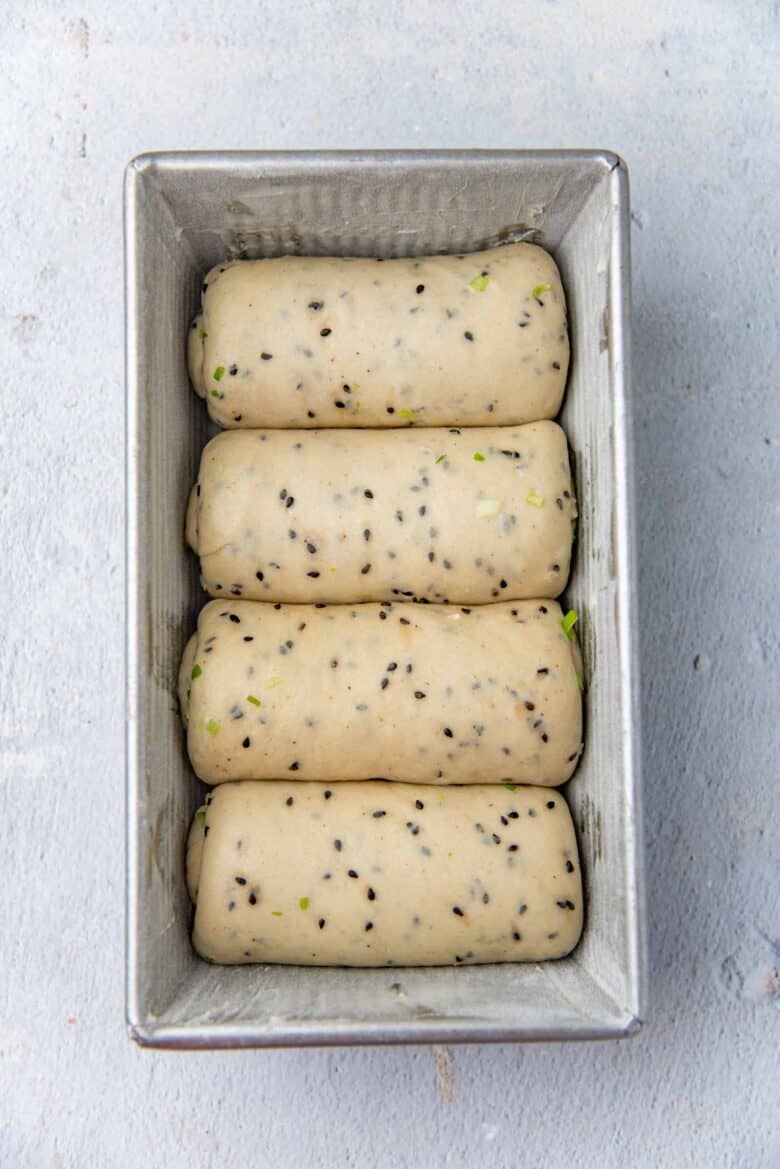
Place the roll (seam side down) inside the loaf pan. Repeat with the 3 other dough portions. This way, you’ll end up with four portions of rolled dough in your loaf pan.
Cover the pan with plastic wrap and let the scallion and sesame milk bread dough proof in a warm place until it has about doubled in size.


Shape the loaf – Second method (see below for pictures)
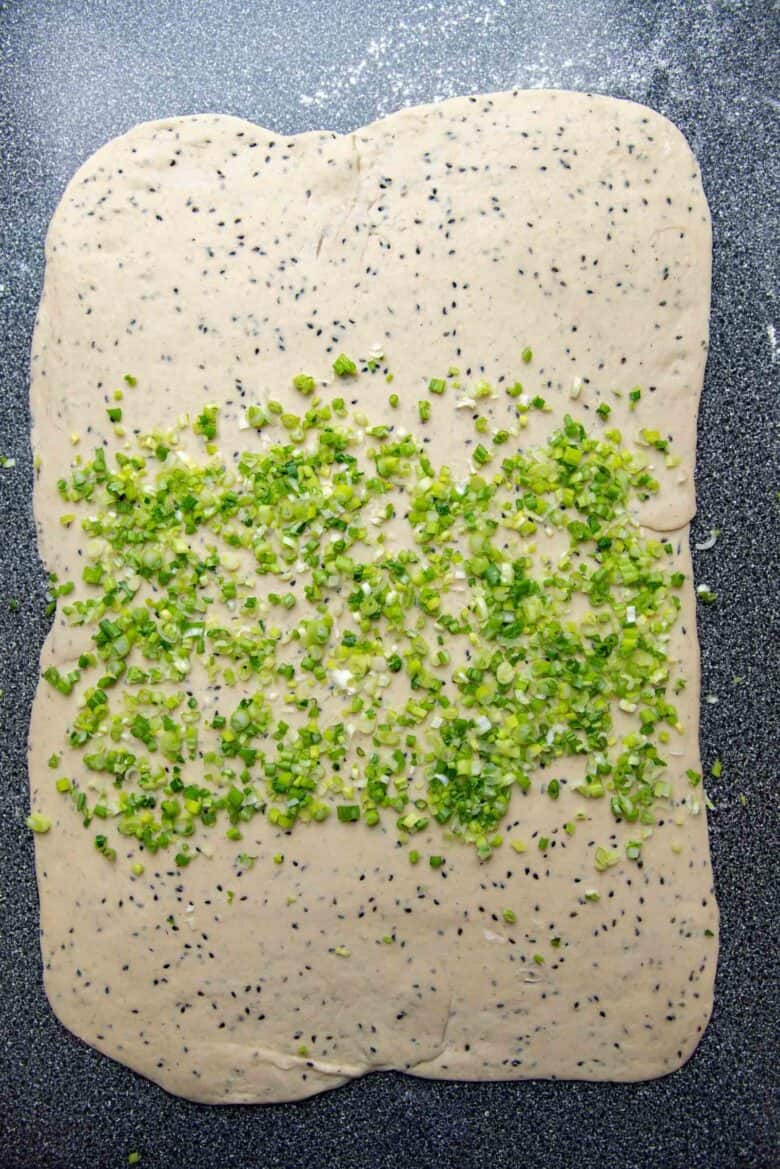
Roll out the dough into a 16 x 12 inch rectangle.
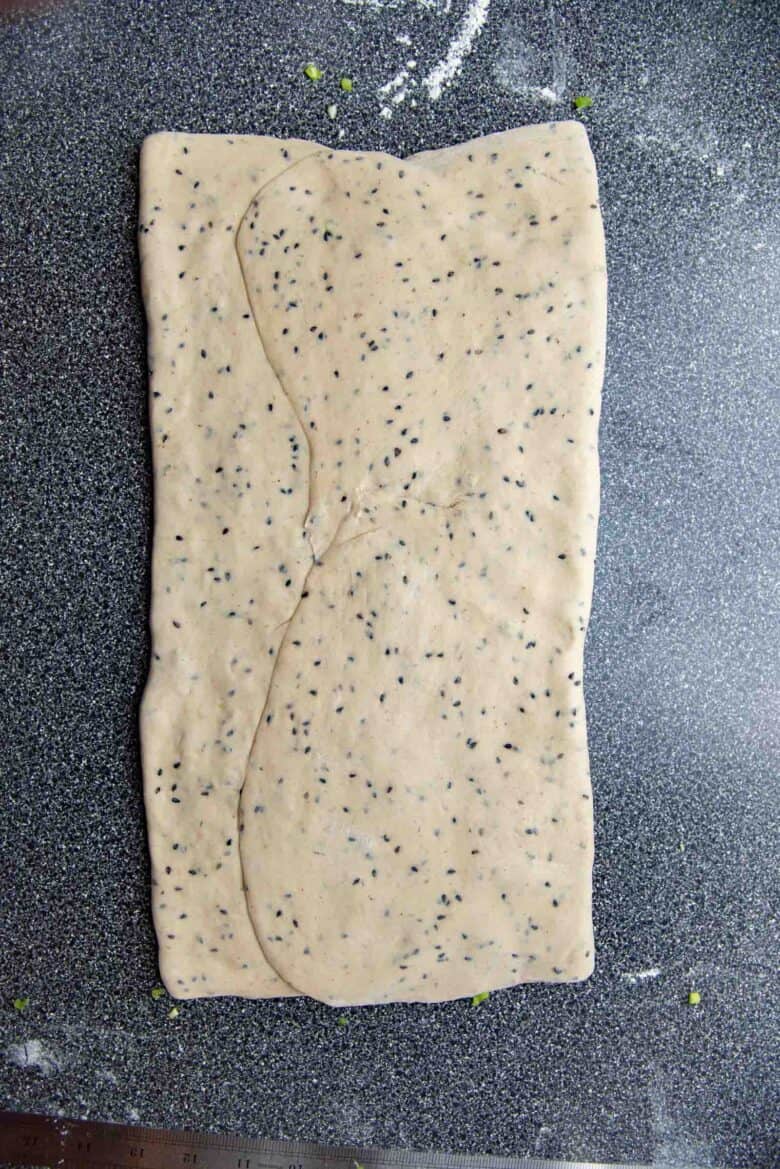
Sprinkle the finely chopped scallion along the middle of the rectangle (as shown below). Fold the 16 inch edges (i.e. the longer edges of the rectangle) towards the middle, so that you create a 8 x 12 inch rectangle. Then gently press down on the dough.
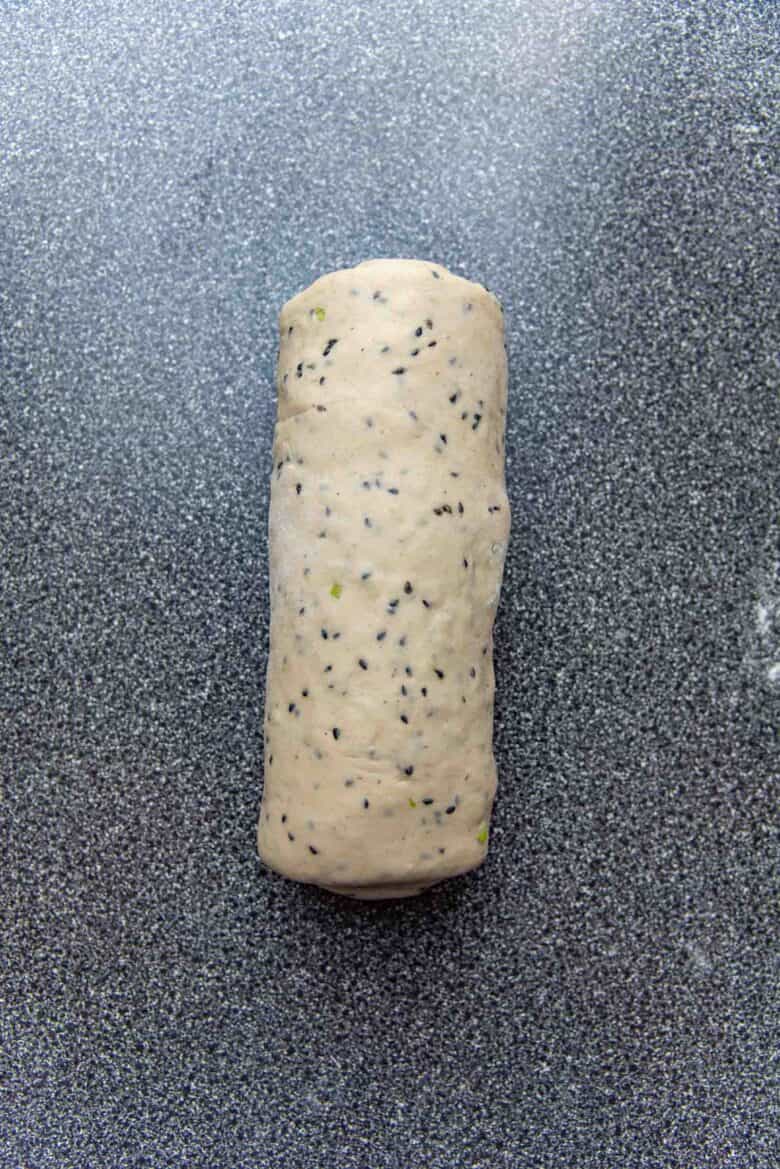
Now roll up the rectangle along the 12 inch edge to form a roll of dough. Make sure to roll it tightly to prevent any air pockets. You should end up with a dough roll that is about 8 inches in length.



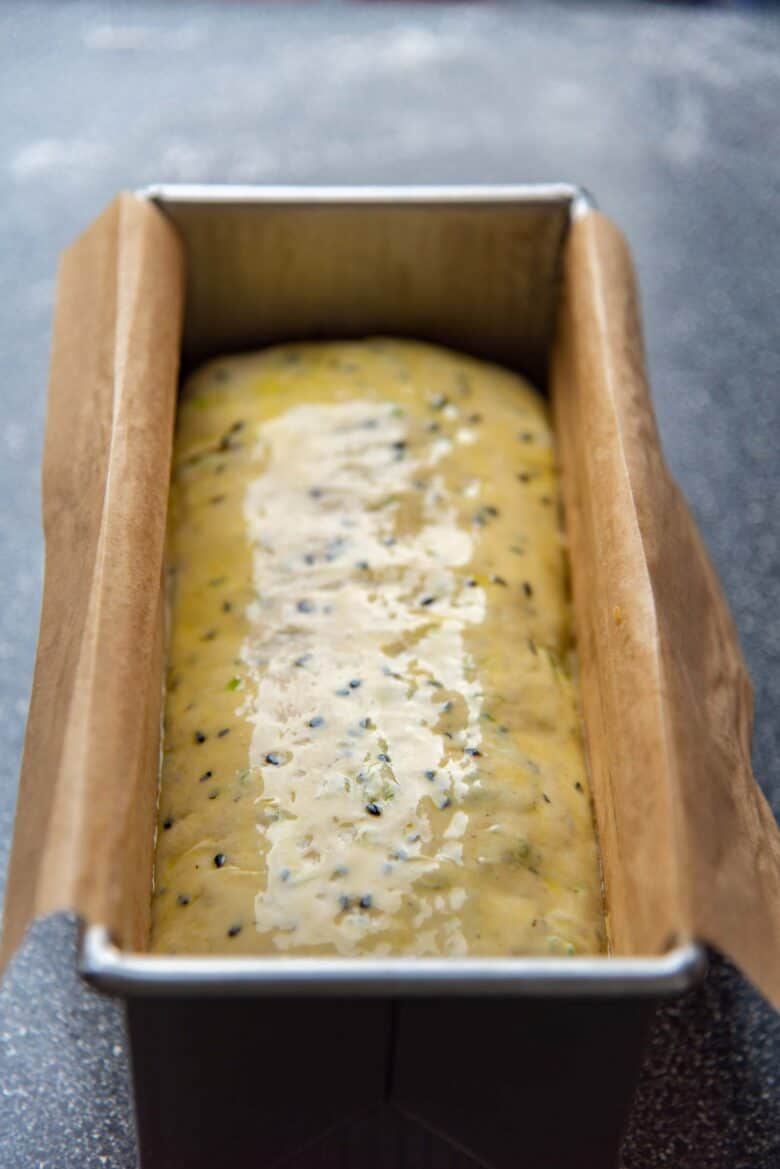
Place this inside the prepared loaf pan. Cover the pan with plastic wrap and let the scallion and sesame milk bread dough proof in a warm place until it has about doubled in size.

How to check if the bread is proofed
The best way to check if the bread is proofed is by the indentation test. This is especially helpful if you’re not very familiar with baking bread.
Make sure your finger is clean and dry. If needed, dip your finger in a little flour to coat. This is to prevent your fingertip from sticking to the dough.
Gently press into the dough to create an indentation. The indentation shouldn’t be too deep, just about 0.5 cm deep.
- If the indentation pops back up to normal = under-proofed, so proof longer
- If the indentation stays that way = proofed (almost over-proofed), so bake immediately
- Indentation comes back up slightly, but still holds = proofed, bake immediately. This is the point when I like to bake my sandwich loaves.
- The dough deflates upon making the indentation = dough is completely over-proofed.
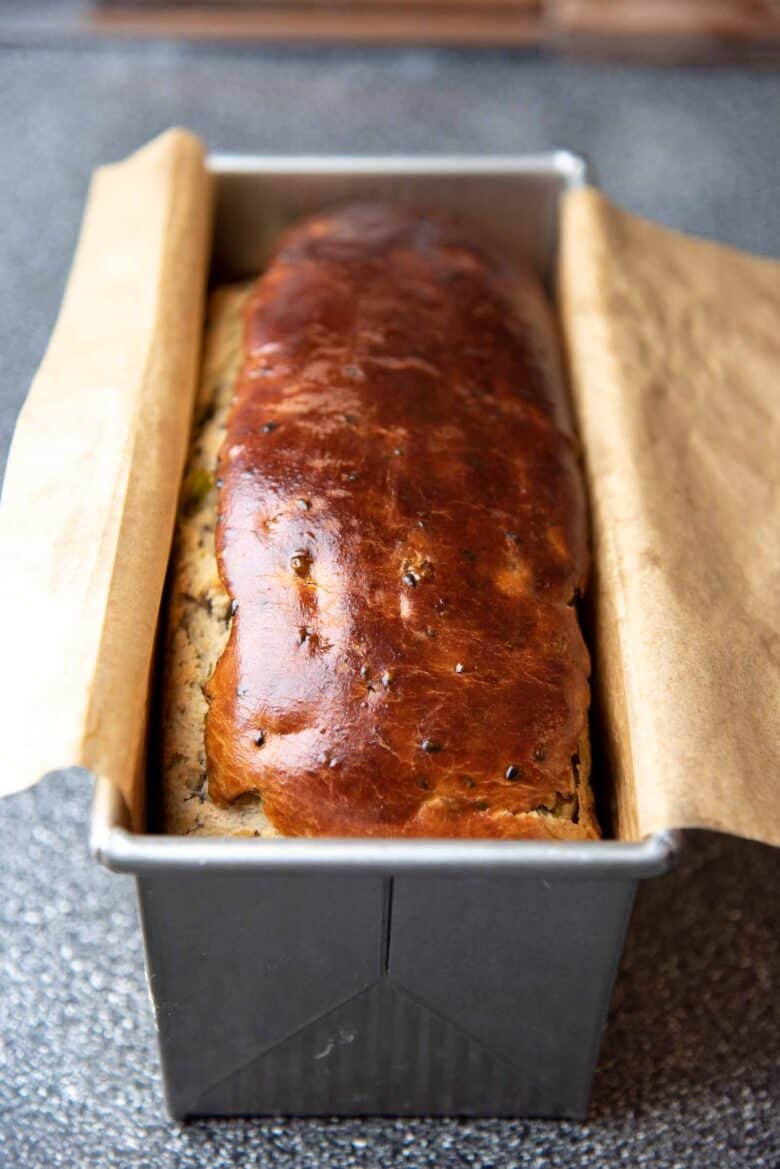
Once the loaf is proofed, brush the top of the bread with eggs (for a shiny glaze), or milk (for a matte glaze). An optional step would be to sprinkle the top with sesame seeds as well. Bake the scallion and black sesame Japanese milk bread in a preheated oven until the top is dark golden brown in color, and the internal temperature registers at about 190 – 200 F.
Remove the pan from the oven and let it cool for a few minutes. Transfer the loaf onto a wire rack and let it cool completely. Do NOT cut the loaf while it’s hot, it will result in a gummy texture. Wait at least until the bread is only slightly warm.
Tips for perfecting this bread recipe
- To get the correct consistency for the tangzhong, I prefer to make a double batch of tangzhong at a time. This allows for the liquid to actually come to a boil before thickening to a paste. But I also make bread often at home, so a double batch makes sense for me.
- Measure ingredients by weight for consistent results.
- Use bread flour. This will give a lovely springy, chewy texture to your bread.
- Knead the dough until you achieve the correct texture, rather than going strictly by time. Do the window pane test to accurately tell when the dough has been kneaded sufficiently.
- The dough is meant to be tacky! Don’t be tempted to add more flour to make the dough “less sticky”. This will mess with the consistency and you will end up with a dry, crumbly black sesame milk bread loaf.
- If you’re a beginner, I recommend proofing the dough in the fridge for 8 – 12 hours. The chilled dough is easier to shape.
- For the final proof, check the dough if it’s proofed properly with the indentation test. Proofing times will vary depending on weather conditions and the ambient temperature / humidity in your kitchen.
- To veganize this recipe, replace
- 1 egg with 1/4 cup soy milk / almond milk (has more protein).
- milk with a plant-based milk.
- butter with a vegan butter.
- milk powder can be left out, OR replaced with a vegan milk powder alternative (like coconut or soy milk powder).
- milk powder can also be replaced with an equal amount of plant based evaporated milk product.
Why I LOVE this recipe
I love flavored bread. This flavor combination reminds me of scallion pancakes, and it’s definitely one of my top 5 favorite breads to make and eat! 🙂
It’s easy to make, and always yields foolproof results.
This bread is also perfect for savory sandwiches. Here are some ideas,
- Grilled cheese sandwich
- Egg salad sandwich
- Chicken katsu or fried chicken sandwich
- Pork katsu sandwich
- Ham and egg sandwiches
- Ham and cheese sandwiches
- BLT
- Shrimp katsu sandwiches
It also makes AMAZING savory French toast too!
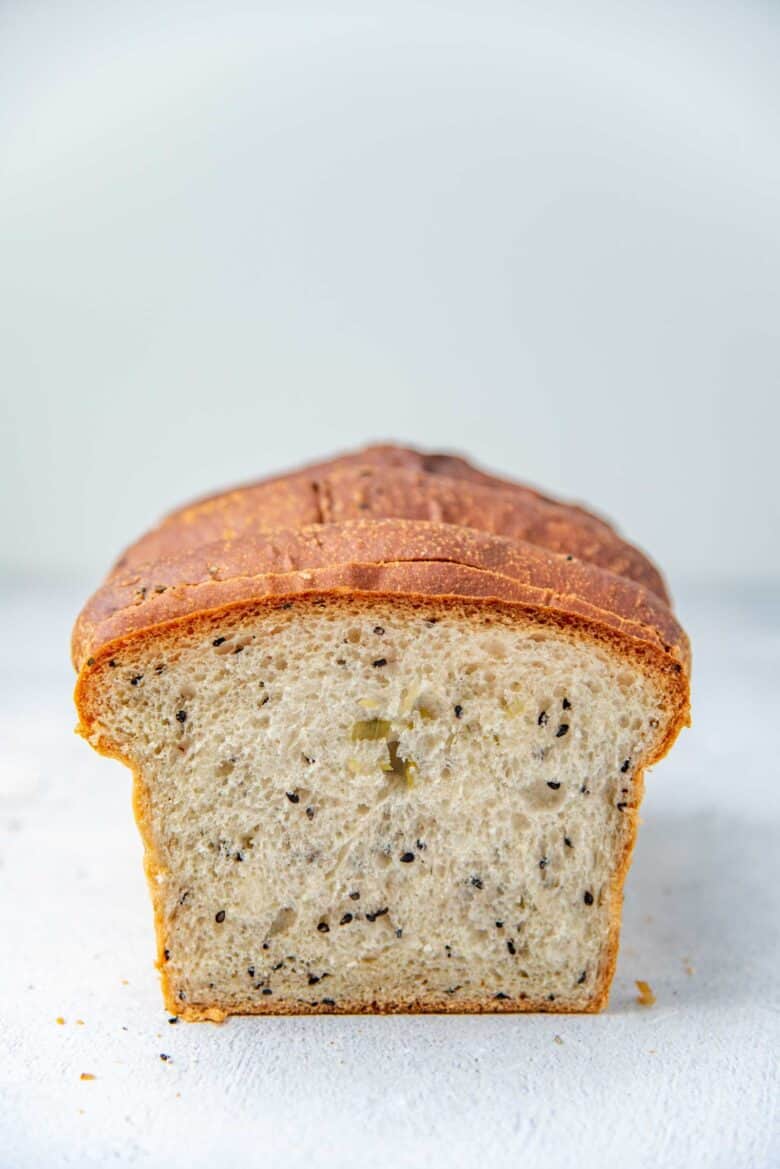
But it’s also just as glorious as is. Freshly baked, soft, springy, slightly chewy slices of this scallion and sesame milk bread are a party on their own!

Looking for more recipes?Sign up for my free recipe newsletter to get new recipes in your inbox each week! Find me sharing more inspiration on Pinterest and Instagram.
Scallion and Sesame Milk Bread (Sesame Shoku Pan)
Ingredients:
Tangzhong
- 60 mL water ¼ cup
- 60 mL milk ¼ cup
- 23 g bread flour
Japanese milk bread
- Tangzhong room temperature
- 120 mL milk ½ cup, lukewarm
- 7 g active dry yeast 2 – 2 ¼ tsp
- 50 g sugar ¼ cup
- 15 g dry milk powder 2 tbsp
- ½ tsp Chinese 5 spice powder
- 1 large egg
- 350 g bread flour about 2 ⅔ cups, measured by spoon and level method
- 1 tsp sea salt
- 58 g unsalted butter 4 tbsp / ½ stick, softened
- 2 tsp roasted sesame oil optional
- 2 tbsp black sesame seeds
- 1 cup chopped scallions / spring onions you will need between ¾–1 cup depending on how it's chopped
For the top of the bread
- 1 egg, beaten or ½ an egg
- Milk
- Sesame seeds
Instructions:
Tangzhong
- Place the water in a small saucepan. Add the bread flour and whisk until you have a smooth mix with no lumps. Add the rest of the milk and whisk to combine.60 mL water, 23 g bread flour, 60 mL milk
- Heat over medium heat while whisking constantly until the mixture thickens. The resulting mixture should have a thick, pudding-like consistency.
- Scrape the mixture into a bowl and then cover with plastic wrap. Make sure the plastic wrap is touching the surface of the tangzhong to prevent a skin from forming on top.
- Allow the tangzhong to cool to room temperature.
Japanese milk bread dough
- In your mixing bowl, place the lukewarm milk and dissolve about 1 tsp of the sugar in the liquid. Sprinkle the yeast over the milk and stir gently to mix. Allow the milk + yeast mixture to stand for about 10 – 15 minutes until the yeast is activated. The mixture should become bubbly and frothy on the surface.120 mL milk, 7 g active dry yeast
- Once the yeast is activated, add the milk powder (if using), the rest of the sugar, tangzhong, the egg, flour, spice powder, and finally the salt.50 g sugar, 15 g dry milk powder, ½ tsp Chinese 5 spice powder, 1 large egg, 350 g bread flour, 1 tsp sea salt, Tangzhong
- Using a spatula, mix the dough to combine the ingredients and to help form a scraggly dough.
- With the dough hook attached to your mixer, knead the dough for about 5 minutes on a low speed (speed 2 or 3). The dough will be very sticky and stick to the sides, but continue mixing and the dough will start to come together.
- After 5 minutes of kneading, add half of the butter, and the sesame seeds, and knead those in for about 2 minutes or until the butter is mixed through.58 g unsalted butter, 2 tbsp black sesame seeds
- Next, add the second half of the butter, along with the roasted sesame oil. Knead for about 2 minutes until the butter is fully incorporated. Scrape down the sides and the bottom of the bowl to make sure the dough is mixing well.58 g unsalted butter, 2 tsp roasted sesame oil
- Once all the butter is incorporated into the dough, turn up the speed to 4 – 5 (medium speed) and knead for a further 10 minutes. Scrape the bowl once or twice while kneading.
- The dough should become smooth, satiny and pull off cleanly from the sides of the bowl. Take a piece of the dough and stretch it gently to see if it passes the window pane test. If the dough tears before you can create a thin “window”, knead the dough for a further few minutes until you can create the “window pane” with the dough.
- Once the dough is sufficiently kneaded, place the dough on a lightly floured surface and shape it into a ball. Brush the inside of the mixer bowl with oil or butter, then place the dough ball back in the bowl and cover with plastic wrap.
- Keep the bowl in a warm place and allow the dough to double in size (about 1 – 2 hours, depending on the weather / ambient room temperature).
- When the dough has proofed in a warm place, you can transfer it to the fridge for a couple of hours just to make the dough a little easier to handle. THIS IS AN OPTIONAL STEP.
- ALTERNATIVELY, place the bowl in the fridge and let it slow proof for about 12 hours. The dough will be easy to handle when chilled.
- Once the dough is proofed and you’re ready to shape it, prepare the loaf pan. Butter 1 – 4.5 x 8.5 inch loaf pan and dust the pan with flour.
- Turn the dough out onto a lightly floured surface and press all the excess air out of the dough.
Japanese milk bread loaf (four portioned dough loaf)
- Weigh the dough, and divide it into 4 equal portions.
- Roll out each dough portion into a six inch (approximately) square.
- Fold two opposite corners of the square towards the middle (see pictures in the post for a visual illustration).
- Sprinkle about 2 – 3 tbsp of the finely chopped spring onions over the dough.1 cup chopped scallions / spring onions
- Roll up this piece of dough, starting from one pointed end towards the other. Make sure to roll up the dough firmly, and a little tightly. If it’s too loose, it may create air pockets and you might end up with large holes in your baked bread.
- Once you’ve rolled up the dough, fold in the pointed end and pinch the seam to seal.
- Place the rolled up dough in the dough pan, seam side down.
- Repeat with the 3 other dough portions and place them in the loaf pan. You'll end up with 4 portions of rolled dough in the pan.
- Cover the loaf pan with plastic wrap and let the dough proof in a warm place, until doubled in size. This can take about 1 – 2 hours depending on the ambient room temperature.
Japanese milk bread loaf (standard loaf)
- Roll out the dough on a lightly floured surface to form a 16 x 12 inch rectangle.
- Spread a thin layer of the finely sliced spring onions in the center of the rolled out dough (see pictures in the post). Fold over the long edges of the rectangle to meet in the middle, and then gently press down on the dough. You should end up with a dough that is about 8 x 12 inches, with spring onions sandwiched inside.1 cup chopped scallions / spring onions
- Tightly roll up the dough rectangle along the 12 inch edge. This way you'll end up with a dough that is about 8 – 9 inches in length. Pinch the seams to seal.
- Place this inside the prepared loaf pan.
- Cover the loaf pan with plastic wrap and let the dough proof in a warm place, until doubled in size. This can take about 1 – 2 hours depending on the ambient room temperature.
Baking the bread
- Preheat the oven to 350°F / 180°C, while you proof the bread loaf.
- Once preheated, AND the bread is proofed, brush the top of the bread dough with a milk wash (for a matte crust), or an egg wash (for a glossy crust). OPTIONAL – sprinkle some sesame seeds on top.1 egg, beaten, Milk, Sesame seeds
- Bake in the preheated oven for 30 – 35 minutes. If the bread starts to caramelize too much in the oven, place a piece of foil over the surface of the bread to prevent it from burning.
- If you have a thermometer, bake until the internal temperature is about 190 – 205°F (88 – 96°C).
- Remove the loaf pan / baking pan from the oven and let it cool for a few minutes.
- Turn the dough out onto a wire rack and let it cool down further.
- This bread is easier to slice when at room temperature, but can be enjoyed warm too.
Tips & Tricks
Notes on proofing
In winter, or if you don’t have a warm place to proof the dough in your house, turn on the oven light, and keep the bowl inside the oven. The heat from the light will warm the oven sufficiently to help with proofing. You can use a metal bowl to make this proofing process go faster. Proofing times will vary depending on the temperature of the dough, environment and the type of yeast you use. So rather than going by time, go by sight and feel.- If you make a small indent on the dough with your finger tip and it bounces back slightly, then it’s ready to be baked.
- If the indentation stays, it’s starting to over-proof, so bake it as quickly as possible.
- If the bread deflates when poked with a finger, then it has definitely over-proofed and may need to be re-done.
To veganize this recipe
- Replace 1 egg with 1/4 cup soy milk / almond milk (has more protein).
- Replace milk with a plant-based milk.
- Replace butter with a vegan butter.
- The milk powder can be left out, OR replaced with a vegan milk powder alternative (like coconut or soy milk powder).
- The milk powder can also be replaced with an equal amount of plant based evaporated milk product.
Nutrition Information:
“This website provides approximate nutrition information for convenience and as a courtesy only. Nutrition data is gathered primarily from the USDA Food Composition Database, whenever available, or otherwise other online calculators.”


Mimi says
I tried this savory variation after making (and loving!) your classic Japanese milk bread. This was just as good, if not better! 😀 It’s so fluffy and tasty.