


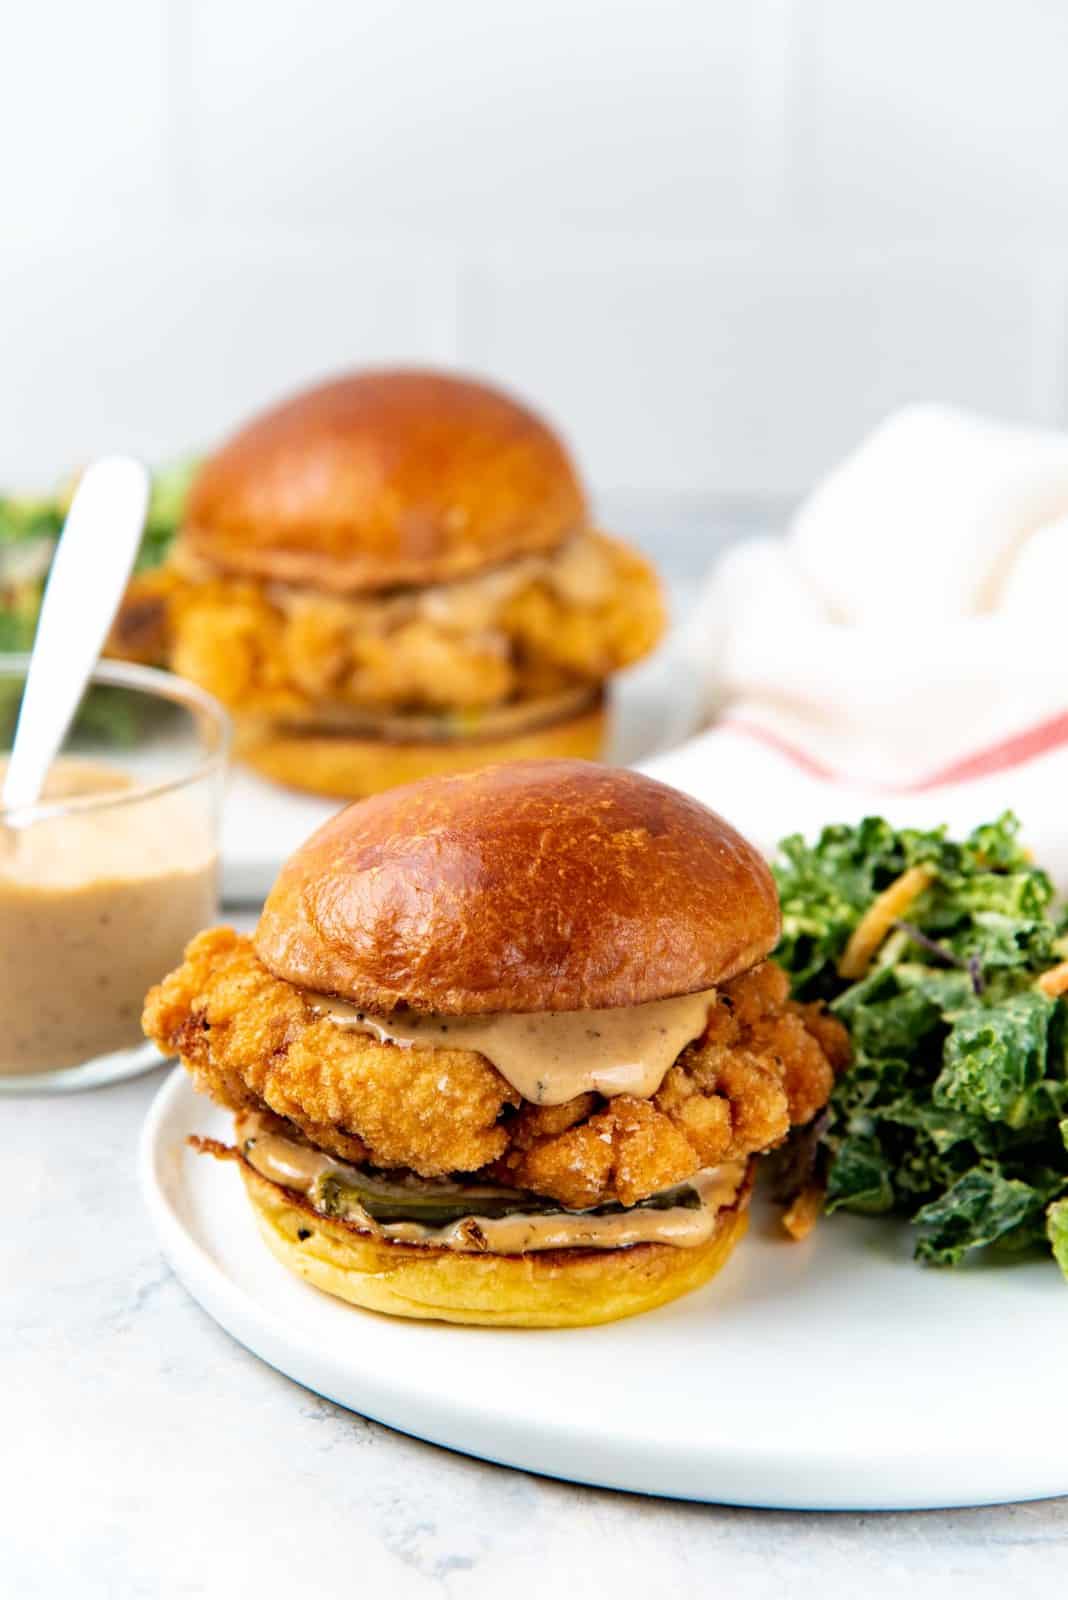
Delicious, buttermilk marinated, crispy fried chicken sandwich with a spicy aioli and pickles. Simple and scrumptious! Gluten free friendly.
Use my reader-favorite easy brioche buns recipe to make the BEST Fried Chicken Sandwich ever!
There are times when you just need a good fried chicken sandwich, and nothing else hits the spot the same way. And I love me a good fried chicken sandwich (the good kind, not the KFC kind). I usually fry my own when the cravings hit, but there’s a great fried chicken place in Ottawa that has soon become one of our favorites.
Yet there’s nothing like a homemade fried chicken sandwich. And for this recipe, I prefer to fry my own. That way I can make the chicken as flavorful as possible! 🙂
Fried chicken
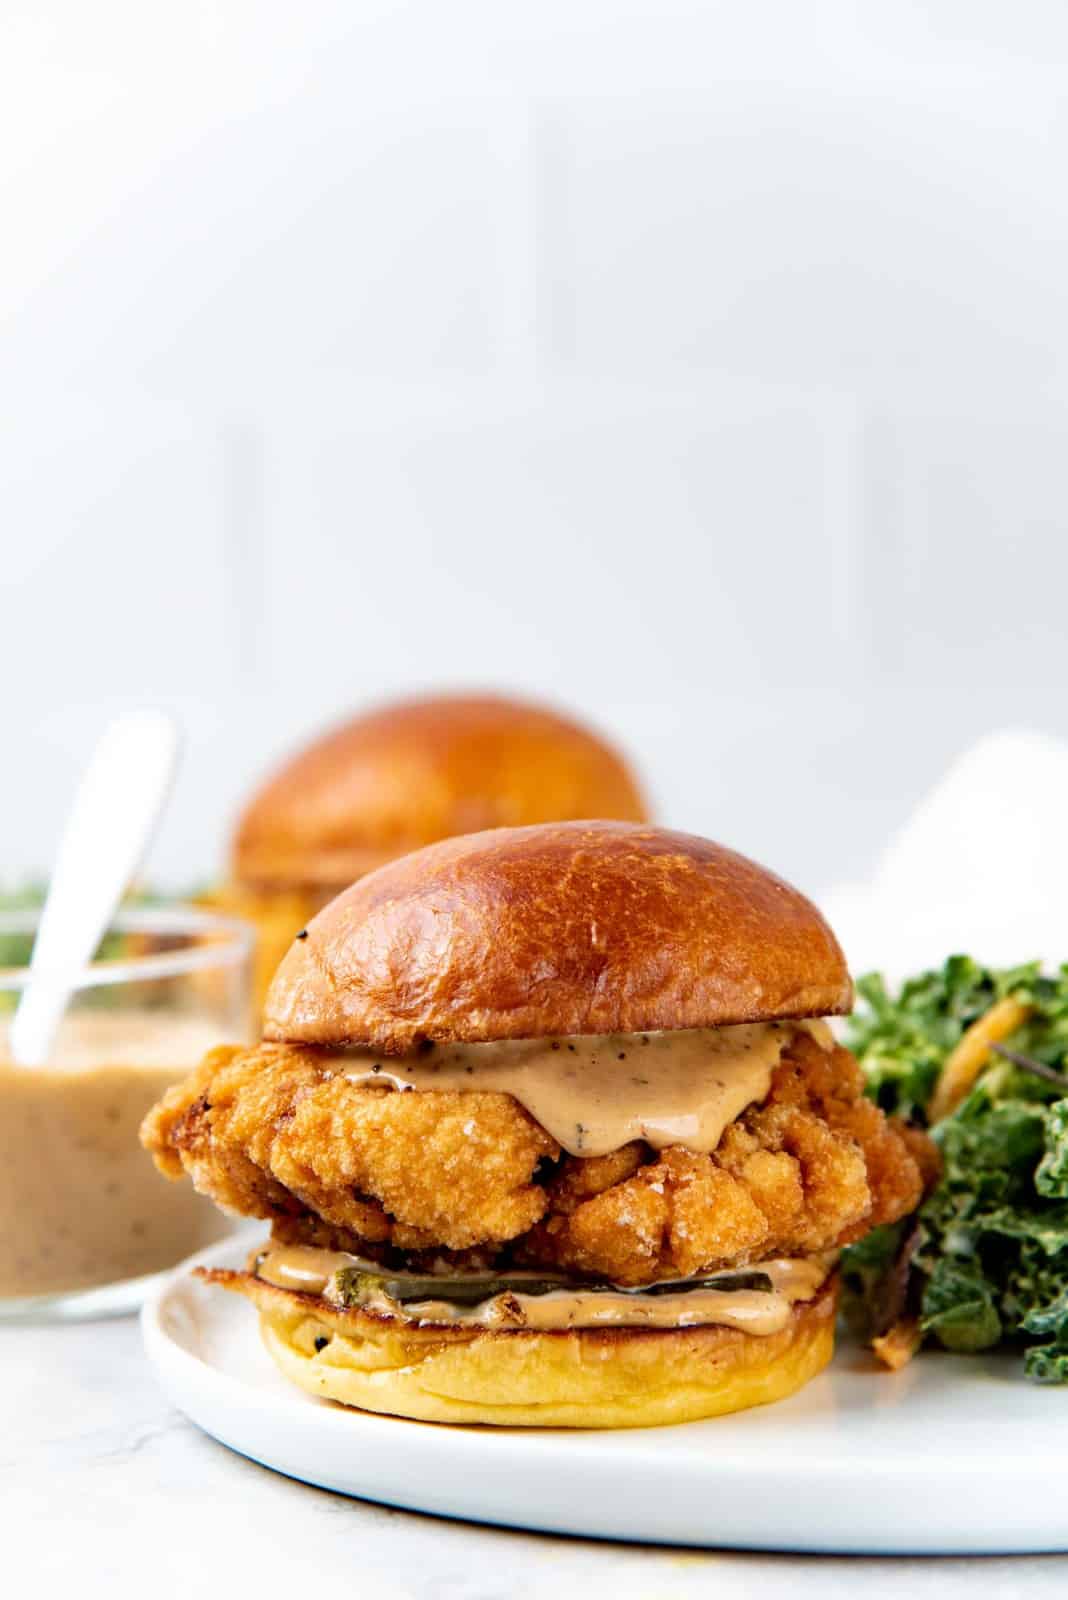
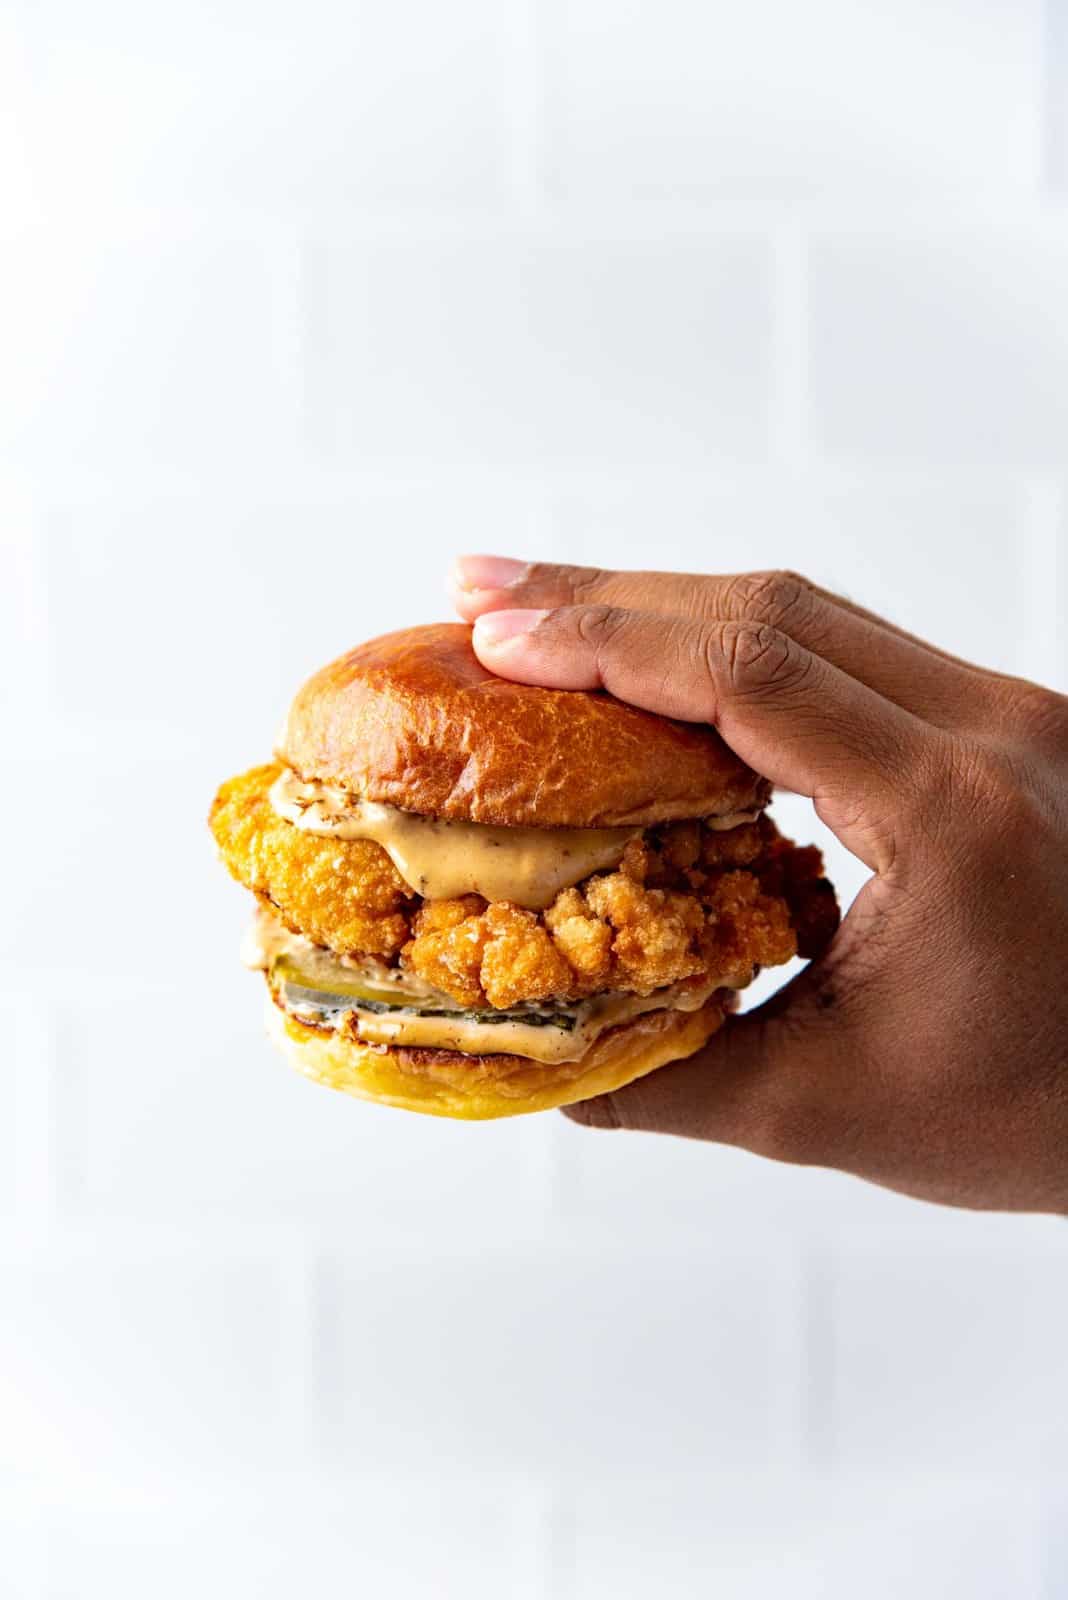
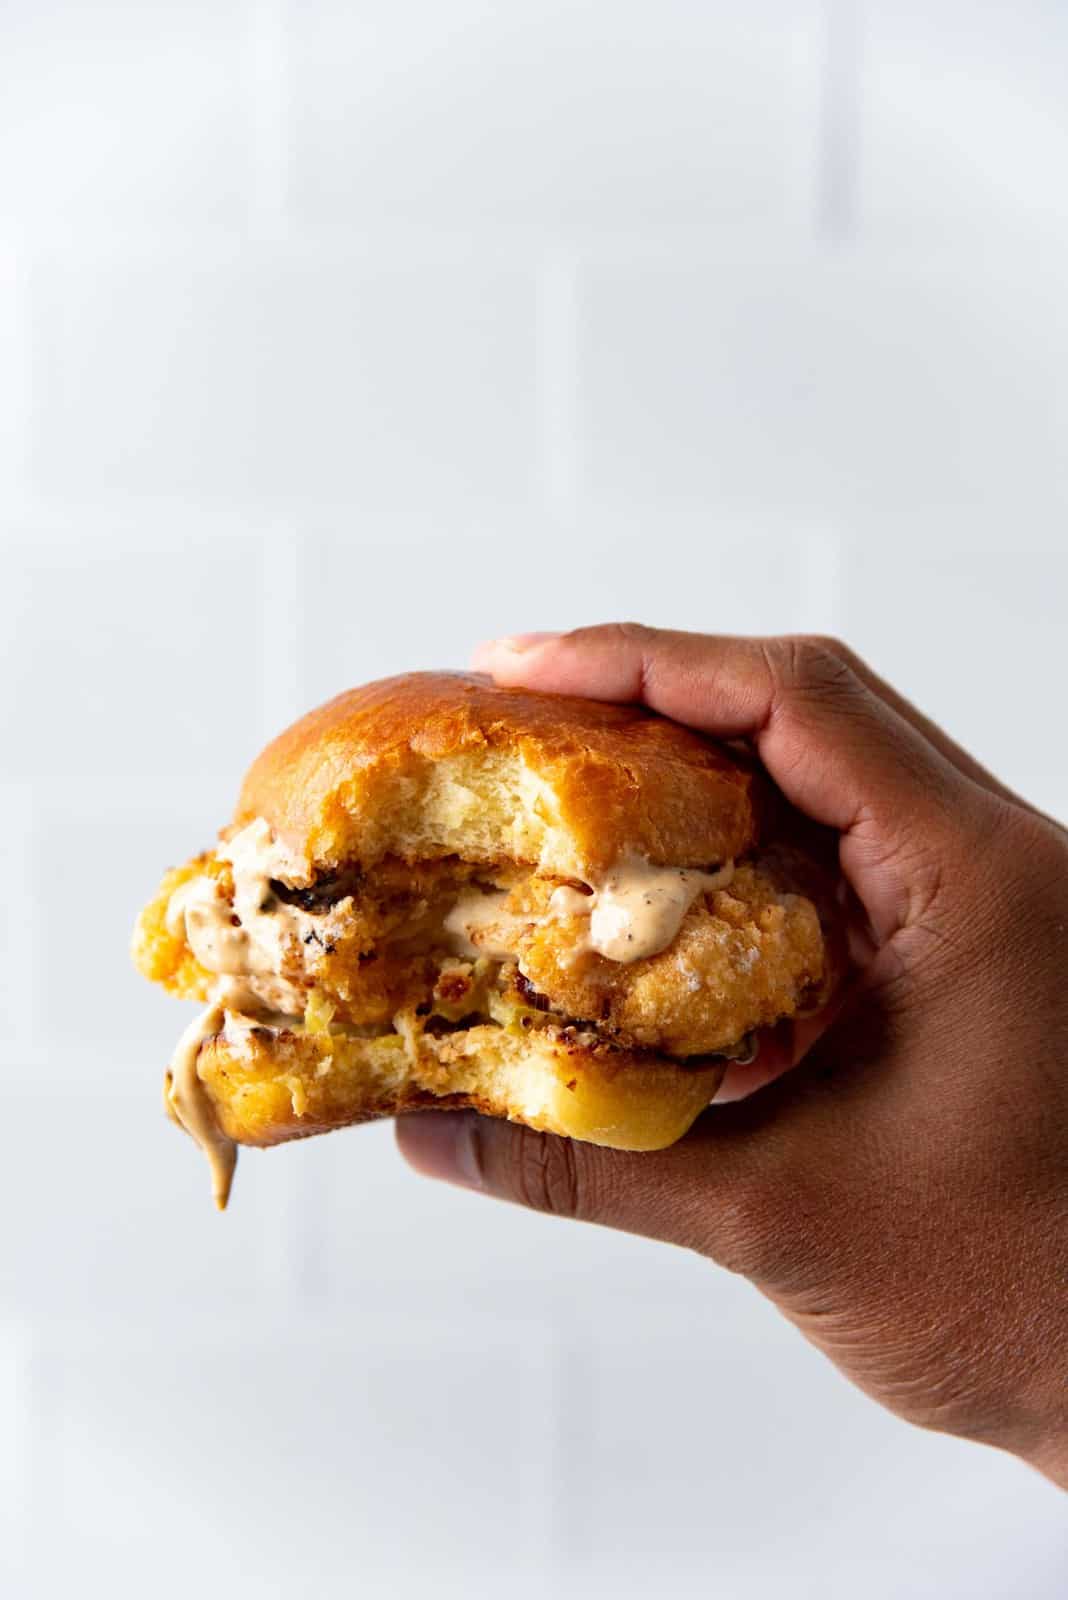
If you’ve tried my spicy fried chicken sandwich (Nashville style fried chicken) before, you know we like it hot and spicy! And I mean haaawwwt. This chicken sandwich is a little more shy and reserved in comparison. But the flavors are just as bold and robust. I marinate the chicken here with a simple buttermilk marinade, with added flavors like garlic, onion, hot sauce, paprika, salt and sugar.
I’ve been using potato starch as the coating for fried chicken for awhile now, and it’s been a game changer! It makes the chicken coating super light, yet becomes super crispy when fried!
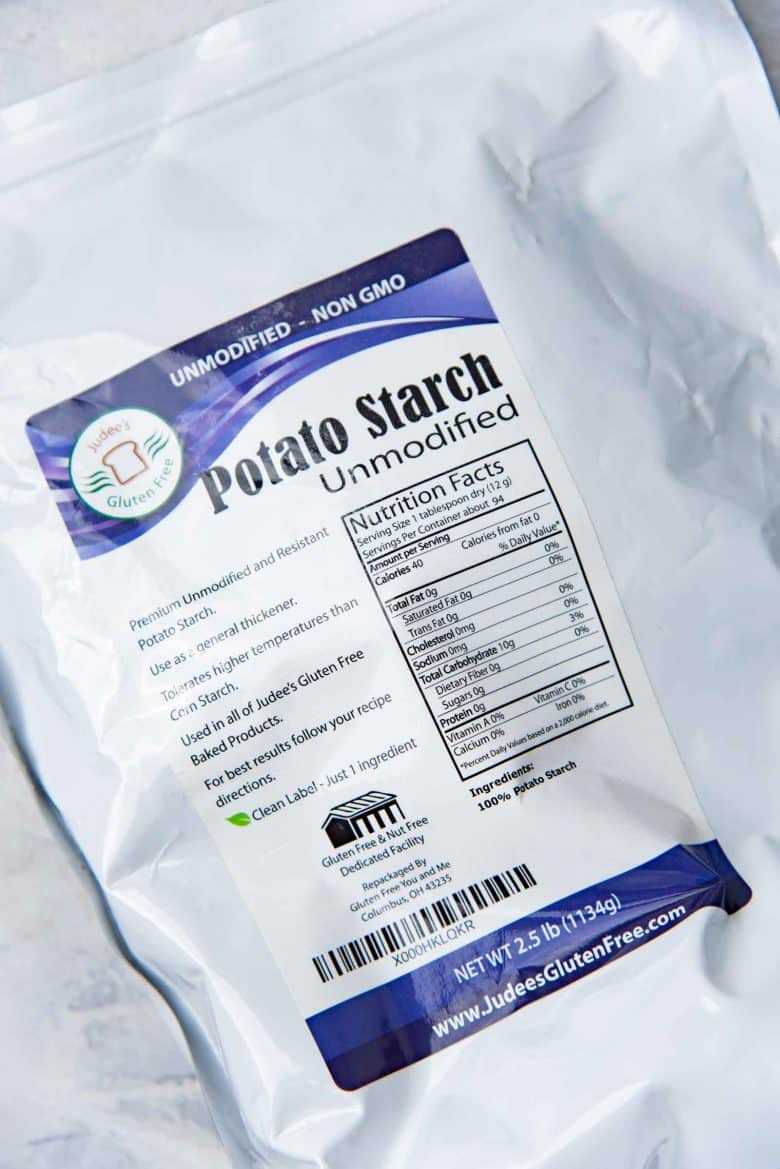
Even if you don’t have potato starch, you can use cornstarch (cornflour) instead. This makes the fried chicken gluten free too!
If you don’t have either of these, then you can use good ol’ flour. The coating will be a little heavier, but you know it’ll taste just as fantastic!


I highly recommend using a meat thermometer to make sure the chicken is cooked through. It takes the guesswork out of the frying process.
Once the chicken is fried, you can place it on a wire rack and in a warm oven, which keeps it warm and crispy until you’re ready to assemble that glorious sandwich.
Mayonnaise
Though we love mayonnaise, we don’t eat it often. And I always prefer to make my own mayonnaise. But 1 cup of mayonnaise usually lasts us a whole week, and homemade mayo simply doesn’t have the same shelf life as store-bought mayonnaise. So I do understand the allure of store-bought mayo.
For my spicy aioli and for this fried chicken sandwich, I use store-bought mayonnaise. But you can certainly make your own. Homemade aioli tastes SO MUCH better, like a lot of other homemade goodies.
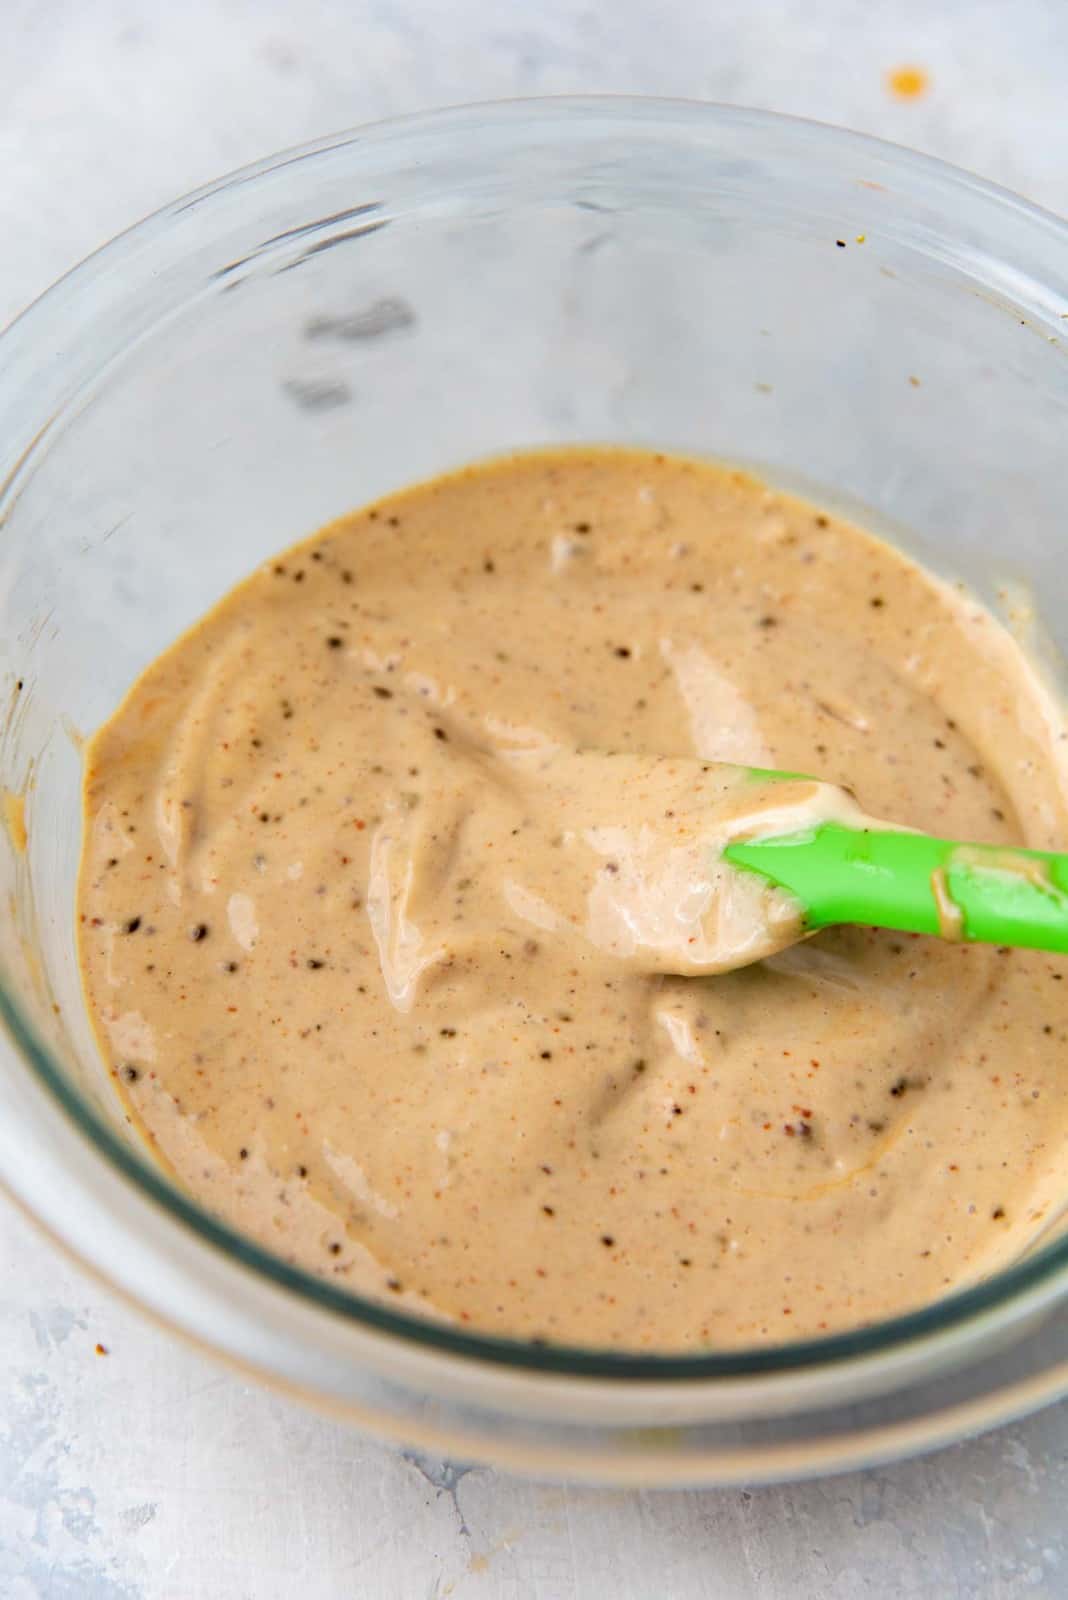
This aioli is super simple and super tasty! I added hot sauce, black pepper, mustard, garlic and balsamic vinegar to the mayonnaise, and then whisked it until done.
To REALLY elevate the flavor of your mayonnaise, you can substitute the garlic with fermented black garlic! The result is a smoky, slightly sweet, tangy mayonnaise that you just might be tempted to eat like pudding… Probably. Not that I’ve ever tried that. Not ever!
Fillings
I keep the other fillings pretty simple.
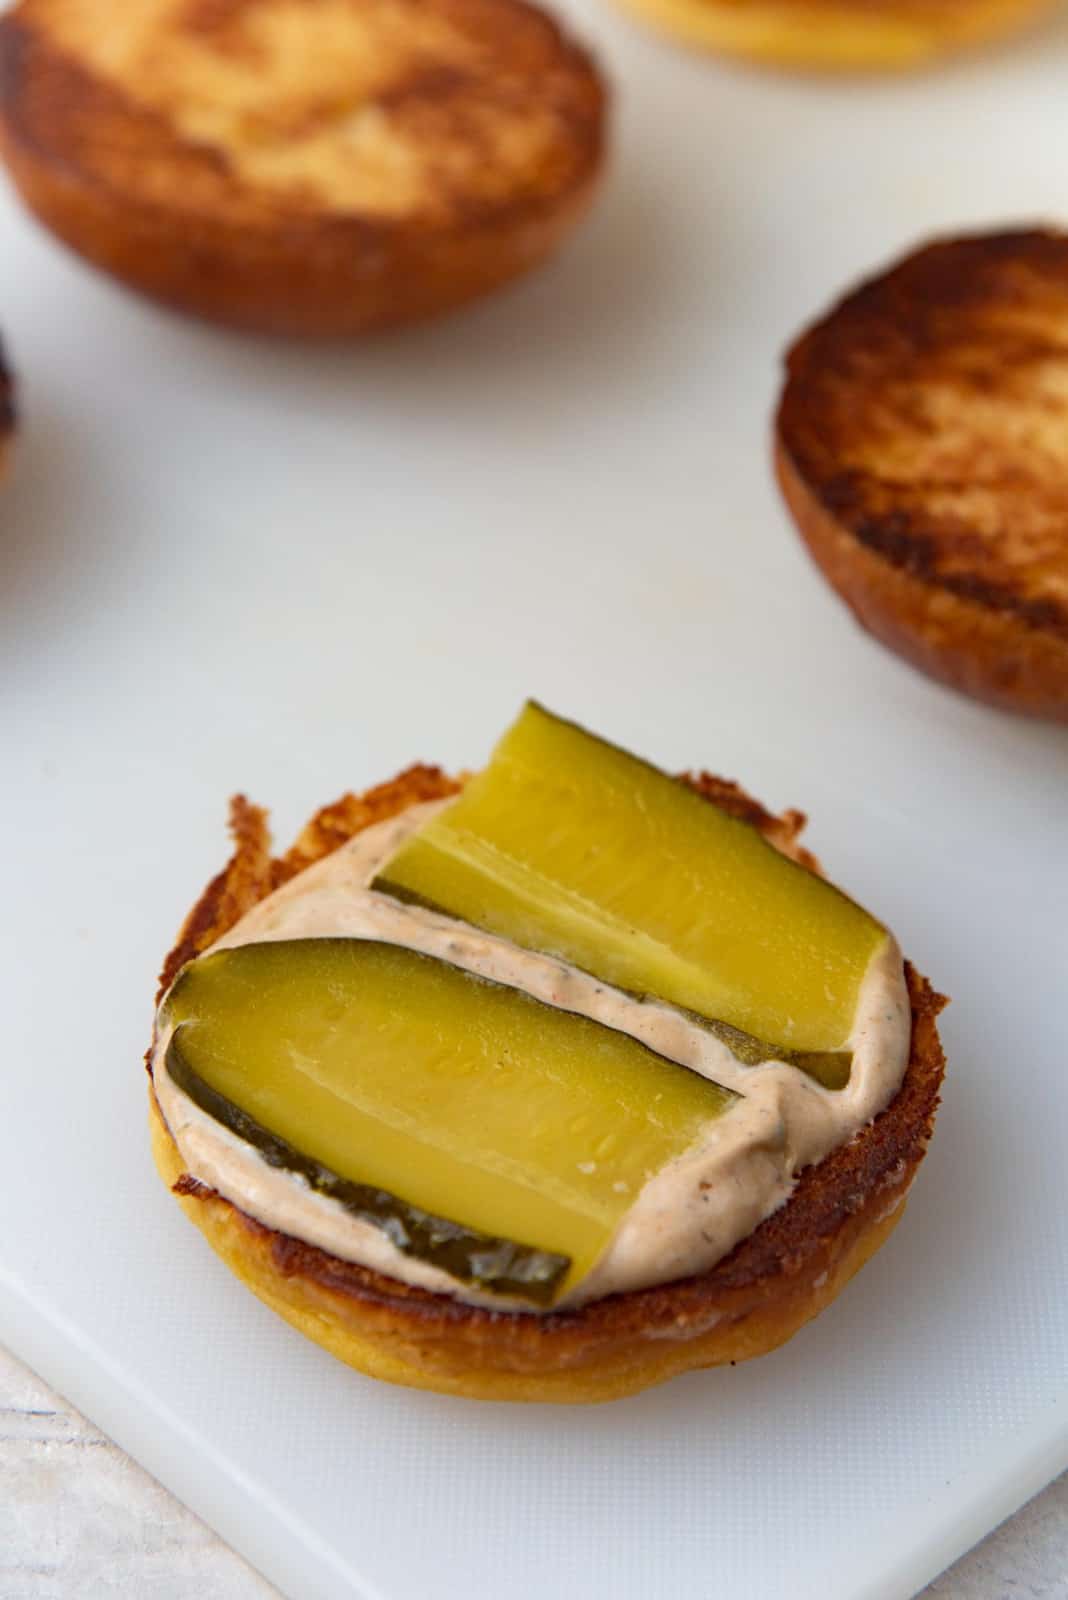
Since we love all things spicy, I added spicy pickles. I also served these sandwiches with a hearty avocado coleslaw.
There are times when I’d skip the pickles and add KIMCHI instead. And holy cow, is that good! I’ll be sharing my version of Korean style fried chicken sandwich on the blog in the future too! 🙂
Other options for fillings include sliced tomatoes, lettuce, French fries or potato chips, red onions, caramelized onion, cheese, bacon etc.
The bun
So one thing I’d like to get out of the way is… when I first moved to the US, I used to wonder why these were called chicken sandwiches. Being Kiwi, chicken inside a bread bun is a burger for me. But in North America, it’s a chicken sandwich.
But semantics aside, we can all agree that the actual bun is a really crucial part of a kick-ass fried chicken sandwich-burger-thingy. So let’s talk bread options.
Here, I used my brioche bun recipe. These were homemade buns, and are incredibly soft, buttery, and just so mmmmm!
You can also use milk bread buns, which are also pillowy soft and delicious!
Regular homemade burger buns are also perfect for this recipe. You can use my popular hot dog bun recipe (regular hot dog buns or New England style hot dog buns), and make burger buns instead with it.
OR you can use store-bought buns too of course. Make ’em white, whole wheat or any other kind you like to eat!

Since the fried chicken here is gluten free, you can make this into a gluten free fried chicken sandwich by using gluten free buns.
Make sure to toast the bread lightly on a heated pan, so you have a toasty caramelized surface on your buns. Toasty buns are the best buns!

Assembly
Assembling the fried chicken sandwich isn’t rocket science. At least, it shouldn’t be.
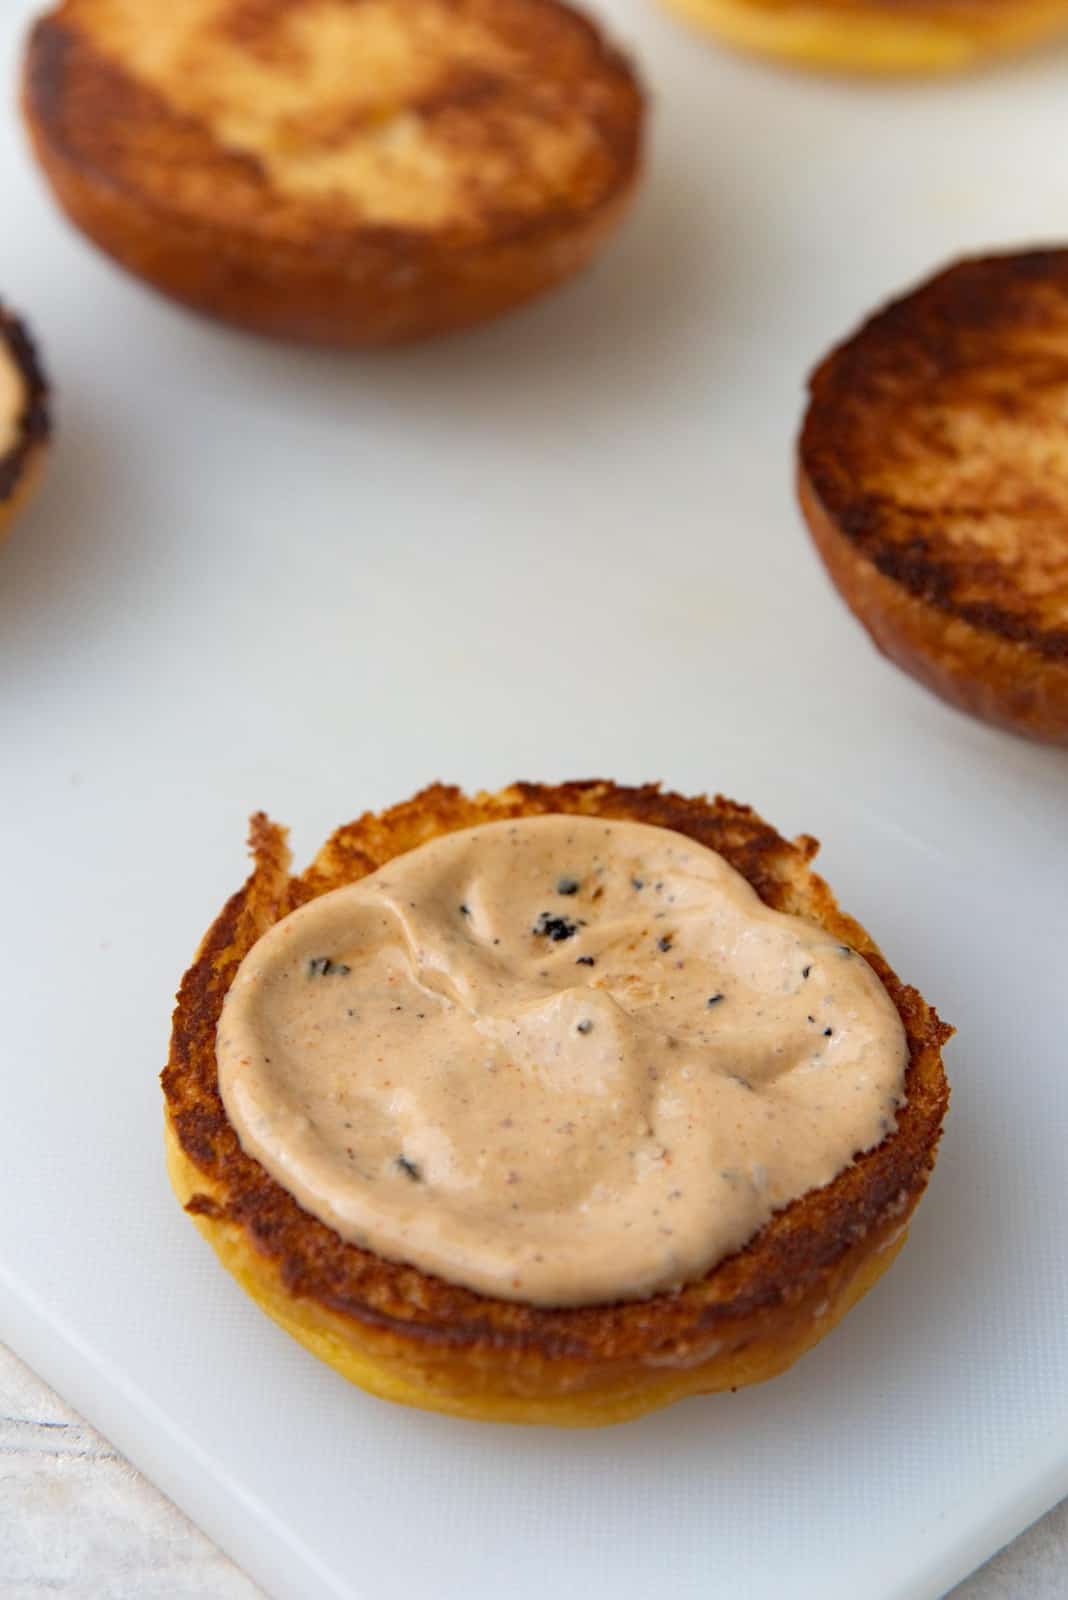
I like to slap the mayonnaise on the top and bottom buns. The mayonnaise is so good, it deserves a spread on both halves.
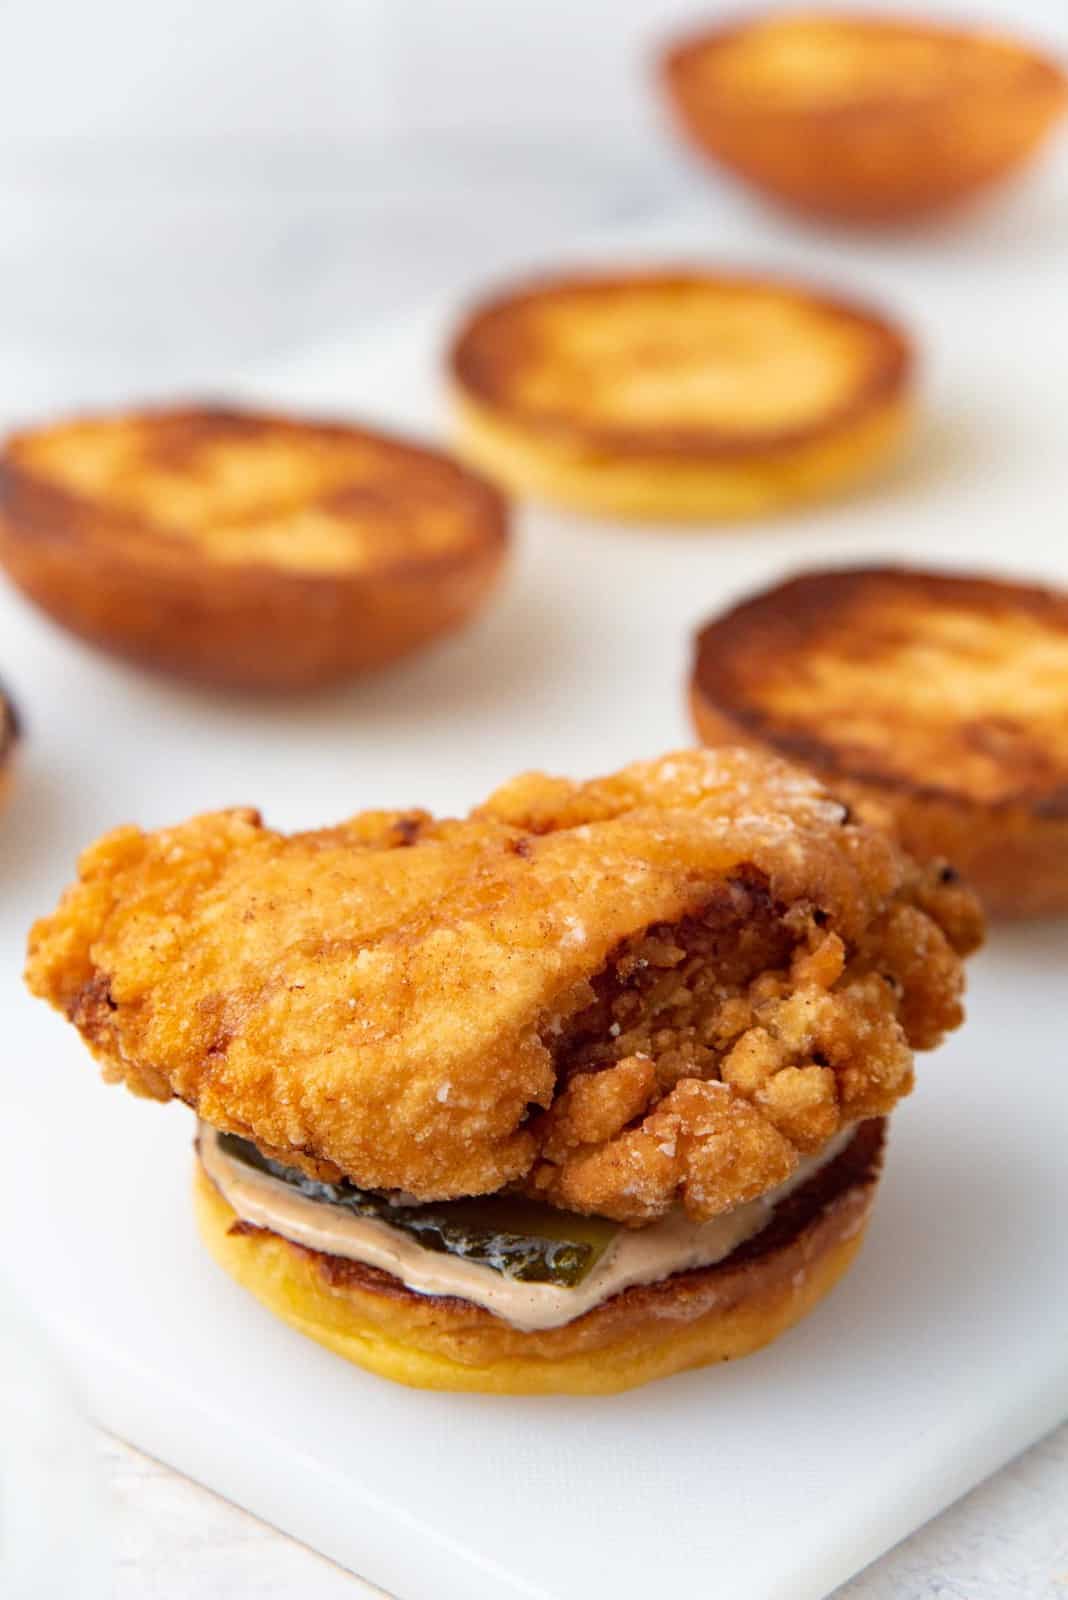
Since I’m only adding pickles, I add the pickles to the base, and place the chicken on top. I sometimes like to place a slice of cheese over the chicken too, but I didn’t do that for the fried chicken sandwiches in these pictures.
I guarantee once you’ve had a bite of these buttermilk marinated, crispy fried chicken sandwiches with spicy aioli, and buttery brioche buns, your KFC trips will be a thing of the past! 😀
Recipe

Delicious Fried Chicken Sandwich
US based cup, teaspoon, tablespoon measurements. Weight measurements are recommended for accurate results whenever available.
Common Measurement ConversionsIngredients:
Fried chicken
- 4 pieces chicken thighs boneless and skinless
Marinade
- 1½ cup buttermilk
- ¼ cup hot sauce
- 1 tsp garlic powder
- 1 tsp onion powder
- 2 tsp paprika
- 2 tsp sugar
- 2 tsp fine sea salt
- 1 tsp ground black pepper
Dredging and coating
- 1 cup potato starch use as needed (you can also use cornstarch or a mix of cornstarch and flour), please see notes
- Oil to deep fry
Mayonnaise
- 1 cup mayonnaise store-bought or homemade
- 3 garlic cloves if you can find black garlic, use that instead
- 3 tbsp hot sauce
- 2 tbsp balsamic glaze OR you can use balsamic vinegar instead
- 1 tbsp whole grain mustard
To serve
- 4 brioche burger buns you can substitute with any kind of burger bun, or a gluten free alternative
- Pickles
- Lettuce or tomatoes or cheese (optional)
Instructions:
Fried chicken
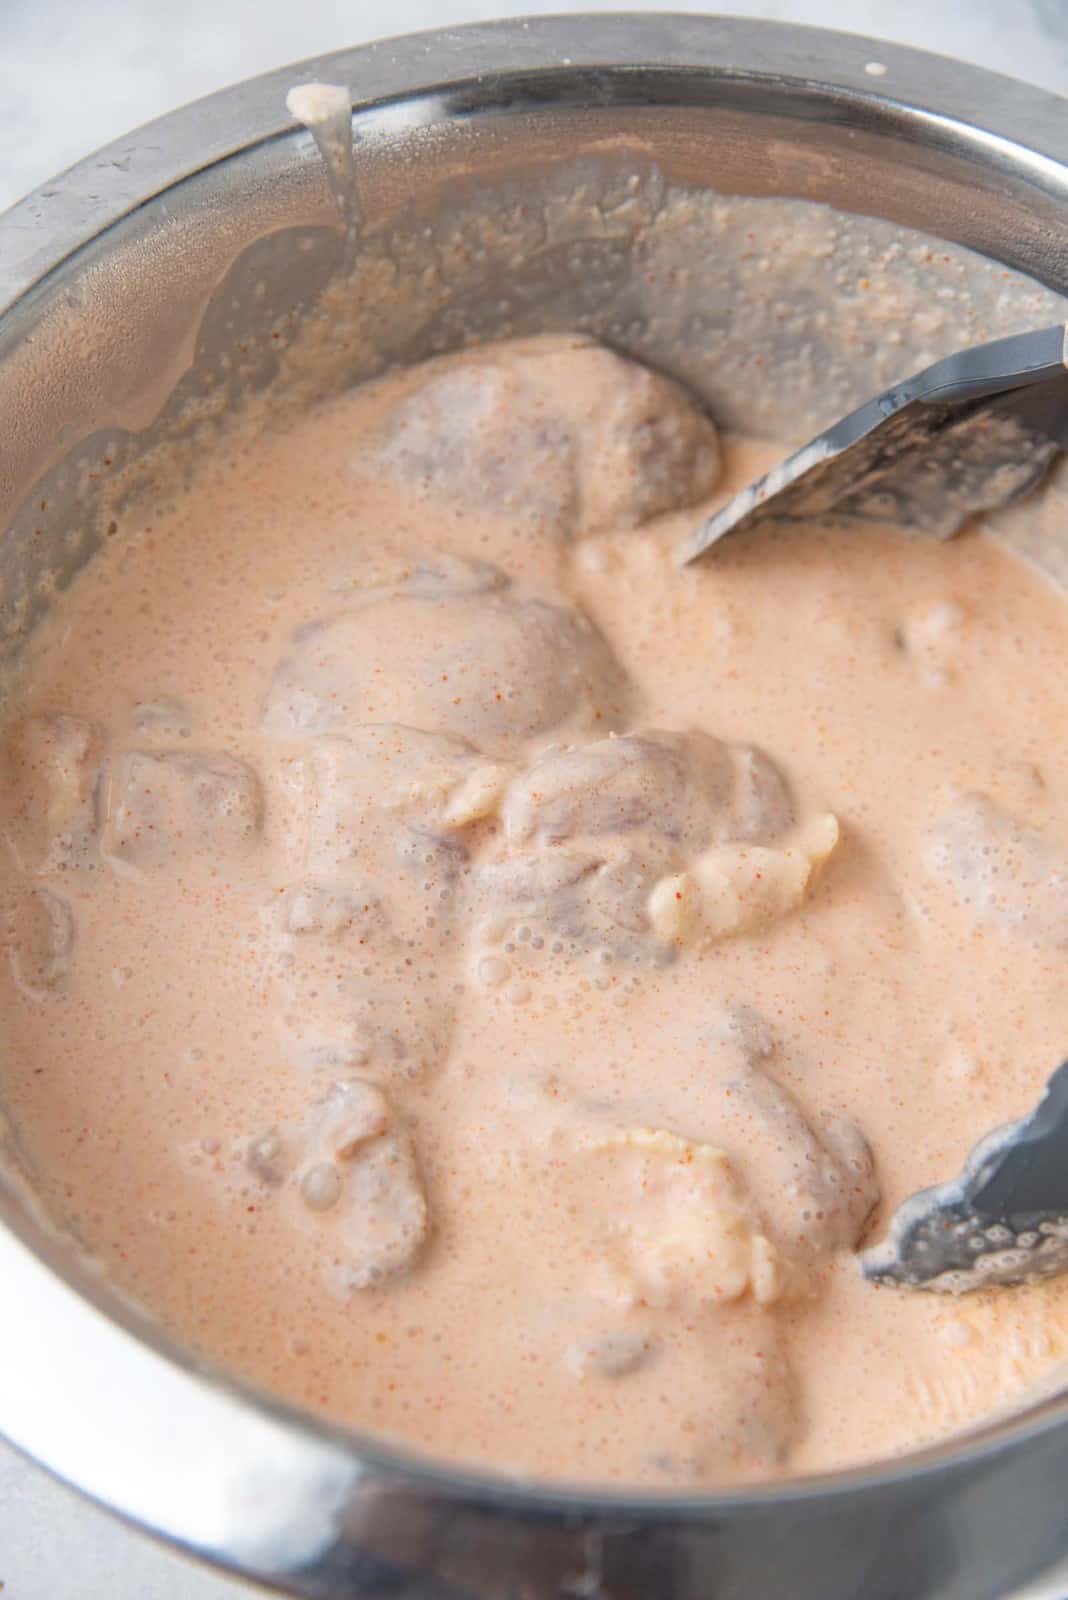
- Place the chicken thighs in a container or ziploc bag. Add the buttermilk, and all of the ingredients of the marinade. Close the ziploc bag (removing as much air as possible), and mix the chicken with all the marinade ingredients to coat.4 pieces chicken thighs, 1½ cup buttermilk, ¼ cup hot sauce, 1 tsp garlic powder, 1 tsp onion powder, 2 tsp paprika, 2 tsp sugar, 2 tsp fine sea salt, 1 tsp ground black pepper
- Let the chicken marinate overnight.
The next day
- Remove all the chicken pieces from the bag and place them on a plate or bowl.
- Place the contents of the leftover marinade in a separate bowl.
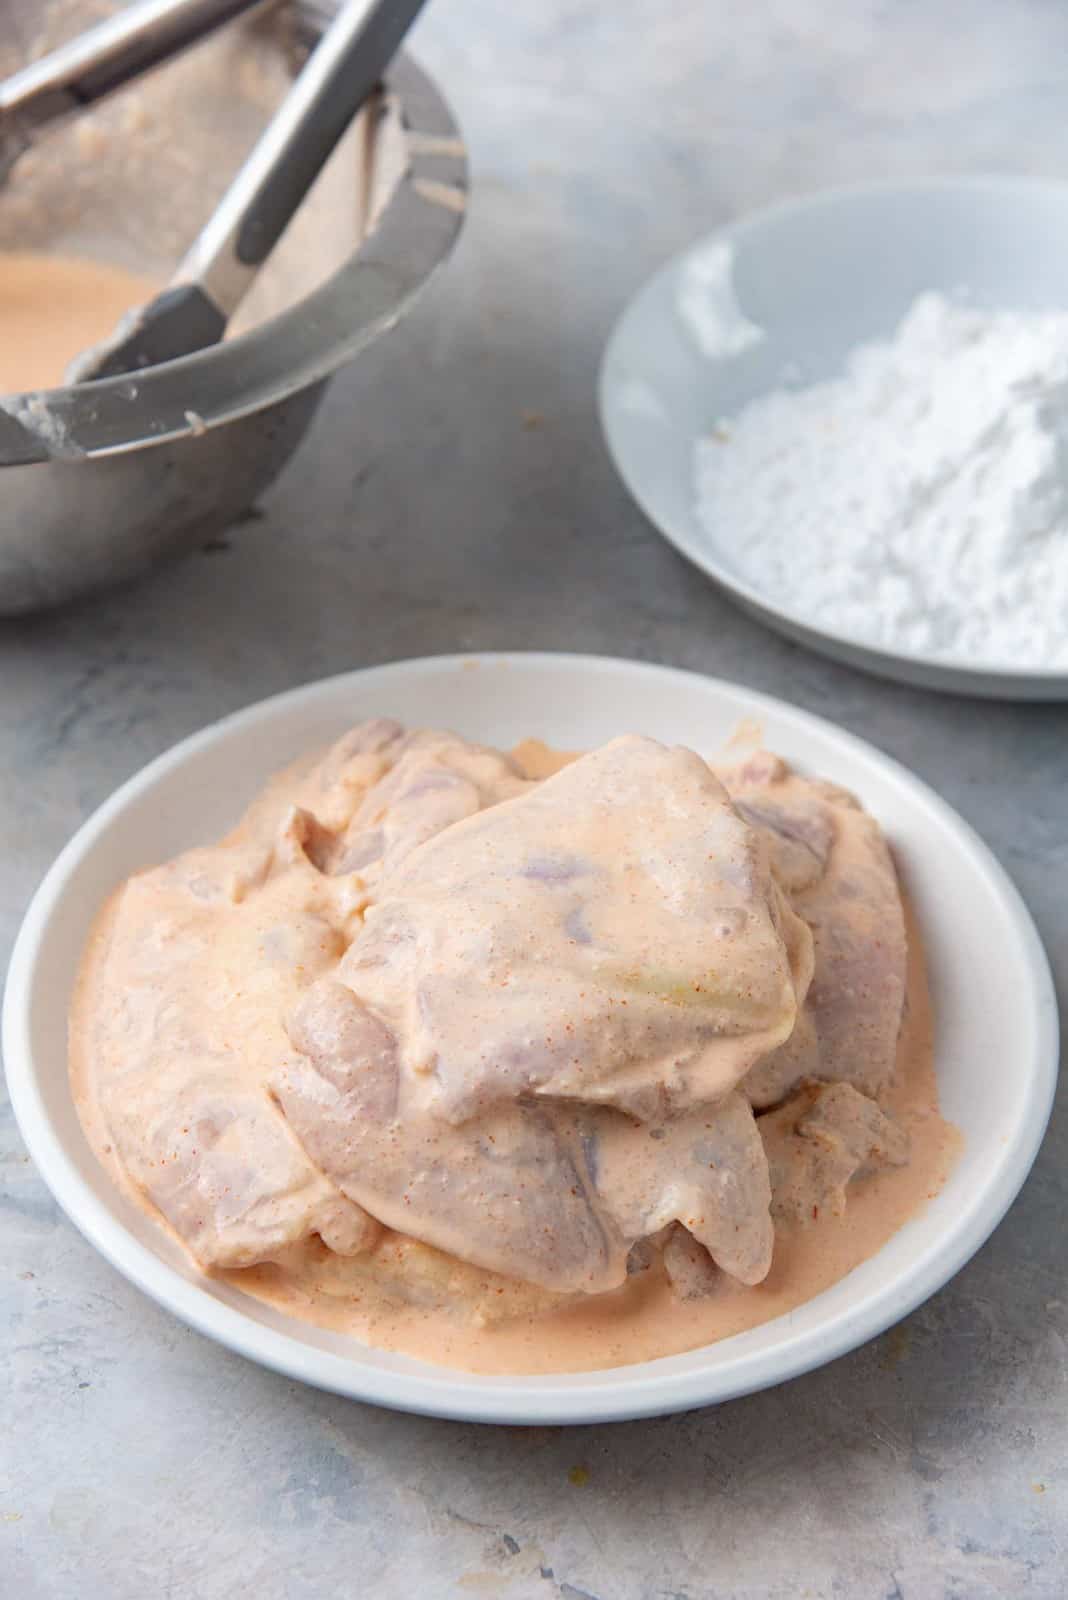
- Take two more plates, and add the potato starch into one.1 cup potato starch
- Sprinkle some of the potato starch on the other empty plate and set aside. This is the plate where you will be keeping the coated chicken BEFORE frying (you can fry the chicken directly after coating as well).
- Dip the chicken in the leftover marinade.
- Place the chicken on the first plate with potato starch and toss to make sure to coat completely, pressing the starch into the chicken.
- The chicken piece should have a scraggly, rough-looking coating. Place this on the second plate, or fry it right away.
- Repeat with all the chicken pieces.
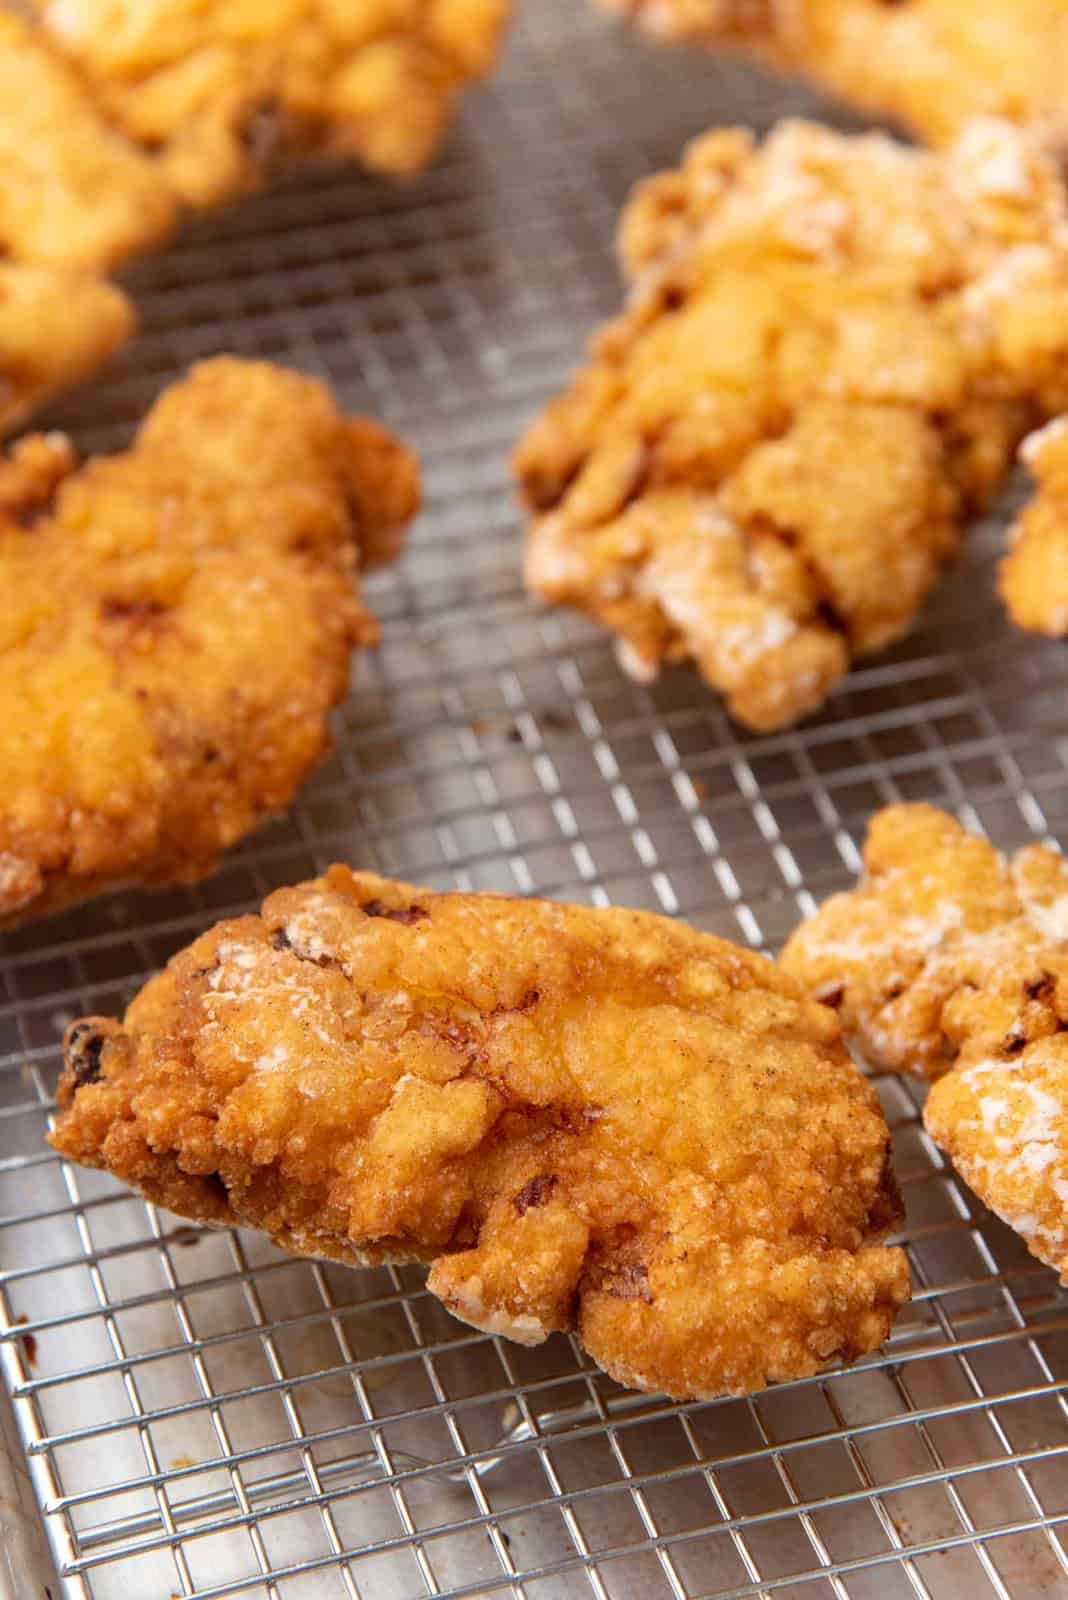
- Heat 2 – 3 inches of oil in a large pan (with tall sides) or pot. When the oil temp. reaches 375°F / 190°C, carefully lower coated pieces of chicken into the oil. Make sure not to overcrowd the pan.Oil to deep fry
- Cook the chicken for 3 – 4 minutes on one side. Then flip and cook for another 3 – 4 minutes on the other side. The cook time will vary depending on the thickness of the chicken, so reduce the time for smaller pieces and increase the time for bigger pieces.
- The best way to tell if the chicken is cooked through is to use a meat thermometer to make sure the internal temperature is 165°F / 74°C.
- When the chicken is cooked through, remove from the oil, and place it on a wire rack, which in turn is placed on a baking tray. (TIP – line the baking tray with foil or parchment paper so that the oil dripping onto the tray can be easily cleaned up).
- Place this tray in the oven with the warm setting turned on (or lowest heat setting). This will keep the fried chicken warm and crispy until you're ready to serve.
Mayonnaise
- Place all the ingredients for the mayonnaise in a small food processor. Process until the mixture is smooth and well blended.1 cup mayonnaise, 3 garlic cloves, 3 tbsp hot sauce, 2 tbsp balsamic glaze, 1 tbsp whole grain mustard
- Cover and refrigerate until needed.
Assembling the chicken sandwiches
- I use homemade brioche burger buns for these sandwiches, but you can use any burger buns you like. For a gluten free option, use gluten free buns or lettuce leaves as a bun alternative.4 brioche burger buns
- Heat a large non-stick pan over medium heat.
- Split the buns, and toast them lightly on the heated pan until the surface is lightly caramelized and toasted.
- Place the lightly toasted buns on a tray to assemble the sandwiches.
- Spread a dollop of mayonnaise on the bottom bun half. Then place the pickles over the mayonnaise.Pickles
- Next, place a piece fried chicken on top. Optional – add a slice of cheese, tomatoes and lettuce on top as well, if you prefer.Lettuce
- Spread a little mayonnaise on the other half of the bun as well, and place it over the fried chicken. Press down gently to spread the mayonnaise more.
- Serve immediately.
Recipe Notes
Nutrition Information:
“This website provides approximate nutrition information for convenience and as a courtesy only. Nutrition data is gathered primarily from the USDA Food Composition Database, whenever available, or otherwise other online calculators.”


Leave a Reply