

Here’s how to make the most perfect, juicy Ebi Katsu to make the ultimate Ebi Katsu Sando. Crispy on the outside, juicy and flavorful on the inside, this is a fantastic lunch sandwich! This shrimp katsu is perfect in a rice bowl too.
Step by step recipe for perfect shrimp cutlets to make the best juicy and flavorful shrimp (ebi) katsu sando, made with Japanese milk bread!
Katsu is a meat or seafood cutlet that has been breaded with Japanese panko breadcrumbs and then fried – like this chicken katsu in this chicken katsu sushi burger. Panko breadcrumbs make the cutlet super crispy, which sets it apart from other breaded cutlets. Chicken katsu, pork katsu, shrimp katsu, steak katsu and even salmon katsu are all popular options. And I love ’em all!
This ebi katsu (or shrimp katsu) is definitely my favorite, but I don’t get to eat it often because I can’t find a restaurant that makes a good one close by. So, I make my own of course.
Shrimp katsu is a little more involved to make than the classic chicken or pork katsu. But the results are amazing! And if you’re here, that means you’d love to learn to make shrimp katsu too. So let’s get to it.
Why I love this recipe
- You can add so much flavor to the shrimp mix to make the most flavorful katsu.
- I show you how to get juicy ebi katsu with the best texture.
- I share tips at every step on how to make it easy to make shrimp katsu.
- This is an easy to follow, beginner-friendly recipe with lots of tips and detail.
- This ebi katsu will guarantee an ebi katsu sando that tastes better than anything you can get from a restaurant!
Ingredients to make Shrimp Katsu Sandwich
Ingredients for the shrimp cutlet
Raw shrimp, with tail and shell removed. This is the most important ingredient of course, so it’s crucial to use good quality raw shrimp. Do NOT use already cooked shrimp for this recipe.
Salt and pepper – For seasoning and flavor.
Chives or green onions (scallions) – This is optional, and isn’t usually added to ebi katsu, but I personally LOVE the freshness and flavor this adds to the katsu.
Cornstarch – A binder that helps to keep the minced shrimp together, while also making sure that the shrimp katsu is nice and juicy after cooking.
Flour – Step 1 of the dredging station.
Egg mix – Step 2 of the dredging station.
Panko crumbs – Step 3 (final step) of the dredging station. Panko crumbs are lighter and a little larger (flakier) than Italian breadcrumbs. This results in a crispier ebi katsu.
Ingredients for the Ebi Katsu Sando (shrimp cutlet sandwich)
Kewpie mayo – This Asian mayonnaise is richer and a little more sour than regular mayonnaise. This is because it’s made with egg yolks only, and rice wine vinegar is also added to it.
Tonkatsu sauce – You can easily find this in Asian grocery stores. Tonkatsu is a sweet and sour sauce that is made with vegetables, fruits and vinegar.
Coleslaw mix – Finely shredded cabbage should be more than enough.
Pickles – I LOVE adding some daikon pickles on the side. This is only if you like the sour flavor contrast.
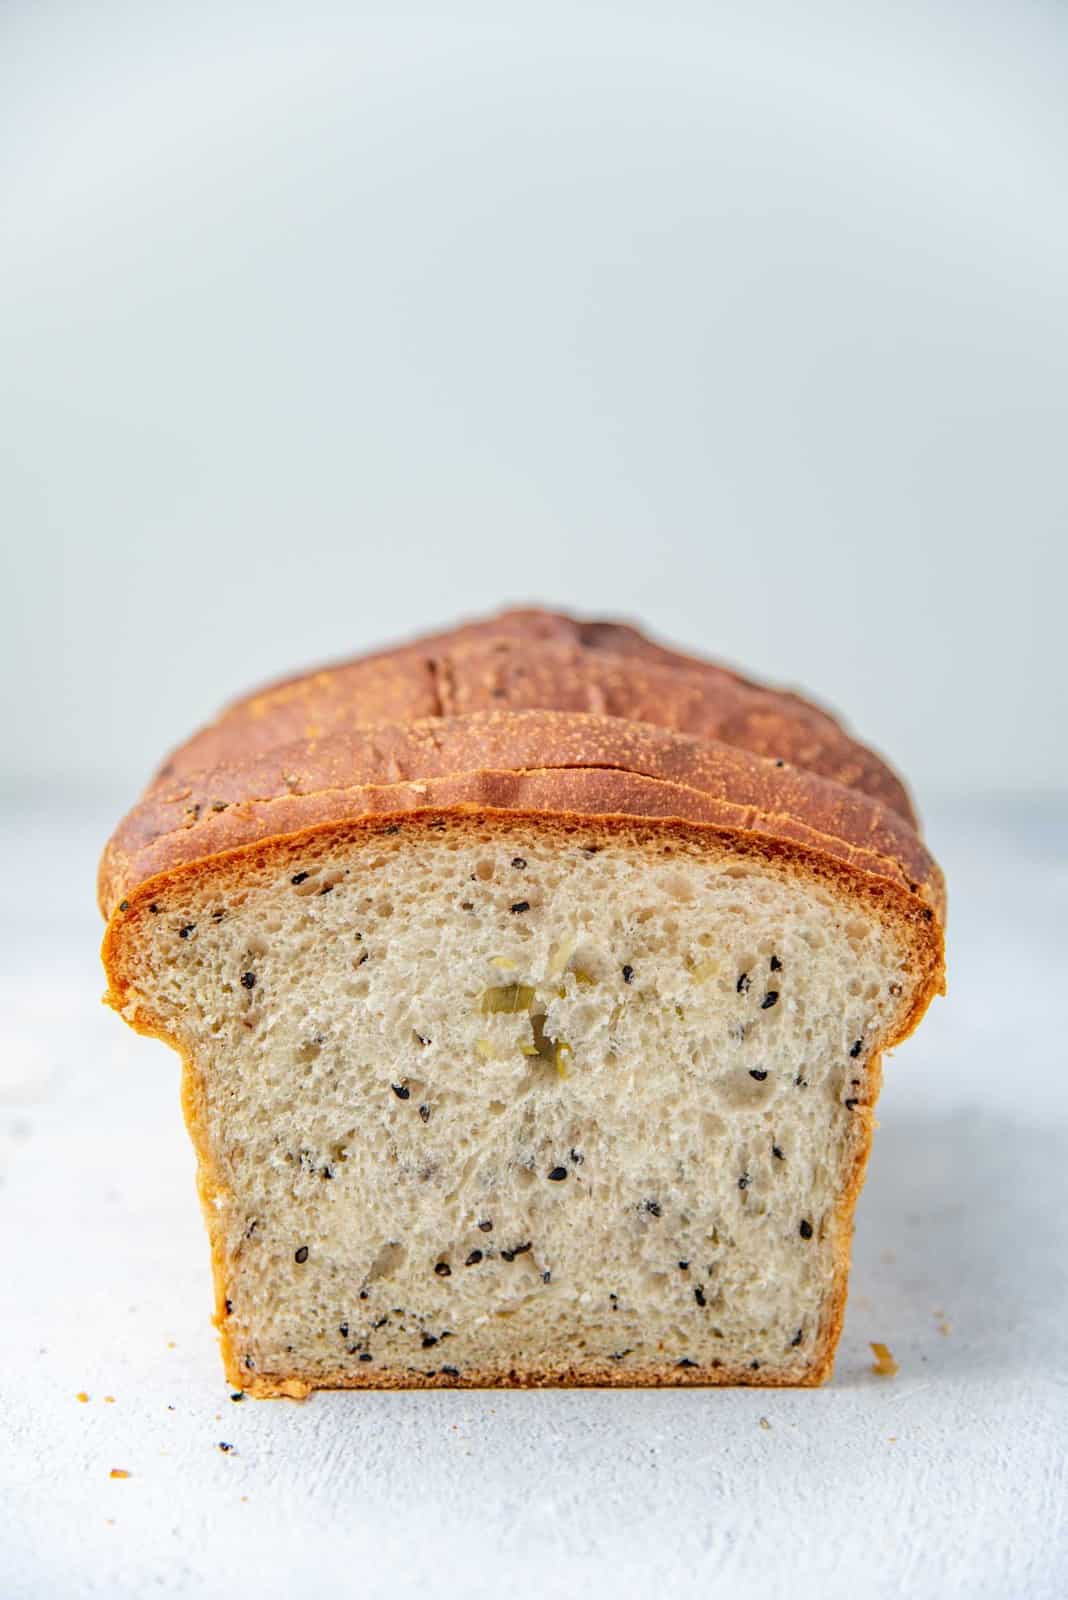
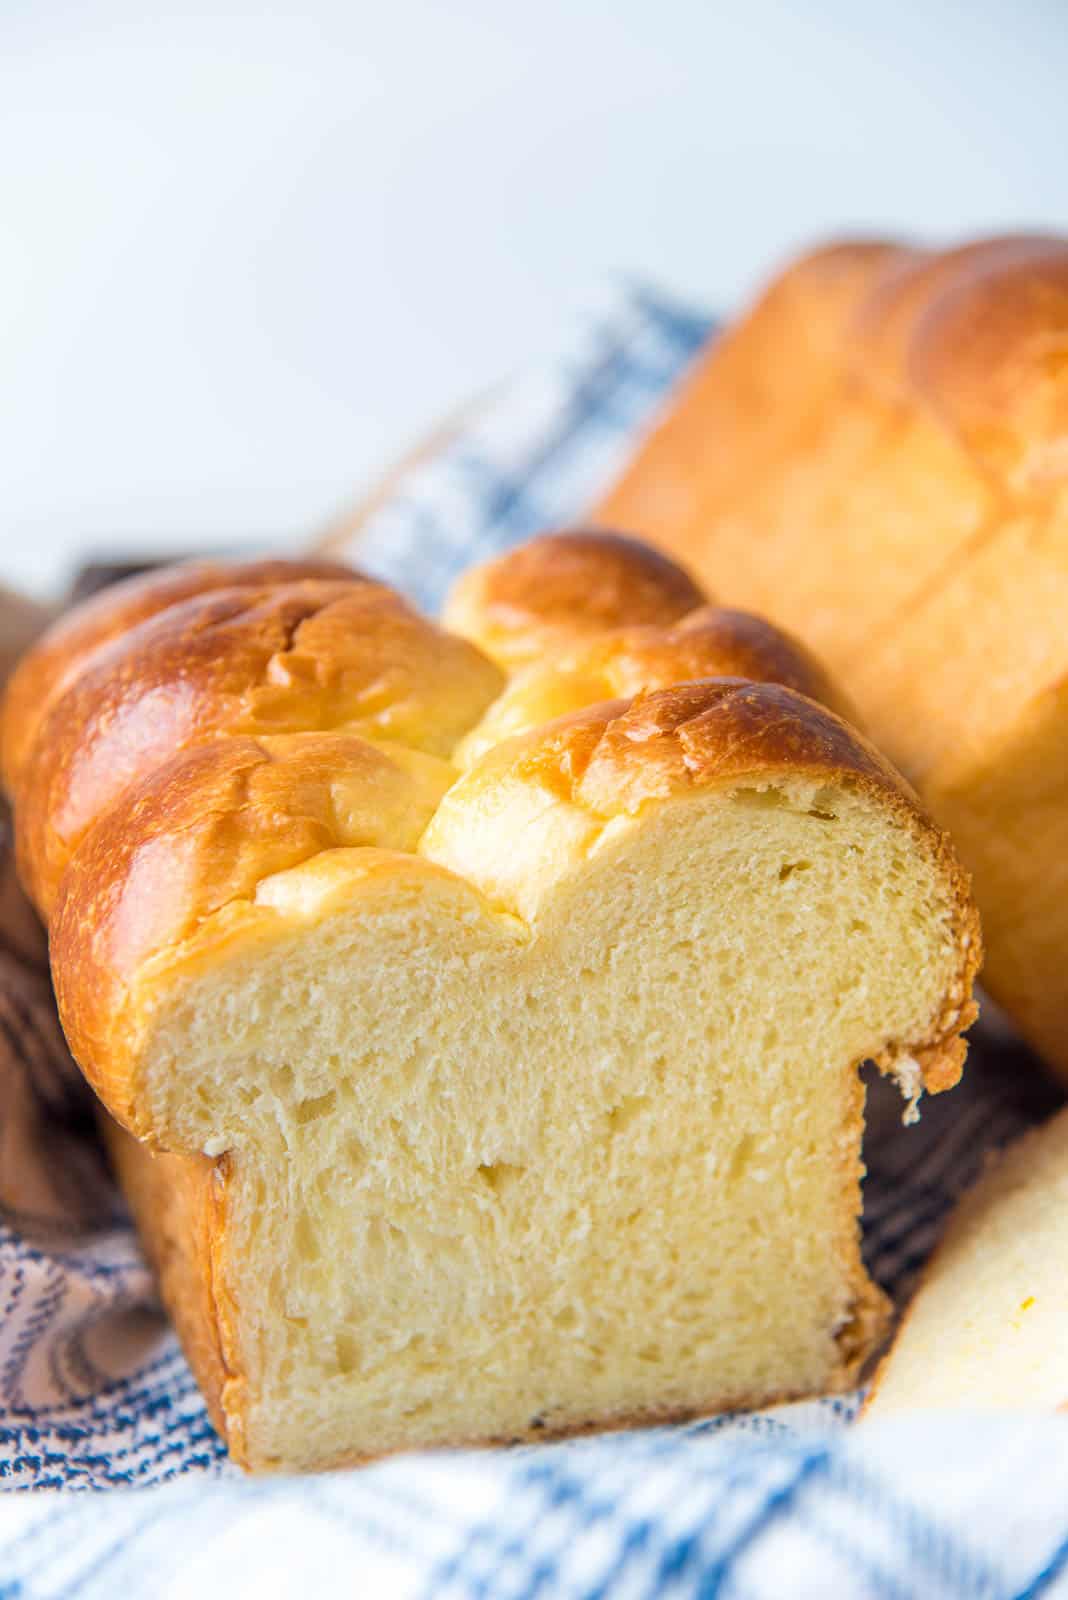
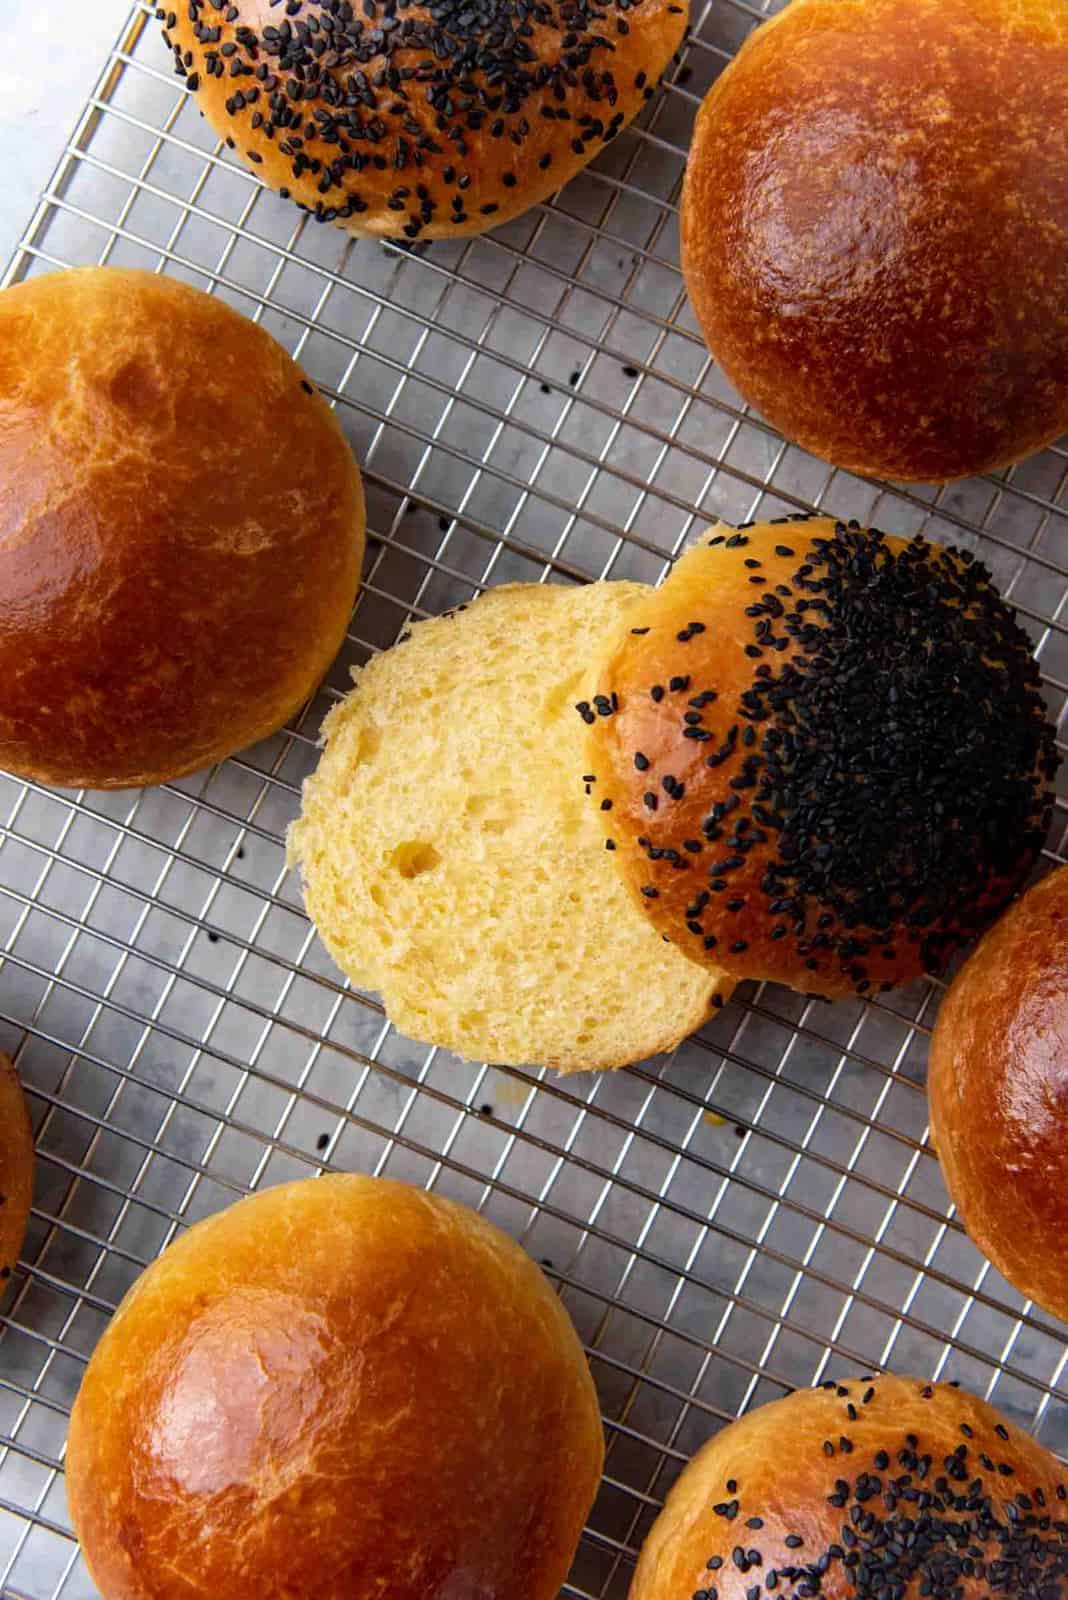
Japanese milk bread – This is the most common type of bread that is used in Japanese sandwiches. Unlike regular bread, milk bead has a delicious milky and slightly sweet taste. Plus the bread is incredibly soft, with a little bit of chewiness too. But if you don’t have access to Japanese milk bread, you can make your own, OR substitute it with brioche bread or buns, or soft sandwich bread or sliced Texas toast bread as well.
Here are my step by step recipes for,
- Sesame and scallion milk bread (which is what I use here), and

How to make Shrimp Katsu
Prepare the shrimp
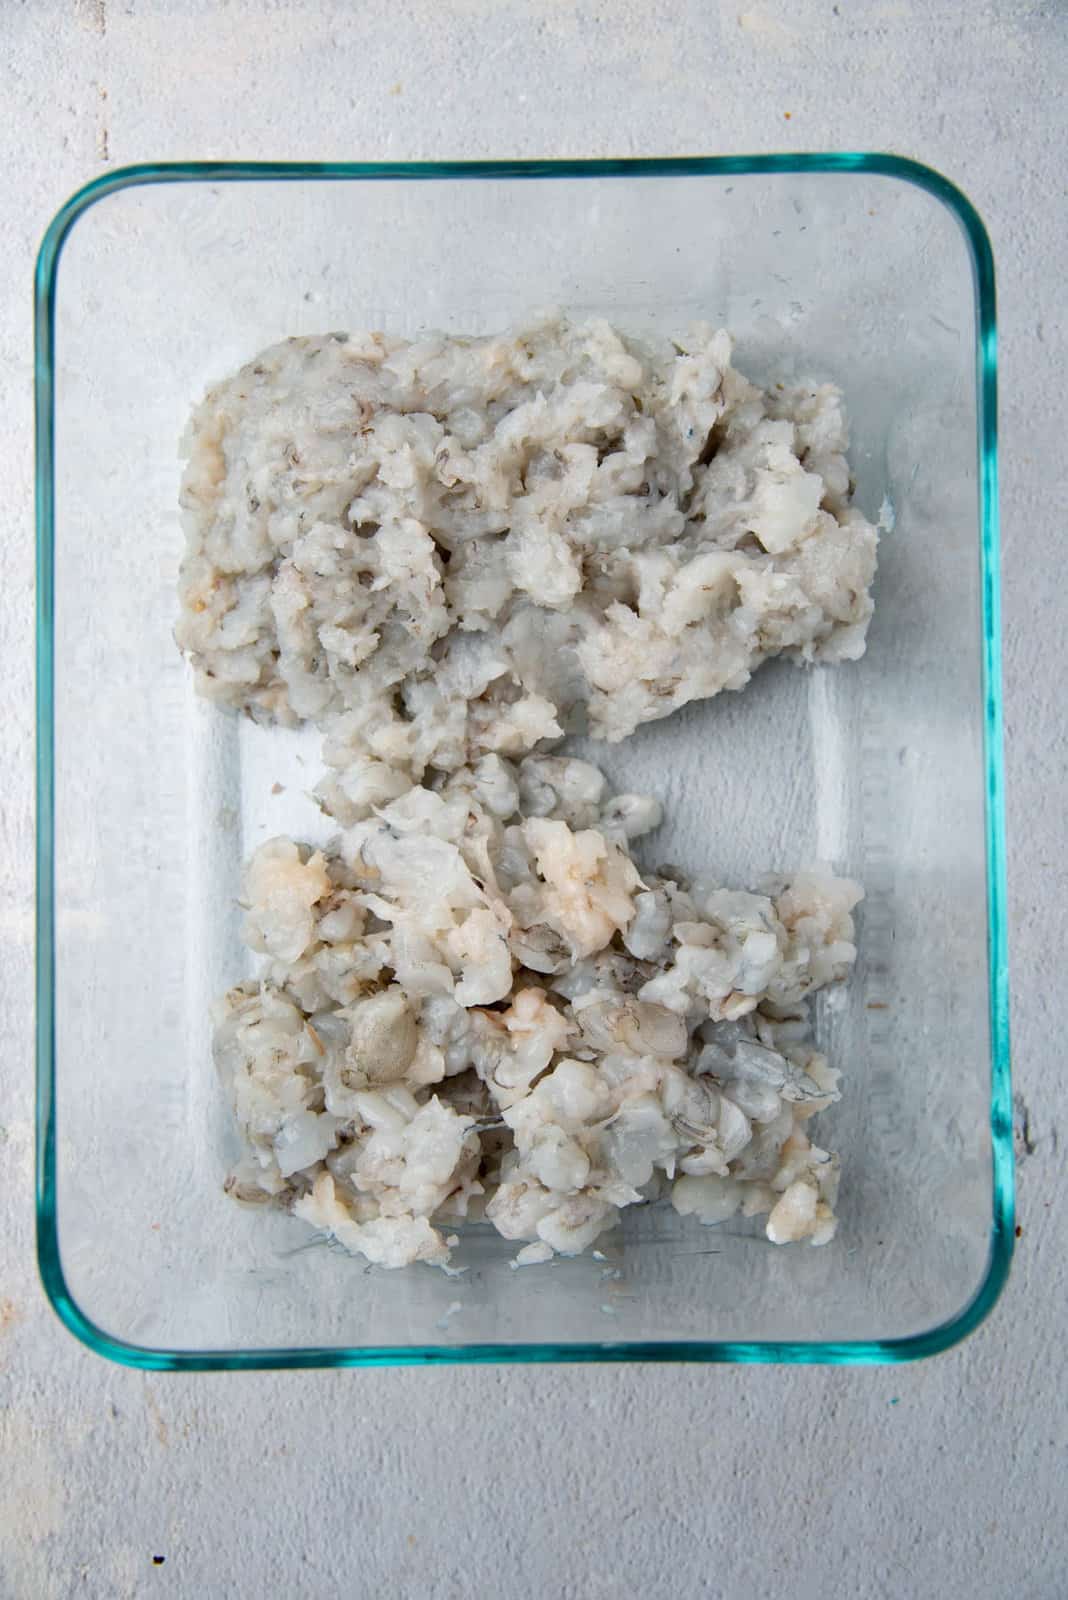
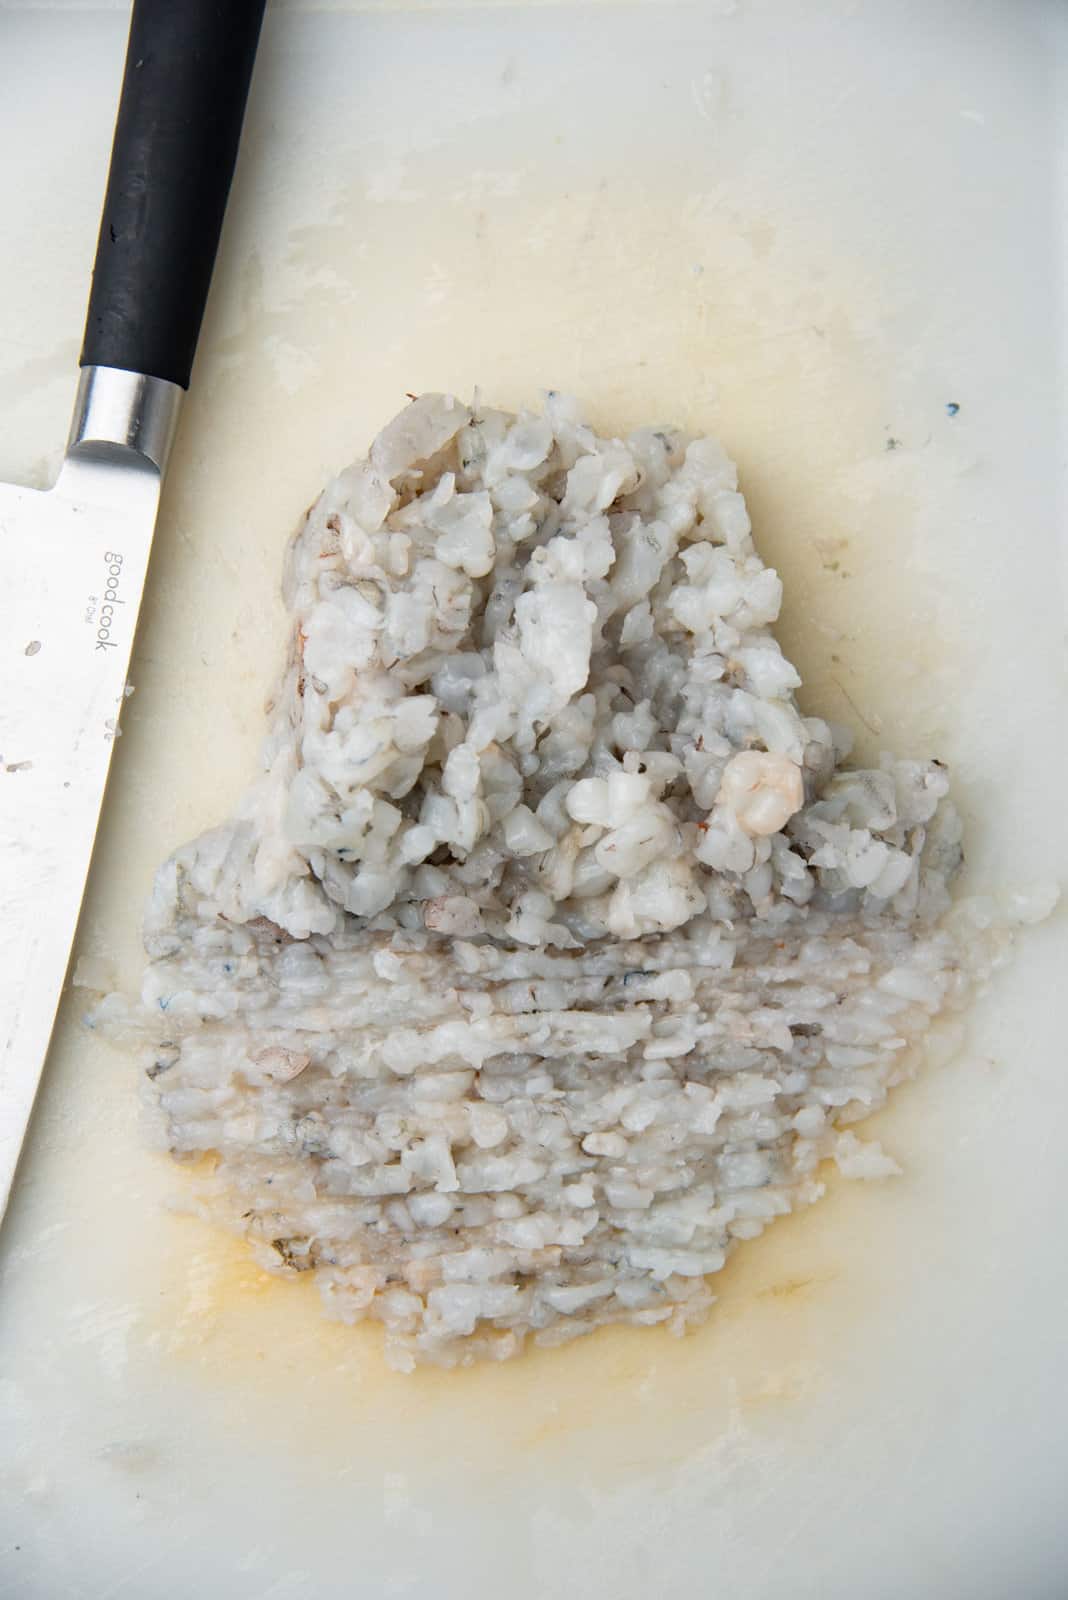
What’s unique about this shrimp cutlet is that the shrimp has different textures within the same cutlet. Juicy minced shrimp is mixed with crunchy plump pieces of shrimp here. To achieve this texture, some of the shrimp is minced into a fine mix, while some of it is chopped into smaller pieces. The minced shrimp will be sticky enough to form the patty shape, while the chunkier pieces of shrimp add texture to the katsu.
First, take 40% of the shrimp and finely chop it into small pieces. The pieces should be about ½ cm in size.
The rest of the 60% of shrimp is finely minced. You can either do this with a knife – which is more time consuming, or you can mince the shrimp in a food processor.
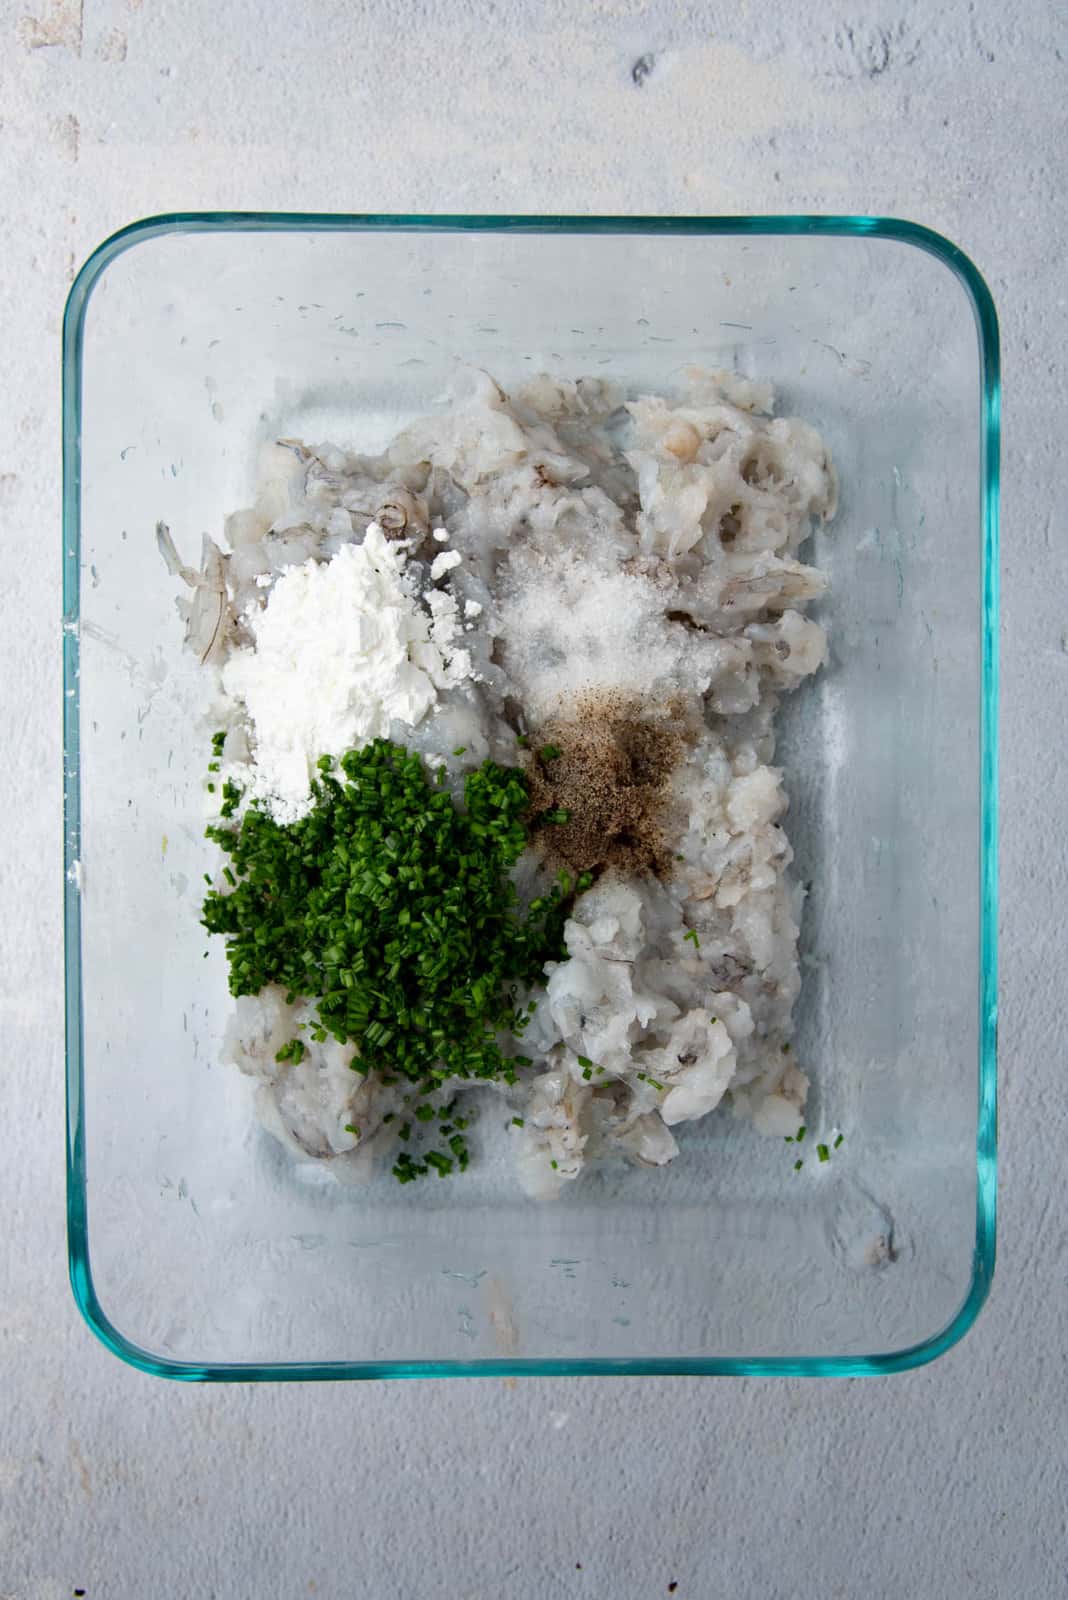
Finely chop the chives and scallions, since this will make it easier to mix them into the shrimp mix.
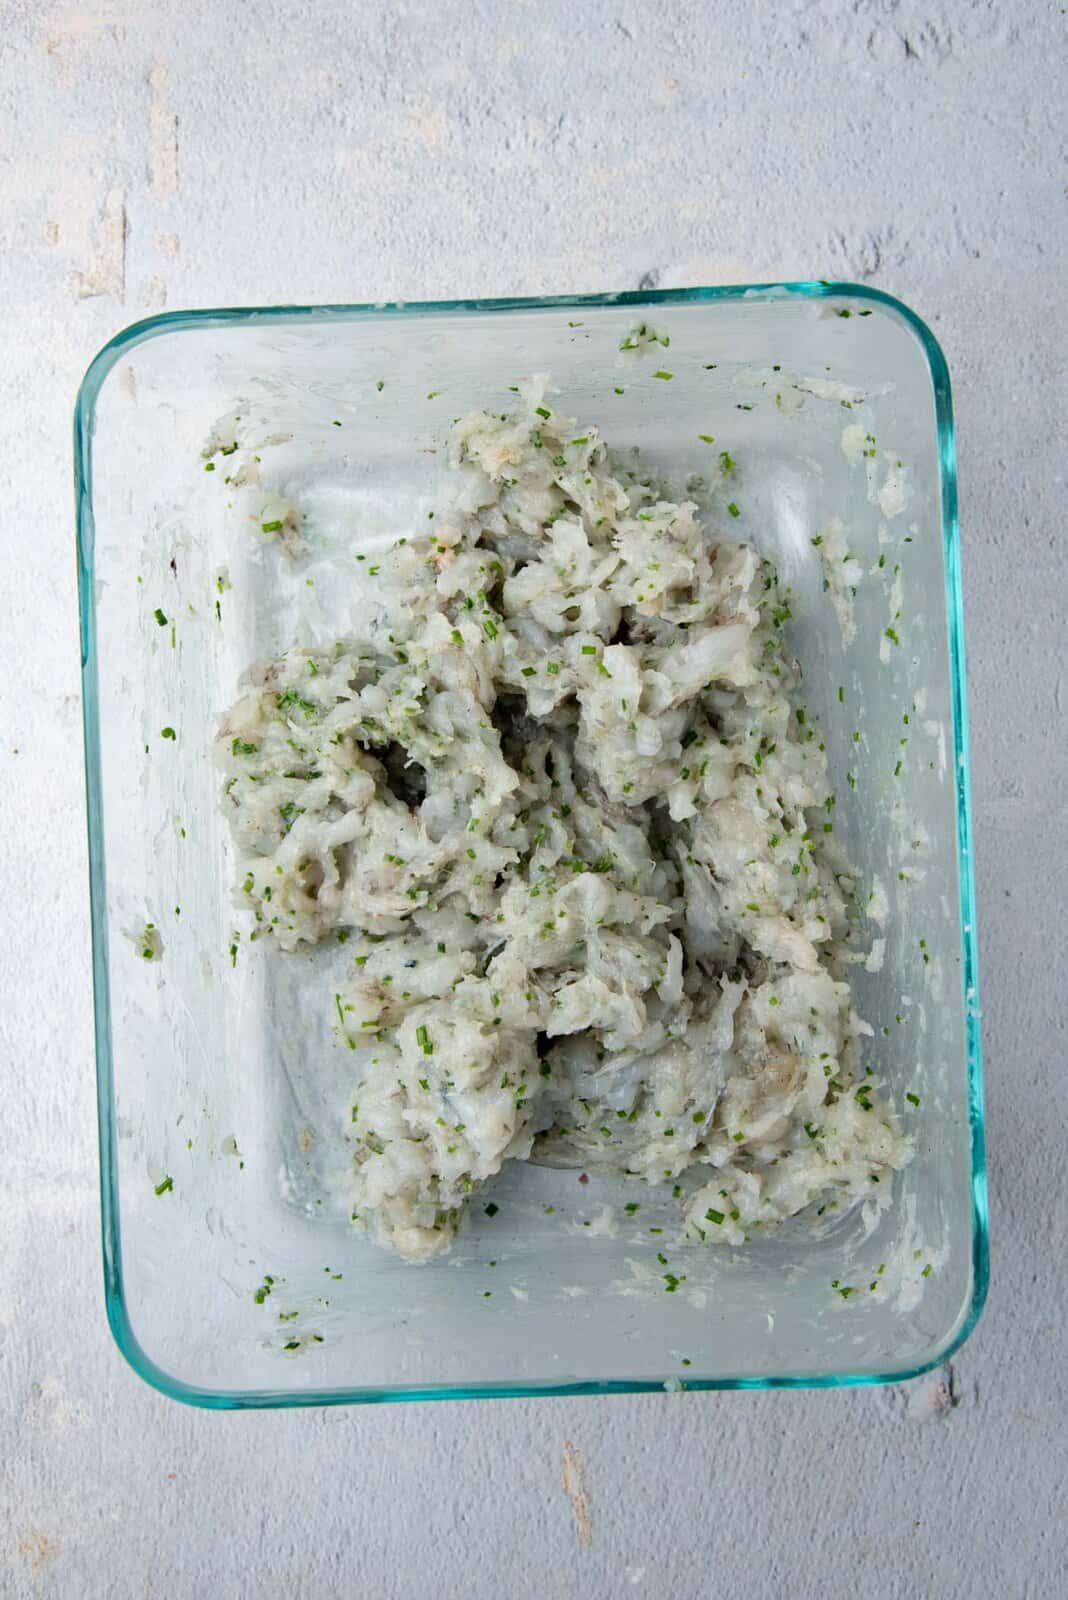
Add both portions of shrimp to the bowl, and add salt and pepper. Followed by cornstarch, and finely chopped chives. Mix well until everything is combined.
How to check if there’s enough seasoning – Take the smallest amount of the shrimp mix and pan fry it. Then taste this to see if it’s seasoned enough and to your liking.
How to shape the ebi katsu
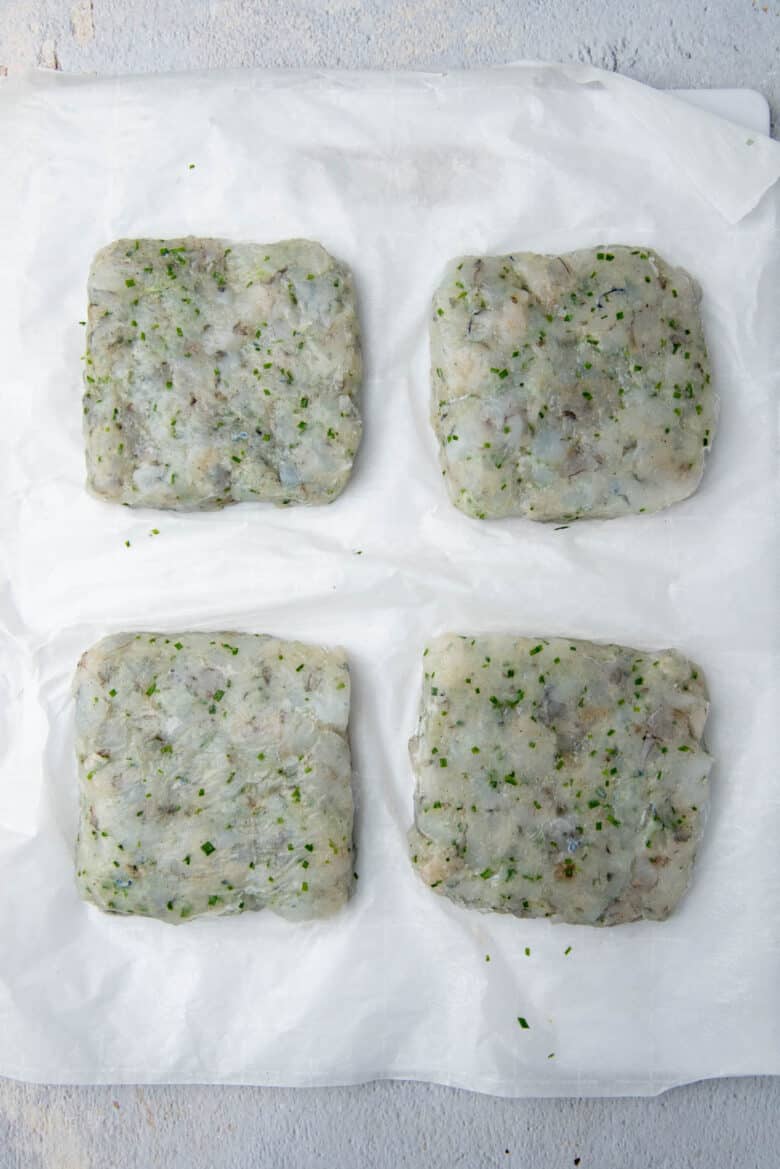
Divide the shrimp mix into four portions. Using wet hands, shape each portion into a patty shape. Here, I shaped each portion into a square that would fit in a sandwich to make the ebi katsu sando. Each cutlet is about 4 – 4.5 inches on each side. You could also shape it into a round shape like a burger patty.
To prevent the shrimp from sticking to your hand – You will need to wet your hands with cold water to handle the shrimp mix. Keep a bowl of cold water next to you so you can dip your hands in the water whenever you need to while shaping the shrimp mix.
Place the patties on a parchment paper lined tray or plate, and then freeze the patties for about 30 – 60 minutes. This helps to make the katsu firm so that it’ll be easier to handle when you crumb them.
Breading the cutlets
The ebi katsu is ready to be coated when the cutlets are just about semi-frozen on the surface. They should NOT be frozen solid. This is so that they can be picked up a little more easily and coated well without changing the shape of the cutlets.
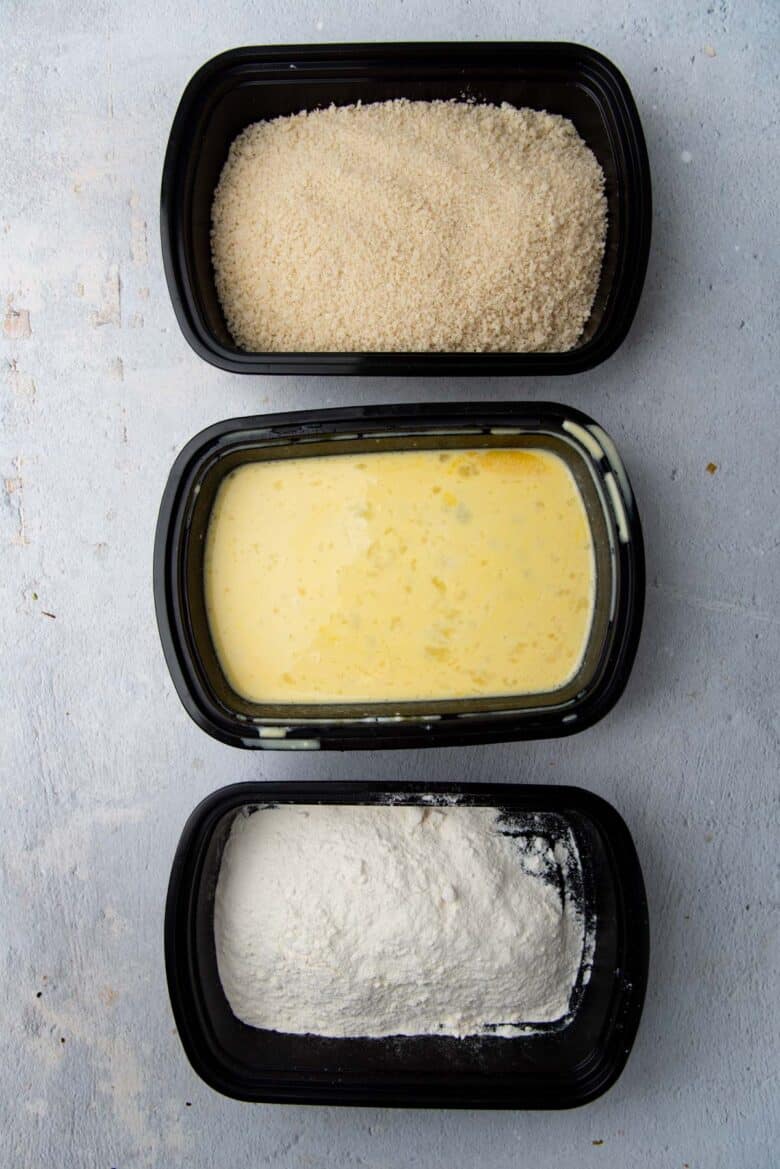
Place the flour, eggs, and panko crumbs in 3 separate dishes. The eggs should be beaten as well. Season the flour mix with some salt, and mix well.
Coat each shrimp cutlet / patty with the flour mix first, followed by the egg white mixture. Finally, place it in the panko crumbs and make sure that it’s coated well with the crumbs. Press the crumbs into the ebi katsu surface, to make sure the katsu is completely covered.
Repeat with all the portions.
Frying the shrimp cutlets
Next, heat about 3 inches of oil in a large pot or pan. When the oil is heated to 375 F, the shrimp katsu can be fried.
Gently lower the ebi katsu into the heated oil. Be careful to avoid any oil splash back. Make sure not to overcrowd the pan or pot with the cutlets, so that the katsu browns evenly and cooks properly.
If you overcrowd the pan, the temperature of the oil will dip too low. This will cause the katsu to absorb the oil instead, and result in very oily ebi katsu. You will also not get a nice crispy surface either, because the extra oil and low temperature will make the katsu soggy.
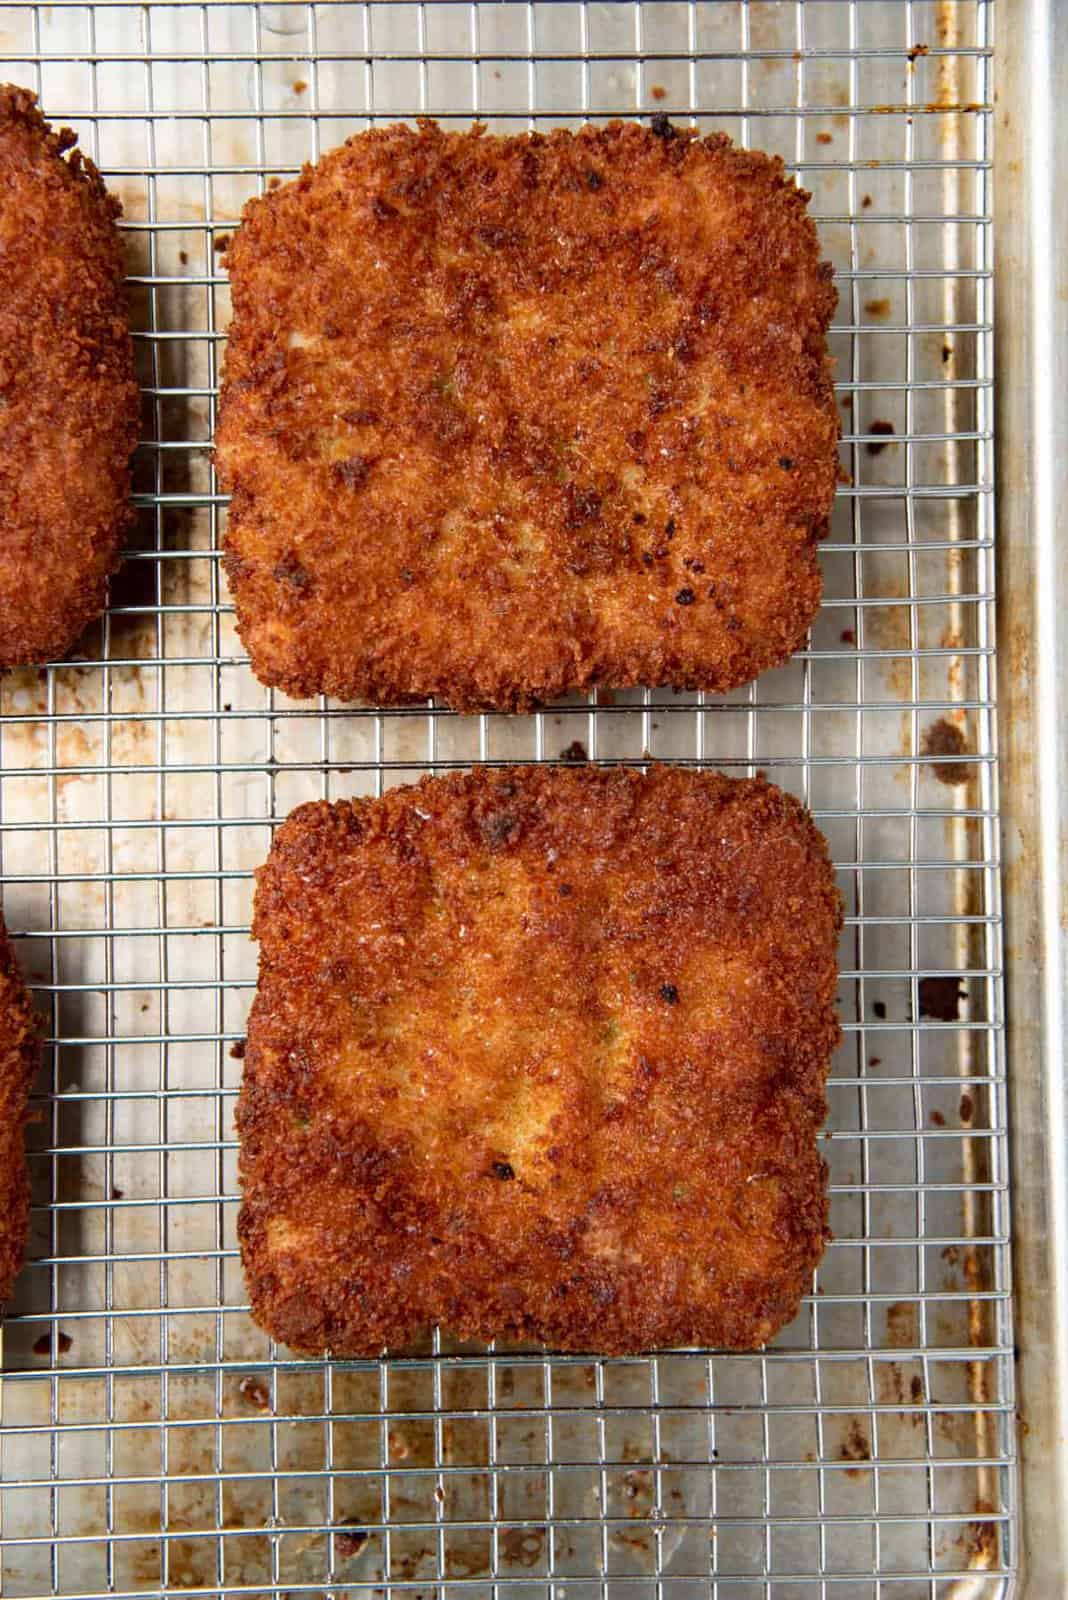
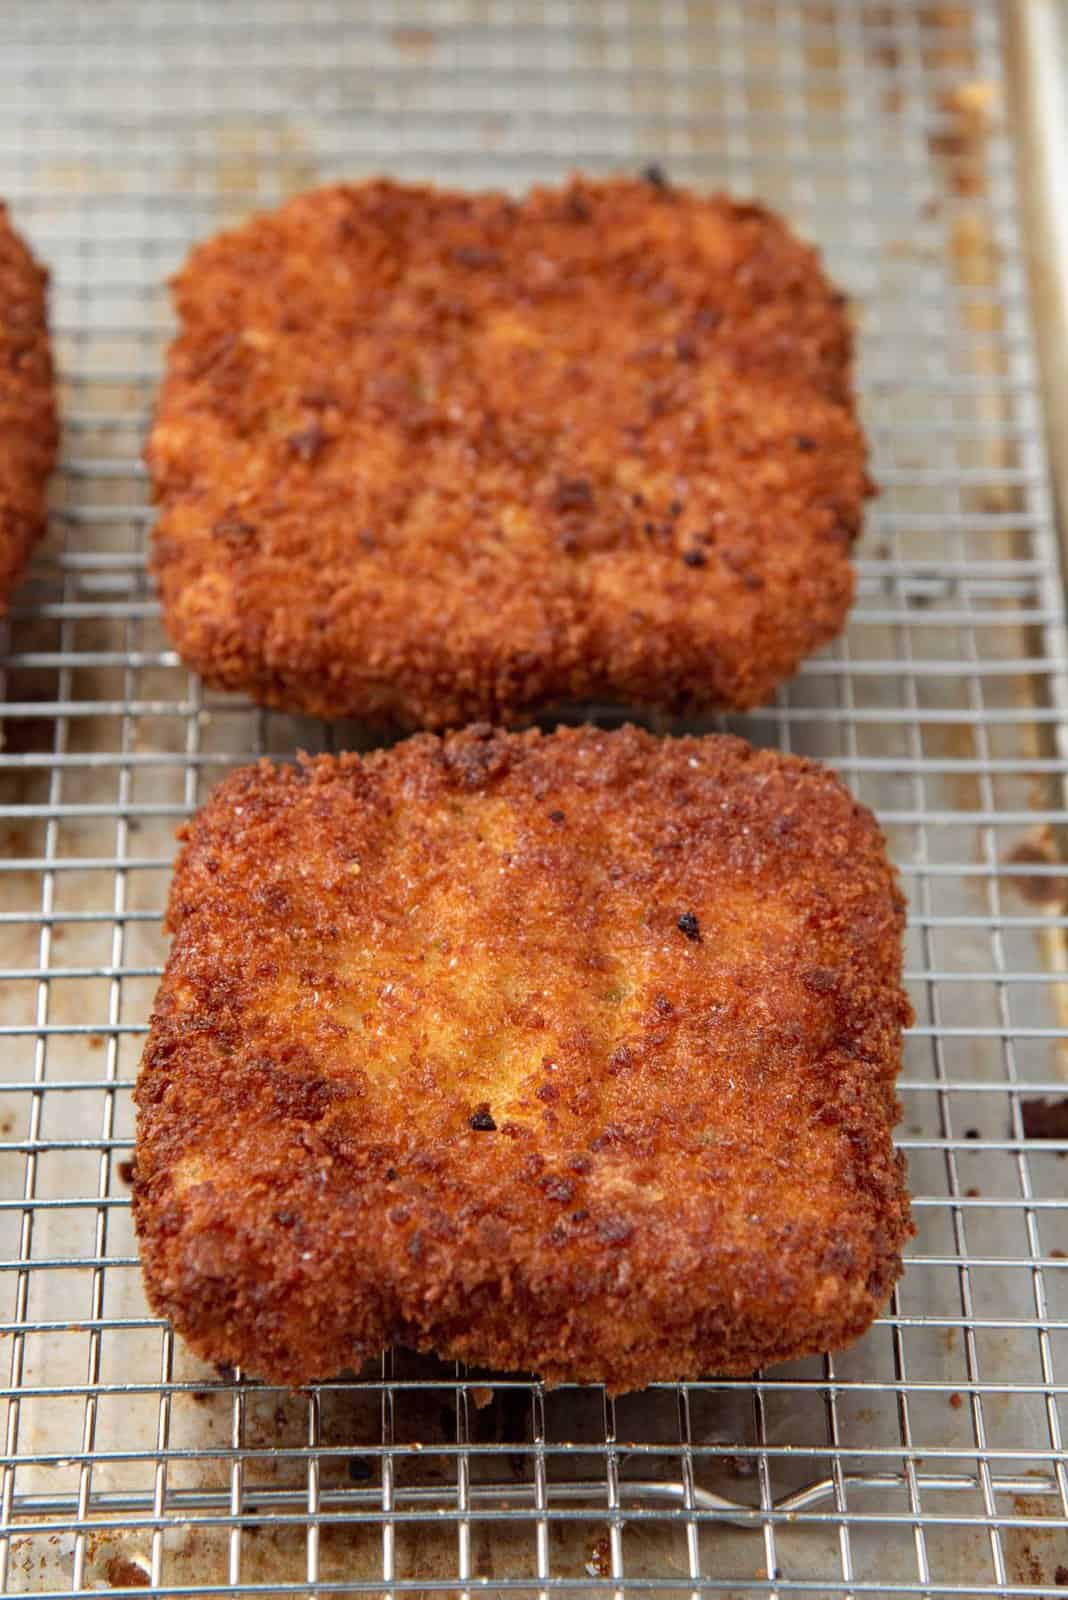
Fry the cutlet for about 6 minutes, making sure to flip once to ensure the cutlet turns golden brown all over (about 3 minutes per side). Transfer the katsu onto a paper towel for a few minutes to drain the excess oil.
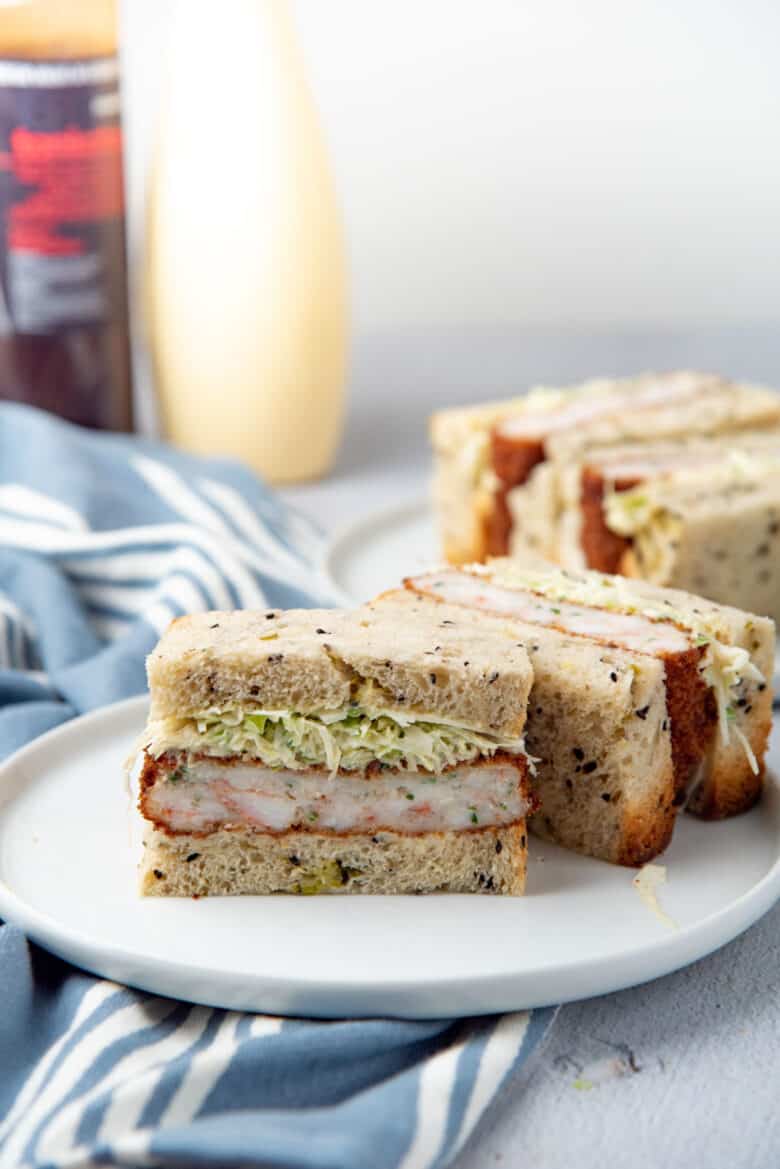
The ebi katsu is now ready to be served as part of a rice bowl for an ebi katsu donburi, or with milk bread or brioche for an ebi katsu sando!
How to make ebi katsu sando
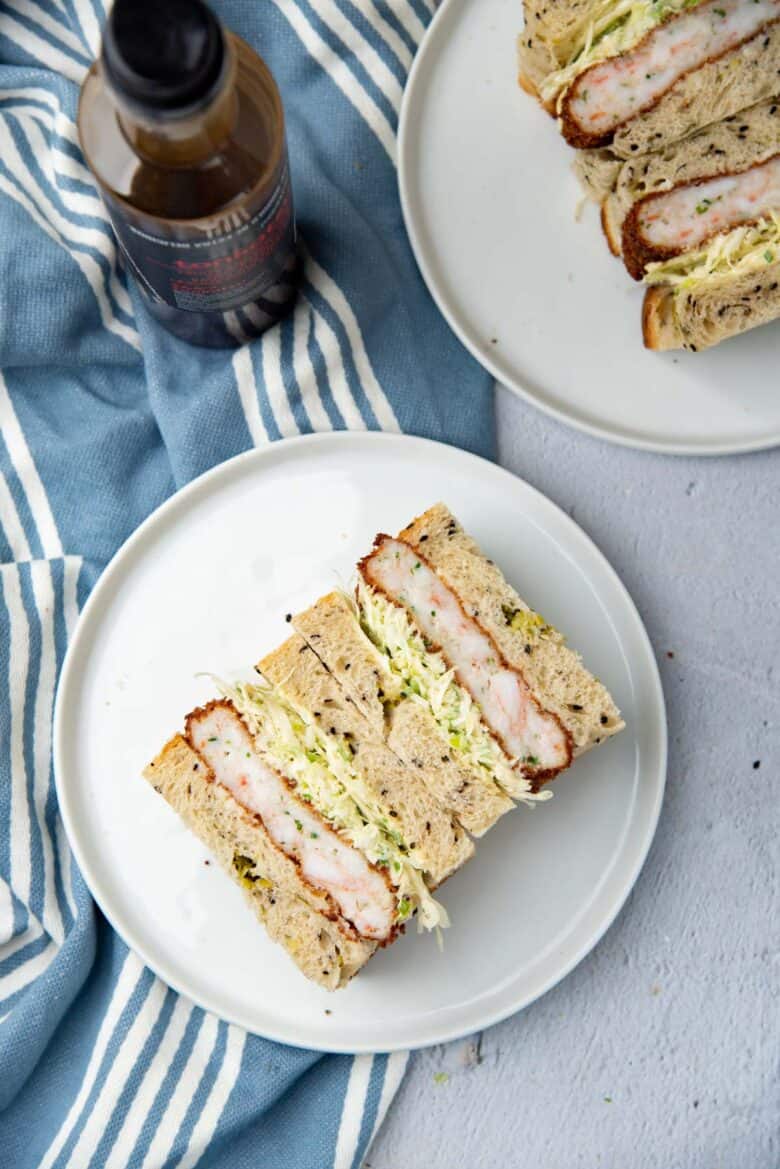
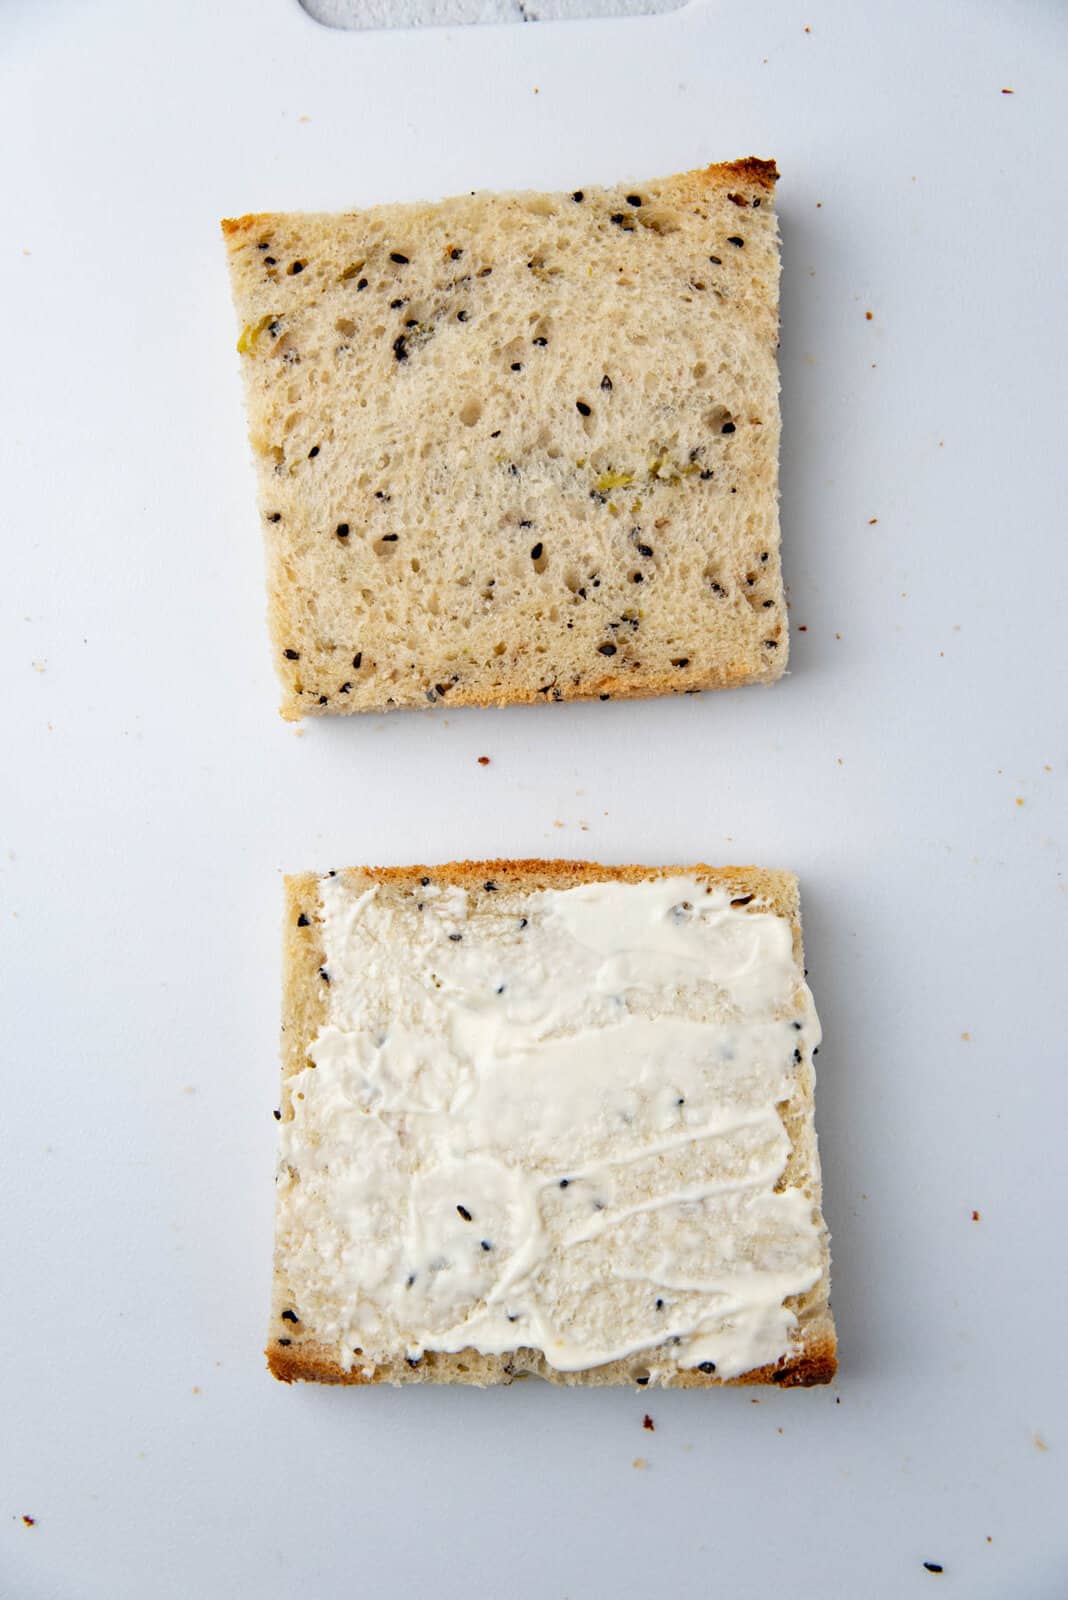
Here I use slices of bread from my scallion and black sesame milk bread loaf. You can also use plain Japanese milk bread slices, or even brioche bread. For the easiest and cheapest option, you can use soft sandwich bread instead too (Texas toast is my choice, but you can use any type of bread you like).
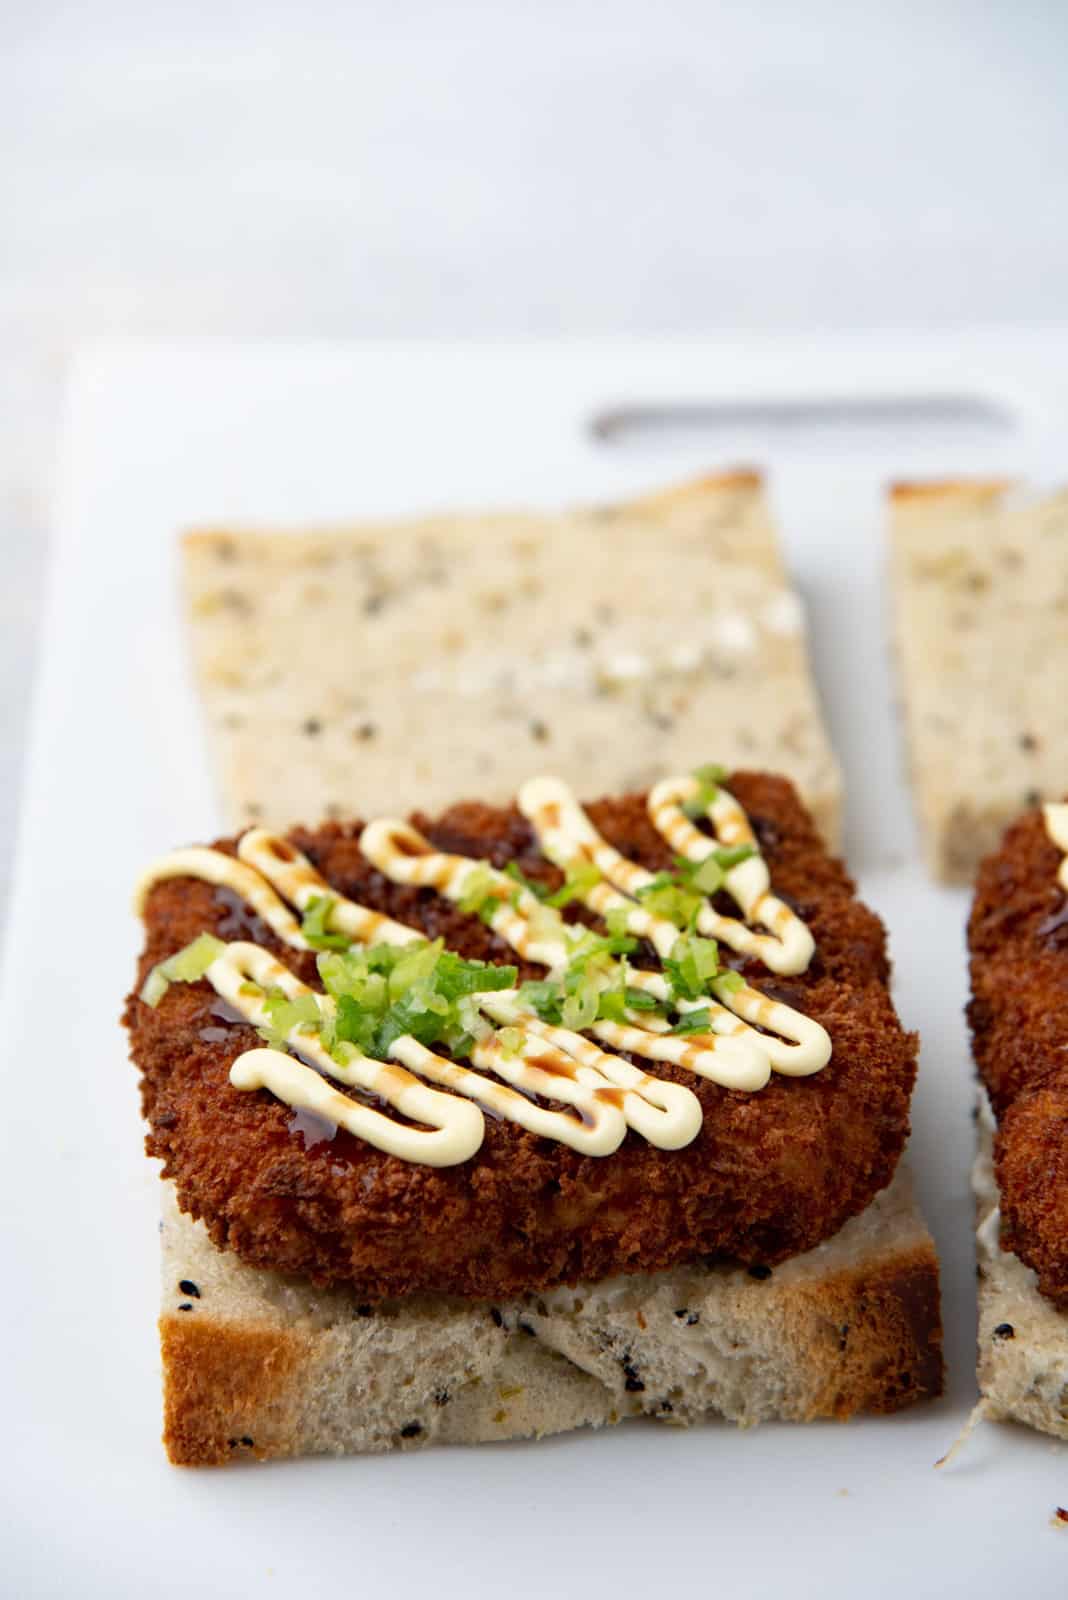
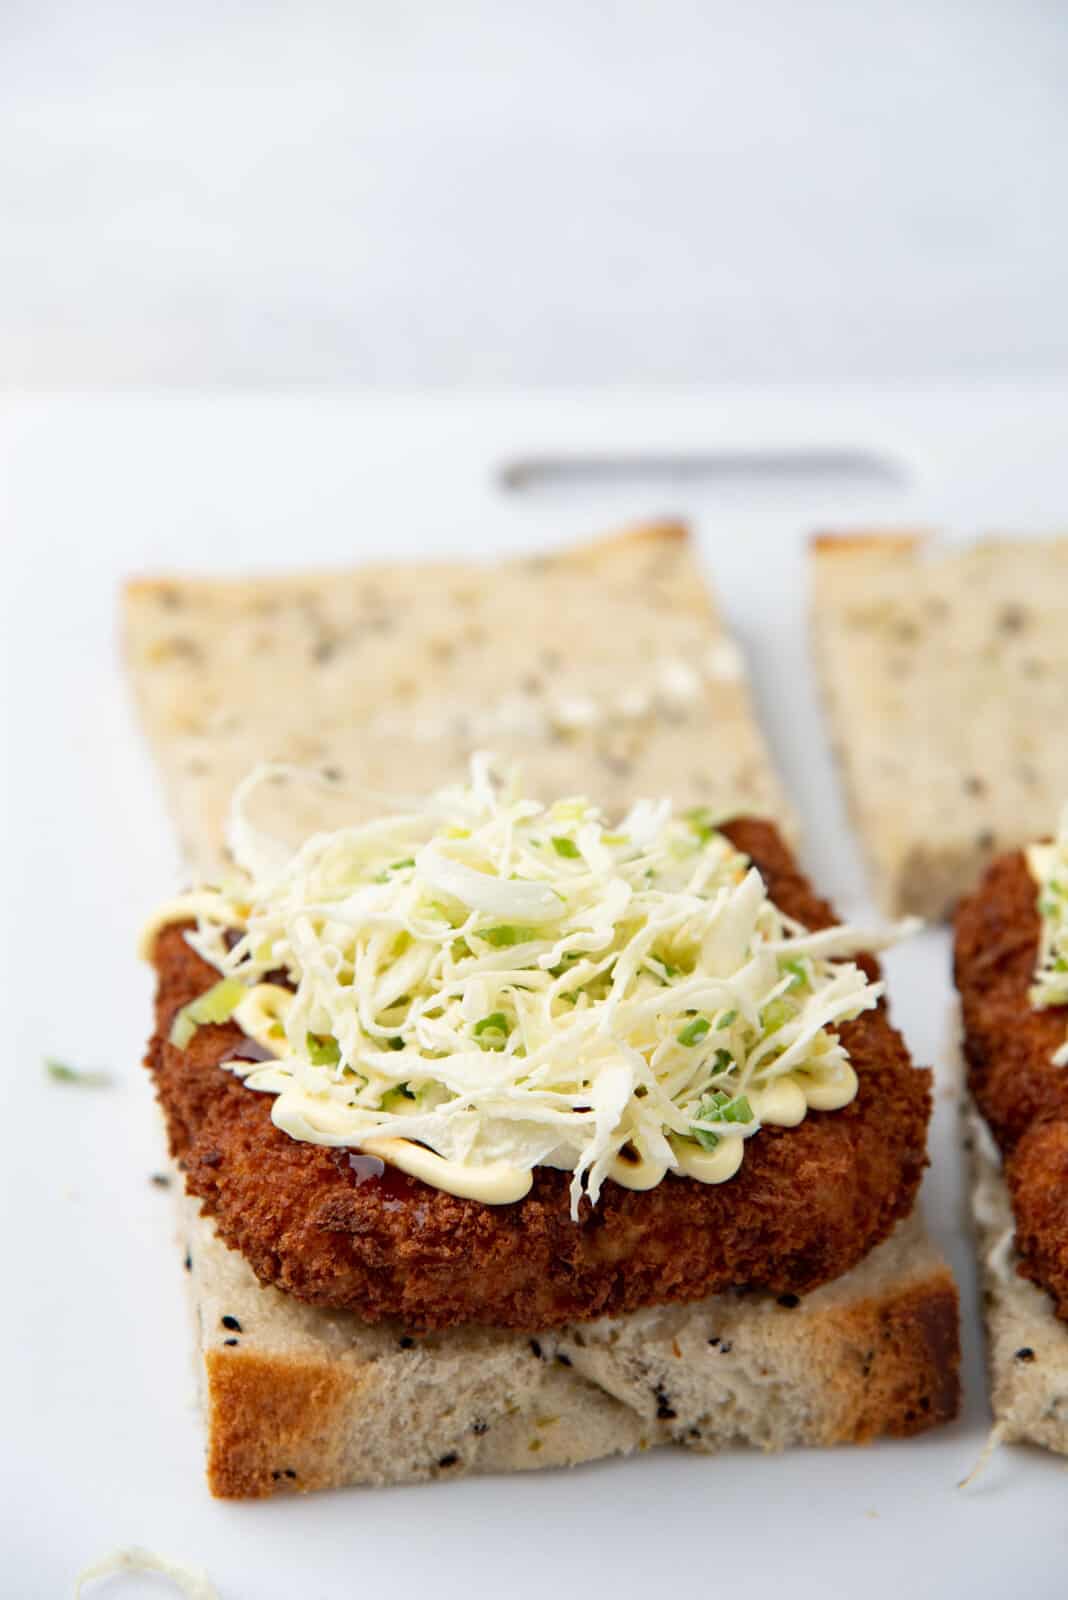
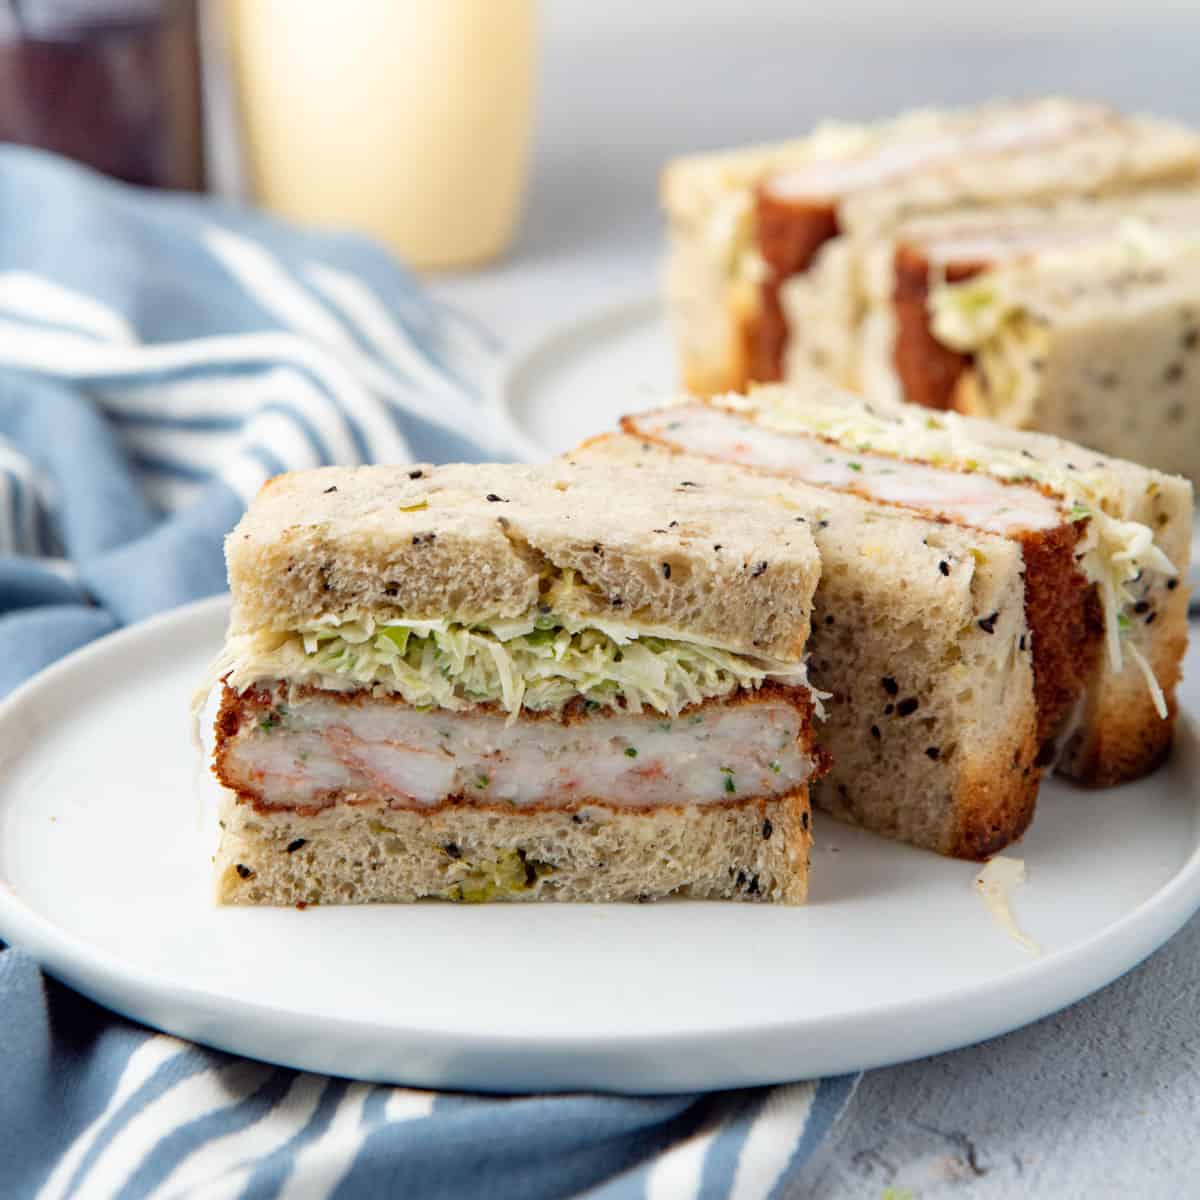
To make the ebi katsu sando, take two slices of bread and stack them on top of each other. Cut off the crust (optional) to get nice clean edges. Spread some mayonnaise on one slice. Place the fried ebi katsu on this slice of bread.
Next, squeeze a swirl of mayonnaise on top of the ebi katsu, followed by tonkatsu sauce. Finally top it with finely shredded cabbage, and follow it with the other slice of bread.
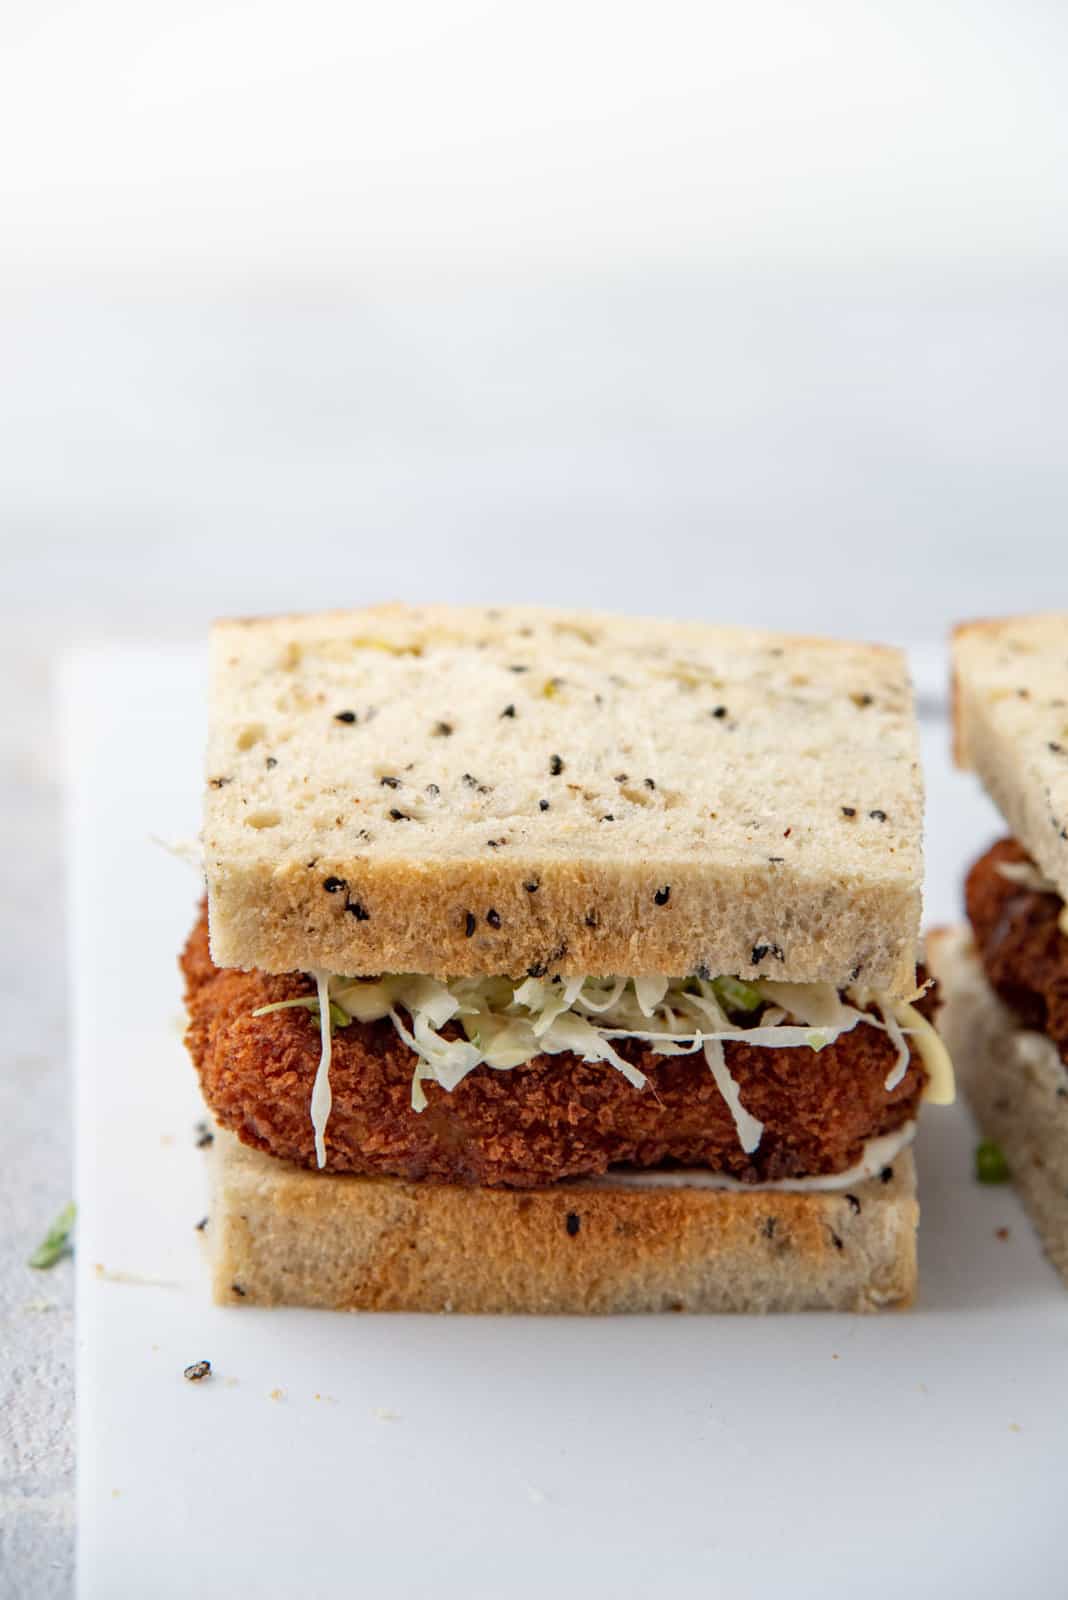
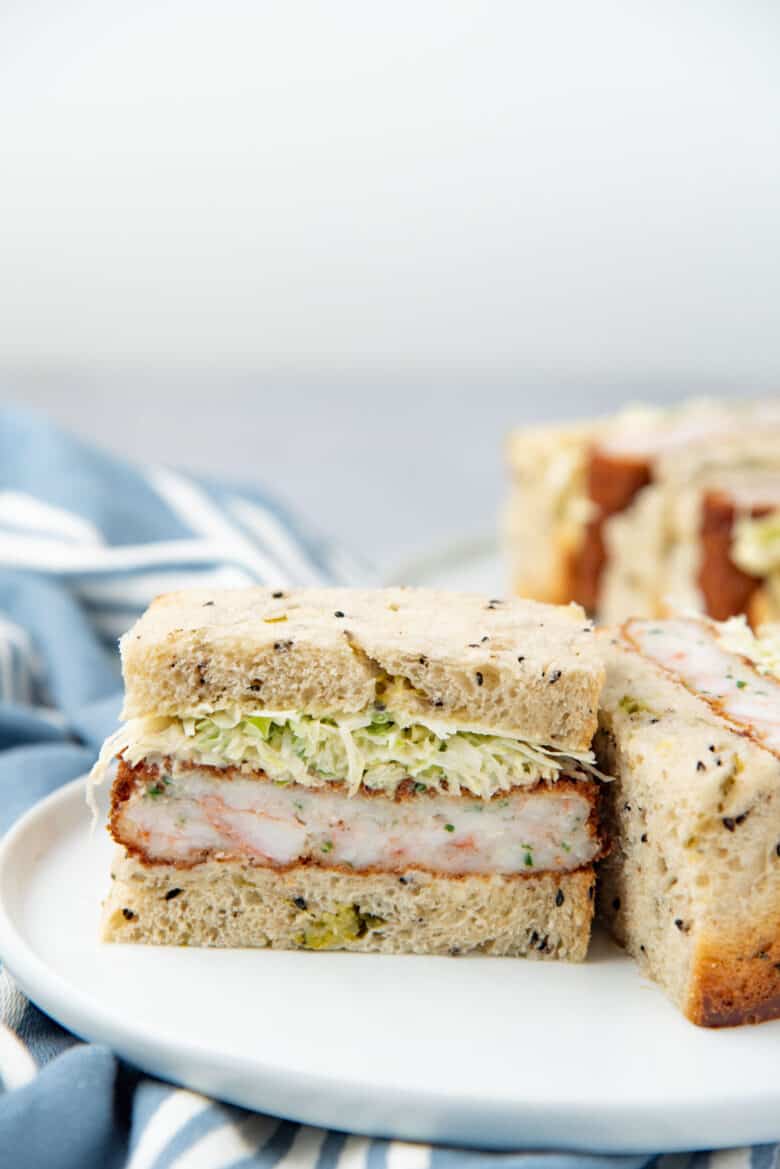
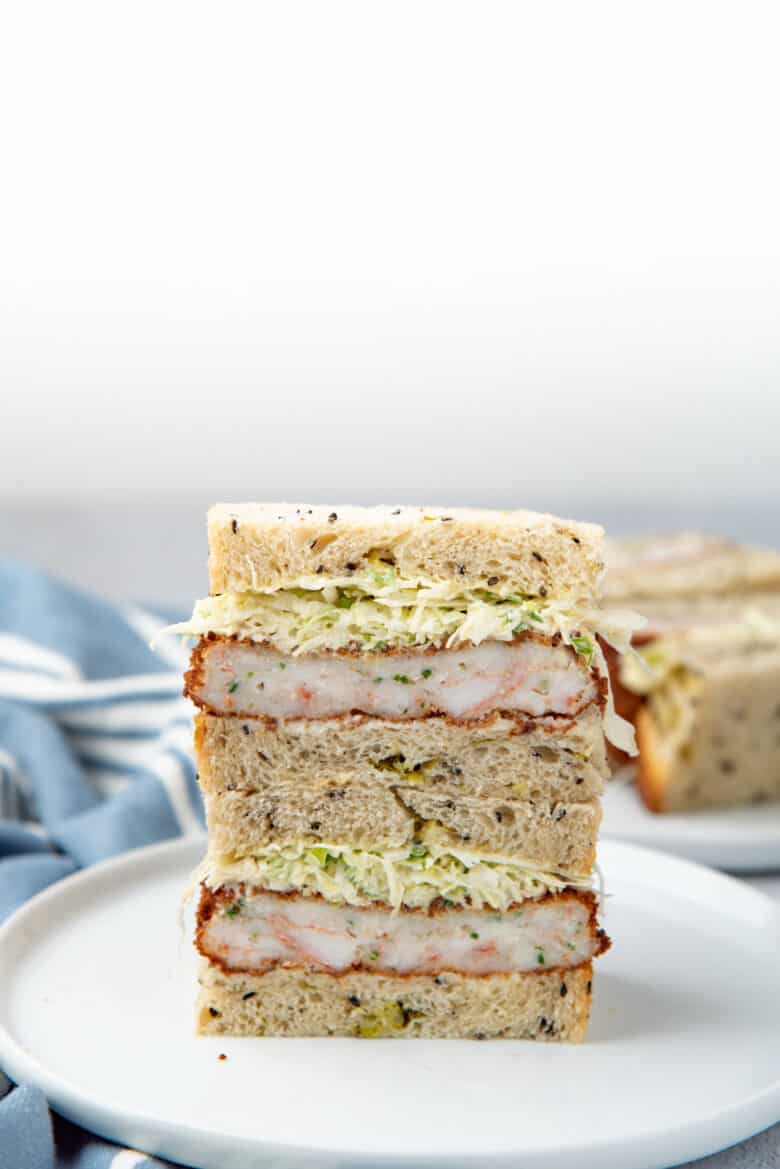
Finally, cut the sandwich in half, and it’s ready to be served.
My favorite way to serve this shrimp katsu sandwich
This sandwich is just so delicious on its own. The shrimp is incredibly juicy and flavorful, with the lovely crunchy and smooth textures. The fresh chives in the cutlet adds a lovely herby and fresh flavor.
I love eating this sando with a side of pickled daikon radish which complements the ebi katsu so well.
A bag of chips on the side is probably a no-brainer.
A side salad is also a great side dish for this ebi katsu sando.
If you decide to make a rice bowl instead, then serve the ebi katsu with steamed rice, with a drizzle of kewpie mayonnaise and tonkatsu sauce. And steamed veggies or stir-fried veggies on the side.
Tips for perfecting this recipe
Use good quality raw shrimp. Sometimes raw shrimp may not make for a tasty dish if they are old or not of the freshest quality. So make sure to use good shrimp for this sandwich. It’s also important that the shrimp should be RAW and not cooked or steamed.
Mince a majority of the shrimp, but chop some of the shrimp in larger pieces as well so that the katsu has an amazing texture.
It’s OK to add some chives, to add more flavor to the ebi katsu.
Use wet hands to shape the cutlets / patties, and freeze them for a short while so that the patties are easier to handle.
Use panko breadcrumbs for the best crunch for your katsu.
Do not overcrowd the frying pot / pan. Maintain a temperature of 350 F in the frying oil when you’re cooking the katsu.
Recipe
Ebi Katsu Recipe (and Ebi Katsu Sando)
US based cup, teaspoon, tablespoon measurements. Weight measurements are recommended for accurate results whenever available.
Common Measurement ConversionsIngredients:
Ebi katsu
- 500 g raw shrimp de-shelled and de-veined
- ¾ tsp fine sea salt
- ½ tsp ground white pepper
- 2 tbsp finely chopped chives or spring onions
- 1 tbsp cornstarch
For crumbing
- ¾ cup flour precise measurement will vary depending on cutlet size, shape etc.
- ½ tsp sea salt
- 2 eggs lightly beaten
- 2 cups panko crumbs precise measurement will vary depending on cutlet size, shape etc.
- Oil for deep frying
Ebi katsu sando
- 8 slices soft sandwich bread preferably Japanese milk bread (I used scallion and sesame milk bread here).
- Kewpie mayonnaise
- Tonkatsu sauce
- Finely shredded cabbage optional
Instructions:
Ebi katsu
- Divide the shrimp into two 300 g and 200 g portions.500 g raw shrimp
- Place the 300 g portion in a small food processor, and pulse until the shrimp is finely minced (almost like a paste). You can also use a knife to finely mince the shrimp portion. This is what I did here. However, for larger portions than this, I prefer to use a food processor for convenience.
- Roughly chop the 200 g portion of shrimp. These pieces of shrimp should not be larger than ½ cm.
- Place both portions of shrimp in a medium sized bowl (large enough to mix the shrimp).
- Add the cornstarch, salt, pepper, and chopped chives.¾ tsp fine sea salt, ½ tsp ground white pepper, 2 tbsp finely chopped chives, 1 tbsp cornstarch
- Mix well until combined.
- Take a small amount of the shrimp mix (about a 1 cm ball) and pan fry it / microwave for a few seconds. Once cooked through, taste it to make sure that it's seasoned well and to your liking. Add more salt if needed.
- Portion the shrimp mix into 4 equal parts.
- Wet your hands with cold water and shape each portion into a 4 – 4.5 inch diameter round patty / cutlet , OR a 4 – 4.5 inch square patty / cutlet. Place each portion on a parchment paper lined baking tray or plate.
- Transfer the tray with the shaped cutlets into the freezer for about 30 – 60 minutes. You want the patties to be just about semi-frozen on the outside, but NOT frozen solid (i.e just firm enough so that you can pick it up and handle easily).
- Once the shaped cutlets have hardened slightly, get the dredging stations ready. In one plate, place the flour and salt and mix well.¾ cup flour, ½ tsp sea salt
- In another plate / bowl, lightly beat the eggs.2 eggs
- Place the panko crumbs in the final plate / bowl.2 cups panko crumbs
- Remove the shrimp cutlets from the freezer. Take one and coat it in the flour mix. Then place it in the egg mix and make sure it’s coated well with the egg mixture. Finally, coat the entire shrimp cutlet in panko crumbs. Make sure to press the panko crumbs into the cutlet / katsu, so that it's coated well.
- Repeat with all of the cutlets.
- Heat a pot or pan with about 3 inches of neutral oil. The oil should reach 350 – 375°F (180 – 190°C) initially, and then maintain a temperature of 350°F / 180°C heat when cooking the katsu.Oil
- Once the oil is heated, gently lower the katsu into the hot oil. Make sure not to overcrowd the pan, so that the heat can be maintained at 350°F.
- Fry each katsu for about 3 minutes per side (6 minutes total) until cooked through and golden brown. The internal temperature of the katsu should read 120 – 125°F (49 – 51°C).
- Place the fried katsu on paper towels to drain off excess oil.
- The ebi katsu is best served hot with rice or on its own. However, wait until the katsu is slightly cooled (but still quite warm) to make ebi katsu sando / sandwich.
Ebi katsu sando
- Stack two slices of bread on top of each other on a cutting board. Slice off the crust if you prefer to make sure the bead slices are the same size as the ebi katsu.8 slices soft sandwich bread
- Once sliced, place the two slices next to each other.
- Spread a little mayonnaise (or butter) on each of the two slices. A thin layer is fine.Kewpie mayonnaise
- On one slice, place the ebi katsu. Squeeze a drizzle of kewpie mayonnaise on top, followed by a drizzle of tonkatsu sauce.Kewpie mayonnaise, Tonkatsu sauce
- Then take about ¼ cup of finely shredded cabbage and place it on top of the ebi katsu.Finely shredded cabbage
- Finally, place the other piece of bread on top (mayonnaise side down).
- Carefully press down on the sandwich. Next, cut through the sandwich to make two pieces. You can cut the sandwich either diagonally or right down the middle.
- Serve with a side of chips, and pickled daikon (optional).
Recipe Notes
Pro tips for this recipe
Use good quality raw shrimp. Make sure to use good shrimp for this sandwich. It’s also important that the shrimp should be RAW and not cooked or steamed. While shirmp should be minced for this recipe, set aside some of the shrimp and chop them into larger pieces. The mixture of minced and chopped shrimp will ensure that the katsu has an amazing texture. Use wet hands to shape the cutlets / patties, and freeze them for a short while so that the patties are easier to handle. Use panko breadcrumbs for the best crunch for your katsu. Do not overcrowd the frying pot / pan. Maintain a temperature of 350 F in the frying oil when you’re cooking the katsu.Nutrition Information:
“This website provides approximate nutrition information for convenience and as a courtesy only. Nutrition data is gathered primarily from the USDA Food Composition Database, whenever available, or otherwise other online calculators.”


Leave a Reply