


A tried and true recipe for homemade whipped cream (easy chantilly cream) made with just 3 ingredients, and perfect to use as a topping for desserts, dessert drinks, to serve with fruit salads, fresh fruits etc.
This simple, foolproof recipe is a result of testing multiple methods of making chantilly cream to determine which one yields the best flavor, texture, consistency, and stability (WITHOUT using stabilizers).

- Why this recipe works
- Stages of making whipped cream
- Ingredients to make easy chantilly cream
- Different methods to make easy whipped cream
- How to make chantilly cream (sweetened whipped cream)
- How to fix overwhipped whipped cream
- Storage
- My best recipe tips
- What you can use chantilly cream for
- Recipe variations
- Recipe FAQs
Growing up in New Zealand, I remember wanting to imitate what I saw in Hollywood movies and squeeze whipped cream out of a can directly into my mouth! I won’t lie, it looked fun.
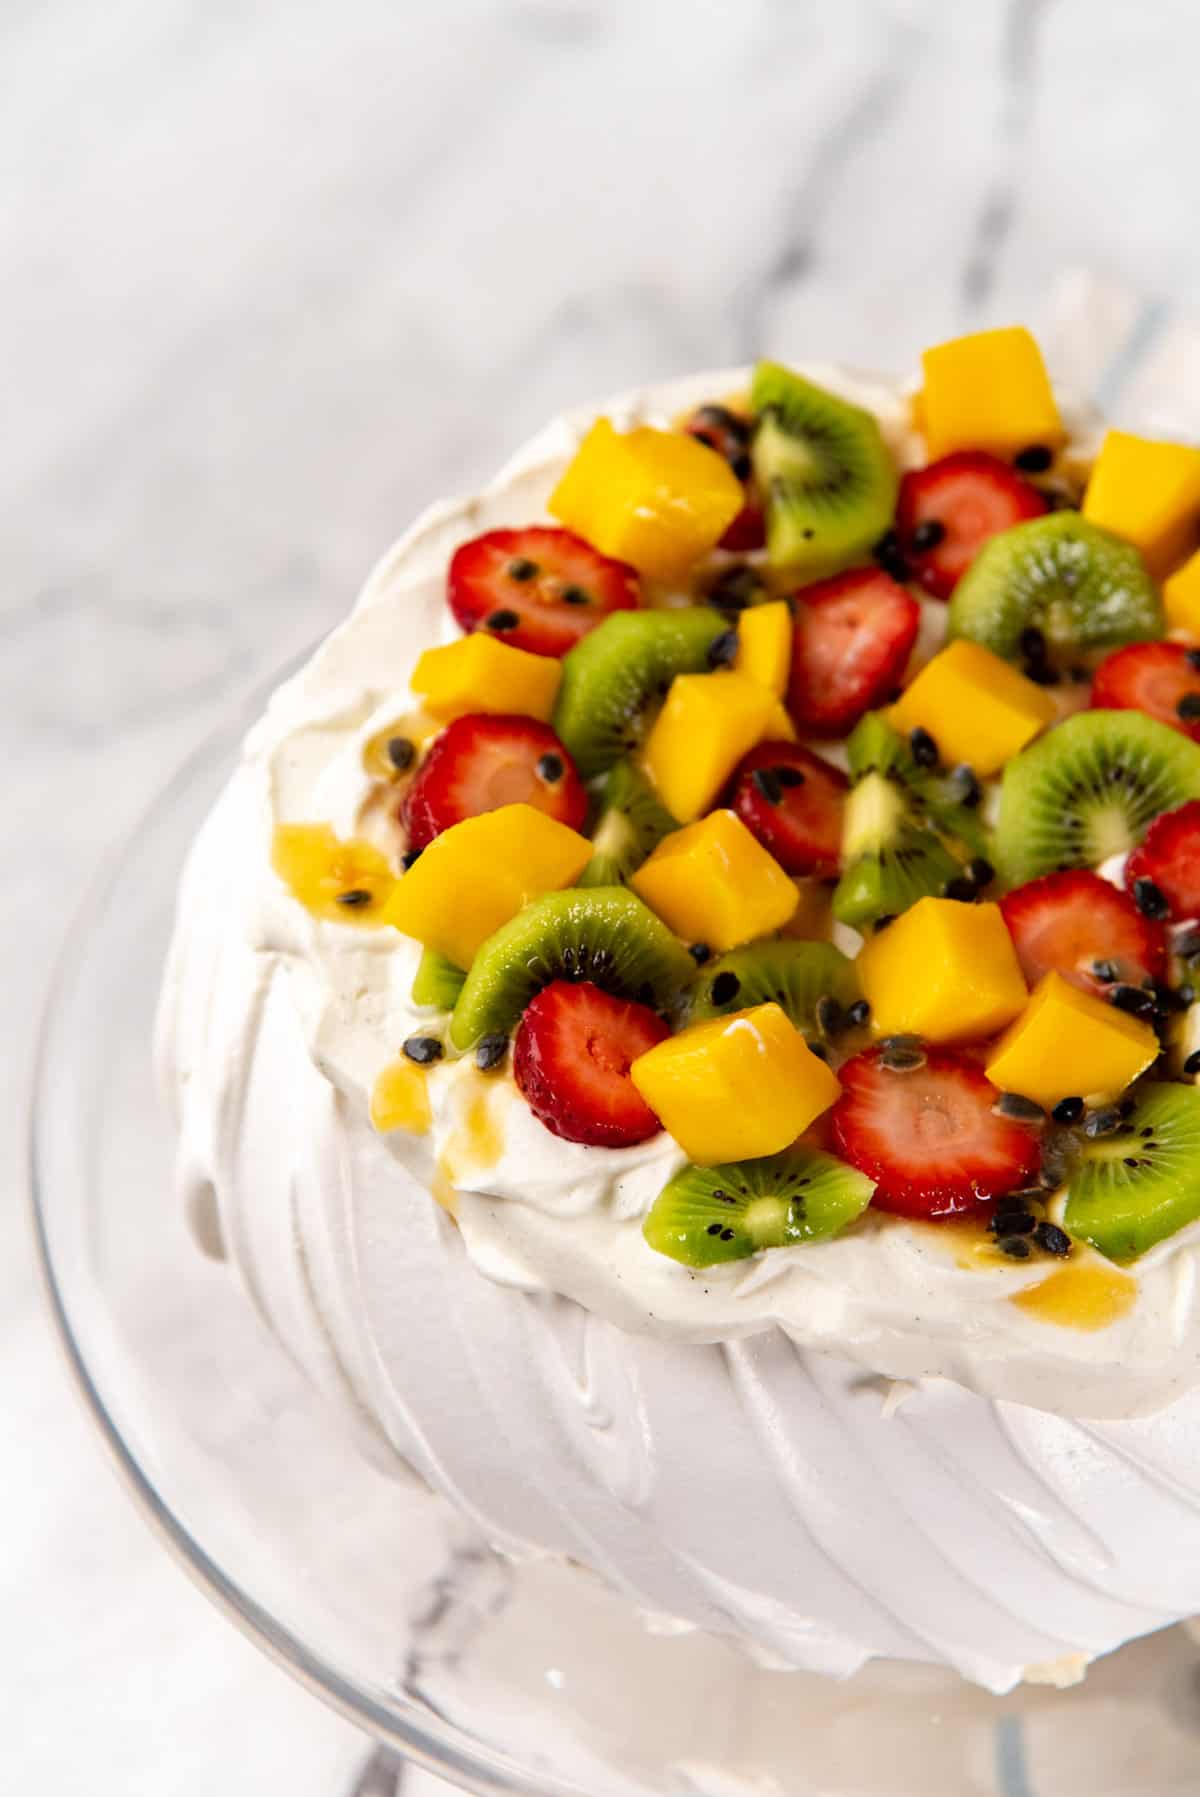
But I always preferred making my own, because my gosh, homemade whipped cream is so much better than anything that comes in a can at the store! A pav was so much more delicious with homemade whipped cream than the canned stuff.
Chantilly cream is sweetened whipped cream. Super simple to make and only requires 3 ingredients (4 if you add a pinch of salt).
It’s the missing piece that I’ve been wanting to share for the longest time in my custard desserts series, where I add chantilly cream to custard to make diplomat cream.
So, let’s talk about the best way to make vanilla chantilly cream.

Why this recipe works

- I test several methods of whipping heavy cream to make chantilly cream to determine which method gives the BEST results without using stabilizers.
- I leave those whipped cream samples in the fridge and cold room temperatures to see which ones hold their shape the longest.
- We also check to see which method provides the best texture.
- This recipe includes ways to enhance the flavor of whipped cream too.
- Plus, I show you how to fix overwhipped whipped cream too.
Stages of making whipped cream
Whipped cream is made by whipping or whisking heavy cream repeatedly to incorporate air into the liquid. Cream is an emulsion containing fat and water dispersed to form an even, homogenous liquid.
When air is incorporated, the tiny air bubbles are trapped within the liquid, because the fat molecules form a protective coating around the air bubbles.
As you incorporate more air, the liquid becomes fluffier, expands more, and becomes a foam (air trapped and dispersed within the liquid).
The result is a light, fluffy, smooth whipped cream (or chantilly cream) that’s perfect on so many types of dessert!

For this, the cream has to go through several stages
- Liquid – At this stage it can be foamy, but doesn’t coat the whisk at all.
- Thickened – Coats the end of the whisk, but falls off and doesn’t form any peaks.
- Soft peaks – When whipped cream forms a peak that completely folds over and almost disappears.
- Mid peaks – When the whipped cream forms a peak that folds over.
- Stiff-ish peaks (or firm peaks) – The whipped cream forms a peak that bends a little. This is my preferred stage for chantilly cream. Still soft and smooth, and can be piped without becoming grainy.
- Stiff peaks – Where the whipped cream forms a peak that stands straight up and doesn’t bend at all. I find that at this stage spreading or piping the whipped cream will make it “overwhip” or become grainy. So I prefer to stop at “stiff-ish” peaks.

Why does my whipped cream deflate so quickly?
If the foam is not stable, the bonds between fat molecules will weaken over time, and the air molecules will aggregate together as well. This will deflate the cream, and water from the cream will separate and “weep”.
This is what happens if the whipped cream is left standing for a long time, OR if air is incorporated into the cream too quickly or too chaotically.
Overwhipped cream?
If too much air is added to the foam, the air molecules will become too big and want to aggregate together, deflating the mixture. The fat molecules will also bond together during the whisking process to form larger fat molecules, squeezing out the water.
This is when whipped cream starts to overwhip and become grainy / curdle, and ultimately turns into butter with more whisking!
Ingredients to make easy chantilly cream

- Heavy cream – At least 35% fat content. MUST be chilled.
- White sugar – Granulated sugar, but can also be substituted with confectioner’s sugar (by weight).
- Vanilla extract – Use vanilla extract for flavor, or vanilla beans or bean paste to get the black flecks.
- Salt – Optional, but really elevates the flavor / sweetness of the sweetened chantilly cream.
There are no stabilizers in this recipe, but I will share how to stabilize whipped cream soon!
Stabilized whipped cream will stay creamy and smooth for much longer under a range of conditions, and can even be stored in the fridge for longer than a day! It’s a superior substitute to cool whip.
How to choose the right cream to make whipped cream in your country / region
You must use cream that has at least 35% fat content. The higher the fat content, the more stable the chantilly cream will be. However, different regions in the world will have different names for whippable cream.
- Canada – Heavy cream / whipping cream or 35% cream.
- Australia / New Zealand – Thickened cream. This cream has 35% fat, and has stabilizers too. So, it can remain whipped longer than cream with no thickeners / stabilizers.
- UK – Whipping cream (about 35% fat). Double cream is even better, as it contains 48% fat.
- USA – Light whipping cream (30 – 35% fat). Heavy cream / whipping cream (36% fat or above).
There are non-dairy versions in the market as well. Make sure you’re not using non-dairy versions for this recipe.
Different methods to make easy whipped cream
There are many ways to make whipped cream.
- Stand mixer or electric hand mixer
- Food processor
- Stick blender / immersion blender
- By hand
- N2O charger

I tested all these methods to show you the pros and cons of each one. Here’s a quick breakdown of it, in order of what worked best. Or skip below to see the winner!
Stand Mixer – Medium speed
My favorite method. Gives me more control. Can handle larger batches. Lasts longer with a fluffy texture. Great for pavlovas or dessert toppings that are served within a day.
| Pros | Cons | |
| Method | Great control over final result and to prevent overwhipping. Great for large quantities. | Slow to whip, and takes time and patience to maintain speed. |
| Results | Smooth, not grainy, keeps shape well. Fluffy and airy. Preserves white color after 12 hours. | Weeps only in warm temperatures or after 12 hours in the fridge. |
Stand Mixer – High speed
I don’t like this method for the lack of control at the end, but great at the beginning to speed things up. I prefer using a combination of high speed at the start and lower speed at the end.
| Pros | Cons | |
| Method | Fast whipping. Great for large quantities. | Hard to prevent overwhipping. |
| Results | Smooth, not grainy, and fluffy. Preserves white color even after 12 hours. | Deflates more easily than the medium speed version. Weeps only in warm temperatures or after 12 hours in the fridge. |
Food Processor
A very popular method to whip cream. I personally don’t like this method. I dislike the lack of control, and needing to remove the lid often to check the consistency. But I do like the dense texture of the cream.
| Pros | Cons | |
| Method | Very fast. | Hard to monitor as you have to constantly remove the lid to make sure it doesn’t overwhip. |
| Results | Thick, dense cream. Keeps shape well even after 12 hours. | Keeps shape well, but can lose some definition with time. Mine started to look grainy after about 8 hours. Also started to turn a little yellow. Only weeping in warm temperatures or after about 8 hours in the fridge. |
Immersion Blender
I use this method for small quantities, when I need some whipped cream immediately (like for pup cups, or for a quick sweet treat). I don’t use this for large quantities, or when I need whipped cream to last a little longer.
| Pros | Cons | |
| Method | Very fast, easy to monitor. | But only great for smaller quantities. Can be annoying to evenly whip the cream (bottom layer remains runnier than the top layer). |
| Results | Thick, dense cream. Great to use immediately. | Deflates after a few hours. Weeps at room temperature after about 4 hours. Does not handle warm temperatures well. |
N2O Charger
Not great, but super convenient. I sometimes have this in my fridge for when I know I’ll need quick whipped cream and don’t want to throw out any unused whipped cream (as it can be stored in the fridge and used on demand).
| Pros | Cons | |
| Method | Fast and convenient and can dispense as much or as little as you need. | Limited in how much liquid to add, and catridges are expensive. |
| Results | Great to store for later and use only as needed. Acceptable for immediate uses (like drinks or to top desserts). | Very grainy appearance. Deflates after 20 minutes. |

Which one’s the winner?
Stand mixer! Medium speed gives the most stable whipped cream that lasts the longest with desirable texture.
Plus, I can easily make larger batches. It gives the most stable chantilly cream (without stabilizers), with the most control. The trade-off is that it takes longer than other methods.
For smaller quantities, I will use the immersion blender more often, as the whipped cream is for immediate use only.
Which method will I never use?
Food processor. It does produce a fairly stable and dense chantilly cream, and is faster. But the stand mixer is more convenient to use with the control I need, even if it takes longer.
How to make chantilly cream (sweetened whipped cream)
Step 1 – Prep the ingredients and tools
Make sure the heavy cream is chilled well. Room temperature or warm cream will not whip properly. If you live in a warm area, then I highly recommend chilling your mixer bowl and whisk attachment too.
Understand that at any point, if your cream gets too warm, you can chill the cream for a few minutes in the freezer.
I prefer to use about 2 tbsp sugar per 1 cup of cream. But you can adjust this to make it sweeter or less sweet. If you’re not using any sugar, you can leave out the salt.

Step 2 – Add ingredients to the mixer
Add the chilled heavy cream, sugar, vanilla, and salt (if using) to the mixer bowl (image 1). Place the mixer in your stand mixer with the whisk attachment.
Step 3 – Start whisking
When whisking, go by consistency of the cream rather than time.
Slowly increase the whisking speed from low to medium – high speed. I like to stick with a low speed for small quantities, but maybe increase the speed to medium – medium high for larger quantities.
Whisk at this speed until the cream starts to thicken (image 2).
Continue to whisk the cream while it goes through the following stages. However, stop whisking a few times to scrape down the bowl and mix the cream with a spatula to make sure it’s all mixing evenly.
- Thickened cream – Can be picked up by the whisk, but falls off and only coats it. Doesn’t form any peaks (image 2).
- Soft peaks – Peak is visible when picking up the whisk, but when you turn it over, the peak completely folds over on itself (image 3).
- Mid peaks – When turning over the whisk, only the tip of the peak folds over (image 4).
Step 4 – Lower the whisking speed to low

When the mixture has reached mid peaks, or just after, lower the speed to have better control of the consistency.
If you’re working with a larger quantity, reduce the speed to 2 or 3. If working with a smaller quantity of cream, then I prefer to switch to manually whisking (image 5).
Whisk the cream on low speed until you have the desired consistency.
- Stiff-ish peaks (image 6)– The whipped cream peaks will bend slightly at the tip. This is the stage I prefer. At this stage, I can handle the cream more for spreading, mixing, or piping, and it’ll still retain a smooth creamy consistency.
- Stiff peaks (image 7)– This is when the peak remains upright without folding or bending. This is good if you’re not planning on piping the cream, or only need to pile the cream on top of a dessert. If whipped cream at stiff peaks is handled too much, or has to be piped, it can lead to a grainy consistency (since it’ll be overaerated / overwhipped).
Step 5 – Use immediately
Chantilly cream must be used immediately after making it. Dollop, spread, fold in, or pipe the chantilly cream as soon as you make it.
After it’s piped / shaped, it should last at least a few hours in cool temperatures.
If you want to make whipped cream than can be spread, or used a few hours AFTER whipping it, then you’re looking for stabilized whipped cream!
It can be used as a frosting, or filling, or topping even the DAY AFTER you make it.

How to fix overwhipped whipped cream
The whipped cream will go through mid, stiff-ish, stiff peaks to overwhipped SUPER FAST! That’s why it’s important to slow down the whisking speed for better control.
Overwhipped cream is when the chantilly cream starts to look grainy (image 8). Next, it’ll start to look curdled, and the final form is butter!
You can reverse overwhipped cream when it’s only at the grainy stage. There is only one method to fix it.

Adding chilled heavy cream or double cream
Make sure your grainy whipped cream is chilled well. Then, add chilled cream to the mixture (image 9). With a 2 cup batch, start by adding about 4 tbsp of heavy cream (about 12.5%).
Use a spatula to mix in the heavy cream with the overwhipped cream. Add more heavy cream if needed until the cream looks smooth again.
If the whipped cream is too runny, keep stirring OR gently stir with a whisk until you have the right consistency (image 10).
Alternatively, you can add some creme fraiche or double cream instead of heavy cream, as these have a higher fat content that can help fix a broken whipped cream too.

Why this works
Whipped cream becomes grainy because the fat and water molecules are separating in the emulsion.
By adding homogenous cream (an intact emulsion), we are “tempering” the cream by reintroducing the emulsified molecules, so that the broken emulsion can “fall back” into a homogenous state.
How to PREVENT overwhipped cream
- Whisking the cream at a lower speed to slowly introduce air into the liquid.
- Adding a stabilizer to the cream mixture. Stabilized whipped cream is much harder to overwhip than regular whipped cream! It can be whipped until it’s at stiff peaks and even a step further without making it grainy and curdled.
Storage
This easy chantilly cream should be used immediately, as it can lose its structure over time. But once piped or spread on desserts, it can last a few hours with no issues!
After a day, the whipped cream can deflate and / or weep, making the dessert under the whipped cream soggy. That’s why it’s best served within a day.
As a result, you can’t make this chantilly cream ahead of time. If you want make ahead chantilly cream, then you will need to make STABILIZED whipped cream instead.

My best recipe tips
- Use chilled heavy cream. Chantilly cream / whipped cream will be more stable if it’s chilled when whipped.
- Make sure there’s at least 35% fat in the cream. Higher fat content will also produce a more stable whipped cream.
- If you live in a warm climate, chill the bowl as well.
- Use the freezer to rapidly cool down the cream (IF the cream is getting too warm at any stage). This only applies to warm environments, or if you’re working with extremely large quantities.
- If you decide to whip the cream on high speed, make sure to at least slow down the speed at the end. Whipping at high speed at the end can cause the whipped cream to overwhip quickly.
- Slower whipping speeds will introduce air to the cream at a moderate pace creating a stable foam. Introducing air too fast can make the foam less stable.
- This recipe is for chantilly cream, which is a simple, sweetened whipped cream. The stability comes from the way the cream is aerated.
What you can use chantilly cream for
You can use chantilly cream for desserts that you’re going to serve within a few hours. Ideally within 8 hours, but it COULD last up to a day in cooler environments.
- To serve with fruit salads, macerated fruits, or fresh cut fruits
- As a topping for frappuccinos and coffee slushie
- To top milkshakes
You can also add chantilly cream to other custards, such as,
Diplomat cream – Custard with chantilly cream folded in. Since the custard is stabilized with cornstarch or gelatin, the chantilly cream doesn’t need to be stabilized. So it’s perfect for making classic diplomat cream.
Recipe variations
- Stabilized chantilly cream – Adding a stabilizer such as gelatin, modified starch to keep the whipped cream structure intact.
- Strawberry whipped cream – Adding freeze dried fruit powder to the heavy cream to flavor it.
- Coffee whipped cream – Adding instant espresso powder. Do not add regular ground coffee, as this will not dissolve in the cream.
- Chocolate whipped cream – Adding cocoa powder. I like to bloom the cocoa powder for a deeper chocolate flavor, and the cocoa paste naturally stabilizes the chocolate whipped cream as well.
- Banana whipped cream – Mashing overripe banana into heavy cream and then whipping it into chantilly cream. However, I prefer to add a stabilizer to make sure the extra moisture doesn’t cause it to weep. This must be used immediately, as the banana will continue to oxidize and darken the whipped cream.
Recipe FAQs
Why is my chantilly cream runny?
If you have whisked it for a while and it’s not forming peaks, then make sure that it’s properly chilled. Keep it in the freezer for a few minutes to chill and try whipping it again.
Why is my chantilly cream grainy?
Chantilly cream becomes grainy when it’s overwhipped / over-whisked. Please check my “how to fix overwhipped whipped cream” section for tips on how to fix this, and how to prevent it from happening.
Can you freeze whipped cream?
Unfortunately, you cannot freeze this easy whipped cream recipe. When thawing whipped cream, the water will separate from the whipped cream.
However, you can certainly freeze stabilized whipped cream.
What’s the difference between chantilly cream vs whipped cream?
Chantilly cream is sweetened whipped cream. Whipped cream that contains some sweetener in the form of sugar or honey.
Whipped cream is just heavy cream that’s whipped, and doesn’t necessarily contain sugar.
Recipe

Easy Chantilly Cream (Homemade Whipped Cream)
US based cup, teaspoon, tablespoon measurements. Weight measurements are recommended for accurate results whenever available.
Common Measurement ConversionsIngredients:
- 240 mL heavy cream ideally 35% fat or higher, 1 cup
- 25 g sugar about 2 tbsp (adjust to your taste)
- 1 tsp vanilla extract
- 1 pinch sea salt optional (but recommended)
Instructions:
- Make sure the heavy cream is chilled well. You can chill the bowl for 15 – 30 minutes as well for good measure (especially in summer or if you live in a hot climate).
- Place the chilled heavy cream in the mixer bowl. Add the sugar, salt, and vanilla.240 mL heavy cream, 25 g sugar, 1 tsp vanilla extract, 1 pinch sea salt
- Use a hand held electric mixer or a stand mixer with a whisk attachment to whisk the heavy cream.
- It's important to control the speed with which you aerate the cream. If the cream is aerated too quickly and too fast, it will deflate faster. If you’re working with a small amount of cream (1 – 3 cups), then whisk on low – medium speed. If you’re working with larger batches (4 cups of more), whisk on slightly higher speed (medium high).
- Start whisking the cream while checking on the consistency often to determine at which stage the whipping cream is at. (See the post for an illustration and information on different stages of whipped cream.)
- The whipping cream will first start to thicken and then reach soft peaks. Soft peaks is when you pull the whisk out and the peak that's formed will droop completely on itself where the tip touches the base.
- If needed, use a spatula to scrape down the bowl and fold the cream to ensure it's thickening evenly.
- Continue to whisk until the cream reaches mid peaks. Mid peaks is when the cream forms a peak on the whisk that folds over at about 90° or over, but the tip is visible.
- At this stage, switch to manually stirring / whisking the cream. This gives you better control of achieving the right consistency WITHOUT overwhipping.
- Use the whisk attachment OR a wire whisk to stir the heavy cream mixture. The whipped cream will start to thicken and stiffen further, and reach stiff-ish / firm peaks. This is when the whipped cream peak bends slightly (between 45 – 90°). The whipped cream should look smooth and creamy as well.
- This is the stage at which I stop whisking the whipped cream. When manually spreading or piping the whipped cream, it will continue to aerate and stiffen further.
- Use immediately.
Recipe Notes
Note about using stand mixer vs hand mixer
When I use my kitchenaid mixer, I use a minimum of 1.5 cups of heavy cream to get best results. For 1 cup or less, I use my hand mixer, and whisk on low speed only.Why I do not whisk to stiff peaks
I prefer not to whisk until stiff peaks (i.e. when the peak stays upright and stiff without bending), as this whipped cream will become grainy too quickly when handled even a little bit. Even stirring can cause the cream to change texture. Keeping the cream SLIGHTLY under-whipped allows us to be able to pipe or spread or handle the cream a bit more while maintaining the desired creamy texture.What to do if you overwhisked the whipping cream and it becomes grainy?
Add about 2 – 4 tbsp of chilled heavy cream into the whipped cream (about ⅛ – ¼ of the initial amount). Use a spatula to fold and gently mix this into the overwhipped cream. If you need to, you can add more as well, but you’ll also need to add some extra sugar to sweeten the whipped cream further. This should make the whipped cream look smooth again. If the whipped cream is runny (soft peaks), then use a whisk to gently stir the mixture until you get to mid – firm peaks.Nutrition Information:
“This website provides approximate nutrition information for convenience and as a courtesy only. Nutrition data is gathered primarily from the USDA Food Composition Database, whenever available, or otherwise other online calculators.”


Leave a Reply