


Just like my popular brioche bread recipe, this brioche buns recipe makes the most amazing buttery, soft, light burger buns or sandwich buns!
I also show you how to make small brioche buns (mini brioche buns), brioche slider buns, or even larger brioche buns with this same tried and true recipe.
Why this recipe works
- This brioche burger buns recipe is based on my tried and true, reader-favorite, foolproof brioche recipe.
- It uses 50% butter which makes this much richer than other brioche bun recipes.
- Other recipes you’ll find online are lean brioche buns, because they use less butter and/or eggs.
- You can adapt this brioche bun recipe to use fewer eggs and less butter to make it easier to handle (i.e. a lean brioche dough), though I highly recommend following the recipe for best results.
- I also show you how to make larger burger buns (10 cm) or small burger buns (8 or 9 cm) or even brioche slider buns.
Brioche is one of my favorite breads to bake! It’s the perfect base for so many baked goods such as cinnamon rolls (so you can make brioche cinnamon rolls), chocolate babka, cinnamon babka, French toast, bostock pastry, brioche tarts, bread pudding, sandwiches (like this fried chicken sandwich), burgers etc.
What are brioche buns? (How do they differ from regular bread buns?)
Brioche dough is a highly enriched dough (similar to Hawaiian dinner rolls, but even richer), whereas regular bread buns will either be a lean dough, or slightly enriched dough.
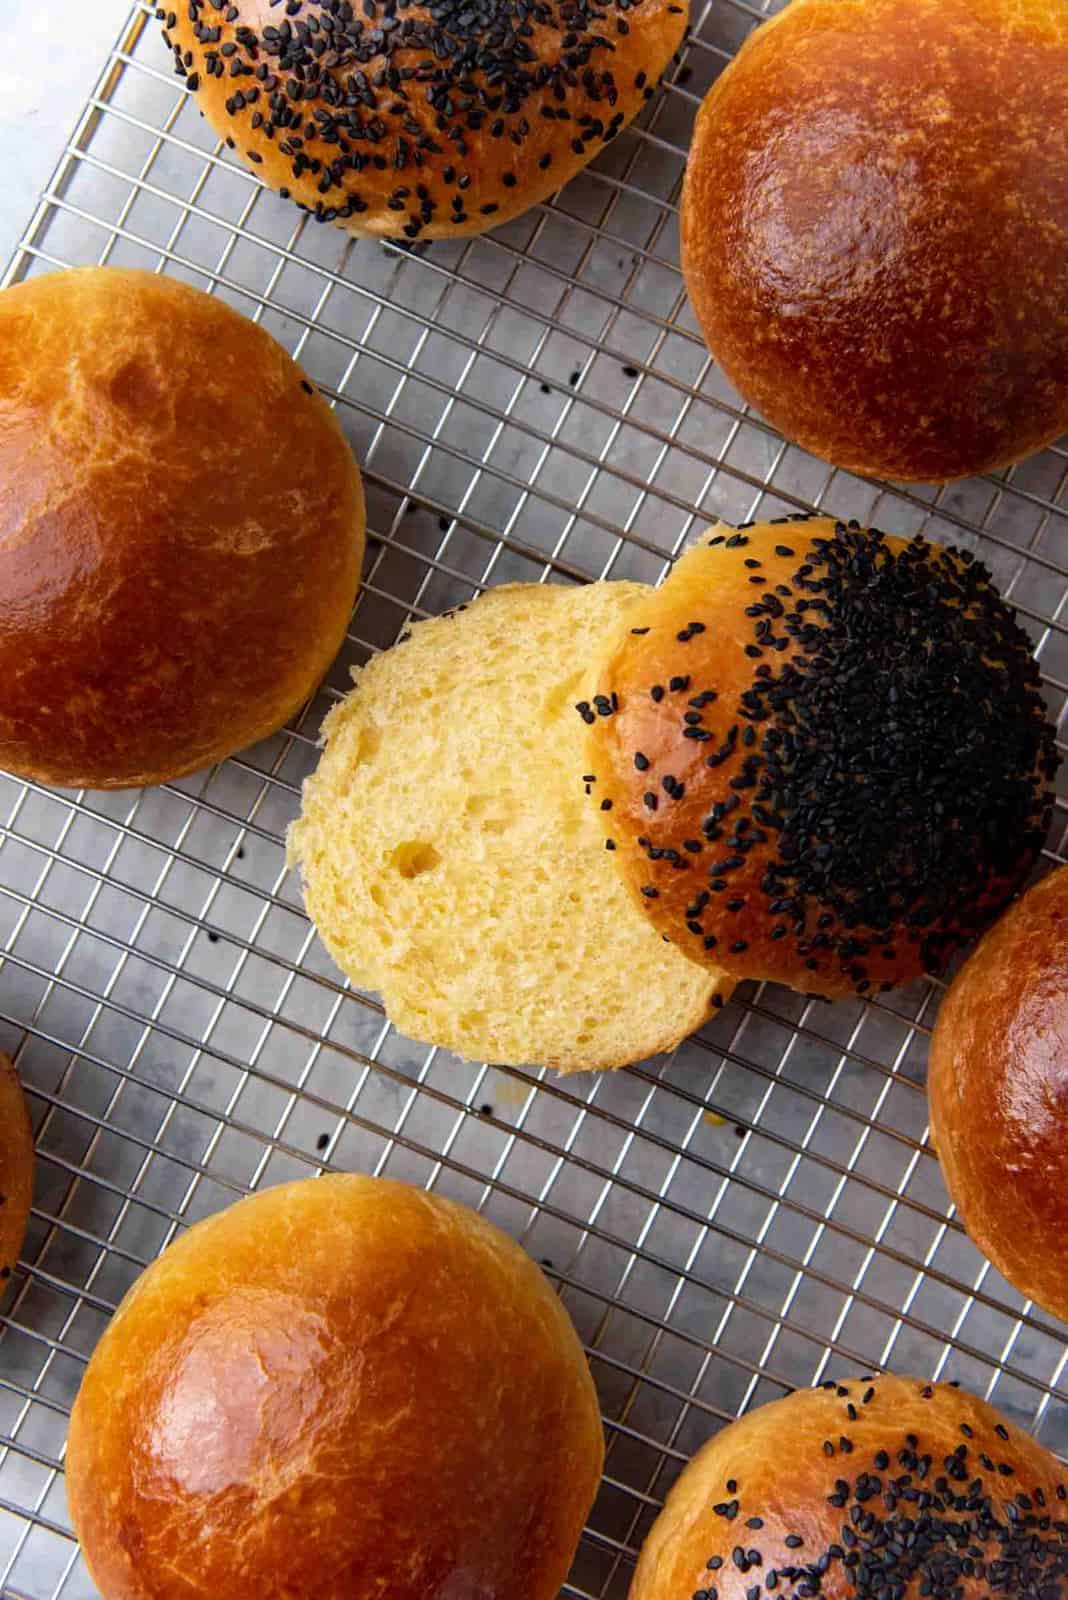
Due to the high egg and butter content in this dough, the resulting bread will be much softer, have a lovely buttery flavor, and a yellow hue due to the egg yolks. These brioche rolls are perfect to make your burgers taste more gourmet!
Brioche is in fact a cross between bread and cake, so the texture and taste are uniquely delicious. It’s in the same viennoiserie category as French croissants.
If you’d like to learn more about brioche, you can check out my detailed brioche bread recipe post. It’s a much-loved reader favorite.
Here I’ll go straight into the nitty-gritty and step by step tutorial on making and baking these beautiful light brioche buns.
Brioche bun ingredients
Flour
I use all purpose flour for this recipe, but you can also use bread flour. Bread flour will give these brioche burger buns a chewier texture (similar to Hawaiian rolls).
Yeast
I use active dry yeast for this recipe. The active dry yeast that I use has finer granules than other active dry yeast brands. But I still like to activate it in warm water/milk before making the dough.
You can also use instant yeast and I have had several readers who made my brioche bread recipe with it. The results are the same, except that proofing times will change because instant yeast is more active.
Milk
I activate the yeast in milk. You can use 2% or 3% milk. You can also use plant-based milk (if that’s what you have at home).
And if you have none of that, you can use 1% milk or water (which will yield similar results).
Sugar
You can use white sugar or brown sugar. Brown sugar will add a molassey flavor as well.
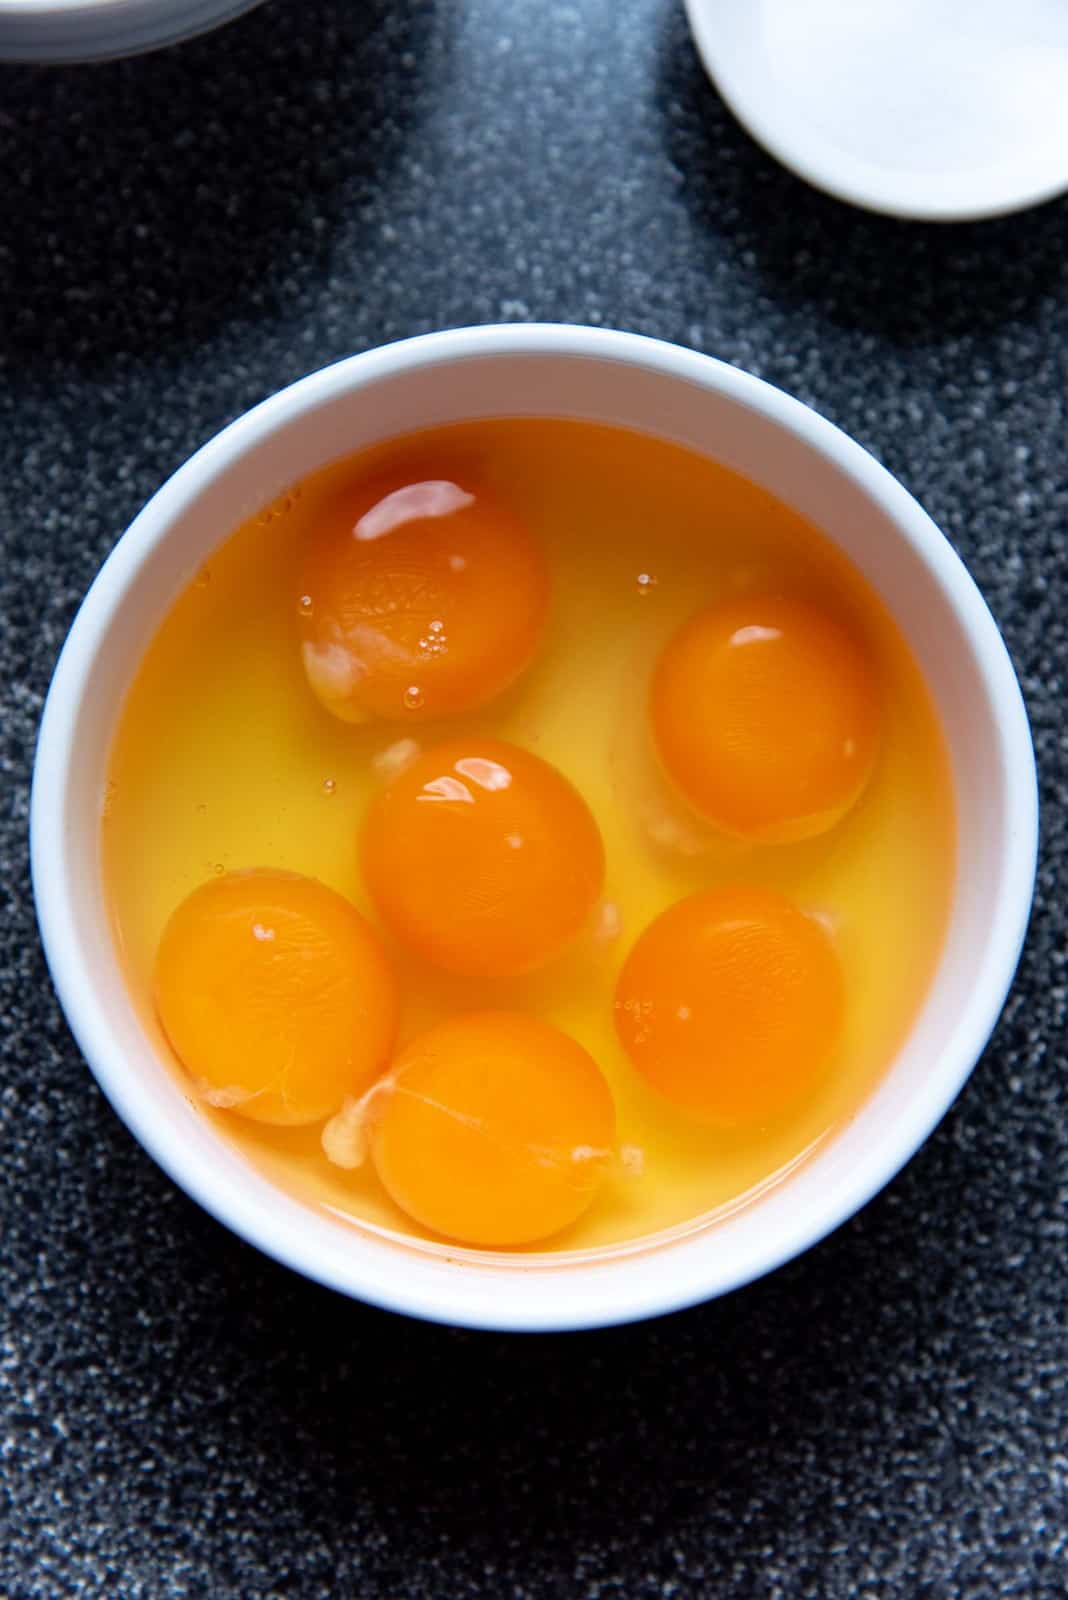
Eggs
Crucial ingredient! I use large eggs (2 oz each) for this brioche rolls recipe.
Good quality eggs are also the secret to beautiful yellow brioche dough. Some eggs have a very pale yellow yolk. These are perfectly acceptable for making brioche (and I use these more often).
However, sometimes I purchase eggs that are not only organic, but have been fed nutrient rich feed, which results in deep orange yolks. These give brioche buns or brioche bread loaves a deep yellow color.
I use 4 whole eggs + 2 egg yolks here. Compared to my brioche bread recipe, here I’ve removed 1 extra egg white to make the dough just a tad easier to handle.
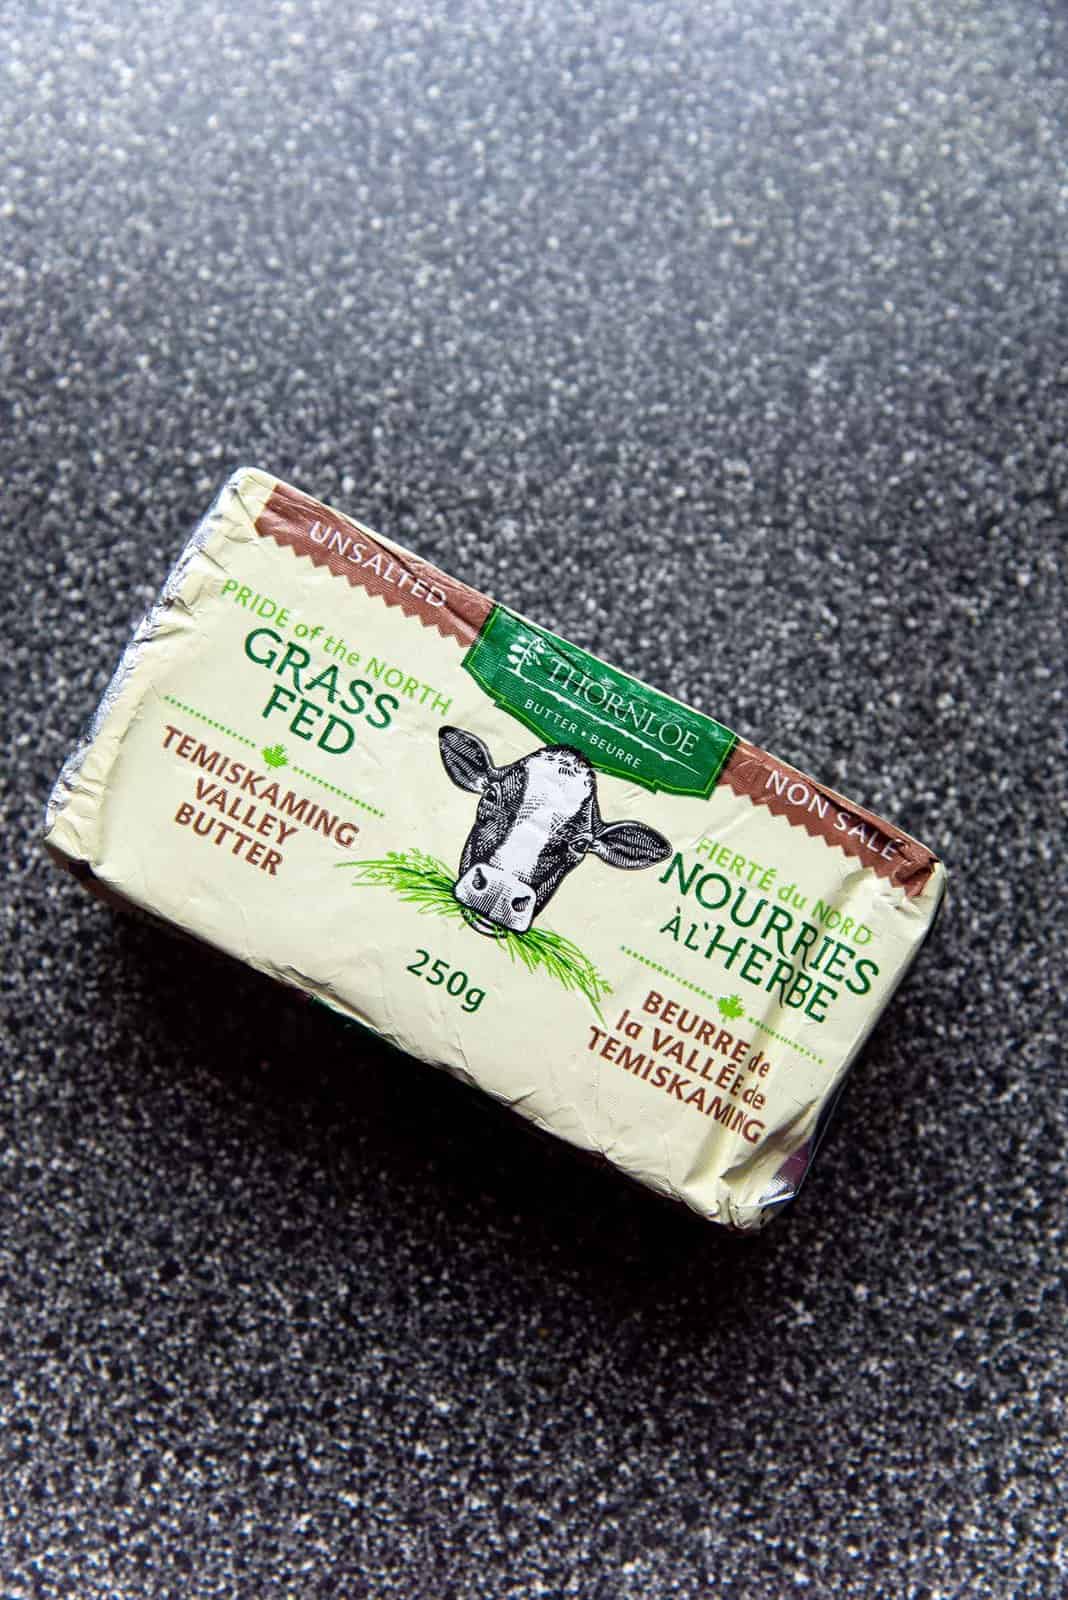
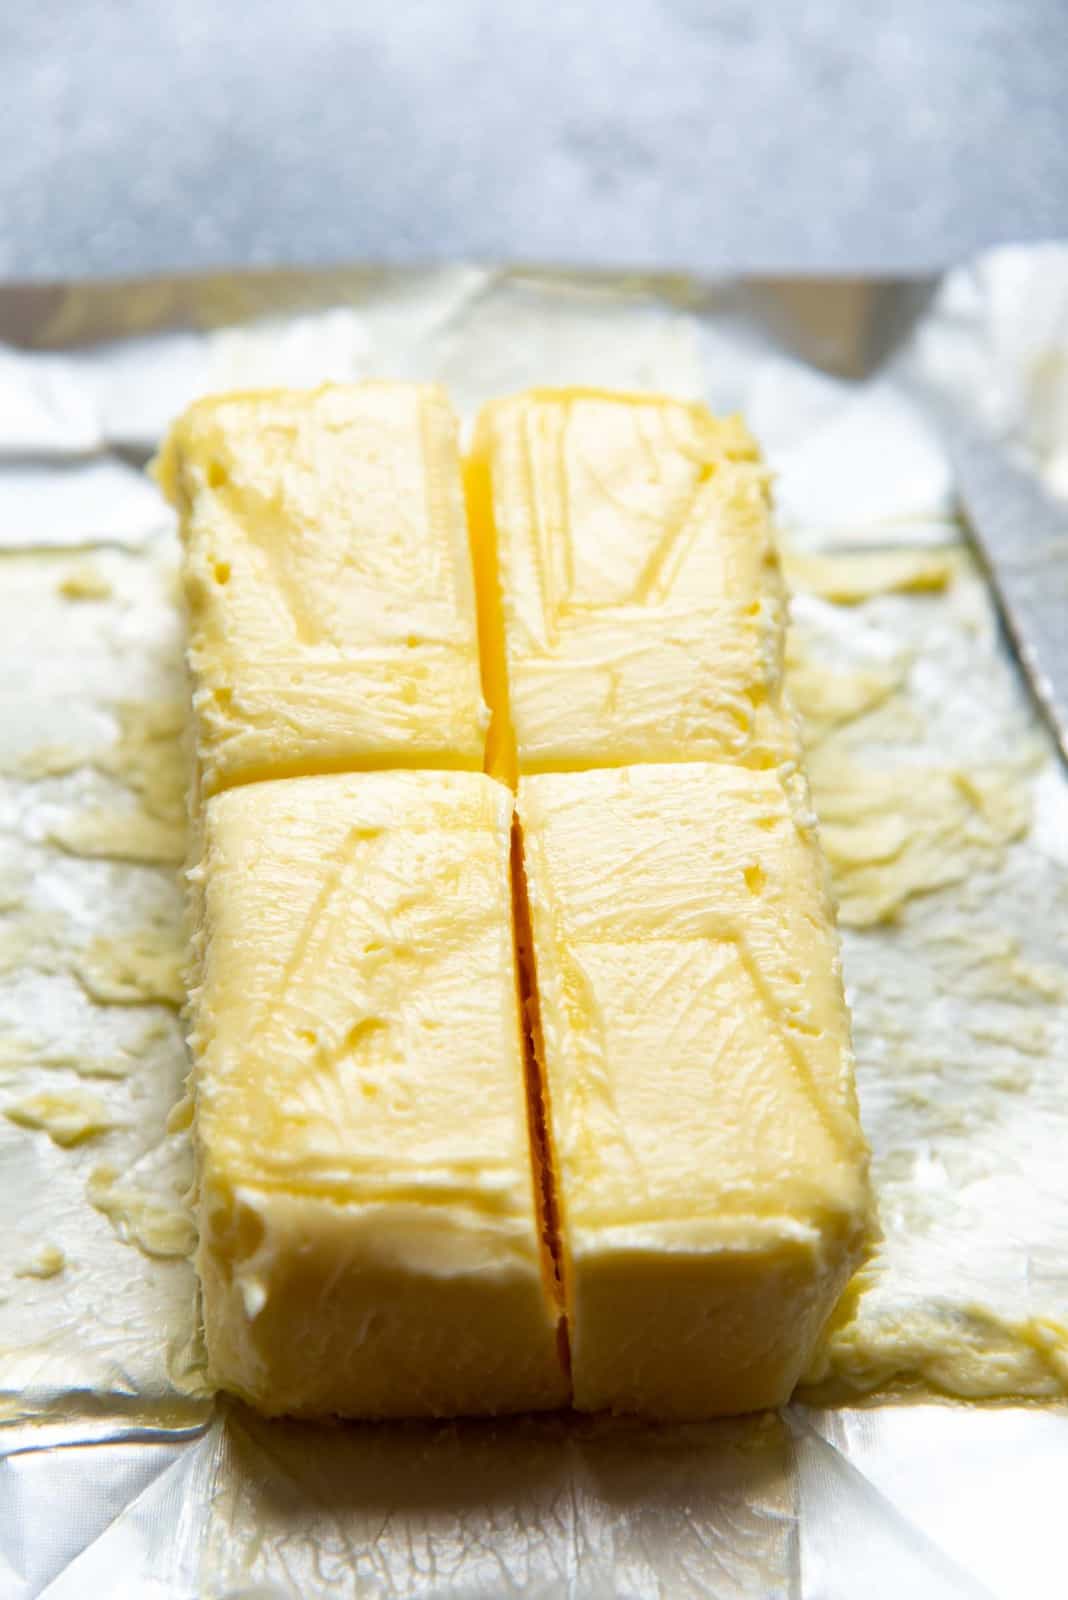
Unsalted butter
This brioche bun dough is also a 50% butter brioche. For 500 g of flour, I use 250 g unsalted butter.
Just like with croissants, a good quality butter is recommended, but you don’t need 82% fat butter. Use a brand that you like to use at home. The better the butter flavor, the better your brioche buns will taste.
Flavoring
To make sure all the flavors of brioche are balanced, I like to add salt and vanilla as well. The vanilla helps to balance the flavor of eggs, and the salt brings out the sweet, buttery flavors.
How to make brioche buns (or mini brioche buns or brioche slider buns)
Make the dough
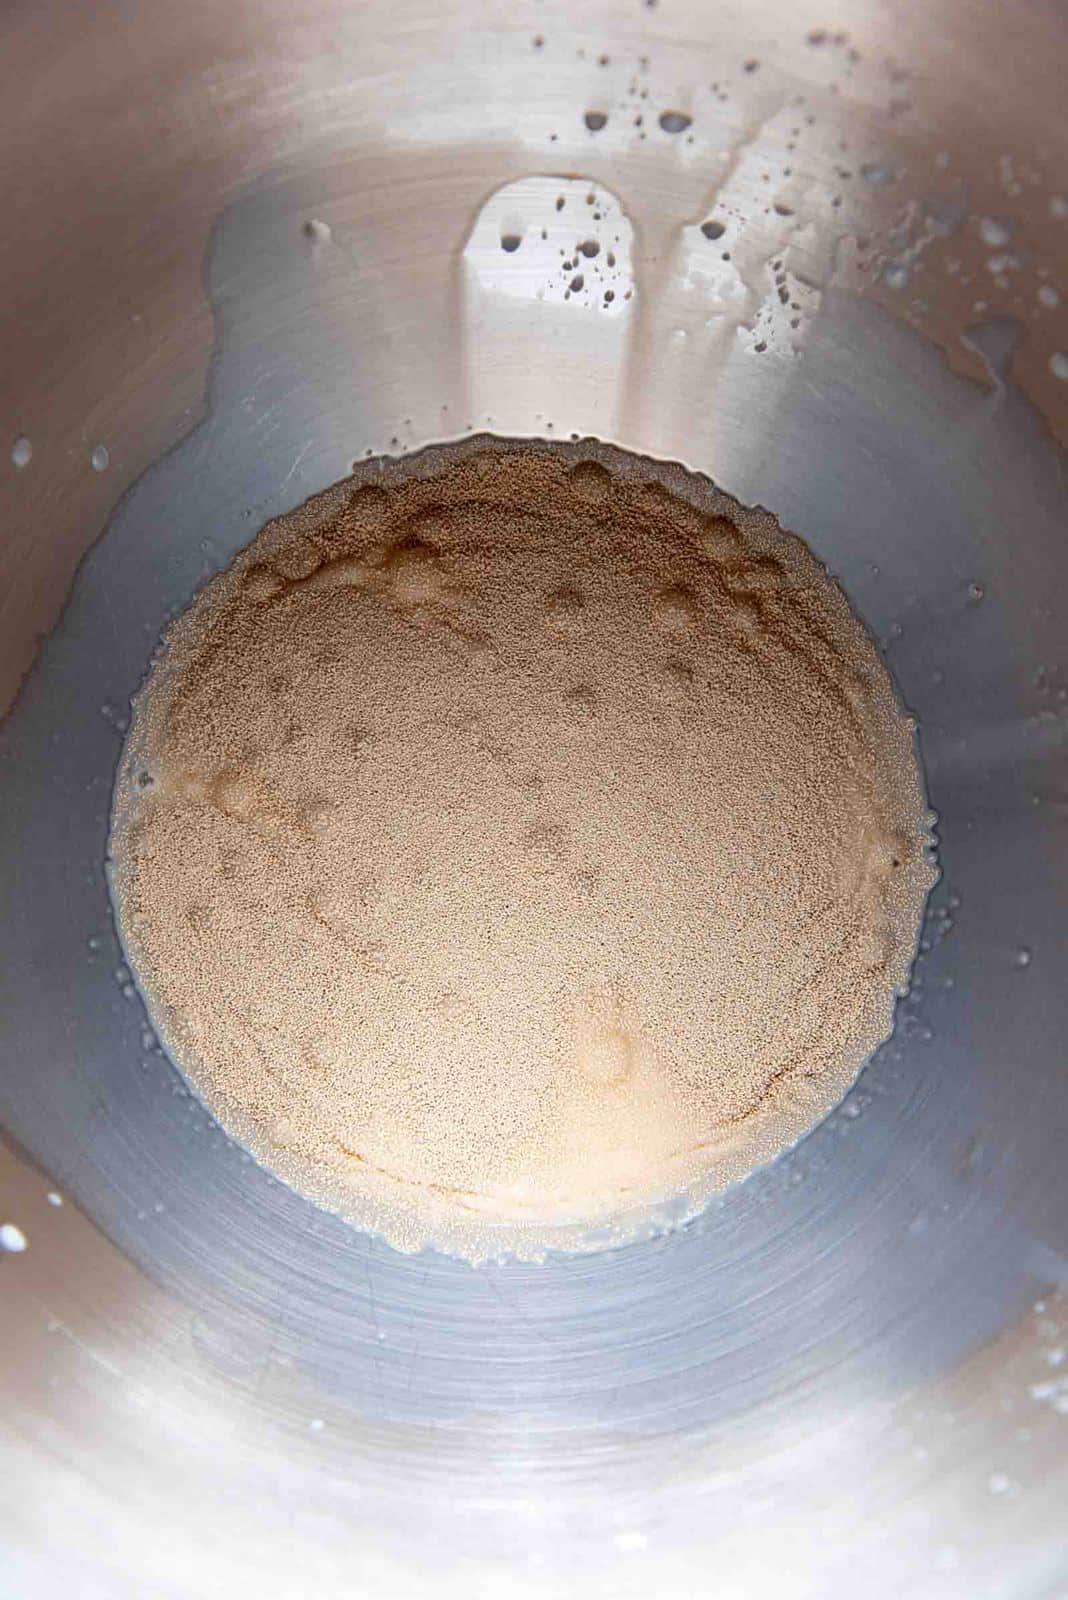
Activate the yeast
The first step is to activate the yeast. I use active dry yeast which requires it to be activated. Instant yeast doesn’t necessarily require to be activated.
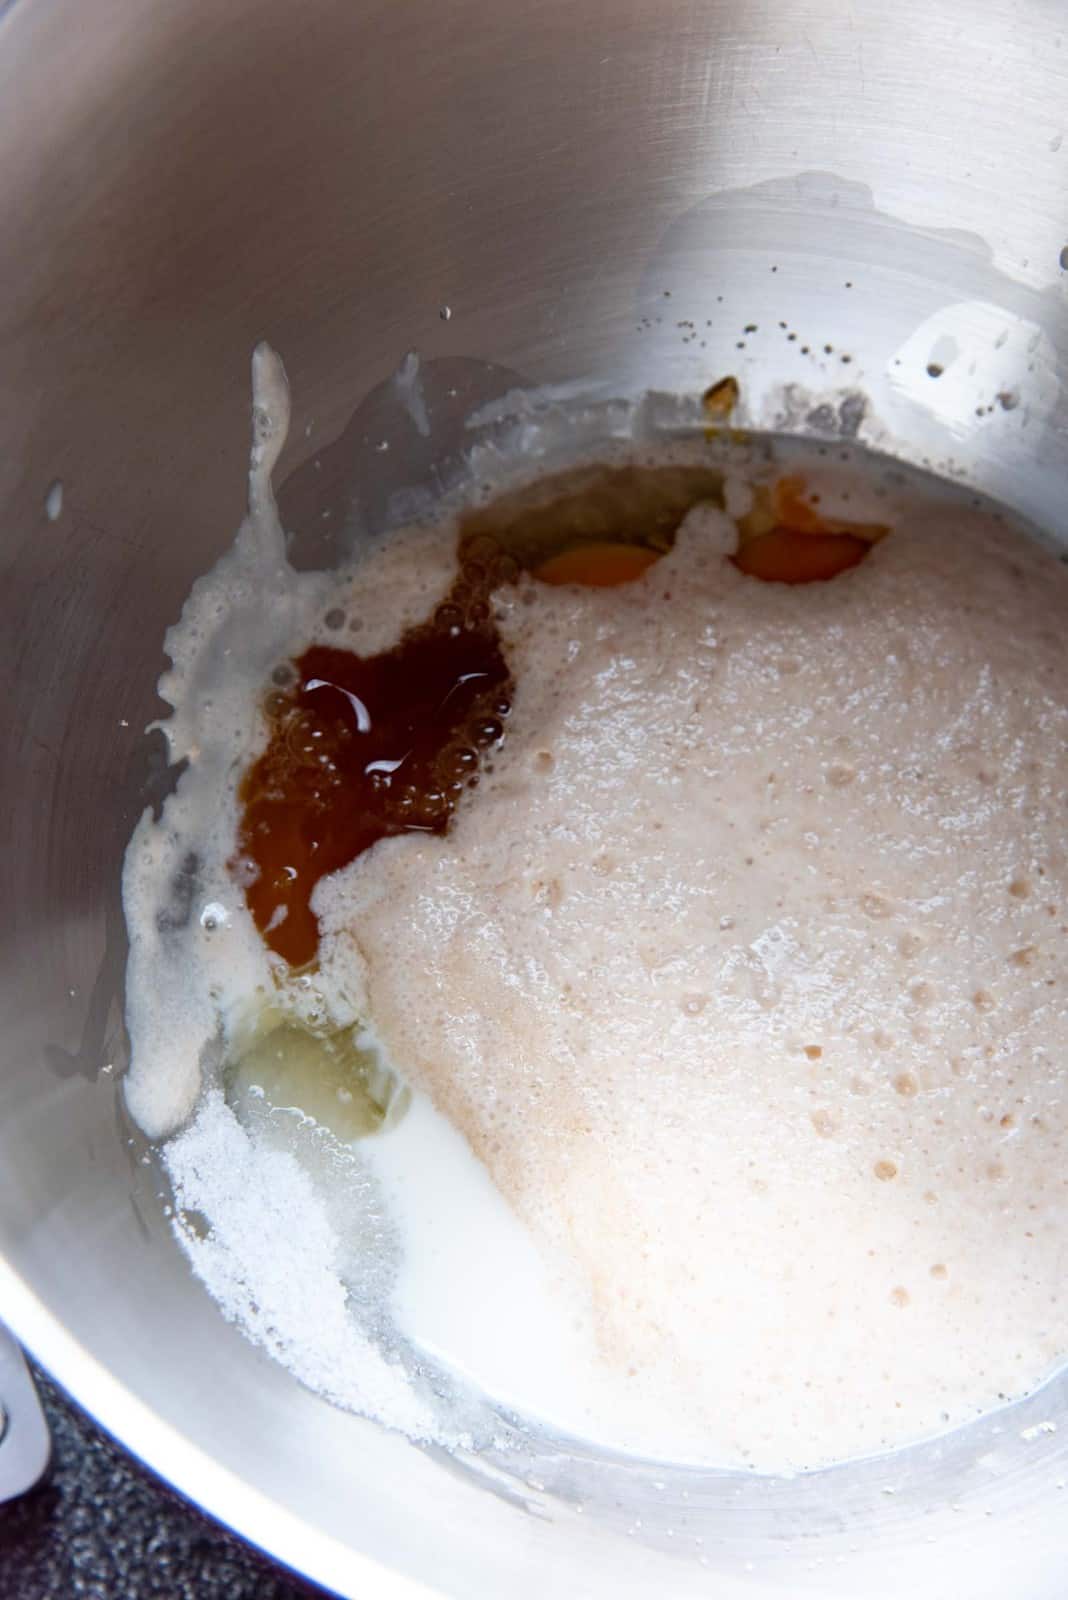
Dissolve a small amount of honey in the lukewarm milk. Add the yeast and mix to dissolve the yeast (or have the yeast be saturated) in the milk. The milk temperature should be about 100 – 110 F (37 – 43 C) for the yeast to activate.
The yeast mixture will start to look frothy and bubbly on the surface when the yeast is active. This can take between 5 – 15 minutes. Longer at lower temperatures.
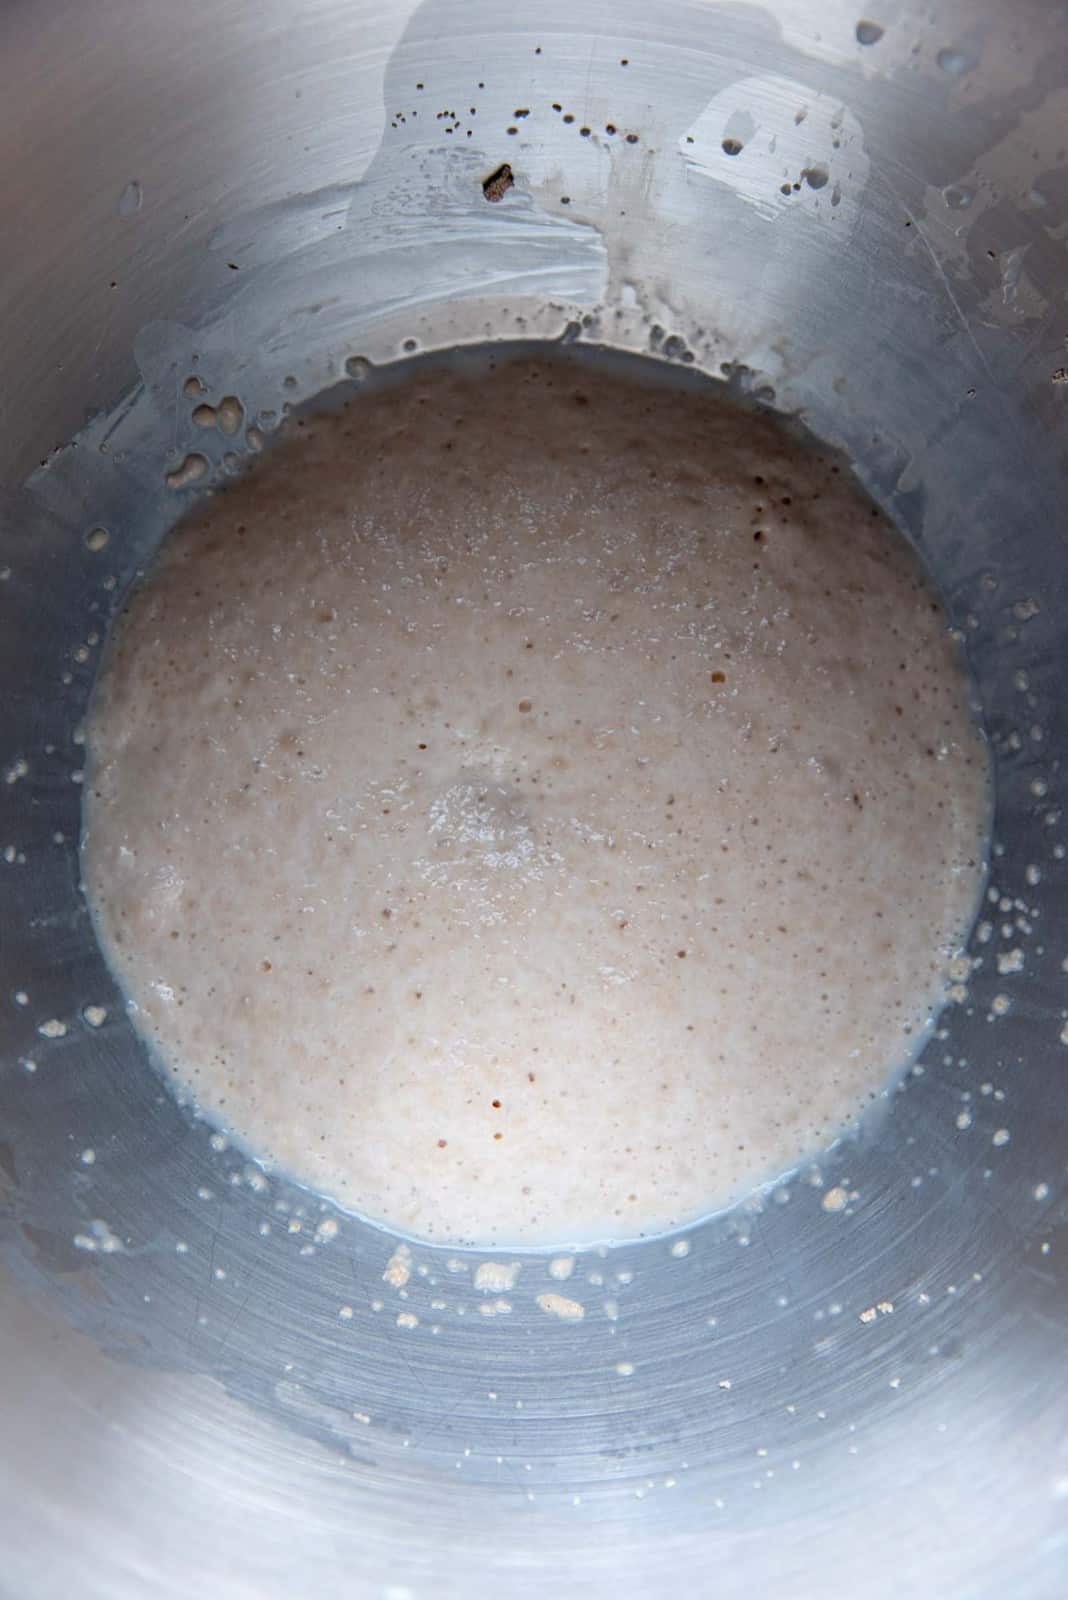
Once the yeast is activated, you can start making the brioche dough.
Form the dough
Add the eggs, egg yolks, vanilla, and sugar to the activated yeast mixture in any order you like. Break the egg with a fork.
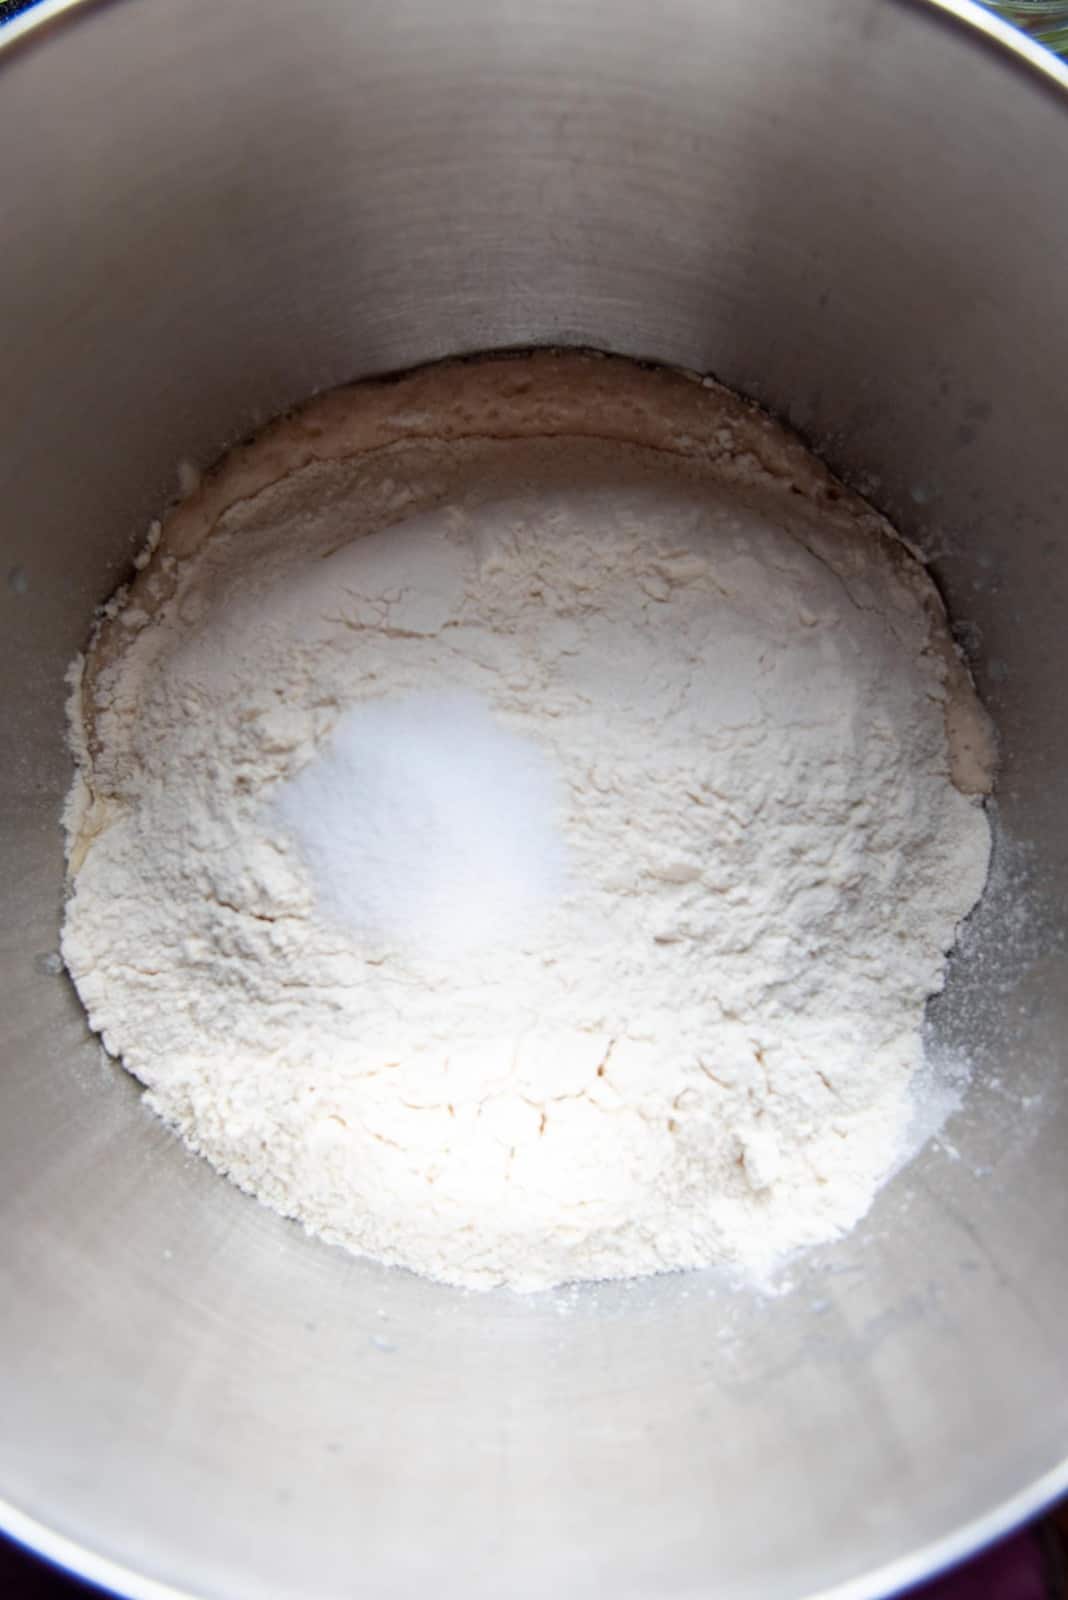
Add the flour, and then salt on top. It’s important that the salt is placed on top of the flour so that it cannot make direct contact with the yeast. Otherwise, the yeast is a goner.
Next, mix the dough to form a scraggly, rough dough ball. Now you’re ready to knead this baby.
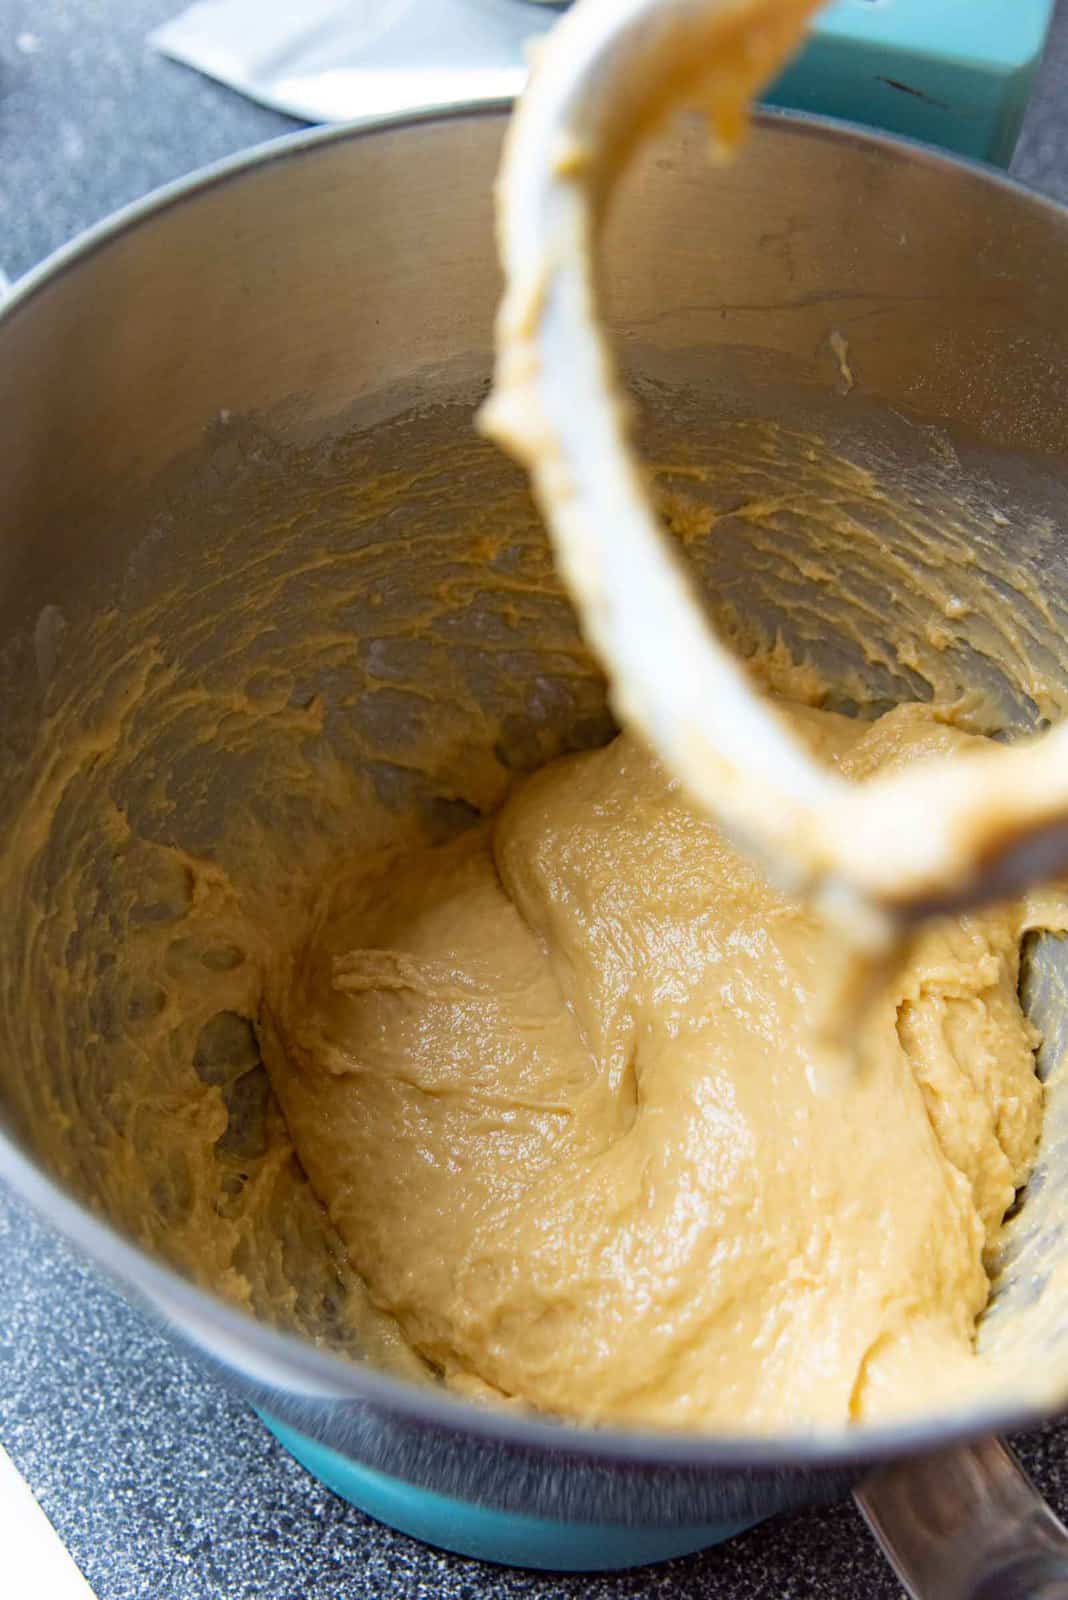
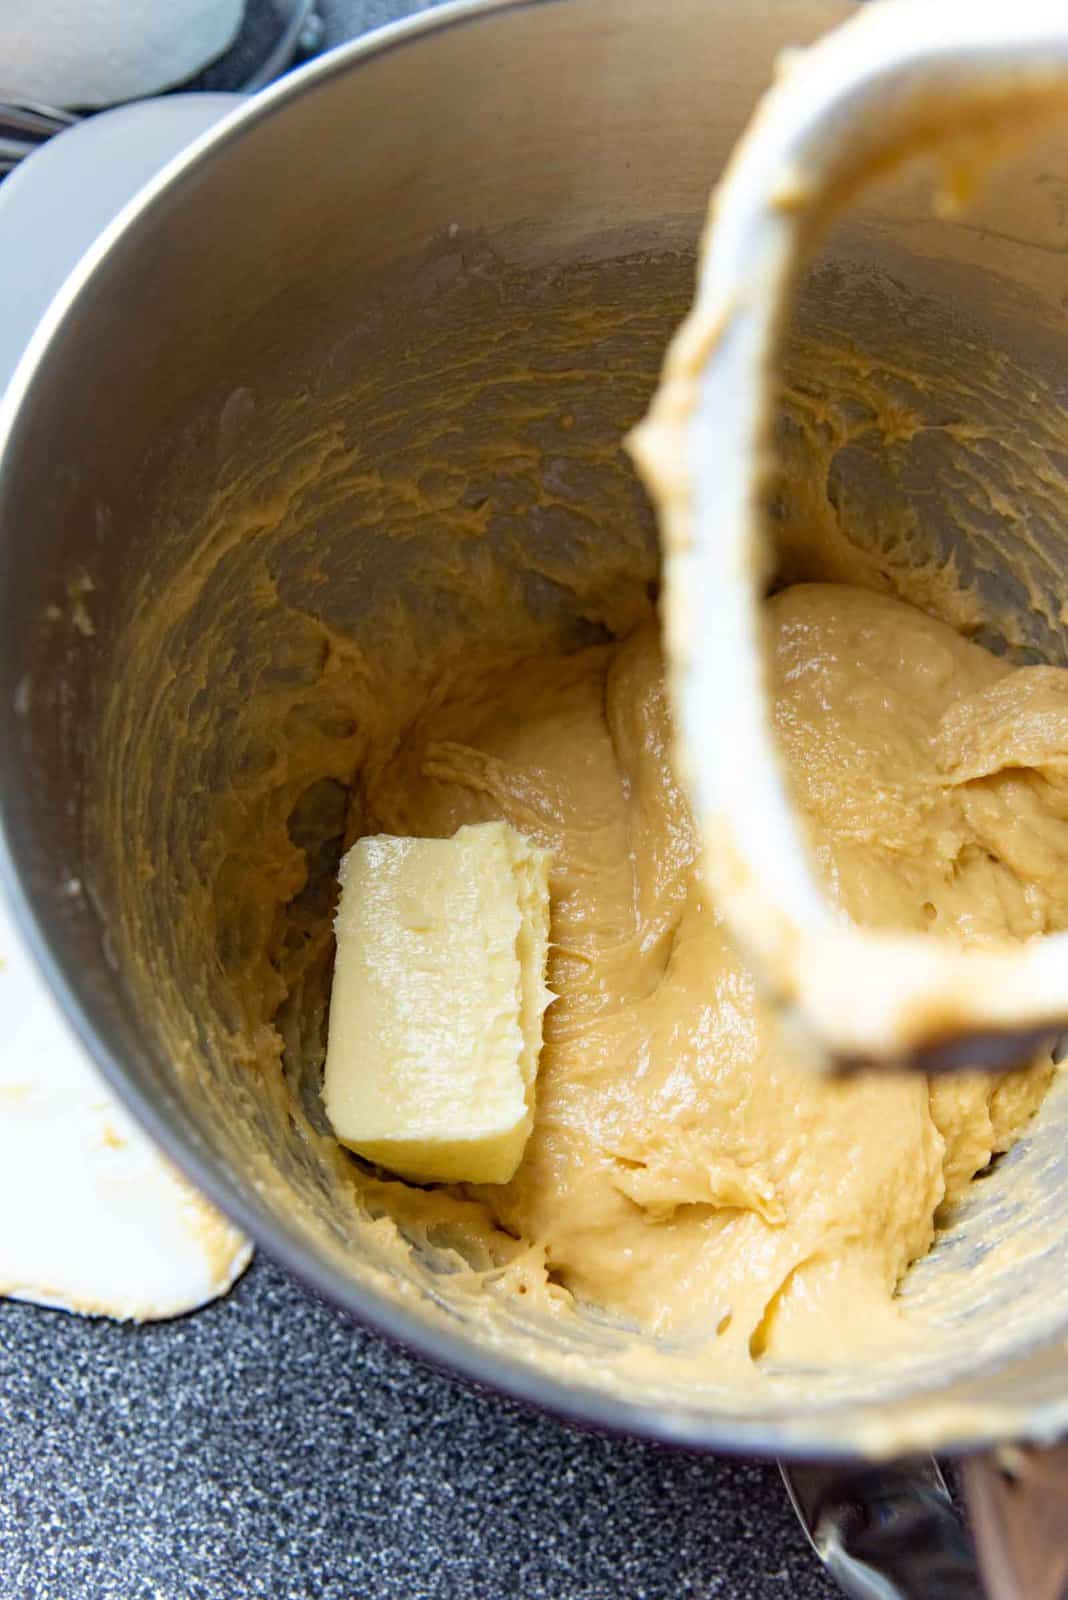
Start kneading the dough at medium speed. The dough will be a little sticky, but that’s OK! Once it comes together to form a nice dough, start to add the softened butter.
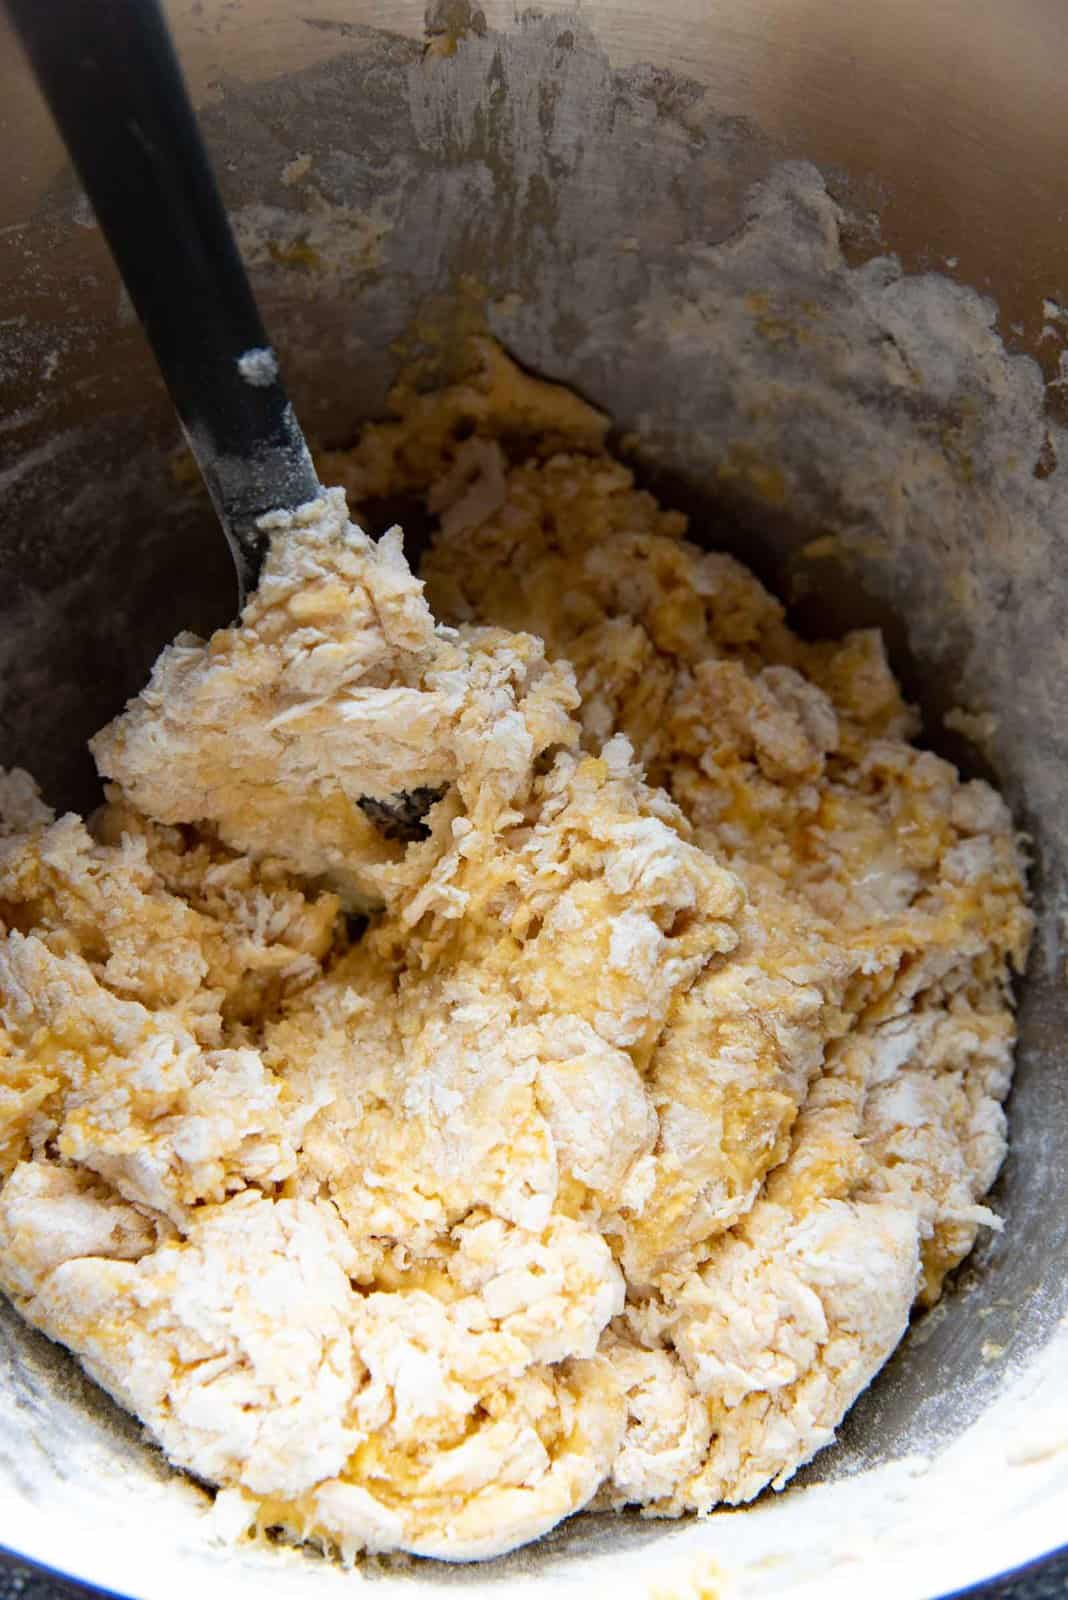
Add the butter
Once the butter is added, the dough becomes runny and soft. Almost like cake batter. This is NORMAL. DO NOT PANIC. I repeat, do NOT panic!
Add the butter in 4 portions or more. Allowing the first portion to completely incorporate into the dough before adding the next.
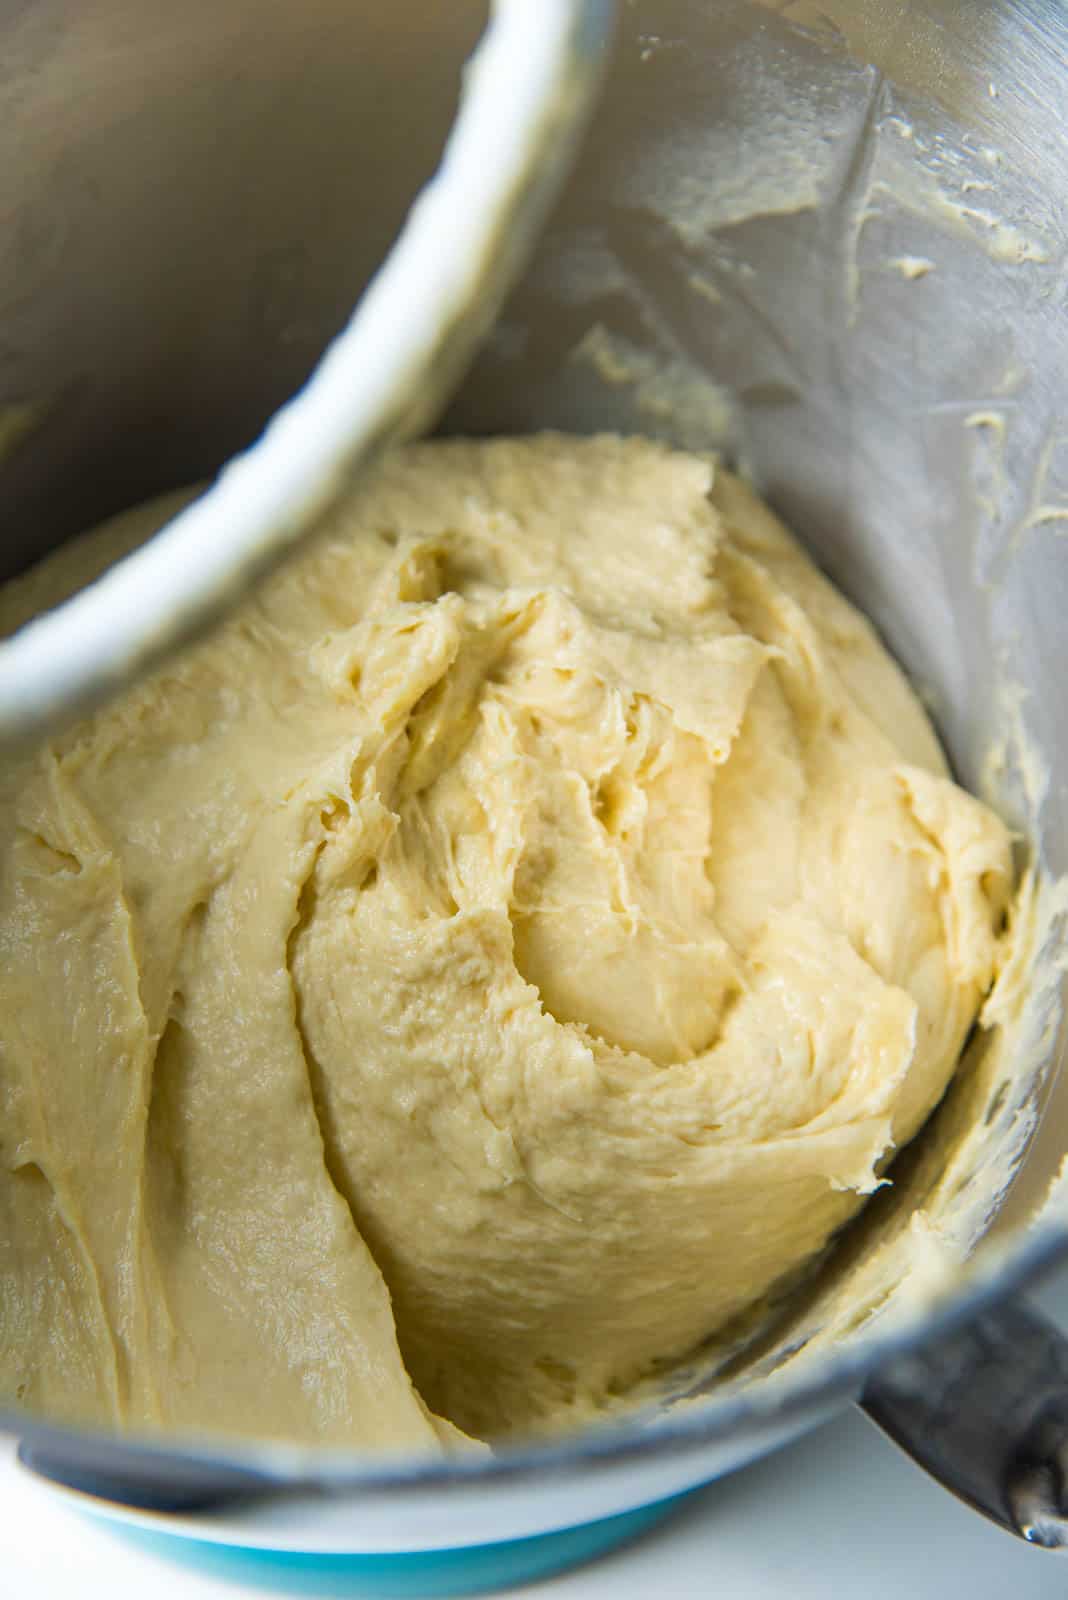
The butter interferes with gluten development, so the dough needs to be kneaded more to develop the gluten necessary for brioche. This is true of the brioche bread loaf as well as these brioche buns.
After adding all the butter, the dough should be kneaded until it changes from a cake batter-like consistency to a smooth, shiny, very slack dough. This can take between 15 – 30 minutes. This takes a lot of patience, but it will come together.
Knead the dough to the correct consistency
Brioche dough is much softer than regular sandwich bread dough, because it’s meant to be a cross between bread and cake.
However, if the dough does not look smooth and satiny, it needs to be kneaded longer.
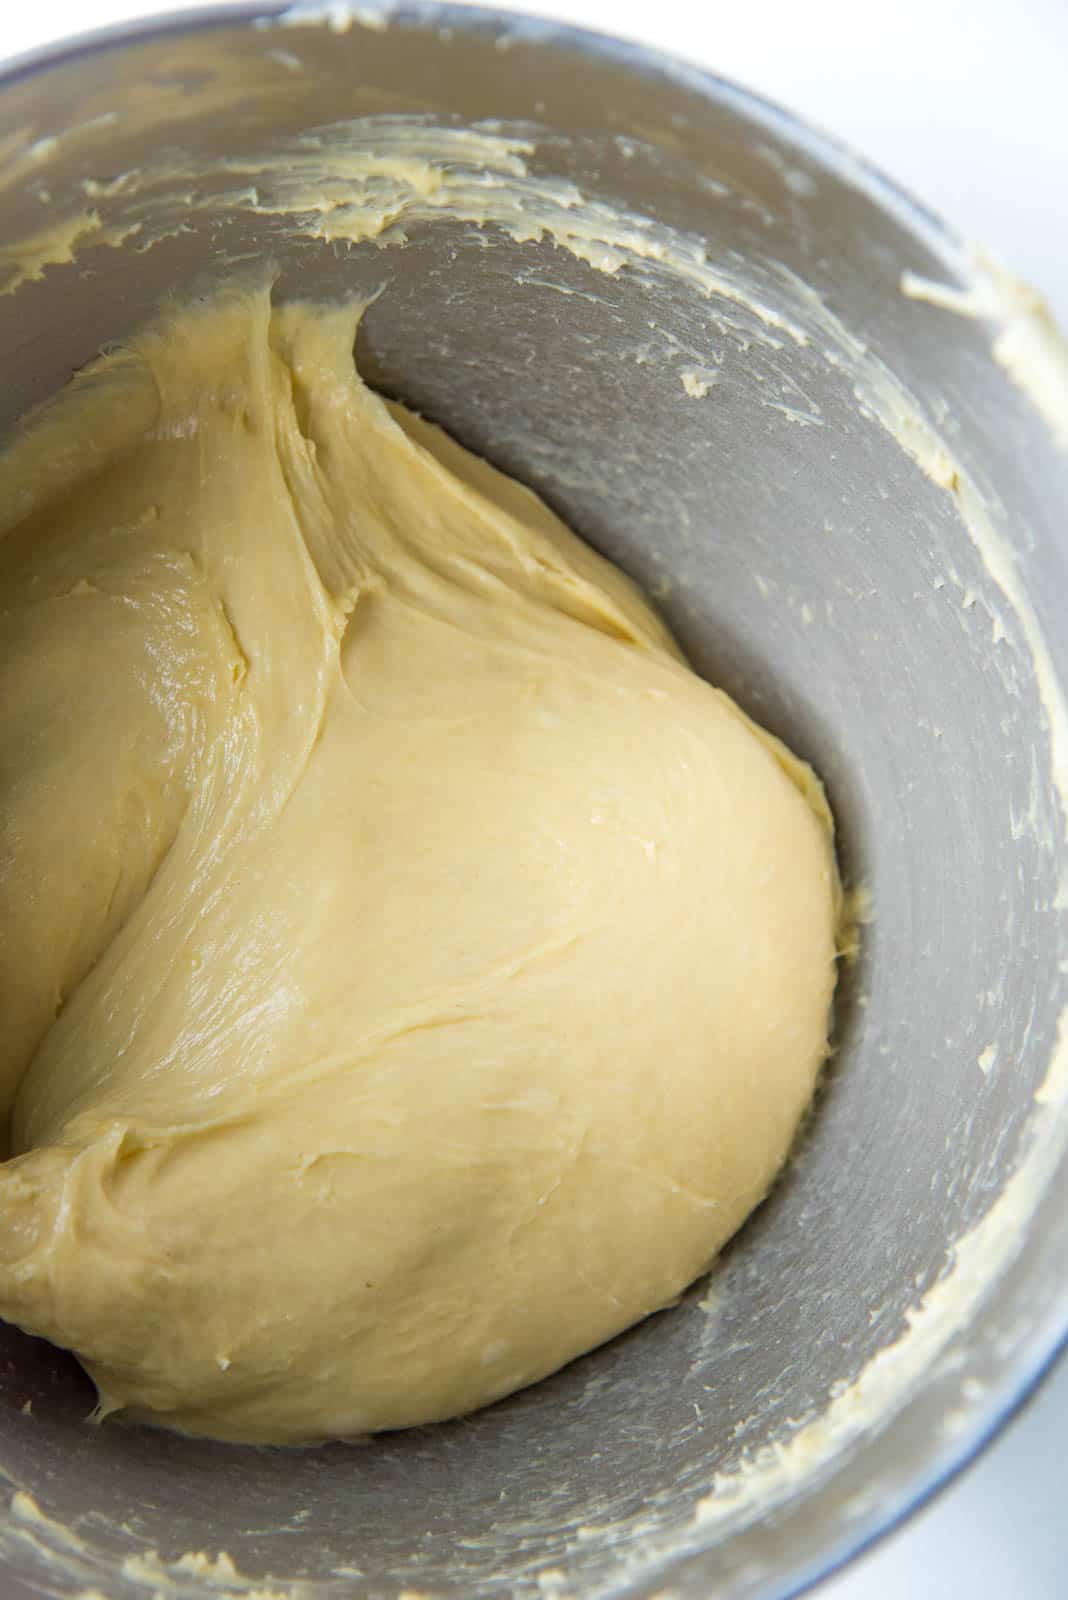
How to check if the dough was kneaded enough
The dough will become smooth and satiny when enough gluten has formed.
Stop kneading the dough and remove the dough hook attachment. Take the dough hook and try to lift the dough out of the bowl in one piece, cleanly off the bowl. The dough should not break in half when you do this.
And when you take the dough into your hands, it should feel like a water balloon. Smooth, shiny, heavy, and it’ll want to droop over the sides. This is good!
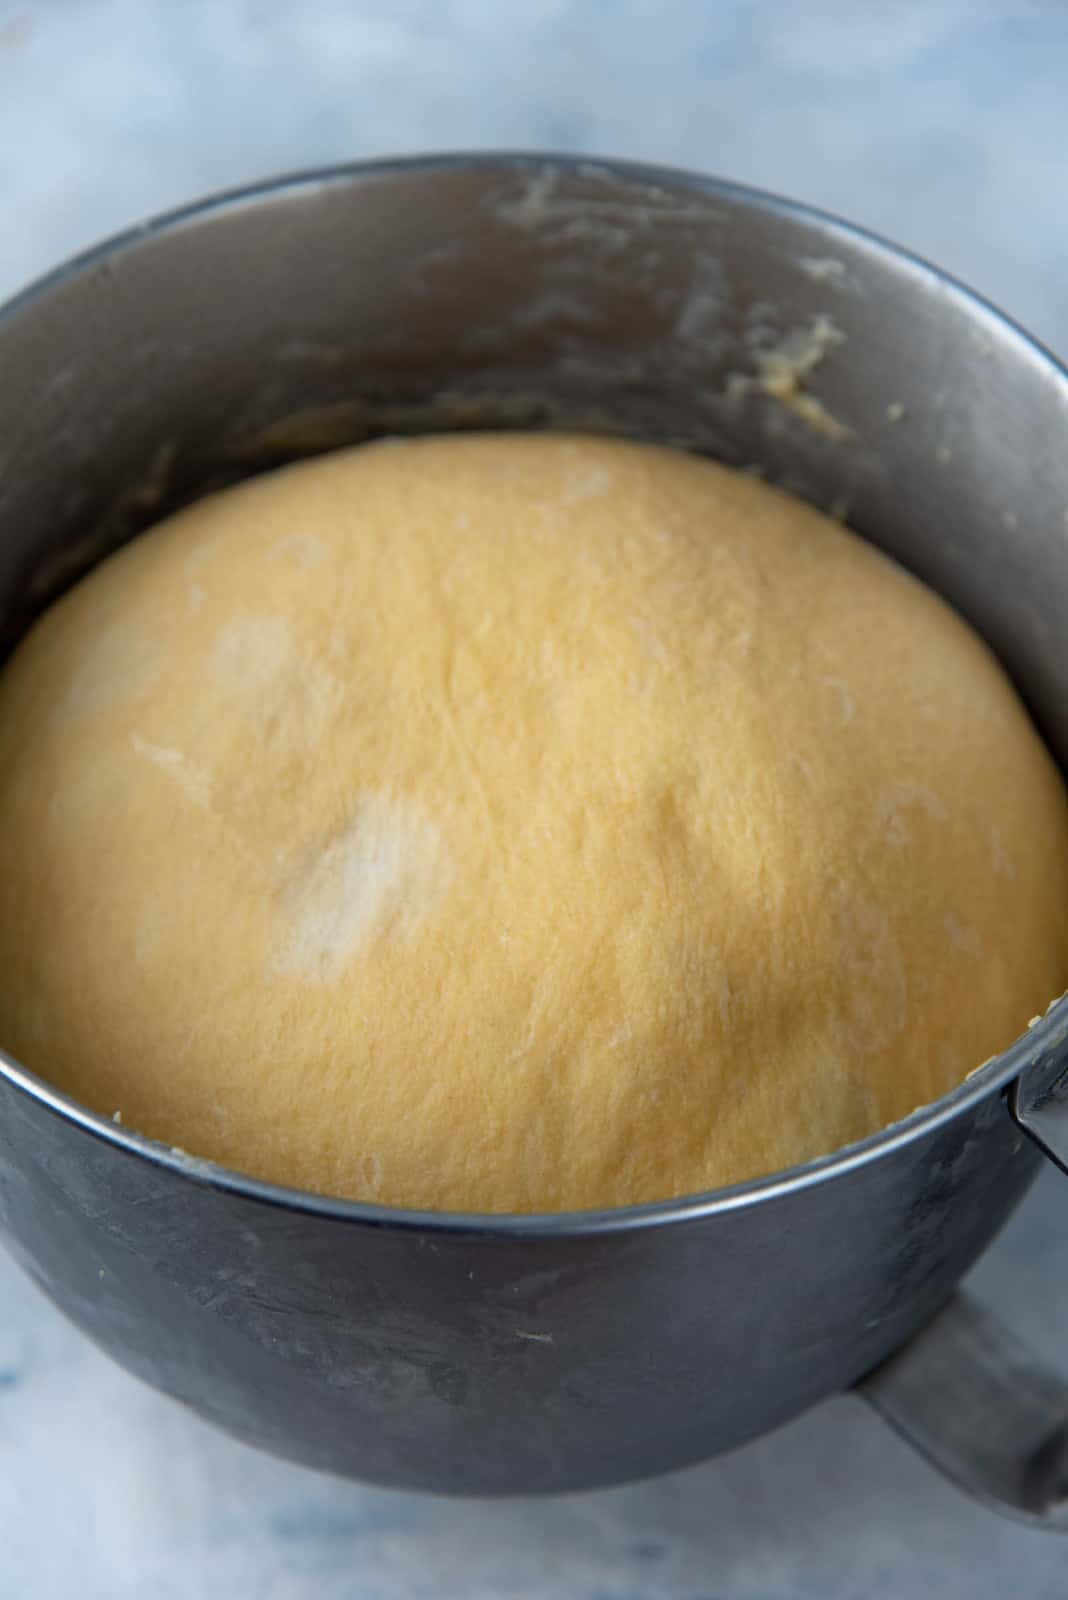
Once the dough has reached this consistency, the dough is ready for the first proof.
First proof
The dough is first proofed at room temperature until it reaches 1.5 – 2 times the original size. The first proof is important to develop the gluten even further in the dough and give it more structure.
However, if you’re really pressed for time, you can skip this proof and go straight to the overnight proof.
Overnight proof
Deflate the proofed dough and shape it into a smooth dough ball. The dough will be very soft and slack, so some care should be taken.
Place the dough on a lightly floured work surface. Also lightly flour your hands when handling this brioche dough.
Then place the bowl in the coldest part of your fridge (covered), and let it proof overnight. This proof can go up to 24 hours too.
Purpose of an overnight proof
The overnight cold proof serves two purposes.
- This brioche dough is very soft and hard to manage. Chilling the dough makes it much easier to portion and shape.
- A long cold proof also helps to develop more flavor in your brioche buns.
Shape the dough
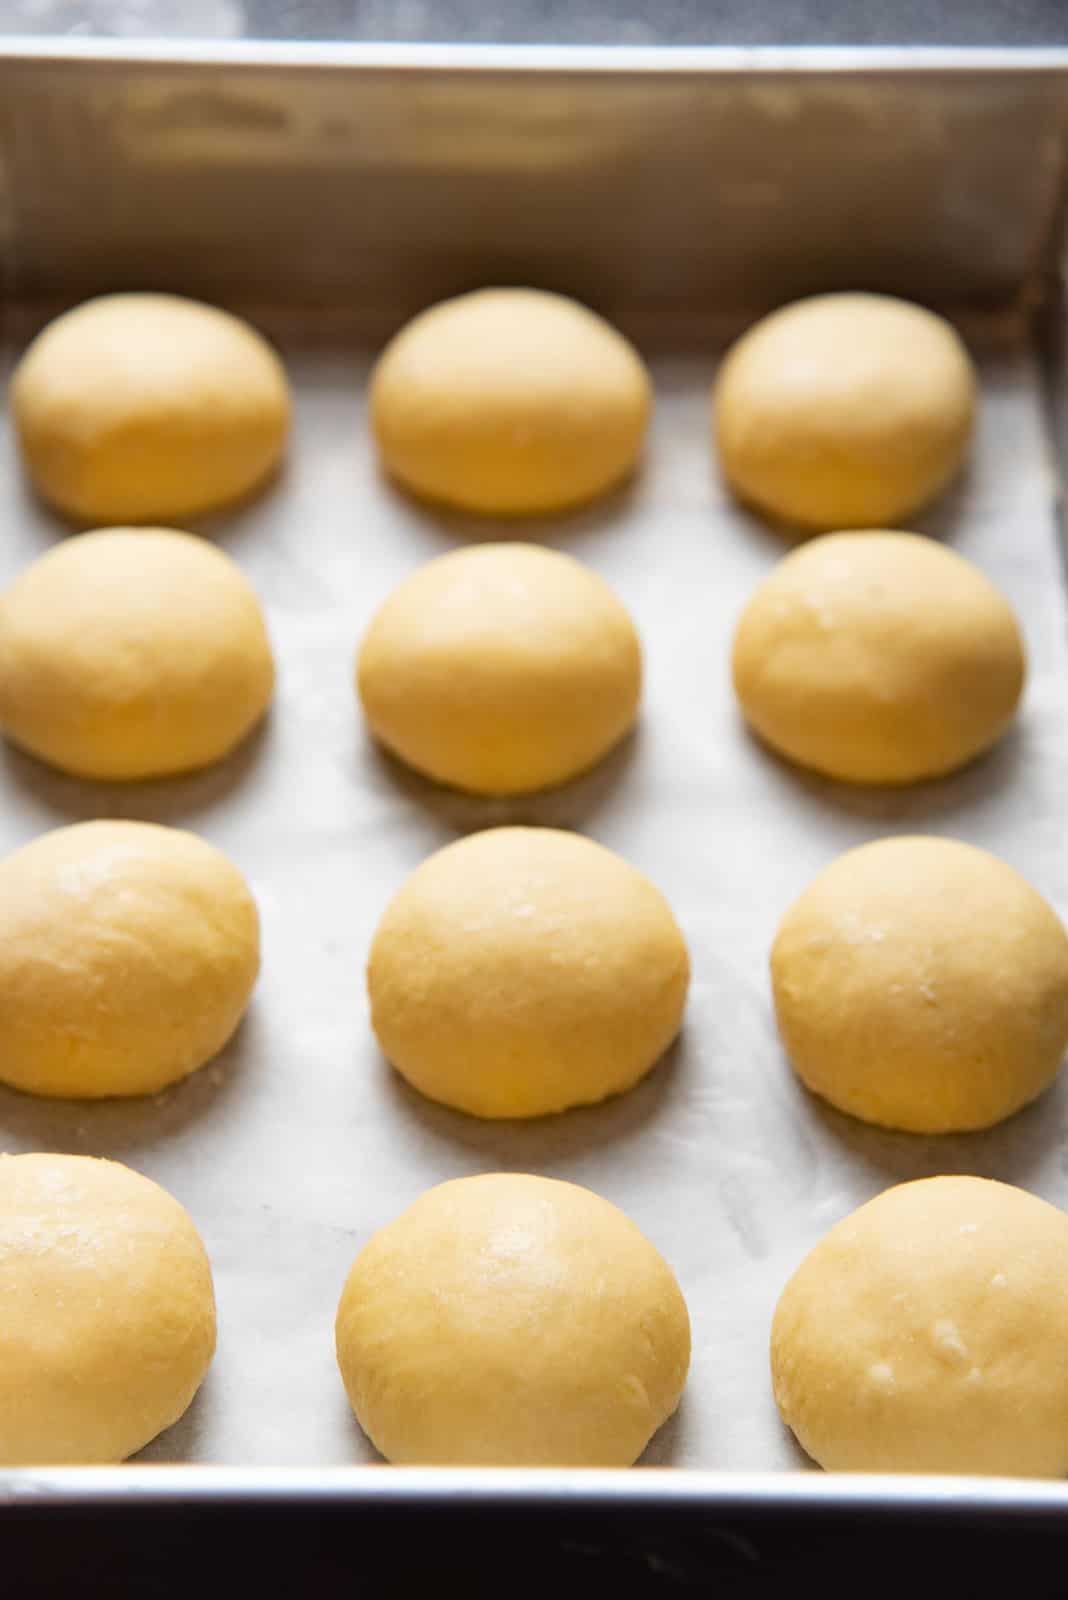
Unlike brioche loaves, the dough will be portioned into small pieces and shaped into smooth balls to make individual brioche buns here.
Weigh the dough, and divide it into smaller portions according to the size you prefer, or how many buns you’d like.
To shape the portions into buns, flatten the dough slightly with the palm of your hand (smooth side down). Then fold in the edges towards the middle. Pinch all the edges together.
Dip the smooth side of the burger bun in a little flour. Place this on your work surface, with the seam side down (and the floured, smooth side up).
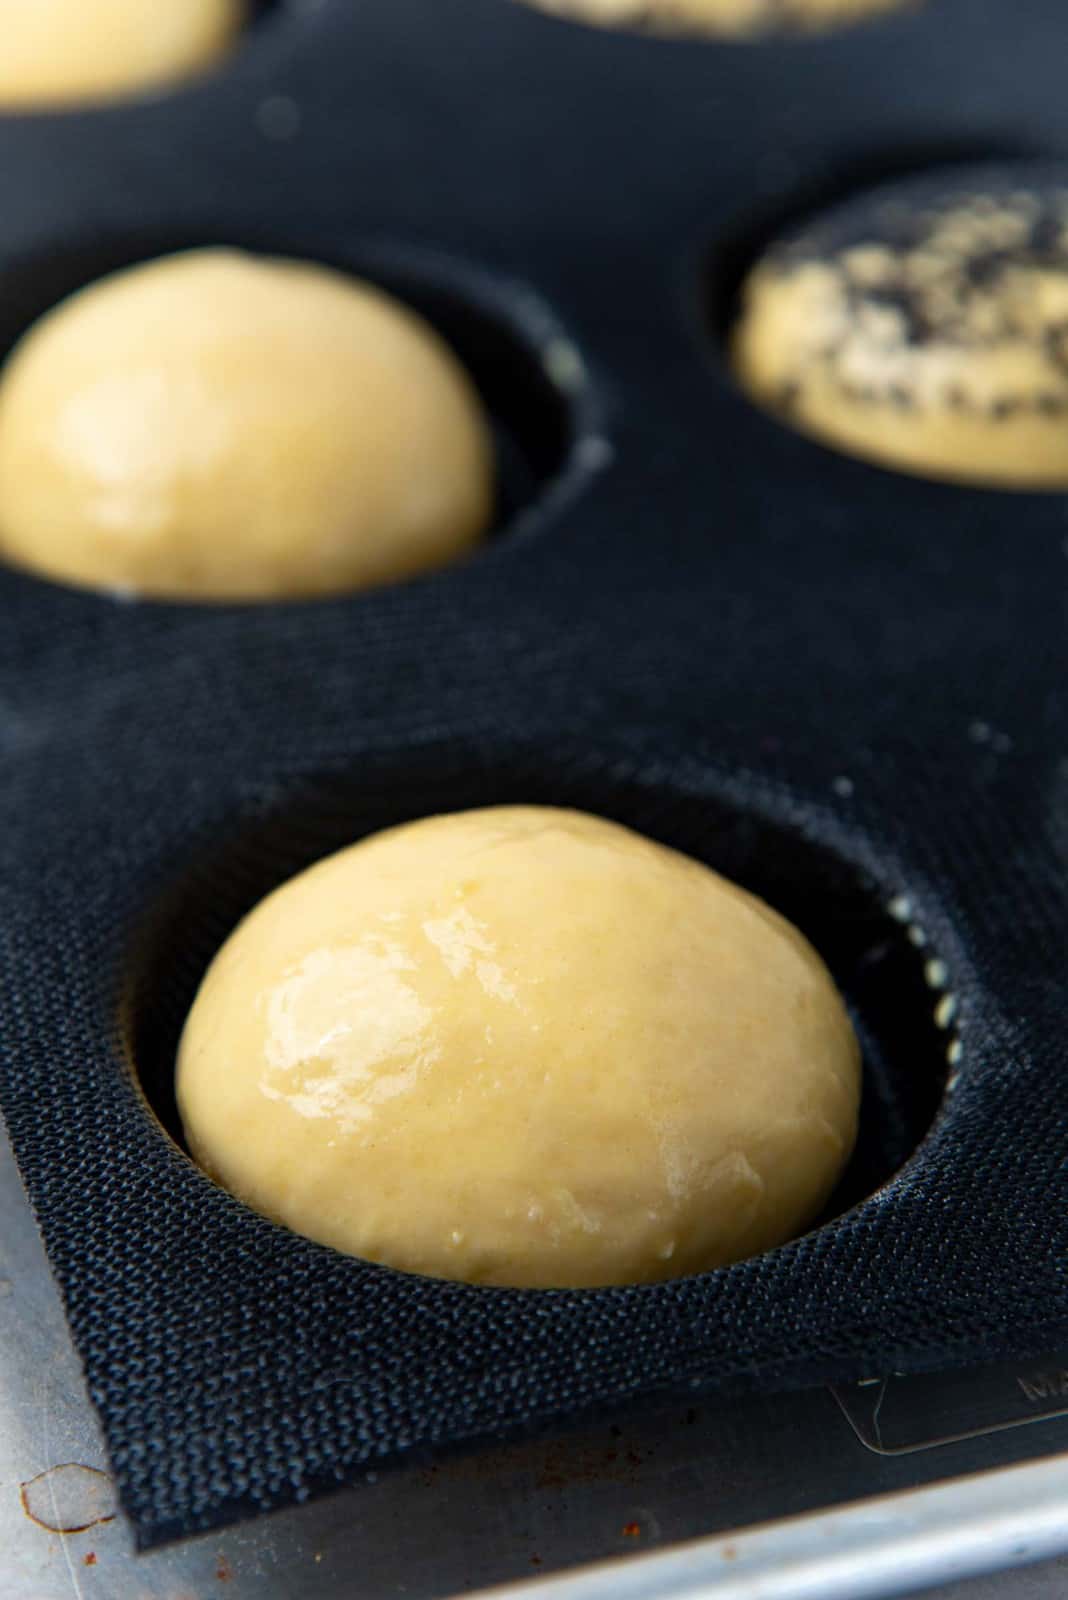
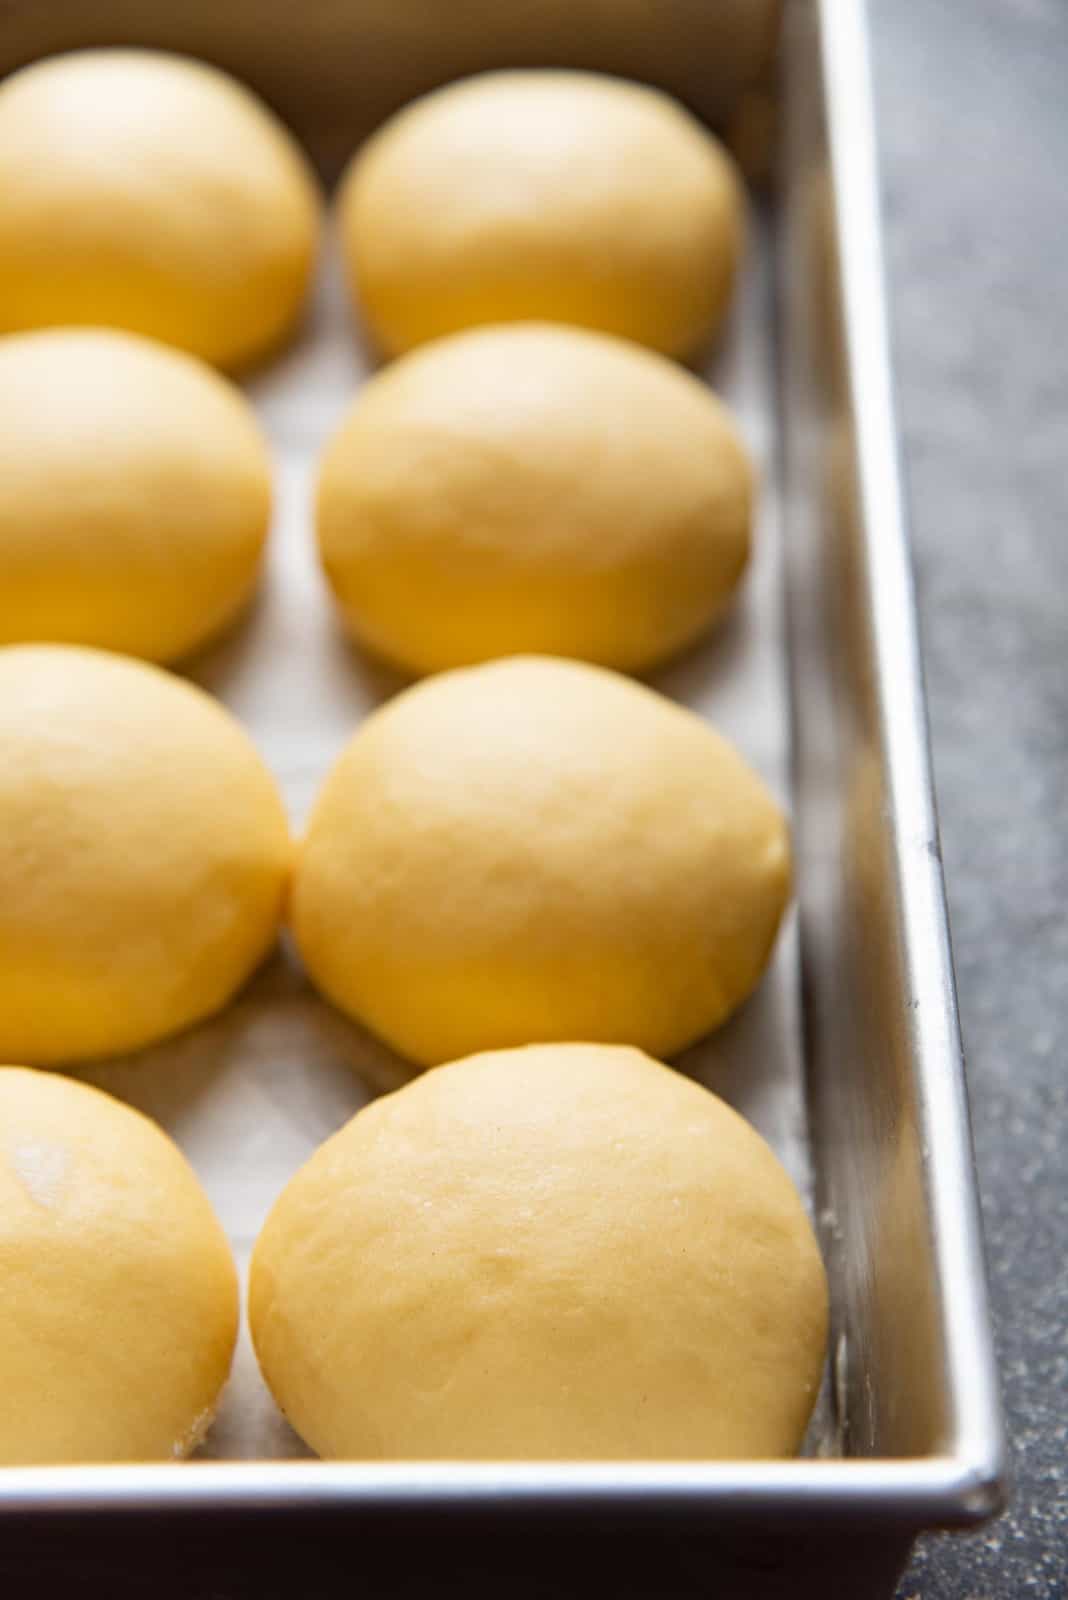
Place your cupped hand over the bun and roll it until it’s nice and smooth. Tighten the dough into a ball with a smooth, taut surface. This can be kept on the parchment paper-lined baking tray to proof.
The size of the dough portions will determine how big the final baked product will be.
Here’s a simple chart for you to determine how much each portion should weigh to make brioche burger buns.
Divide the dough into equal pieces with the weights below for the type of bun you want. You can make small brioche buns (mini brioche buns), brioche slider buns, large brioche buns etc.
| Weight of the dough (grams) | Size of the burger (diameter) | How many buns per batch |
| 85 g | 10 – 10.5 cm | 12 – 14 |
| 72 g | 9 – 9.5cm | 16 – 17 |
| 65 g | 8 cm | 17 – 18 |
| 50 g | 6 cm (sliders) | 23 – 24 |
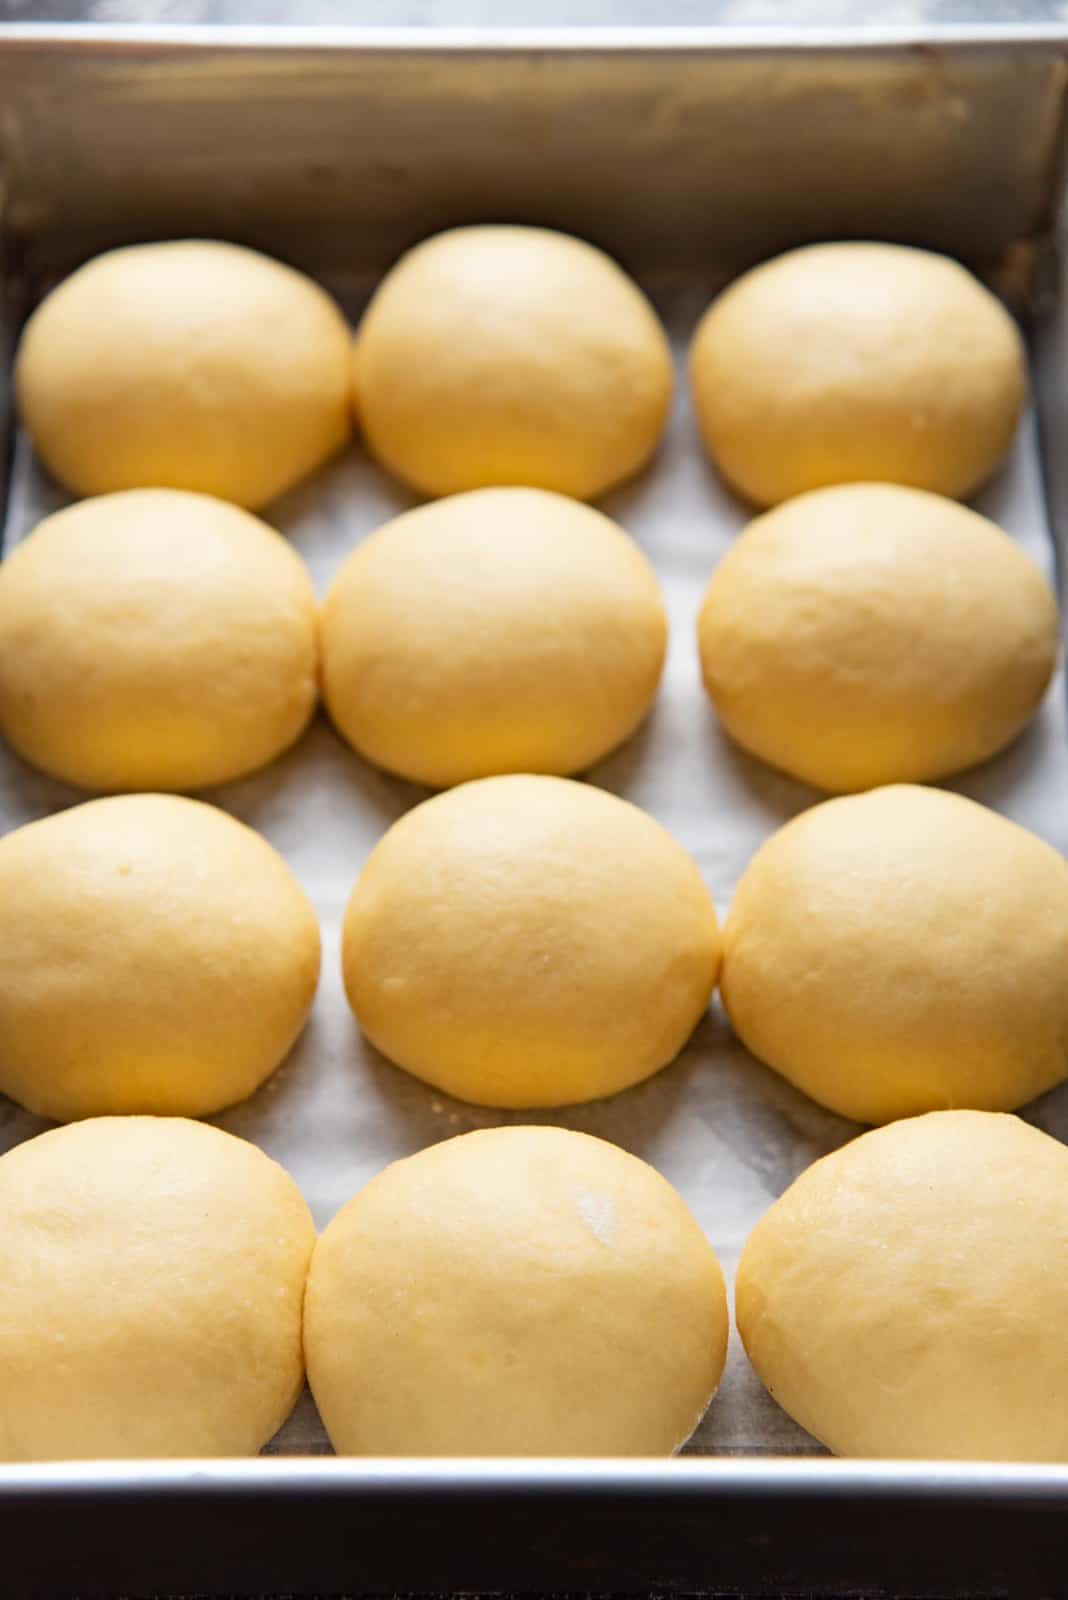
Final proof for brioche burger buns
The brioche buns require one last proofing before baking.
Once the dough is shaped into smooth balls, place them on a baking tray for baking.
Then, flatten them slightly with the palm of your hand.
Make sure to leave enough room in between the dough portions for them to proof and bake. However, if you’d like the bread buns to be attached together after baking, then keep them a little closer together.
Then cover the dough loosely with plastic wrap and let them proof in a warm area of your kitchen. The dough should have doubled in size, maybe a little more. The dough rise times / proofing times depend on the size of your portions, temperature of the dough, and ambient temperature.
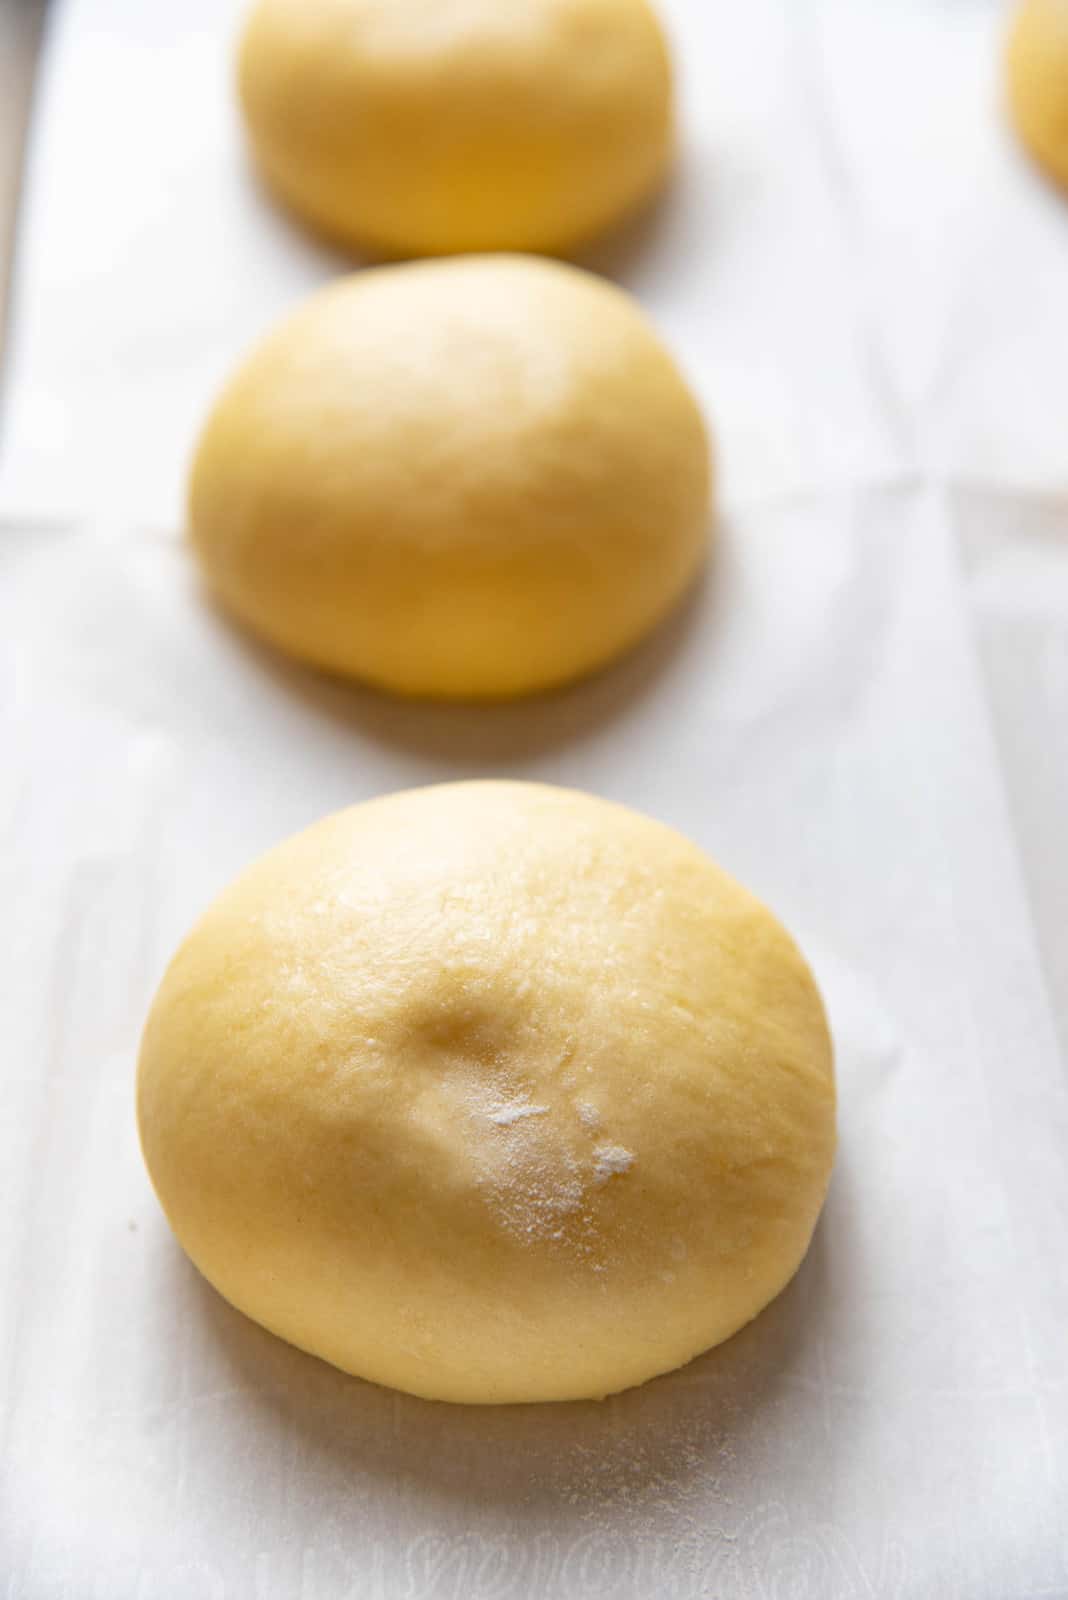
The best way to tell if the brioche dough has proofed properly is to do the fingertip indentation test.
Fingertip indentation test
Use your fingertip (which is either floured or buttered to avoid stickiness), and then gently press it into the dough. This should leave an indentation.
- If the indentation springs back up to almost its original state, then the dough is under-proofed. Leave it to proof a little longer.
- If the indentation only comes back up a little, then it’s proofed well and can be baked.
- However, if the indentation stays with no discernible movement, then the brioche burger buns need to be baked immediately, because they may be almost or slightly over-proofed.
- If the dough deflates when you leave an indentation, the dough has already over-proofed unfortunately. You could bake them, but they might be dense or dry and might have a flat shape. They could also have a very obvious yeasty / beer-like smell and taste.
Bake the brioche buns
Brioche hamburger buns bake much faster than brioche bread loaves, but it’s just as important to preheat the oven. Preheat the oven to 350 F / 180 C.
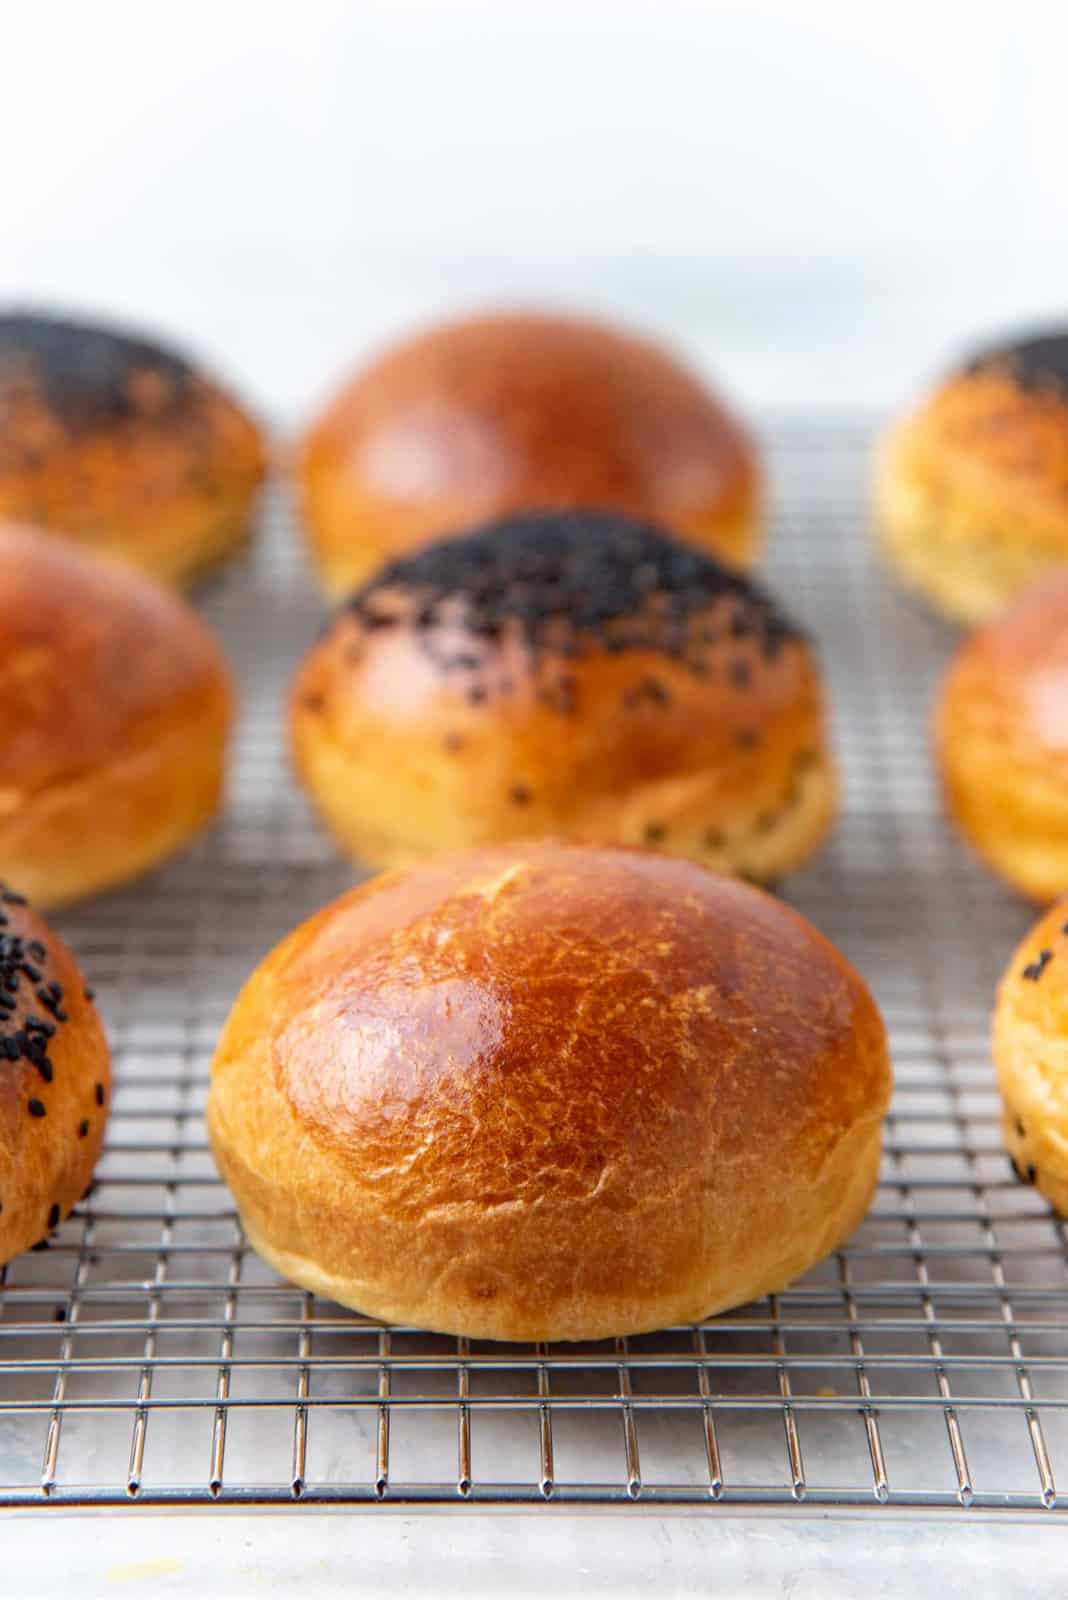
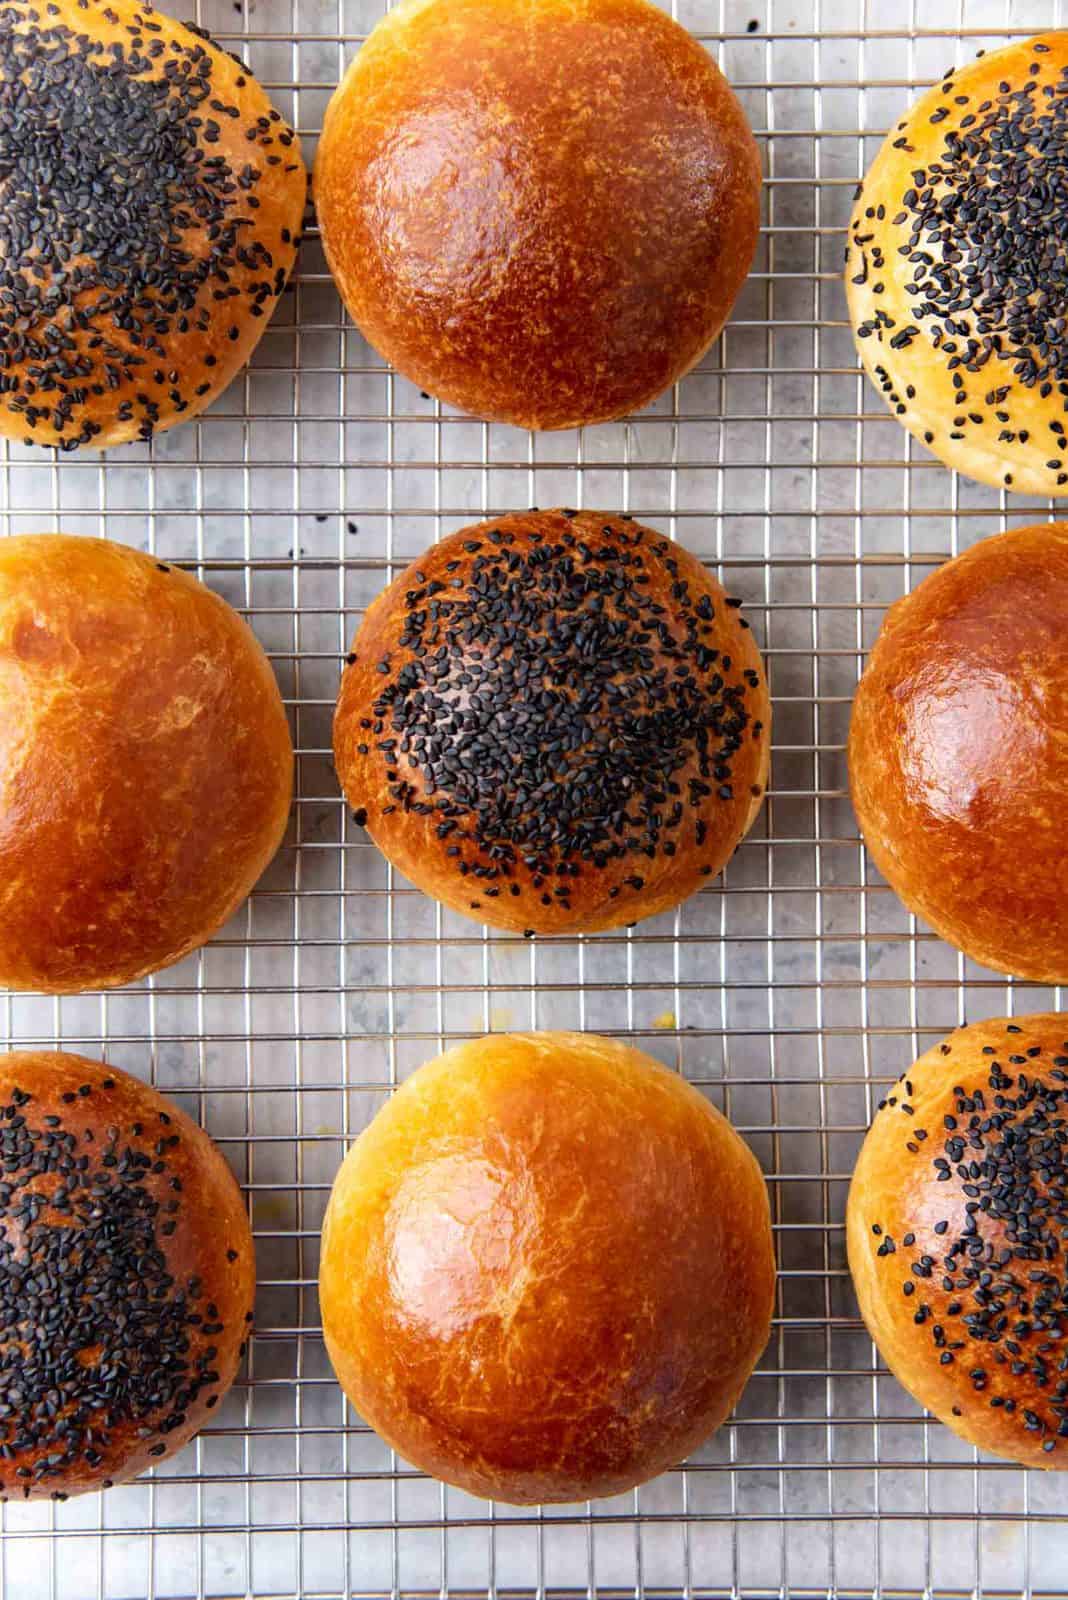
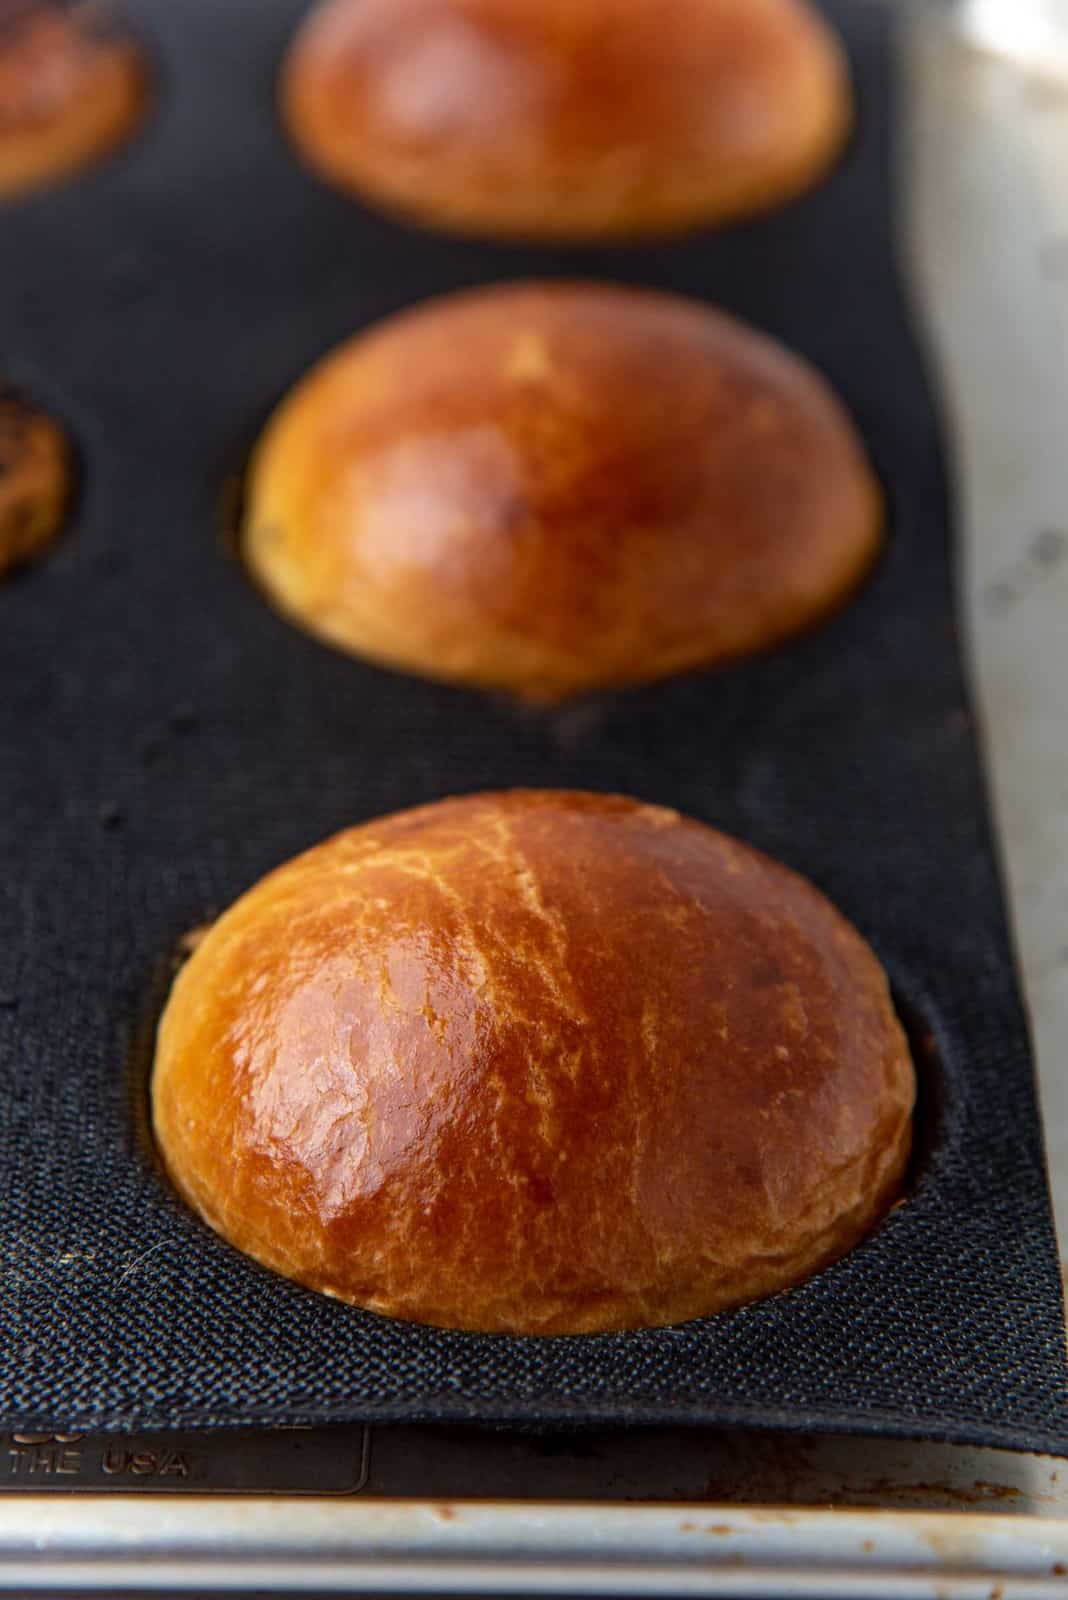
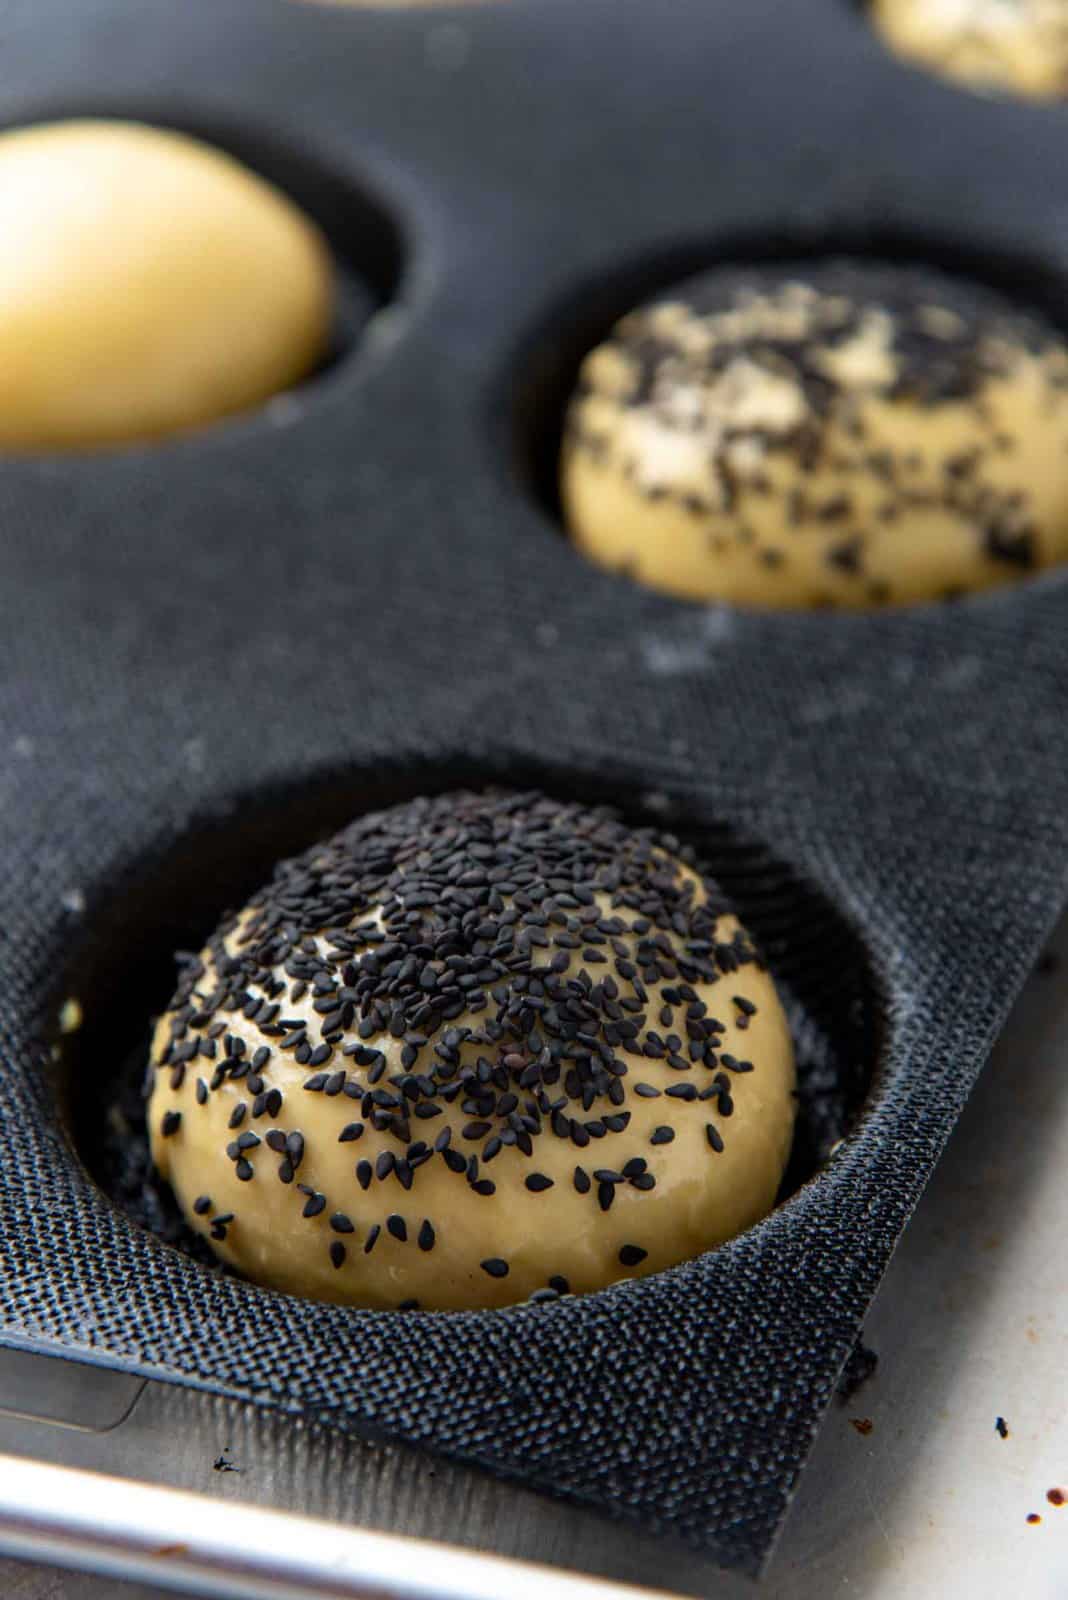
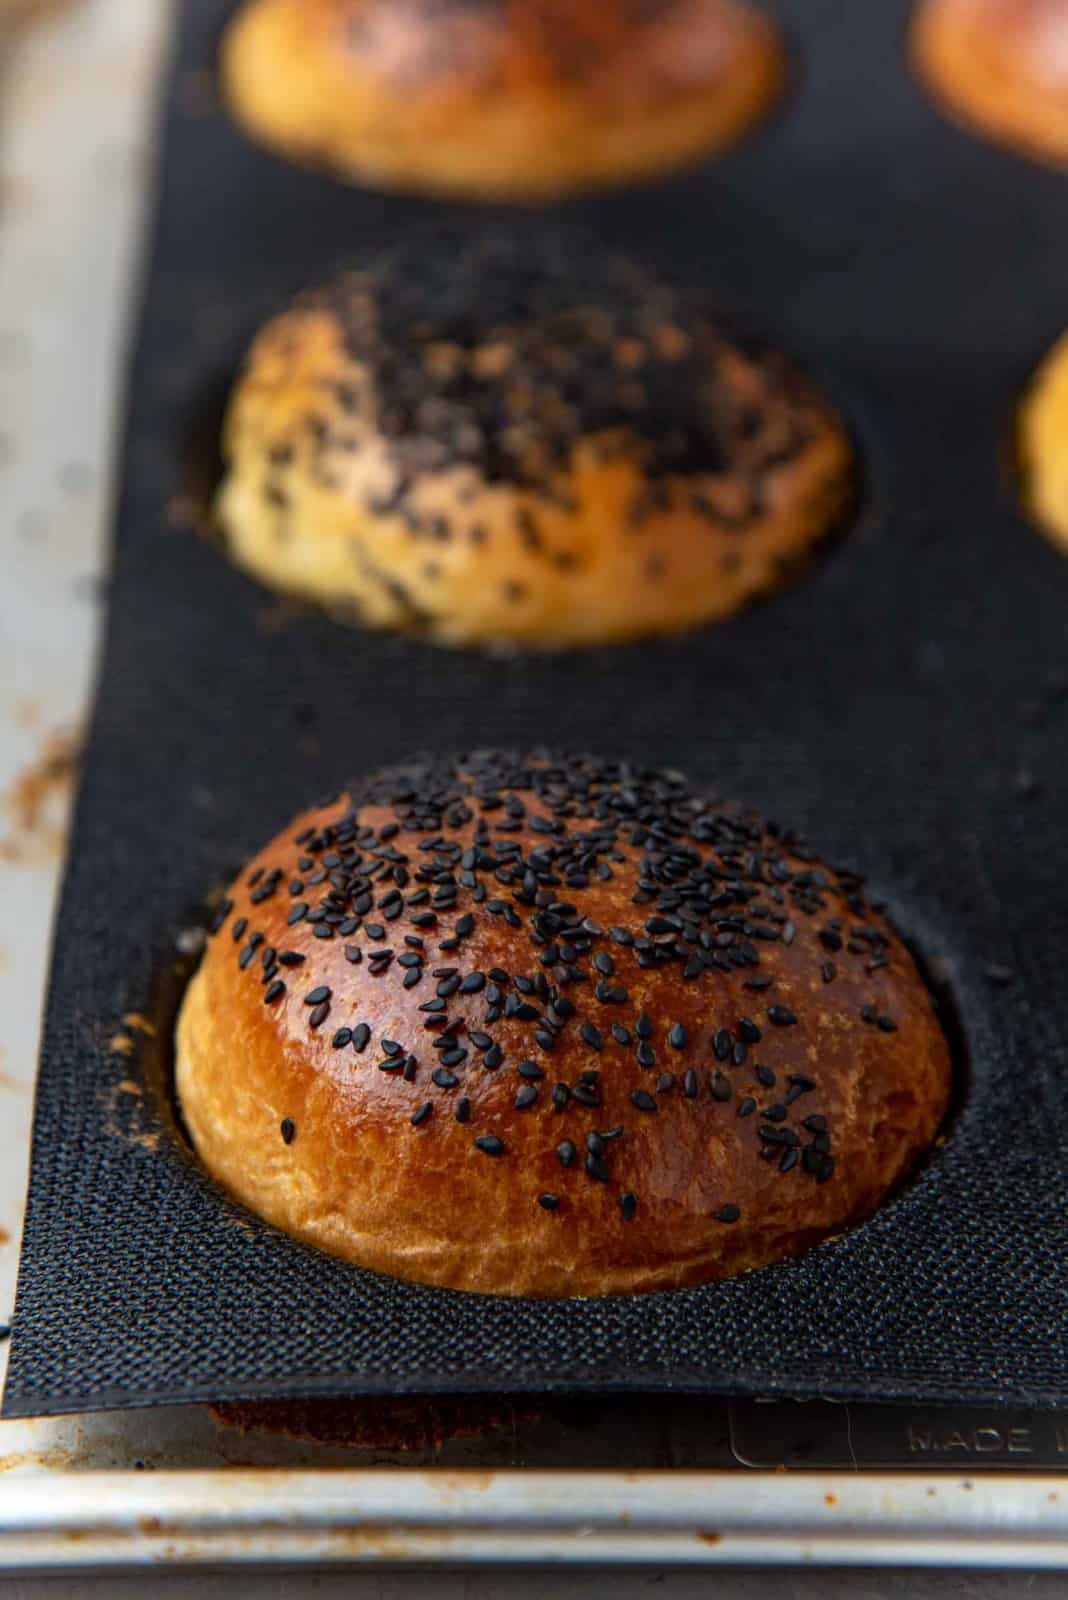
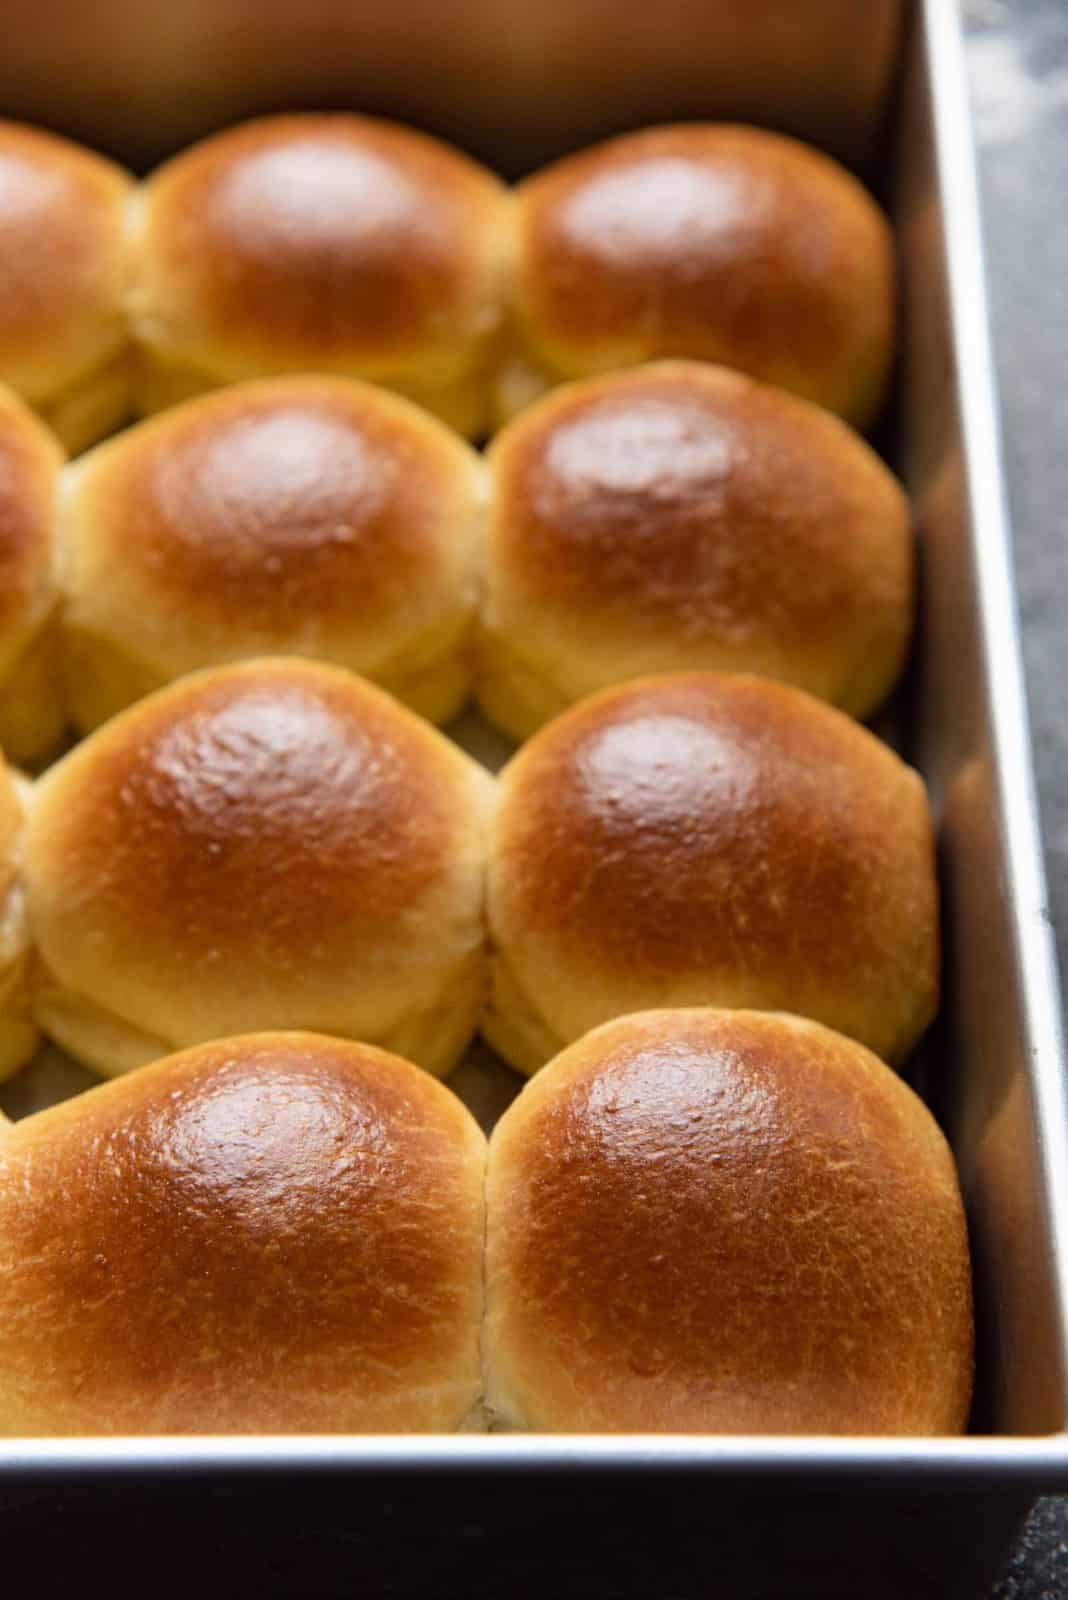
To make sure the brioche burger buns have a beautiful and shiny crust, brush the tops of the buns with an egg wash (a beaten egg).
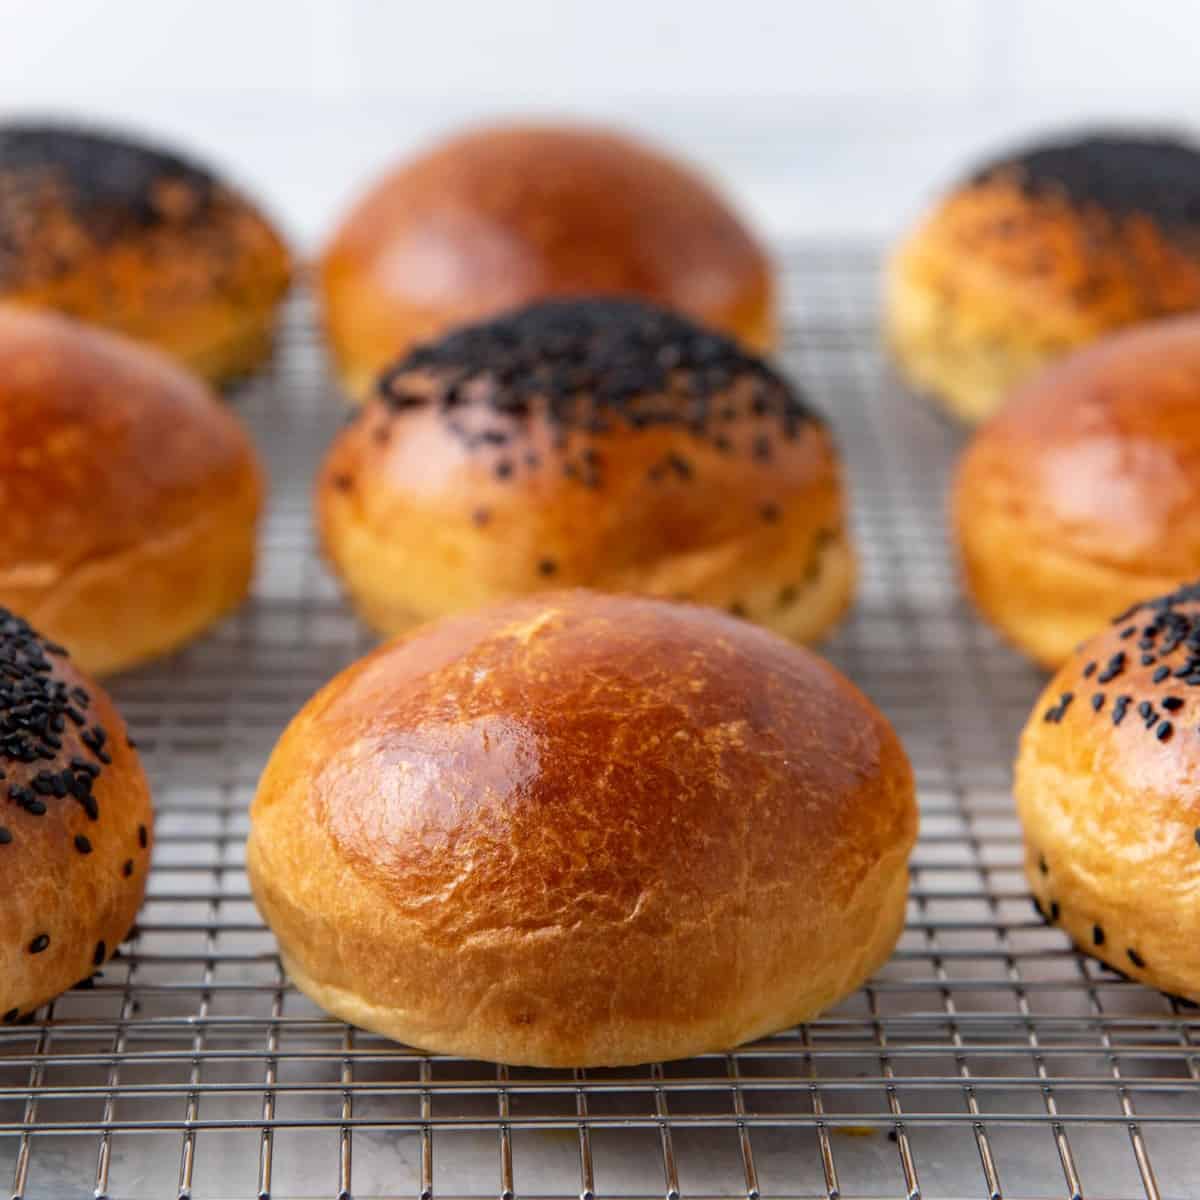
If you like sesame seed topped buns, then you can sprinkle white sesame seeds or black sesame seeds on top. For added flavor, you can go with everything bagel seasoning – this is not traditional, but delicious!
Bake the buns until they are a deep golden brown on top. The internal temperature should be about 200 F. This can take about 10 – 12 minutes for regular burger buns. Slightly faster for mini brioche buns.
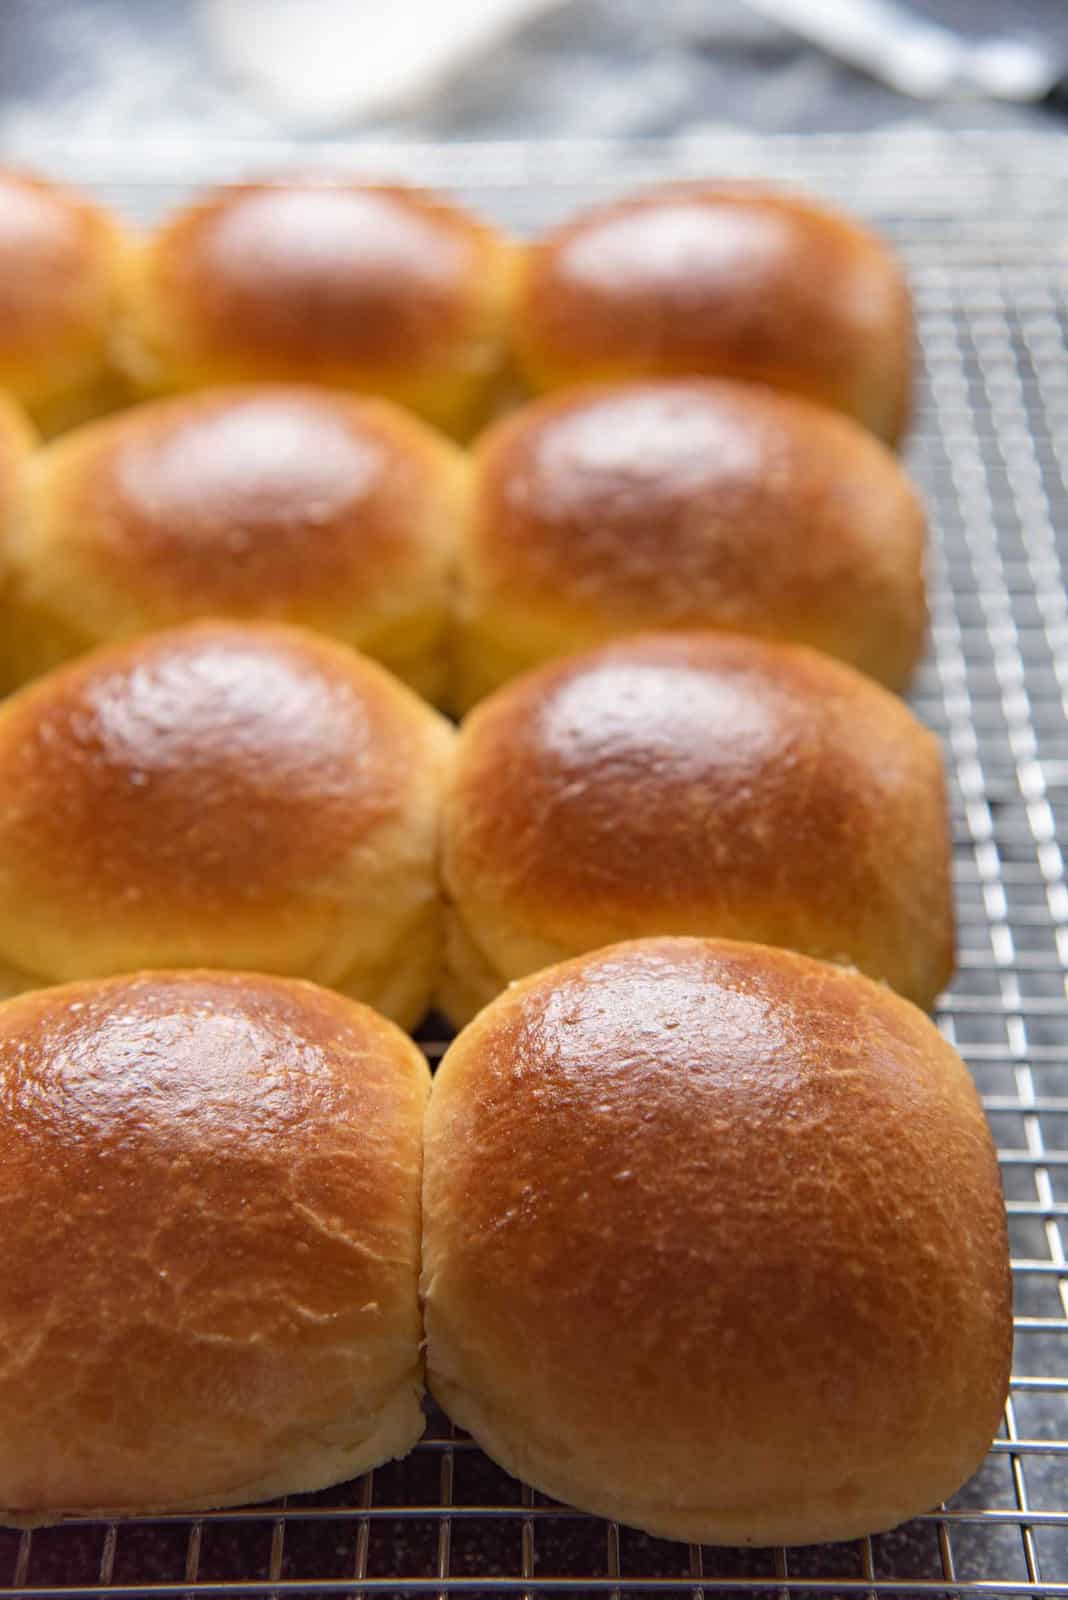
Allow the buns to cool slightly, and then transfer them to a wire rack to cool to room temperature.
Expert tips for making brioche buns
- Be patient when kneading the dough. It takes a while for the brioche dough to come together.
- If you live in a very hot climate, then add cool butter, instead of softened butter. If the dough becomes too warm (or the butter makes it greasy), the dough should be chilled in the fridge (or freezer) for a few minutes and then you can re-knead.
- If you’re short on time, you can skip the first proof and then let the dough proof in the fridge overnight instead.
- If you choose to do the first proof, but don’t have time for the overnight proof, then place the dough in the freezer until it’s chilled (this can can take 30 mins – 2 hours). The dough must be chilled to make it easier to shape and handle the dough. To do this, place the dough on a baking sheet (flatten it with your hands), and cover with plastic wrap very well (do not use a hand towel or napkin for this). Then transfer it to the freezer until chilled. Don’t let it freeze.
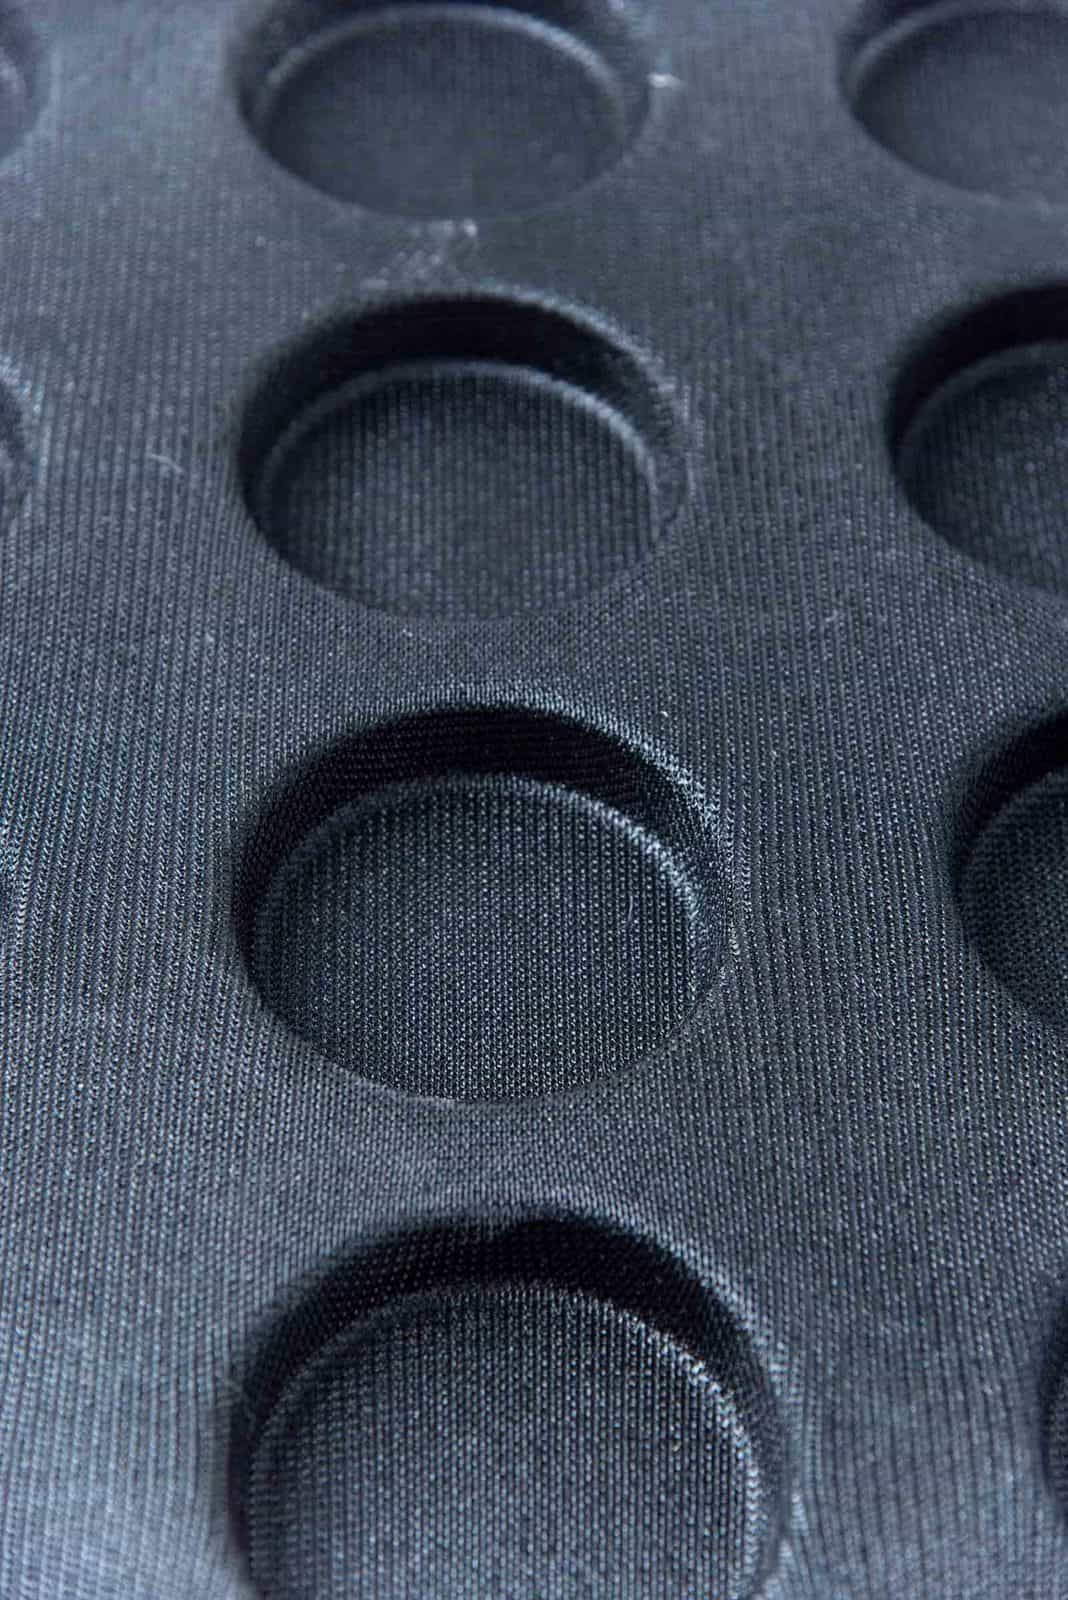
- If you want to have the classic ring look around the base of your brioche burger buns, you can purchase burger baking mats or make foil rings. I learned the foil ring trick from ChefSteps. It’s cheaper but time consuming to make the foil rings. It’s a little finicky, and you have to ensure that they are all the right diameter. Also remember to butter the inside of the foil rings to prevent the buns from sticking as they bake. The burger mats with cavities are easier to use, but more expensive.
- Want to make fewer buns? Since making brioche dough is a labor of love, I highly recommend making the full amount of dough if you can. Half of the dough can be used to make a loaf that you can bake and freeze for later, and then make buns with the other half of the dough. Or make all the buns and then freeze the excess for later. You can also make brioche tarts with some of the dough if you’d like a sweet treat.

Storage instructions
Just like other breads, brioche becomes stale the longer you keep them outside.
I store mine in an air-tight container and they’re pretty good for 2 days at room temperature. On the third day, I’d usually toast the brioche and it’s still delicious for sandwiches. After that, the brioche buns can be pretty stale.
So, if you want these brioche burger buns to last longer, I recommend freezing them. This way they will last for at least 2 – 3 months.
When you’re ready, let them thaw out at room temperature, or in the fridge. Alternatively, you can reheat them in the oven as well.
Serving suggestions
These brioche buns and brioche dough can be used in any number of ways!
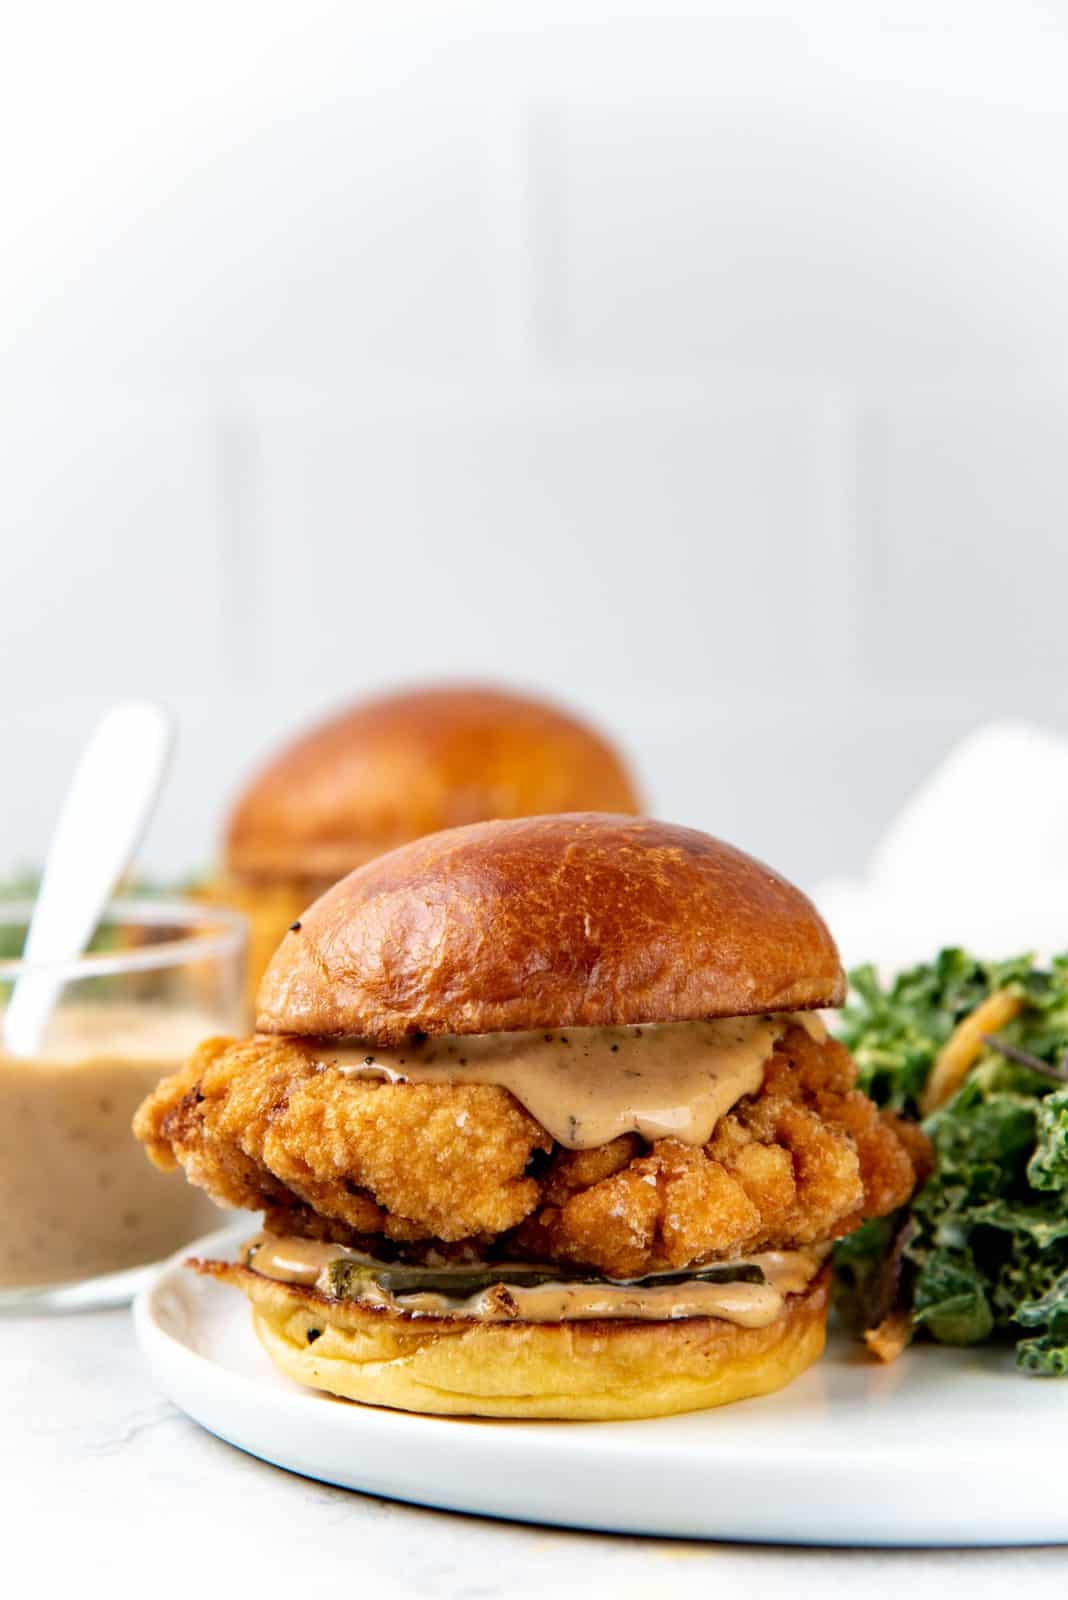
Burger buns – They make the absolute best homemade hamburger buns / burger buns! Toasted, buttery burger buns make your burgers taste gourmet.
Sandwich buns – Make the best fried chicken sandwiches or Nashville hot chicken sandwich (spicy chicken sandwich), or turkey sandwich using these buns!
Plus, if you’re running out of bread, you could even use these burger buns as bread slices for sandwiches. How about a delicious breakfast sandwich with brioche buns, egg omelet, cheese, and bacon? Or even a brioche cheese and ham sandwich?
These buns are perfect for any breakfast, brunch or lunch needs. Fill them up with your favorite filling for an on-the-go breakfast or lunch.
Dessert – Bake the bread with a little granulated sugar for a sweet version of your brioche buns, or toast the buns with a little sugar. Then place a scoop of your favorite vanilla ice cream in the middle and serve with hot fudge sauce. This will be such an incredible dessert idea!
Here are a few more sweet treats that you can whip up with these brioche buns.
- Brioche cinnamon toast – Instead of sugar, toast the buns with cinnamon sugar butter to make brioche cinnamon toast instead (similar to regular cinnamon toast). The caramelized, crunchy surface is the perfect canvas for anything sweet!
- Brioche bostock – Yes, you can make bostock with brioche buns too.
- French toast and French toast casserole – Soak the buns in an egg mixture to make French toast, or cut them into cubes and make a French toast casserole / bread pudding.
- Did you know that you can also fry the brioche dough to make brioche doughnuts?
Frequently asked questions
What do brioche burger buns taste like?
These buns are super soft in texture and rich in flavor! The color of the crumb will depend on the eggs that you use, but it can range from a light yellow to a deep yellow color.
Brioche buns will make any burger or chicken sandwich a work of art. It’s the perfect bun for your favorite fillings!
Can I halve this recipe?
You can. But I find that the dough is harder to knead in a stand mixer when I make half the quantity.
The dough hook isn’t able to catch the dough in the bowl, so the kneading process can be longer. I use a 5 qt bowl, so if your mixer is smaller, then you might be able to make a half batch more easily.
Can I make brioche rolls without a mixer?
This is a fairly difficult task.
Hand kneading generally takes about twice as long. However, with brioche, it might take even longer because you have to incorporate the butter in small additions.
I recommend only making half of the recipe, and expect a very messy process and a solid upper body workout.
How to adapt this brioche buns recipe to use less butter
This is an enriched dough recipe. This means it has butter and eggs to make the dough richer. Brioche is one of the breads that has the richest flavor because of the higher egg and butter content.
This recipe is a 50% butter brioche, and there are even brioche breads that are up to 90% butter content. If you’d like to reduce the butter content, then you can absolutely add less butter.
You can add anywhere between 125 – 250 g of butter to get a 25% – 50 % brioche dough (lean brioche with 125 g).
However, the less butter you add, the less rich the flavor. So, expect the texture and flavor to change if you reduce the butter content in the recipe too much.
Can I make brioche buns in advance?
Yes, you can!
Brioche buns freeze very well! Once you have baked the buns, let them cool down. Then place them on a baking tray, loosely covered, and allow them to freeze in the freezer. The faster they freeze, the better it’ll be.
Once frozen, place the buns in an airtight container or freezer bag. Do not leave them loosely covered for too long, as this will cause freezer burn.
Let the buns thaw in the fridge overnight, or place frozen buns (or thawed buns) in a 300 F oven and reheat until heated through.
How to make vegan brioche buns
There are ways to make vegan brioche, but the results will not be the same as authentic brioche.
It is possible to replace the eggs and egg yolk with a high protein (fortified) plant-based milk. Almond milk, cashew milk, or oat milk will work well. For every whole egg, replace with ¼ cup of milk, and for every yolk, replace with 2 tbsp of milk.
Instead of regular butter, use vegan butter. But since vegan butter has a higher water content than regular butter, the dough might be more loose than authentic brioche.
But please note that since I haven’t made a vegan version myself, I can’t be certain of these adjustments.
Recipe
Easy Brioche Buns
US based cup, teaspoon, tablespoon measurements. Weight measurements are recommended for accurate results whenever available.
Common Measurement ConversionsIngredients:
- 120 mL warm milk ½ cup, around 110 F
- 9 g active dry yeast about 2 ½
tsp - 10 mL honey
- 4 large eggs
- 2 yolks from large eggs
- 10 mL vanilla 2 tsp
- 60 g granulated white sugar
5 tbsp - 500 g AP flour 17.6 oz (weighed) OR
4 cups + 2 tbsp, measured by spoon and level method - 10 g fine sea salt 1 ½ tsp
- 250 g unsalted butter (very soft) roughly divided into four portions (1 cup + 2 tbsp) / 8.8 oz
To brush / sprinkle on top
- 1 egg whisked, for the egg wash
- Sesame seeds (optional)
- Everything bagel seasoning (optional)
Instructions:
DAY ONE
Making the dough
- Measure all the ingredients.
- Add the milk, yeast and honey into the mixing bowl and whisk gently to combine. Set aside for 10 minutes to allow the yeast to activate.120 mL warm milk, 9 g active dry yeast , 10 mL honey
- Add the eggs and yolks, vanilla, and sugar, and whisk gently to break the egg yolks.4 large eggs, 2 yolks from large eggs, 10 mL vanilla, 60 g granulated white sugar
- Add the flour and sea salt, and mix with a spatula or dough whisk to form a scraggly dough.500 g AP flour, 10 g fine sea salt
- With the dough hook attachment, knead the dough on speed 2 or 3 for about 3 – 5 minutes.
- Add the first portion of butter, in increments, after the first minute of kneading. Allow the butter to be mixed well into the dough. This should take about 1 – 2 minutes.250 g unsalted butter (very soft)
- Repeat with the other 3 portions of butter, kneading the dough for about 2 minutes after each addition.250 g unsalted butter (very soft)
- Make sure to stop the mixer to scrape down the sides of the bowl (and the bottom) between adding butter and kneading. You will have incorporated all the butter in about 9 – 10 minutes of kneading time.
- Once all the butter is incorporated, scrape down the sides and bottom of the bowl, and knead the dough for a further 5 – 20 minutes on speed 5 or 6.
- The dough will have been kneaded enough when it can be lifted fairly cleanly off the bottom of the bowl when picked up with the dough hook. It will be very soft and tacky to the touch, but shouldn’t stick to your fingertips. Rather than strictly going by time, knead the dough until you have reached this consistency.
- Flour your work surface, and turn the dough out onto the floured surface. Lightly flour your hands and the surface of the dough to prevent the dough from sticking to your palms. Then flatten the dough with your hands to deflate.
- Fold in the edges of the dough towards the middle and gently press them into the dough (see pictures in my brioche bread loaf post for more information). Carefully flip the dough over, and then with the heel of your palms, shape the dough to form a tight ball.
- Carefully pick up the dough ball and place it back in the mixer bowl (or another large bowl).
- Let it rise until it has doubled in size, in a warm place (72°F), for about 1 hour.
- Turn the proofed dough out onto a lightly floured surface, and fold in the edges again as before towards the middle and press them in. Carefully flip the dough over (seam side down now). Tighten the dough into a ball with a smooth, taut surface (using the edges of your palms). Transfer the dough into the mixer bowl again.
- Cover and let it chill in the fridge for at least 8 hours, or up to 24 hours.
DAY TWO
Portioning the dough
- Remove the chilled dough from the fridge. The dough will be much easier to work with now.
- Line a few baking trays with parchment paper. Keep a bowl of flour, a scale, and a dough cutter ready.
- Turn the dough out onto a lightly floured surface. Deflate the dough by flattening it lightly.
- Measure the weight of the dough, and then divide it into 16 pieces (about 75 g per portion).
- Each portion will bake into a burger bun that is 9 – 9.5 cm in diameter. Please see the table in the post for different sizes and yields.
Shaping the dough
- Place each dough portion on your work surface, with the smooth side down. Fold in the edges towards the middle. Pinch the seams together.
- Dip the smooth side of the dough in a little flour. Carefully flip the dough over, and then using a cupped palm, and with the seam side down, roll the dough portion on your work surface until you get a smooth dough ball.
- Place the smooth, rolled dough on the parchment paper-lined baking tray; 6 buns on a baking tray plus 2 more on another tray.
- Repeat with the other dough portions to get 16 smooth dough balls.
- After arranging the dough balls on your baking trays, flatten them slightly. Cover the buns loosely with plastic wrap. This is important to prevent a skin from forming on the dough as it proofs.
Proofing and baking
- Proof the bread in the covered loaf pans for about 2 hours at room temperature, or until doubled in size. Preheat the oven to 350°F / 180°C before baking the buns. You can check if the buns are proofed by doing the indentation test (see recipe notes).
- Once proofed, brush the tops with an egg wash. Optional – sprinkle sesame seeds on top. For more flavor, you can sprinkle everything bagel seasoning as well.1 egg, Sesame seeds, Everything bagel seasoning
- Bake in preheated oven until golden brown on top, and the internal temperature registers 190°F / 88°C. This can take about 10 – 12 minutes.
- Remove from the oven and let the buns cool slightly.
- Transfer the buns to a wire rack and let them cool down to room temperature. They’re ready to be served now.
- I prefer to bake one tray at a time. But you can bake two at a time as well, just make sure to switch the tray positions halfway through the baking time. To prevent over-proofing, refrigerate the remaining baking trays with the proofed buns (still covered in plastic wrap) until they're ready to be baked.
Recipe Notes
- If you make a small indentation in the dough with your fingertip, and it bounces back 90 – 100% of the way, then the dough is still under-proofed.
- If the indentation bounces back only slightly, then it’s proofed and ready to be baked. If the indentation stays, it’s starting to over-proof, so bake it as soon as possible.
- If the bread deflates when poked with a finger, then it has over-proofed.
Nutrition Information:
“This website provides approximate nutrition information for convenience and as a courtesy only. Nutrition data is gathered primarily from the USDA Food Composition Database, whenever available, or otherwise other online calculators.”


Leave a Reply