


Soft and delicious, with just a touch of sweetness, and not at all like flimsy store-bought white bread, this homemade white bread recipe is easy and it’s made with simple ingredients.
Just like my brioche bread, milk bread, focaccia bread etc., this too is a reader-favorite recipe. And here’s ALL you need to know about making the perfect loaf of homemade bread (white bread)!

There’s something deeply satisfying about a slice of white bread. And when that white bread goodness is homemade? The best! Plus, I LOVE the smell of freshly baked bread and the simple joy you get from developing homemade bread recipes.
I’ve been making homemade white bread for about 15 years now, and I’ve made it so often that I can make this white bread recipe without measuring the ingredients now.
And the more you make it, a better feel you get for it, and you’ll instinctively know what your bread dough is supposed to feel like.
Why you’ll LOVE this white bread loaf recipe!
- Make no mistake, this homemade bread recipe is simple to make.
- Incredibly soft and delicious, with just a touch of sweetness, it’s easily the best white bead I’ve ever tasted!
- Really substantial, unlike the sad, flimsy store-bought white bread.
- It’s free of all the sodium and preservatives of store-bought bread, and it’s made with simple ingredients. What’s not to love?
- This recipe provides STEP BY STEP instructions, on how to make the perfect loaf of bread
- Because of how loved this recipe has become, I have adjusted the recipe so you can easily make TWO standard bread loaves, instead of 1 extra large loaf! These adjustments are included in the recipe notes. The original recipe remains unchanged!
I guarantee you’ll never want to go back to store-bought white bread after tasting this!

What is classic white bread made with?
Delicious white bread is traditionally made with just,
- Flour
- Water
- Yeast
- Honey
- Salt
- Butter (or some other type of fat)
However, I also like to add a little citric acid (or vinegar) as well. This is optional, but it achieves two things.
- The acidity helps keep the bread soft. It apparently helps with preserving the bread too, but the amount I add in this recipe may likely not have an appreciable impact on this.
- Citric acid adds a little sourness to the bread loaf as well, much like the acidity in sourdough gives it that characteristic “sourness”. The citric acid adds an extra depth of flavor to the this classic white bread recipe too. But the sourness here isn’t as pronounced as with sourdough.

My best tips for perfect homemade bread (homemade white bread)
Use a stand mixer.
Makes the whole process easy. You can knead the dough by hand, but it takes quite a while to develop the gluten in the dough this way. (Although, I do quite enjoy kneading dough by hand sometimes, bashing the dough repeatedly. Great for letting out some pent up frustration!).
Just make sure not to “tear” the bread while you’re kneading it by hand.

Don’t be afraid to get your hands in there and feel the texture of the dough.
This is the only way to make sure you get the right consistency. The amount of water or flour needed to make this homemade white bread can vary slightly each time.
Use this recipe as a guide, and know that you may have to adjust it a touch depending on the weather, and type of flour and ingredients used.
I use AP flour to make homemade white bread, but you can use bread flour too.
With bread flour, you may need to use a little extra water to get the right consistency, because the more protein content in the flour, the more moisture it’ll need to yield a soft texture.
Using bread flour will also lead to a chewier bread texture, which is also incredible desirable.


Proofing is important.
The first proof is important to allow the yeast and gluten to develop. This plays a huge role in the flavor of the final product as well. The second proof is important to get a loaf that is light and airy with a beautiful rise.
If you over-proof the bread dough at any stage, it can result in an unpleasant yeasty flavor. And if you over-proof the dough during the second stage, you’ll likely end up with a bread loaf where the crust separates from the rest of the loaf, or the crust is misshapen, or there’ll be big holes in the bread and it’ll collapse.
With under-proofed bread dough, you’ll end up with a smaller bread loaf that is more dense and has less volume.
A quick, simple way to check whether your homemade bread loaf is done is to tap the bread on top for that characteristic “hollow” sound.
However, a fool-proof method to ensure perfectly baked bread is to use a thermometer. Your bread loaf is done when the internal temp. registers 195°F.


To avoid a soggy bread bottom, make sure not to leave the bread in the pan to cool completely.
Leave it in the pan only for about 10-15 minutes and then place it on a wire rack to cool completely. This prevents any condensation from forming on the pan and making the bread soggy.
Another really helpful tip that I’ve discovered is to allow the bread to cool down in the oven.
When the bread is done, I turn off the oven and let it cool down inside, with the oven door half open. Or if I have to do more baking, I let the bread cool down in a draft free, warm place.
If the bread cools down too fast, it can cause some wrinkles to form on the crust. It doesn’t affect the taste however, just the appearance. However, this may sometimes be unavoidable in the winter.

Choosing the correct bread pan
You can make this white bread recipe in two 8 ½ x 4 ½ inch loaf pan for bread loaves that are taller. But a 9 x 5 loaf pan will work too.
However, if you do use a 9 x 5 inch pan, the resulting bread loaves will be slightly taller (but still makes great sandwiches – like these delightful rainbow sandwiches!)


How to form the perfect loaf of bread
The next step after proofing the bread dough, is to form the dough into a log to fit inside your bread pan.
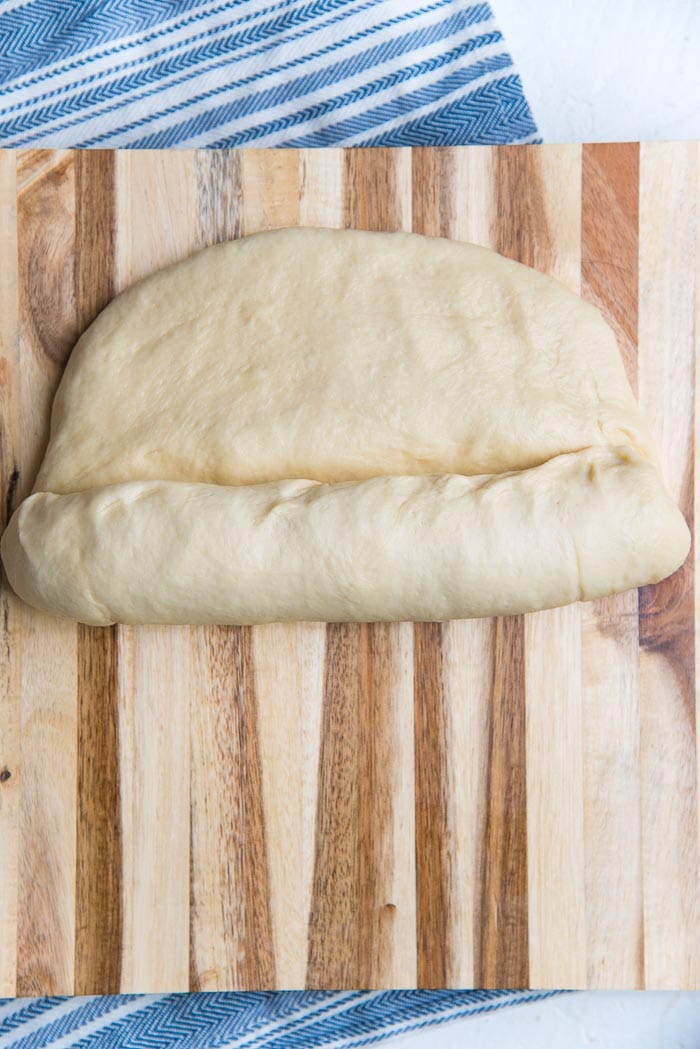
I turn the bread dough out on to a lightly floured surface and flatten it into a rectangle. This removes excess air that formed in the dough while it was proofing. The longer side of this rectangle should be slightly shorter than that of your bread pan.
To make sure you have a tightly formed bread loaf, roll up the dough, while pinching the edge into the dough along the way. Pinch the seams of the dough, tuck the sides in and pinch them into the dough as well.
It’s important to tightly roll up the dough while pinching it into itself. This prevents large air pockets from forming inside the dough as it proofs and bakes.
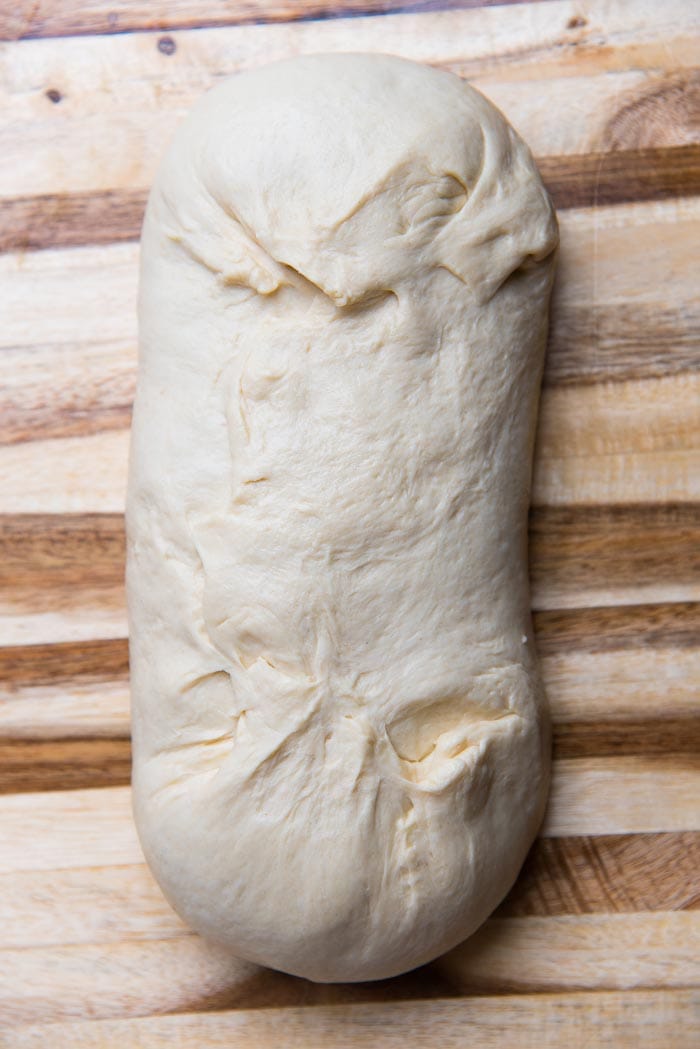

All the seams of the dough should be on one side, while the other side should be smooth and tightly stretched (with no wrinkles). Make sure your bread dough log has an even thickness too.
Then carefully place this in the prepared bread loaf pan, and gently press it into the corners and bottom of the pan. Cover the pan and let it proof for a second time.

How to check when your bread loaf is ready to be baked
The second proofing time can vary greatly depending on the ambient temperature and weather. It can take much longer in the winter to proof, than in the summer.
So it’s important to know what signs to look for to know when you’re bread loaf has proofed properly and is ready to be baked.
- The bread dough will double in size when proofed. It might even be a little more than that, but this indentation test will let you know for sure if the bread is proofed properly.
- When you gently press into the dough with your index finger, an indentation will form and it’ll remain, if the dough is perfectly proofed. If the dough bounces back without leaving an indentation, then the dough is under-proofed. If the indentation causes the dough to collapse, then the dough has over-proofed, and you may need to re-knead and re-form the dough and proof it once again.

How to store homemade white bread
The fact is homemade white bread doesn’t keep for too long, since it doesn’t have preservatives like store-bought bread.
So it’s important to keep your homemade bread in a container that allows for some ventilation, to let the the bread “breathe”. This white bread will keep for about 4-5 days this way.
But what I personally like to do (especially because this recipe will yield TWO loaves), is to slice the bread once it cools down, and then place these bread slices in a container or sealable bag and freeze.
This keeps the bread fresh for much longer! Then I just remove the slices I need from the freezer, and let them thaw out whenever needed.
However, never refrigerate bread. The dry air in the fridge will make the bread go stale even faster.

Seriously, there’s something just so satisfying about a slice of white bread, when you’ve made it yourself! 🙂 Even from frozen, it tastes incredibly fresh and DELICIOUS.
Peanut butter and jam sandwiches are a whole new level of comfort with this homemade white bread recipe! 🙂

Frequently asked questions and troubleshooting
My bead is burnt on the outside or has a really hard crust.
The chances are that your bread was baked in an oven that is too hot. My oven is a conventional oven, and if you have a convection oven, you will need to reduce the oven temperature. Usually by about 15 – 25 degrees.
Sometimes, oven just run hot and can burn food. You can check this by using an oven thermometer, and then adjust the temperature to compensate.
If your loaf pan is dark in color, this can also conduct heat too fast and bake the outside faster than the inside.
Lower the oven temperature, and bake the bread until the internal temperature of the dough is 195°F (as stated in the post).
My bread looks great, but it’s raw inside.
This is because the oven was too hot, baking the outside faster than the inside. See above for ways to fix this issues.
My bread was really dry
This happens because the dough was made with too much flour or too little water.
If you used cups to measure the flour, the chances are that too much flour was added. Cups are not recommended as cups will add varying amounts of flour depending on how you use the cups to scoop the flour.
To fix this issue, always use a kitchen scale to weigh the flour and/or other ingredients. If you absolutely have to use cups, then adjust the water in the dough until you get the right consistency.
The dough should be soft, and tacky. If its not tacky when you need to the dough, then there’s too much flour in the dough.
Why is my bread so dense?
For bread to be too dense, you either added too much flour (see above), or the bread was over proofed during the final proofing. A dense bread can also occur if the dough is under proofed before baking as well.
Under-proofing can happen if the loaf wasn’t given enough time to proof to at least 1.5 times or wasn’t in a warm place, or if the yeast has somehow died and is not active enough.
My bread smells like beer
This is because of the yeast. If you do an overnight proof, this can happen as the yeast develops ore flavor. I personally love the more complex flavor.
However, if you over proof the dough (especially during the last proof), the bread will have an unpleasant flavor and will also be dense.
How long should I proof my dough?
As with all my bread recipes, I recommend going by visual cues, rather than time. Depending on the ambient temperature, humidity, and flour type the proofing times can vary.
Can I use milk instead of water?
Absolutely! Milk has fat that can inhibit some of that gluten structure. So the bread might be less chewy and even more soft.
Can I leave out citric acid?
Yes! It is optional. You can read the post as to why I do like to add citric acid and why it’s optional.
Can I use bread flour instead of AP flour
Absolutely! Bread flour will give the bread a slightly chewier texture. Because of the higher protein content, you will need to add some extra water.
Just add enough water to create a dough that is soft, smooth, satiny and tacky to the touch. The soft, tacky dough is what will make a soft loaf.
If you liked this step by step homemade bread recipe, then you may also like some of my other detailed how-to posts,
- And check here for more easy bread recipes.
Equipment and tools I use for this recipe
- Stand Mixer – I use my KitchenAid mixer
- 9 x 5 inch loaf pans or 8.5 x 4.5 inch loaf pans – the perfect sized pans to make these bread loaves.
- Kitchen Scale – Best tool for baking, to ensure you get accurate results each time
- Measuring Cups – I like to use cups to measure all liquid ingredients most of the time.
- Measuring spoons – for measuring all the small amounts of ingredients.
Recipe

Homemade Bread (Homemade White Bread)
US based cup, teaspoon, tablespoon measurements. Weight measurements are recommended for accurate results whenever available.
Common Measurement ConversionsEquipment:
- See post for detailed list of equipment & tools used.
Ingredients:
Proofing yeast
- 7 g active dry yeast 2 ¼ tsp.
- 240 mL lukewarm water
- 11 g honey (or sugar or maple syrup)
Bread loaf
- Proofed yeast mixture (ingredients listed above)
- 553 g AP flour 4 ⅓ cups, spoon and leveled (please see notes)
- 120 mL lukewarm water ½ cup – more if needed.
- 1 ¼ tsp sea salt
- 22 g honey 2 tbsp / 30 mL (or sugar or maple syrup), add up to 4 tbsp / 60 mL for a more pronounced honey flavor)
- ¼ tsp citric acid or ½ tbsp white vinegar (optional)
- 30 g unsalted butter 2 tbsp. melted (or vegetable oil)
Instructions:
Proofing yeast
- Place the water in the mixer bowl of your stand mixer.240 mL lukewarm water
- Stir in the honey to dissolve, and sprinkle the yeast over the water. Gently stir to mix.11 g honey, 7 g active dry yeast
- Allow the yeast to sit in a warm place for about 15 minutes, until it’s activated and becomes frothy. This could take longer if your yeast was in the freezer. If the yeast doesn’t activate (no frothy bubbles), then your yeast is likely too old and you will need it replaced with fresh yeast.
- Once the yeast is activated, you’re ready to make the bread dough.
Bread loaf
- To the proofed yeast mixture, add the flour, warm water, salt, honey, citric acid and melted butter.Proofed yeast mixture, 553 g AP flour, 120 mL lukewarm water, 1 ¼ tsp sea salt, 22 g honey, ¼ tsp citric acid, 30 g unsalted butter
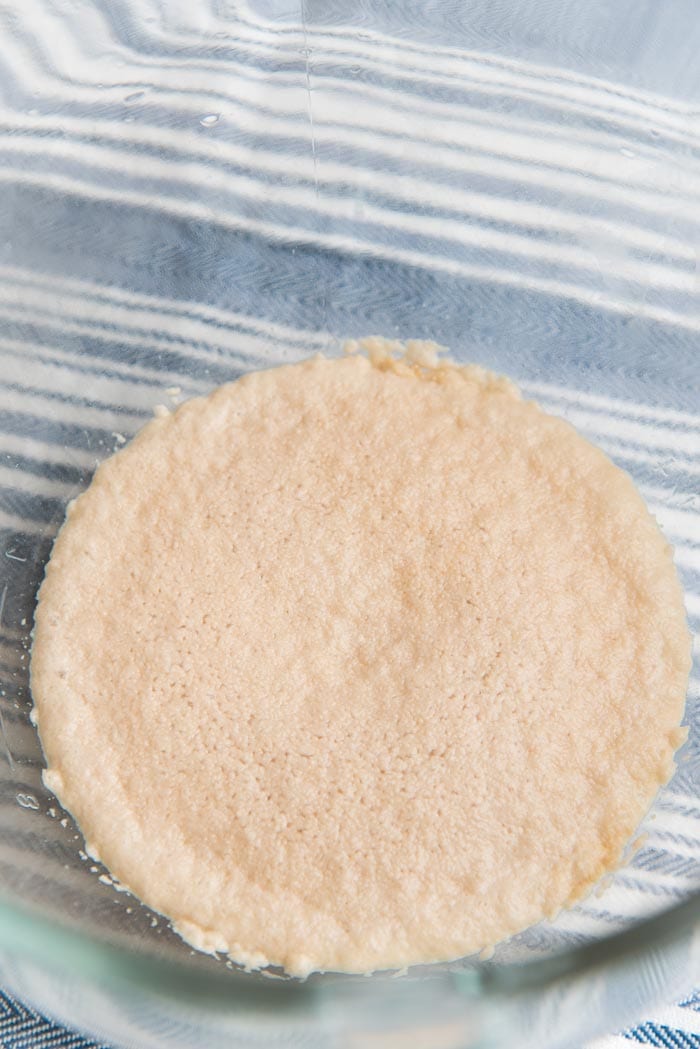
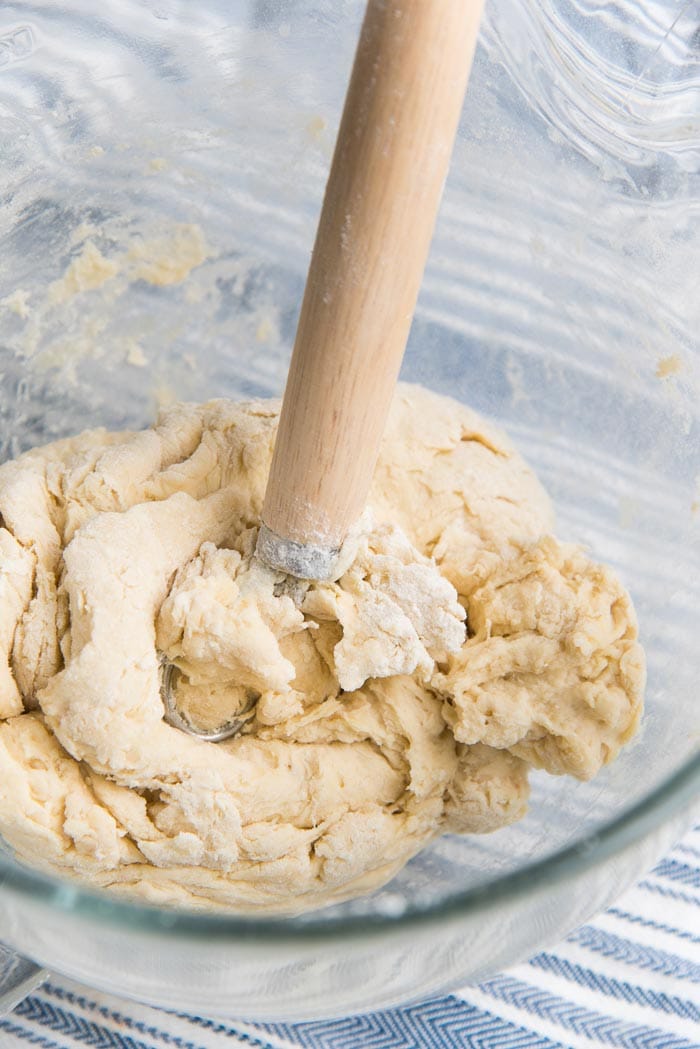
- Using a dough whisk or a spatula, mix the ingredients to form a rough dough.
- Place the bowl in the mixer with a kneading hook attached, and knead the dough on low speed for about 2 – 5 minutes, until the dough comes together to form a ball.
- Increase the speed by 1 or 2 levels (speed 3 or 4 in a kitchen aid mixer) and knead the dough for a further 12 – 15 minutes until it's smooth and elastic.
- While the dough is kneading, check on it every few minutes to make sure it’s kneading well, and is not too dry or too wet. The dough is going to be very sticky and wet at the beginning, and become smoother as it's kneaded.
- To check if the dough has the right consistency after about 10 minutes of kneading – Increase the speed of the mixer to about 5 or 6 just for a minute or two. If the dough is sticking to the sides of the bowl, then it’s too wet, so add a little extra flour (a dusting at a time), to get the right texture. If the dough is still tacky but is coming off the sides (mostly), and only sticking to the bottom of the bowl, then it's at the right consistency. When you stop the mixer and lift the kneading hook from the bowl, and the dough isn’t sticking to the bottom of the bowl, then the dough might be too dry. You may need to add a little extra water (just ½ tsp at a time), to get the right consistency. The dough should be smooth, a little soft and tacky to the touch.
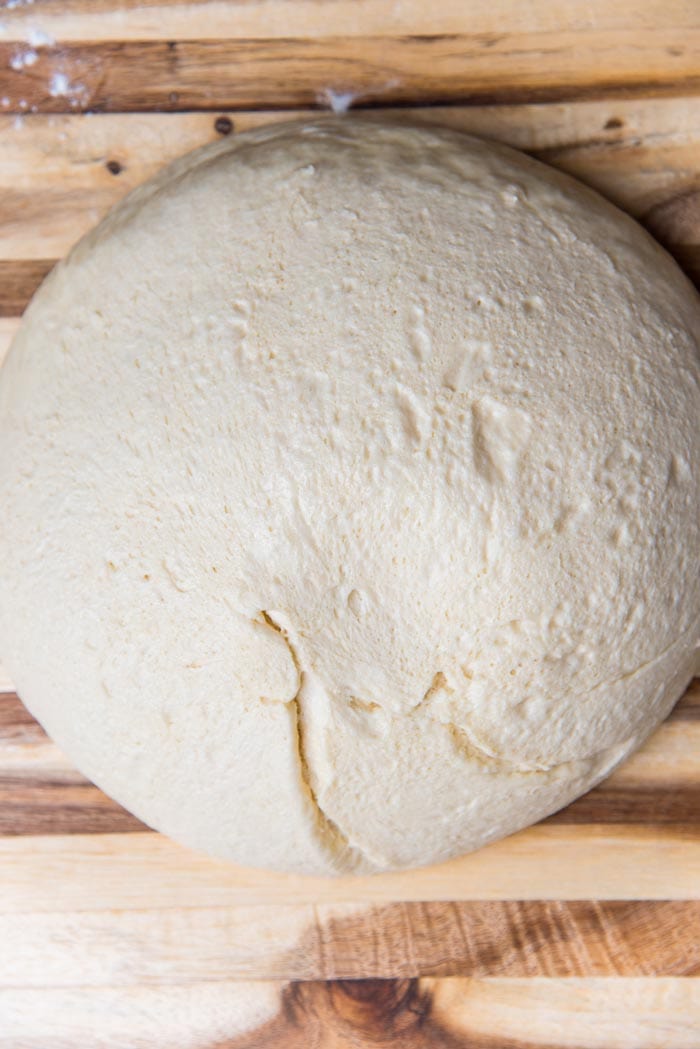
- Once the dough is kneaded, remove the dough hook and fold the dough over a few times by hand, to get a smooth ball. Then place it in a lightly oiled bowl, and cover with plastic wrap. Let the dough proof for about 1 hour until it has at least doubled in size.
- While the dough is proofing, prepare the bread loaf pans. Butter 1 – 9 x 5 inch loaf pan for a very large loaf, or 2 – 8.5 x 4.5 inch loaf pans for smaller loaves, and set aside until the dough is ready.
- Turn the proofed dough out onto a lightly floured work surface. Slightly flatten is with your hands. If making two smaller loaves, halve the dough with a sharp knife or bench scraper. (For more accurately halved dough, weigh the dough and then split it evenly by weight.) Place one portion of the dough back in the bowl and place it in the fridge while you shape the first portion.
- Gently press the dough into an evenly thick rectangle. The short side of this rectangle should be roughly about 8 – 8.5 inches (i.e. slightly shorter than the length of your bread loaf pan).
- Next, tightly roll up the short side, along the length of the dough rectangle. Make sure to pinch / press the edge of the dough as you go, while rolling it up (read the post and see pictures for more details).
- Once the dough is rolled up, pinch the seams to seal it, and tuck in the two sides and pinch these seams as well. Make sure all the seams are on one side (this will be the bottom) and the other side is smooth and seam-free (this will be the top).
- Transfer this into the prepared loaf pan, seam side down, and press the dough into the pan. Make sure it’s evenly pressed into the bottom of the pan. Loosely cover the loaf pan with plastic wrap and let it proof again in a warm place, for about 45 minutes – 1 hour. The dough should double in size inside the loaf pan / pans.
- Repeat with the second portion of dough (if making two smaller loaves).
- To check if it has proofed enough, gently press the top of the dough with your finger to leave an indentation that is about ½ cm deep. If proofed properly, this indentation should remain, or only bounce back slightly. If it bounces back almost completely, then it's underproofed. (Read the post and see pictures for more details.)
- Preheat the oven (conventional oven) to 375°F / 190°C, during the last 30 minutes of the second proofing time. It’s best for the oven to be preheated to the right temperature for at least 20 minutes before baking the bread.
- When the bread loaf is ready and the oven has preheated, place the loaf pans in the middle of the oven, and bake for 35 – 45 minutes. Make sure there is at least 2 inches of space between the pans to allow for proper air circulation. The bread is done when it sounds hollow when tapped on top, OR when the internal temperature reaches 195°F / 91°C.
- Remove the pans from the oven and keep in a warm place (away from drafts) to cool. After about 10 minutes, remove the bread from the pans and keep it on a wire rack to cool down completely. The bread is now ready to be served.
- Optional – brush melted butter on top while it's hot to add more buttery flavor.
- Keep the loaf (or loaves) in a bread box at room temperature for up to 4 – 5 days, or slice and keep in the freezer for up to 1 month.
Recipe Notes
Flour
If you use a scale to measure the flour, the amount of liquid given in the recipe should be perfectly sufficient to make wonderfully soft bread loaves. However, if you use MEASURING CUPS to measure flour, please use the spoon and level method to weigh the flour accurately. When using cups, you risk having MORE flour than intended, which will result in a dense, heavy bread. Or you may end up using more water than stated in the recipe to compensate for the extra flour. This dough will be very sticky at the start of the kneading time, and then should gradually become soft and tacky with a smooth surface.Choosing the right loaf pan
I have had a few readers reach out to me about the bread being perfect, except for the fact that their loaves were quite tall after baking. For this reason, this loaf can be split into two, to make two smaller loaves as well. If you’re making 1 larger loaf, choose a 9 x 5 inch loaf pan (taller pans are better). If you choose to make 2 smaller loaves, each loaf will be smaller than a standard-sized loaf. Baking them in a 8.5 x 4.5 inch, OR 8 x 4 inch loaf pan is better for this purpose.Proofing times
The proofing time will vary greatly depending on the environment. In summer, the bread will proof much faster than during winter. So keep an eye on the dough to make sure it doesn’t overproof. To check if the bread is perfectly proofed, follow the indentation test described in the post to confirm.How to minimize kneading time
Once the dough ingredients are mixed, and the flour is well hydrated, cover the bowl with plastic wrap and leave it on your counter for about 30 minutes. The water in the dough should passively develop gluten in the flour. This will extend the time to make the dough, however it should lower the amount of time it takes to knead the dough (by hand or by mixer).Oven temperatures
If your oven runs hot, then I recommend baking the loaves at 350 F / 180 C. If the crust of your bread burns, then your bread dough must be baked at a lower temperature.Ingredients adjustments to make 2 standard-sized loaves
If you’d like to make 2 standard-sized loaves, here are the ingredient adjustments to follow. Proofed yeast ingredients 9 g active dry yeast, 2 ½ tsp 240 mL lukewarm water, 1 cup 15 mL honey (or sugar or maple syrup), 1 tbsp Bread loaf Proofed yeast mixture (ingredients listed above) 700 g AP flour, 5 ⅔ cups, spoon and leveled 220 mL lukewarm water, scant 1 cup 2 tsp sea salt 55 mL honey (or sugar or maple syrup), add up to 4 tbsp / 60 mL for a more pronounced honey flavor) ½ tsp citric acid or 1 tbsp white vinegar (optional) 45 g unsalted butter melted (or vegetable oil), 3 ½ tbspNutrition Information:
“This website provides approximate nutrition information for convenience and as a courtesy only. Nutrition data is gathered primarily from the USDA Food Composition Database, whenever available, or otherwise other online calculators.”


Leave a Reply