About
My Cookbooks
Work With Me
Contact
  • Facebook
  • Instagram
  • Pinterest
  • X
  • YouTube
The Flavor Bender

Master the Science of Delicious

  • Recipe Index
    • All Recipes
    • Desserts
      • Cakes & Cupcakes
      • Candy & Bite Sizes
      • Chocolate
      • Cookies, Brownies & Bars
      • Frozen Desserts
      • Fruit Desserts
      • Puddings & Custards
      • Dessert drinks
      • No Bake
      • Pastries & Breads
      • Sweet Syrups & Spreads
      • Tarts & Pies
      • Cheesecakes
      • Healthy sweets
    • Breakfasts
      • Tarts, Quiches, & Pies
      • Waffles, Pancakes & Crepes
      • Quick Breads, Scones & Muffins
      • Breakfast Sandwiches
      • Breakfast Pastries
      • Eggs
      • Breakfast & Brunch Drinks
      • Make Ahead Breakfasts
      • Healthy Breakfasts
      • Coffee and Tea drinks
      • Breakfast Smoothies & Juices
      • Breakfast Sides
      • Casseroles
      • Jams & Spreads
    • Courses
      • Main Meals
        • Bread, Sandwiches & Burgers
        • Curries
        • Salads
        • Roasts & BBQ
        • Soups & Stews
        • Casseroles
      • Bread
      • Lunch
      • Beverages
      • Appetizers & Tapas
      • Sides
      • Dips & Condiments
      • Tea Time & Snacks
      • Desserts
      • Meal Prep
      • Cocktails
      • Pet Friendly Recipes
    • Cuisines
      • American
      • European
      • Australasian
      • Sri Lankan
      • East Asian
      • Mexican
      • Middle Eastern
      • South Asian
    • Sri Lankan
      • Main Meals
      • Drinks
      • Desserts
      • Breakfasts
      • Snacks
    • Skill Level
      • Easy
        • Easy Desserts
        • Easy Cooking
        • Easy Breads
        • Easy Breakfasts
        • Easy Dinners
      • Intermediate
        • Intermediate Desserts
        • Intermediate Cooking
        • Intermediate Breads
        • Intermediate Breakfasts
        • Intermediate Dinners
      • Advanced
        • Advanced Desserts
        • Advanced Cooking
    • Recipes by Season
      • Christmas
      • Fall & Winter
      • Halloween
      • Spring & Summer
      • Thanksgiving
      • Valentines Day
    • Recipes by Diet
      • Dairy Free
      • Eggless
      • Gluten Free
      • Paleo
      • Vegan & Vegetarian
    • Recipe Basics
      • Baking Basics
      • Cooking Basics
      • Baking & Cooking 101
  • New? Start Here
  • Measurement Conversions
  • How-To Posts
  • About
  • My Cookbooks
  • Work With Me
  • Contact
The Flavor Bender   ›   Recipes   ›   Delicious Desserts   ›   No Bake Desserts   ›   Mars Bar Slice (No Bake Treats)

Mars Bar Slice (No Bake Treats)

Author:

Dini Kodippili


Jump to Recipe


Posted: 12/23/2020
Total Time2 hours hrs 35 minutes mins
Quick and Easy Recipes
{{title}}
Mars bar slice social media

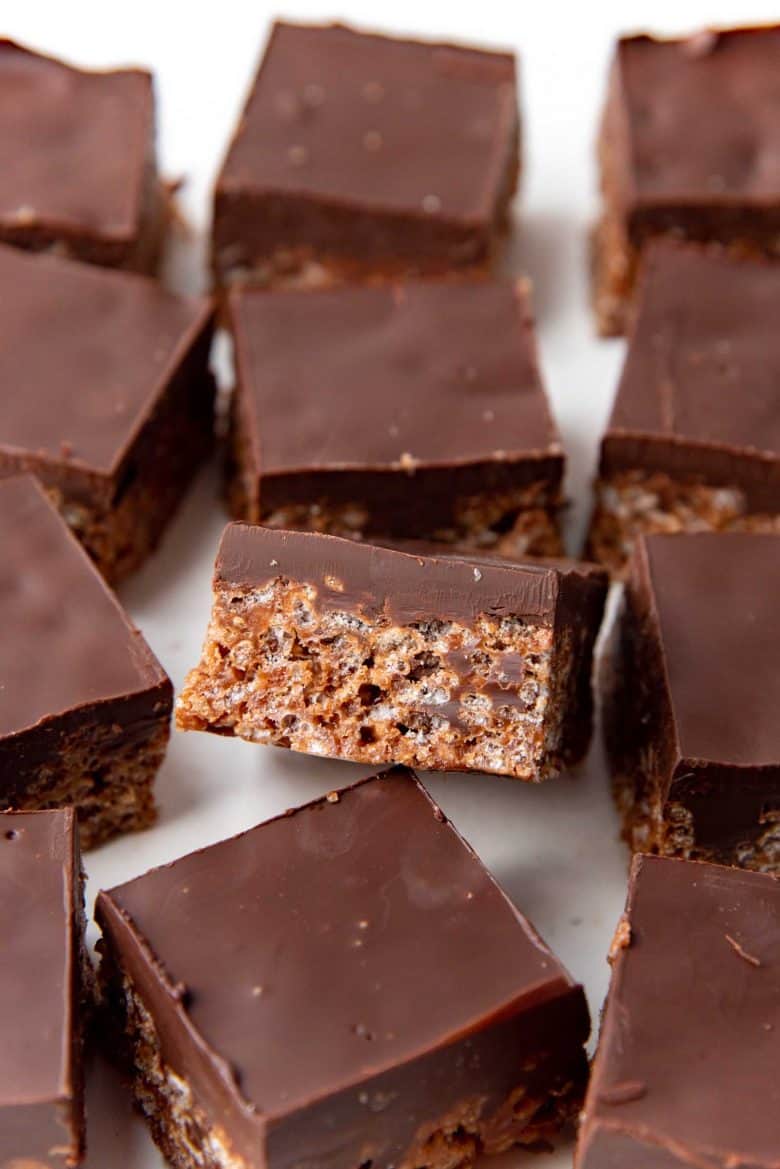
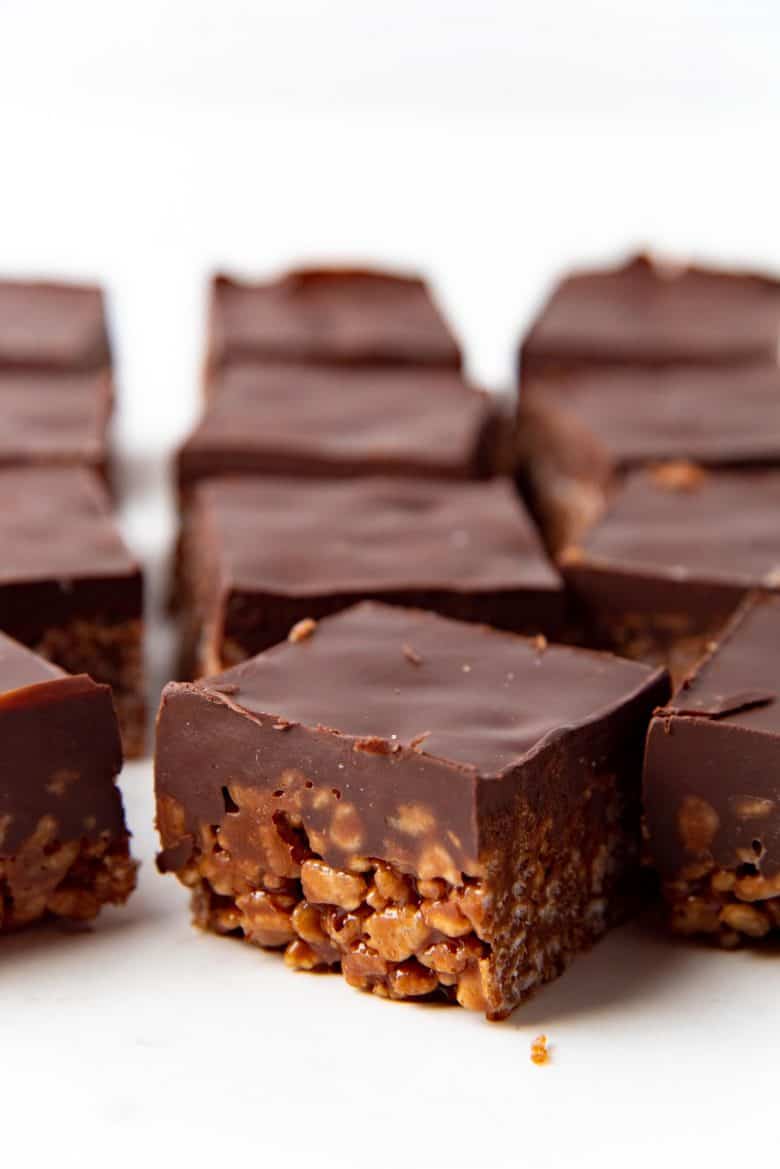
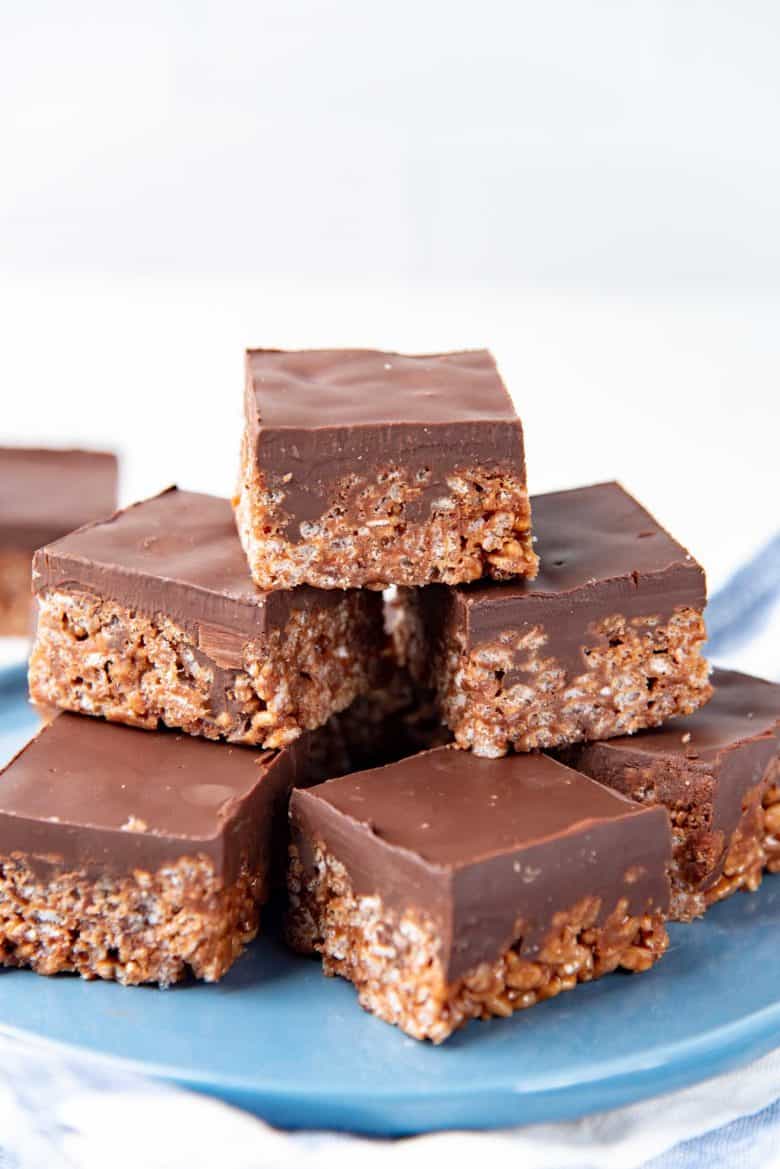
Mars bar slice was the rice krispie treat that I grew up with. Rice krispies mixed with melted Mars bars, for a gooey caramel base, and topped with a layer of chocolate!

Easy to make, no bake, crunchy, and decadent Mars bar rice krispie treats

Close up of the rice krispie mars bar slices layers

I love making rice krispie treats for the holidays! Like these brown butter rice krispie treats and chocolate & peppermint rice krispie treats. They are always a crowd-favorite, especially with kids.

But imagine a rice krispies treat, but instead of marshmallows, you get melted caramel, nougat, and chocolate from Mars bars… These crunchy rice krispies treats are decadent and impressive. And they are super easy to make too.

Ingredients to make Mars bar slice

  • Mars bars (also known as Milky way in the US, but the Mars bar sold worldwide is much better in terms of flavor, in my opinion).
  • Butter
  • Rice krispies
  • Semisweet chocolate chips – for the topping
  • Coconut oil or butter – for the topping

The topping is optional, but these no bake slices just aren’t complete without a generous layer of chocolate on top!

No bake Mars bar slices, after being cut

Making the Mars bar slice recipe

Super easy. I made these often as a kid, so it even feels ridiculous to call this a recipe. But here goes…

Line an 8 or 9 inch square pan with parchment paper and set aside.

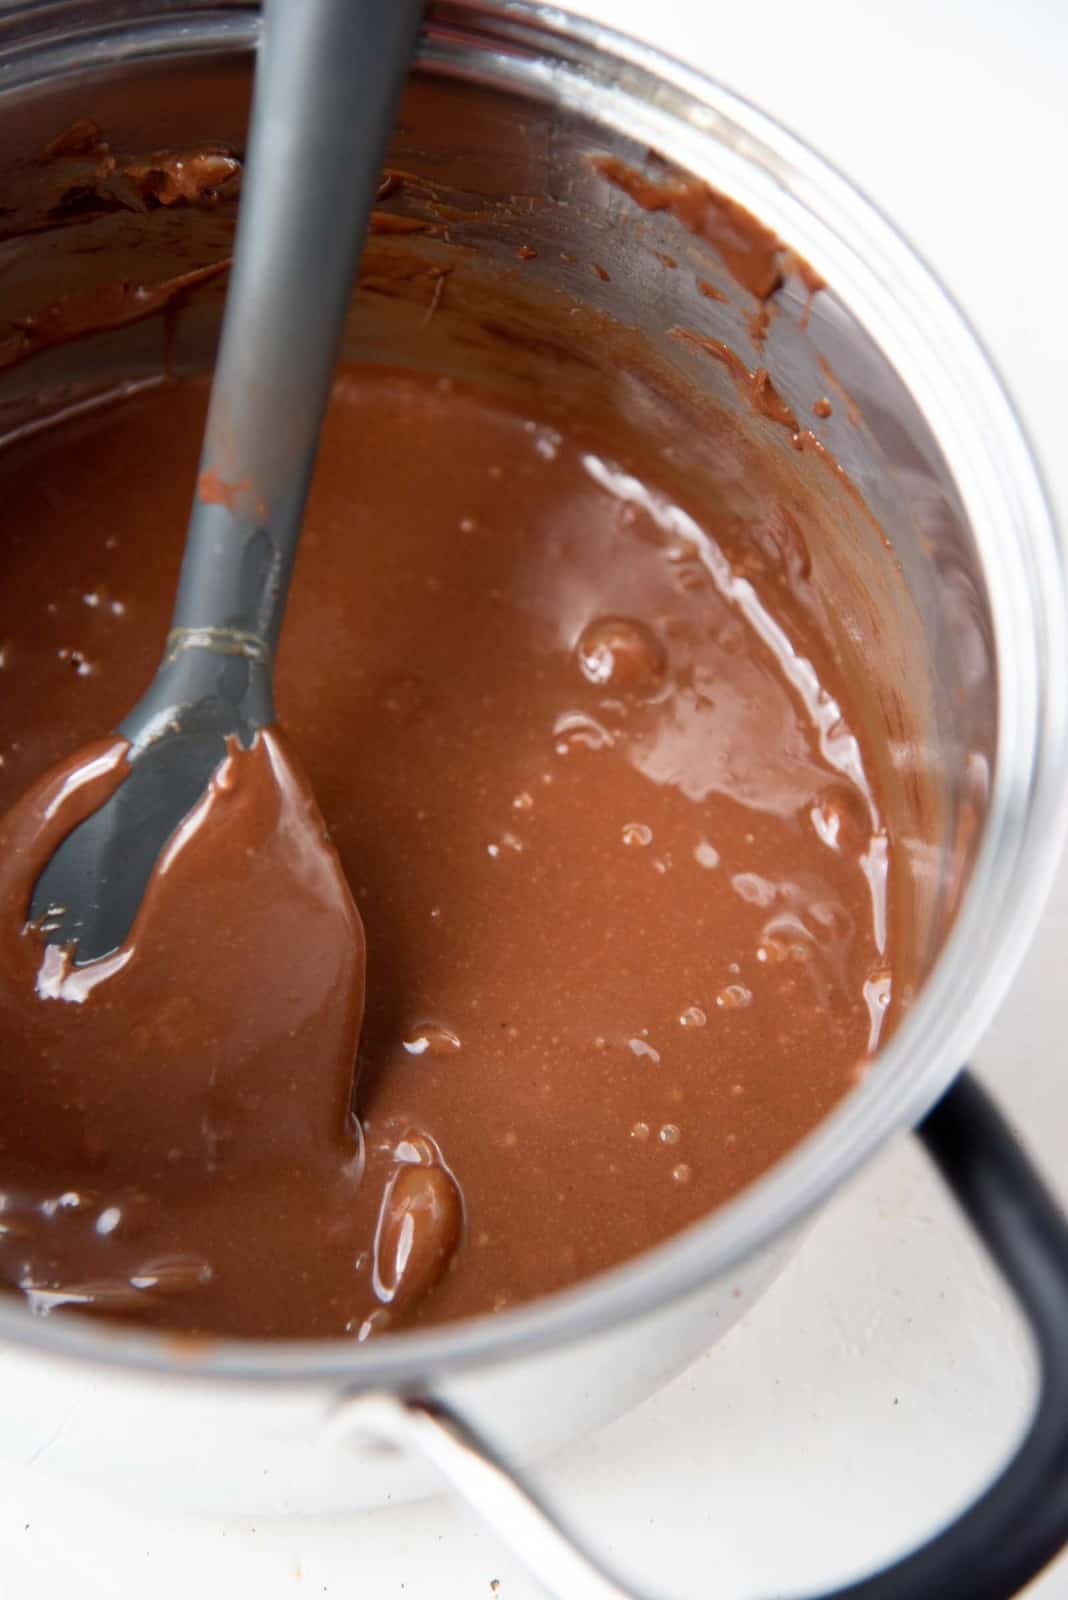
Cut the mars bars and place them in a pot, along with the butter. I also like to add some salt, which helps balance the sweetness. Heat the pot over medium / medium high heat and stir to melt the ingredients. Stir the mix frequently to prevent the melted chocolate mix from burning.

When the chocolate bars have melted and the mix is smooth, add all the rice krispies and quickly mix it in until it’s all evenly coated.

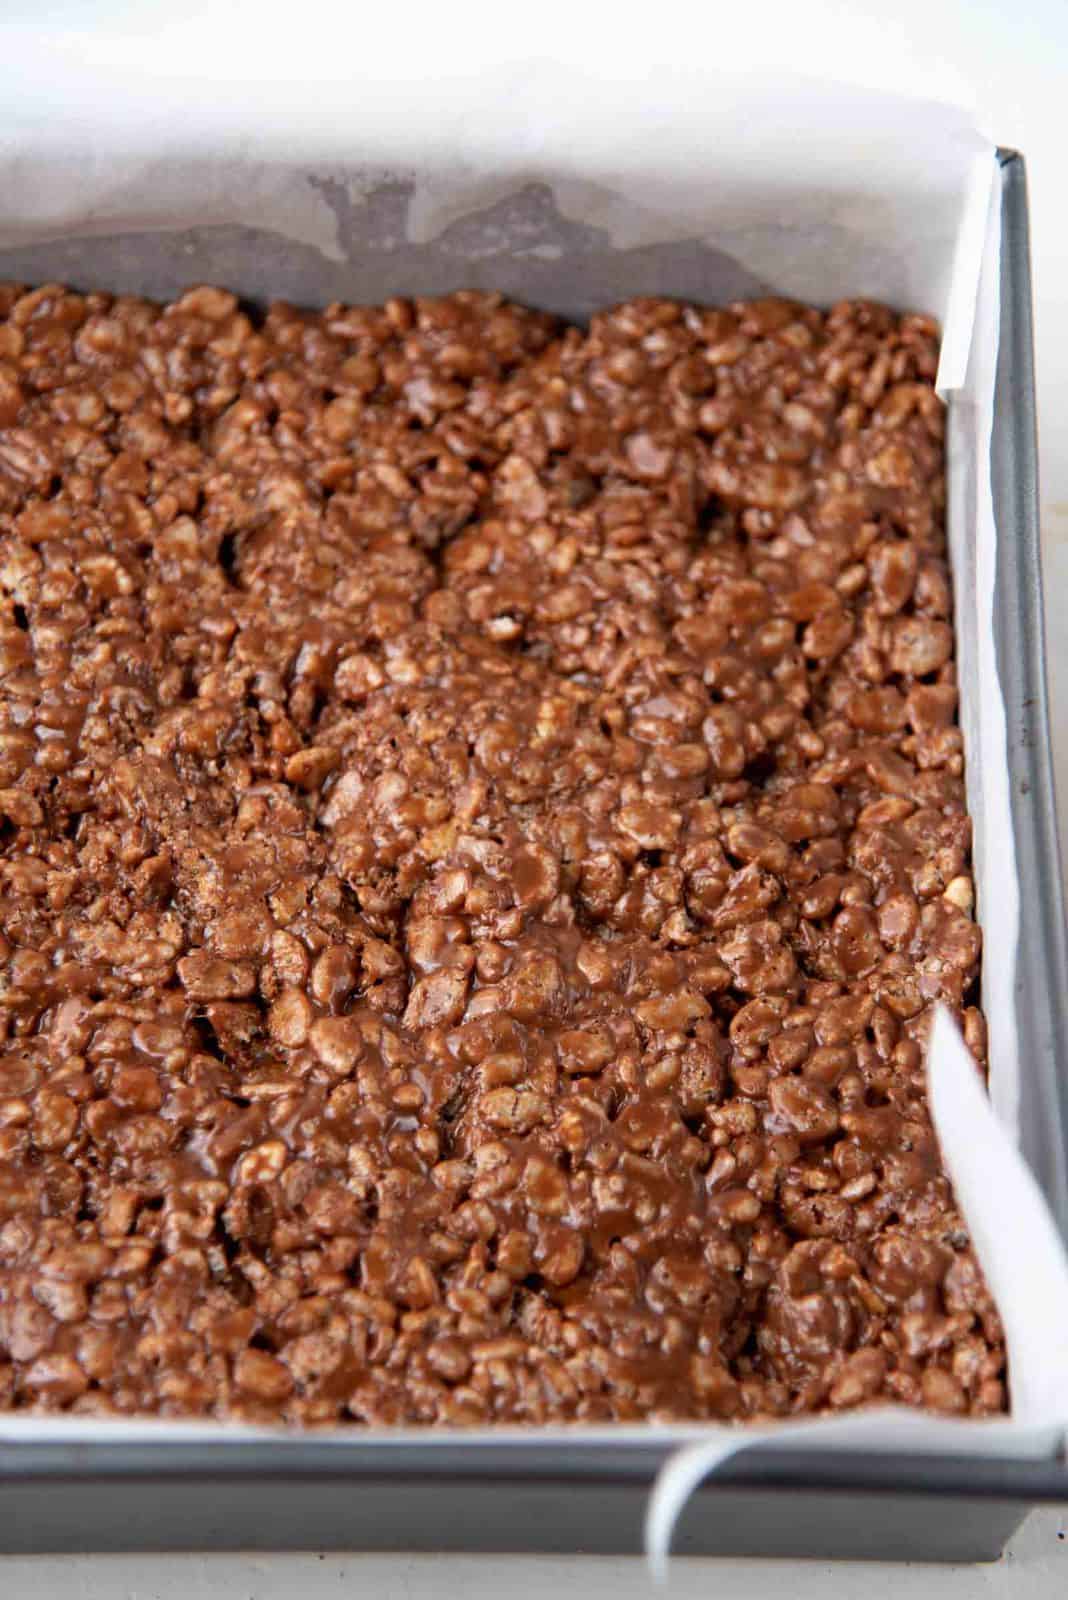
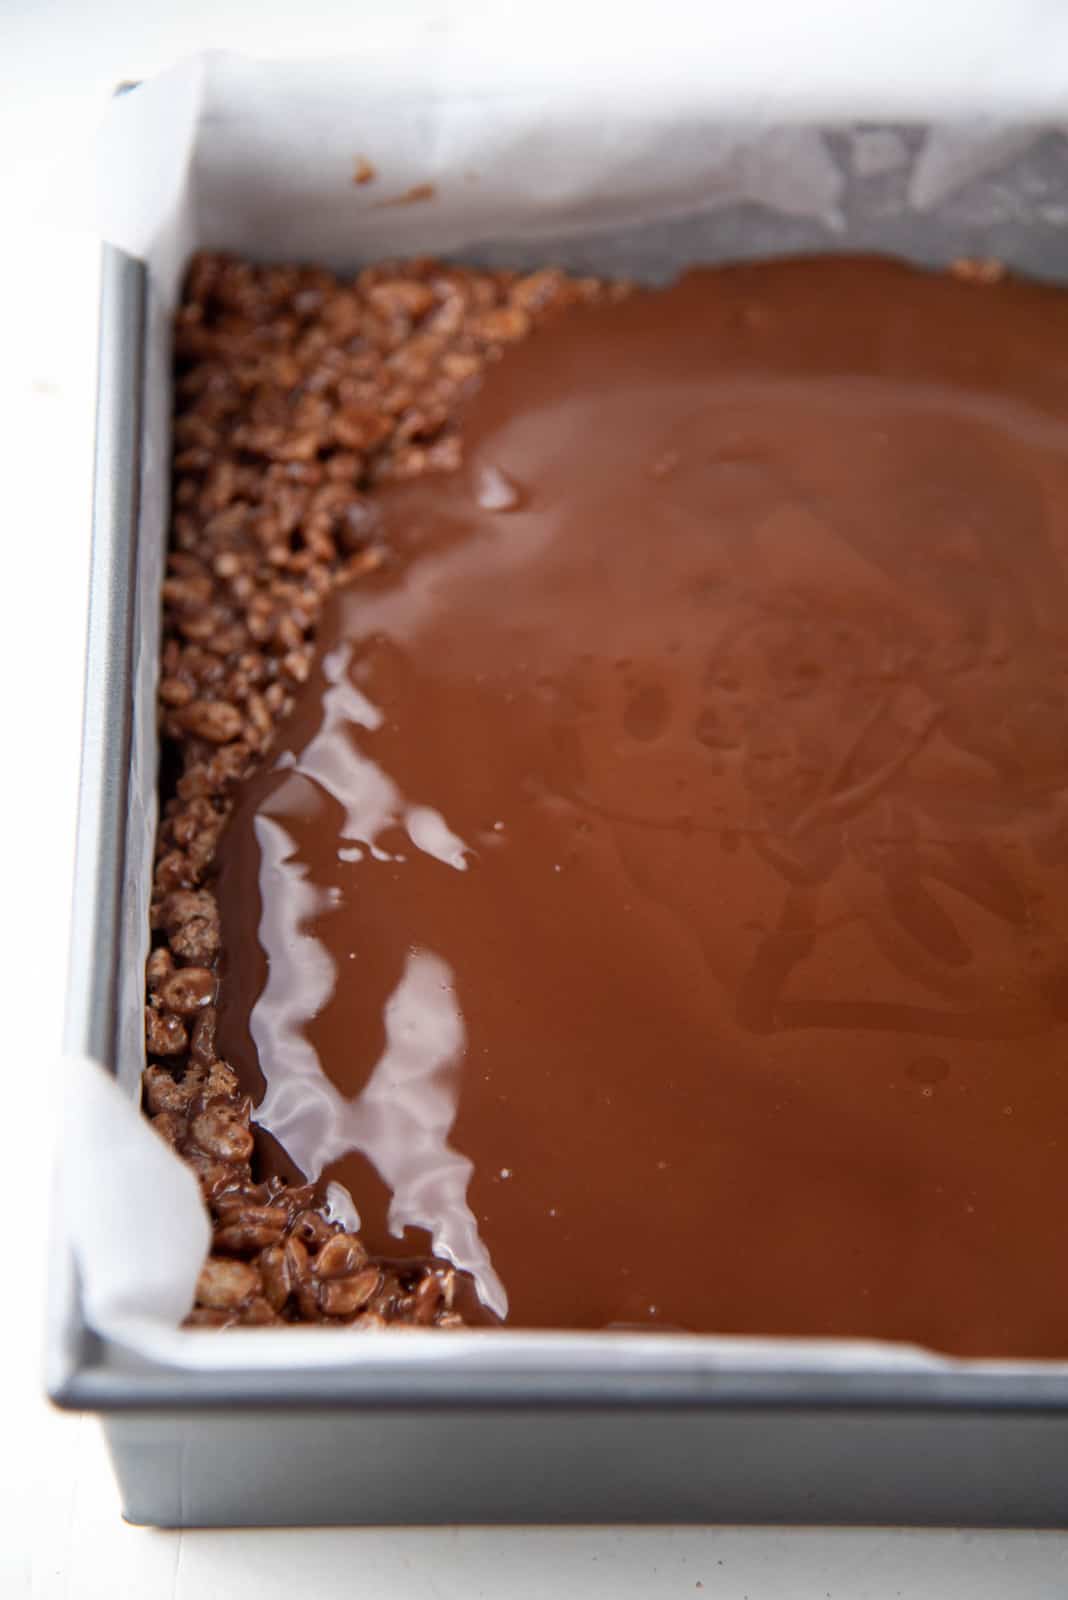
While still warm, scrape the mixture into the prepared pan. Press it into the pan to form an even layer. This is the bottom layer of your mars bar slice.

Mars bar pieces in a pot with butter
The melted mars bars melted in the pot
Mixing the rice krispies with the chocolate mix
The Mars bar rice krispie layers pressed into the baking pan

To make the chocolate layer
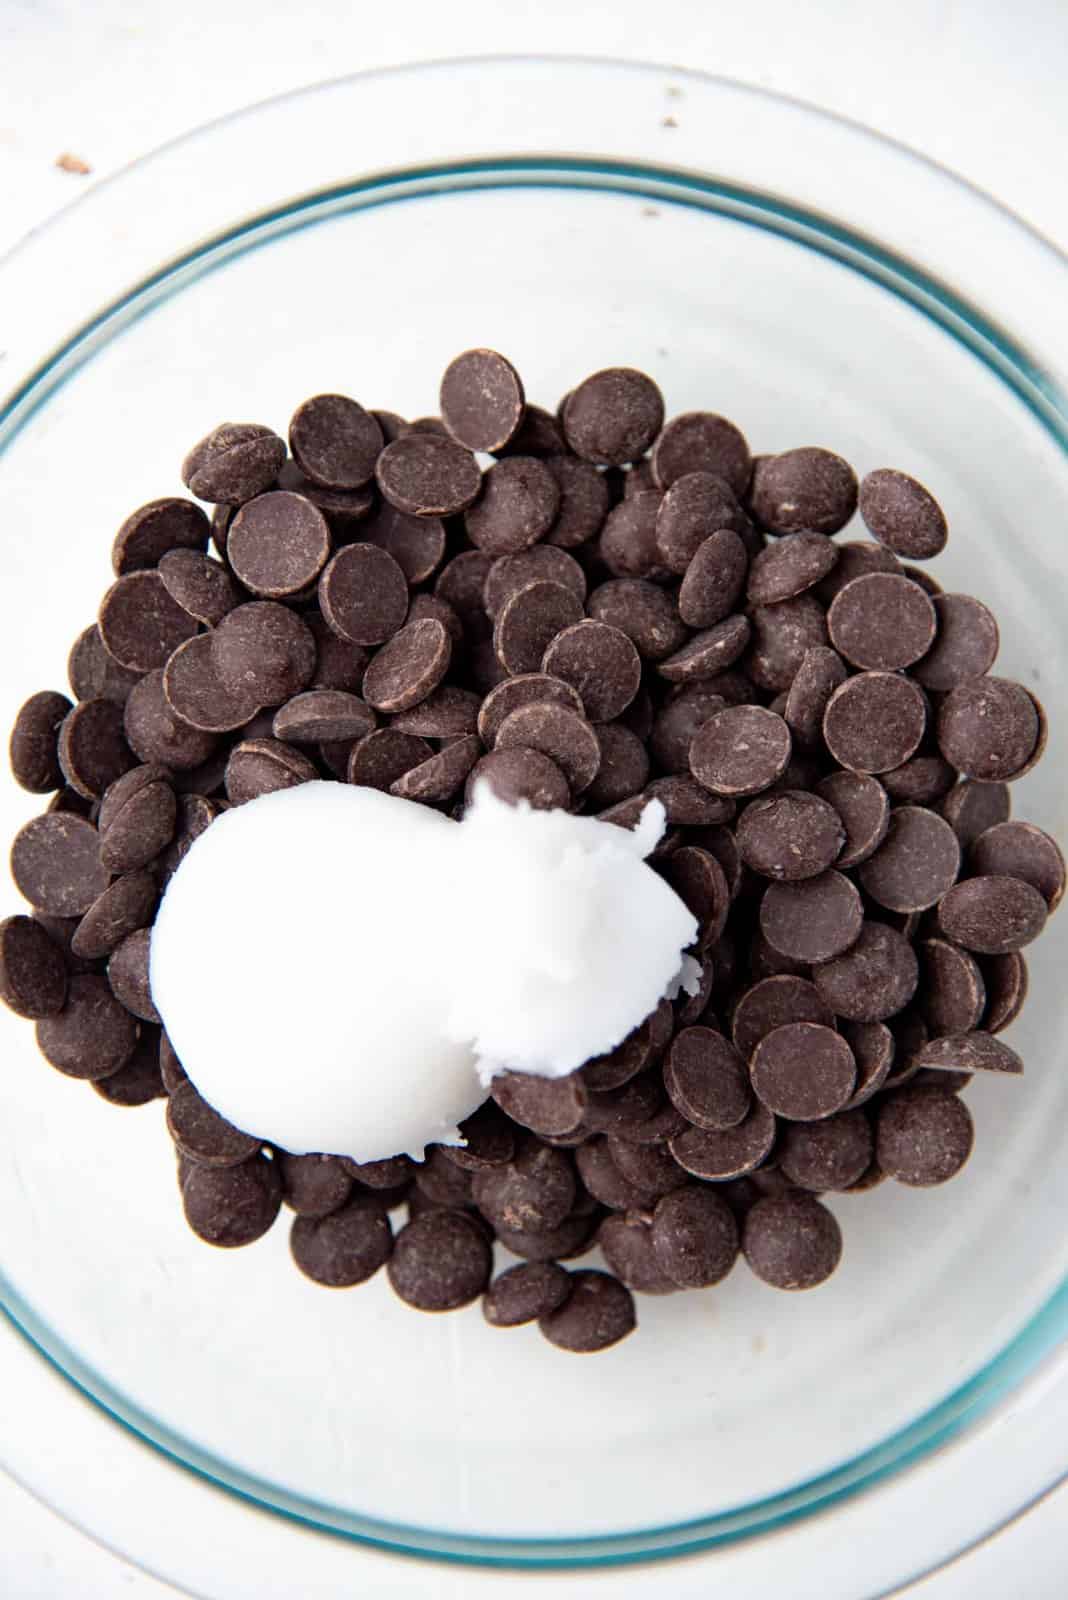
 – melt the chocolate and coconut oil (or butter) until smooth. You can do this in the microwave in small bursts, or melt the chocolate over a double boiler.

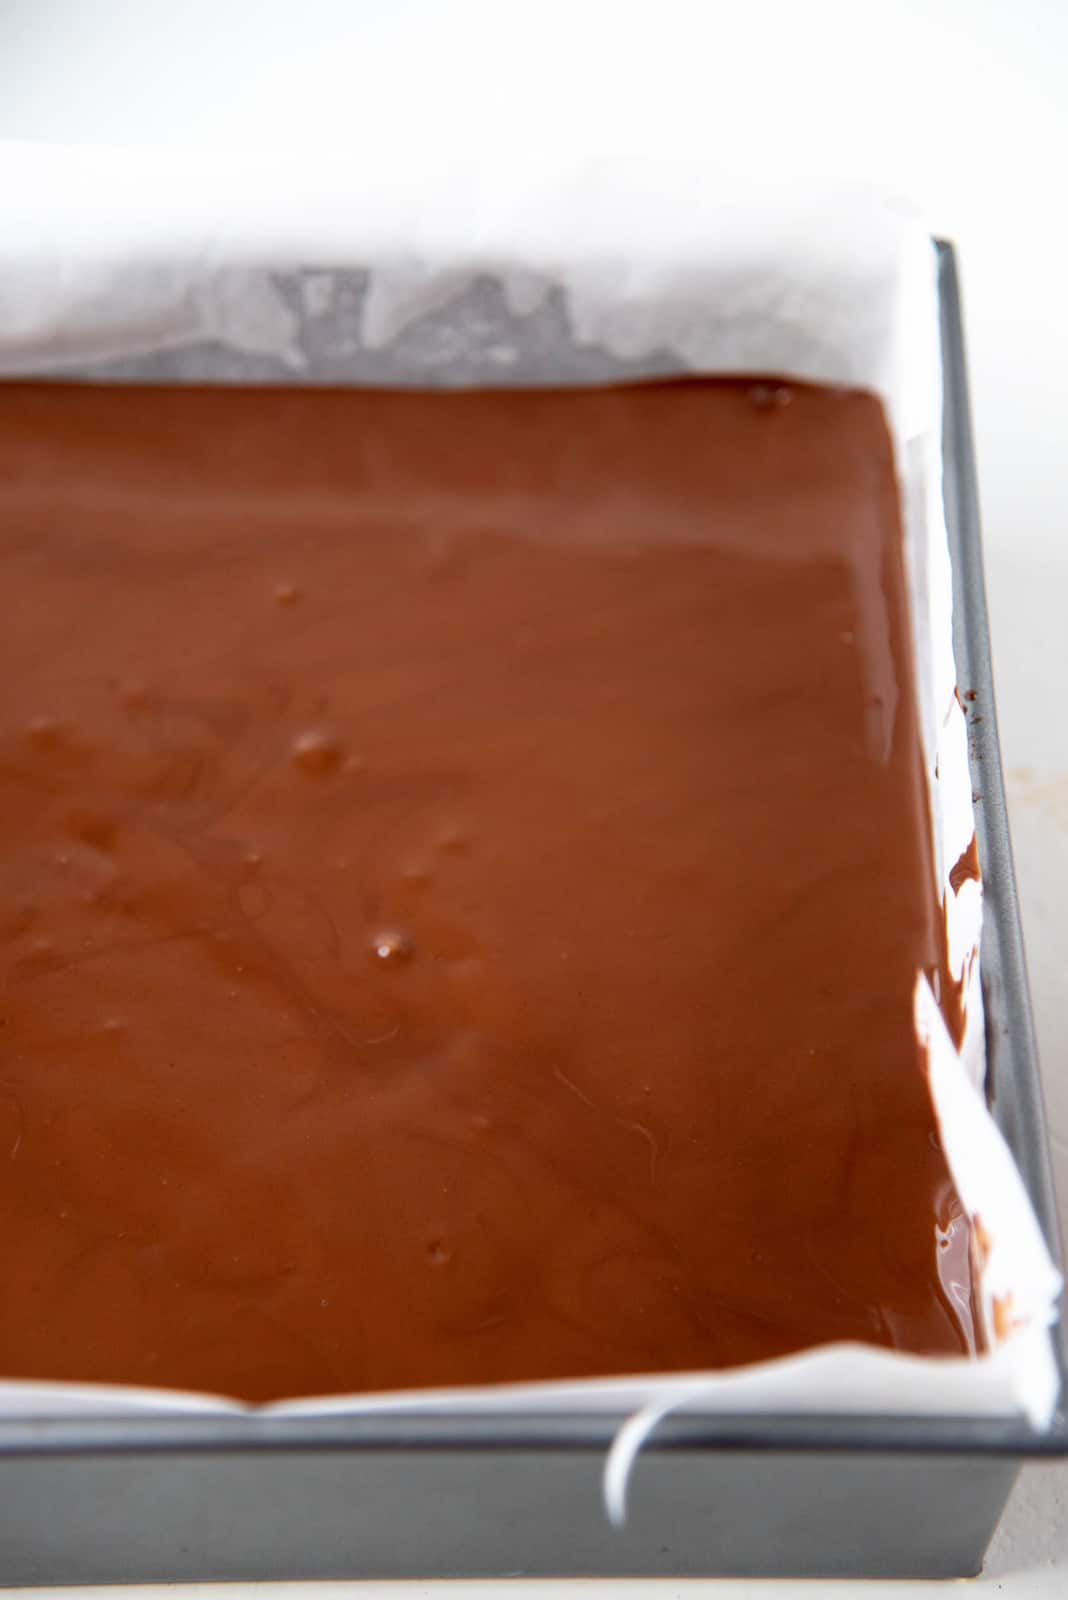
Pour the smooth chocolate mix over the surface of the mars bar rice krispie treat layer, and smooth it out with an offset spatula.

Refrigerate until the mars bar slices have cooled and are set. Once set, they can be removed from the pan and cut into squares.

Chocolate and coconut oil for the chocolate layer on top
Melted chocolate layer on top
The chocolate layer spread evenly on the mars bar rice krispie layer
The Mars bar slice slab after chilling

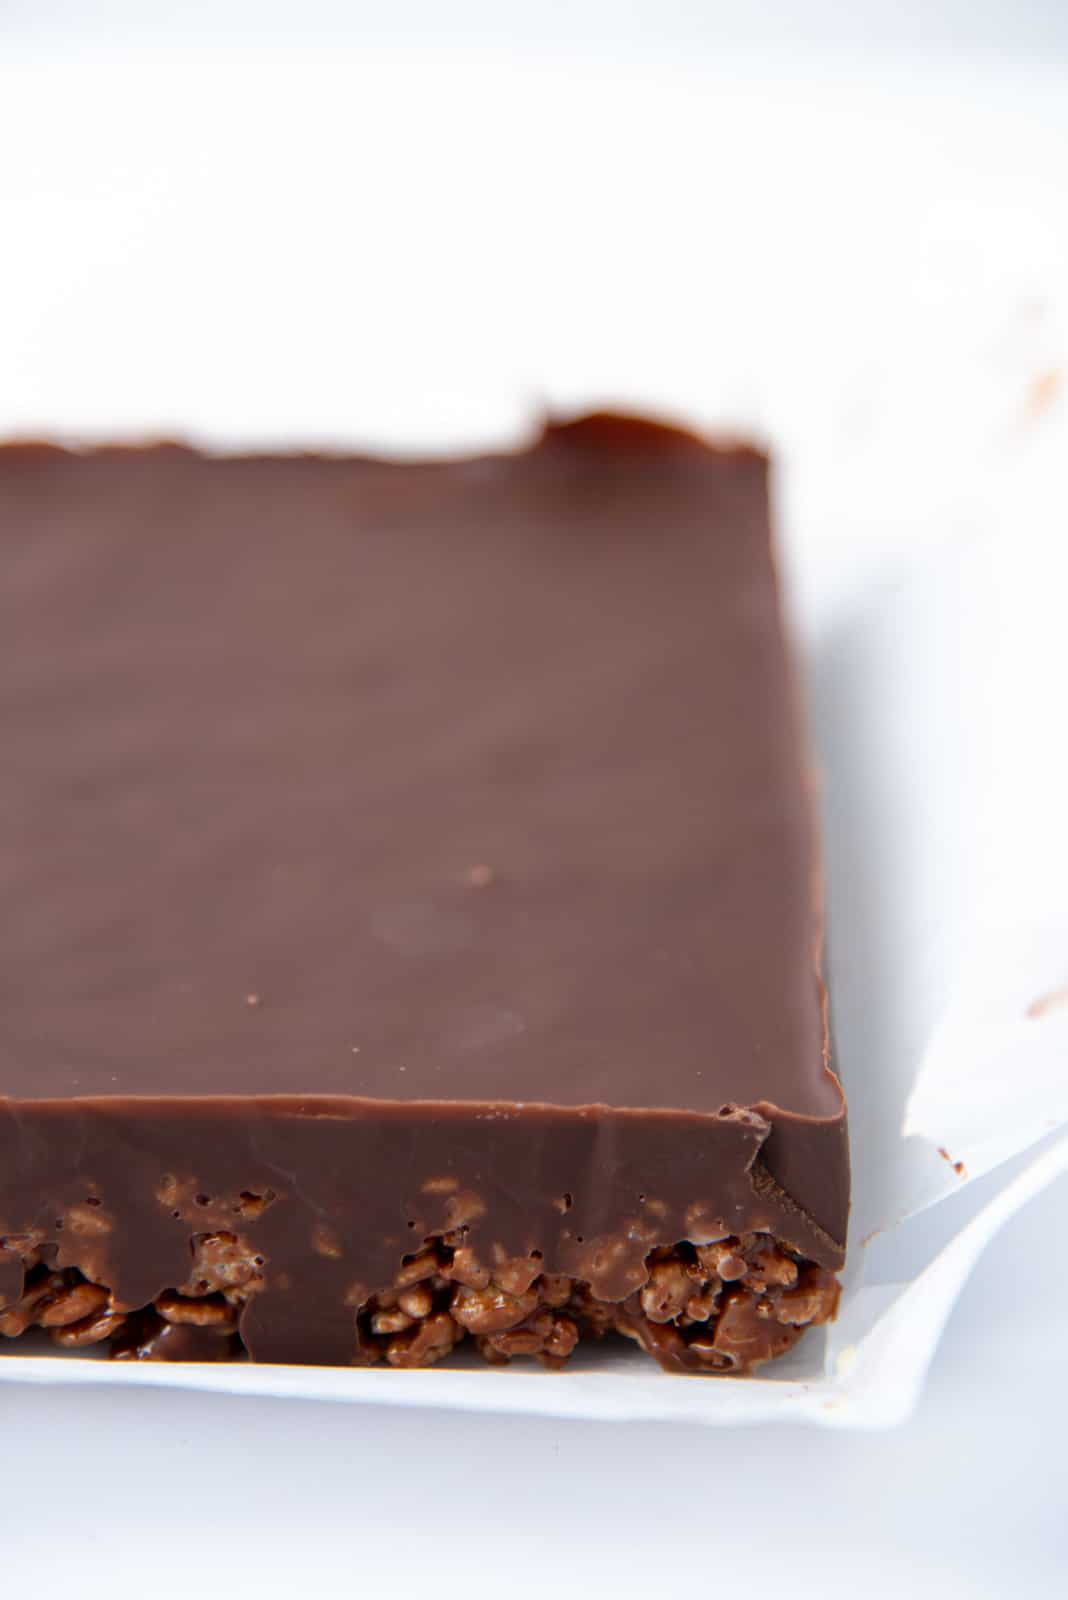
Tips for cutting Mars bar slices

  • Let the bars come to room temperature, so that they are easier to cut through.
  • Use a sharp, clean, warm knife to cut the slab into squares. The warm blade helps cut through the chocolate layer.
  • Wipe the blade clean between cuts.

Storing the slices for later

I’ve kept these mars bar slices in an air-tight container and in the fridge for over two weeks. They keep really well.

But do let them rest at room temperature for a bit before eating. This lets the Mars bar rice krispie layer soften a little.

You could also store these in the freezer for up to 6 months. Then let them fully thaw out before eating.

A corner piece of the mars bar squares

Final recipe notes

These no bake rice krispie bars are a nostalgic shout out to my childhood! I loved making Mars bar slices because they were addictively delicious, and so easy to make.

These are great for gift giving during the holidays too! They make the perfect addition to treat boxes during Christmas or special occasions.

The rice krispie mars bar treats stacks on a blue pla

Recipe

Mars bar slice social media
5 from 2 votes

Mars Bar Slice (Mars Rice Krispie Treats)

Author: Dini Kodippili
Yield: 16 pieces (about 2 x 2 inches each)
Cuisine: Australasian, Australia, New Zealand
Mars bar slice social media

 Difficulty: 

Easy
This Mars bar slice is made with rice krispies mixed with melted Mars bars, and with a chocolate layer on top. Caramel, nougat, chocolate, and rice krispies! Easy recipe & no bake too. Kid friendly (with supervision!), and great as edible gifts.
EASY – Very easy recipe. I made this often as a little kid (with adult supervision of course).
US based cup, teaspoon, tablespoon measurements. Common Measurement Conversions. Weight measurements are recommended for accurate results.

US based cup, teaspoon, tablespoon measurements. Weight‌ ‌measurements‌ ‌are‌ ‌recommended‌ ‌for‌ ‌accurate‌ ‌results whenever available.

Common Measurement Conversions
Prep: 15 minutes mins
Cook: 20 minutes mins
Chilling time: 2 hours hrs
Total Time: 2 hours hrs 35 minutes mins
Print Recipe Rate SaveSaved!
Makes: 16 servings

Ingredients:
 

Mars bar rice krispie layer
  • 260 g Mars bars 5 x 52 g bars
  • 115 g butter ½ cup / 1 stick (salted or unsalted)
  • ¼ tsp sea salt Only if using unsalted butter
  • 110 g rice krispies 3 ½ cups
Chocolate coating
  • 300 g semisweet chocolate
  • 15 g coconut oil about 2 tbsp
  • ¼ tsp sea salt

Instructions:
 

Mars bar rice krispie layer
  • Line an 8 or 9 inch square pan with parchment paper.
  • Cut the mars bars into pieces (1 – 2 inch pieces are fine), and place them in a large saucepan (enough to fit 3 ½ cups of rice krispies).
    260 g Mars bars
  • Add the butter and salt (only if using unsalted butter).
    115 g butter, ¼ tsp sea salt
  • Heat the candy bars, butter, and salt mix over medium heat while stirring until everything is dissolved and the mix is smooth. Make sure the mix doesn't burn at the bottom of the pot.
  • Once the mixture is melted and smooth, turn off the heat, and add the rice krispies.
    110 g rice krispies
  • Quickly mix in the rice krispies until it’s all evenly coated.
  • Remove the pot from the stove, and scrape the rice krispie mix into the prepared pan. Using a spatula, press the mixture into the pan to get an even layer.
  • Set aside until you prepare the chocolate layer.
Chocolate layer
  • Place the chocolate, salt, and coconut oil in a microwave-safe bowl. Heat in the microwave in 20 – 30 second bursts, while stirring in between, until the chocolate is about 80% melted.
    300 g semisweet chocolate, 15 g coconut oil, ¼ tsp sea salt
  • Continue to stir the mix until all the chocolate is melted. The chocolate mix is now ready.
Assembly and cutting the Mars bar slice
  • Pour the chocolate topping over the rice krispie layer. Use an offset spatula to evenly spread the chocolate layer.
  • Let the two layers set. You can transfer this to the fridge to let it chill faster.
  • When the mars bar slice is set, remove it from the pan. If the slice is very cold, let it soften to room temperature a little, as it will be easier to cut then.
  • Using a sharp knife, cut into portions. I prefer to cut the slice into 16 portions (about 2 x 2 inches per piece). But feel free to cut them into any size you like.
Storage
  • Store these slices in an airtight container. Place parchment paper or wax paper between layers to prevent sticking.
  • These will keep in the fridge for at least 2 weeks, and up to 6 months in the freezer.
  • Allow the slices to come to room temperature before eating, for the best flavor and texture.

Recipe Notes

Storage

Store them in an air tight container in the fridge for upto 2 weeks. However, let them rest at room temeprature before eating. This helps to soften the rice krispie layer. 
They can also be stored in the freezer for up to 6 months. But let them fully thaw out before eating.

Nutrition Information:

Serving: 1slice Calories: 268kcal (13%) Carbohydrates: 27g (9%) Protein: 2g (4%) Fat: 17g (26%) Saturated Fat: 11g (69%) Cholesterol: 18mg (6%) Sodium: 189mg (8%) Potassium: 135mg (4%) Fiber: 2g (8%) Sugar: 17g (19%) Vitamin A: 664IU (13%) Vitamin C: 4mg (5%) Calcium: 32mg (3%) Iron: 3mg (17%)

“This website provides approximate nutrition information for convenience and as a courtesy only. Nutrition data is gathered primarily from the USDA Food Composition Database, whenever available, or otherwise other online calculators.”

Tag me on Instagram!I love seeing what you’ve made! Tag me on Instagram at @TheFlavorBender or leave me a comment & rating below.
Dini Kodippili Avatar

About

Dini Kodippili

Dini Kodippili is a professional food writer, recipe developer, food photographer, cookbook author, and baker. Dini has been featured on HuffPost, Cosmopolitan, Forbes, Delish, Food & Wine and more. Learn More

I love hearing from you! Submit your question or recipe review here.

5 from 2 votes (1 rating without comment)

Leave a Reply Cancel reply

Your email address will not be published. Required fields are marked *

Made this? Rate this recipe:


This site uses Akismet to reduce spam. Learn how your comment data is processed.

One response

  1. Hannah
    March 8, 2022

    5 stars
    I grew up with Mars bar slices too and these were so easy and delicious. Great recipe!

    Reply

Hey There!

Hi! I’m Dini, a third culture kid by upbringing and a food-geek by nature. I was born in Sri Lanka, grew up in New Zealand and lived in Australia, and then the US, before moving to and settling down in Canada. My food is a reflection of those amazing experiences!

Read More
Front cover of the Secret Layer Cakes cookbook by Dini Kodippili.

The Flavor Bender

Cookbook

Buy now on Amazon!

Recipe Basics

  • How To Make Perfect Choux Pastry

    How To Make Perfect Choux Pastry

  • Flaky All Butter Pie Crust Recipe

    Flaky All Butter Pie Crust Recipe

  • How To Make Homemade Marshmallows (Foolproof Guide)

    How To Make Homemade Marshmallows (Foolproof Guide)

  • The Best Homemade Bread (White Bread Recipe)

    The Best Homemade Bread (White Bread Recipe)

  • Homemade French Croissants (Step By Step Recipe)

    Homemade French Croissants (Step By Step Recipe)

  • The BEST Pavlova Recipe (Step by step recipe and video)

    The BEST Pavlova Recipe (Step by step recipe and video)

Featured On

Master the science of baking!

Get my FREE Printable Cake Pan Conversion Chart!

So you’ll know how to substitute cake pans of different shapes, sizes & volumes in a pinch!

A must have resource for all pro bakers, novice bakers, and aspiring bakers alike!

Download now!

Reader Faves

  • How to make the Best Instant Pot Short Ribs

    How to make the Best Instant Pot Short Ribs

  • Perfect Quick and Easy Rough Puff Pastry

    Perfect Quick and Easy Rough Puff Pastry

  • The Best Spicy Sweet Chili Sauce (Easy Recipe!)

    The Best Spicy Sweet Chili Sauce (Easy Recipe!)

  • The Best Homemade Bread (White Bread Recipe)

    The Best Homemade Bread (White Bread Recipe)

The Flavor Bender

I love baking, cooking, experimenting with flavors and ingredients, and passing on all my tips and tricks to you!

Read More

About

Meet Dini
My Book
Work With Me
Contact

Browse

Recipes
Measurement Guide
Baking How-To’s
Shop My Faves
Privacy
Disclosure
Terms

Branding by MRD

Theme by OC

Back to Top
  • Facebook
  • Instagram
  • Pinterest
  • X
  • YouTube
1024 shares

Rate This Recipe

Your vote:


A rating is required
A name is required
An email is required

Recipe Ratings without Comment

Something went wrong. Please try again.