


Let’s learn how to make the Perfect White Cake! This is an easy white cake recipe that gives a wonderfully moist crumb, and is perfect for birthday cakes, wedding cakes, or any celebratory occasion!
The best white cake recipe you will make!
So my last post was a recipe for a gorgeous coconut cake (winter cake). The base for that cake is my classic white cake, for which I’m sharing the recipe here.
White cake is one of those cake recipes that I didn’t particularly like for a long time. I love how beautifully white it was, but the texture was something I wasn’t fond of – gummy and somehow dry at the same time. It didn’t taste as nice as a classic vanilla cake.
But after testing various ways of making white cakes, I finally have a recipe that I love and is foolproof and easy, and heaps better than a box mix. And now you can make it too!
What is a white cake?
A white cake is similar to a yellow cake, but very white in color. This is because a white cake has no egg yolks and only uses egg whites. Yolks lend a yellow color and a richer taste to yellow cake.
Some white cakes call for the egg whites to be whisked into a meringue, creating a sponge-like cake. But this recipe does not use a sponge method to create white cakes and uses the classic creaming method just like a yellow cake.
A white cake is also made as a layer cake, just like a yellow cake or chocolate cake. It is traditionally filled with a white frosting, like vanilla buttercream (aka – American vanilla buttercream frosting), or vanilla Swiss meringue buttercream.
How to make sure your cake stays white
With white cakes, there’s usually a battle between maintaining great flavor and keeping the cake white, as explained below. Flavor ALWAYS wins out for me, but you can choose which way is more preferable to you.
To help keep the cake white, make sure you cream the butter REALLY well. Beating the butter will make the mixture fluffier and lighter in color which will minimize the yellowing of the cake batter.
Good vanilla extract or clear vanilla extract?
This is where the flavor vs appearance comes into play. If you add good quality vanilla extract, the white cake batter will lose a little of the classic, pristine, snowy white color, and make it an off white color. However the taste will be fantastic.
If you use clear vanilla extract, you can preserve the white color. However, you will compromise on flavor with clear vanilla extract. It is an imitation flavoring, and doesn’t really have actual vanilla.
Another flavoring option to use is almond extract or a different clear flavoring extract like lemon. This will also keep the white cake white, without using vanilla extract.
If you do use a natural vanilla flavoring, and want to remove the off white color, you can do so with a little trick (with some risk). Add the teeniest, tiniest amount of purple gel food coloring to the white cake batter to remove the yellow tinge. And when I mean teeny tiny, I really mean teeny tiny.
Simply dip a toothpick in your gel food coloring (about 3/4 of an inch deep), and then scrape off the excess all around the toothpick. Dip this toothpick in the cake batter and move it around. Whatever coloring that gets into the cake batter should be more than enough to neutralize the slight yellow tinge without coloring the batter purple.
However, please be aware that with this trick, there MIGHT be a chance of the cake having very small spots of coloring in the cake AFTER being baked. So that’s why I prefer most of the time to just keep the off white color rather than try and make it pristine white by using clear vanilla flavor extract.
How to make white cake
How to prep the cake pans
This needs to be done before you start making the cake. For this white cake, I like to wrap the cake pans with baking strips. Baking strips will act like a water bath, and help keep the sides of the cake white (no caramelization), and keep the cake top flat and even.
Line the bottom of two 8 inch cake pans with parchment paper and butter and flour the sides as well.
Wrap the cake pans with the soaked baking strips (if using), and set aside until needed.
Separate the egg whites
Egg whites are an important ingredient in any white cake recipe. So, the first step in making this cake is always to separate the egg whites from egg yolks.
You can do this while the eggs are cold to make it easier to separate. However, they can also be done at room temperature. Just allow the egg whites to come to room temperature so that they will incorporate into the batter better.
Another thing about white cake is that because we don’t need a meringue base, it’s absolutely OK if the egg whites get a little yolk in them. A small amount of egg yolk may add a shade of color to the cake, but it won’t affect the taste or texture of the final white cake.
Other wet ingredients
Get all the other ingredients weighed and ready to go. It’s preferable to have all the wet ingredients at room temperature (72 – 74°F), so that the white cake batter will mix better. The butter should be softened, but not melted, so that it will be easier to cream.
Which type of flour to use
With no egg yolks, we need to make sure the cake stays as soft as possible. Choosing the right flour will help keep the white cake moist and soft.
I prefer to use cake flour or pastry flour instead of all purpose flour. Cake flour has less gluten, which means it’s less likely to form a gummy texture.
You can use AP flour (plain flour), but you have to be extra careful to not over-mix the batter. I have tried both, and prefer using cake flour for this white cake recipe.
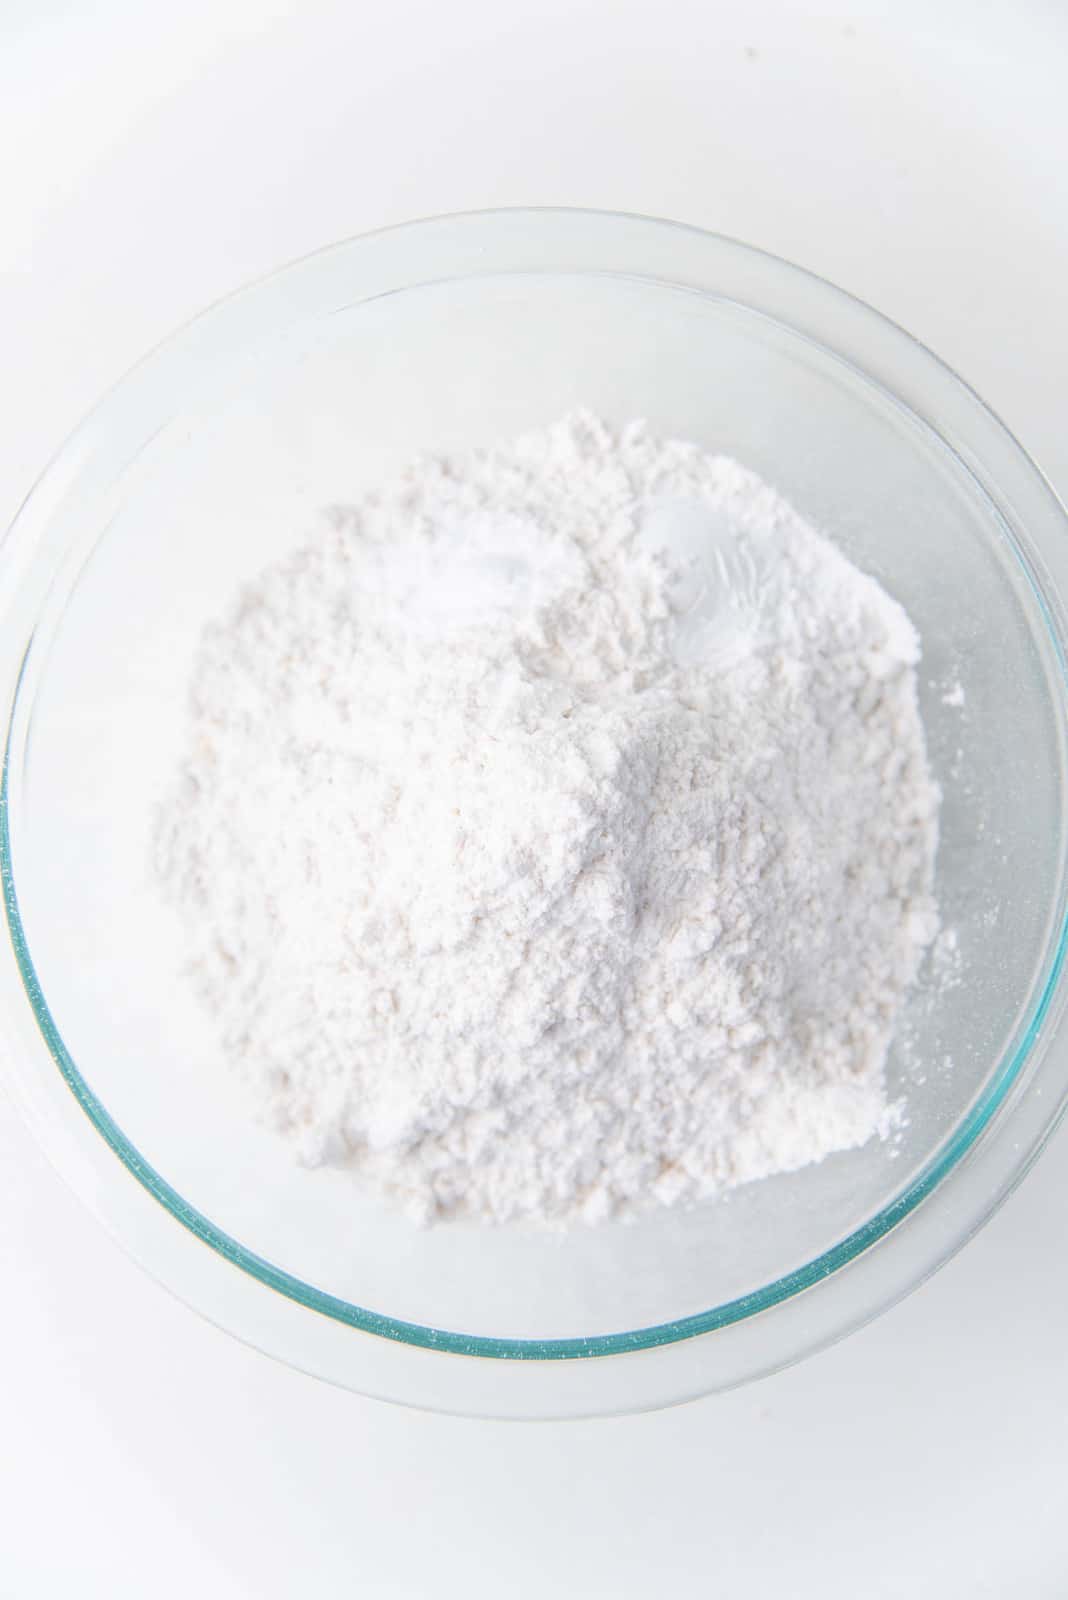
It’s also important to sift all the dry ingredients together (cake flour, baking powder and baking soda). This will reduce the chances of lumps in the batter, and prevent over-mixing while getting a smooth batter.
Making the batter
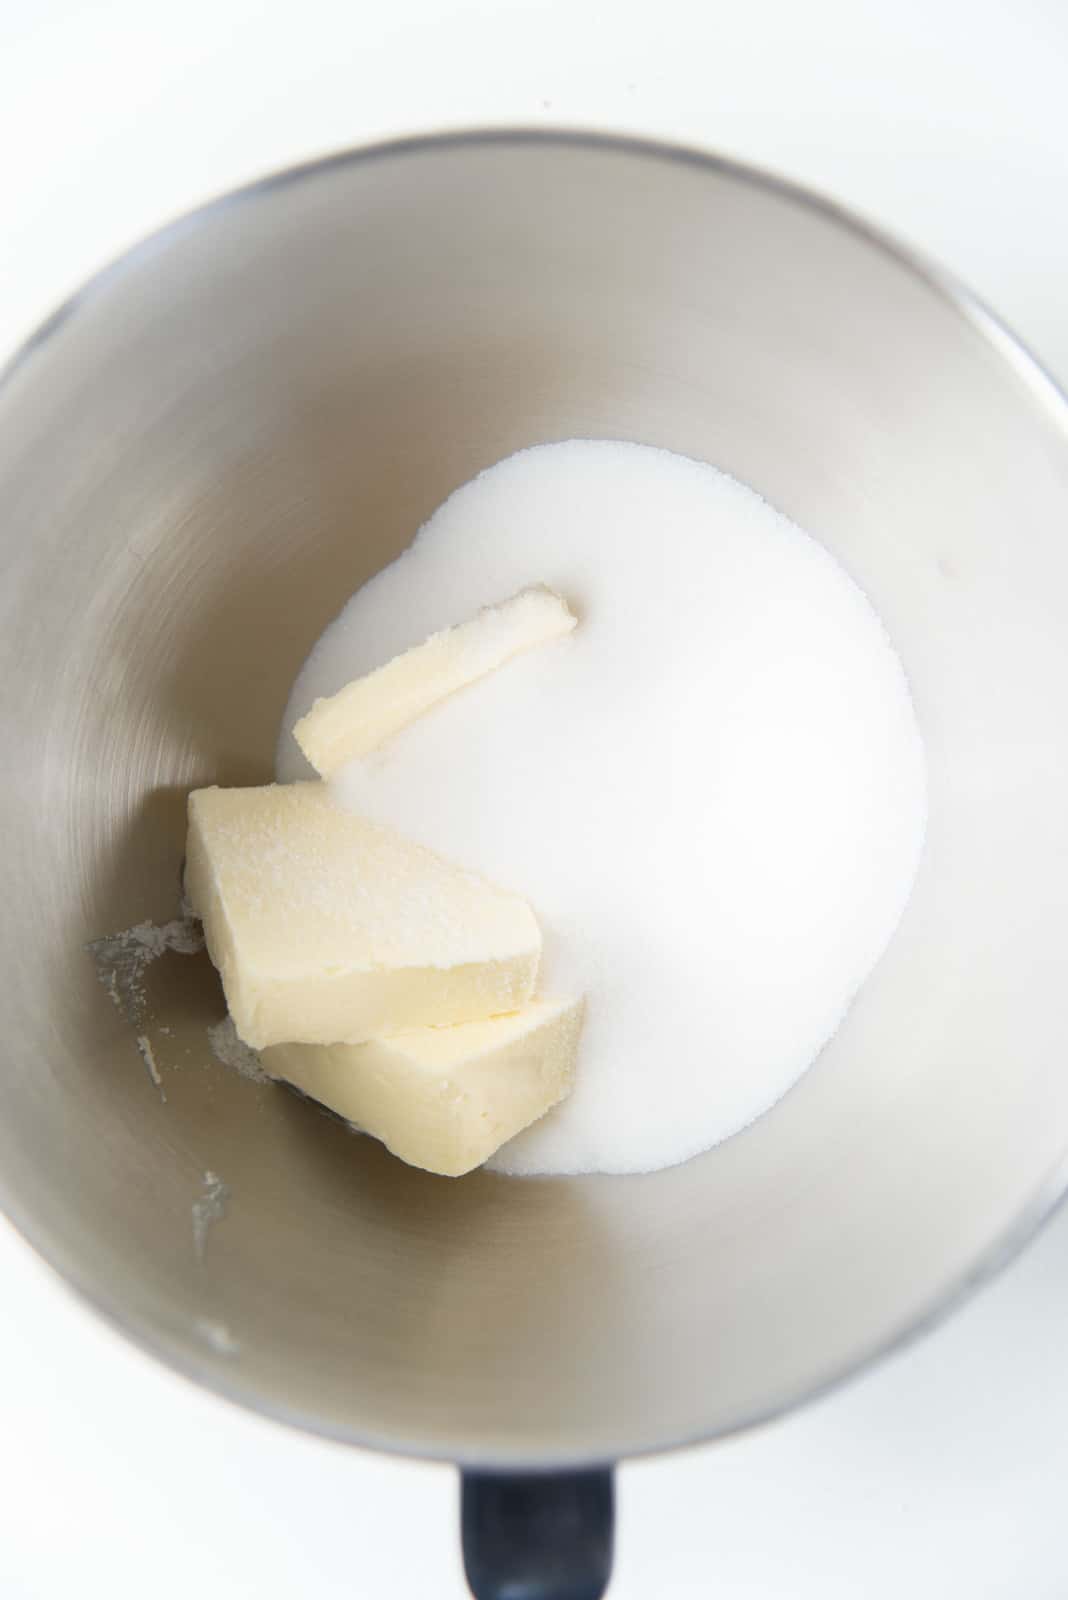
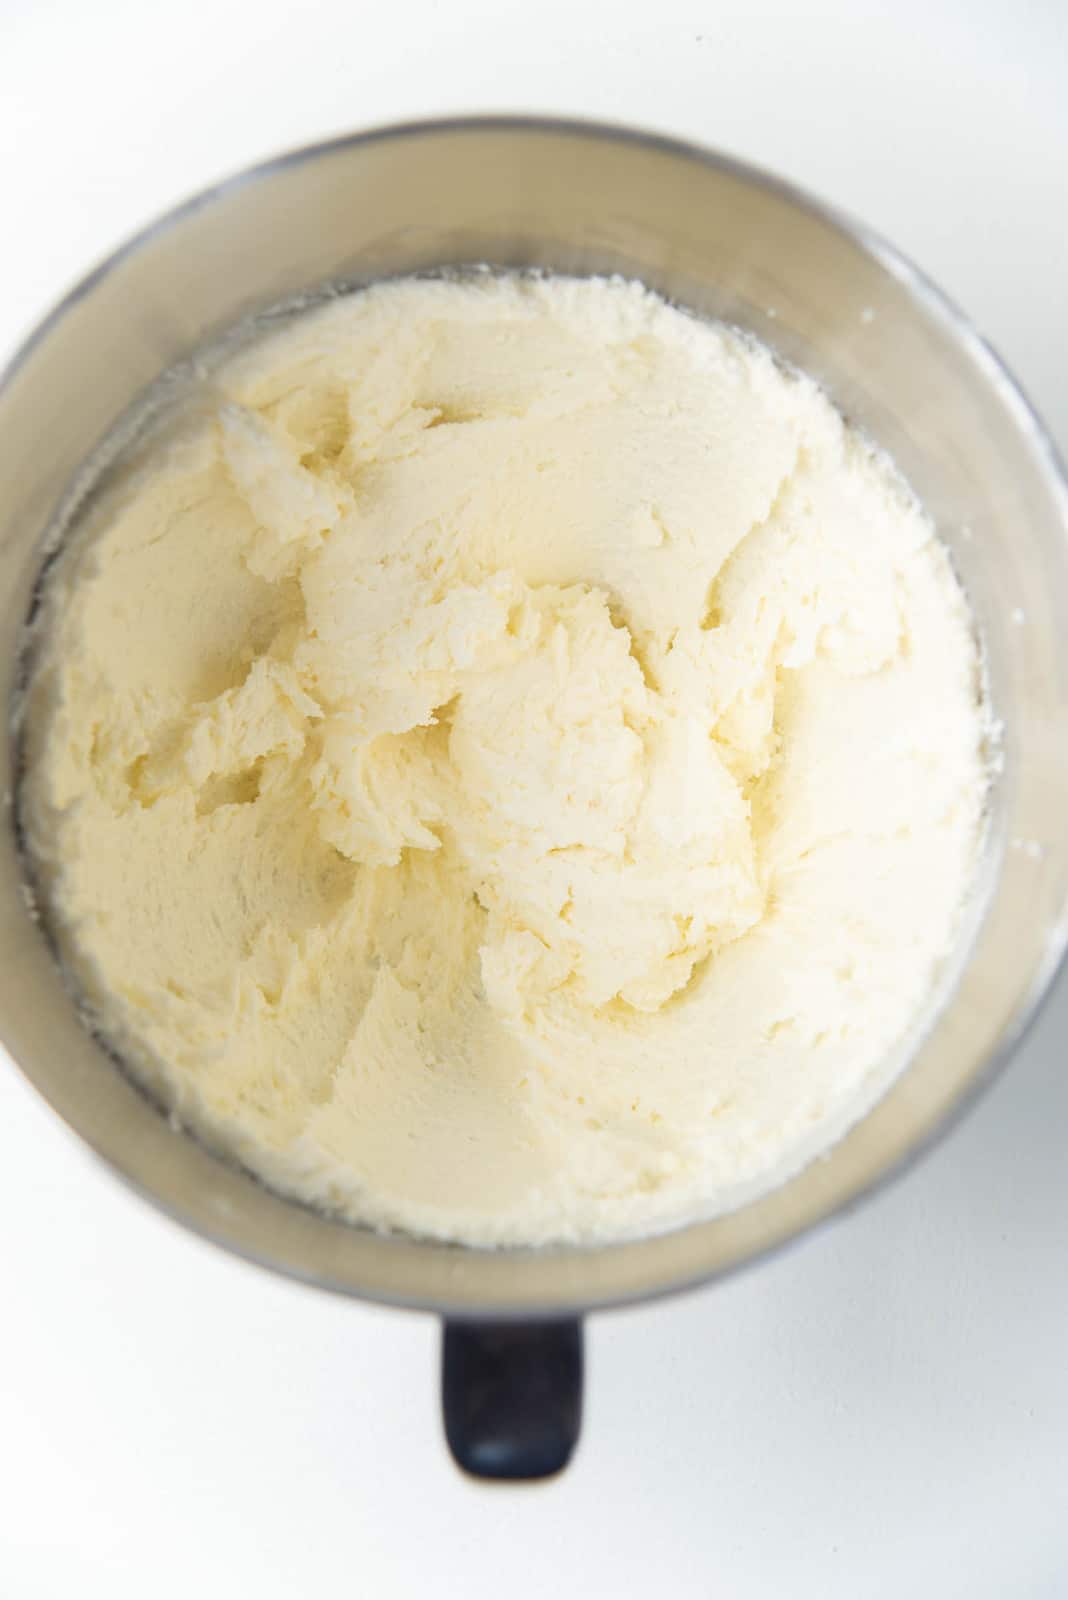
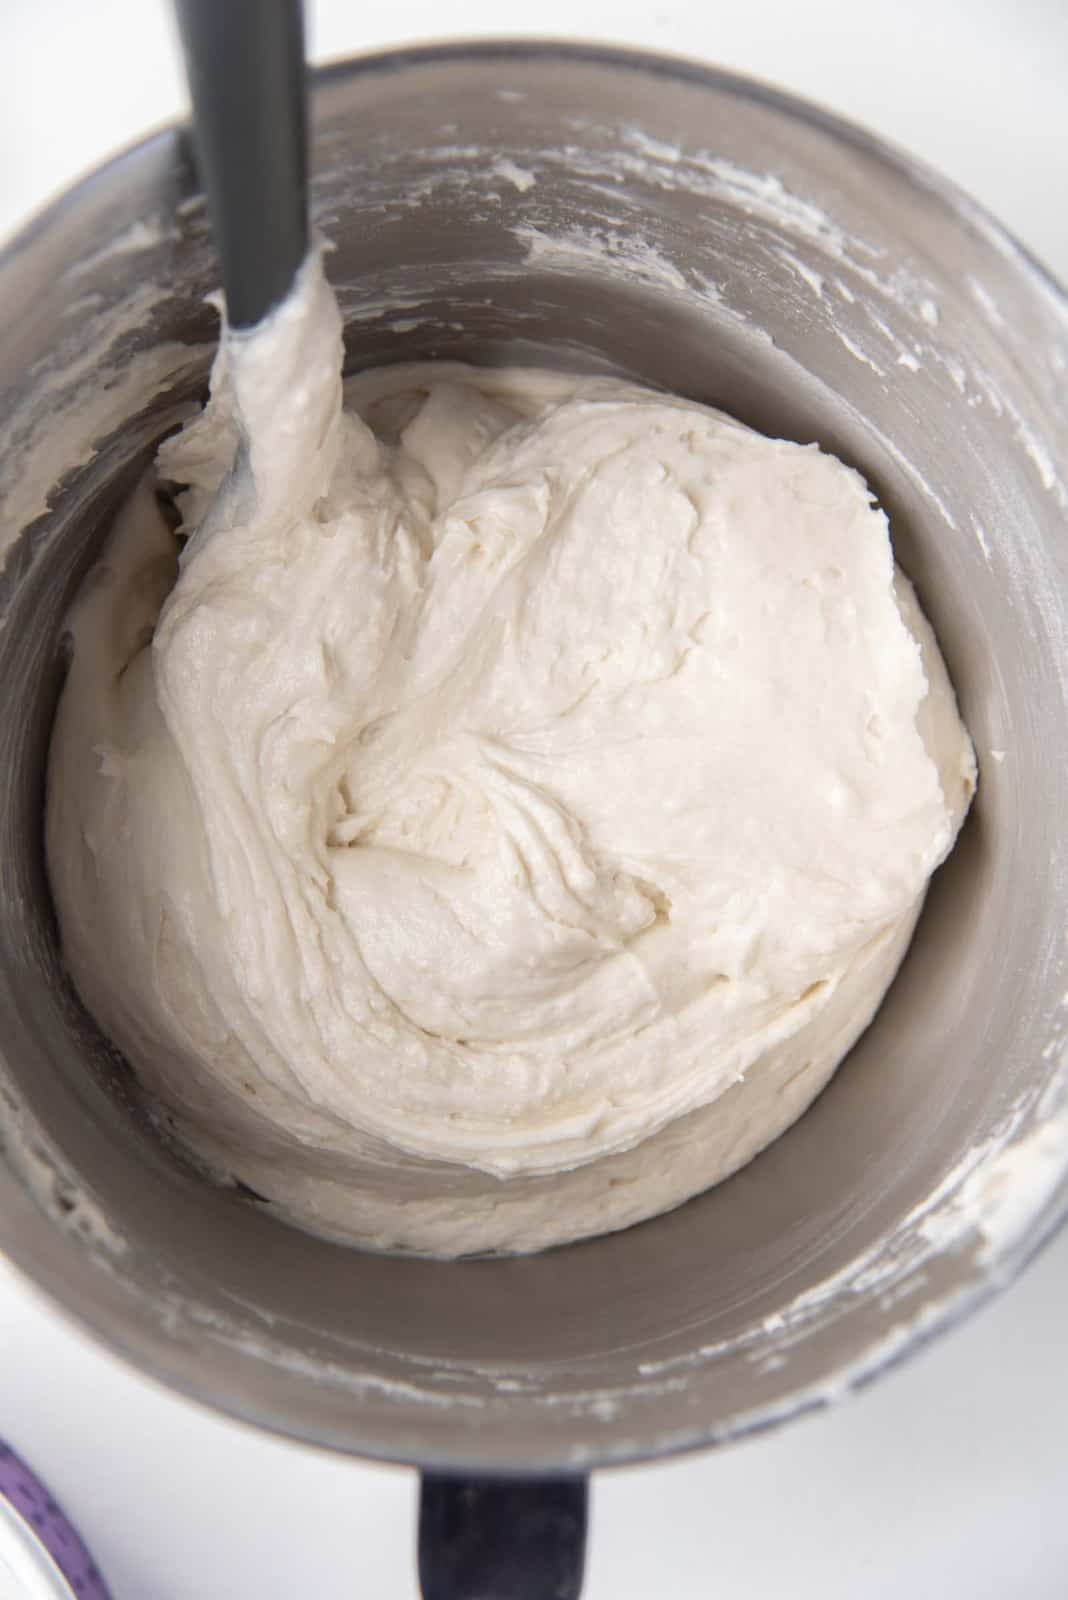
Since this cake uses the creaming method, the first step is to cream the butter and sugar together. Depending on the temperature of the butter and environment, the time can vary. Just make sure the butter and sugar mix is light in color, fluffy and creamy. This will help keep the white cake light in color.
You can first cream the butter by itself, before adding the sugar, to soften the butter and make the creaming process easier.
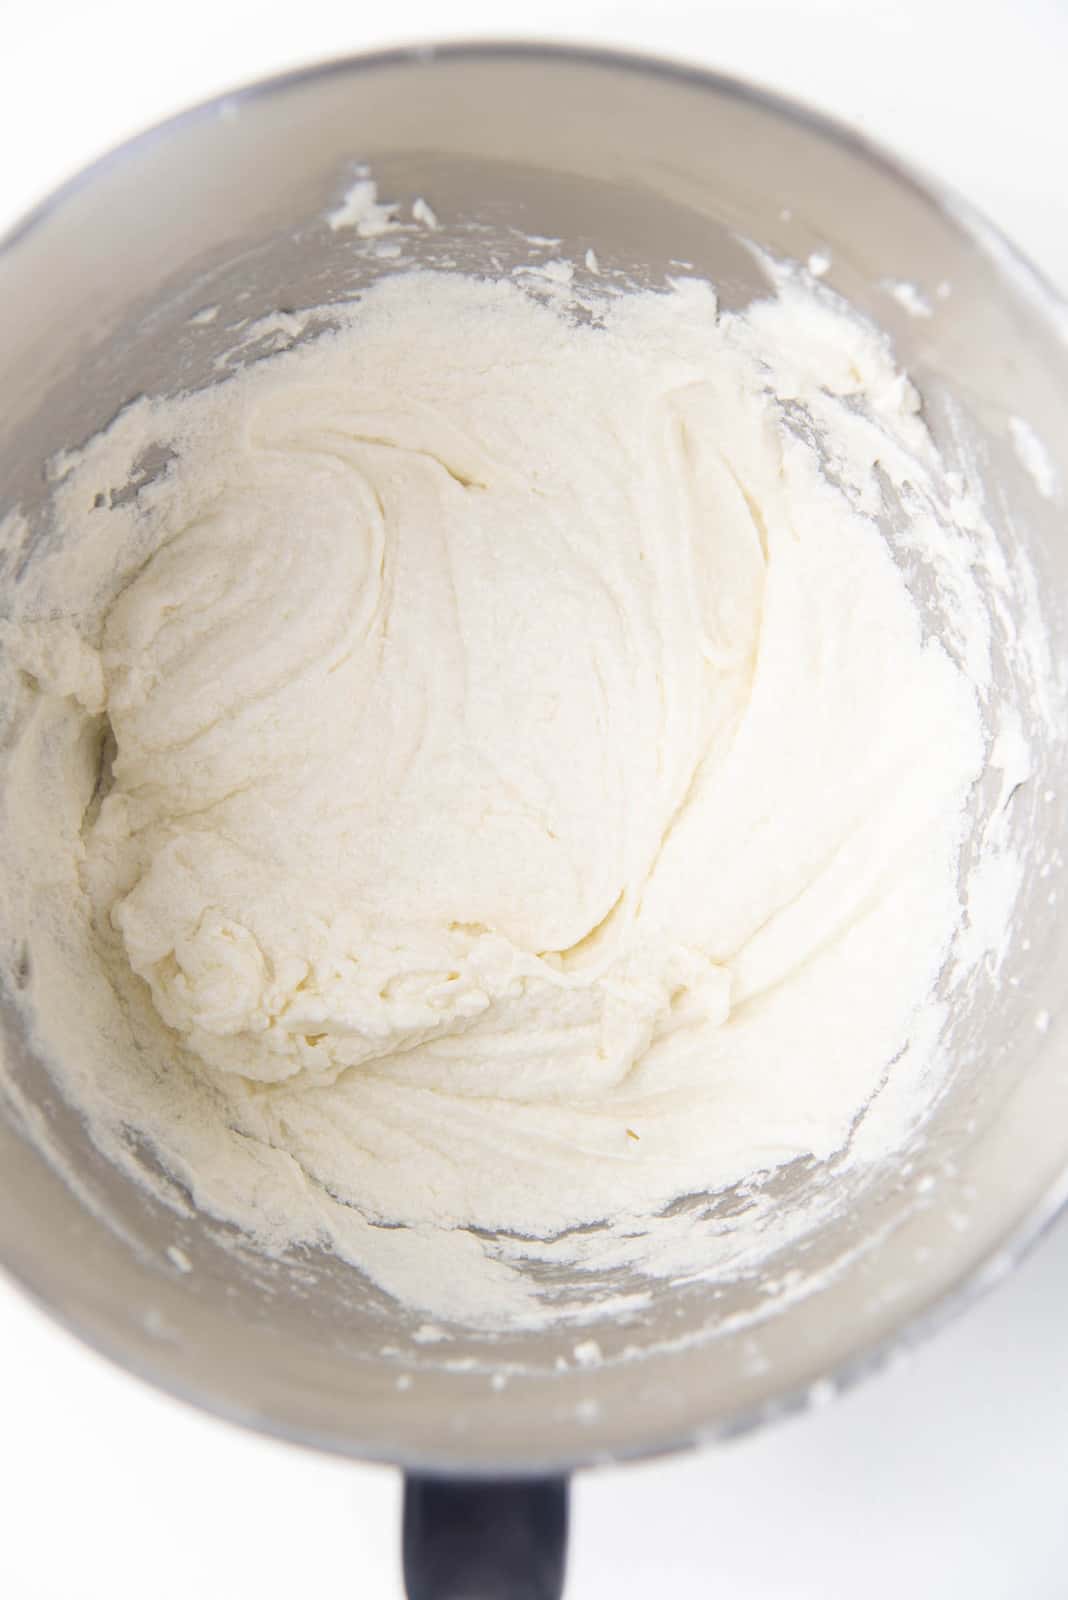
Once the butter and sugar are creamed, the egg whites can be added.
Why are you not adding meringue?
This white cake recipe doesn’t require the egg whites to be whisked into a meringue. You could if you want to, but I haven’t noticed a difference in doing this, and feel like it’s an unnecessary step.
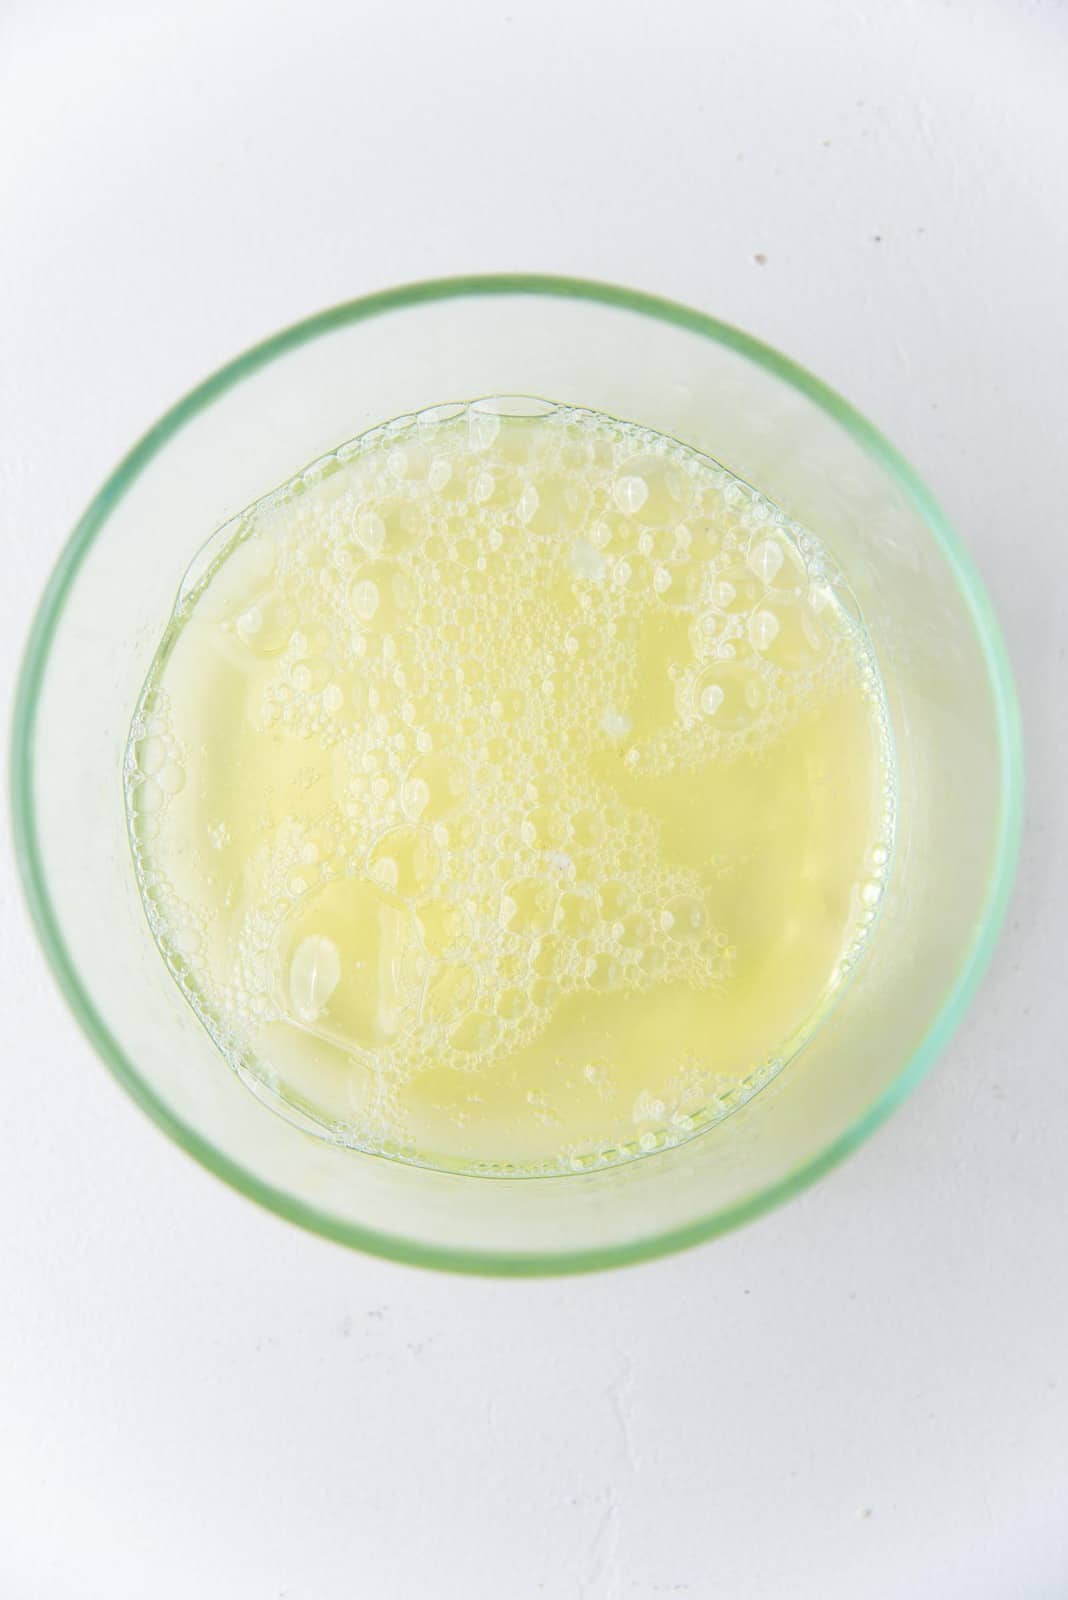
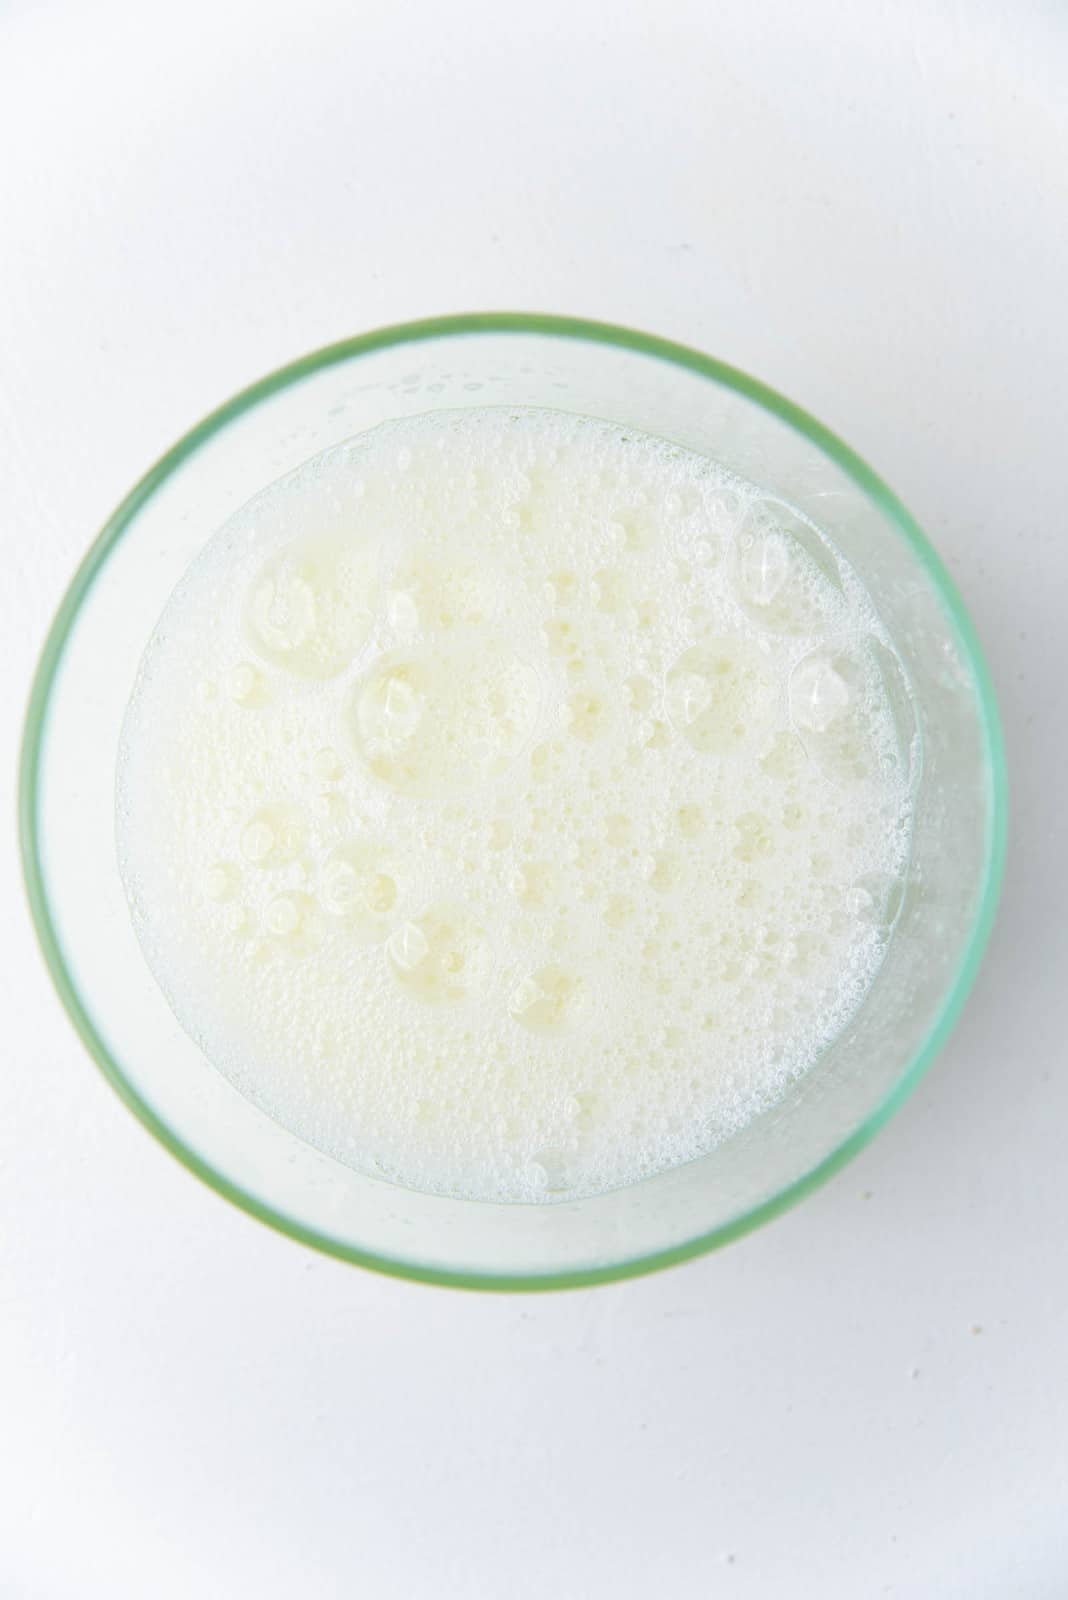
However, egg whites have a very gloopy texture. These proteins should be broken down so that the egg whites can incorporate well. So, make sure to whisk the eggs until they are frothy, before adding it to the batter. This will break down the gloopy texture.
Adding the rest of the ingredients
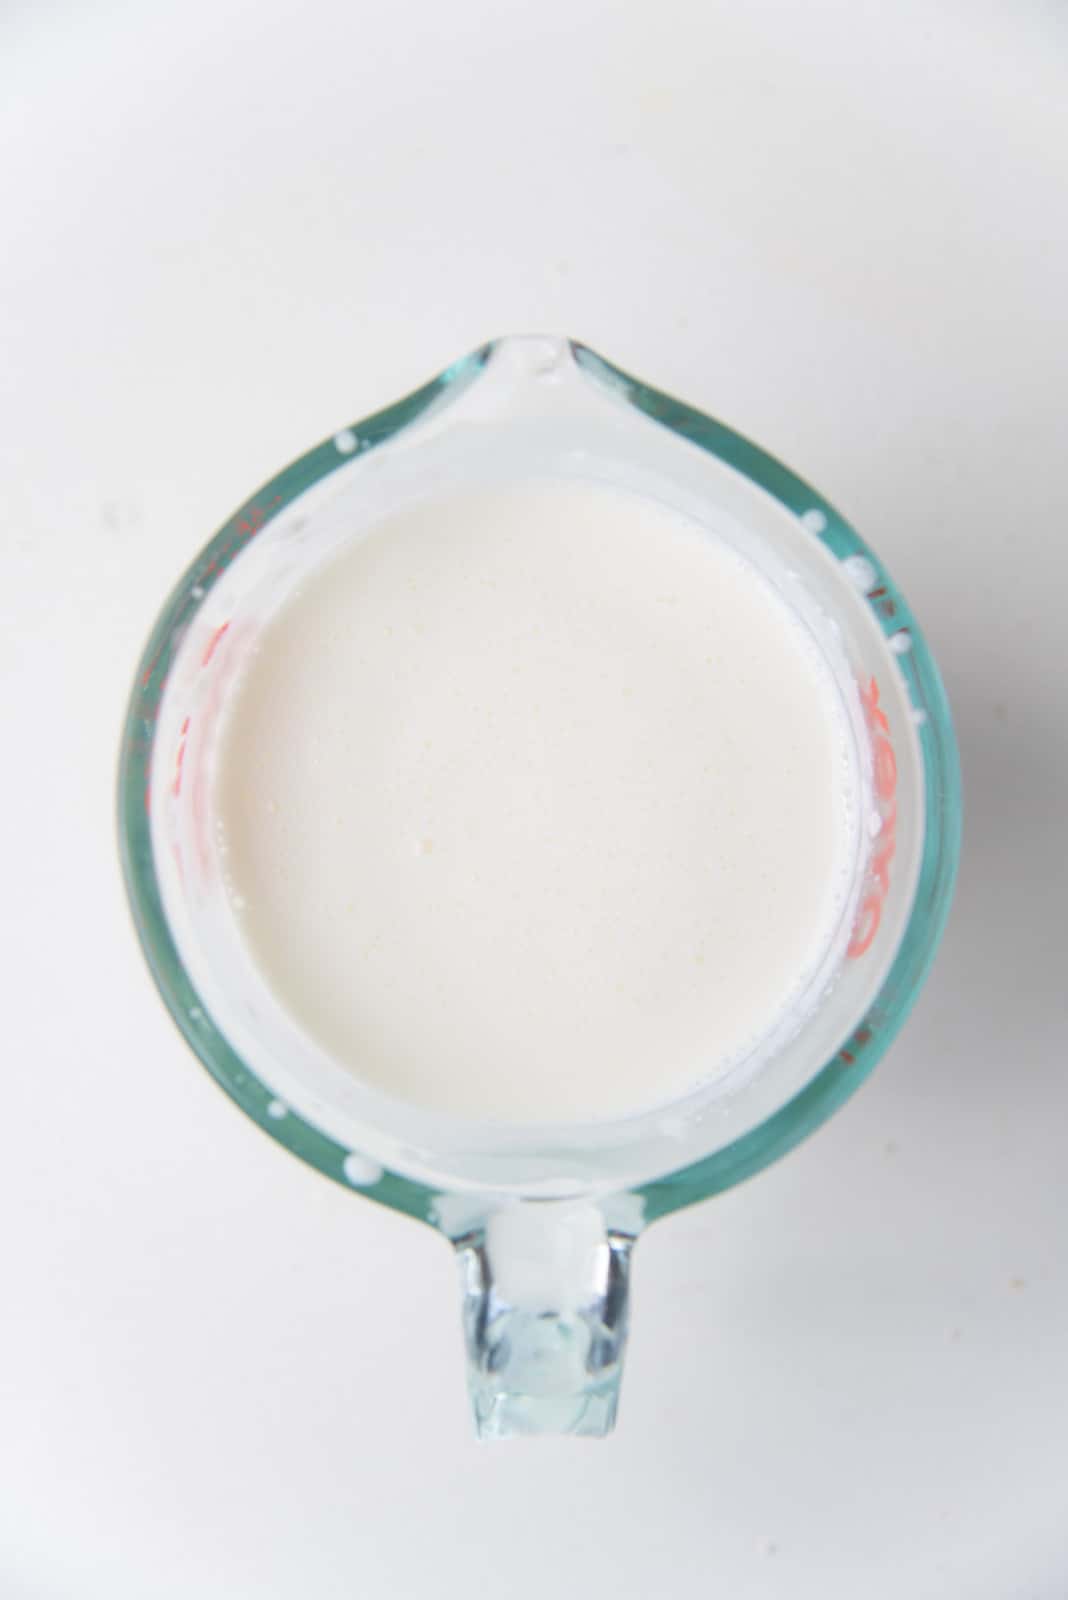
Next, mix the rest of the wet ingredients. Mix the milk, sour cream and other flavorings (vanilla, almond etc.), and get ready to add that to the batter. You can be flexible with the flavoring you add to this white cake recipe as long as it won’t change the color too much.
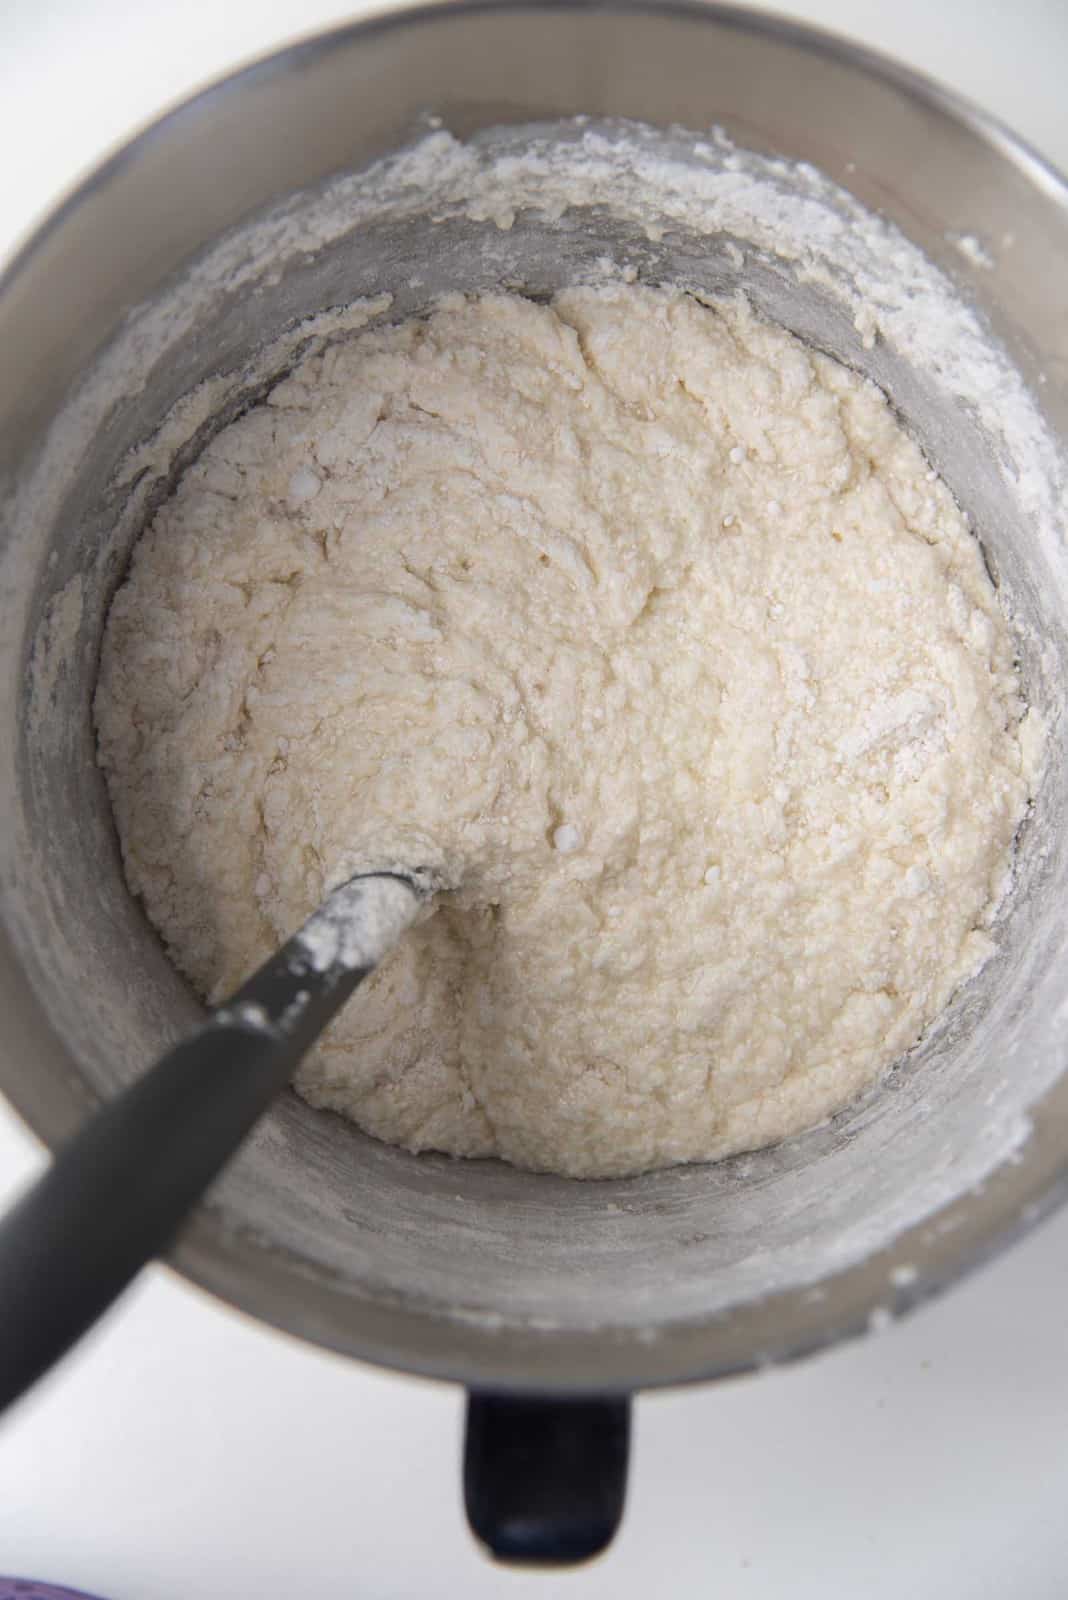
Finally, gently fold in the flour mixture into the cake batter, alternating with the wet ingredients. Remember to get under the batter and fold it over, so that the flour will be incorporated without any extra force. The more you handle the batter, the greater the risk of a gummy cake. So fold the batter only until all the flour is well-incorporated.
Always start and end with the dry ingredients when folding it into the batter.
NOTE – You can also add the wet ingredients into the batter first and then add the dry ingredients in 2 – 3 additions.
Divide and bake
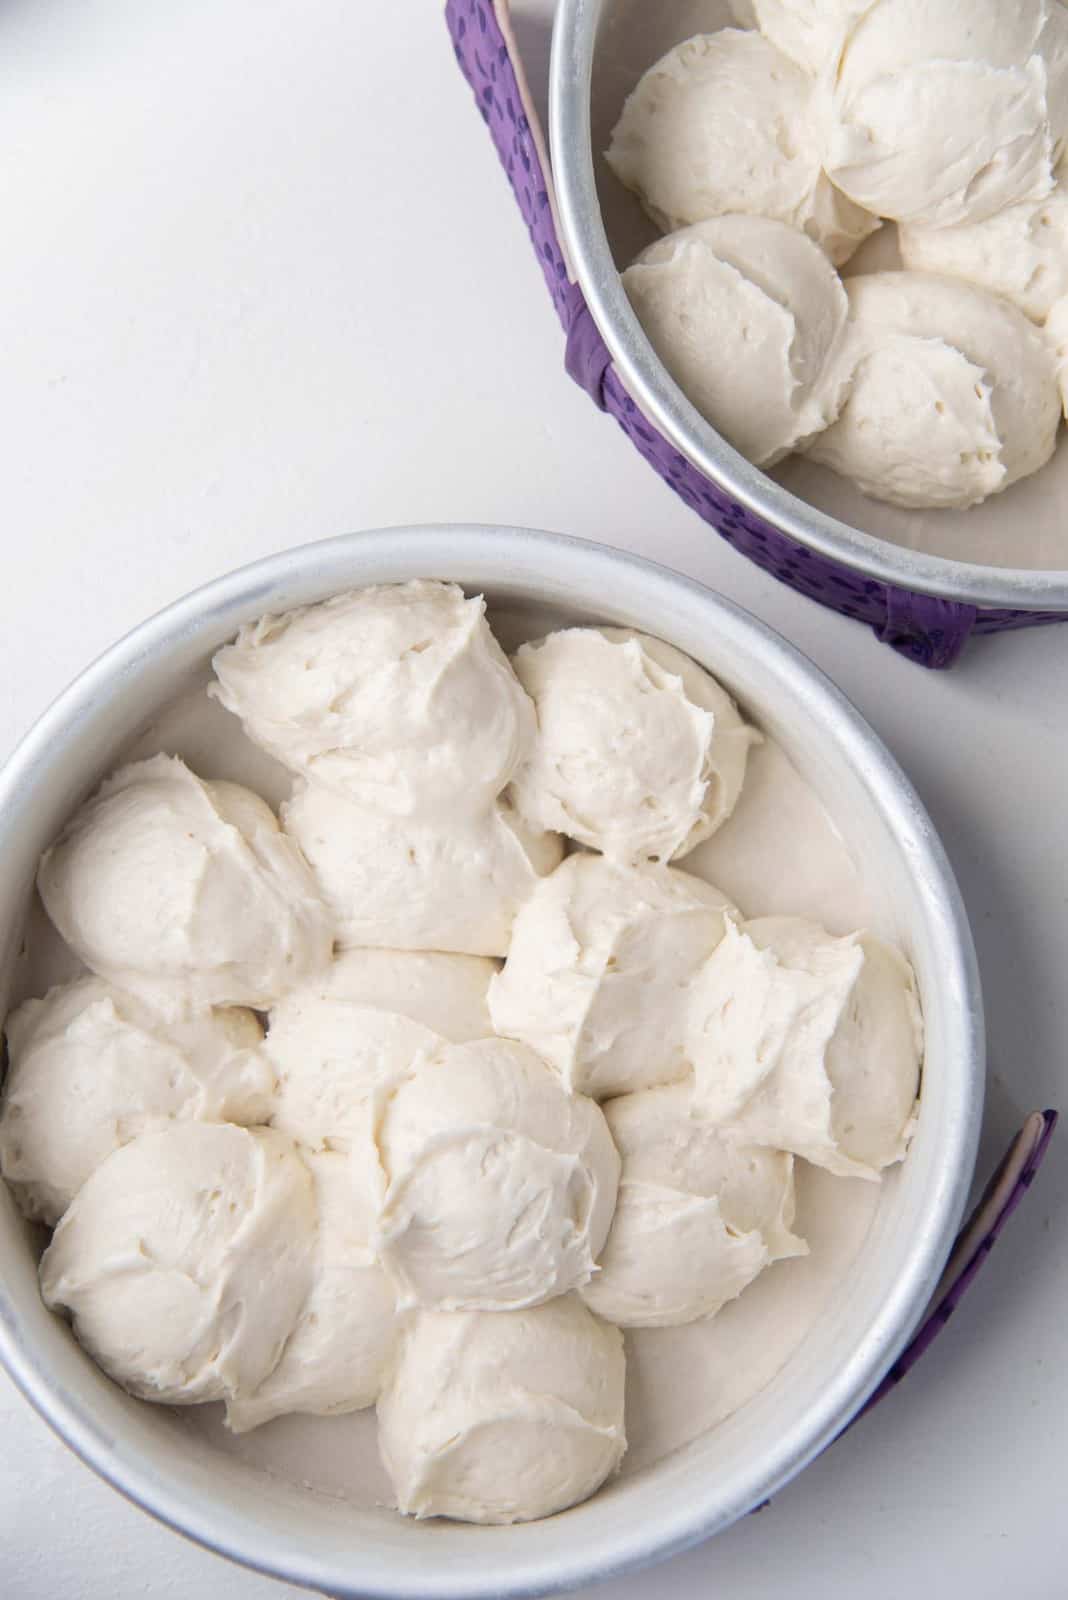
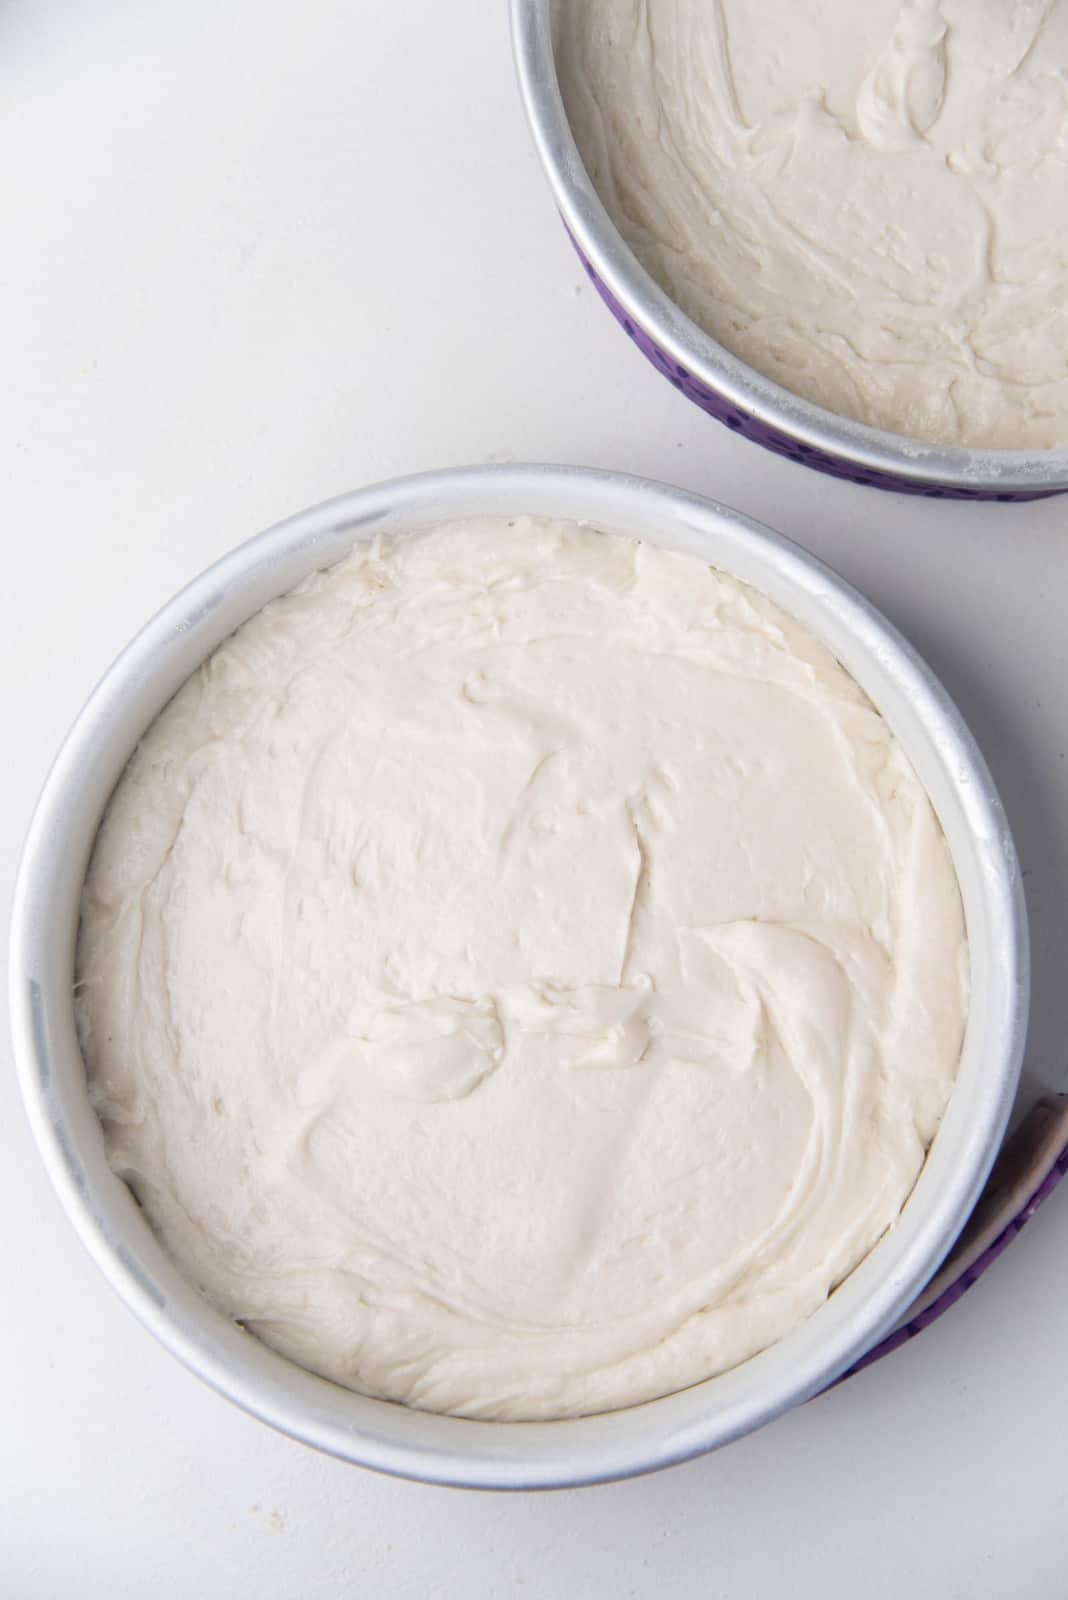
Use an ice cream scoop to divide the batter between the two prepared pans. This is the easiest way to make sure that your cake layers are going to be even. Remember to evenly spread out the batter in the cake pans before baking them.
Place the cake pans in the preheated oven. If you use baking strips, the cake will take slightly longer to bake.
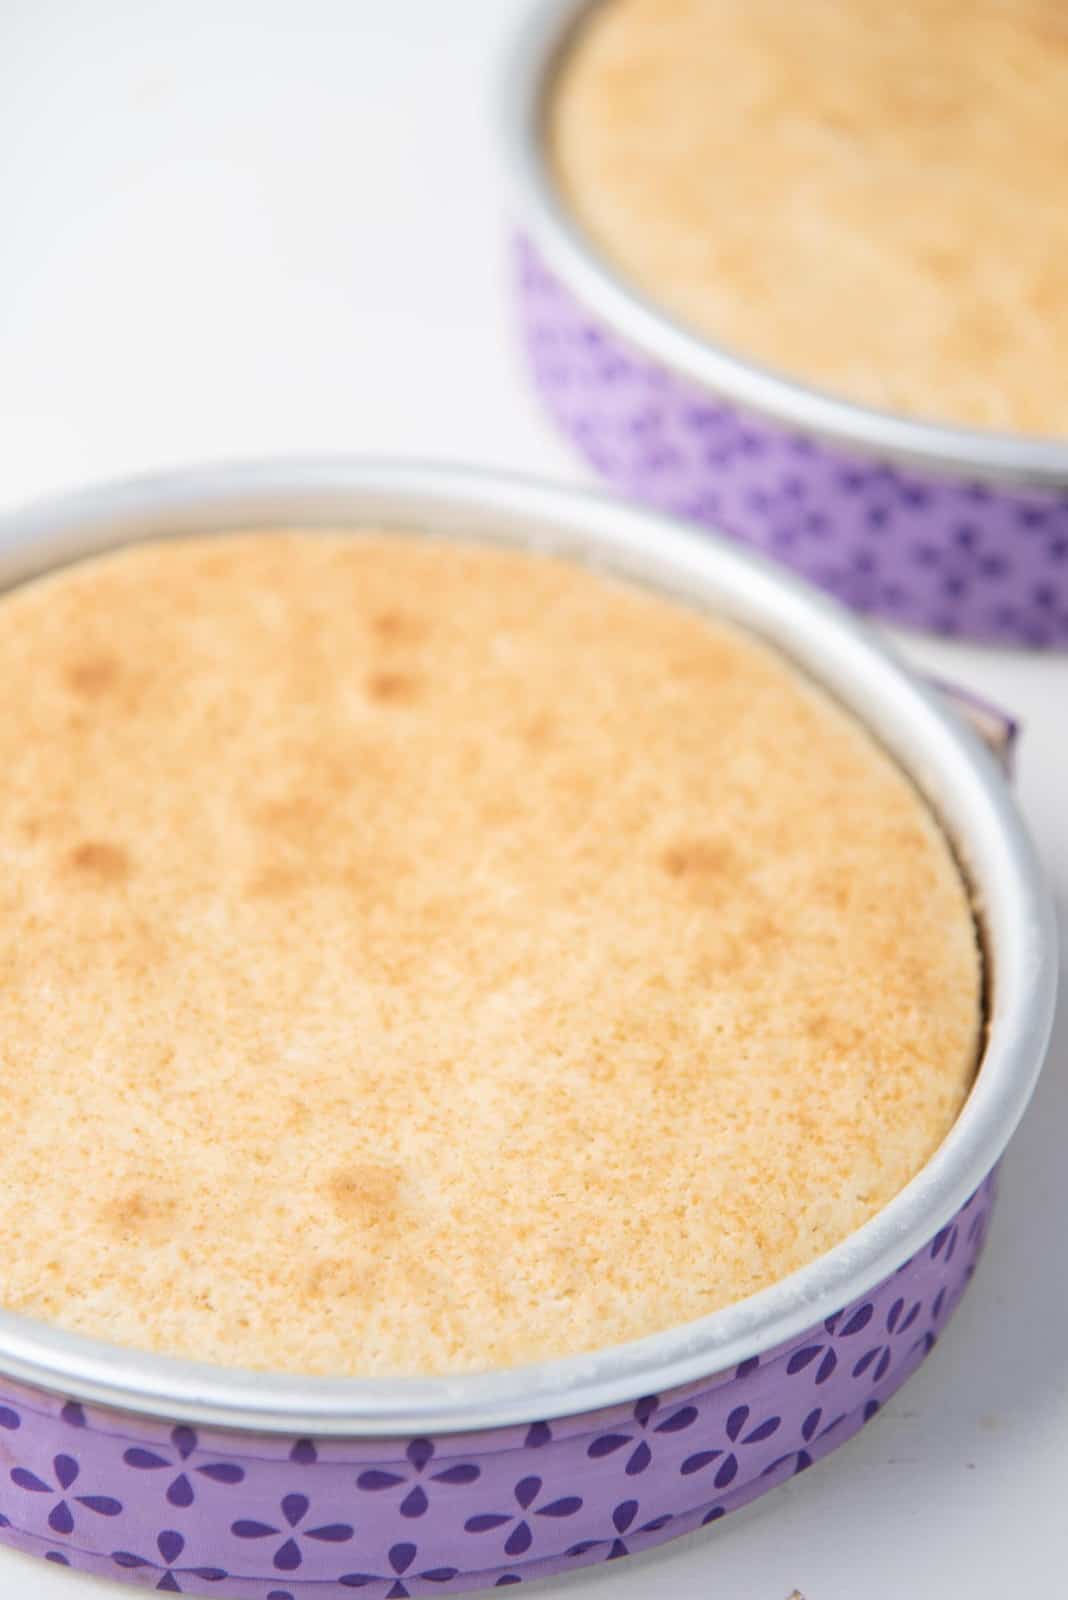
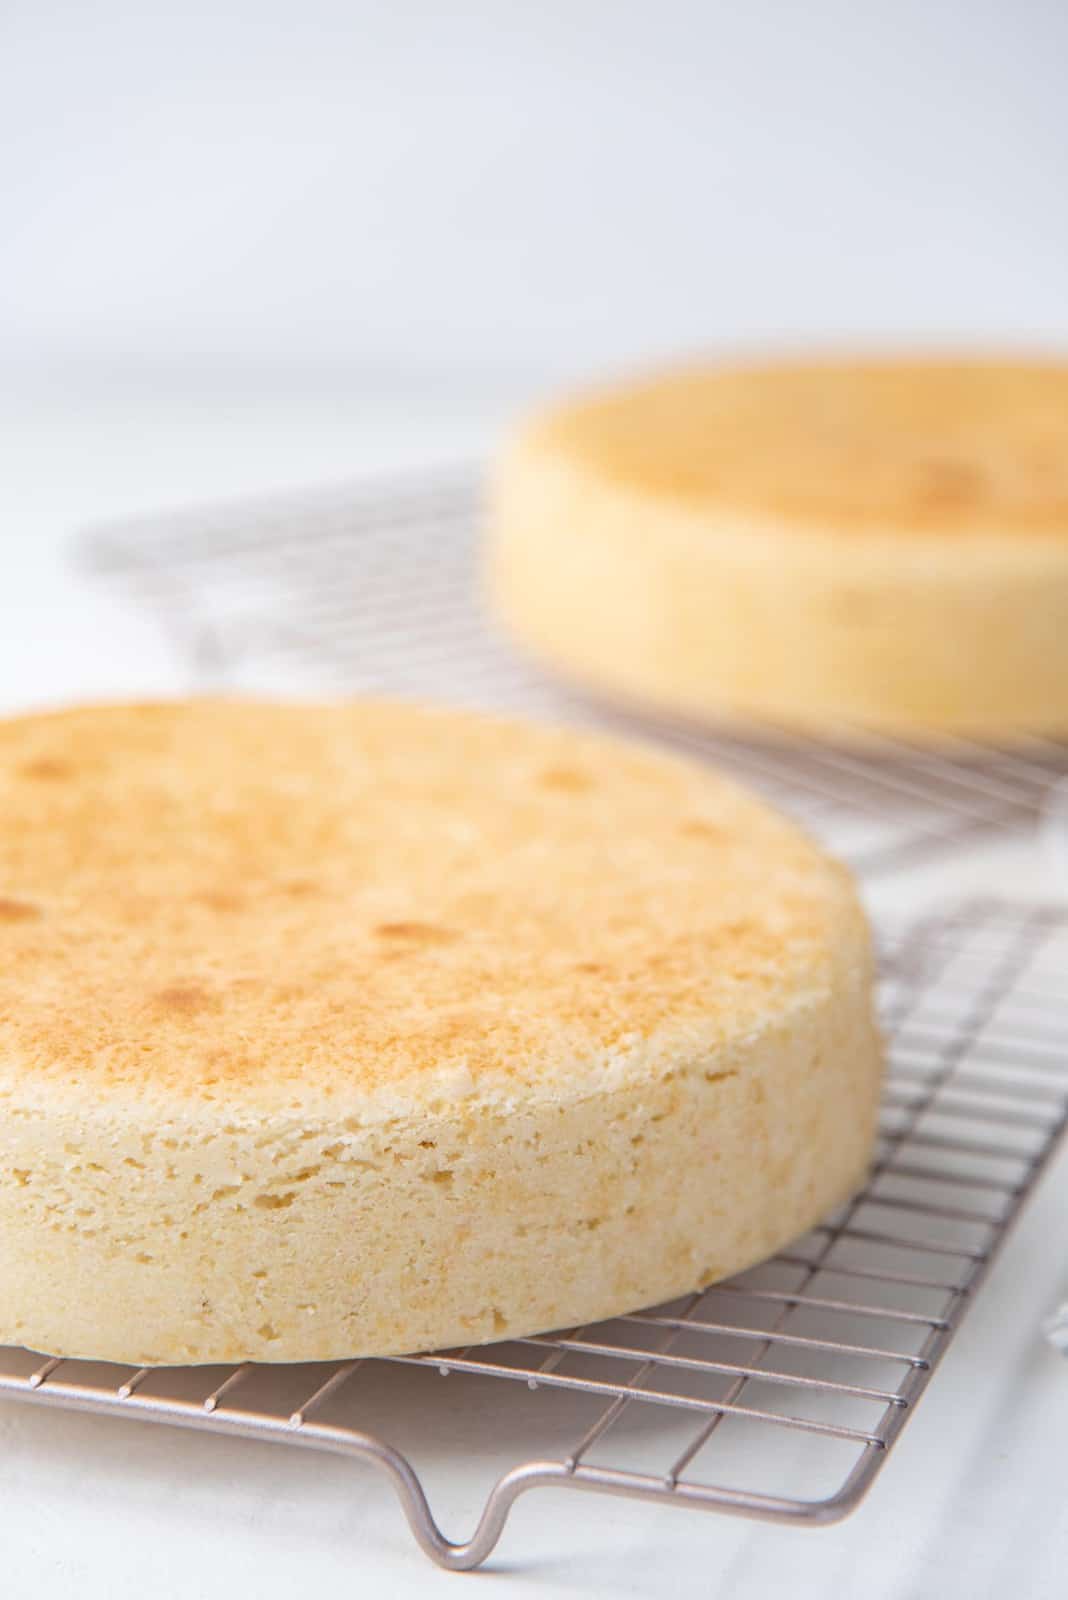
You know the white cake layers are done when a toothpick inserted comes out clean. I like to touch the surface of the cakes to see if they are springy to the touch. When the cake surface starts to become springy, the cake is ready.
Remove the cakes from the oven and let them cool slightly, before turning them out onto a cooling rack and letting them cool completely.
This white cake recipe is super easy and very similar to making yellow cake. Just without the yolks, and with a little extra care.
What if I overbake the cake?
If you let the cake bake a little too long, you risk the cake being dried out. But there is a fix for this. A generous drizzle of simple syrup…
I like to drizzle simple syrup while the cake is warm (so it absorbs better). If my cake is a little dry (overbaked), then I drizzle a little extra simple syrup to keep the cake moist.
Layer and decorate
Once the cake is cooled down to room temperature, it’s ready to be filled and frosted.
I like to use my Swiss meringue buttercream recipe for this white cake, because it’s a light and buttery buttercream. Perfect for this cake. But a classic American buttercream will work just as well too.
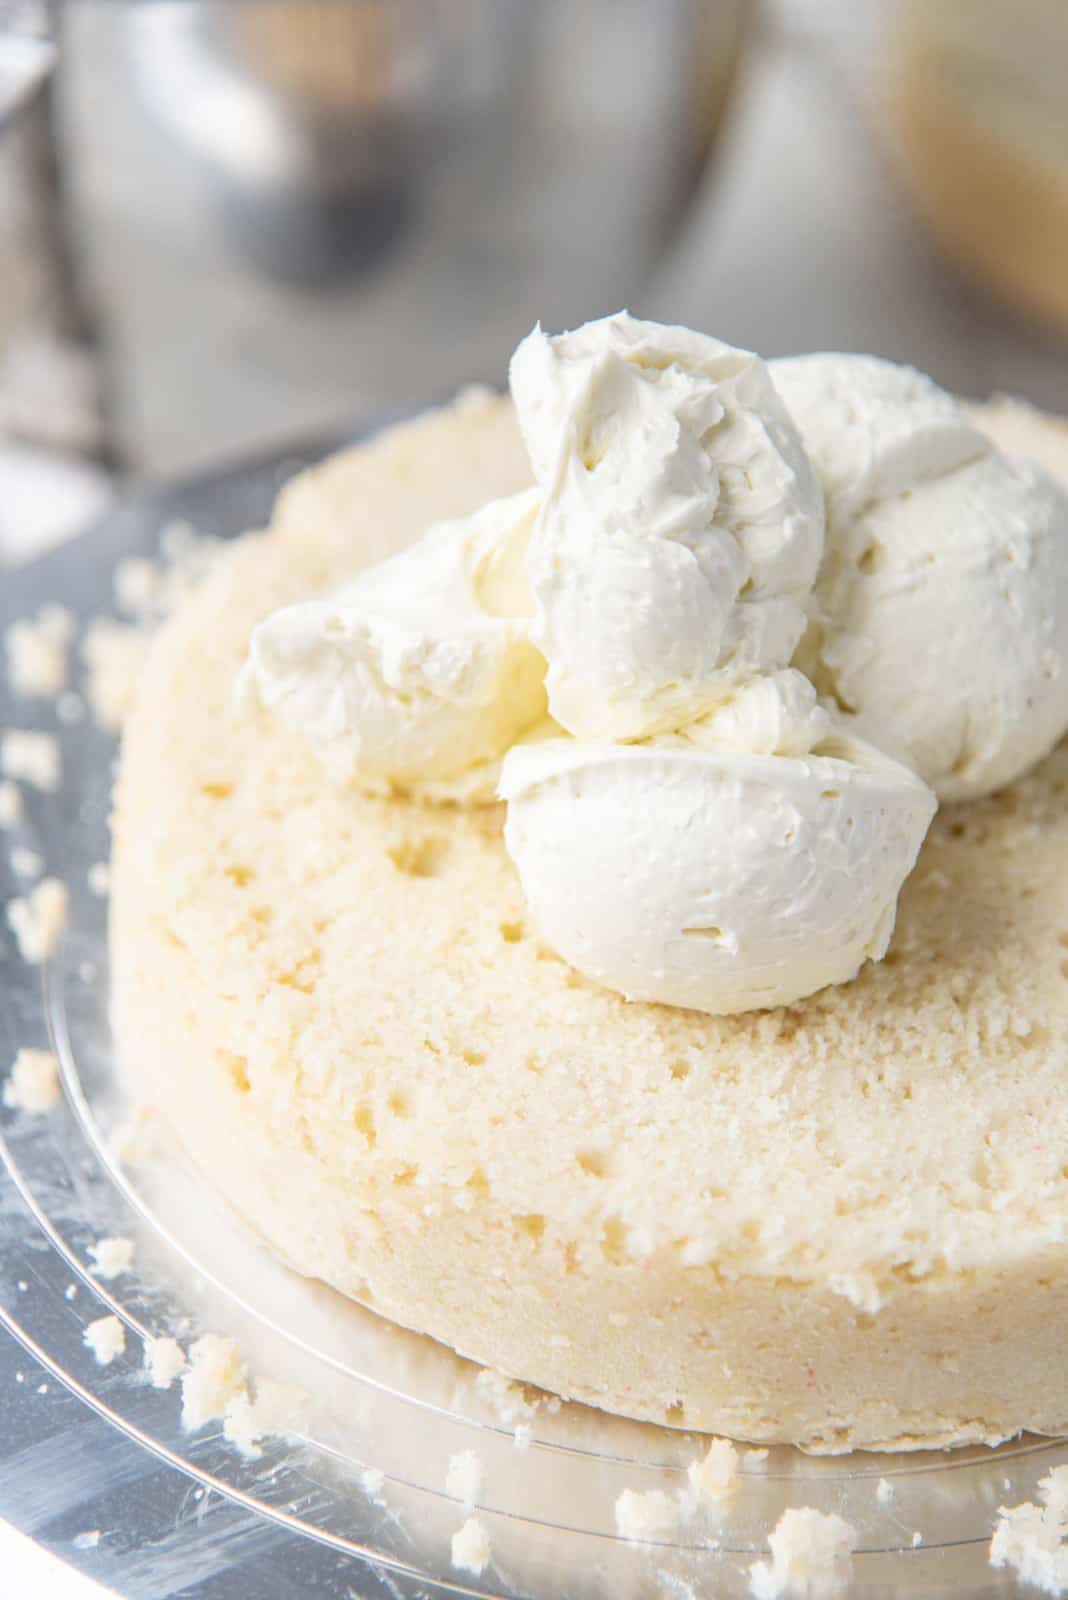
For an easier option, go with the American buttercream, but for a more decadent option, try the Swiss meringue buttercream.
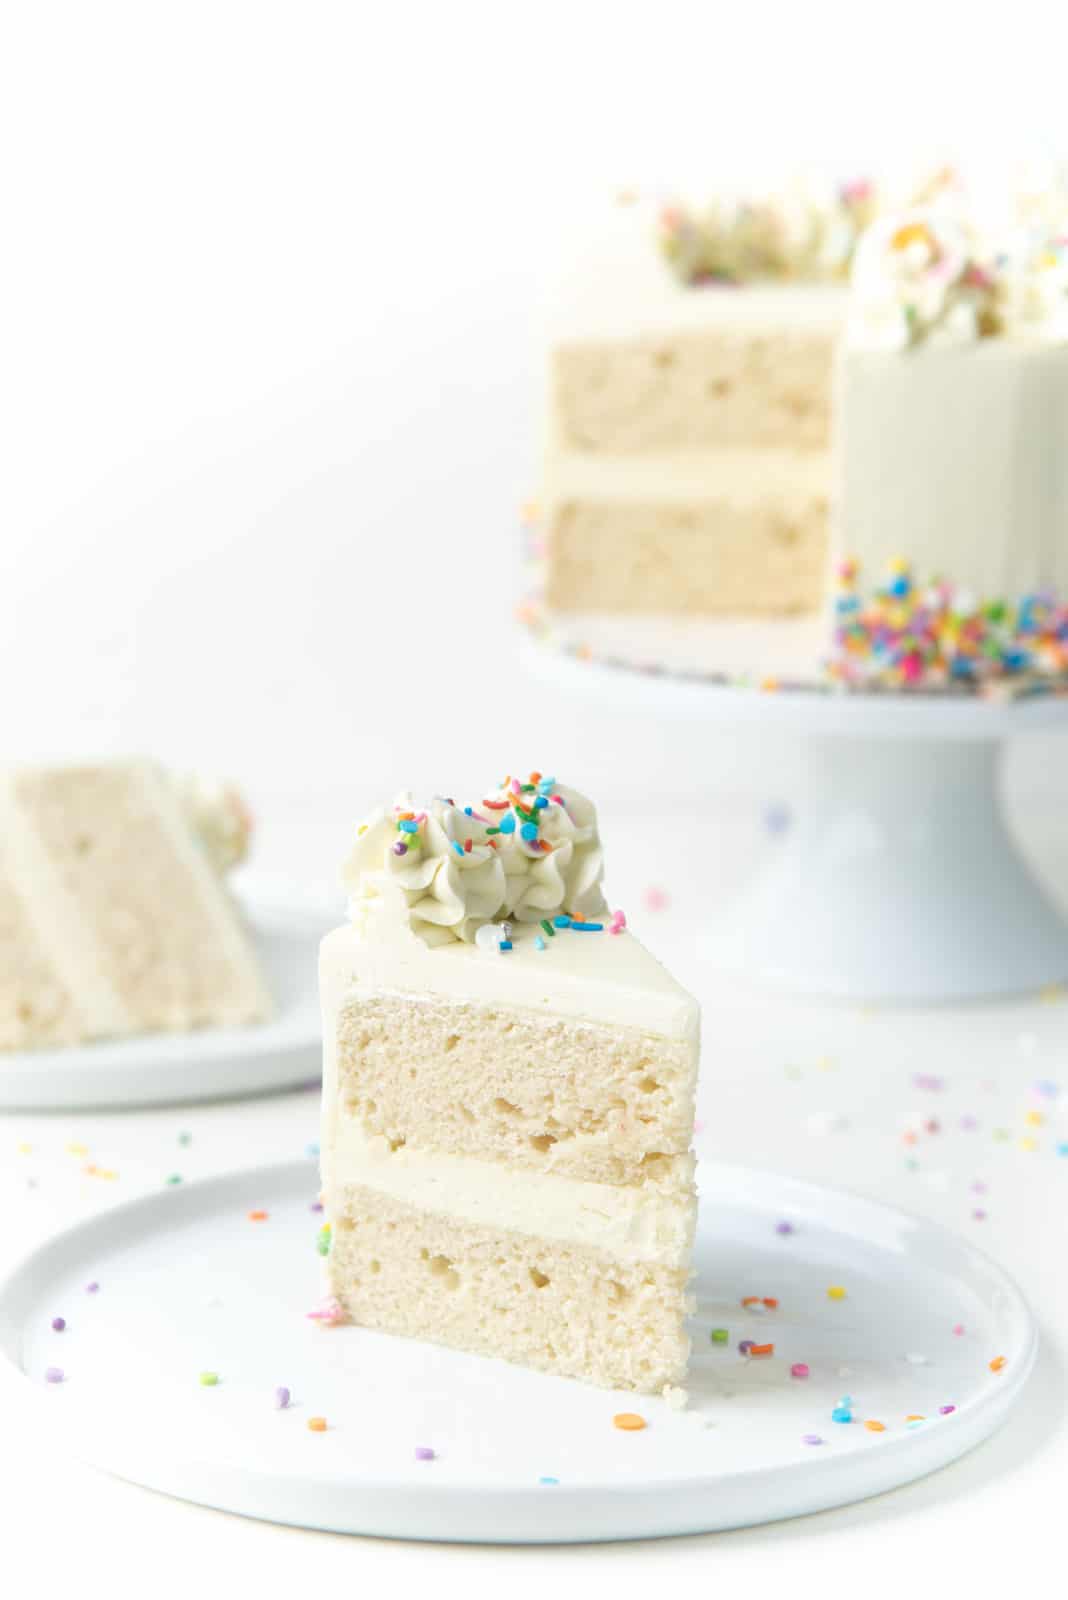
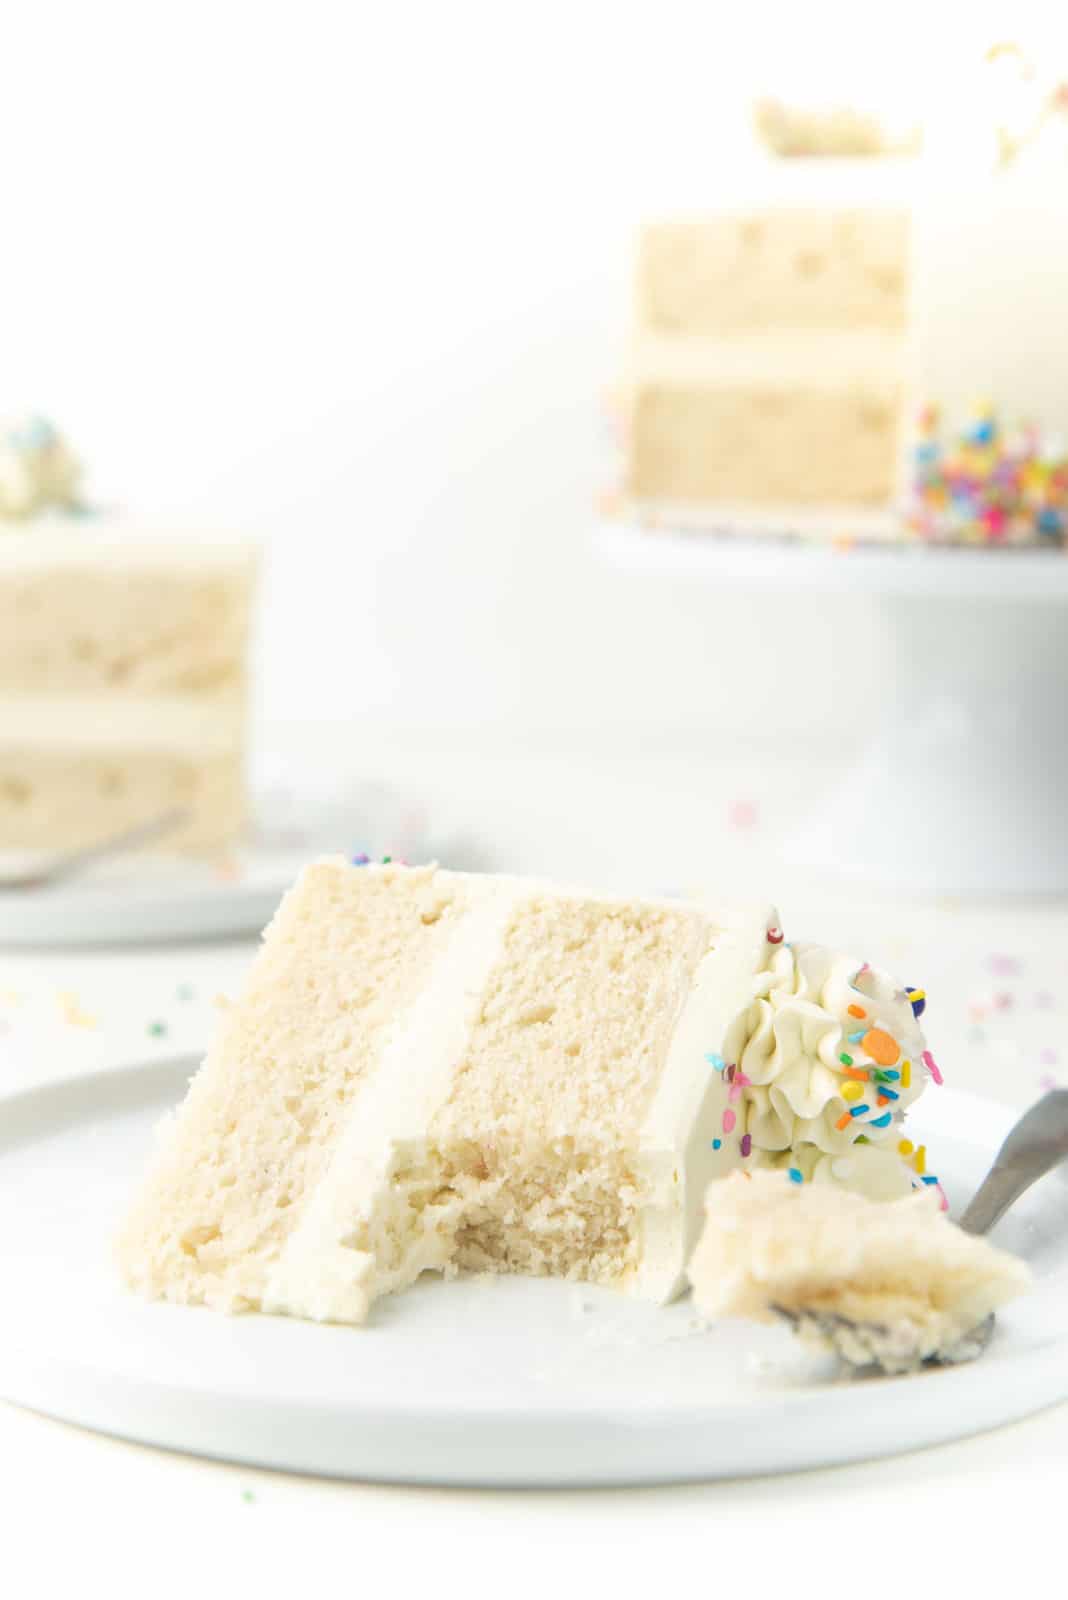
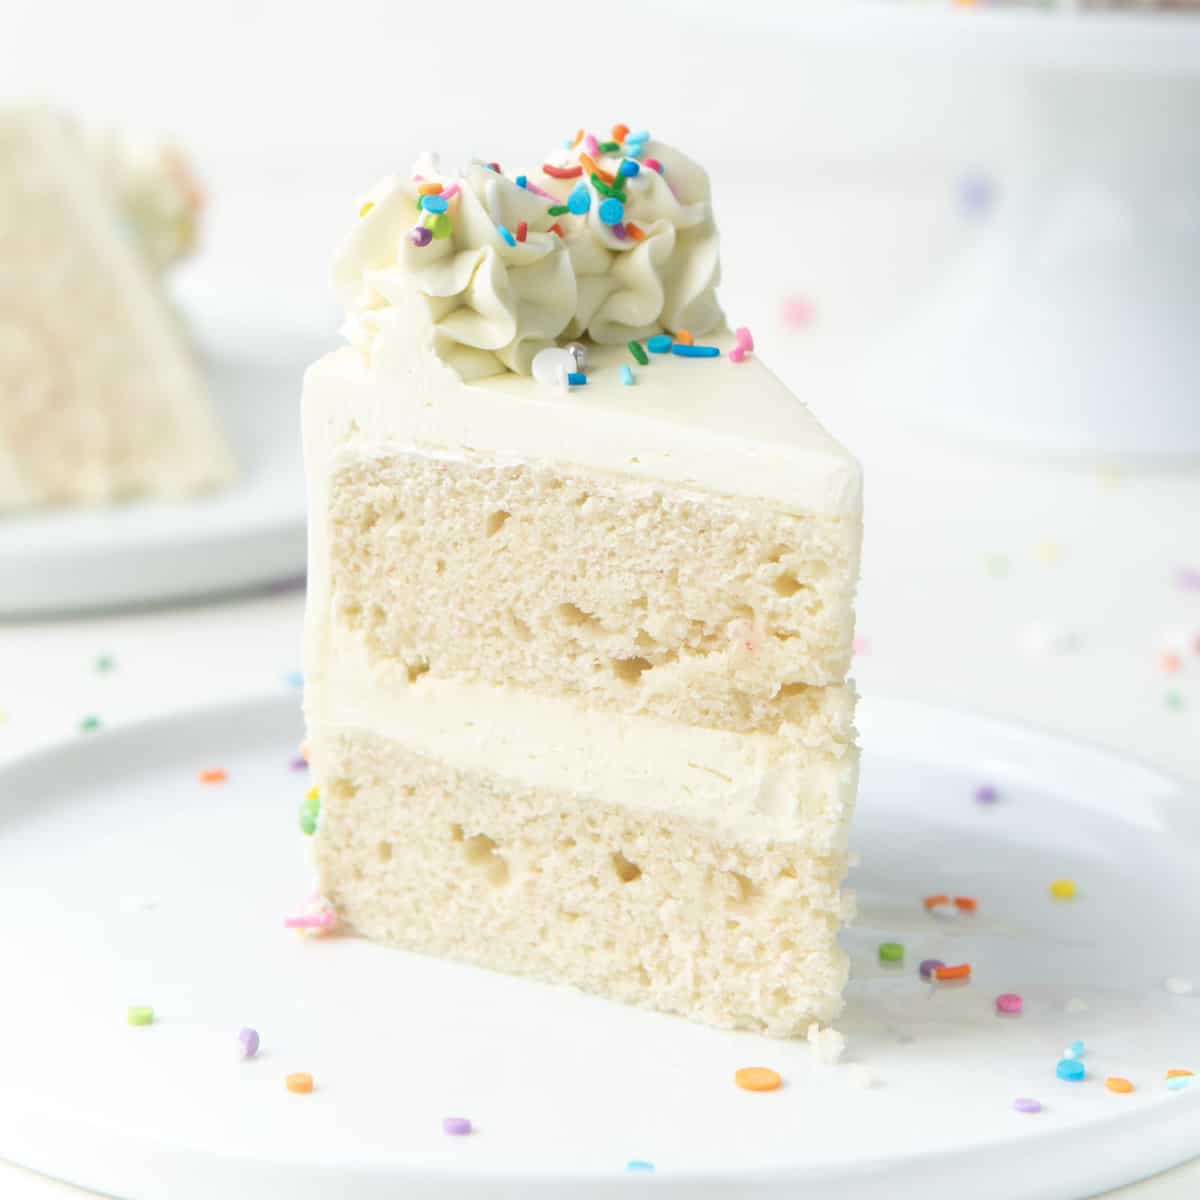
Top one white cake layer with a generous layer of buttercream, and then place the second cake layer on top.
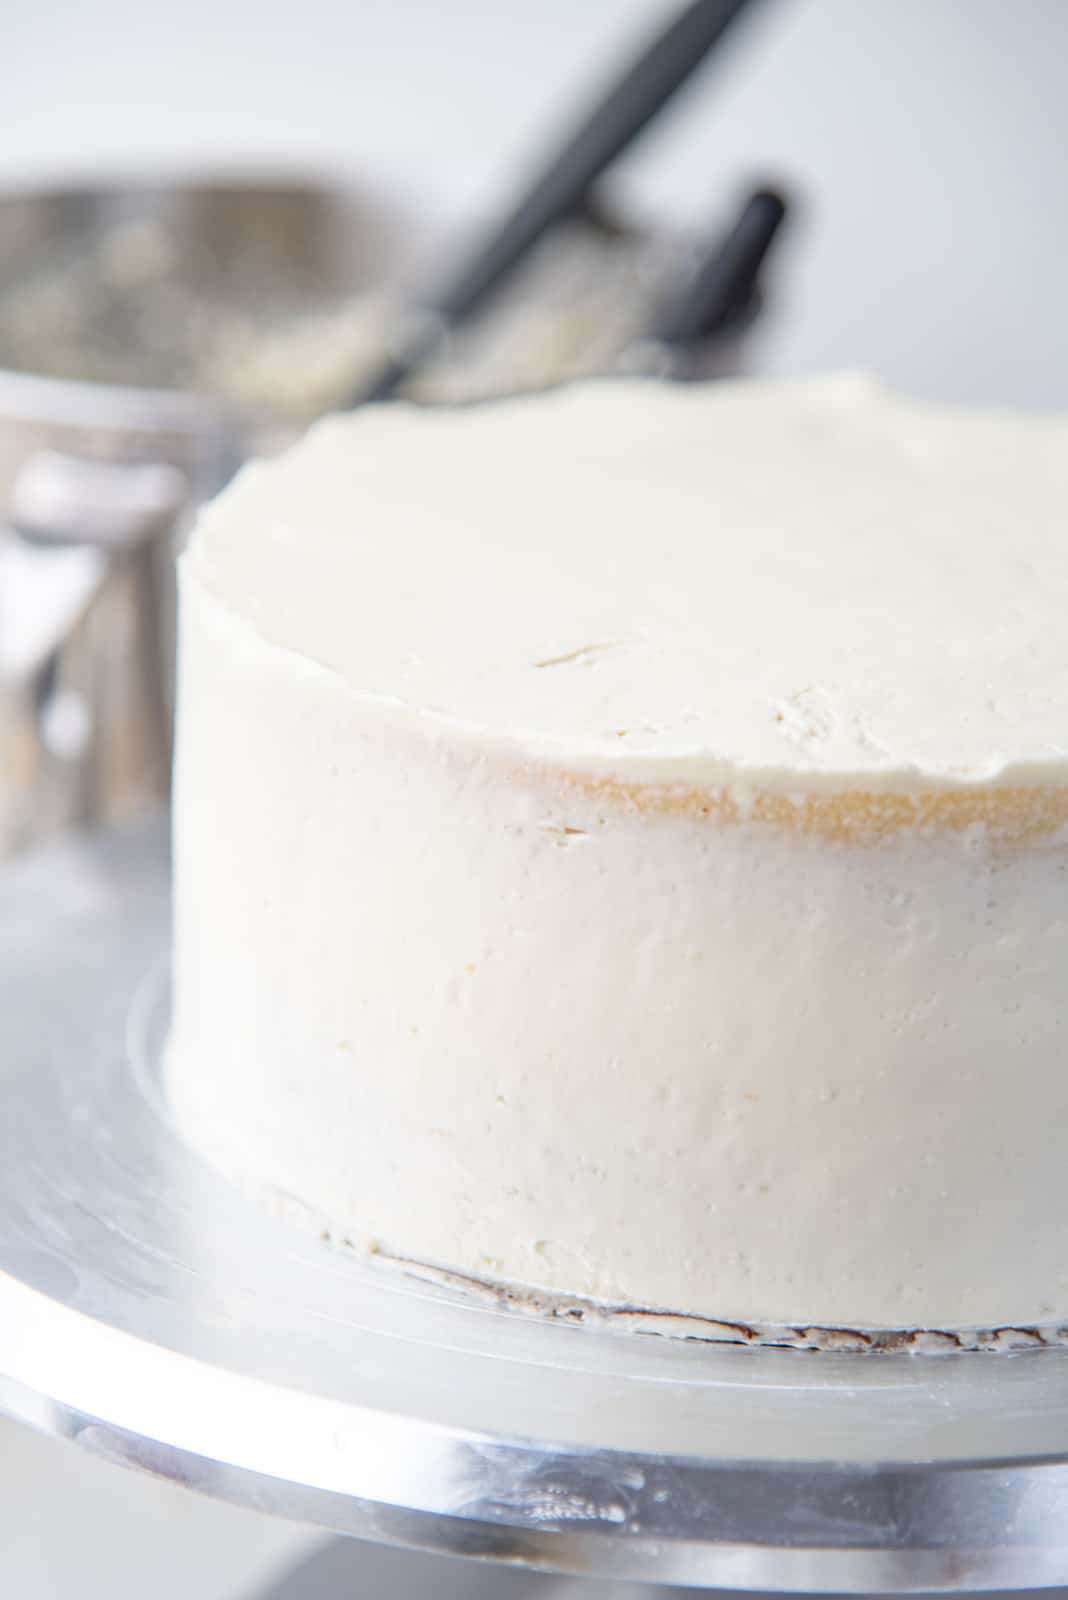
For an extra white cake when sliced into, trim off the tops of the cake to remove the caramelized layer. This will ensure the inside of the cake will be pure white!
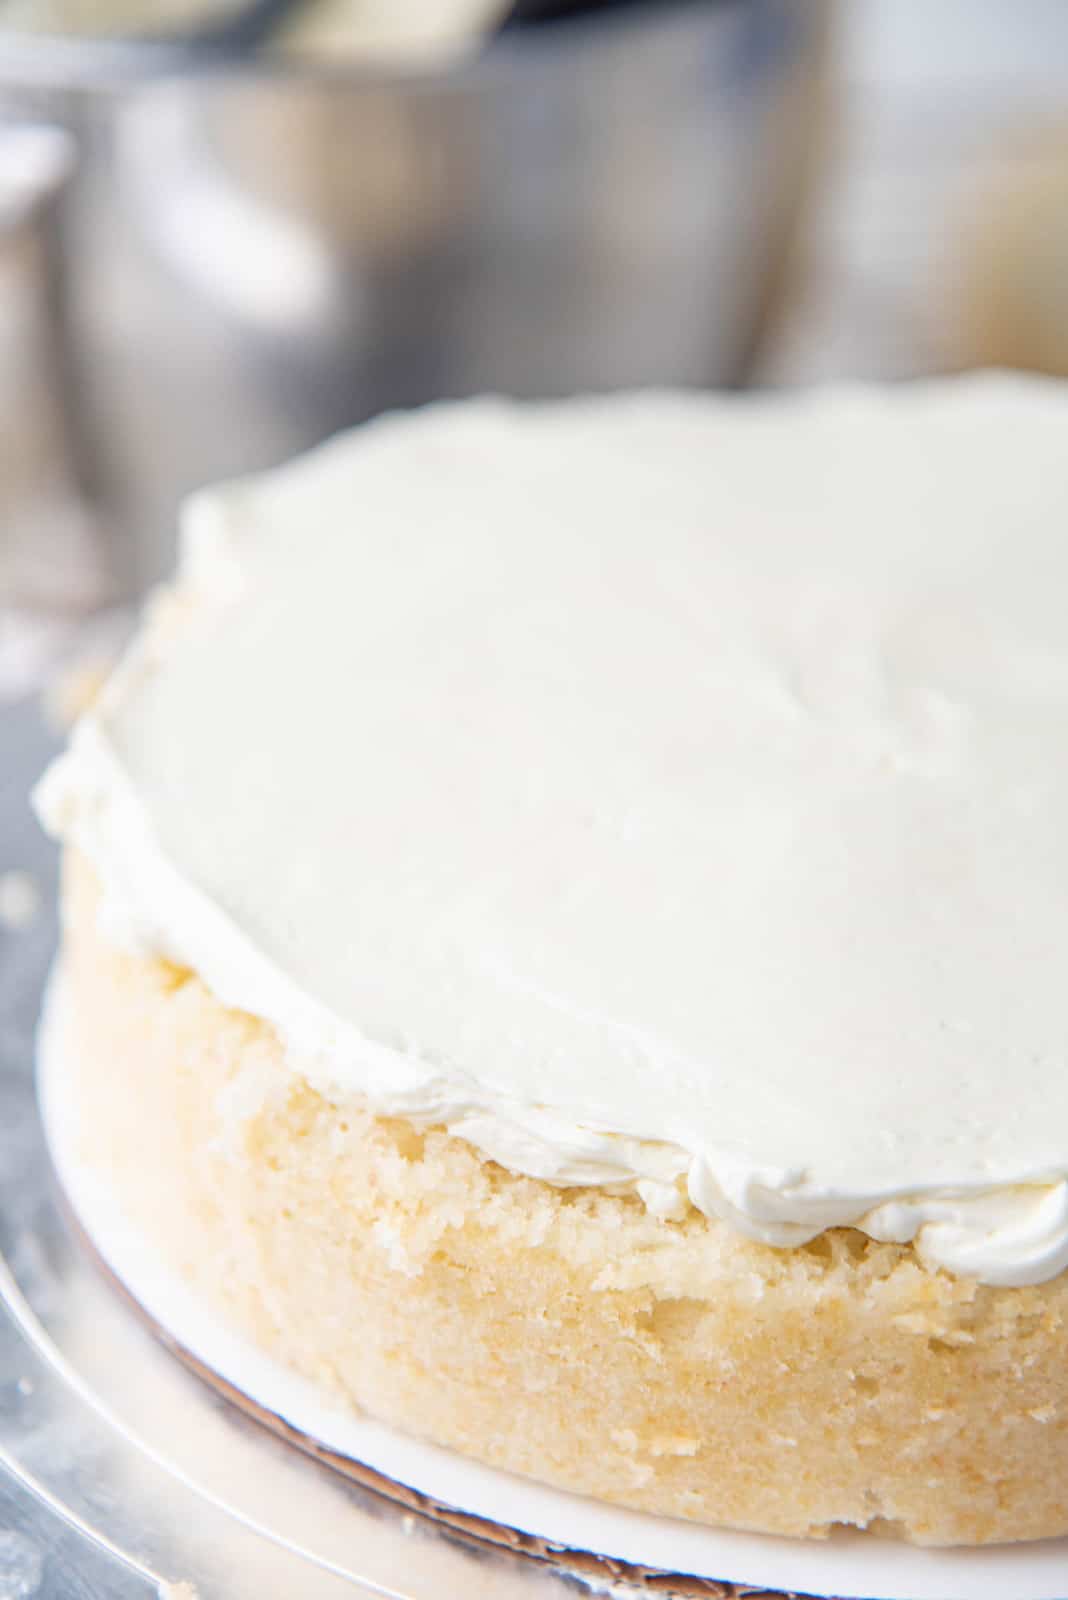
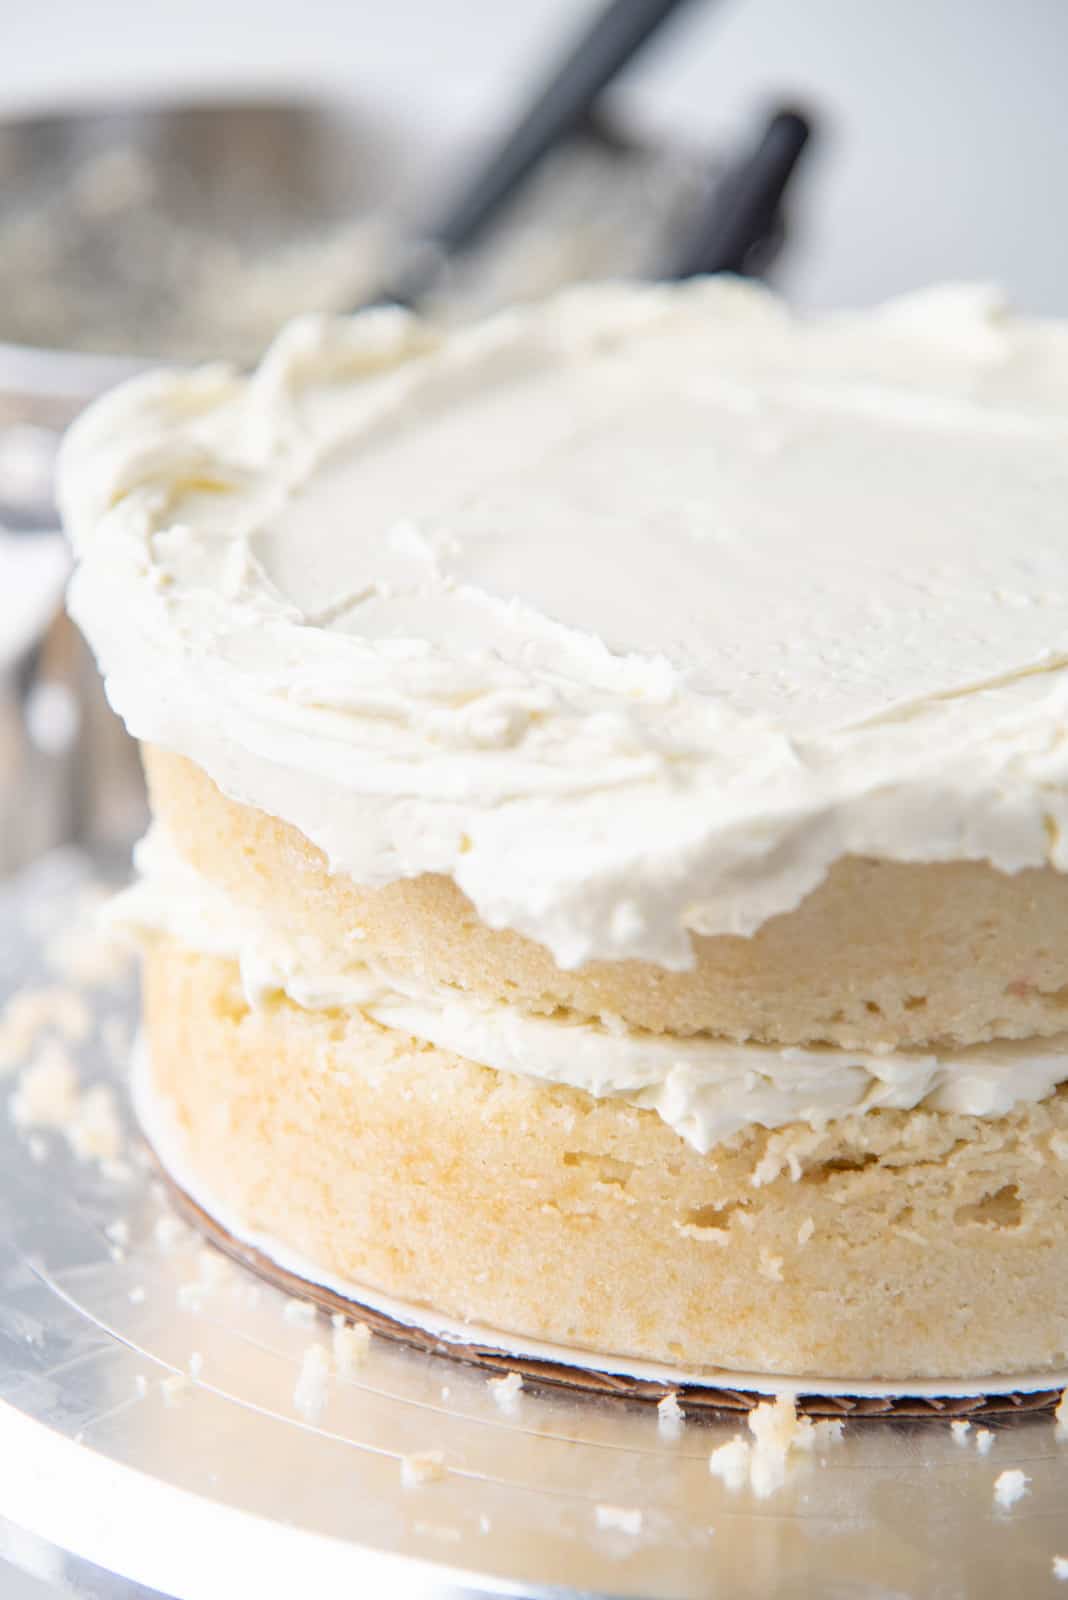
Apply a thin coating of buttercream as a crumb coating all over the top and the sides of the cake. This is optional, but it helps maintain a clean, professional look in your final cake. If you’re making a rustic looking white cake, you can skip this step.
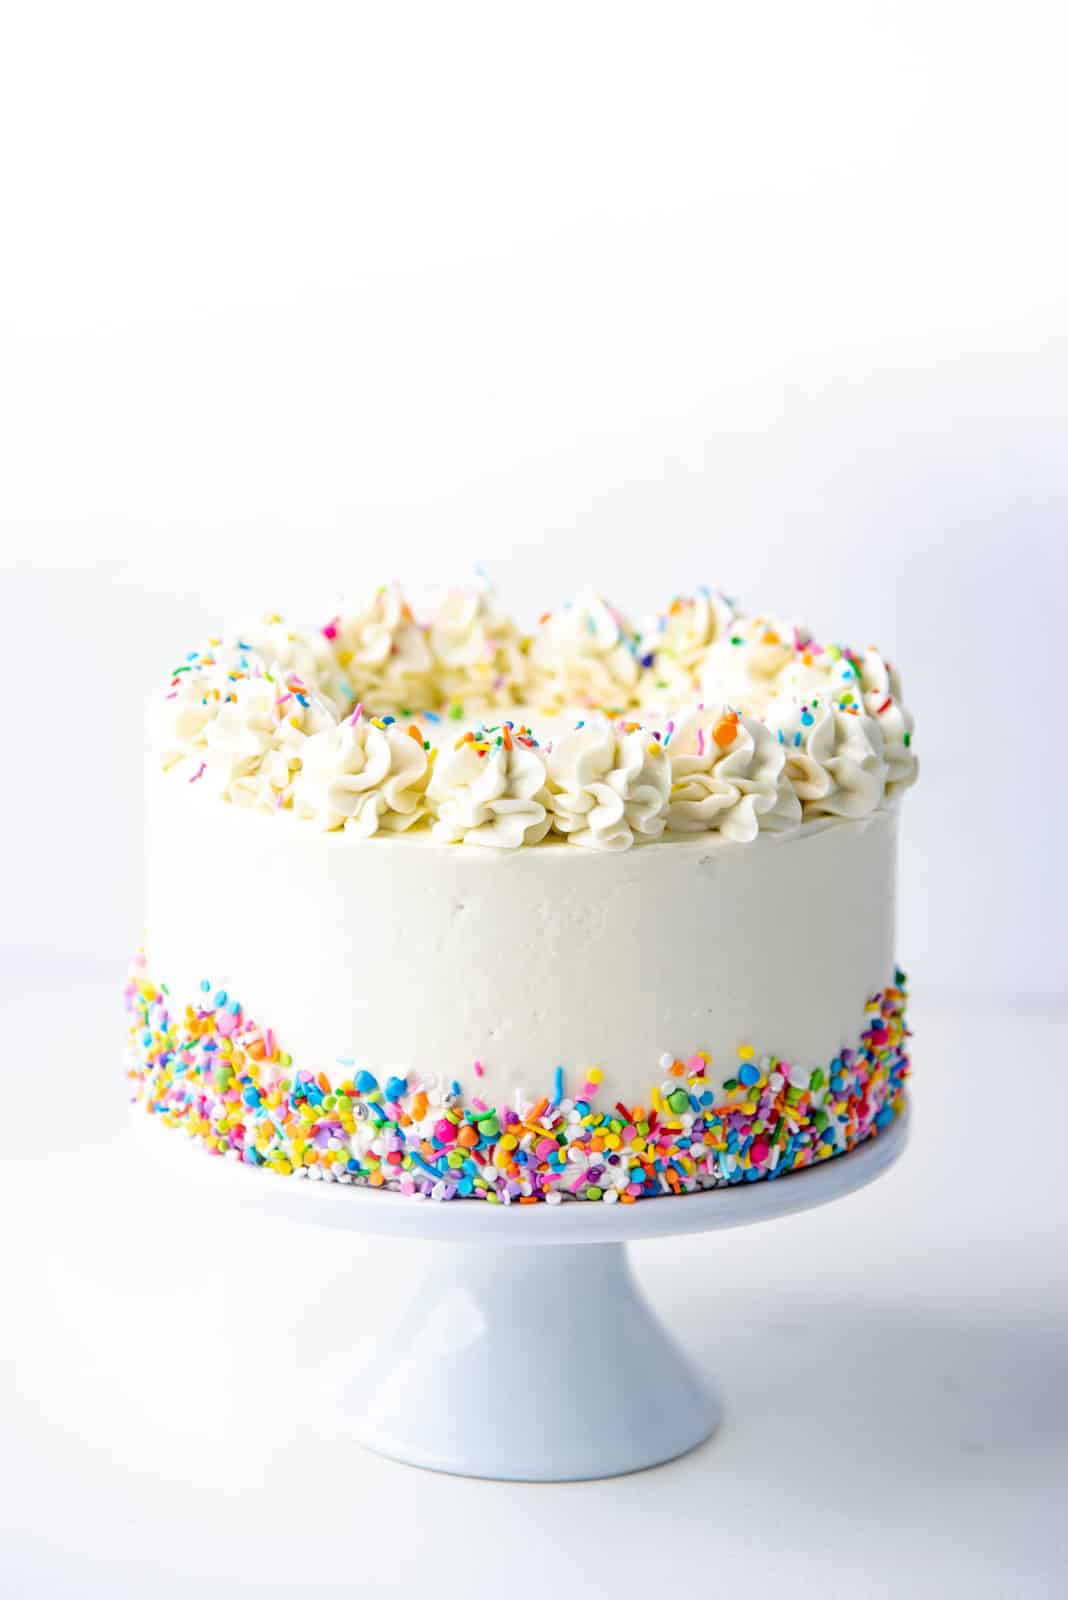
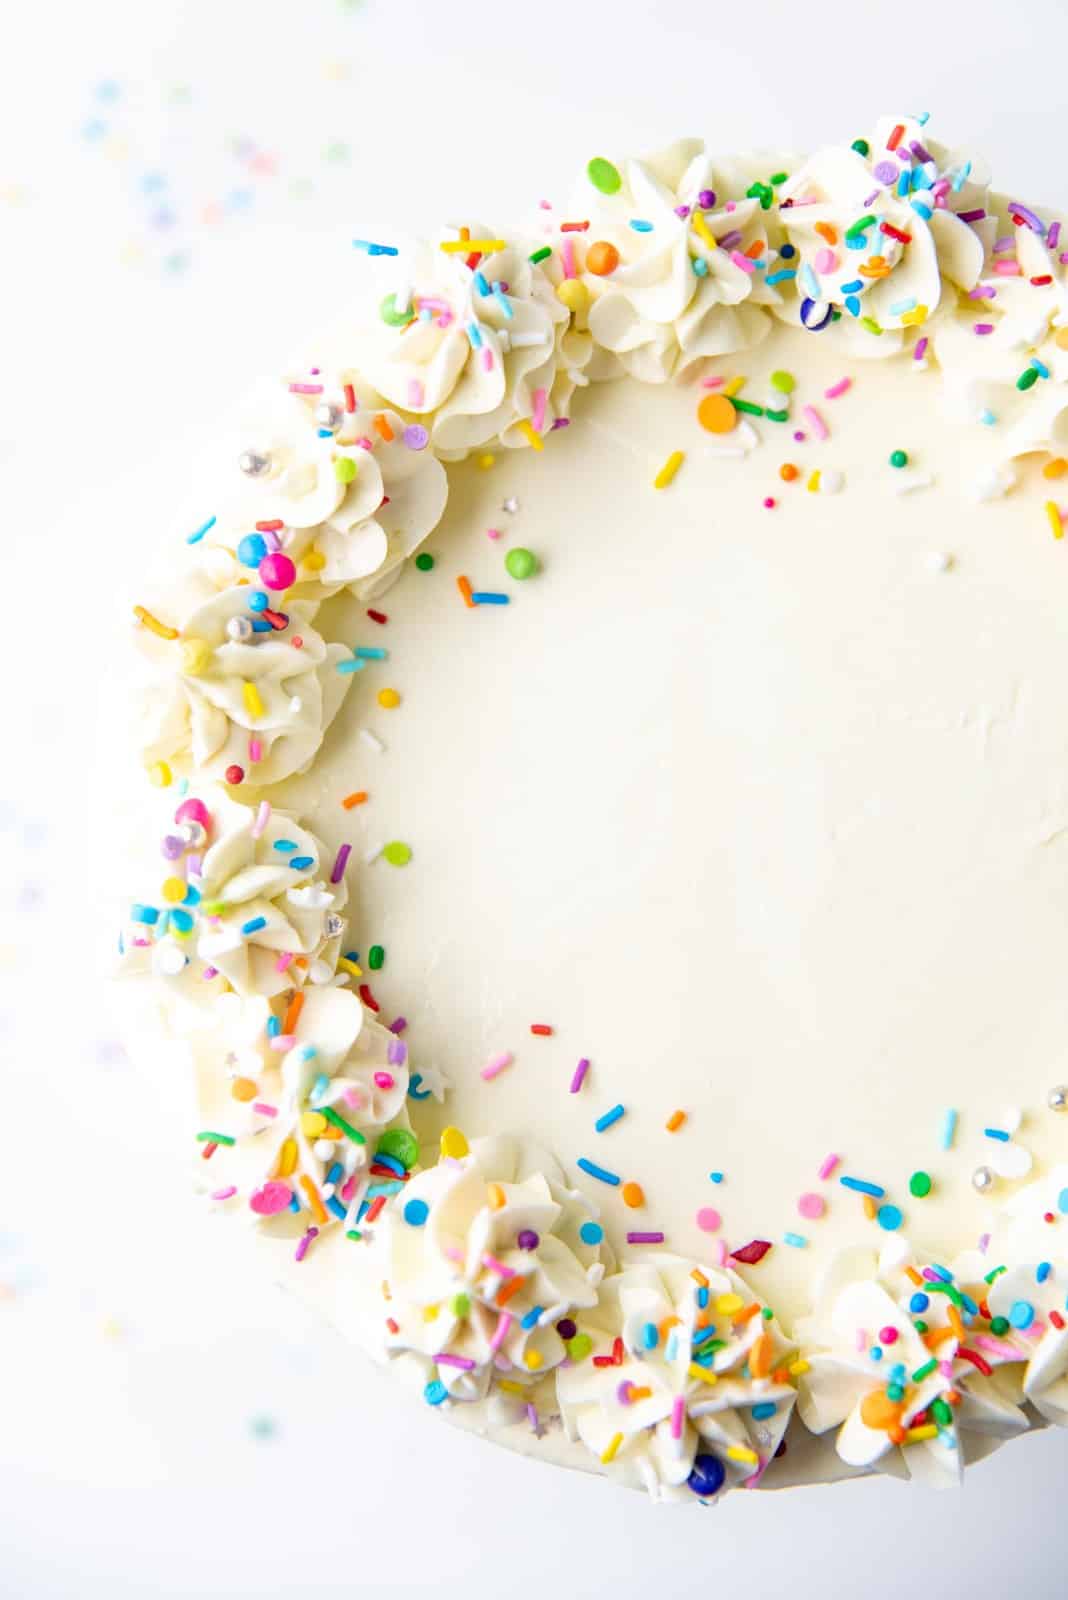
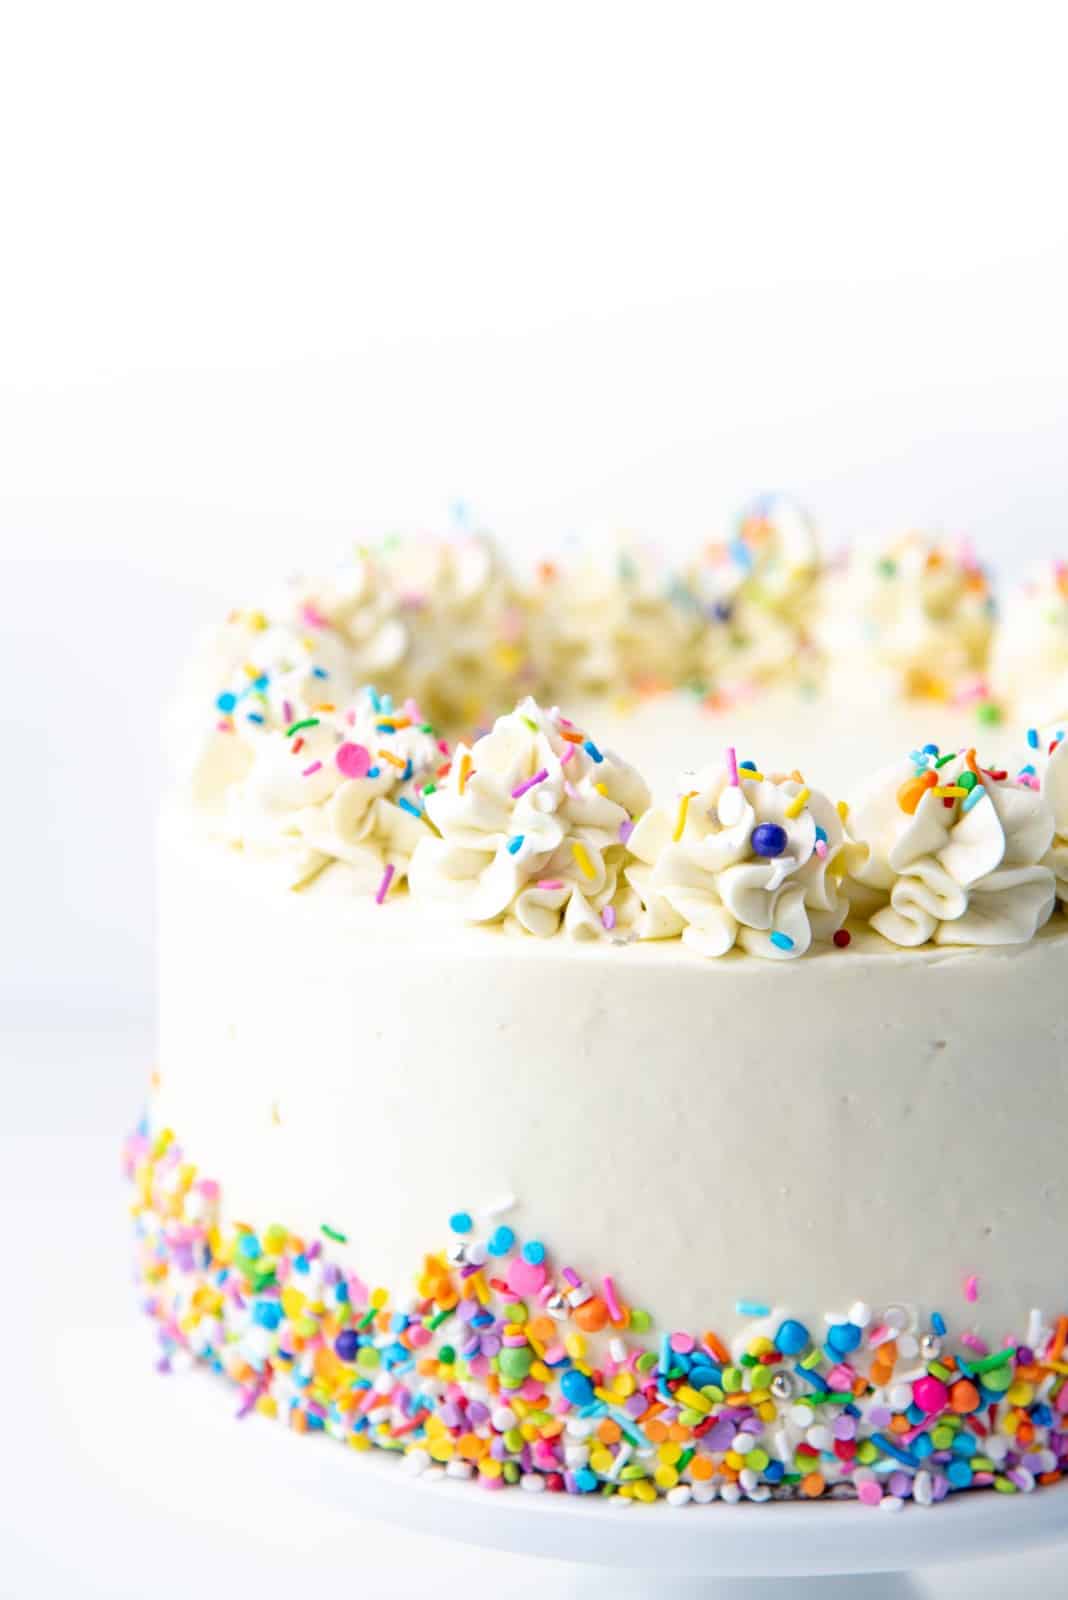
Frost the cake with more buttercream for the final layer. You can keep smooth sides, or swirl the frosting. Here I have smooth sides on this cake, and added lots of rainbow sprinkles to the side, along the bottom of the cake. A perfect look for a simple birthday cake.
Since the cake is white in color, it takes on color really well too. So it’s the perfect white cake recipe to make a rainbow-themed cake as well!
Tips for making this white cake recipe
- Have all the ingredients at room temperature. This will help create a smooth, emulsified batter.
- It’s OK to have a little yolk in the egg whites if it gets in accidentally. However, try to avoid it to keep the cake as white as possible.
- Colder eggs are easier to separate, but it’s best to let them come to room temperature before making the cake.
- Whisk the egg whites until a little frothy, to “loosen” them before adding them to the cake batter.
- Without the fat and emulsifiers from the egg yolks, the flour is more likely to develop gluten creating a gummy texture. So try to use cake flour to minimize gluten development. Also fold it gently and be careful to not over-mix the batter.
- Use cake strips to keep the white cake from coloring on the sides.
- Use simple syrup to flavor the cake layers! This is an optional step, but can make the cake more moist and flavorful.
- To make an extra tall cake, you can double the recipe to make 4 layers. Or if you want 3 layers, like this white coconut cake, then multiply the recipe by 1.5 times (change the servings number to 18).

Recipe
Classic white cake
US based cup, teaspoon, tablespoon measurements. Weight measurements are recommended for accurate results whenever available.
Common Measurement ConversionsIngredients:
White cake
Dry ingredients
- 330 g cake flour / pastry flour 2 ¾ cups, (measured by spoon and level method)
- 2 tsp baking powder
- ½ tsp baking soda
Wet ingredients (all at room temperature for best results)
- 180 g sour cream ¾ cup
- 120 ml milk ½ cup
- 10 mL clear vanilla extract or a good quality vanilla extract 2 tsp
- 5 mL lemon extract or almond extract 1 tsp
- 226 g unsalted butter 2 sticks, (softened)
- 350 g white sugar 1 ¾ cups
- ½ tsp sea salt
- 6 egg whites from large eggs 180 – 185 g
Vanilla syrup (this is optional – the cake will be moist even without it!)
- 200 g white sugar 1 cup
- 240 mL water 1 cup
- 5 mL vanilla extract 1 tsp. regular or clear
Easy Vanilla Buttercream
- 226 g unsalted butter 2 sticks, cool but not cold (about 70°F)
- ½ tsp sea salt
- 60 mL cold whipping cream ¼ cup
- 10 mL good quality vanilla extract 2 tsp
- 226 -290 g confectioner's sugar 2 – 2½ cups (measured by spoon and level method)
OR Vanilla Swiss Meringue Buttercream (optional)
Instructions:
- Prepare the cake pans – line the bottom of two 8 inch cake pans and butter and flour the sides. For best results, you can use cake baking strips for white sides. These need to be soaked in cold water ahead of time (at least 15 minutes). After 15 – 30 minutes of soaking, wrap the prepared cake pans with the soaked baking strips and set aside until needed.
- Preheat the oven to 325°F.
White cake
- Sift all the dry ingredients together and set aside. This includes the cake flour, baking powder and baking soda.330 g cake flour / pastry flour, 2 tsp baking powder, ½ tsp baking soda
- In another bowl or jug – combine the sour cream, milk and the flavor extracts. Stir to combine and set aside until needed.180 g sour cream, 120 ml milk , 10 mL clear vanilla extract or a good quality vanilla extract, 5 mL lemon extract or almond extract
- Place the butter, salt and sugar in the bowl of your stand mixer. With a paddle attachment, cream the butter and sugar mix together until light, creamy and fluffy. This can take as long as 5 – 10 minutes depending on the texture and temperature of the butter and the ambient room temperature.226 g unsalted butter, 350 g white sugar , ½ tsp sea salt
- Whisk the egg whites separately until they are slightly frothy. This is to break up the egg whites and to make them loose. They do not have to be whisked into a meringue.6 egg whites from large eggs
- Add the whisked egg whites to the butter-sugar mixture. Mix for about 1 – 2 minutes until the egg whites have completely incorporated into the butter.6 egg whites from large eggs
- Next, add in the rest of the wet ingredients and mix until well incorporated. If the mixture becomes grainy, do not worry. This can happen if the ingredients are at different temperatures, but it will come together after the dry ingredients have been added.
- Gently fold in the sifted dry ingredients. Be careful to NOT OVER-MIX the dry ingredients. I like to add the dry ingredients in 2 – 3 additions to make sure I don’t over-mix the cake batter.330 g cake flour / pastry flour, 2 tsp baking powder, ½ tsp baking soda
- Divide the cake batter equally between the 2 cake pans. An ice cream scoop is a great way to divide the batter equally, or do it by weight to divide the batter accurately.
- Use an offset spatula to spread the batter evenly in the cake pan. Knock the pans against your kitchen counter 2 – 3 times, firmly but not too hard, to knock out any air bubbles stuck in the batter.
- Bake the cake pans in the preheated oven for about 25 – 35 minutes, rotating once halfway through the baking time. It will take 25 – 30 minutes without cake strips, and up to 35 minutes with cake strips.
- The cake is done when a toothpick inserted comes out clean, or when the surface of the cakes is just starting to be springy to the touch. The baking time can vary depending on your oven and cake pans too, so keep an eye on them.
- Remove the cakes from the oven and let them cool for 5 – 10 minutes. While the cakes are still warm, carefully remove them from the pans and transfer them on to cooling racks.
- OPTIONAL – while warm, soak the cakes with the vanilla syrup using a squeeze bottle.
- Let the cakes cool completely.
- While the cakes are cooling, you can make the Swiss meringue buttercream (you can also make this the day before too) or the American buttercream.
Vanilla syrup – This can be made a day ahead, or just before making the cake.
- Place the sugar and water in a saucepan. Heat over medium-high heat and stir to dissolve the sugar. Heat until the mixture comes to a boil. Lower the heat and let it simmer for 2 – 5 minutes and then remove from the heat. Stir in the vanilla extract.200 g white sugar, 240 mL water, 5 mL vanilla extract
- Let the syrup cool down completely. Store the syrup in a squeeze bottle until needed. You can use the syrup while warm or at room temperature.
Buttercream – can be made ahead of time.
- Use the recipe here to make vanilla Swiss meringue buttercream (this is a slightly more involved option) OR make American buttercream (for an easier option).226 g unsalted butter, ½ tsp sea salt, 60 mL cold whipping cream, 10 mL good quality vanilla extract, 226 -290 g confectioner's sugar
Frosting and decorating the cake
- When the cakes have cooled down, they are ready to be frosted. If needed, trim and level the cake tops to make them evenly flat.
- Place a cake layer on your cake turntable (or platter). Measure and place about ½ – ¾ cup of frosting on top of the cake and use an offset spatula to spread it evenly. Leave a small margin along the edge of the cake.
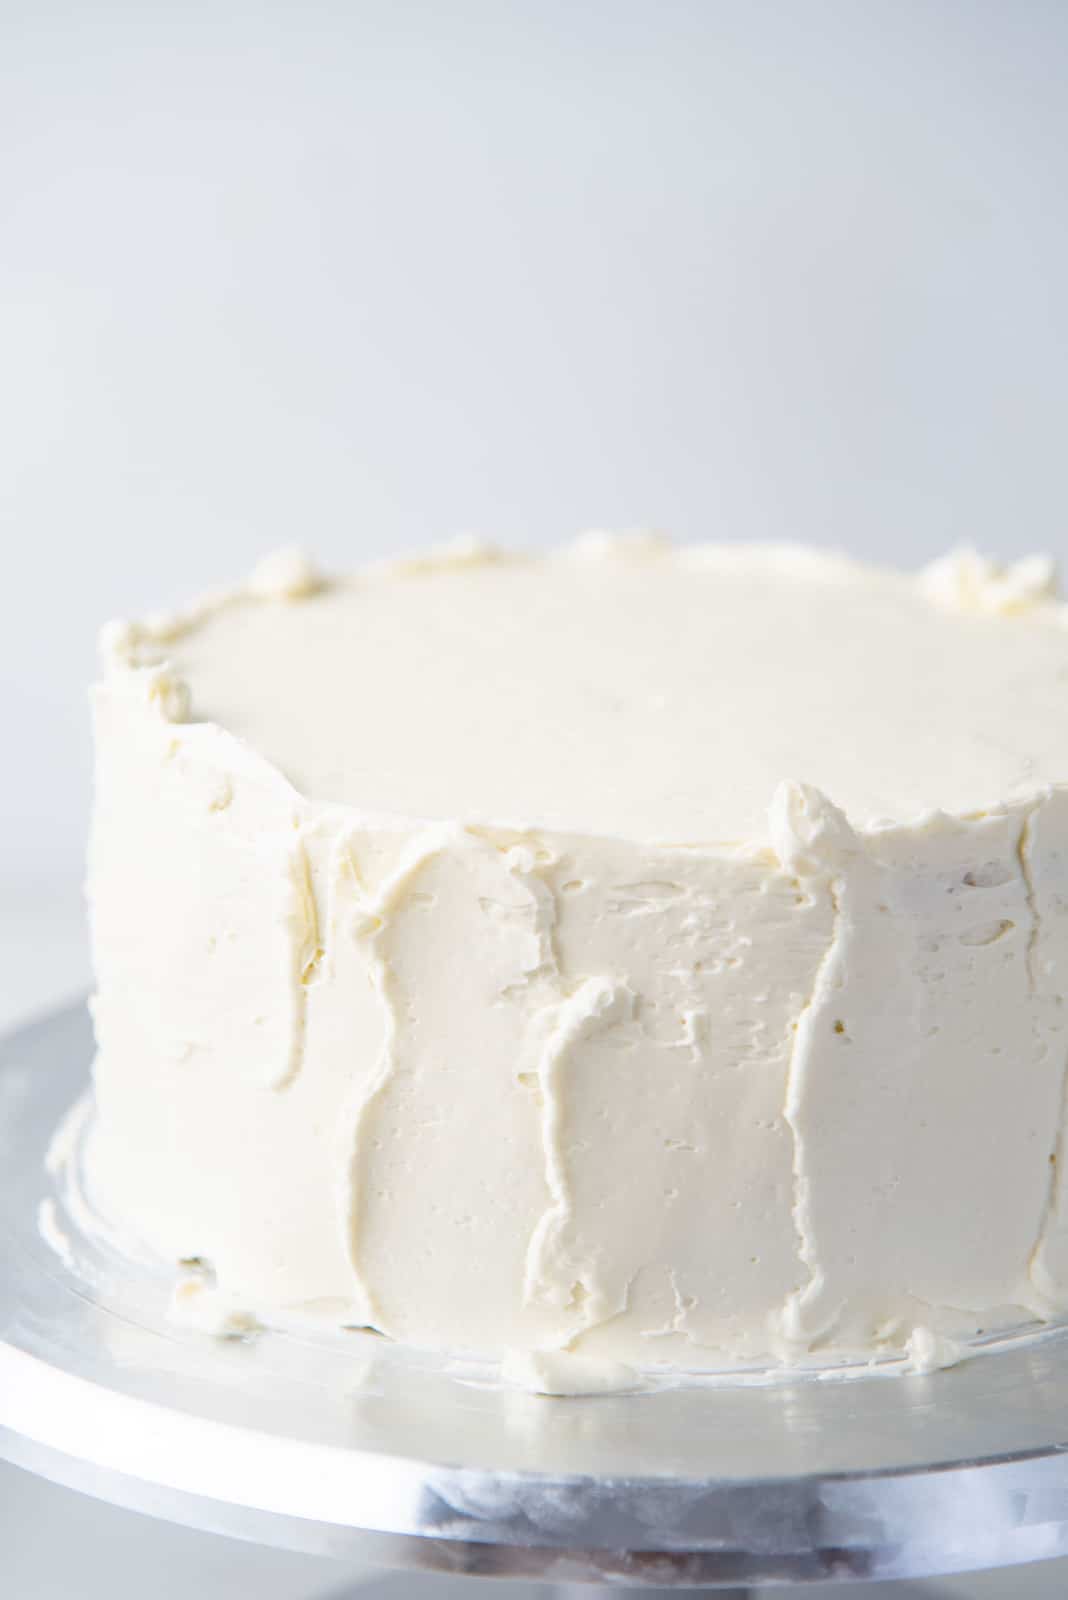
- Place the second cake layer on top, with the bottom side facing up (this is to create a flat surface on top). Place about ¾ – 1 cup of frosting and spread the frosting along the top and sides of the cake, filling any gaps between cake layers. Make sure the frosting is spread very thin, over the top and sides, to create a flat surface and straight sides. This will be your crumb coating (which catches and seals in any loose crumbs). Having a crumb coating is optional, but recommended for a clean, professional looking cake.
- Let the frosting “set” in the fridge, or in a cool place for about 30 minutes.
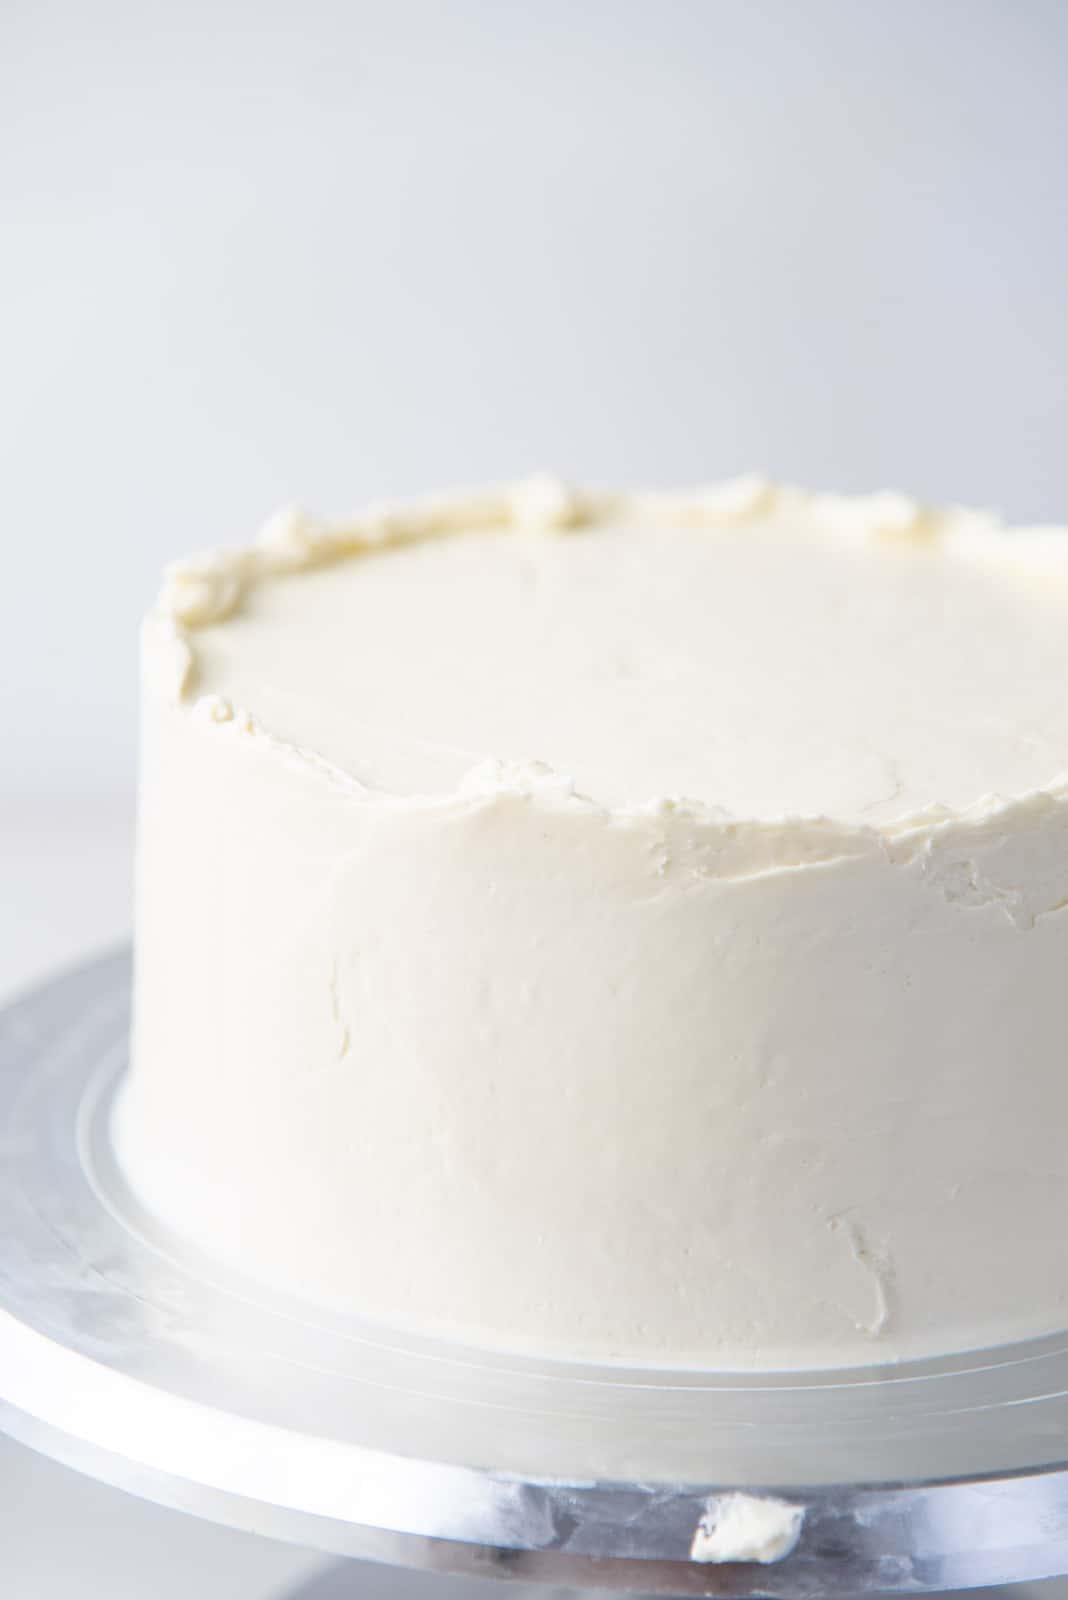
- Once the crumb coating is “set”, apply another layer of white frosting. You can create a smooth layer of frosting using a frosting scraper, or create swirls of frosting with an offset spatula instead (for a rustic look).
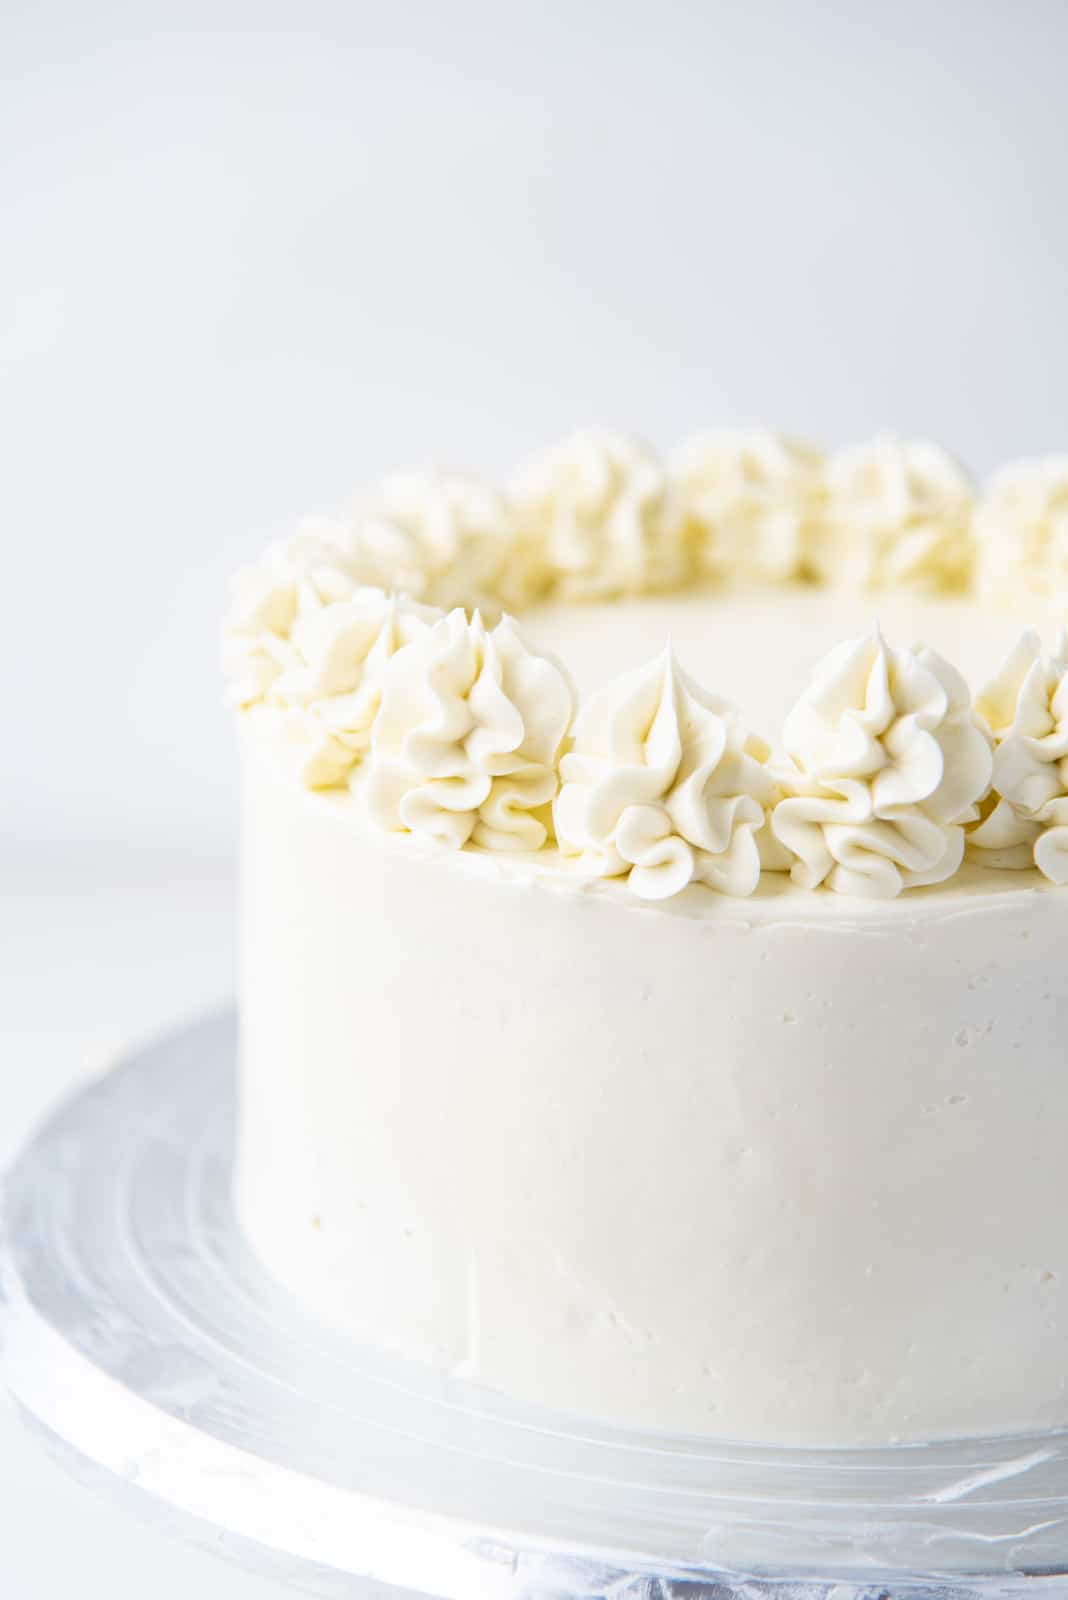
- OPTIONAL – place some frosting in a piping bag with a large open star or closed star piping tip. Pipe swirls on the top of the cake. Decorate with sprinkles.
Recipe Notes
Nutrition Information:
“This website provides approximate nutrition information for convenience and as a courtesy only. Nutrition data is gathered primarily from the USDA Food Composition Database, whenever available, or otherwise other online calculators.”


Leave a Reply