

Homemade dumpling dough is a thing of beauty! It’s a labor of love, but absolutely worth it. Here, I’m showing you how to make dumpling dough for dumplings and potstickers. An easy to follow, complete guide for beginners!
The only dumpling dough recipe you’ll need to make perfect dumplings or potstickers!

This post was first written in 2014, so an update with new photos and information is long overdue.
I really enjoy making dumplings for my family. However, I was still bit of a novice at it 7 years ago. The technique I used to make dumplings at the time served me very well. But over the years, my dumpling making skills have improved greatly!
But everyone’s gotta start somewhere. It’s not easy making dumpling wrappers the way pros do when you’re a complete novice. So, here’s my beginner’s guide to making dumpling dough for dumpling wrappers, along with ways to improve your skills over time!

But do keep in mind, this isn’t a “quick” recipe. It’s not a short cut. Making dumplings is not a fast process. You got to put the effort in to reap the rewards. You could recruit the help of your family, and make a big batch of dumplings at once. I always make enough dumplings for at least 3 – 4 meals in one go, and then freeze the extra.
So make this a weekend project to do with friends or family. OR while you catch up on your favorite TV show. Precisely what I do whenever I make a big batch of homemade boba pearls (tapioca pearls) too!
What’s the difference between dumpling wrappers and potsticker wrappers?
There are two types of dumpling dough.
- Hot water dough
- Cold water dough
Traditionally, hot water dumpling dough is used to make potstickers and steamed dumplings (as well as Chinese scallion pancakes). This produces dumpling wrappers that are more delicate and can be rolled very thinly.
Cold water dough is used to make boiled dumplings. This dough produces wrappers that can be thicker and more sturdy. So it’s great for boiling.
I mostly make hot water dough because I LOVE potstickers!
How to make the dough for dumpling wrappers
Which type of flour is best for making dumpling dough?
You can buy flour that is specifically made for dumpling dough. This flour produces snowy white dumpling wrappers and have the right protein content to make soft, delicate dough.
However, if you live in an area where you can’t find this specialty dough (like me), you can mix 50% cake flour and 50% AP flour.
I make dumpling dough with all AP flour more often because that’s what I have available, and have great results each time.
Type of water to use
The ratio of flour to water is usually the same for either hot water or cold water dough.
For hot water dumpling dough, you have the option of mixing boiling water first, followed by regular water. This makes the dough a little easier to knead by hand, because regular temperature water cools down the dough a little.
But you can also add all hot water and mix the dough. Just be careful since the dough will be very hot.
How to mix the flour and water
Traditional method
Usually the dough is mixed in a bowl, first using chopsticks and then using your hands to knead until you achieve the right consistency.
There is one trick to avoid kneading for too long. Once the flour absorbs the water, cover the bowl containing the shaggy dough and let it rest for about 15 – 30 minutes. This softens the dough, so that it’s easier (and faster) to knead to a smooth ball.
Once the dough is kneaded, wrap it with plastic wrap, or place it in a ziploc bag, and let it rest for about 30 – 60 minutes. This will make the dough soft and easy to work with.


Stand mixer method
You can skip the chopsticks and hand kneading method, and use a stand mixer to knead the dough as well. Just note that if the mixer bowl is too big for a small amount of dough, it won’t be able to knead the dough effectively. The dough hook has to be able to catch the dough and move it around.
Food processor method
I use the food processor to bring the dough together by streaming the water into the flour while the food processor is running. However, with this method, I’d still need to knead the dough by hand to make it smooth.


Which method do I use?
The food processor is how I began the fun journey of making dumpling dough, but quickly realized that making it by hand was more preferable. Unless I’m making a double batch of dumpling dough, in which case I’ll use a stand mixer to make the kneading process easier.
Making dumpling wrappers
Once the dough is made, and rested, you’re ready to make the wrappers.
There are two ways to make dumpling wrappers. I started off with the beginner’s method described below, because I just couldn’t roll out the wrappers the traditional way. But after plenty of practice over the years, I now make dumpling wrappers the traditional way.
Beginner method to making dumpling wrappers
Here you’ll be using a pasta sheeting machine to roll out the dough to the proper thickness for dumpling dough.
I divide the dough into 4 and work with smaller portions. Just like with pasta, the dough is passed through the pasta maker, starting with the thickest setting, and then make it thinner and thinner until it’s about 2 – 3 mm thick.
Once rolled out, use a large cookie cutter (about 4 – 4.5 inches), and cut out circles from the dough. These will be your dumpling dough wrappers.
Make sure to dust the wrappers well (with flour) before stacking them to prevent them from sticking to each other.
Pros
- It’s an easy method for anyone to do, provided you have a pasta roller.
- Each dumpling wrapper will be uniform in shape.
Cons
- There’s some dough wastage.
- Unlike traditional dough wrappers, the middle isn’t thicker than the edge here. So it’s more delicate to use and not as “stretchable” as the classic wrapper.


Traditional method of making wrappers out of dumpling dough
The traditional method might be a little harder for beginners. But it certainly gets easier with practice!
The dough is divided into 4, so that you only work with a smaller portion at a time. Place the other portions in a ziploc bag or cover with plastic wrap to prevent them from drying out.

Roll the dough portion into a log, with an equal width throughout (as pictured below). Cut each log into about 8 pieces (for larger dumpling wrappers) or 9 -10 (for smaller dumpling wrappers).
Cover all the small portions of the dough that you’re not working with (with a cloth napkin or plastic wrap) as well, to prevent them from drying out.


Take one small portion of the dough, and flatten it with your palm. Make sure your work surface and the dough are always lightly floured to prevent the dough from sticking. Use a small rolling pin to roll it out until it’s about 3 inches in diameter, while maintaining the shape of a circle as much as possible.
Keep rolling it out until it’s about 4 – 4.5 inches in diameter, while maintaining the circle shape. It doesn’t have to be a perfect circle though.
The traditional way is to hold one edge of the wrapper with your fingers, while placing the other edge on your work surface. Then use a rolling pin to roll out that one edge. Please see photos and video below for reference.
Rotate the dumpling wrapper with your fingers to thin out the edge right around the circle. The final wrapper will be slightly thicker in the middle, with a thinner edge, and be about 4 – 4.5 inches in diameter.


It’s totally OK if your dumpling wrappers aren’t perfect circles. I’ve made hundreds (if not thousands) of dumplings with this dough, and my wrappers aren’t always perfect circles.
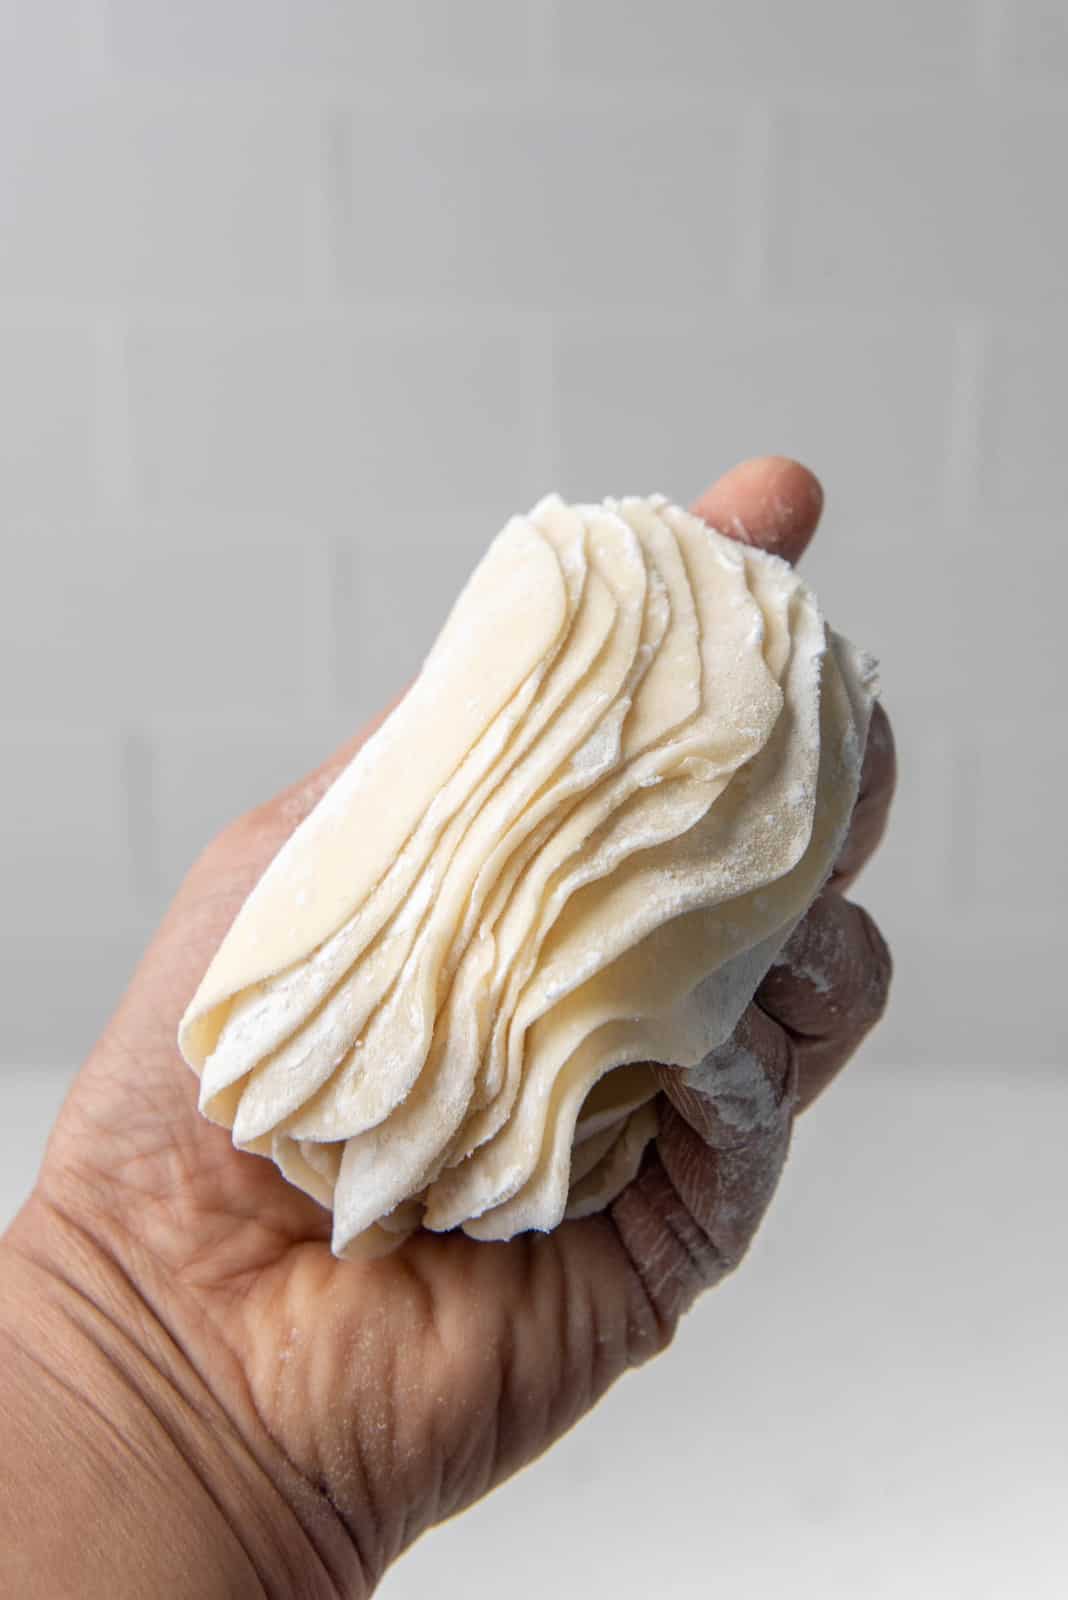
Make sure the wrappers are dusted well with flour, so that they don’t stick to each other. I prefer not to stack them directly on top of each other, and instead, I stagger them.
Repeat this process with the other dough portions.
Pros
- These wrappers have a thicker middle and a thinner edge. This makes the wrappers stronger in the middle (where the filling goes), with an edge that’s not too thick even after being pleated.
- There is no dough wastage.
- Can be quicker to do once you get the hang of it.
Cons
- Needs practice to get it right, and to do it quickly.
- May take longer for beginners.
- The wrappers may not all be perfect circles, nor identical (at least until you become more familiar with the technique).
Video on how to roll out dumpling wrappers
Pleating techniques
Once you’ve made the dumpling wrappers with the dumpling dough, and your filling is ready, it’s time to make dumplings!
There’s a number of ways to seal the filling in the dumpling wrappers. This ranges from very easy to elaborate and advanced. In this post, I’ll show you 4 ways to seal or pleat your dumplings.
If your wrappers are dry, you may need to use some water to help seal the edges. But I find that wrappers made with homemade dumpling dough don’t need any water, while store-bought wrappers may need some water to help seal properly.
Beginner
For beginners, you don’t need to worry about creating pleats to seal your dumplings.
You can simply fold over the dumpling wrapper, and seal the edges to form a tight seal.
If you want to create crescent shaped dumplings with a simple seal,
- Fold over the dumpling wrapper and seal the edge in the middle.
- Then, hold the dumpling in both hands, with the two ends of the wrapper pressed between your thumb and the base of your index finger on either hand.
- Press the ends together with your thumbs (against your index fingers). See the short video clip below to see how it’s done.
Advanced
There are many other ways to seal dumplings that you made with either homemade dumpling dough or store-bought wrappers.
Here I’ll just go through a few of these folding styles.
Bi-directional pleated dumplings
These dumplings are first folded in half, and sealed in the middle only. Then they are pleated in both directions towards the middle. About 3 – 4 folds on either side are more than enough, if evenly spaced out.
This is my favorite way to prepare dumplings, whether I buy pre-made dumpling wrappers, or make my own with my dumpling dough. See video clip below for reference.
One directional pleated crescent shaped dumplings
Here you pleat the edge of the dumpling wrapper in one direction. Start from one end and pleat toward the other end. You don’t need a large number of pleats for this – about 5 to 8 pleats in one direction should do it. With practice, you will get better at evenly spacing out the pleats. See video clip below for reference.
Braided dumplings
This is a bit more difficult, and will require practice. But they do look absolutely beautiful when prepared this way!
Here’s a video to show you how I do it.
How to store dumpling dough and/or wrappers
I don’t normally store dumpling wrappers on their own. This is because they stick together very easily when stored for an extended period of time.
You could store them this way if you place wax paper between each wrapper to prevent them from sticking to each other. However, I simply prefer to make dumplings with the wrappers, as soon as I make them with my dumpling dough.
Once the dumplings are made, the can be frozen in batches, for months (that is if you don’t polish ’em off before that!).
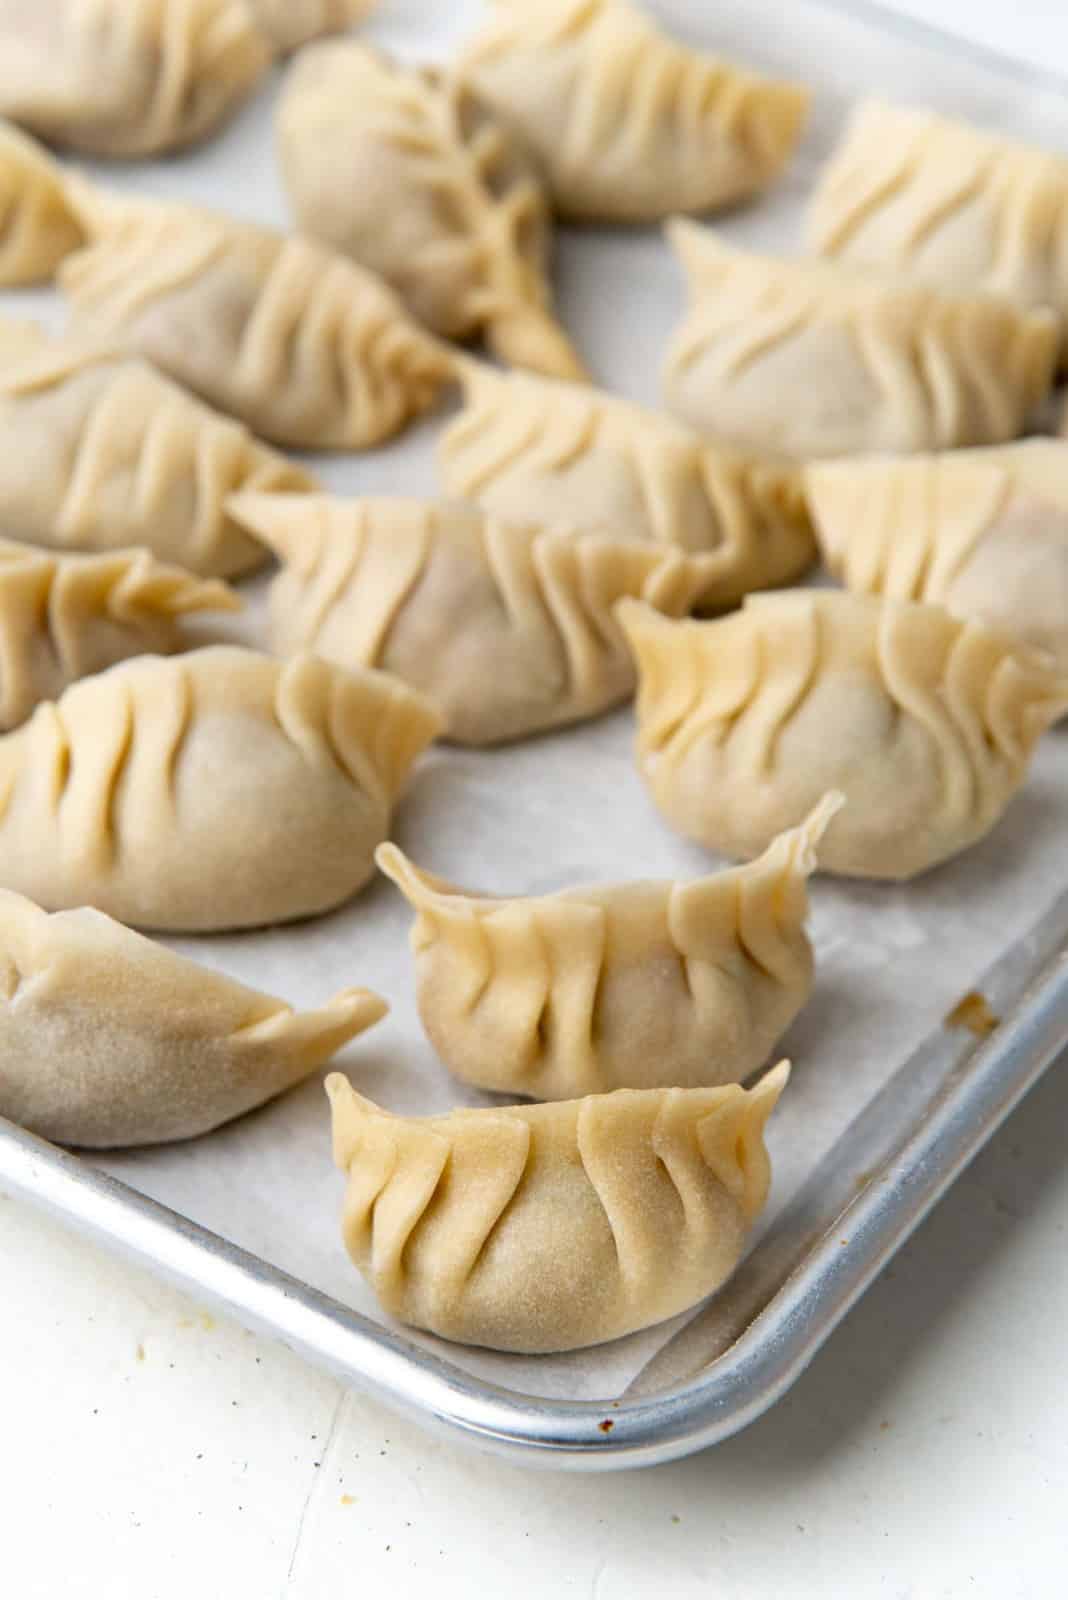
How to freeze homemade dumplings
Line a baking tray with parchment paper, and place the dumplings on the tray, while making sure they are not touching each other. Then, loosely cover the tray with plastic wrap (or with a second baking tray, making sure it’s not crushing the dumplings).
Place the tray in the freezer for 2 – 4 hours (depending on the freezer and how big the dumplings are). When the dumplings are quite solid to the touch, place your homemade dumplings in a freezer bag, and store in the freezer until you’re ready to cook them.
Tips on making perfect dough for dumpling / potsticker wrappers
- Don’t add too much water. This leads to dumpling dough that is too soft. They need to have “ear lobe” softness. Not any softer or stiffer.
- Allowing the dough to rest will make it easier to roll out your dumpling wrappers.
- Dust your dough and work surface as you go. It’s important for the work surface to be lightly floured so that the dough doesn’t stick to it (or to the rolling pin), as you work quickly to roll out the wrappers. If the wrappers stick while being rolled out, it could distort the wrappers.
- Make an evening of making dumplings! Making dumpling dough and homemade wrappers is a time-consuming process. But if you make a big batch at once, you can store these in the freezer for quick and easy meals for a good long while!
Why I love this recipe
I LOOOOVE eating dumplings! Homemade dumplings made with homemade dumpling dough is just that much better than store-bought!
The wrappers are silkier, softer, and all-around more delicious. They are a labor of love, with a fantastic pay-off!
Do I still buy store-bought dumplings? Sure, I do! But when I do make homemade dumplings or potstickers, I always enjoy them so much more, and I also make enough to last us for at least 3 or 4 meals. I even get my husband to help with the pleating.
You can also make a variation of fillings, so that you have a variety of dumplings and flavors to enjoy. To differentiate between the fillings, pleat each type of dumpling differently, before freezing.
And once you’re comfortable with making classic dumpling dough, you can get more creative and make colored dumpling dough too! Like this spinach dumpling dough that is naturally green, or replace some of the water with vegetable juice to make other naturally colored dumplings.
Recipe

Homemade Dumpling Dough
US based cup, teaspoon, tablespoon measurements. Weight measurements are recommended for accurate results whenever available.
Common Measurement ConversionsIngredients:
- 300 g all purpose flour (or a mix of 50% cake flour and 50% AP flour)
- 175 – 200 ml boiling water see recipe notes – use room temperature water if you're making boiled dumplings
- ¾ tsp salt
- Extra flour for dusting
Instructions:
By hand
- In a bowl, mix the flour and salt together.
- Create a well in the middle (like you would when making pasta).
- Slowly add about 130 ml of the hot water, while mixing with chopsticks or a fork until the flour forms clumpy bits. You can alternate mixing and pouring water, if that's easier.
- Add up to 70 mL of the rest of the hot water (or room temperature water, if using), while mixing, to form a clumpy dough. There will be dry spots and wet clumps of dough.
- Gently mix the dough by hand to bring it together to form a scraggly dough, with no dry spots. Cover the bowl with plastic wrap and let it rest for 20 – 30 minutes. If it’s too wet, add a little more flour. If too dry, add just a little water (about ½ tsp at a time).
- After 20 – 30 minutes, the dough will have completely hydrated, and be soft enough to knead.
- Knead the dough for a few minutes until it looks smooth and feels supple (ear lobe soft).
- Roughly separate the dough into 4 portions, and wrap them in plastic wrap (or place them in ziploc bags) and let the dough rest for at least 30 minutes at room temperature (I prefer to leave it for 1 hour).
- You should get a dough that is soft, not sticky, and firm enough to hold its shape.
By stand mixer (works best for a double batch)
- Place the flour and salt in the bowl of your mixer.
- Stream in the 130 ml of hot water, while running the mixer on low.
- Replace the mixer attachment with the kneading attachment. Add the rest of the hot water (or room temperature water) while kneading the dough. You should be able to form a scraggly dough.
- Knead the dough until you have a soft, supple, smooth dough.
- Portion the dough into 4, and wrap each portion in plastic wrap or put it in ziploc bags, and let the dough rest for at least 30 minutes (I prefer to leave it for 1 hour).
By food processor
- Process the flour and salt for a few seconds to mix.
- In a steady stream, pour about 130 mL of the hot water while the processor is running. Add the rest of the water, until the mix starts to resemble very coarse crumbs.
- Turn the dough out onto a lightly floured surface.
- Using your hands, bring the flour clumps together to form a soft but firm ball of dough. Adjust water or flour as needed (if the dough is too dry or too wet).
- Knead the dough further on your work surface for a few minutes (2 – 5 minutes). Use flour sparingly if the dough is getting sticky. You're looking for a smooth, soft, and supple dough (ear lobe soft).
- Divide the dough into 4, and wrap each portion in plastic wrap (or place it in ziploc bags). Let the dough rest for at least 30 minutes (I prefer to leave it for 1 hour).
Making the dumpling wrappers
- If you're using the dough the following day instead, place it in the fridge (sealed in plastic bags), and then return it back to room temperature before handling it.
- Lightly dust your work surface and rolling pin with flour, and have a clean cloth napkin and a well floured area ready to place your cut wrappers. I like to keep a little extra flour in a bowl or shaker, to use as needed.
Traditional method
- Take one portion of dough, and roll it out into a tube that's about 1 ½ inches in diameter. Make sure the tube has an even thickness throughout.
- Cut the tube into 8 or 9 equal portions. While you work with each individual portion, cover the other portions with a cloth napkin or plastic wrap to prevent them from drying out.
- Place one portion of the dough on a lightly floured surface, with the cut side down.
- Press down on the dough with the heel of your palm to flatten it slightly. Then, using a small rolling pin, roll out the dough into a circle that is about 2.5 – 3 inches in diameter.
- While holding up one end of the wrapper with your fingers, use the rolling pin to roll out the opposite end of the dumpling wrapper. Apply light pressure with the rolling pin when rolling out the dough.
- Rotate the dumpling wrapper with one hand (from the end that you're holding up), and roll out the edge of the dumpling wrapper right around the circle with your other hand (please see video below for reference).
- This method will take some practice to get it right. You should end up with a dumpling wrapper that is about 4 inches in diameter, and slightly thicker in the middle.
- EASIER OPTION – Place the flattened dough on a lightly floured surface and roll it out (while rotating) using a small rolling pin, until you have a round dumpling wrapper that is about 4 inches in diameter.
- Store the dumpling wrappers on a lightly floured work surface, making sure there is a light dusting of flour between each wrapper. Stagger the wrappers, rather than stacking them directly on top of each other (otherwise they will all stick together!). Keep them covered in plastic wrap or a clean cloth napkin.
- Repeat with the other dough portions. Use the dough wrappers as soon as possible, since they become stickier the longer they are kept.
Pasta machine (for beginners)
- Set the pasta roller to the thickest setting. Flatten one portion of dough, and feed it through the pasta machine. Fold it in half, and roll it through the pasta machine again.
- Repeat this process, while reducing the pasta thickness setting, until you have a dough sheet that is about 2 – 3 mm in thickness.
- Once the dough is rolled out, place it on a lightly floured work surface. Cut out dumpling wrappers using a well floured cookie cutter (about 3.5-4 inches in diameter).
- OPTIONAL – Re-knead the leftover dough and let it rest for about 45 minutes (while covered). This can be re-rolled in the pasta machine once more to cut out more dumpling wrappers. Make sure to let the dough rest further if it shows any resistance (or shrinkage).
- Store the cut dumpling wrappers on a lightly floured surface, making sure there is a light dusting of flour between each wrapper. Stagger the wrappers, rather than stacking them directly on top of each other (otherwise they will all stick together!). Keep them covered in plastic wrap or a clean cloth napkin.
- Repeat with the other dough portions. Use the dough wrappers as soon as possible, since they become stickier the longer they are kept.
Recipe Notes
Water for the dumpling dough
The amount of water you use will vary depending on the brand of flour you use, the amount of protein in the flour, and even the water temperature. So do keep an eye out for the right dough consistency. The typical flour to water ratio is roughly 2:1. You can also add 2 parts boiling water, and 1 part room temperature water to the dough as well. Make sure to add the boiling water first. Then add enough room temperature water to get the right consistency. When using boiling water, boil the water first, and then measure the required amount. Do not measure water first and then boil, since obviously, evaporation = less water. To make boiled dumplings, replace all the hot water with room temperature water. This produces wrappers that are thicker and more sturdy, so more suitable for boiling.Nutrition Information:
“This website provides approximate nutrition information for convenience and as a courtesy only. Nutrition data is gathered primarily from the USDA Food Composition Database, whenever available, or otherwise other online calculators.”


Leave a Reply