


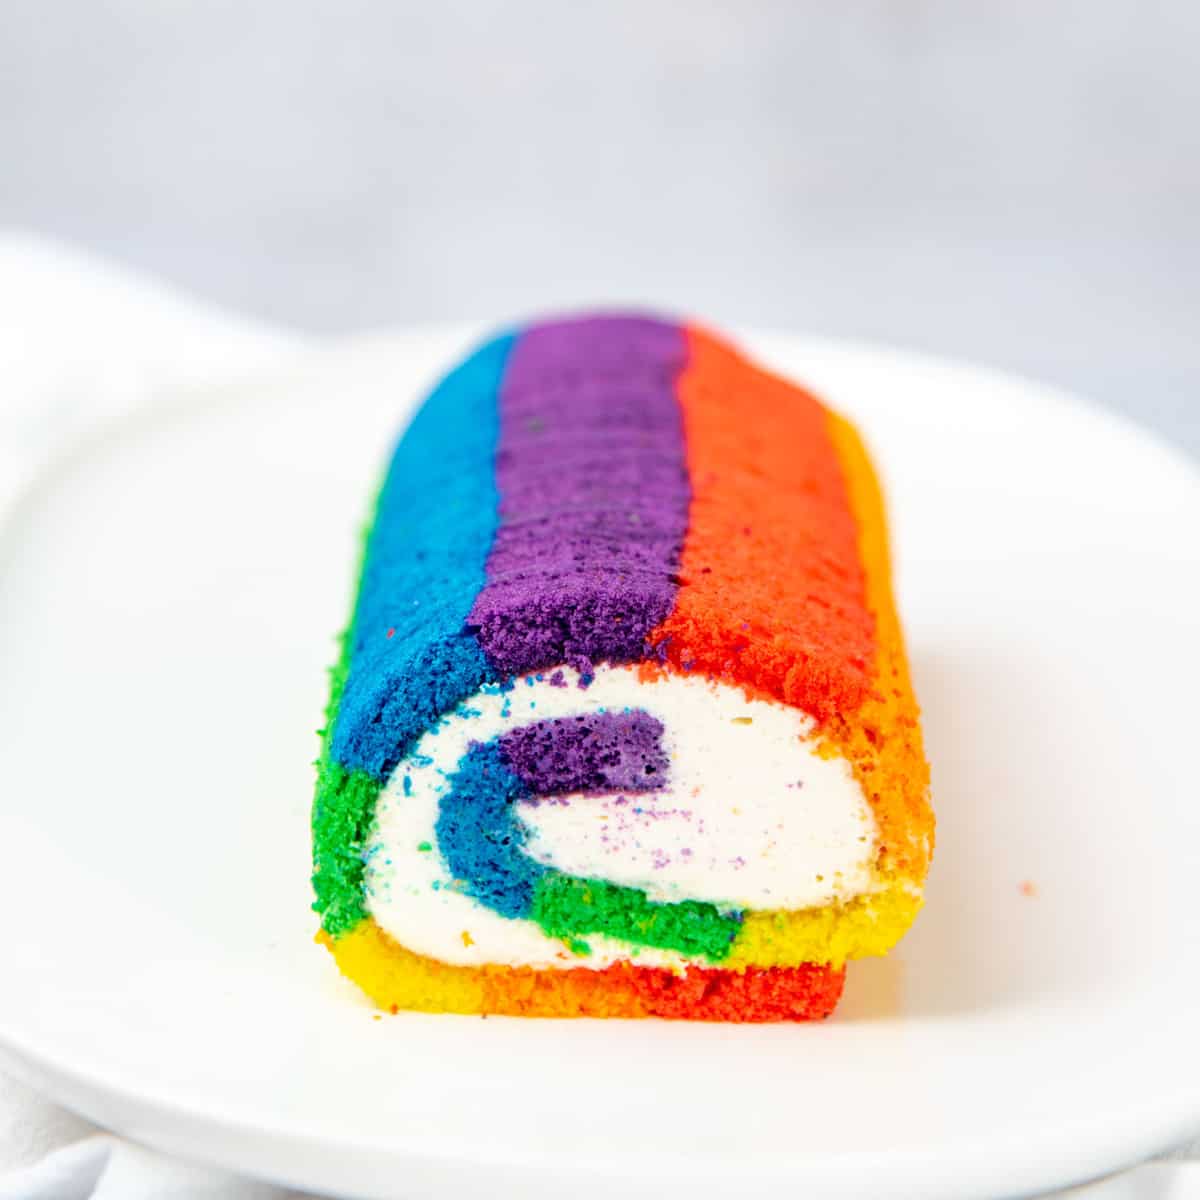
A Rainbow Swiss Roll Cake that is vibrantly beautiful, and soft, moist, light, and delicious! An easy and foolproof recipe to celebrate everything rainbow colored and spirited.
This vibrantly colored version of my vanilla roll cake is made with a light sponge cake and filled with lightly sweetened whipped cream!

Happy Pride Month everyone!
I know I’m a little late to the party this year, but I’m thrilled to share this delicious rainbow roll cake to celebrate pride month this year! I wanted to make something just as vibrant as the rainbow ice cream cake I made a few years ago.
After rolling around a few ideas in my head, I decided on this simple and beautiful rainbow swiss roll cake.
Swiss roll cakes aren’t difficult to make. The trick is to get the texture and timing right to ensure a soft, moist, and delicious cake with absolutely no cracks!
Thankfully, I’ve written a very detailed post on how to make the perfect swiss rolls cakes with my vanilla roll recipe. You can read that post for all my tips and tricks on perfecting Swiss roll cakes. Plus, I’ve also shared my chocolate roll cake, pumpkin roll cake, and yule log cake for other roll cake ideas!
Since this rainbow swiss roll cake requires a fair bit of mixing in of colors, there is bound to be some deflation in the cake batter. But not to worry. I adapted this cake recipe to still ensure the BEST results, regardless.

How to make the Rainbow Sponge Cake base
The base for this rainbow swiss roll is a modified sponge cake.
The sponge cake is made with whole egg foam, with an additional egg yolk added for richness, and with flour folded in for structure. As explained in my vanilla swiss roll recipe, I’ve previously tried making genoise sponge cake with whole eggs at room temperature. But I find that the warmer eggs produce a more stable foam that can withstand some mixing.
I highly recommend reading my vanilla swiss roll cake post for more details and tips. But here is a summary of how to make the rainbow swiss roll base;
- Weigh the empty mixing bowl before adding any ingredients into it.
- Whisk the egg and sugar together over a water bath until the egg mix is at about 110 F.
- Whisk the warmed egg mixture in your stand mixer for about 5 – 6 minutes until you get a stable foam.
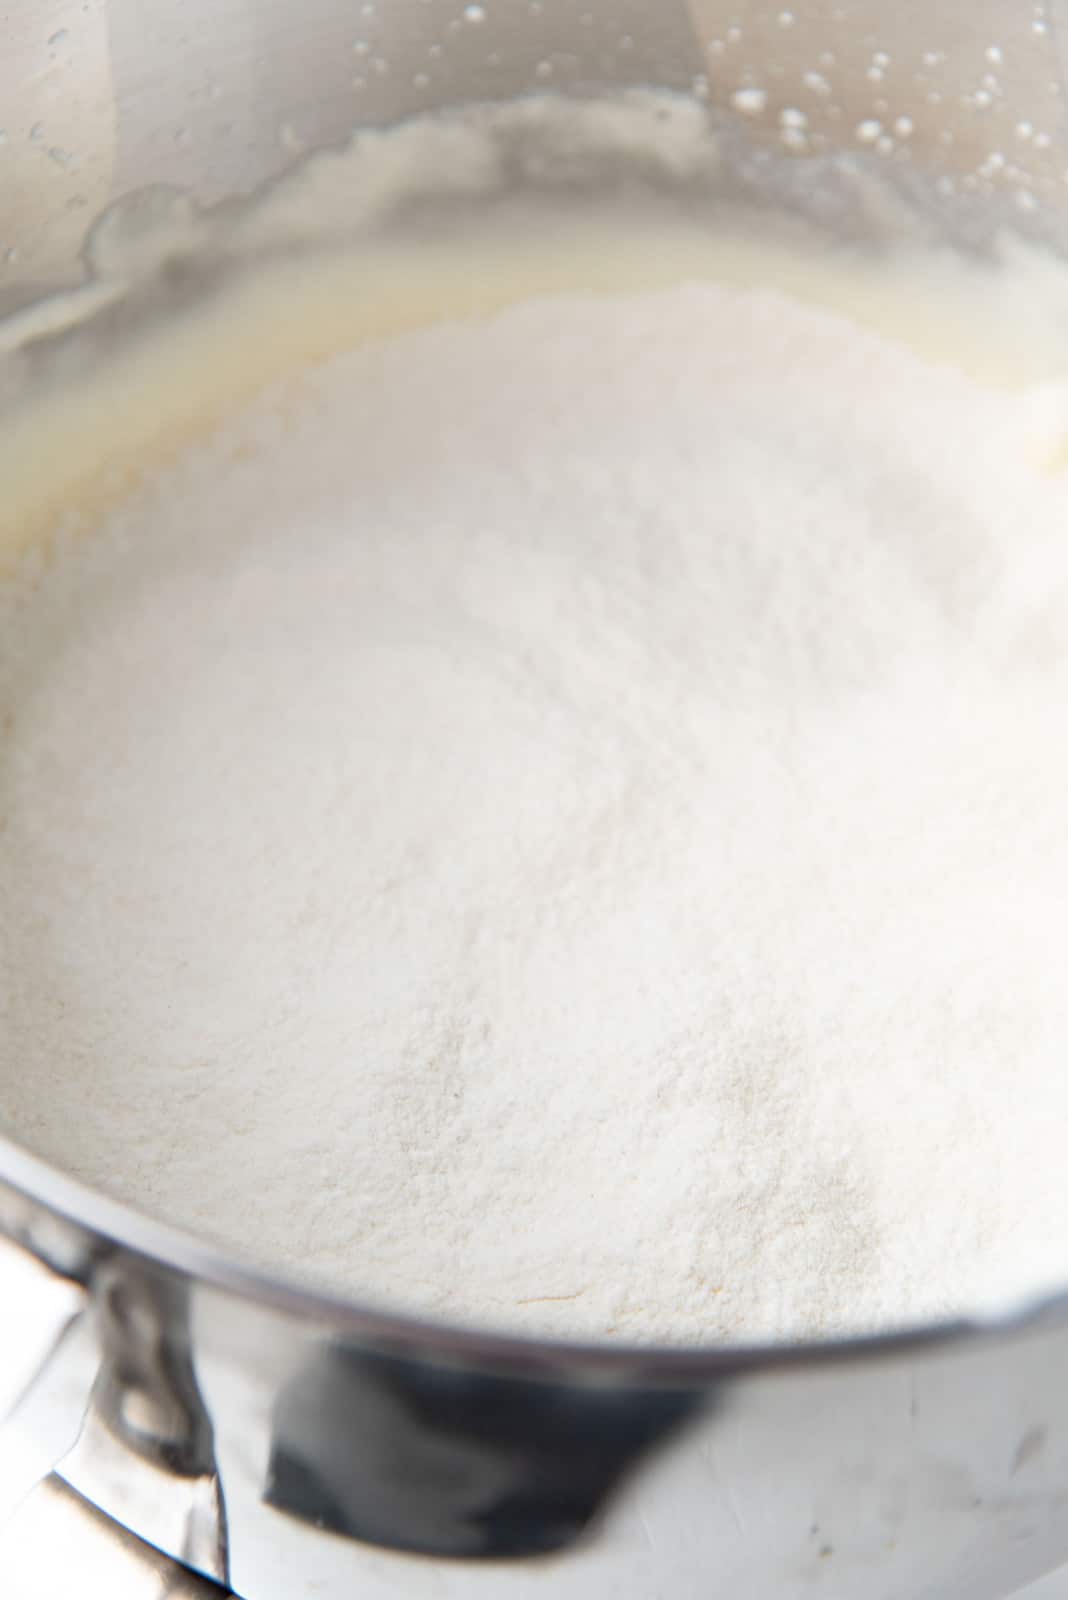
- Weigh the dry ingredients and sift them over the egg mixture.
- Fold in the dry ingredients, making sure that they are being mixed in well. Rotate the bowl as you fold everything in.
This is the first stage of making the batter.


How to divide and color the batter
- Weigh how much batter is in the bowl (i.e. weight of the bowl and batter – weight of the empty bowl = weight of the batter).
- Divide the weight by 6 (for the six colored striped flag, about 60 – 65 g per portion).
- Pour the batter portions into bowls, and color each portion with the appropriate color.
- Place each portion in an uncut pastry bag, and close the pastry bag with a knot.
The rainbow colors I used here are red, orange, yellow, green, blue, and purple.


How to assemble the rainbow sponge cake layer
Prep a swiss roll pan with parchment paper (10 x 15 inches). To avoid wrinkles in your rainbow swiss roll cake, butter the entire pan, and then line it with parchment paper.
Make sure the parchment paper sticks to the baking tray properly to prevent wrinkles. To make it easier to manage the baked cake, make sure to have an overhang of parchment paper over the short edges of the pan.
Visualize the swiss roll pan being horizontally divided into roughly 12 equal sections (i.e. two segments of the six colors). Cut about 1 cm from the tip of each of the pastry bags, and pipe the cake batter into the pan.
Start with red and finish with purple, and then repeat the six colors one more time, for a total of 12 stripes as shown below.
Knock the pan on a hard surface (kitchen counter) about 3 – 4 times, and bake the cake in the preheated oven until baked through.

How to maintain the vibrant color of the rainbow in your roll cake
Use gel food coloring instead of regular water-based food coloring. You’d need A LOT of the water-based food coloring to get similar vibrant colors.
Be generous with the gel food coloring (I use americolor), to make sure you have a vibrant rainbow color in the cake batter to begin with. I used about 4 – 5 drops, but it could vary.
Bake the cake at a slightly lower temperature to prevent the cake from browning too much.
Can I make the trans pride and bipoc inclusive pride flag cake?
Absolutely. You will need to divide the cake into 10 colors (the above 6 rainbow colors plus pastel pink, blue, brown, and black). You will also need to divide the pan into 10 sections (instead of 12 as we do here), so you know where to pipe each color.

How to prep and roll the baked rainbow swiss roll cake
You can check out my vanilla swiss roll post for a detailed look on how to prepare your swiss roll cake. But here are the key points;
- While the cake is still warm, roll it up firmly but gently. You don’t want to roll it up too tight, because this will flatten the cake.
- Dust the surface with confectioner’s sugar to prevent the cake from sticking to the parchment paper.
- Allow the cake to cool completely before unravelling it (carefully).
- Fill the cake with an even layer of filling, leaving the outer edge unfilled. This helps seal the cake, once rolled up.
- Roll the cake and wrap it with parchment paper, and then plastic wrap, before refrigerating it. This will “set” the filling, and help maintain the shape of the cake.


How to neatly slice the swiss roll
The rainbow stripes should be visible throughout the rainbow swiss roll cake slice. To get nice, clean cuts, you could do either of these two things;
- Use a sharp knife (not serrated). Warm the knife blade with hot water (and then wipe it dry), or a blowtorch, and cleanly slice the cake with the warm blade. This will give the cleanest cuts IF you use a sharp knife.
- Use a sharp serrated knife to “saw” through the cake. This may not give you the cleanest cuts, but still be better than trying to cut through with a blunt knife.

Serving suggestions
This rainbow swiss roll is gorgeous on its own. You don’t want to cover it with any decorations, because the rainbow colors of the exterior are obviously the draw here.
The lightly sweetened whipped cream filling is the perfect filling for this light sponge cake. Making it irresistible to stop at just one slice.
You could add fruits if you like though. A light drizzle of chocolate sauce is also a great option.

Why I love this recipe
The first reason why I love this recipe is the cake itself! Soft, light sponge cake, paired with a light filling is just a fantastic dessert.
Once you get the hang of making the genoise sponge cake, turning it into a rainbow swiss roll is easy. It just takes a little planning and organization. I’ve made the recipe foolproof as possible, so that you have some room for error, and still produce an incredibly delicious cake.
The second reason why I love this recipe is of course the beautiful symbolism of the cake. What these rainbow colors represent.
Having grown up in a discriminatory culture with homophobic gestures, sentiments, and laws that were quick to heap pity and judgement if you were anything but heterosexual or the majority, I was incredibly happy to find a community and world out there that were far more accepting and loving.
Even if I’m not part of the LGBTQ+ community myself, my whole-hearted and full-throated support is always present, and I want to be an even better ally.
People come in different colors, and so does love, just like a rainbow. That’s what makes this world a beautiful place to live in! That’s what this gorgeous rainbow swiss roll cake represents.
So what better way to spread love and celebration to everyone around you, than with cake? 😀

Recipe
Rainbow Swiss Roll Recipe
US based cup, teaspoon, tablespoon measurements. Weight measurements are recommended for accurate results whenever available.
Common Measurement ConversionsIngredients:
Vanilla swiss roll base
- 4 large eggs
- 1 egg yolk from a large egg
- 120 g white sugar ½ cup + 1 ½ tbsp
- ¼ tsp sea salt generous ¼ tsp
- 50 g AP flour about 6 tbsp
- 30 g cornstarch 3 tbsp
- 1 tsp baking powder
- 2 tsp vanilla
- Gel food coloring – Red, Orange, Yellow, Green, Blue, and Purple
- Extra confectioner’s sugar for dusting and decorating
Stabilized chantilly cream (whipped cream)
- ¾ tsp gelatin powder
- 1 tbsp water
- 1 tbsp chilled whipping cream
- 240 ml chilled whipping cream, 35% fat 1 cup
- 30 g confectioner’s sugar
- 2 tsp vanilla extract
Instructions:
Swiss roll batter
- Lightly grease a 10 x 15 inch jelly roll pan with butter. Line the pan with parchment paper, with an overhang along the short edges of the pan (to make it easy to remove the cake from the pan). Dust the exposed edges with flour. Set aside.
- Preheat the conventional oven to 325°F / 163°C.
- Sift the flour, cornstarch, and baking powder into a separate small bowl.50 g AP flour, 30 g cornstarch , 1 tsp baking powder
- Add a few inches of water into a medium saucepan, and bring it to a simmer on your stove.
- Record the weight of your empty mixing bowl. Make sure the mixing bowl can fit over the saucepan.
- Place the eggs and yolk in the mixing bowl. Then add the vanilla, sugar and salt, and whisk to combine.4 large eggs, 1 egg yolk , 120 g white sugar , ¼ tsp sea salt, 2 tsp vanilla
- Place the mixing bowl on the saucepan over the simmering water (without touching the water), and whisk continuously for about 2 – 4 minutes until the egg mixture is warm to the touch or until the eggs reach a temperature of about 110 – 120°F.
- Remove the egg mixture from the heat. Then remove the saucepan from the heat.
- Place the mixing bowl in your stand mixer, with the whisk attachment. Whisk on high speed for about 5 – 6 minutes. The eggs should at least triple in volume.
- To check if the egg mixture is at the right consistency, take some of the egg mixture with your whisk attachment and create some ribbons on the surface. The ribbons should remain on the surface and not immediately disappear.
- Sift the dry ingredients evenly over the surface of the egg mixture. Make sure it’s sifted evenly, so that the flour doesn’t collect at one spot and sink to the bottom.
- Using a wide spatula (or the largest spatula you own), fold the flour into the egg mixture. Rotate the bowl after every fold to make sure all the flour is well incorporated, and there are no dry spots in the batter or the bottom of the bowl. Be careful not to deflate the mixture by overmixing.
Coloring the batter
- Weigh the mixing bowl WITH the batter. Deduct the weight of the empty bowl from this value. This is the weight of the batter. Divide this value by 6 to get the weight of each of the individual portions.
- Evenly divide the batter (by weight) into 6 bowls. (If you don't have 6 bowls, you can do this one at a time, taking care to wash the bowl between each colored portion. But this will be more time consuming.)
- Add a few drops of the appropriate gel food coloring into each bowl of batter. Using a small spatula, mix the food coloring into the batter. Use small circular motions to dissolve the food coloring into a small area of the batter, and then fold the batter through to mix it in uniformly.Gel food coloring
- Scrape the batter into uncut pastry bags, or ziploc bags. Seal the bags (with a knot), and set aside.
- Repeat with all the colors to get the 6 colored batter portions.
Piping the batter into the pan, baking, and rolling up the cake
- You will be piping 12 even strips of color into the cake pan, parallel to the short edge (i.e repeating the 6 color segment once for a total of 12 sections – see images in the post). You could also pipe the batter diagonally if you prefer.
- Start with red, and then go orange, yellow, green, blue, and purple. Try to make the strips as even as possible.
- Knock the pan on a hard surface (kitchen counter) about 3 – 4 times to remove any big bubbles trapped in the batter.
- Bake in the preheated oven for about 12 – 15 minutes. It takes 13 minutes in my oven. The cake is done when the cake surface is springy to the touch, and the cake is starting to pull away from the sides. The cake surface should not have browned too much either.
- Remove the pan from the oven and let it cool down slightly, for about 1 minute.
- While the cake is still warm, gently remove the cake from the pan (using the parchment paper), and place it on your work surface.
- Dust the surface with confectioner's sugar, and roll up the swiss roll while it's still very warm. Start at one of the short edges, and roll it up along the long edge, with the help of the parchment paper that is attached to the cake.Extra confectioner’s sugar for dusting and decorating
- Wrap the cake with a cloth napkin / kitchen towel and allow the cake to cool down to room temperature completely. Make sure the cake is stored with the seam-side down to help seal the cake.
- Make the filling once the cake has cooled down. (See below.)
Filling the cake
- Once the cake is completely cooled down, gently unravel it.
- Spread a thin layer of stabilized chantilly cream, about ½ – 1 cm (¼ – ½ inch) thick, on the surface. Leave a 1 – 1½ inch border at the second short edge that will form the seal.
- Now roll up the cake again, but loosen the parchment paper from the cake as you go. Make sure the cake is firmly rolled up, while maintaining its shape, and the filling isn't squeezed out much. Wrap the cake well with parchment paper and/or a cloth napkin so that the cake doesn't lose its shape. You can use the parchment paper to shape the cake if the roll seems loose.
- Make sure the cake is stored with the seam-side down, to hold its shape.
- Refrigerate for a few hours until the cake and filling have firmed up.
- Slice off the ends with a warm, sharp or serrated knife, so that the swiss roll cake looks neat.
- Serve with a dusting of confectioner’s sugar.
Stabilized cream chantilly (sweetened whipped cream)
- Place the water in a small microwave-safe bowl and sprinkle the gelatin over the surface. Mix with a toothpick to saturate the gelatin. Let it sit for about 10 minutes until the gelatin has bloomed.¾ tsp gelatin powder, 1 tbsp water
- Place the chilled cream (1 cup) in a mixer bowl (preferably chilled bowl). Add the confectioner’s sugar and vanilla, and whisk to mix the ingredients together. Set aside until the gelatin is ready.240 ml chilled whipping cream, 35% fat, 30 g confectioner’s sugar, 2 tsp vanilla extract
- Microwave the bloomed gelatin for just 15 – 20 seconds until the gelatin is dissolved. Do NOT let it boil. I prefer to microwave in 5 – 10 second bursts and check in between to make sure the gelatin has fully dissolved in the water (a clear liquid with no granules).
- Stir in 1 tbsp of cream to temper the temperature of the gelatin mixture.1 tbsp chilled whipping cream
- Whisk the cream on medium high – high speed using the whisk attachment in your stand mixer.
- Pour the gelatin mix carefully, while the mixer is running, and whisk for a few seconds until the gelatin has mixed through. The gelatin mixture should be poured into the cream and NOT on the whisk, as it will solidify and form lumps then.
- Lower the speed to medium, and whisk the cream until it starts to thicken and form soft peaks.
- Continue to whisk the cream until it reaches stiff peaks, but is still creamy. I prefer to whisk the cream by hand after reaching soft peaks stage, so that I don’t risk curdling the cream.
- The cream is now ready to be used.
Recipe Notes
Nutrition Information:
“This website provides approximate nutrition information for convenience and as a courtesy only. Nutrition data is gathered primarily from the USDA Food Composition Database, whenever available, or otherwise other online calculators.”


Leave a Reply