


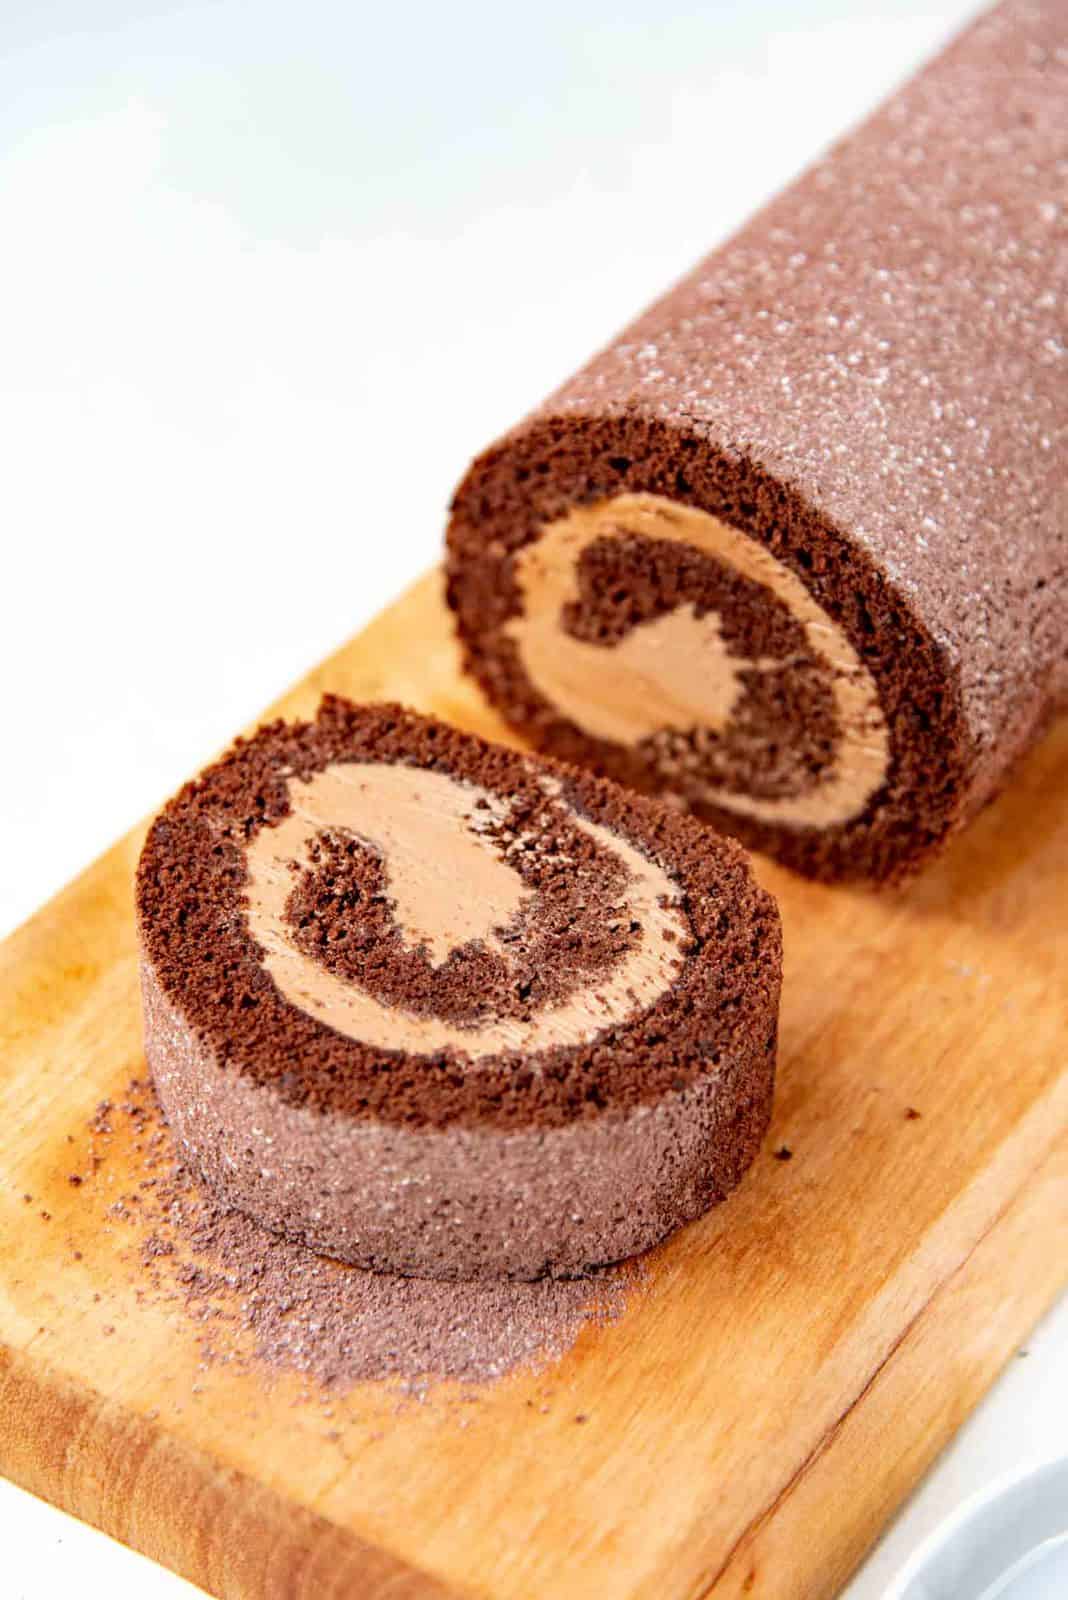
Delicious chocolate roll cake that is soft, fluffy, and easy to make! One of my favorite and most requested cake recipes, this chocolate Swiss roll is perfect for any occasion. And it can be whipped up SO quickly too!
Step by step recipe to make an incredibly soft chocolate swiss roll.
Why you’ll love this chocolate roll cake
This recipe guarantees fantastic results, because this chocolate swiss roll cake is,
- A foolproof recipe, tested many times over the years.
- A soft, spongy cake that is not dry.
- Fluffy and not dense.
- Has perfect sweetness and chocolate flavor.
- Easy to make, and I’ve provided lots of tips for successful results.
This recipe is adapted from my vanilla swiss roll, so you know it’s going to be great! 🙂 And I use this same recipe for my holiday favorite Bûche de Noël (yule log cake), a much loved, crowd favorite Christmas recipe!
I grew up eating chocolate swiss roll quite often, so it was important and nostalgic for me to get this recipe perfect! And this tastes even better than anything I remember from my childhood.

Ingredients to make the chocolate sponge cake base
The base of this chocolate cake roll is a genoise sponge cake. Sponge cake relies on eggs being whipped into a foam, which is the leavening agent for the cake.
- Eggs + egg yolk – The eggs are whipped and then they add volume to the cake batter that makes it fluffy. The extra egg yolk adds extra fat to prevent the cake from being too dry, and it yields more flavor as well.
- Sugar – I use brown sugar with the chocolate cake because I love that molassey flavor. But you can also use white sugar.
- All purpose flour – I use all purpose flour. Only a little is added to provide structure to the egg foam.
- Cocoa powder – I use Callebaut dutch cocoa powder, but you can use natural cocoa powder or any other dutch cocoa powder as well.
- Baking powder – Traditional genoise sponge cake doesn’t rely on baking powder as a raising agent. However, I do use a little for this recipe to make it foolproof! It ensures that the cake rises, and be fluffy and soft, even if it deflates a little.
- Butter – Clarified butter (you can use melted butter too) is used to add more fat to the cake. Just like the egg yolk, it adds some moisture to the cake and prevents it from being too dry, and tasting too dry.
- Vanilla extract, coffee and salt – These ingredients enhance the flavor of the chocolate swiss roll. I prefer to dissolve instant coffee in my vanilla extract and add it to the butter. And add the salt to the egg mixture so it dissolves as it’s heated.
How to make chocolate Swiss roll cake (step by step instructions)
How to make the chocolate roll cake batter
This recipe is easy! But do read the full recipe carefully at least once, and have ALL the ingredients measured and ready to go in separate bowls before you start. The recipe progresses quickly, so it’s easier to have everything set to go.
Prepare the jelly roll pan and preheat the oven.
Prep a 10 x 15 inch jelly roll pan by buttering and lining it with parchment paper. You could also use cooking spray, but I prefer butter.
Preheat the oven to 350 F / 180 C.

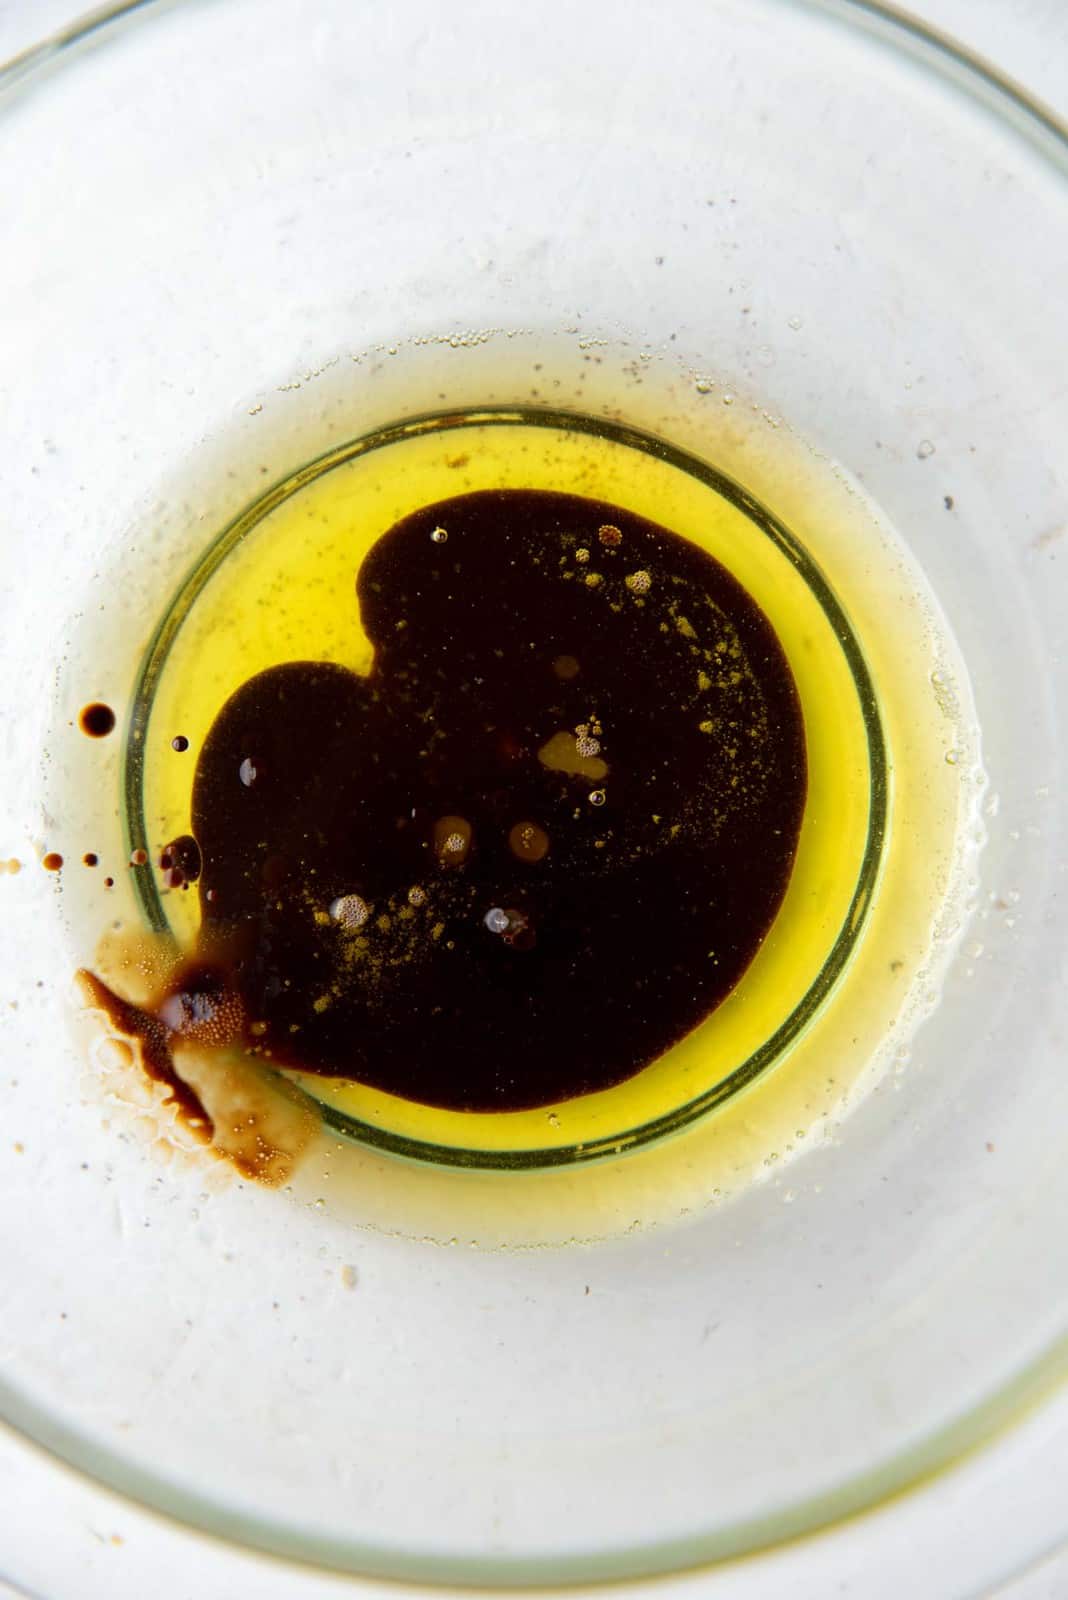
Melt the butter and keep it warm.
Melt more butter than needed to make the clarified butter. You can also just melt the butter or use brown butter instead. Place the melted butter in a bowl, then whisk in the vanilla, and set aside.
Measure and have the ingredients ready to go.
Measure all the ingredients. Keep the flour and cocoa powder in one bowl, the melted butter and vanilla in another, and finally place the eggs and yolk with the sugar in a separate bowl.
Whip the eggs and yolk.
To whip the eggs and yolks, place them with the sugar, and heat the mixture over a double boiler for 2 – 4 minutes. When the egg and sugar mixture is heated to about 110 F, it can be whipped until foamy and stable.
You can check if the foam is stable by creating a ribbon flow with some of the batter. If the ribbon doesn’t disappear, then it’s ready.

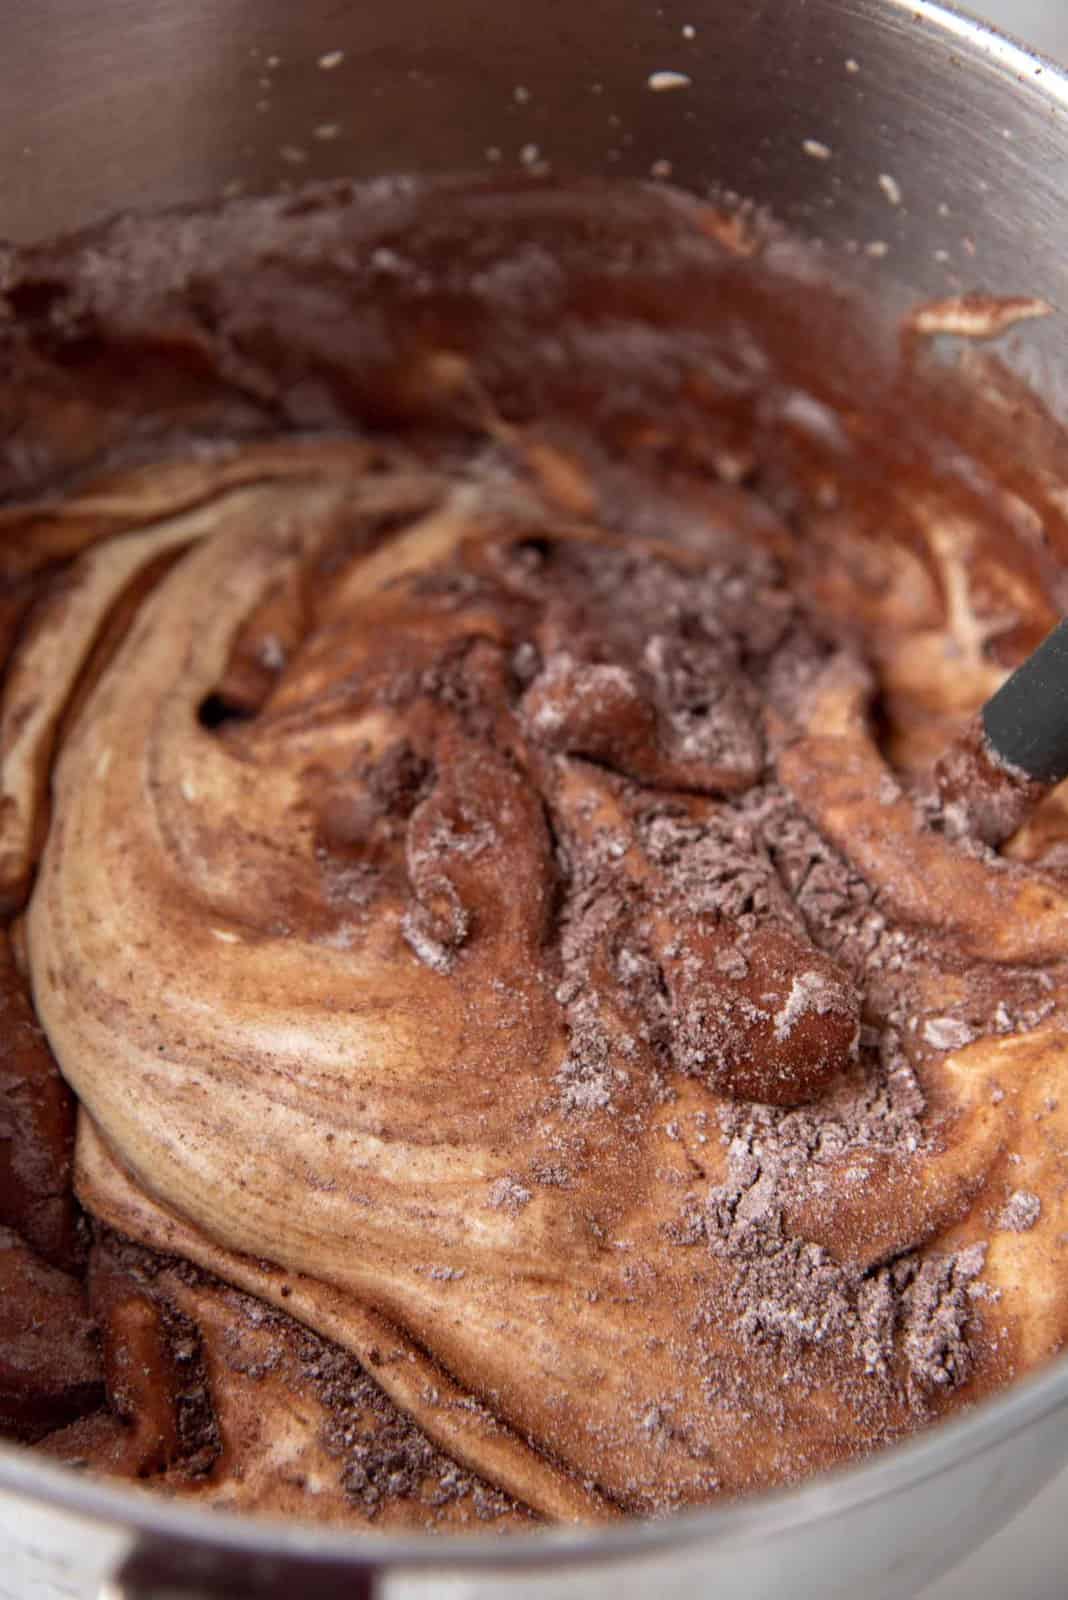
Gently fold in the dry ingredients
Sift the cocoa flour mixture with the baking powder. Then sift it again over the surface of the egg foam, as evenly as possible. Fold it in, while rotating the bowl as you go, and make sure to reach the bottom of the bowl and the middle of the batter. There should be no dry pockets (pockets of unmixed flour). Try to fold it in with as few folds as possible – no more than 15 folds.

Mix in the butter and vanilla extract
To mix in the butter, it’s important to emulsify it first. Add about 1 cup of the batter into the melted and warm butter, and mix thoroughly until the butter has emulsified into the batter. Now it’s easier to mix the butter back into the rest of the batter without deflating it too much.
Now evenly pour the butter mixture over the surface of the batter. Fold it in, while rotating the bowl (just like you did with the flour mixture above). Be gentle so as not to deflate the batter. Do not exceed 10 – 12 folds at most.


Now that the batter is ready, this is how you bake and prepare a chocolate swiss roll
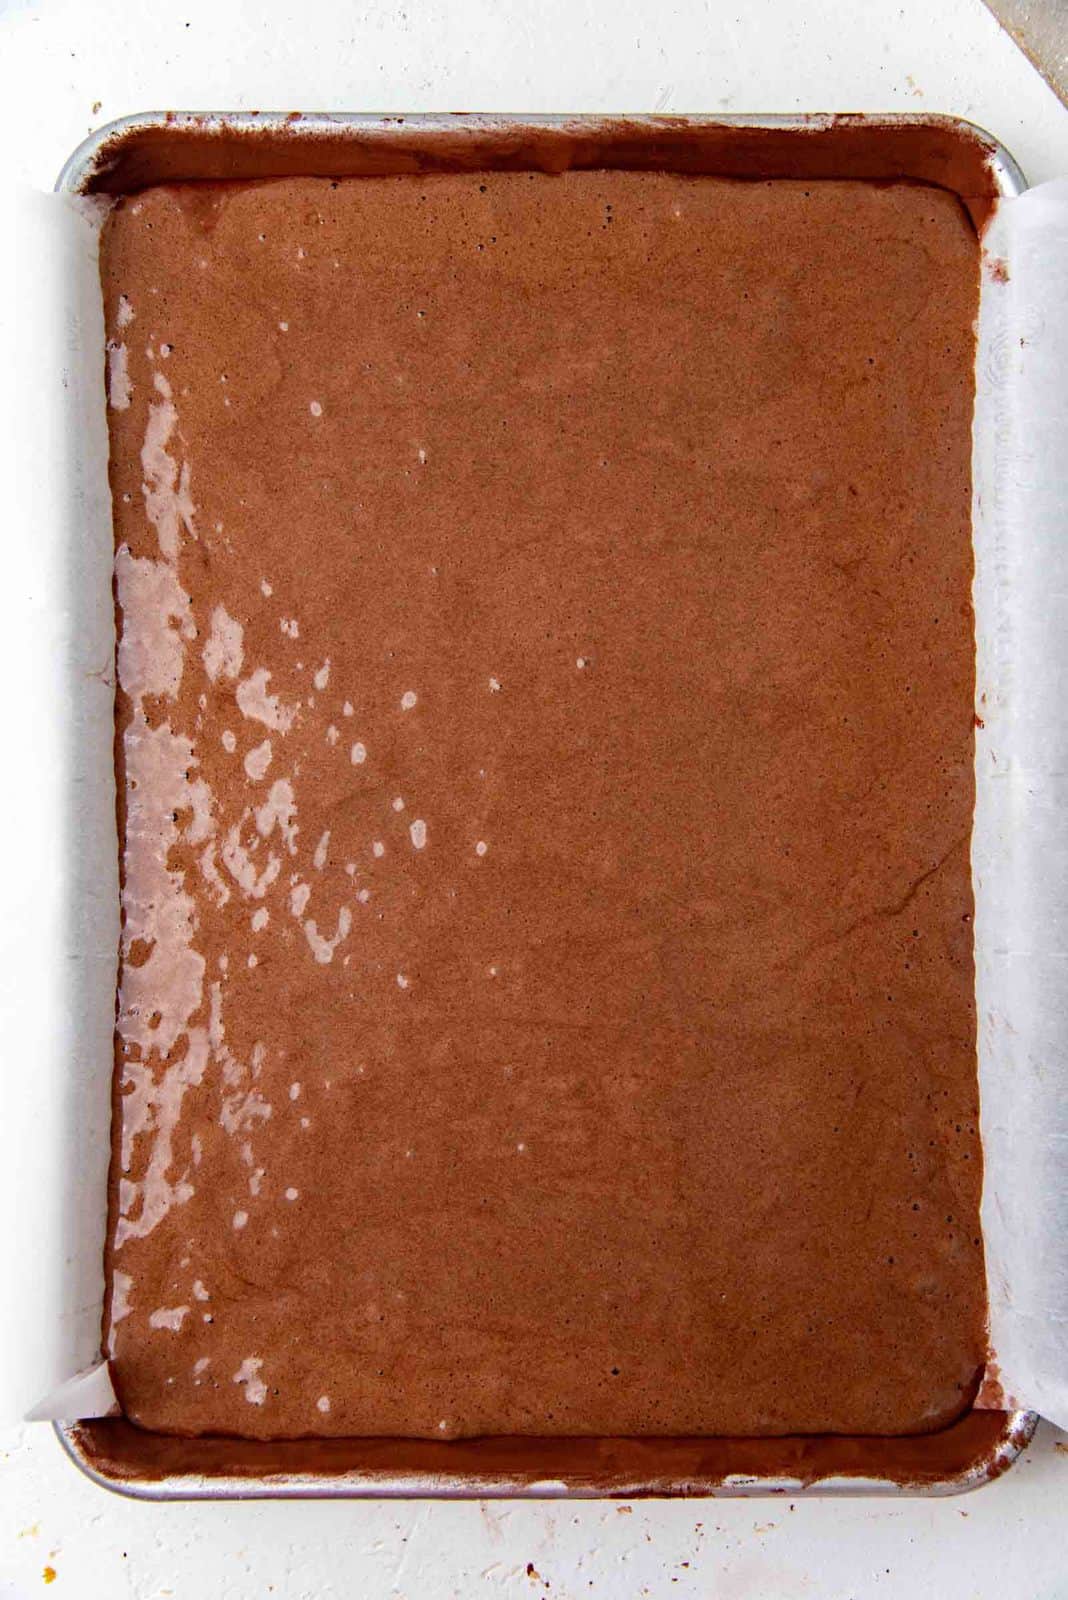
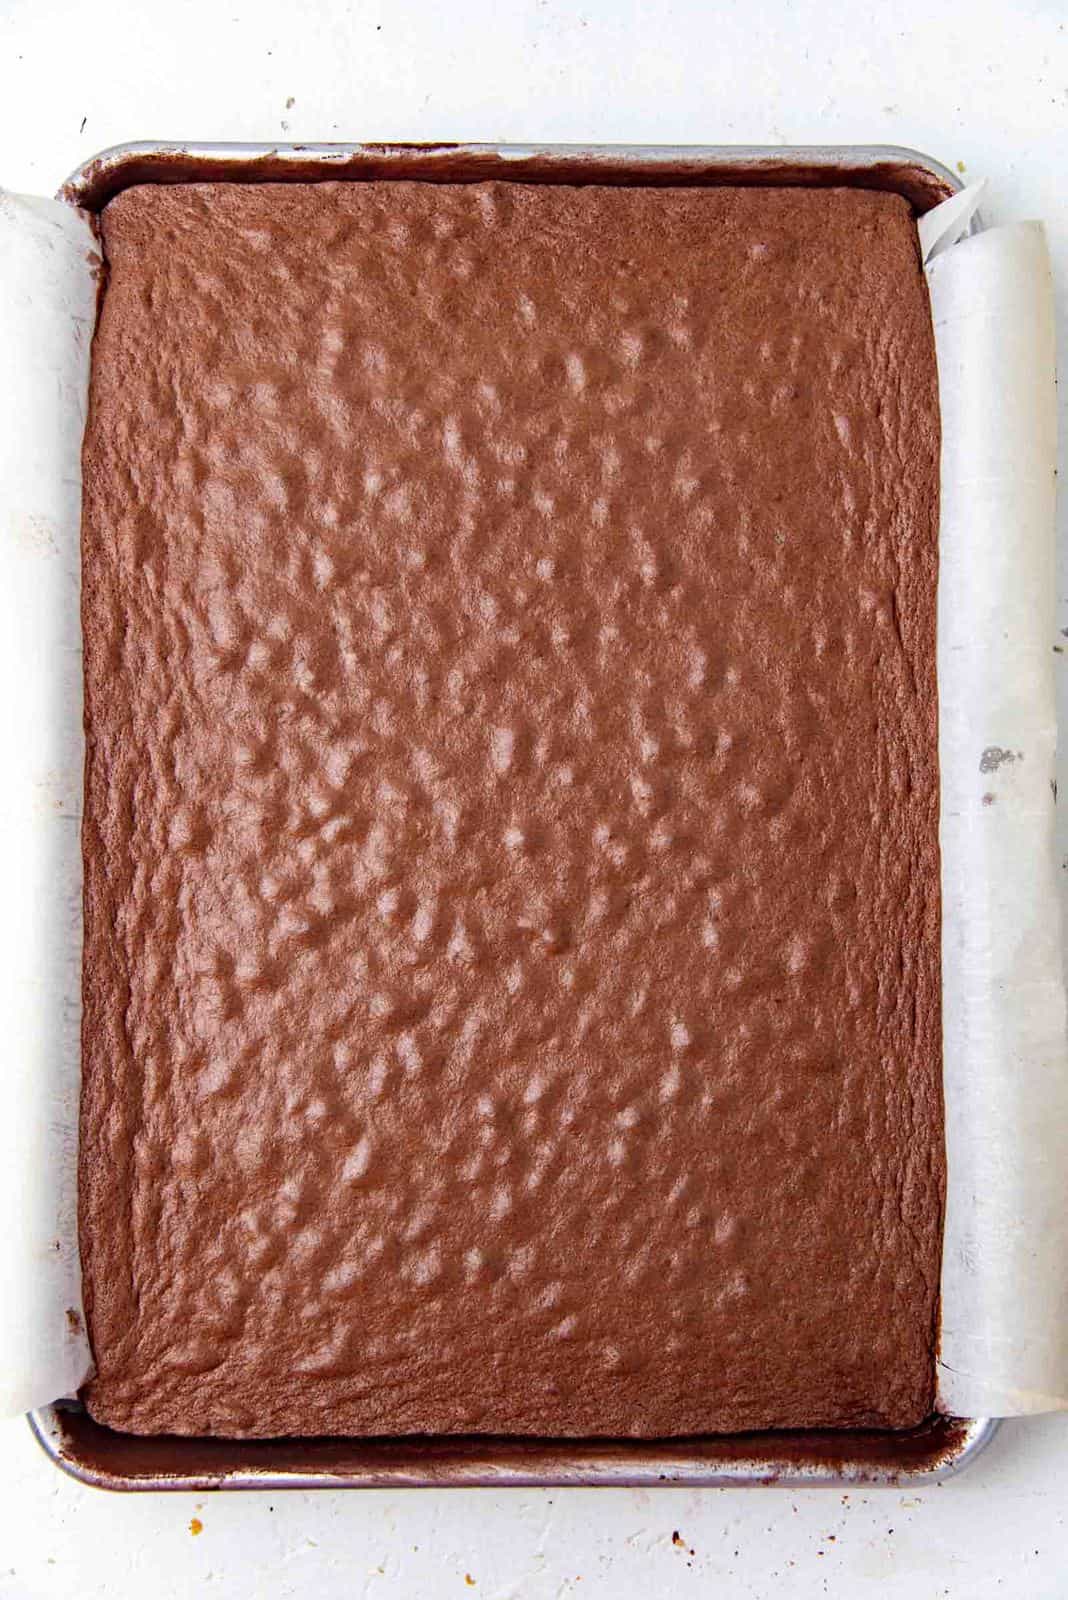
Pour and bake
Pour the batter into the prepared cake pan. Pour as evenly as possible. Then evenly spread out the batter with an offset spatula. Shake the pan a little to help spread the batter evenly, and knock it a few times on your countertop to remove any large air bubbles.
Bake in the preheated oven for 10 – 15 minutes until the cake is springy to the touch.
Rolling the cake
As soon as the cake is done baking, remove it from the oven and roll it up into the swiss roll shape. It’s important to roll the cake while still warm, because the cake is still pliable at this stage. Which makes it easy to fill and roll up the cake again for presentation.
You can either roll up the cake in the same parchment paper you baked it in, or remove the parchment paper and transfer the cake to a new parchment paper.
The bottom of the cake is the presentation side in the final chocolate swiss roll. So it’s important that the presentation side is at the bottom while rolling up the cake. The top of the cake will be where the filling goes, so it should be facing up while rolling.

Dust the surface of the cake with powdered sugar (confectioner’s sugar) or cocoa powder.
I make two very shallow cuts along one of the short sides, and trim off the edge of the opposite short side of the cake. This is optional, but it helps to make a neat seal once the cake is rolled up.


Then I roll up the cake (along with the parchment paper), and wrap it again with parchment paper or paper towel to help maintain the shape. Let the rolled up cake cool completely to room temperature.
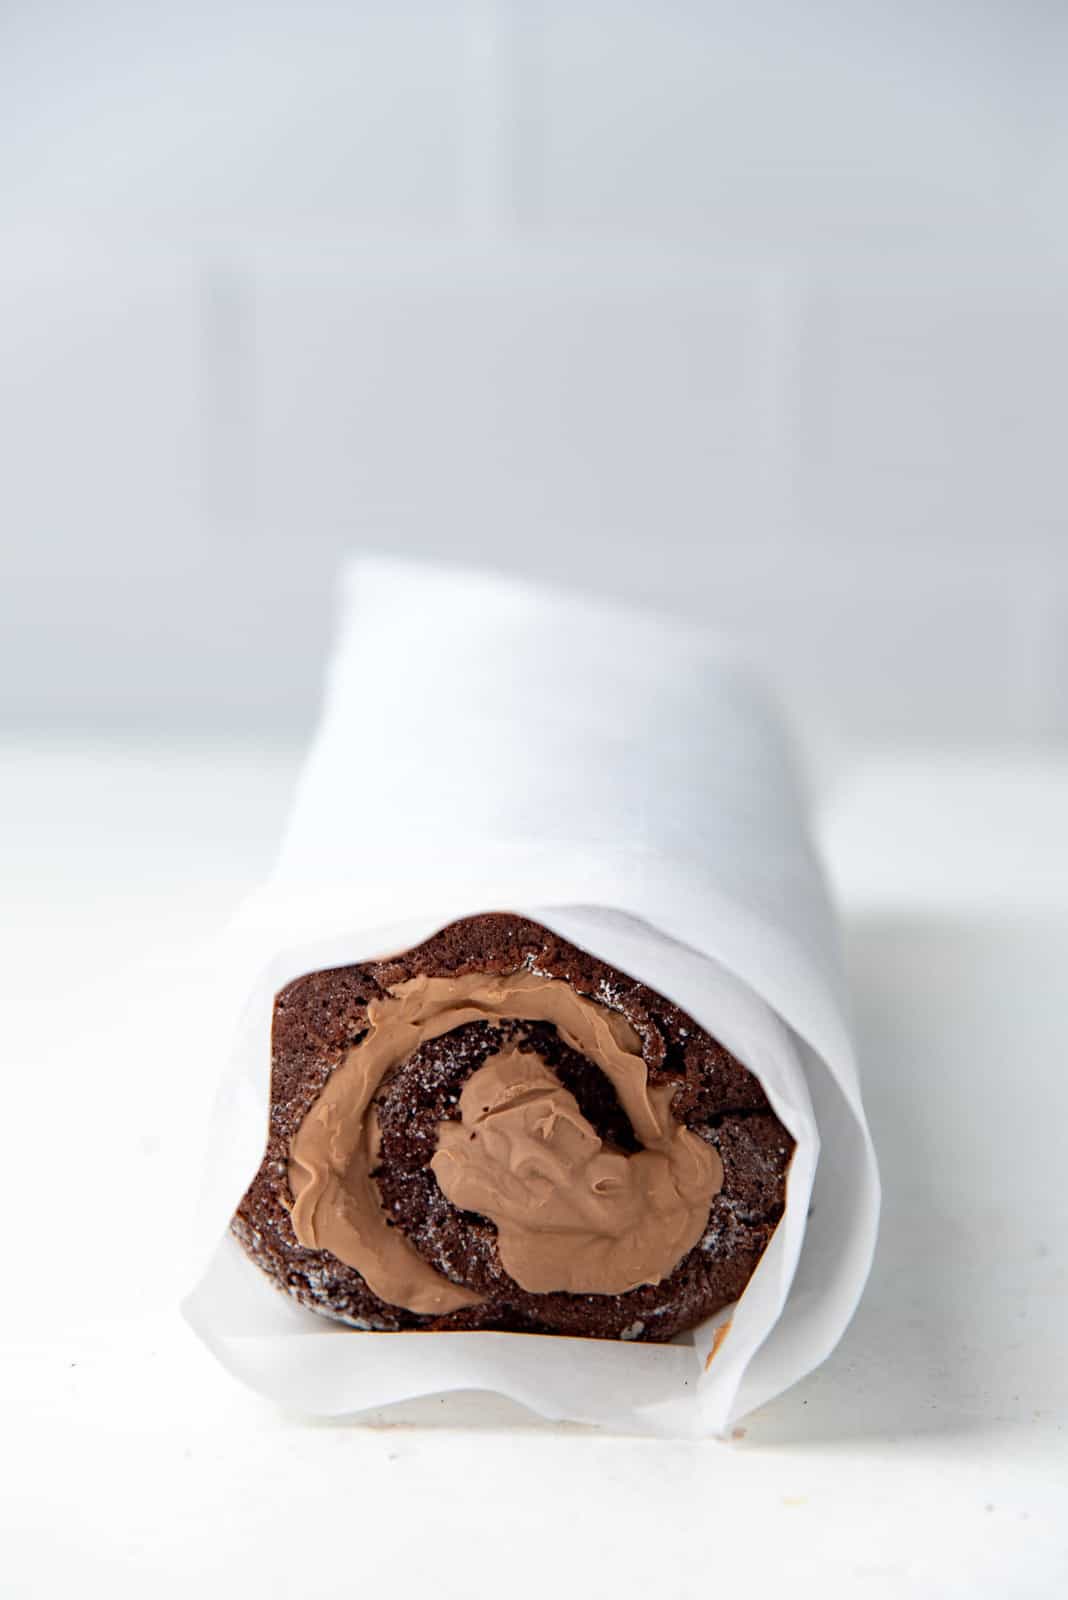
Filling the cake
You can use different fillings for the chocolate cake roll. Here, I have used my EASY swiss meringue buttercream. You can make the filling while the cake cools.
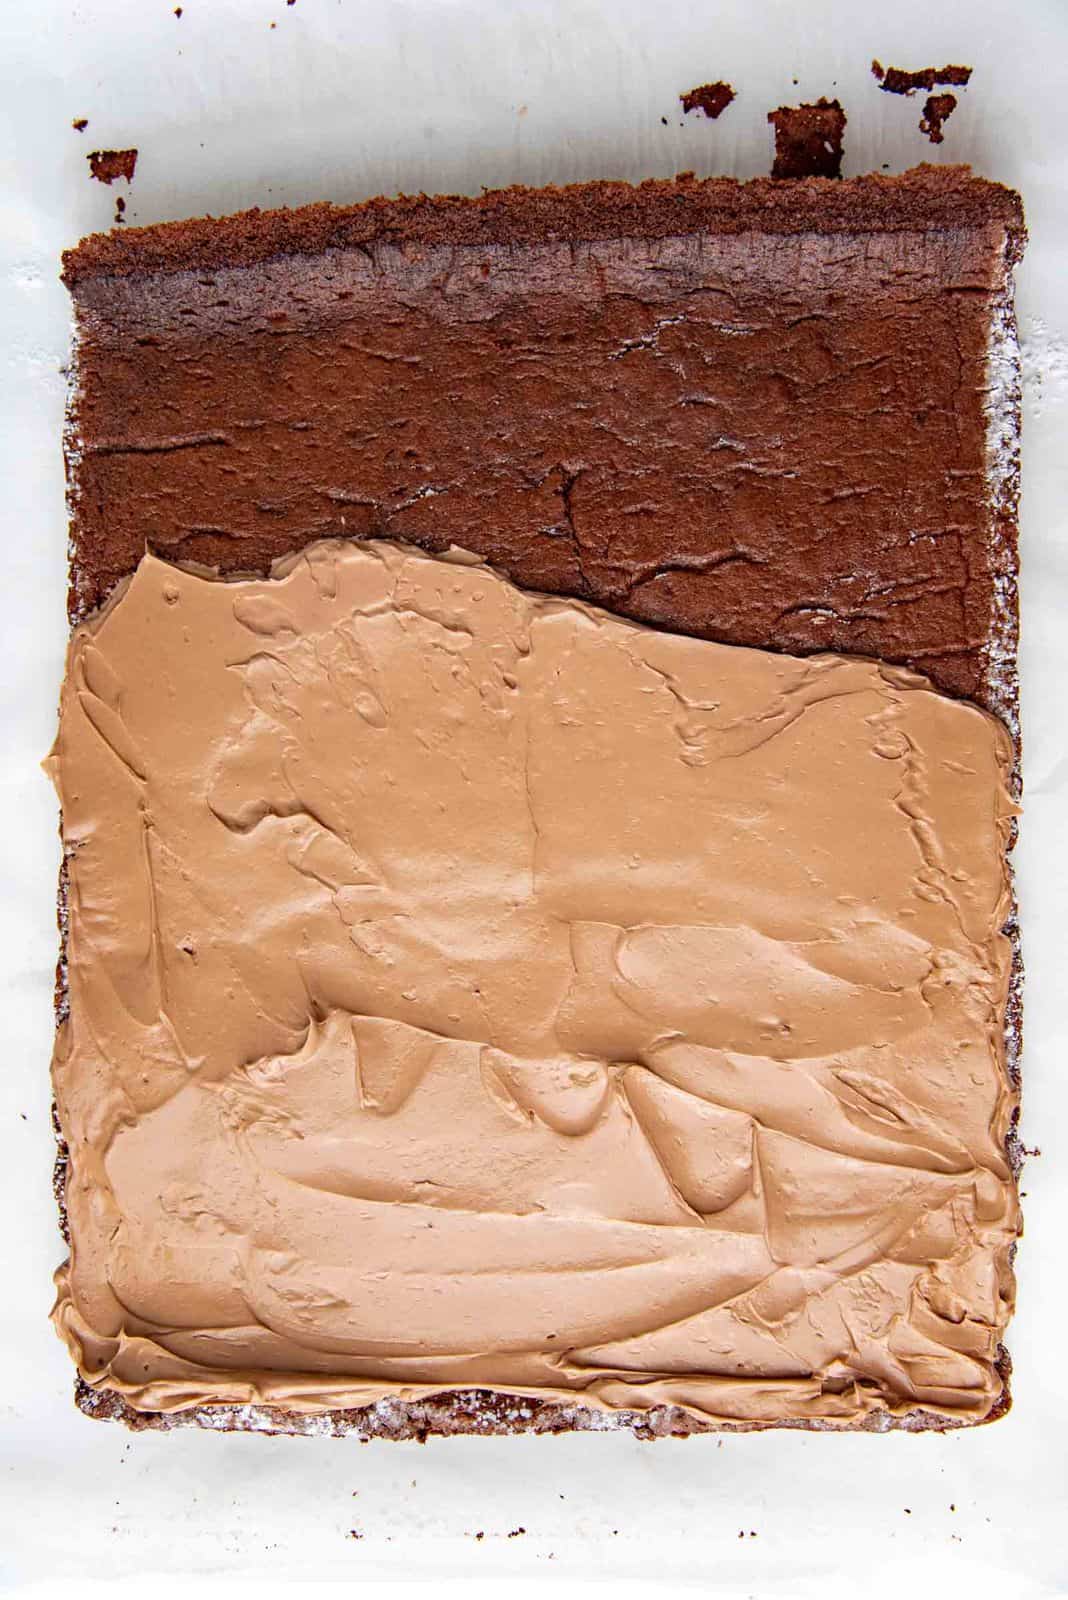
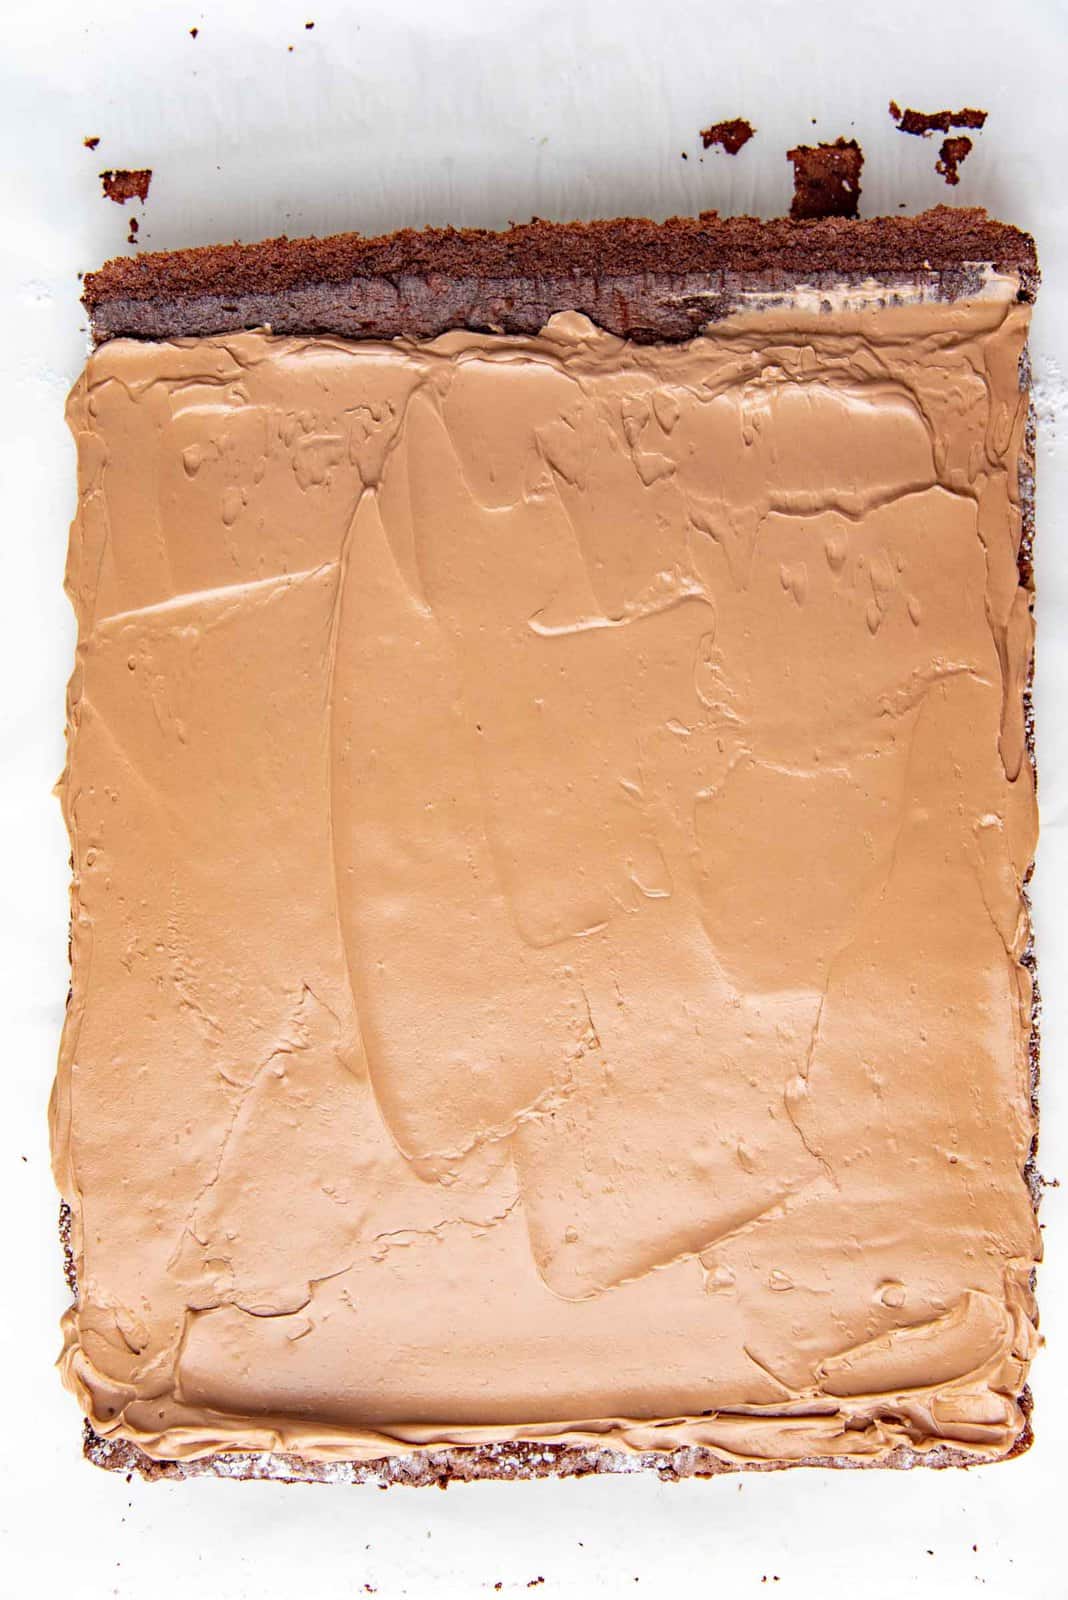
To fill the chocolate swiss roll, carefully unroll the cake. Spread an even layer of frosting on the carefully unrolled cake, leaving about a 3/4 – 1 inch space at the seam end of the cake (see pictures below).
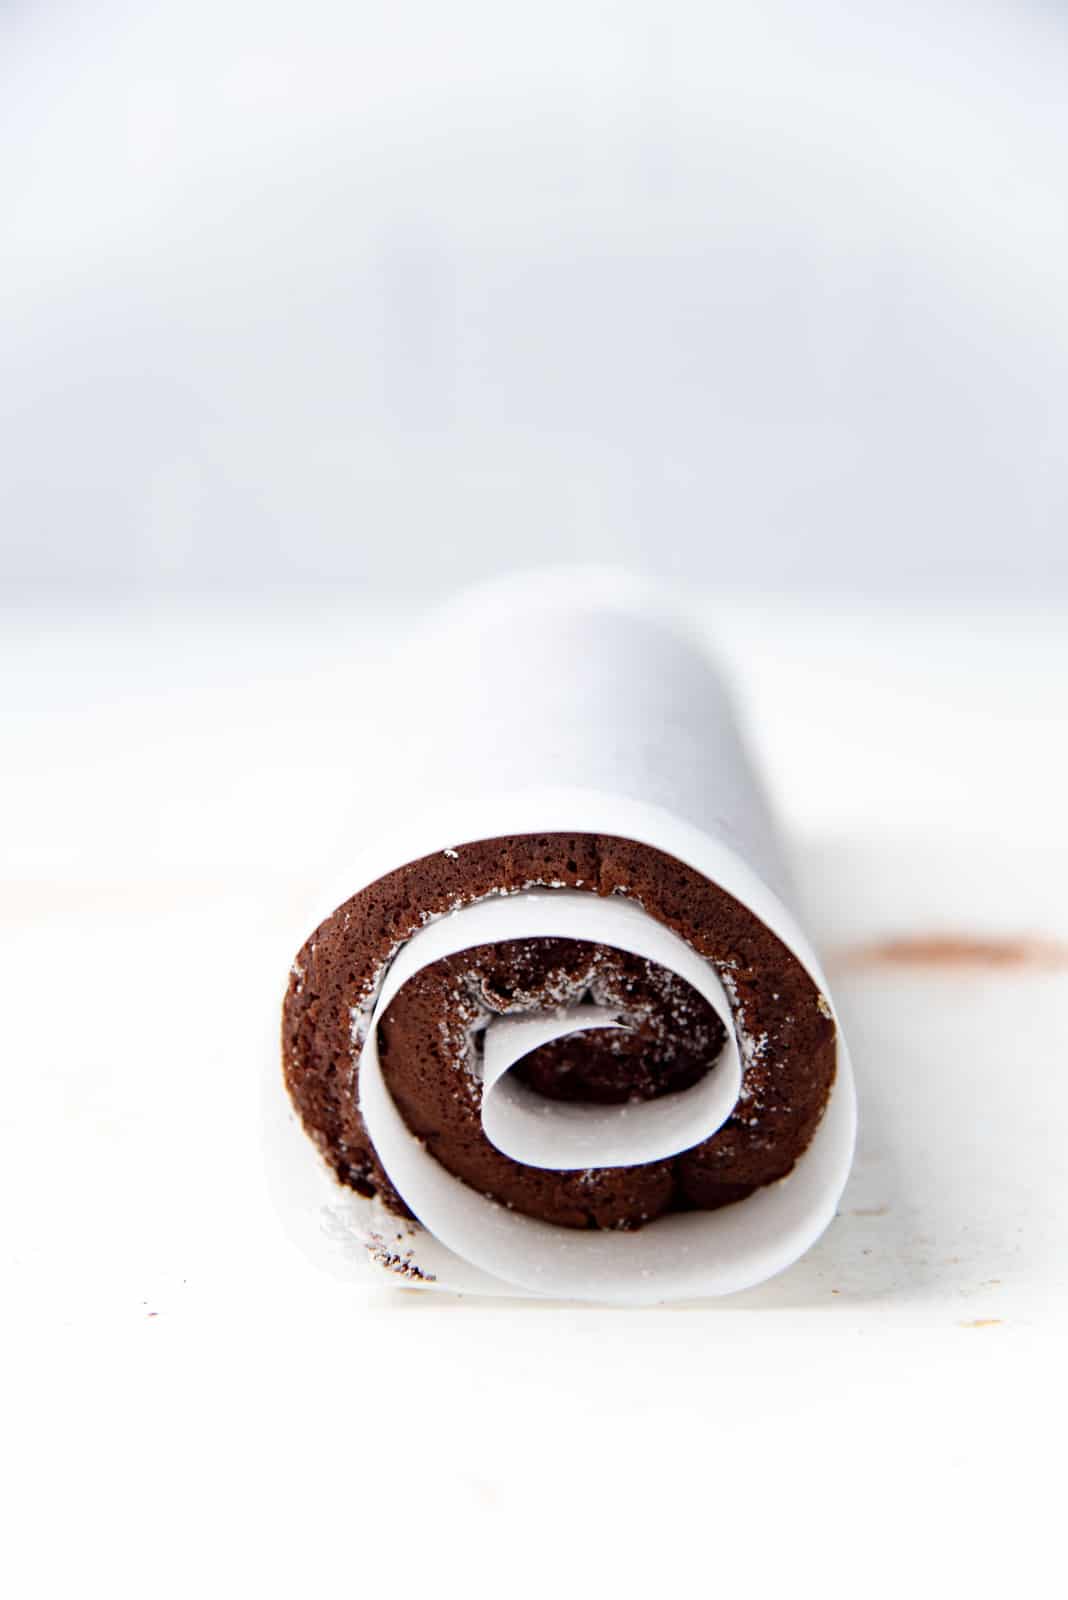
Roll up the cake again, while peeling off the parchment paper as you go. And gently tighten the roll as you go as well, so that you get a nice spiral.
Now roll the swiss roll in parchment paper or cloth napkin, so that the cake maintains its shape, and then chill the cake for at least 2 hours. This will allow for the filling and the shape to set.
Filling options for chocolate swiss roll
As mentioned before, I have used an easy chocolate swiss meringue buttercream in these photos. Which is a cheat’s variation of my classic chocolate Swiss meringue buttercream recipe.
You could also pair this cake with classic Swiss meringue buttercream or the cheat’s version of it, my easy swiss meringue buttercream recipe.
However, you can use other filling options too.
- Whipped cream – like I have used in the vanilla swiss rolls cake.
- American buttercream – which can be American vanilla buttercream or American chocolate buttercream.
- Or a whipped version of this cream cheese frosting, like I did in this pumpkin roll cake recipe.
- Or even chocolate whipped cream, as I have used for my Christmas yule log cake.
- You can even use fruit flavored frosting as well.
How to serve chocolate swiss roll cake
Trim off the edges of the chocolate swiss roll, if you’d like neater ends for presentation.
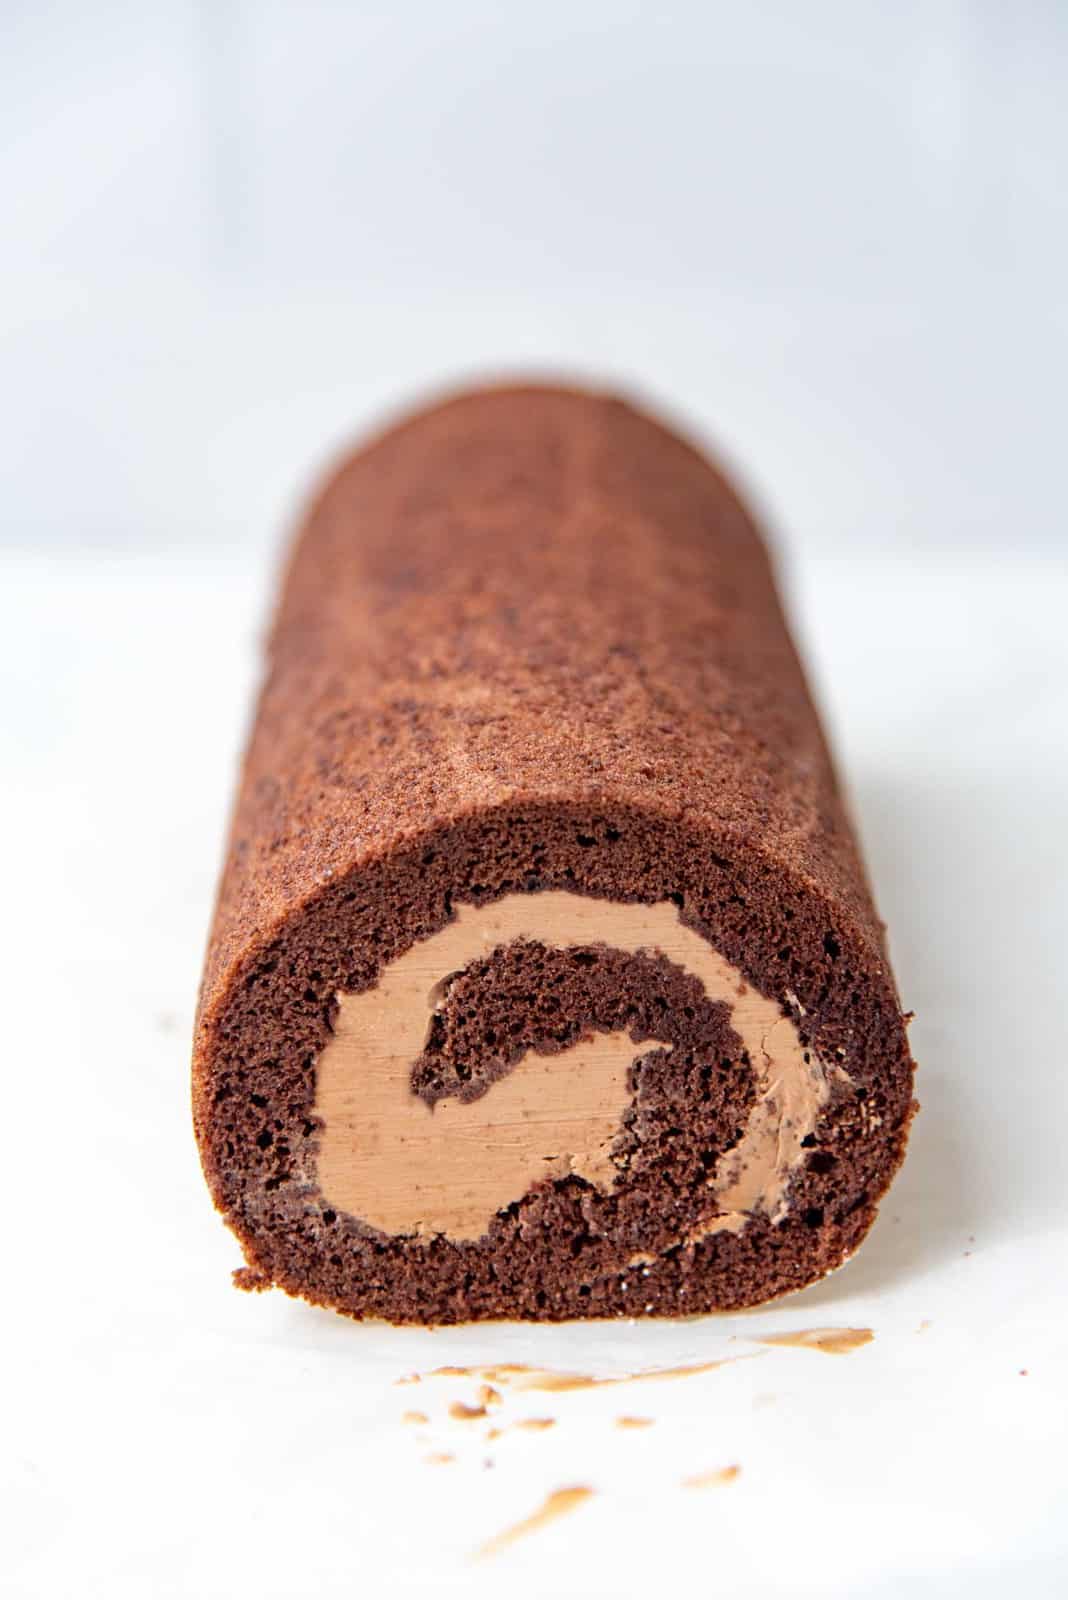
You can serve the cake as is, without any toppings. But if you’d like to, you can top it with confectioner’s sugar. You can also frost the top of the cake with buttercream or just coat it with a chocolate ganache glaze.

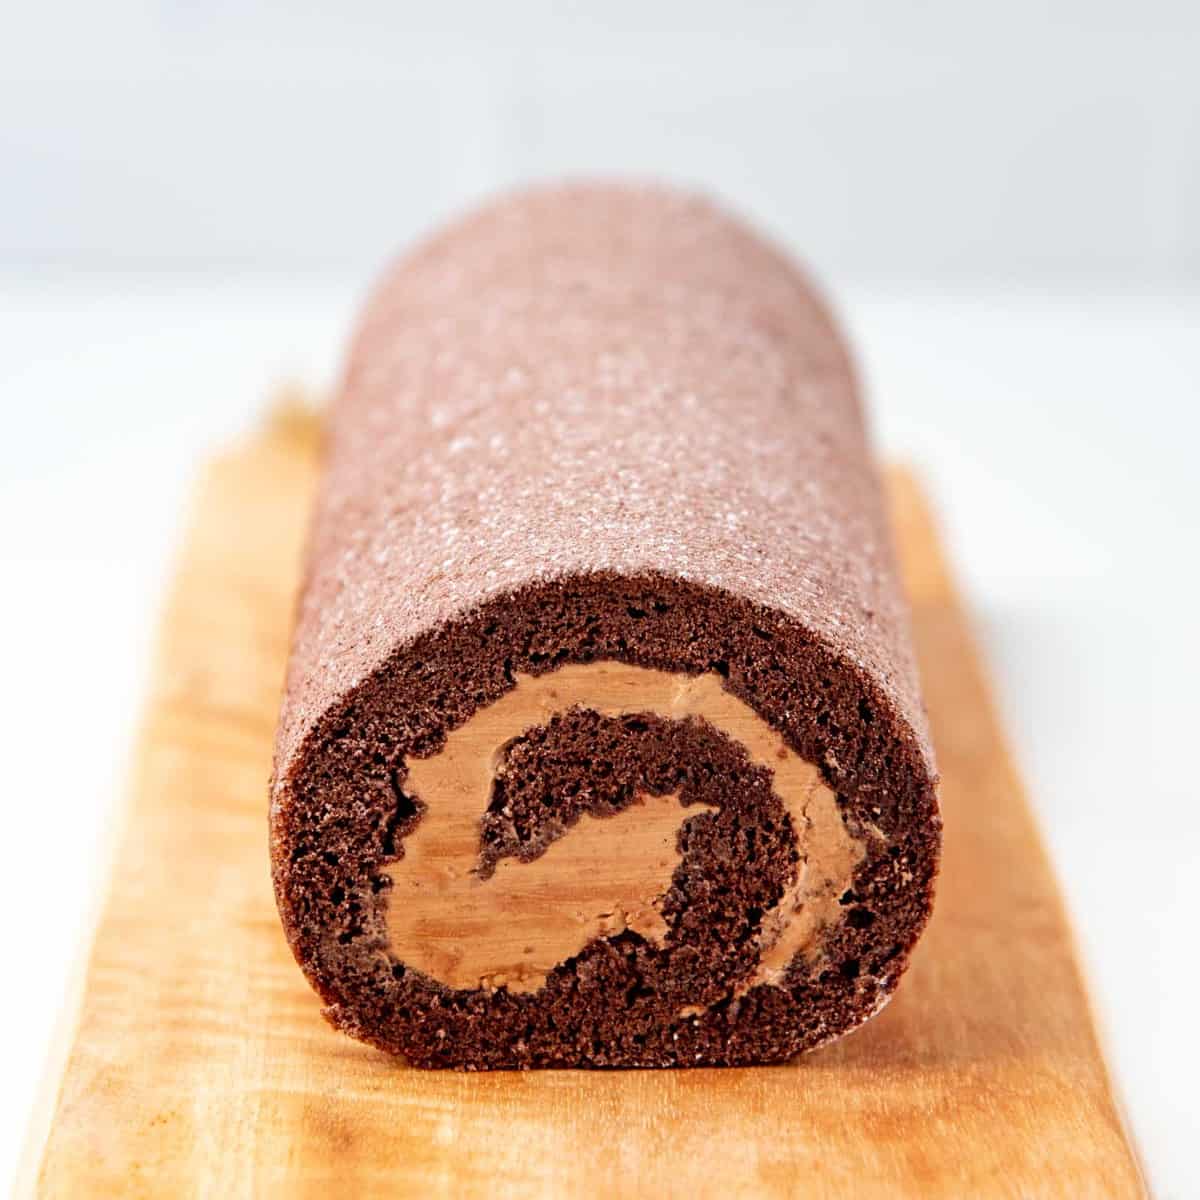
How to cut clean slices of chocolate swiss roll
To get nice, clean slices of the cake, use a warm, sharp knife. I like to dip or run my knife under hot tap water, wipe it dry, and then gently cut through the cake. Then repeat for more slices.
I prefer this swiss roll cake with chocolate whipped cream filling, which is just as light as the cake. The buttercream does add a delicious richness to the cake too.
Just like the vanilla swiss roll cake, this chocolate swiss roll will be great with fruits too.

Other roll cake recipes you may enjoy,
Other chocolate cake recipes you may enjoy,
Recipe
Chocolate swiss roll recipe
US based cup, teaspoon, tablespoon measurements. Weight measurements are recommended for accurate results whenever available.
Common Measurement ConversionsIngredients:
Chocolate swiss roll recipe
- 45 g warm clarified butter 3 tbsp, substitute with same amount of warm olive oil, vegetable oil, or vegan butter
- 2 tsp vanilla
- ½ tsp instant coffee powder
- 50 g AP flour about 6 tbsp
- 30 g Dutch cocoa powder
- ½ tsp baking powder
- 4 large eggs
- 1 egg yolk from a large egg
- 120 g white sugar ½ cup + 1 ½ tbsp
- Generous ¼ tsp salt
Filling
- 1 batch of faux swiss meringue chocolate buttercream
Instructions:
Chocolate swiss roll
- Lightly grease a 10 x 15 inch jelly roll pan with butter. Line it with parchment paper, with an overhang over the short edges (to make it easy to lift the cake from the pan). Dust the exposed edges with flour. Set aside.
- Preheat oven to 350°F / 180°C.
- Cook about 60 g of butter until the milk solids separate. Measure out 45 g of the butterfat into a bowl (about 2 cup capacity).45 g warm clarified butter
- Dissolve the coffee in the vanilla, and add it to the butter mix. Set aside.2 tsp vanilla, ½ tsp instant coffee powder
- Sift the flour, cocoa powder, and baking powder mixture in a separate small bowl.50 g AP flour, 30 g Dutch cocoa powder, ½ tsp baking powder
- Bring a few inches of water to a simmer in a medium saucepan.
- Place the eggs and yolk in a metal mixing bowl that can fit over the saucepan. Add the sugar and salt, and whisk to combine.4 large eggs, 1 egg yolk from a large egg, 120 g white sugar, Generous ¼ tsp salt
- Place the bowl over the pan with simmering water (not touching the water) and whisk continuously for about 2 – 4 minutes until the egg mixture is warm to the touch, or until the eggs reach a temperature of about 110 – 120°F.
- Remove the egg mixture from the heat. Remove the saucepan from the heat.
- Place the mixing bowl in your stand mixer with the whisk attachment. Whisk on high speed for about 5 – 6 minutes. The eggs should at least triple in size.
- To see if it’s at the right consistency, take some of the egg mixture with your mixer whisk attachment and create some ribbons on the surface. The ribbons should remain on the surface without immediately disappearing.
- Sift the dry ingredients over the surface of the egg mixture. Try to evenly sift the flour mixture over the surface, to prevent the flour from sinking to the bottom.
- Using a wide spatula (or largest spatula you own), fold the flour into the egg mixture. Rotate the bowl after every fold to make sure all the flour is incorporating well, and there are no dry spots in the batter or the bottom of the bowl. Be careful not to deflate the mixture – ideally no more than 15 folds.
- The butter vanilla mixture should be warm. If not, microwave it for a few seconds to make it warm.45 g warm clarified butter, Generous ¼ tsp salt
- Add roughly 1 cup of the cake batter (using your spatula) to the butter vanilla mix. Mix well until the butter has emulsified into the batter.
- Gently pour the butter batter mix evenly over the surface of the rest of the batter in the mixing bowl. I use the flat side of my spatula to break the flow of the butter mixture, so that it doesn’t sink to the bottom of the bowl.
- Fold the butter mixture into the rest of the cake batter mixture. Do this gently with as fewer folds as possible so as not to deflate the cake batter.
- Pour all the cake batter into the prepared cake tray. Using an offset spatula, spread the batter into the corners of the tray, and make sure it's spread as evenly as possible.
- Knock the tray on a firm surface about 4 times to get rid of any larger bubbles trapped in the batter. Give the tray a little shake to evenly spread the batter.
- Bake in the preheated oven for about 10 – 15 minutes (13 minutes in my conventional oven), rotating halfway through the baking process if needed.
- The cake is done when the surface is springy to the touch, or when a toothpick inserted comes out clean.
- Remove the cake from the oven. Let it cool for at most 1 minute (the cake needs to be warm and pliable for rolling up in the following step).
Rolling up the swiss roll cake
- The bottom of the cake will be the presentation side for the swiss roll. So the cake will need to be rolled up with the presentation side on the bottom.
- You can use the parchment paper you baked the cake in to roll up the swiss roll for convenience. If you prefer to use a new parchment paper, see recipe notes for directions.
- Gently lift the cake from the baking tray and place it on your work surface (slip a cake lifter or flexible cutting board underneath for support if needed).
- Sift confectioner's sugar or cocoa powder over the surface of the cake.
- OPTIONAL STEP ONE – Along one of the short ends of the cake, make a diagonal cut as shown in the pictures in the post. This helps create a neat seal when the cake is rolled up, as described below.
- OPTIONAL STEP TWO – On the opposite short end of the cake, make two shallow cuts (2 mm deep), parallel to the short edge. The first cut is 1 inch from the edge, and the second is 1 inch from the first cut. DO NOT cut all the way through! See pictures in the post for reference. This step helps maintain an even thickness as the cake is rolled up.
- Fold about 1 inch of parchment paper overhang over the short edge with the shallow cuts, and start rolling up the cake into a spiral. Make sure the spiral is tight, but not too tight that it crushes the cake. Keep rolling until the cake is completely wrapped in parchment paper.
- Use another parchment paper or cloth napkin to wrap the swiss roll further to help keep its shape. This will prevent unravelling. Make sure the cake is stored with the seam side down. Let it cool completely to room temperature.
Filling the cake
- Once the cake is cooled, gently unroll the cake.
- Spread an even layer of the chocolate buttercream, about ½ – 1 cm thick (¼ – ½ inch) over the surface of the cake. Leave about a 2 – 2.5 cm (1 inch) margin at the short edge with the diagonal cut.
- Now roll up the cake again, but make sure to loosen the parchment paper from the cake as you go. Make sure the cake is firmly rolled up, while maintaining its shape, and the filling isn't squeezed out much. Wrap the cake well with parchment paper and/or a cloth napkin so that the cake doesn't lose its shape. You can use the parchment paper to shape the cake if the roll seems loose.
- Refrigerate for a few hours until the cake and filling have firmed up.
- Slice off the ends with a serrated knife, so that the swiss roll cake looks neat.
- Serve with a dusting of confectioner's sugar on top.
Filling
- Make 1 batch of this easy swiss meringue chocolate buttercream. (There will be some leftover.)1 batch of faux swiss meringue chocolate buttercream
- You can also make ½ batch of this American chocolate buttercream.
Recipe Notes
Other variations
Vanilla swiss roll cake Yule log cake Pumpkin swiss roll cake Rainbow swiss roll cakeHow to switch the cake over to a new parchment paper for rolling up.
While the cake is in the baking tray, dust the surface with confectioner’s sugar. Place a piece of parchment paper or cloth napkin on top (so that the cake doesn’t stick), followed by a cutting board. Now carefully flip the cake over onto the cutting board. Peel off the parchment paper on the bottom of the cake. Now take another piece of parchment paper that is longer than the length of the swiss roll. You can also use a clean kitchen towel / cloth napkin as well. Place this on the cake surface. Now carefully flip the cake back over onto the new parchment paper (or cloth napkin). Remove the parchment paper and cutting board on top. The cake is now ready to be rolled up with the new parchment paper on the bottom.Storing the cake
This roulade will taste best within the first few days. Vanilla swiss roll can be stored in an airtight container and then in the fridge for up to 5 days. If there are fruits in it, it will keep for fewer days as the fruits can go bad faster. An unfilled, rolled up cake can be stored in the freezer for up to 2 months. Wrap the rolled up cake with plastic wrap (at least 2 layers), and then in a layer of foil. Then place it in a large enough container so that it doesn’t get crushed during storage. This will also help the cake maintain its shape. Thaw it out until it’s at room temperature before unrolling and filling.Nutrition Information:
“This website provides approximate nutrition information for convenience and as a courtesy only. Nutrition data is gathered primarily from the USDA Food Composition Database, whenever available, or otherwise other online calculators.”


Leave a Reply