


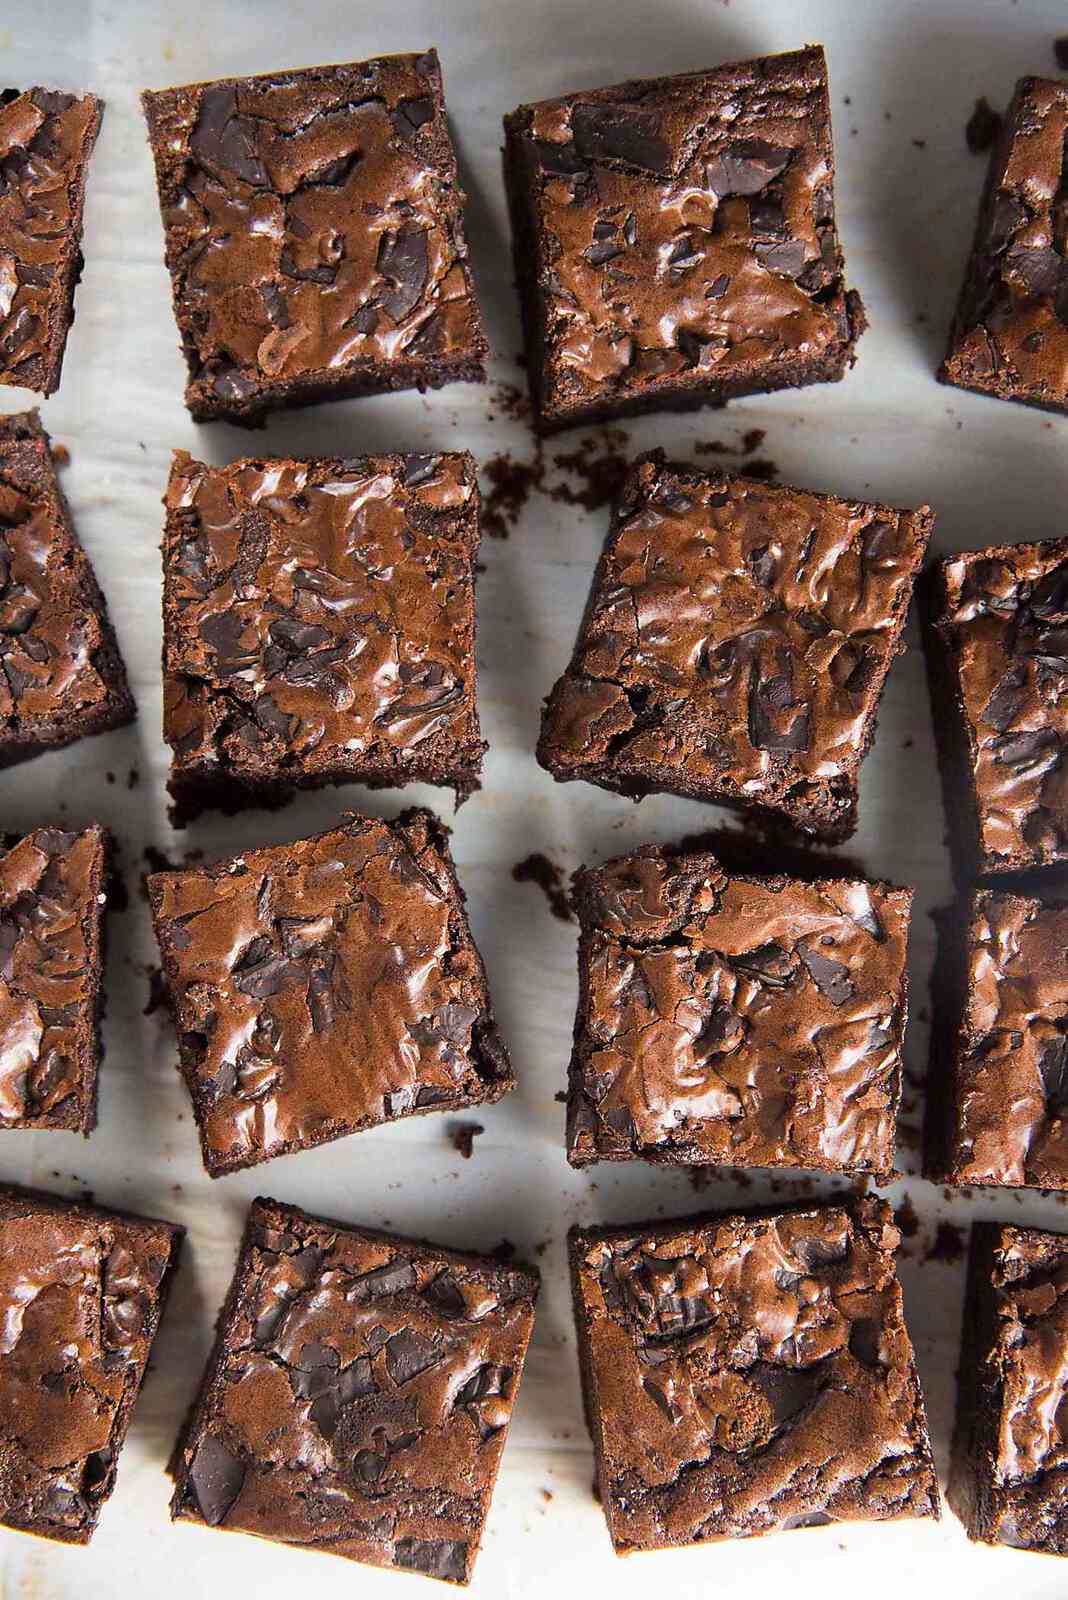
If you’re looking for the BEST Fudgy Chocolate Brownies Ever, then you’ve come to the right place! 🙂 This extensively tested recipe uses cocoa powder (instead of melted chocolate) to make very chocolatey double fudge cocoa brownies!
Slightly chewy and fudgy at the edges of the pan, while the middle pieces are super fudgy. You can also make brookies for a combo dessert of these brownies and my brown butter chocolate chip cookies!

- Cocoa brownies
- What makes this the perfect fudgy brownie recipe
- Ingredients to make cocoa powder brownies (and notes)
- How to get the glossy, crackly brownie surface
- How to make double fudge chocolate brownies (recipe overview)
- How to tell when brownies are done baking (toothpick test)
- My best recipe tips for success!
- Storage tips
- Commonly asked questions
- Recipe video
Cocoa brownies
These homemade fudgy double chocolate brownies are a hit no matter who or what occasion I bake them for. But it did take me a few tries to get it right.
I usually make brownies with melted chocolate (which is great, obviously), but I wanted brownies that were even fudgier with MORE chocolate.
So I started experimenting with cocoa brownies. And after numerous attempts, I’ve perfected the recipe for these addictive fudge chocolate brownies (or as I’d like to call them double fudge cocoa brownies!).
These fudgy cocoa brownies have just the right amount of sweetness with deep, bittersweet chocolate flavor. I’ve also included plenty of tips in this post to help you make the BEST fudgy chocolate brownies!
What makes this the perfect fudgy brownie recipe
- These cocoa brownies are so easy to make!
- With double the amount of chocolate (cocoa powder + chocolate chips), these are the ultimate chocolate brownies!
- The cocoa powder guarantees that your brownies will have an incredibly deep and strong chocolate flavor.
- The brownies are thick and fudgy!
Ingredients to make cocoa powder brownies (and notes)

- Unsalted butter
- Sugar (ideally both white and brown sugar)
- Dutch processed cocoa powder (or regular cocoa powder)
- Salt and vanilla (for flavor)
- Instant coffee (for additional flavor, optional)
- AP flour
- Chocolate chips or chunks
It helps to understand how each ingredient contributes to your double chocolate brownie recipe, so that you can learn how to make the perfect fudgy chocolate brownies using cocoa powder!
Why does this chocolate brownie recipe use cocoa powder instead of melted chocolate?
The melted chocolate adds the fudginess to chocolate brownies. Or more specifically, it’s the cocoa butter and sugar in the chocolate that make chocolate brownies fudgy. However, since cocoa butter remains a solid at room temperature, the chocolate brownies tend to be a bit firm as well.
So instead of melted chocolate, these fudgy brownies are made with cocoa powder. The cocoa powder also adds a deeper chocolate flavor to these brownies. Another advantage of making cocoa brownies is that here you remove all the cocoa butter and replace it with regular butter instead.
And since regular butter is soft at room temp., this makes the brownies extra fudgy. It’s important to use melted butter for this recipe. Unmelted butter will make the brownies more cake-like than fudgy.
But by removing melted chocolate, you’re also removing a certain amount of sweetness (sugar) as well. So you must add extra sugar to compensate for that in this fudgy chocolate brownie recipe.
Dutch cocoa vs natural cocoa
You can use either for this recipe. I use a dutch processed cocoa (usually Callebaut or Cocoa Barry), but you can use either one of these. You can even use cacao powder.
You can see my baking basics article on dutch process vs natural cocoa powder to read more about the differences between these two and their applications. Since this recipe doesn’t use any leavening agents, both can be used. But do keep in mind that dutch processed cocoa powder has a “cleaner” cocoa flavor, without the bitterness, while natural cocoa powder is more bitter.
Another tip for getting the best tasting cocoa brownies is to use a cocoa powder with a higher fat content. High fat cocoa powder can contain up to 22 – 24% fat.

Type of chocolate to mix in
I like to use anything between semisweet chocolate to bittersweet chocolate (50% – 70% chocolate). But you can use milk chocolate too.
While I prefer to buy blocks or use couverture chocolate, you can use store-bought chocolate chips too. These are more likely to be compound chocolate that doesn’t melt as much during the baking process. For best results, I recommend using a good quality chocolate you like to eat.
Adding chocolate is not optional, as it does help the texture and flavor of the brownies! Without the chocolate, the brownies are still fudgy, but the shiny crust is more matte and there’s less chocolate flavor.
What does the sugar do in a cocoa brownie recipe? Is white sugar or brown sugar better?
- The obvious purpose is to add sweetness. Cocoa powder is quite bitter, and the extra sugar will provide balance and make the chocolate brownie sweeter (instead of bitter, which obviously isn’t as desirable).
- Sugar makes the brownies “softer”. This is because sugar acts as a tenderizer for baked recipes. For example, with a regular vanilla cake or vanilla cupcakes, or recipes with extra sugar tend to have a softer crumb. For this brownie recipe though, we are not really worried about getting “softer” brownies, as it doesn’t really provide an advantage as such. What we want is a fudgy chocolate brownie.
- White sugar makes the chocolate brownies chewier. Since white sugar is “dry” (with no molasses) it melts to create a chewier brownie.
- Brown sugar makes the brownies fudgy. The molasses in brown sugar melts to create a “wetter” batter that becomes fudgier when baked.
So with all this in mind, I decided that it was important to include both kinds of sugar in this fudgy cocoa brownie recipe. You can use ALL white sugar or use ALL brown sugar as well. I have tried both, and have gotten delicious results, with slight changes in texture.
Check out this guide to types of sugar to learn how different sugars contribute in baked goods.

Butter vs oil
Butter does add more flavor than oil in recipes. However, there are more important reasons as to why butter is better for brownies.
Butter helps to keep the brownies nice and fudgy. Substituting oil for butter will change the texture of the brownie and make it dense and oily.
Butter contains some water and milk solids! Oil is 100% fat. The water and milk solids interact with the sugar and help dissolve the sugar. The water, sugar, and eggs (and chocolate) combine to help create that beautiful shiny crust that oil is unable to replicate reliably.
So, unless a recipe has been tested and adapted to be made with oil, I do not recommend substituting butter with oil for brownie recipes!
Why is there no baking powder or baking soda in this recipe?
Since I want to keep these chocolate brownies fudgy and dense, I don’t use any chemical leaveners. Using leaveners could cause the brownies to rise and give them a cake-like texture.
Usually brownies do not use chemical leaveners. The only exception is cake brownies where you want the brownies to have a cake-like crumb.
Role of eggs in brownies
Eggs play a big role in chocolate brownies as well. A brownie isn’t really a brownie without a shiny, nice, crackly top, amiright? Eggs + sugar are the main ingredients for how you achieve that deliciously crackly brownie surface!
Eggs add fudginess too
This also brings us to another reason why eggs are important in this fudgy chocolate brownie recipe. Egg whites help create the meringue-like crust, while the yolks help make the chocolate brownies fudgy.
Since I wanted extra fudgy brownies, I used 3 whole eggs plus 1 egg yolk. When I make these cocoa brownies using ONLY whole eggs, the edges of the brownies become more cake-like than fudgy.
And if I remove 2 whole eggs and use 2 extra egg yolks, the brownies are fudgy, but the batter is too dry. So 3 whole eggs plus 1 egg yolk is the sweet spot.
How to get the glossy, crackly brownie surface
The melted butter, sugar, and eggs are beaten together until you have a pale, thick mix. This stage is crucial to create that beautiful brownie crust. The eggs beating vigorously with the sugar incorporates air which creates an almost meringue-like mix.
The sugar and egg mixture also tends to separate, and as the brownies bake, this meringue-like foam floats to the top and creates that shiny crust!
The cocoa powder tends to absorb extra moisture in the brownie that can dull that shiny crust though. But the addition of chocolate chips helps emulsify the brownies, allowing the meringue to still float and set as it bakes.
And THAT is what creates that crackly crust we all love in these brownies or like in these brookie bars!

How to make these cocoa brownies even more fudgy
The added chopped dark chocolate to the batter makes the brownie fudgy as well! 🙂 You can also add in chopped nuts, or other types of chocolate like white chocolate or milk chocolate, or even fruits like raspberries and strawberries, or even crushed Oreos!
But I do highly recommend adding the chocolate to the batter. The chocolate melts and creates pockets of delicious and intense chocolate flavor.
How to make double fudge chocolate brownies (recipe overview)
Step one – Prepare brownie pan
Line an 8 or 9 inch pan with parchment paper. Use butter to help secure the parchment paper onto the brownie pan. Use a metal pan, since this will help bake the brownies evenly. Glass pans will bake the brownie differently.
Also preheat the oven to 350°F / 180°C.

Step two – Melt the butter and mix sugar
Melt the butter. You can use your microwave for this (with a heatproof bowl), or even your stove top. Just remember to keep an eye on the butter. Make sure that the butter is fully melted and separated.
Add the sugar (brown + white sugar) next along with the salt (image 1). The heat from the butter will melt the sugar and salt. It’s important to mix these ingredients well to form a smooth mix (image 2). This also helps to cool down the butter mixture.
Step three – Mix in the eggs
Add the eggs and flavoring (image 3). Whisk the mixture with an electric mixer on high speed for AT LEAST 2 minutes. I usually mix this for 4 minutes. This step is important because you want the brownie batter to transform into a pale, frothy, meringue-like batter! The batter should thicken and become pale in color (image 4).
The warmer the butter mixture, the longer you will need to whisk it to achieve the pale color.
Step four – Prepare dry ingredients and mix
Sift and add the flour and cocoa powder (dry ingredients). It’s important to sift the ingredients to remove lumps. Any lumps introduced into the brownie batter will be so hard to get rid of without overworking the batter and ruining the brownies at the end.
Fold it into the brownie batter in two steps (this might be easier for beginners, to prevent overmixing) (images 5 – 6). OR you can sift the dry ingredients DIRECTLY into the brownie batter and then fold it in afterwards.
Remember not to overmix! This will create a tough rubbery brownie.

Step five – Add the chocolate
Have the chopped chocolate or nuts ready to go. These are added during the folding process, while the dry ingredients are about 2/3 of the way incorporated (image 7). The reason I don’t incorporate the flour mix first before adding the chocolate is to prevent overmixing of the batter.
The final brownie batter should be smooth with no dry spots or flour lumps (image 8).
Step six – Bake the brownies
Scrape the batter into the prepared pan. If you feel generous, you can add a few chunks of chocolate on top too (image 9)! These will bake into gooey melty chocolate pools once baked. 🙂 But this is not necessary – as you can see below, I sometimes skip the addition of chocolate on top too.

Bake the brownies in the preheated oven according to your liking (see the baking times below or in the recipe card). Less for a fudgy chocolate brownie, and longer for brownie with a chewier texture.
Once they are done, resist all urges to cut into them immediately (image 10)! Allow them to cool completely, because these taste MUCH better once they have rested. If you ABSOLUTELY MUST expedite this process, let them cool in the fridge (uncovered).
Not only are the flavors better when these have cooled down, but they will be easier to cut too! Remember, the brownies are pretty fudgy.

Baking times for these fudge chocolate brownies
You can also easily adjust the fudginess to your liking by adjusting the baking time as follows.
- 30 minutes for extra gooey, fudgy pieces in the middle, and perfectly fudgy pieces at the edges of the baking pan.
- 35 minutes for perfectly fudgy pieces in the middle, and chewy-fudgy edges.
- 40 minutes for fudgy pieces with a slight chewiness in the middle, and chewy edges.
The good news is that you will get delicious brownies even if you bake it to 40 minutes! They may be slightly less fudgy, but still very moist.
Step seven – Serve
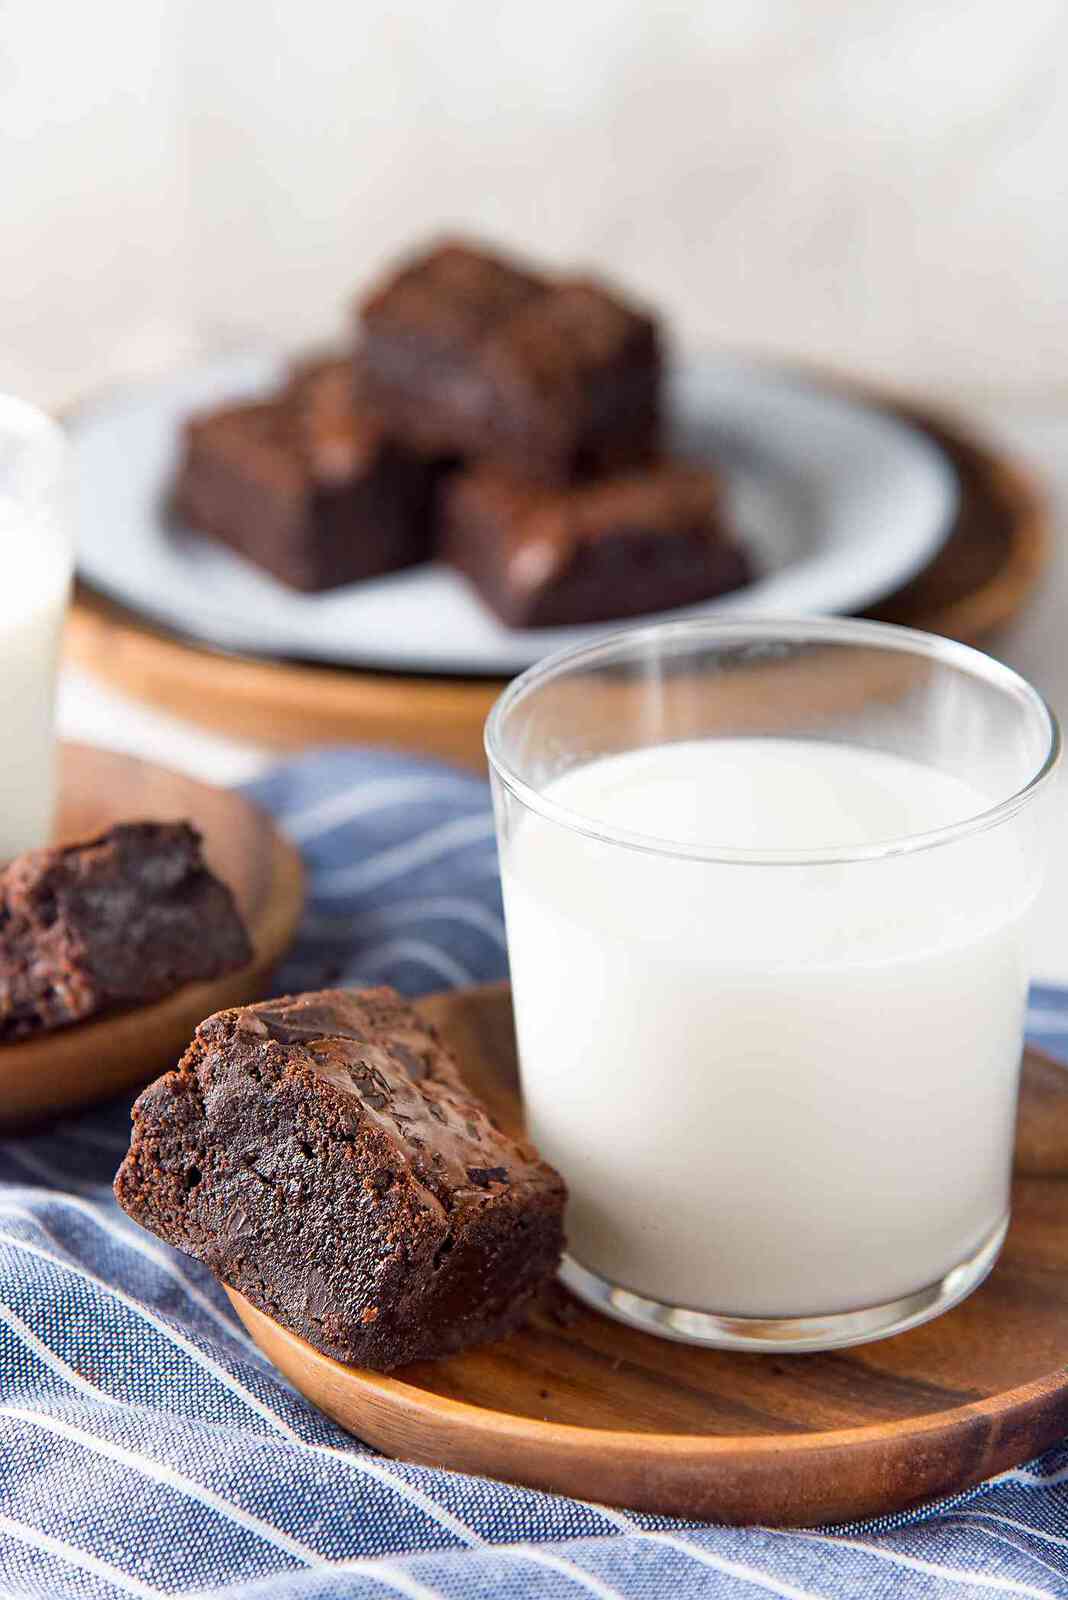
Since these cocoa brownies are decadent, they don’t need any frosting. But you could drizzle them with extra chocolate sauce.
They taste GREAT on their own, but I could NEVER turn down a slightly warmed up brownie with a scoop of creamy vanilla ice cream or cereal milk ice cream!
How to tell when brownies are done baking (toothpick test)
A lot of people seem to assume that brownies are simply “underdone cake”. That’s NOT true. But because of the fudgy interior, it’s hard to know exactly when brownies are done baking.
It took me many many iterations of this brownie recipe over the years to be able to tell the exact baking time for when it’s done to my desired fudginess. But this depends on the cake pan you use, and a reliable heat level in your oven.
With my brownie recipe, you can also use a toothpick test to tell when it’s done. Below, I show the toothpick test from the 20 min mark up to the 40 min mark. Both at about 1 inch from the edge, and half way between the edge of the pan and the middle of the brownies.

20 minute bake time – Brownies are not done. At the edge, the toothpick has wet crumbs, but at the half way point (between the edge and the middle), the batter is absolutely liquid.
At 25 minutes – At the edge, the chocolate brownie is still wet, and at the half way point the batter is starting to firm up, but it’s still very wet and there are no crumbs.
30 minutes – At the edge, the toothpick is fairly dry with fewer crumbs. At the half way point, we’re starting to see fudgy looking crumbs. This is where the brownie will be ultra fudgy, a little gooey in the middle, while still being fudgy at the edges too!
35 minutes – At the edge, the toothpick shows even fewer crumbs, indicating that the edges are drying out slightly. The half way point shows slightly drier crumbs that are still soft and fudgy. This is where you get a fudge chocolate brownie with contrasting slightly chewy edges.
At 40 minutes – The toothpick from the edge has no crumbs indicating baked-through edges, while the middle has very few crumbs that also indicate the middle is starting to dry out. This brownie will be a little overbaked (for my liking) with a more chewy texture. However, the texture is still moist and fudgy.
If you like your brownies to be a little fudgy without being gooey then bake the brownies for 40 minutes.
My sweet spot for perfect double chocolate brownies that are fudgy and just a little gooey is between 30 – 35 minutes!
What is the internal temperature for brownies?
For more precision, you can also check the internal temperature for brownies.
The internal temperature for these perfect fudgy brownies is 206°F at the center (no underbaking here!), and about 213°F at 1 inch from the edge.

My best recipe tips for success!
- Use melted, hot butter. The butter melts both types of sugar during mixing which helps create that fudgy and chewy texture, and the meringue-like, crackly surface.
- Use unsalted butter so you can control the amount of salt you add to the recipe. If you use salted butter, you will need to adjust the amount of salt in the recipe.
- Use both types of sugar for best results. That way you get the best of both worlds – chewy and fudgy brownies!
- Mix the butter, sugar and eggs together for a mnimum of 3 minutes. So that you have a pale, thick mix.
- NEVER overmix the flour and cocoa powder. You want to avoid using a hand-held mixer to fold in the dry ingredients. Whether you use a hand-held beater or spatula, you should mix the flour and cocoa powder ONLY until they are just mixed through. This way you avoid the gluten from developing, and end up with a deliciously fudgy chocolate brownie. Over-mixed brownie batter on the other hand, results in rubbery brownies.
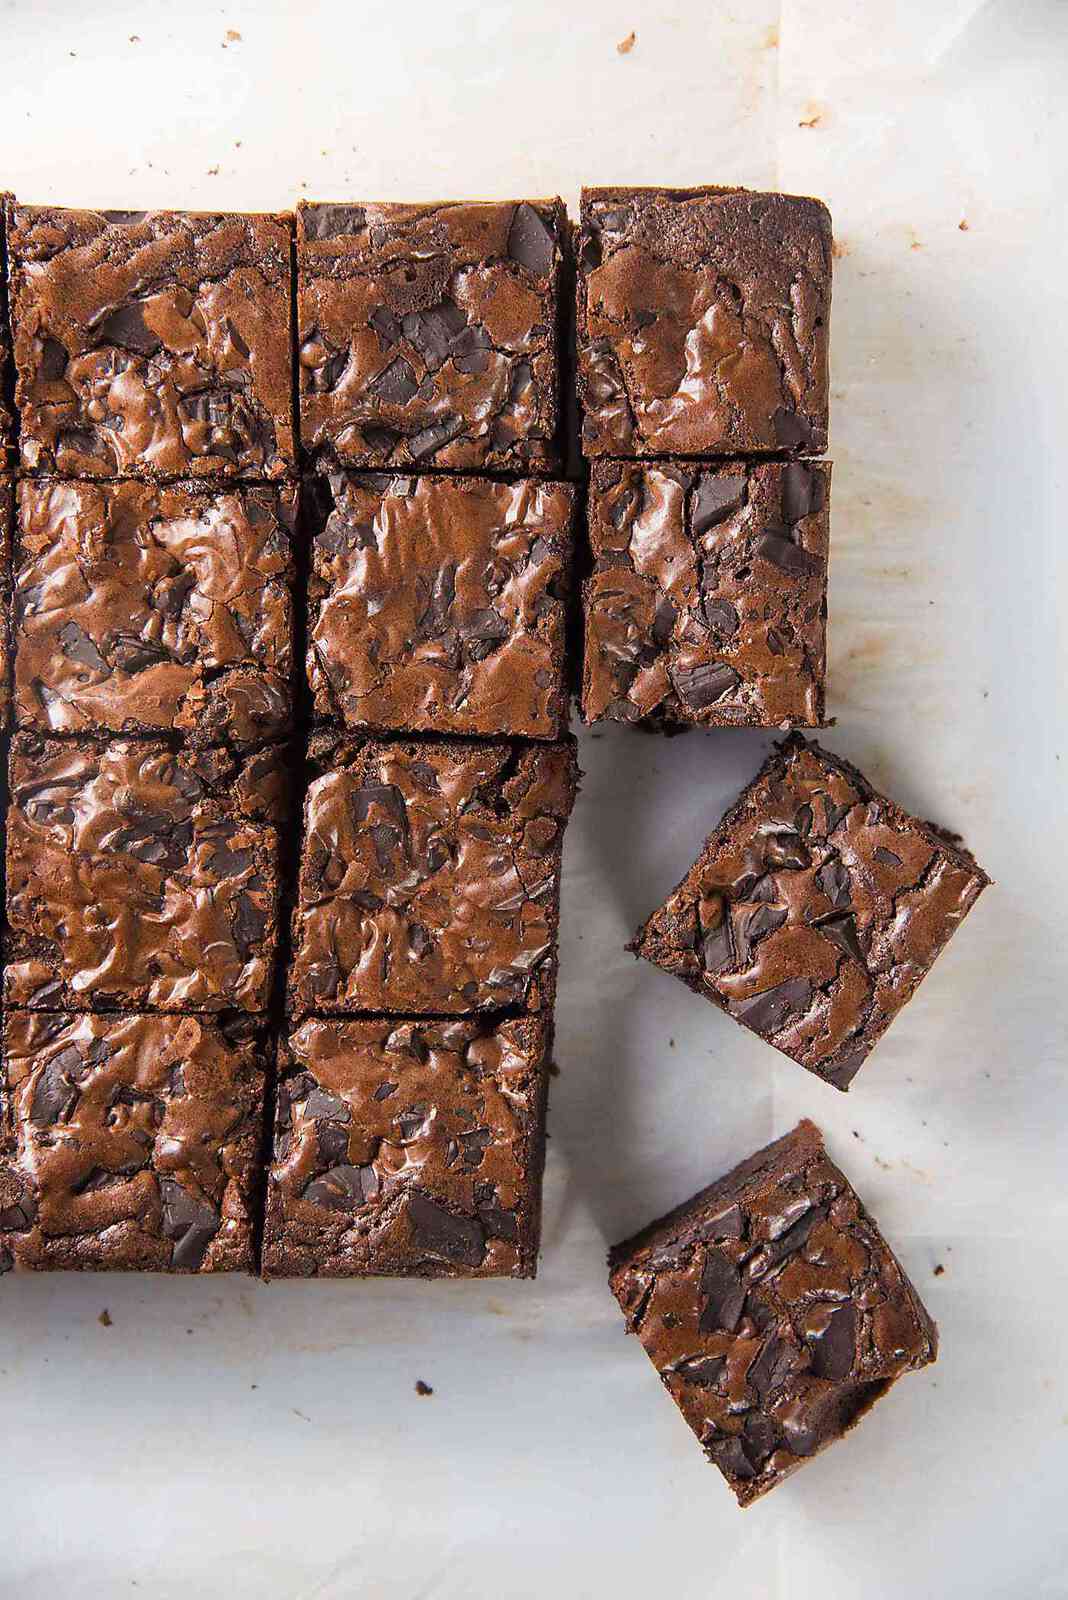
- Make sure to cut with a clean warm knife, for every cut, to get those nice clean edges. Dip the knife in warm water and wipe clean in between each cut to get the cleanest cuts.
Storage tips
At room temperature, they will last 3 – 5 days.
In the fridge, they should last about 2 weeks. Let them come to room temperature before you eat (or warm it gently). This prevents the brownies and chocolate chunks from being too hard.
In the freezer, they should last at least one month. Allow them to defrost at room temperature before eating them though.
To reheat, microwave the brownies for about 20 – 30 second increments until they are warm to your liking.
These fudge chocolate brownies are so decadent and rich in flavor with perfectly sweet, deep, bittersweet chocolate flavor. It’s a great recipe for beginners too!
You can make batches of brownies and store in the fridge for a special occasion or whenever you fancy some fudgy, chocolatey deliciousness in your life! 🙂 Remember to let them come to room temperature a little before eating them. These are one of my FAVORITE Valentine’s day recipes as well. Who wouldn’t want the best chocolate brownie recipe as an edible gift?
This extensively tested chocolate brownies recipe is foolproof and failproof. And these don’t mess around in terms of flavor either. They are double chocolate cocoa brownies (double fudge cocoa brownies), with a deep chocolate flavor.

Commonly asked questions
Can I use self-raising flour?
Can I use self-raising flour?
I don’t recommend it. I use AP flour that has no chemical leaveners, and self raising flour does. You could end up with more cake-like brownies instead of a fudgy chocolate brownies.
Can I add nuts to the brownies too?
Absolutely! You can use a combination of chocolate and nuts, or just nuts too. Keep the total amount of additions to 8 oz / 226 g if possible.
Is it possible to bake this in a 9 inch square pan instead of an 8 inch square pan?
Is it possible to bake this in a 9 inch square pan instead of an 8 inch square pan?
Yes! The brownies will take slightly less time to bake because they will be less thick. So keep an eye on them as they bake.
Can I double this recipe?
Absolutely!
If you double the recipe, you can bake them in a 9 x 13 pan! The bake time will change because of the increased baking area. Make sure to use a metal baking pan so that the brownies bake more evenly.
Can I skip the chocolate chips?
Yes, you can. I’ve made these brownies WITHOUT adding chocolate chips. They are absolutely fudgy and delicious still.
However, the brownie crust will be darker and more matte in color. It won’t be shiny. But it won’t have an impact on the flavor (other than not having extra chocolate pockets in the brownies).
Equipment and tools I use for this recipe
- 8 x 8 square cake pan or 9 x 9 square pan – You can change the pan size, the cook times will vary slightly. The 8 x 8 pan will need to bake for slightly longer than the 9 x 9 inch pan.
- Hand mixer – Makes the process of mixing the ingredients so easy.
- Mixing bowls – I love these microwaveable ones, they are so versatile.
- Spatula – To mix and scrape out the batter.
Recipe video
Recipe

The Best Fudgy Chocolate Brownies
US based cup, teaspoon, tablespoon measurements. Weight measurements are recommended for accurate results whenever available.
Common Measurement ConversionsIngredients:
- 226 g butter 2 sticks of butter
- 170 g brown sugar packed ¾ cup + 2 tbsp
- 170 g white sugar ¾ cup + 2 tbsp
- ¼ tsp salt increase to ½ tsp for a salty sweet treat
- 2 tsp vanilla extract
- 1 tsp coffee extract optional OR 1 tsp instant coffee dissolved in vanilla extract
- 3 large eggs
- 1 yolk from a large egg
- 150 g dark chocolate good quality chips or chunks. ¾ cup chips / small chunks
- 85 g cocoa powder I use Dutch cocoa powder (Callebaut), ¾ cup, sifted
- 85 g AP flour approximately ⅔ cup, spooned and leveled
- 50 g dark chocolate chunks / chips to sprinkle on top (optional)
Instructions:
- Preheat oven to 350°F. Line a 9 x 9 inch or 8 x 8 inch square pan with parchment paper. To make it easier to remove the brownies later, have an overhang of parchment paper over the edges of the baking pan. Use butter to stick the paper to the pan. Set aside when done.
- Place the butter in a heat-proof bowl and microwave to completely melt the butter, and until the butter is fairly hot.226 g butter
- Add the brown sugar, white sugar, and salt while the butter is still hot. Mix to combine the butter and sugars together until you have a smooth paste.170 g brown sugar, 170 g white sugar, ¼ tsp salt
- Add the vanilla, coffee extract (if using), eggs, and egg yolks to the butter-sugar mix. Mix in the eggs until they have been incorporated into the butter-sugar mix.2 tsp vanilla extract, 1 tsp coffee extract, 3 large eggs, 1 yolk
- Using a hand mixer, whisk the butter-sugar-egg mix on medium high speed, until the batter becomes pale in color (3 – 4 minutes) and is thick. This is an important step.
- In a separate bowl, sift the flour and cocoa powder together.85 g cocoa powder, 85 g AP flour
- Add the flour-cocoa mix into the wet ingredients (in two batches if that's easier) and mix it in until just combined. DO NOT OVERMIX. Add the chopped chocolate halfway through the mixing in of the flour. The goal is to make sure the batter is not overmixed when the flour is being incorporated.150 g dark chocolate
- Scrape the batter into the prepared pan. Evenly spread the batter. Sprinkle the remaining chocolate on top (optional). You may not need to use all of the chocolate.50 g dark chocolate chunks / chips
- Bake for 30 – 40 minutes (30 minutes = extra fudgy, 35 minutes = perfectly fudgy for my liking, 40 minutes = fudgy, but not gooey at all). Slightly longer times for an 8 x 8 inch pan. For fudgy brownies, the internal temperature in the middle should be about 206°F and 213°F about 1 inch from the edge of the pan.
- Remove from the oven and let it cool down to room temperature. Remove the brownies from the pan and let them chill in the fridge for a couple of hours (chilled brownies are easier to cut).
- Cut the brownies into 16 pieces. Use a warm knife to cut, making sure to clean the blade after each cut for clean and neat edges.
Recipe Notes
Other recipe variations
- Fudgy brown butter blondies
- Amazing snickerdoodle blondies
- Brookie bars (brownies + chocolate chip cookies)
Nutrition Information:
“This website provides approximate nutrition information for convenience and as a courtesy only. Nutrition data is gathered primarily from the USDA Food Composition Database, whenever available, or otherwise other online calculators.”


Leave a Reply