


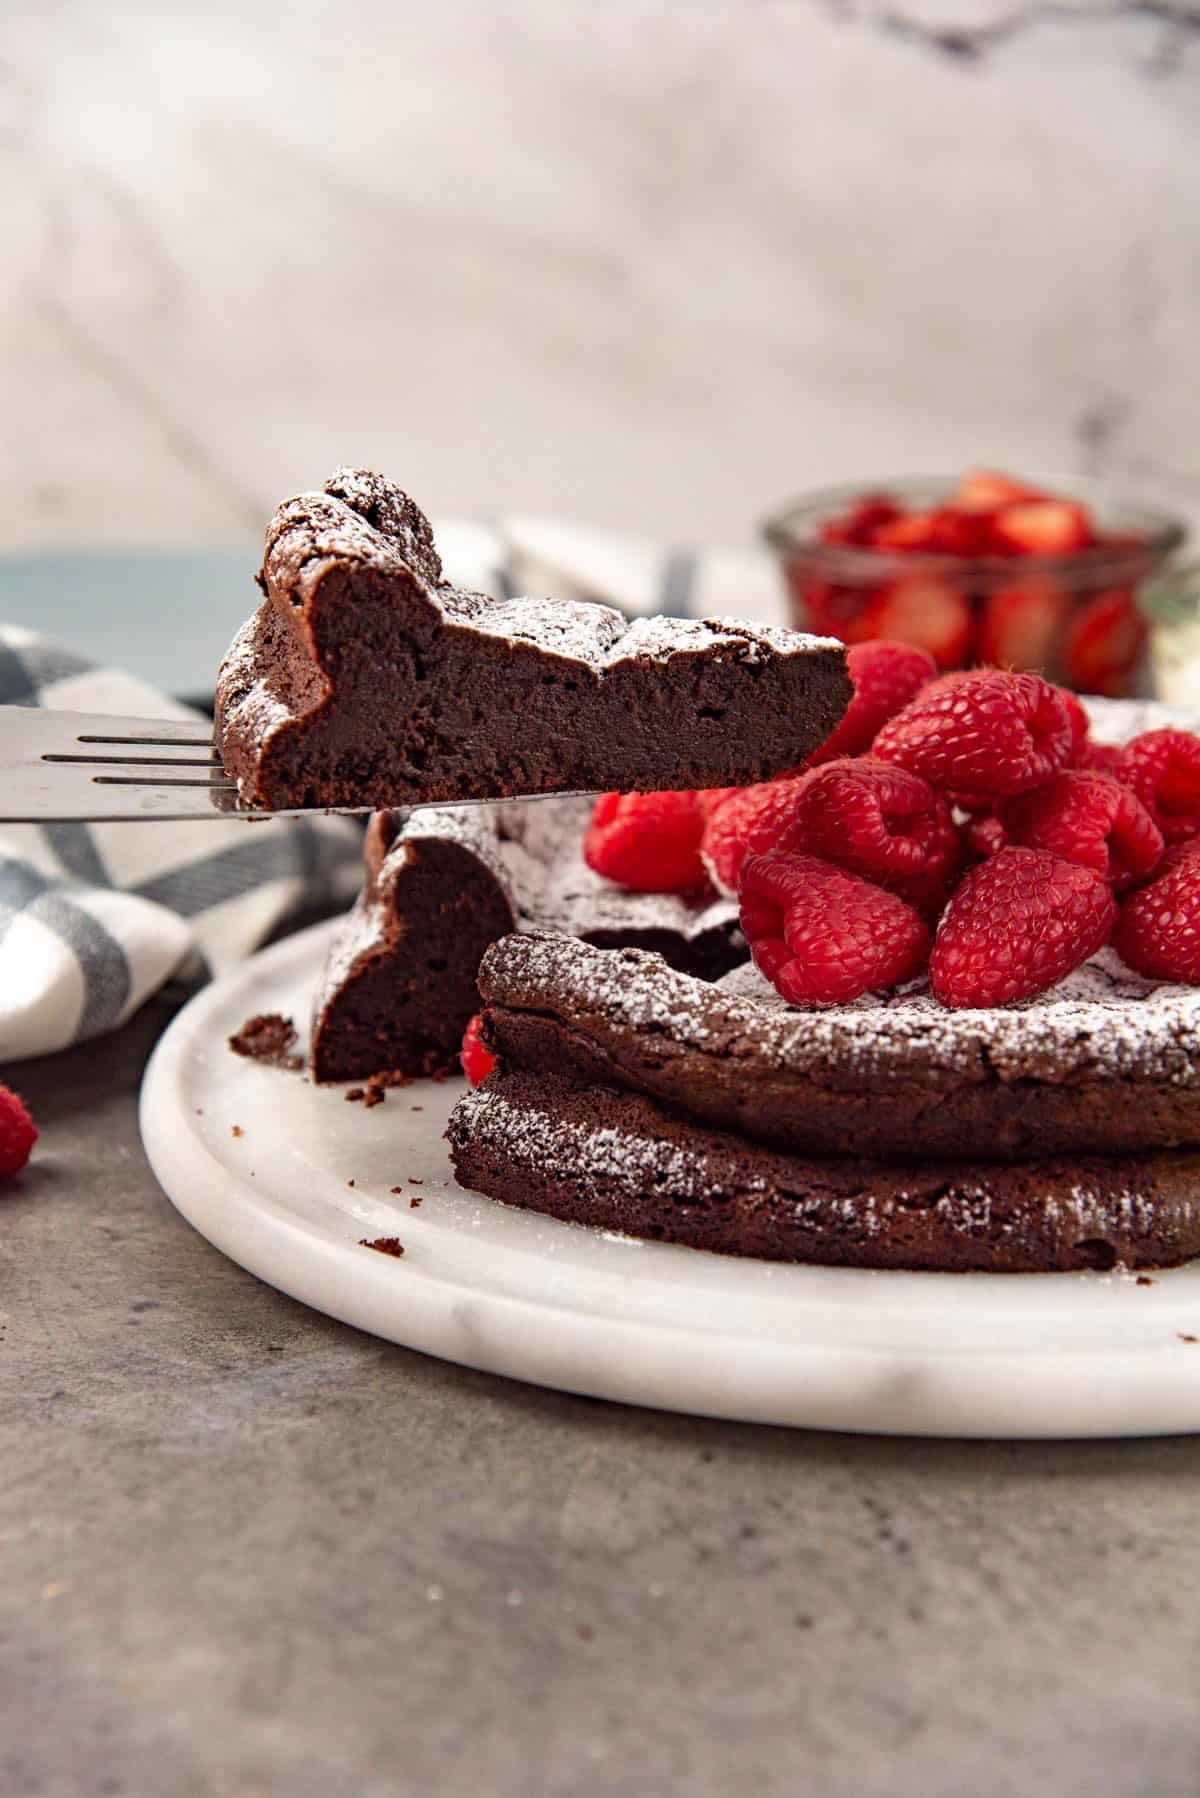
If you’re looking for a super easy, quick to make chocolate dessert that is decadent, rich, and delicious, then here it is! This Flourless Chocolate Torte is an elegant dessert to serve at dinner parties and potlucks. It’s also a perfect Valentine’s day recipe too.
What is a chocolate torte?
Chocolate torte is a baked dessert that contains little to no flour. In this recipe, there is absolutely no flour, which makes it a flourless chocolate torte (or a flourless chocolate cake).
The result is a batter that comes together so quickly, but produces a cake that is decadent and delicious! It’s one of my favorite easy chocolate desserts.
Why I love this recipe
- This recipe is incredibly easy to put together! Prep time is just 20 minutes.
- A delicious, rich chocolate torte or cake for all chocolate lovers and for special occasions! Plus, the torte is gluten free too.
- Because this creamy chocolate torte is so rich, a little goes a long way. So, this torte will serve many, even if it may seem like it won’t!
- You can easily make this torte ahead of time, and it freezes well too.
Chocolate torte ingredients
Bittersweet chocolate
The most important ingredient, of course. I make sure not to skimp on the quality of the chocolate that I use here for that reason.
Only choose a chocolate that you enjoy eating. Do not use chocolate that doesn’t taste good, or has a weird mouthfeel. This will transfer to the torte as well.
Eggs
I use large eggs for this recipe. The egg yolks will add richness and flavor to the flourless chocolate torte, but since the eggs are whisked into a foam, they will also provide a little lift.
The cake is still very dense, but the whisked eggs create the lovely outer crust and also prevents the cake from being too dense and gummy.
Sugar
Sugar usually serves two main functions in baking, and that is true of this torte as well. The sugar adds sweetness to the cake, and also makes the cake a little softer / tender. The sugar helps to aerate the eggs, which in turn contributes to the texture of the final product.
Salt and flavoring
While vanilla extract is optional in this cake, salt is not! The bittersweet richness from the chocolate is balanced by the slight saltiness. So do not skip it!
You can adjust the salt level to your preference (less salt, if you’re sensitive to it, or more salt for a sweet and salty chocolate torte).
Vanilla is optional, but you can add coffee extract or instant espresso powder (dissolved in water) which will also elevate the flavor of chocolate! If not coffee extract, you could also use bourbon, whiskey, rum, or brandy to give this decadent dessert a more adult-friendly palette!
Equipment needed to make this flourless chocolate torte recipe
- To make this dessert, you will need a stand mixer with a whisk attachment. You can use a hand-held electric mixer as well.
- Bowls to mix and melt chocolate.
- Weighing scale – I also strongly advocate for weighing your ingredients if you want to achieve consistent results!
- Whisk – you can also use the whisk attachment in your mixer. This is what I use.
- Spatulas
- Parchment paper – this will make the process of removing the cake so much easier!
- 9 inch springform cake pan that is at least 3 inches tall – This torte will rise as it bakes, so it’s important to have a cake pan that is tall enough. Otherwise, the batter will boil over the cake pan. If you don’t have a 9 inch springform pan, you can use an 8 inch springform pan that is at least 3 inches tall (you can make it a little taller with parchment paper).
How to make flourless chocolate torte
Preheat the oven
This cake is really quick and easy to make. So, it’s important to preheat the oven first. The oven needs time to preheat properly to ensure even baking.
The more the cake batter sits on your counter, the more it will deflate. So it’s best to have the oven ready by the time your torte is ready to be baked.
Prepare the baking pan
Next, butter the inside of the springform pan. This is so that the parchment paper sticks securely to the pan.
Cut strips of parchment paper (that are at least 4 inches tall) to fit on the sides of the pan, and a circle to fit the bottom of the pan.
Make the flourless cake batter
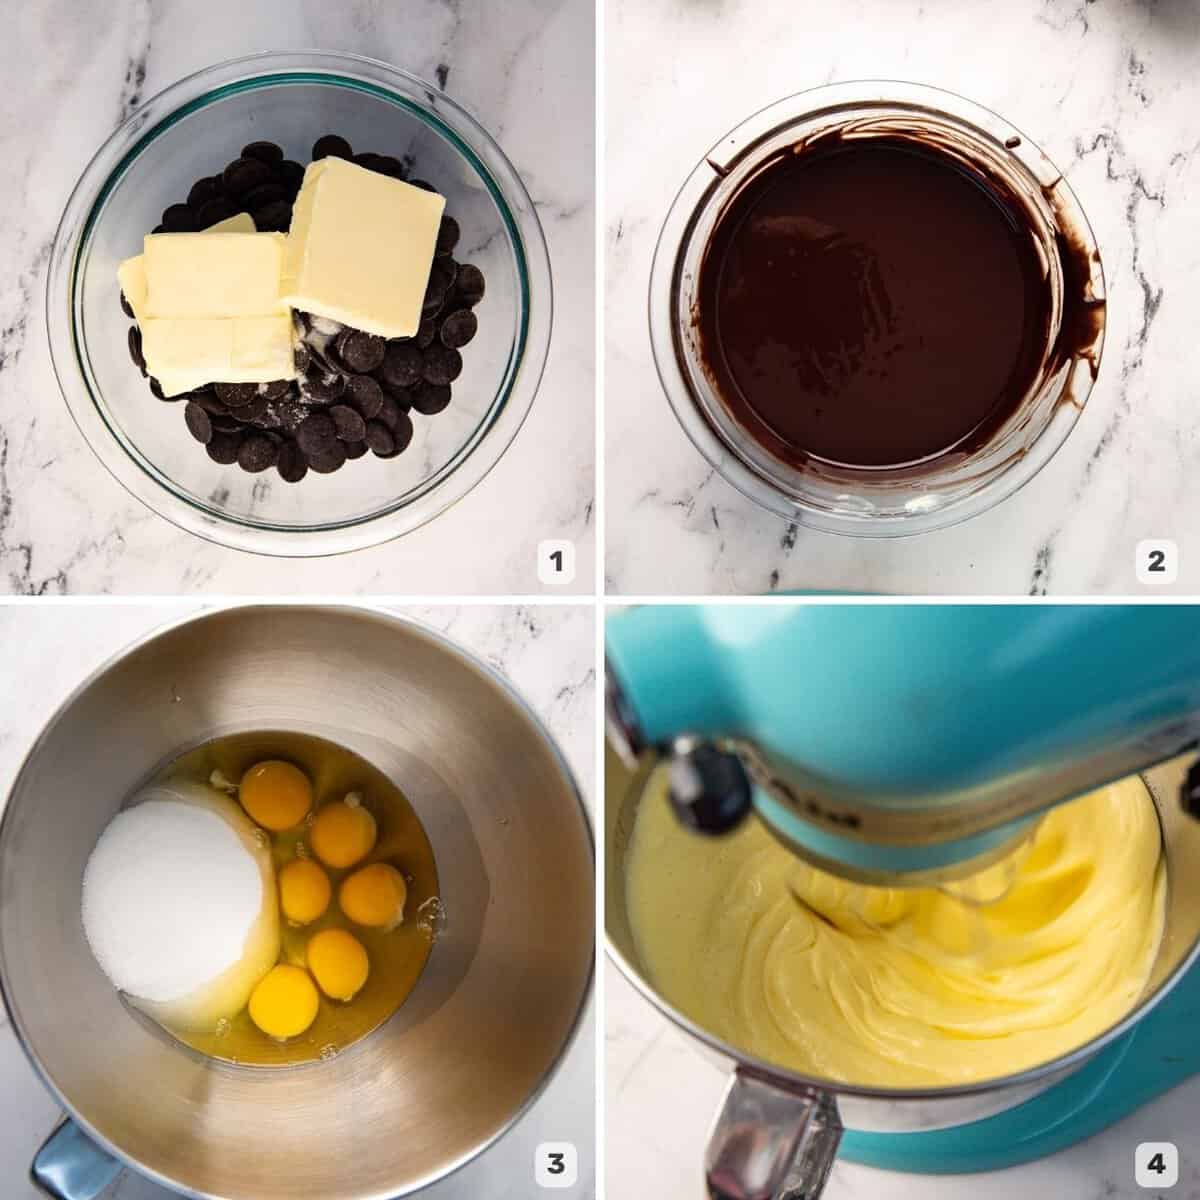
Place the butter, salt, and chocolate in a microwave-safe bowl. Heat the butter and chocolate mixture in 20 second increments, stirring in between, until the chocolate is melted and is lump-free. The amount of time this takes will depend on your microwave and the size of the chocolate pieces as well.
When the chocolate and butter are melted and mixed well to form a smooth mixture, stir in the vanilla or alcohol. Set aside until needed.

Make the egg mixture
Crack the eggs into the mixing bowl. Add the sugar as well.
Whisk on high speed until the eggs have formed a fine foam that is about double the initial volume. I like to whisk the eggs for about 5 – 6 minutes.
Next, lower the mixing speed to medium, and slowly pour in the melted chocolate butter mix. Scrape all the chocolate into the egg mixture.
After adding the chocolate mixture, manually mix the chocolate and egg mixture until you have a uniformly mixed cake batter.

Bake the cake
Pour the mixture into the prepared pan and use a spatula to evenly spread the mixture in the cake pan. Knock the cake pan a few times on your kitchen counter to evenly spread out the batter in the pan.
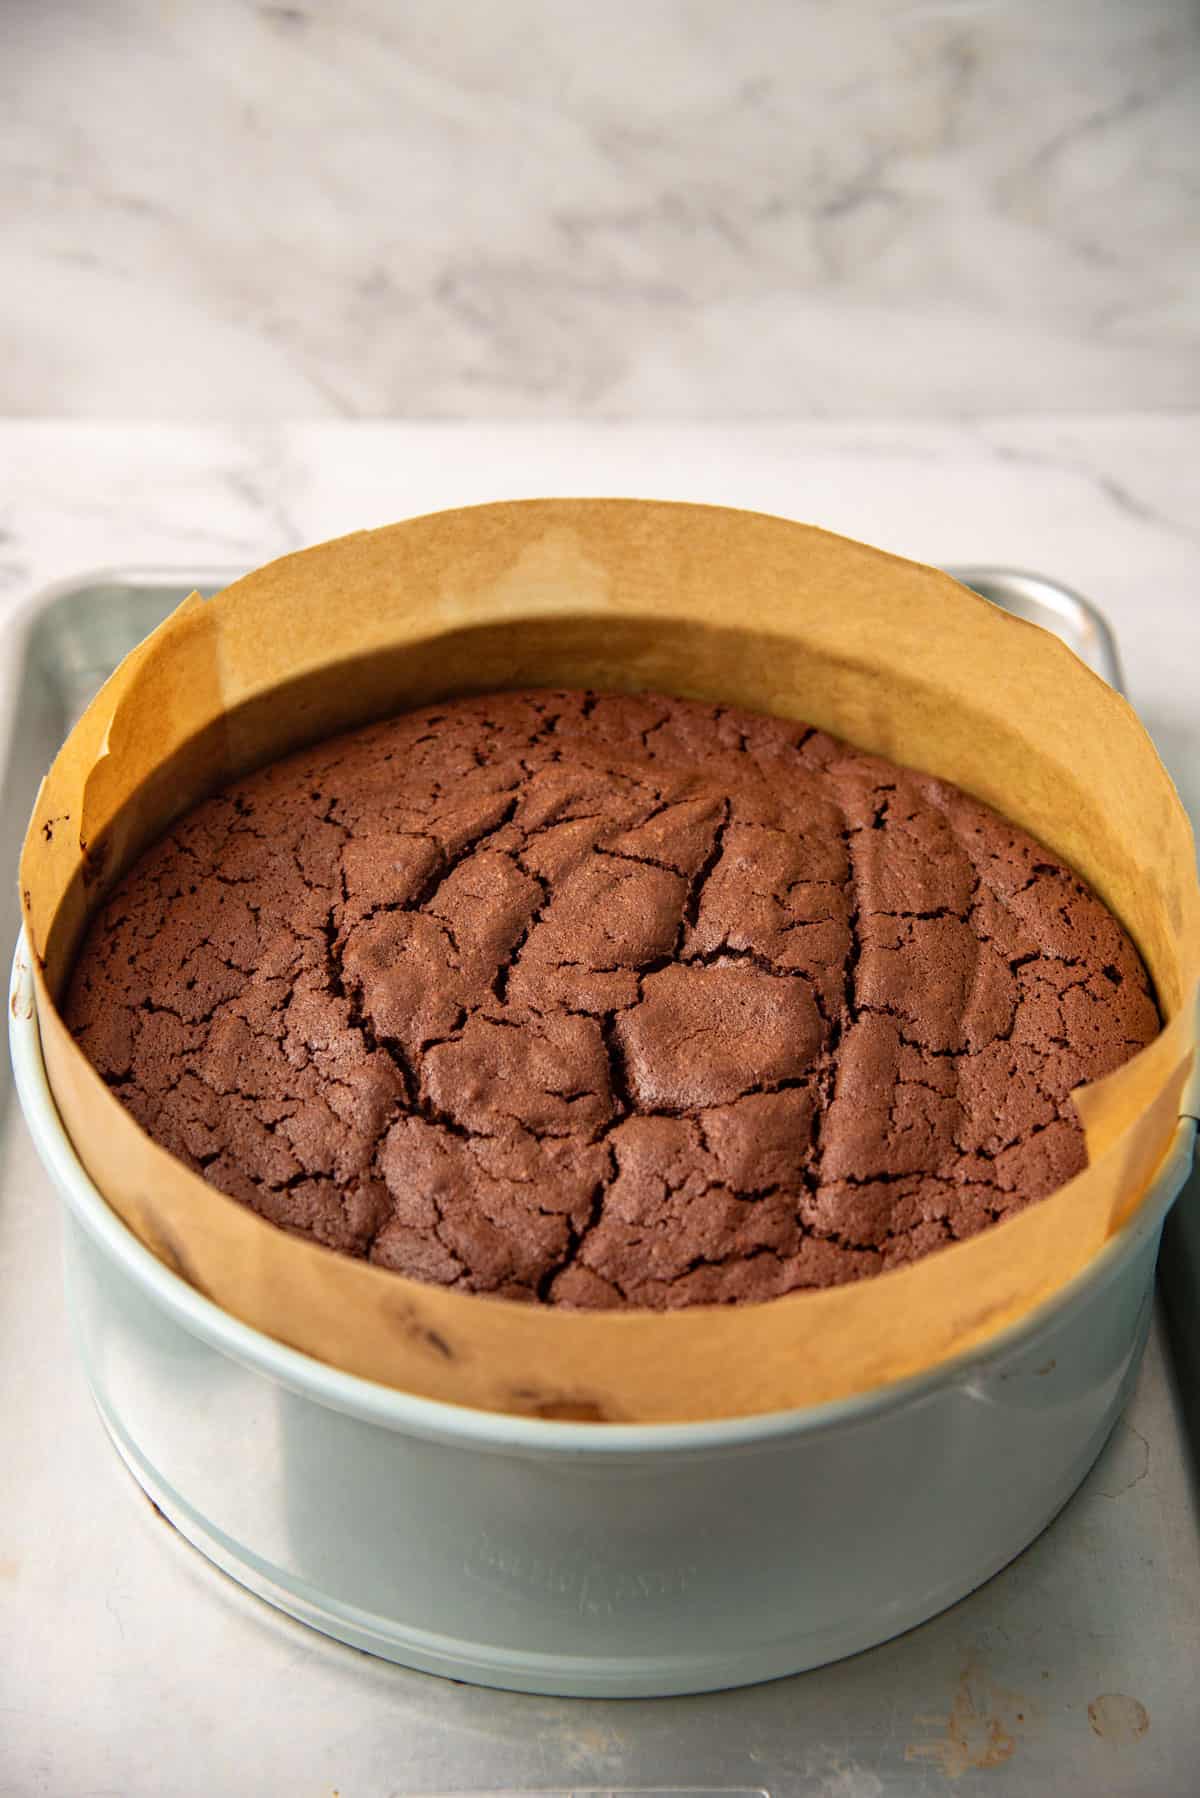
Bake in the preheated oven for 40 – 45 minutes.
Remove the flourless chocolate torte from the oven and let it cool completely, and then transfer the torte to the fridge to chill overnight. This will allow the cake to set.
Serving the chocolate torte
Before serving the cake, remove the cake from the springform cake pan (the parchment paper makes this so easy!).
Place the cake on a serving plate or cake stand.
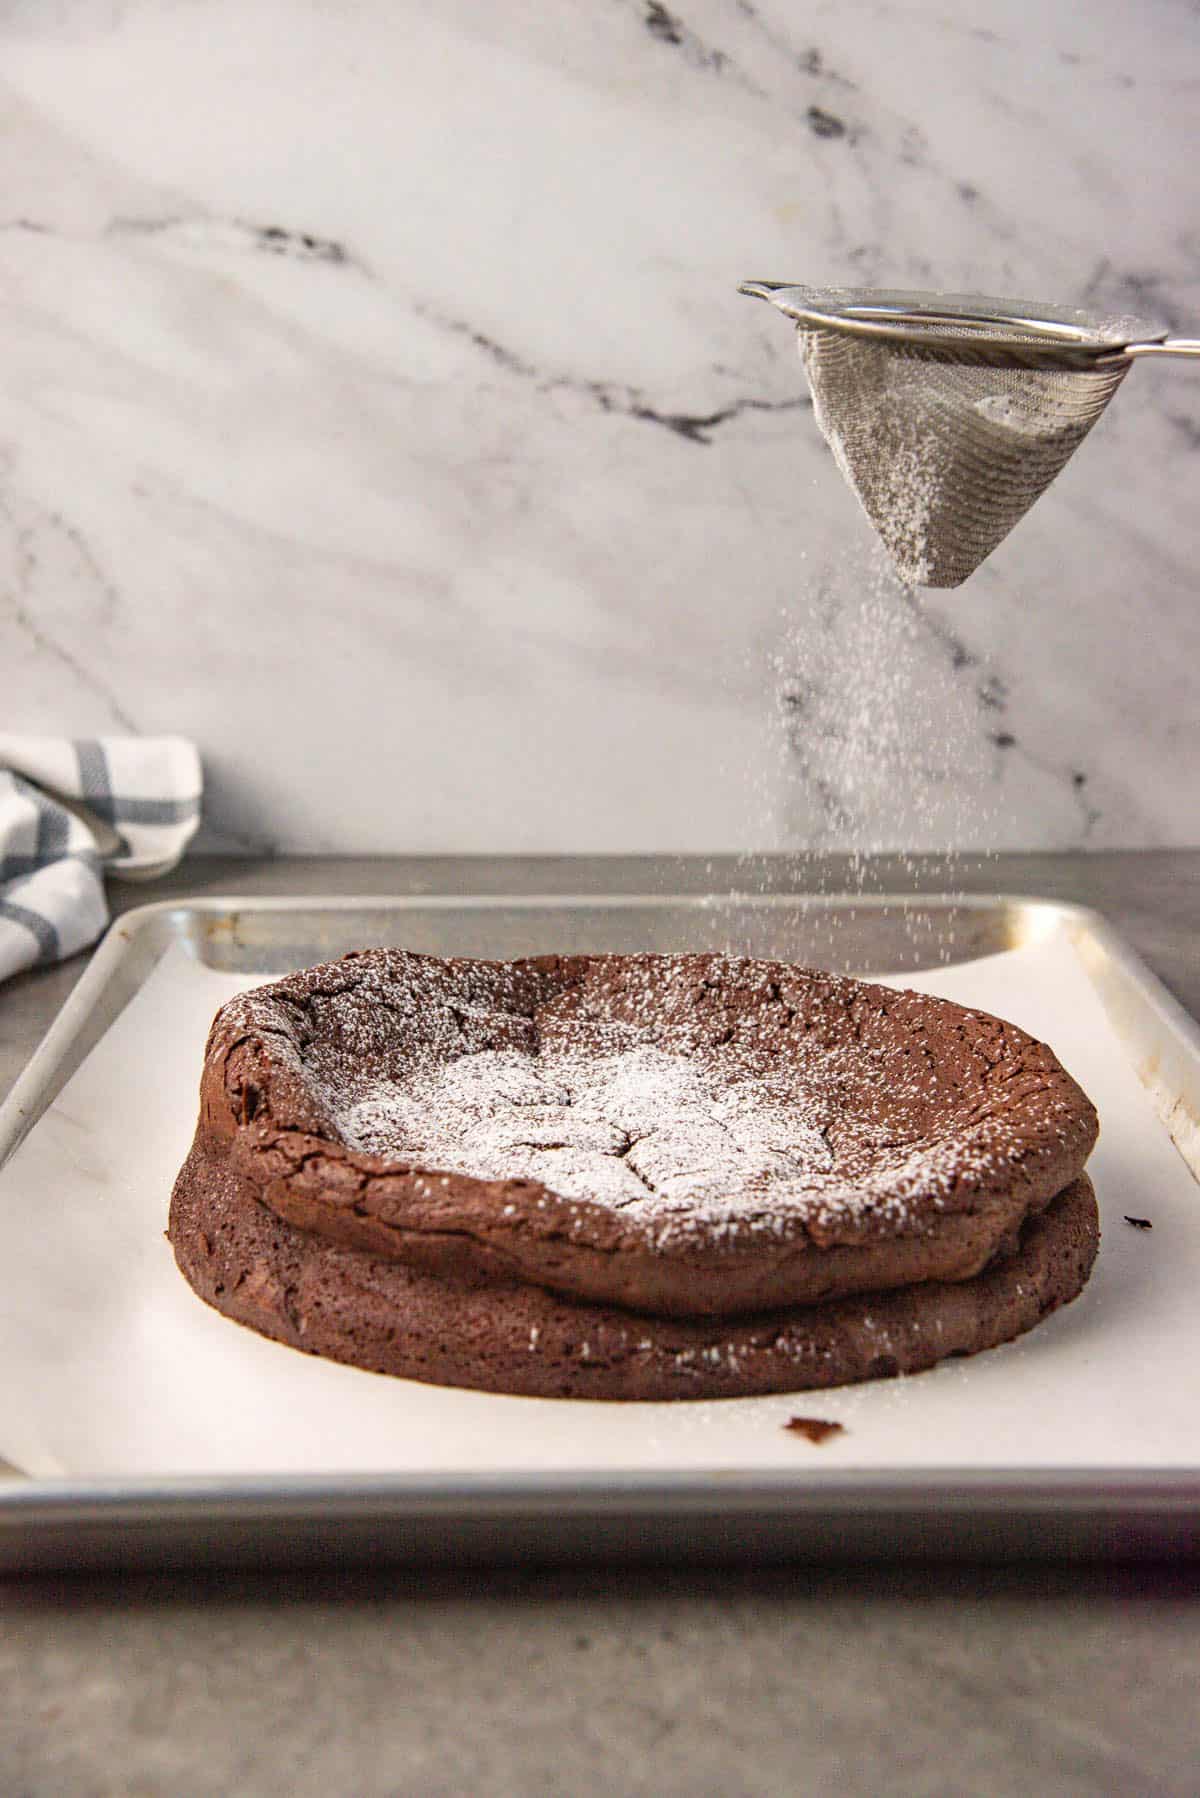
Decorate the torte with a dusting of confectioner’s sugar or cocoa powder. Top it with fruits or whipped cream (or even both), and serve!
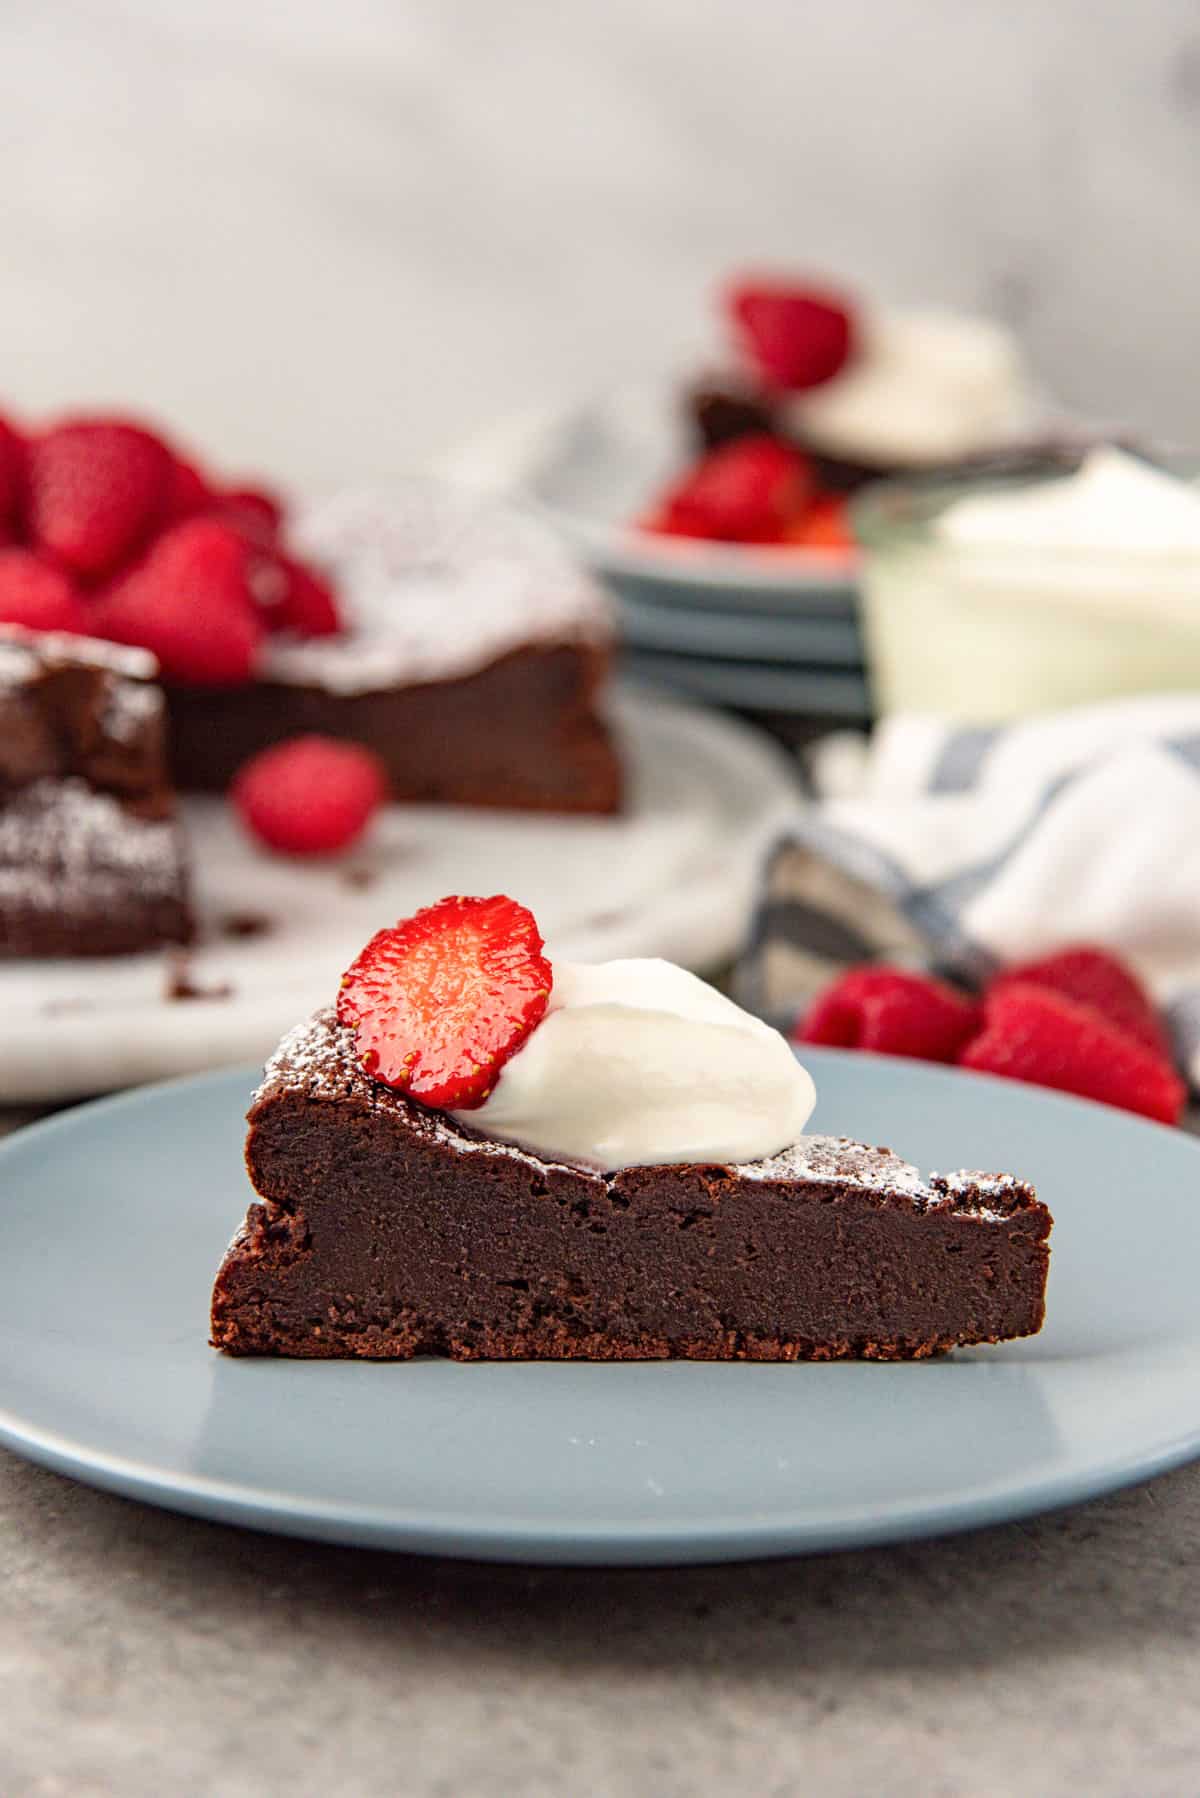
When cutting slices, remember that this chocolate torte has a fudgy texture (like a fudgy chocolate brownie). So use a warm, sharp knife to easily and cleanly cut slices.
Pro tips for this recipe
- Use a dark chocolate that you love to eat! Bittersweet chocolate gives a rich, intense chocolate flavor, while semisweet chocolate will make the torte a little sweeter. Either works well, but make sure to use a chocolate that you like to eat.
- Room temperature eggs will whip better, so make sure to use room temperature eggs. If your eggs are in the fridge, place the eggs in hot water (from the tap) for about 10 minutes to slightly warm them.
- Using a stand mixer will make the process of whipping the whole eggs so much easier! But if not, you can also use a hand-held electric mixer too. Whipping the eggs by hand will be difficult.
- Let the torte set in the fridge for at least 4 hours until it’s properly chilled. This will also make it easier to cut the torte.
- Use a warm, clean knife to cut the chocolate torte. This will get you nice clean cuts for slices.
- Start with small slices. This torte is rich, so I find that a small piece goes a long way!
Serving ideas
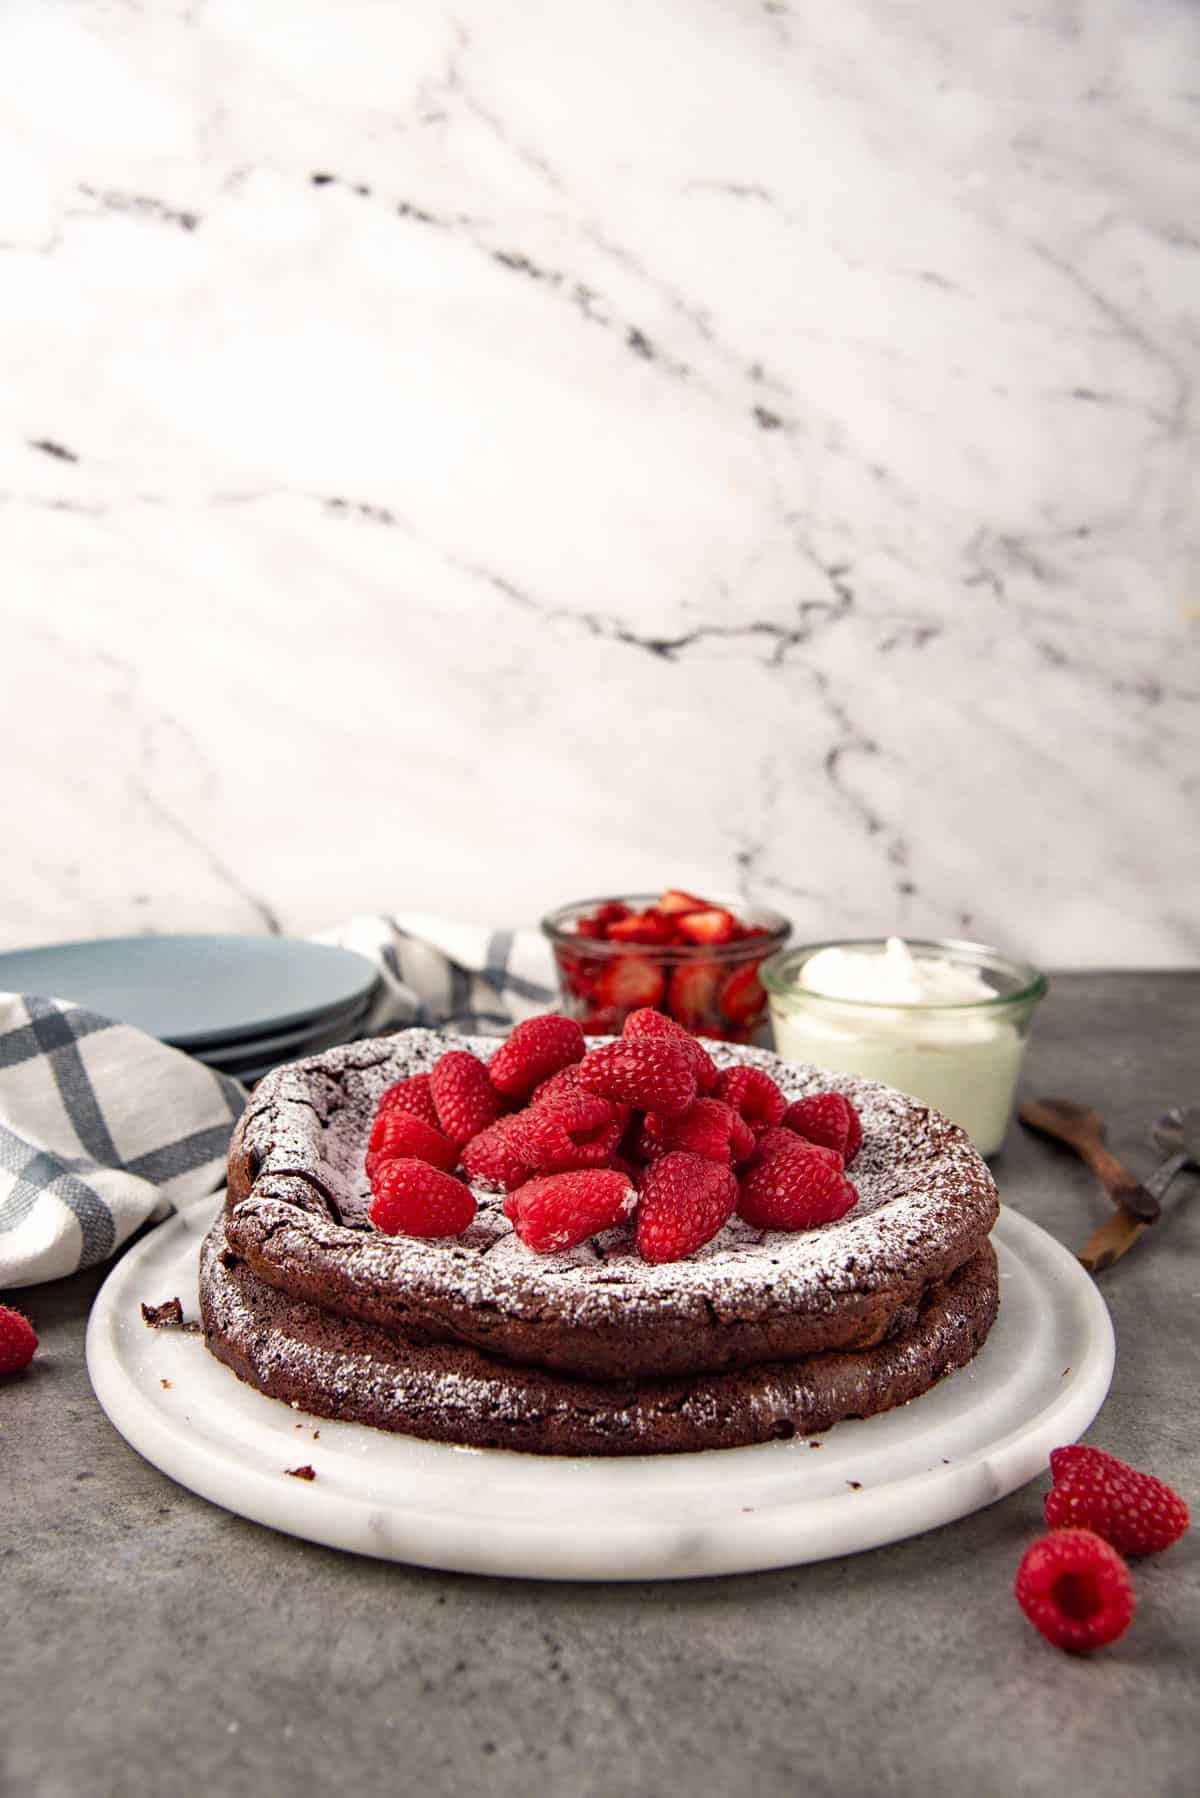
- This flourless chocolate torte tastes even better when accompanied with some fruits (especially fresh berries)! Either fresh raspberries or strawberries are perfect. But you can also make a berry coulis and drizzle it over the top.
- Chocolate and red berries are the perfect pairing for a valentine’s day dessert too!
- Serve it with some whipped cream or lightly sweetened Greek yogurt (the tanginess complements the richness of the torte very well!).
- I’ve also made this torte with raspberries added TO the cake! Before baking the cake, dot the surface with some fresh raspberries. Then you can make a flourless raspberry and chocolate torte.
- You can also add some chopped nuts to the batter. My favorite is chopped cashews. The result is a nutty chocolate torte with bits of delicious cashews embedded throughout the cake.
- For a more simple presentation, simply decorate it with a dusting of confectioner’s sugar or cocoa powder.
Storage instructions
This torte can be stored in the fridge for up to 5 days. However, make sure it’s stored in an airtight container. Otherwise the cake can go stale very quickly.
But obviously, the sooner you eat the chocolate torte, the fresher the taste will be.
Flourless tortes also freeze beautifully! Wrap the cake in plastic wrap, and then foil. This prevents freezer burn. Then place it in an airtight container (or freezer bags), and then the torte can be frozen for up to 3 months.
If you made this cake as a sweet treat, then this can be sliced first, and then stored in the freezer that way too. This way, you only remove the portion you want, and leave the rest in the freezer. To enjoy, let the flourless chocolate cake (or slice) thaw in the fridge overnight.
More chocolate recipes you’ll love
Frequently asked questions
What’s the difference between torte and chocolate cake?
The first difference is in the ingredients used. Chocolate cake recipes (like my classic chocolate cake) usually use flour and leavening agents (eggs, or chemical). Torte recipes use no flour, or very little flour. They may use ground nuts in place of flour as well.
This brings us to the second difference, which is texture.
Due to the flour and leavening, cakes have lighter, moist crumbs. But because of the reduced amount or absence of flour, tortes are a lot more dense than regular cakes.
Chocolate torte vs flourless chocolate cake vs Torta Caprese
A chocolate torte can have flour, or it could also be flourless. The result is a dense, rich cake that is not too tall and very decadent.
This can be made with eggs that are beaten into a foam (like my recipe), or without beating the eggs at all (for a truffle-like consistency), or with the egg whites beaten separately and added to the chocolate mixture (for a meringue-like crust on top of the chocolate torte).
Each of these methods will yield slightly different textures in the cake, along with the fudgy center.
Torta caprese is a chocolate torte, but with the addition of ground nuts. This is usually almond flour or almond meal. This results in a more nutty dessert. It’s still very rich and decadent, and has a dense texture, but it is slightly less dense because of the presence of the almonds.
Flourless chocolate cake is any chocolate cake that is made without flour! Both the chocolate torte and the Torta caprese fall into this category IF no flour is added. Which is why my flourless chocolate torte is also a flourless chocolate cake.
Can I make this recipe ahead of time?
Yes, you can! This recipe can be frozen for up to 3 months, so you can make it ahead.
This torte can also be made in a pinch, and stored in the fridge for up to 5 days. But I recommend serving it within the first 3 days for the best flavor and texture.
Can you freeze this chocolate torte?
Absolutely! Make sure to properly wrap it to prevent freezer burn, and store it in the freezer in an airtight container or bag.
How do you know when the torte is done baking?
The chocolate torte rises as it bakes. When it’s done baking, the edges of the cake and the top of the cake look fairly dry, but when the cake is wiggled, it shakes a little because the middle is fudgy.
Why does my chocolate torte sink after baking?
Since there is no flour, the cake lacks any structure to hold it up. The cake expands due to the air inside the eggs, but without any starch to hold the air bubbles, the cake collapses a bit as it cools.
This is normal and to be expected! In fact it is precisely this sinking that creates the delicious fudgy, dense center.

Recipe
Flourless Chocolate Torte
US based cup, teaspoon, tablespoon measurements. Weight measurements are recommended for accurate results whenever available.
Common Measurement ConversionsIngredients:
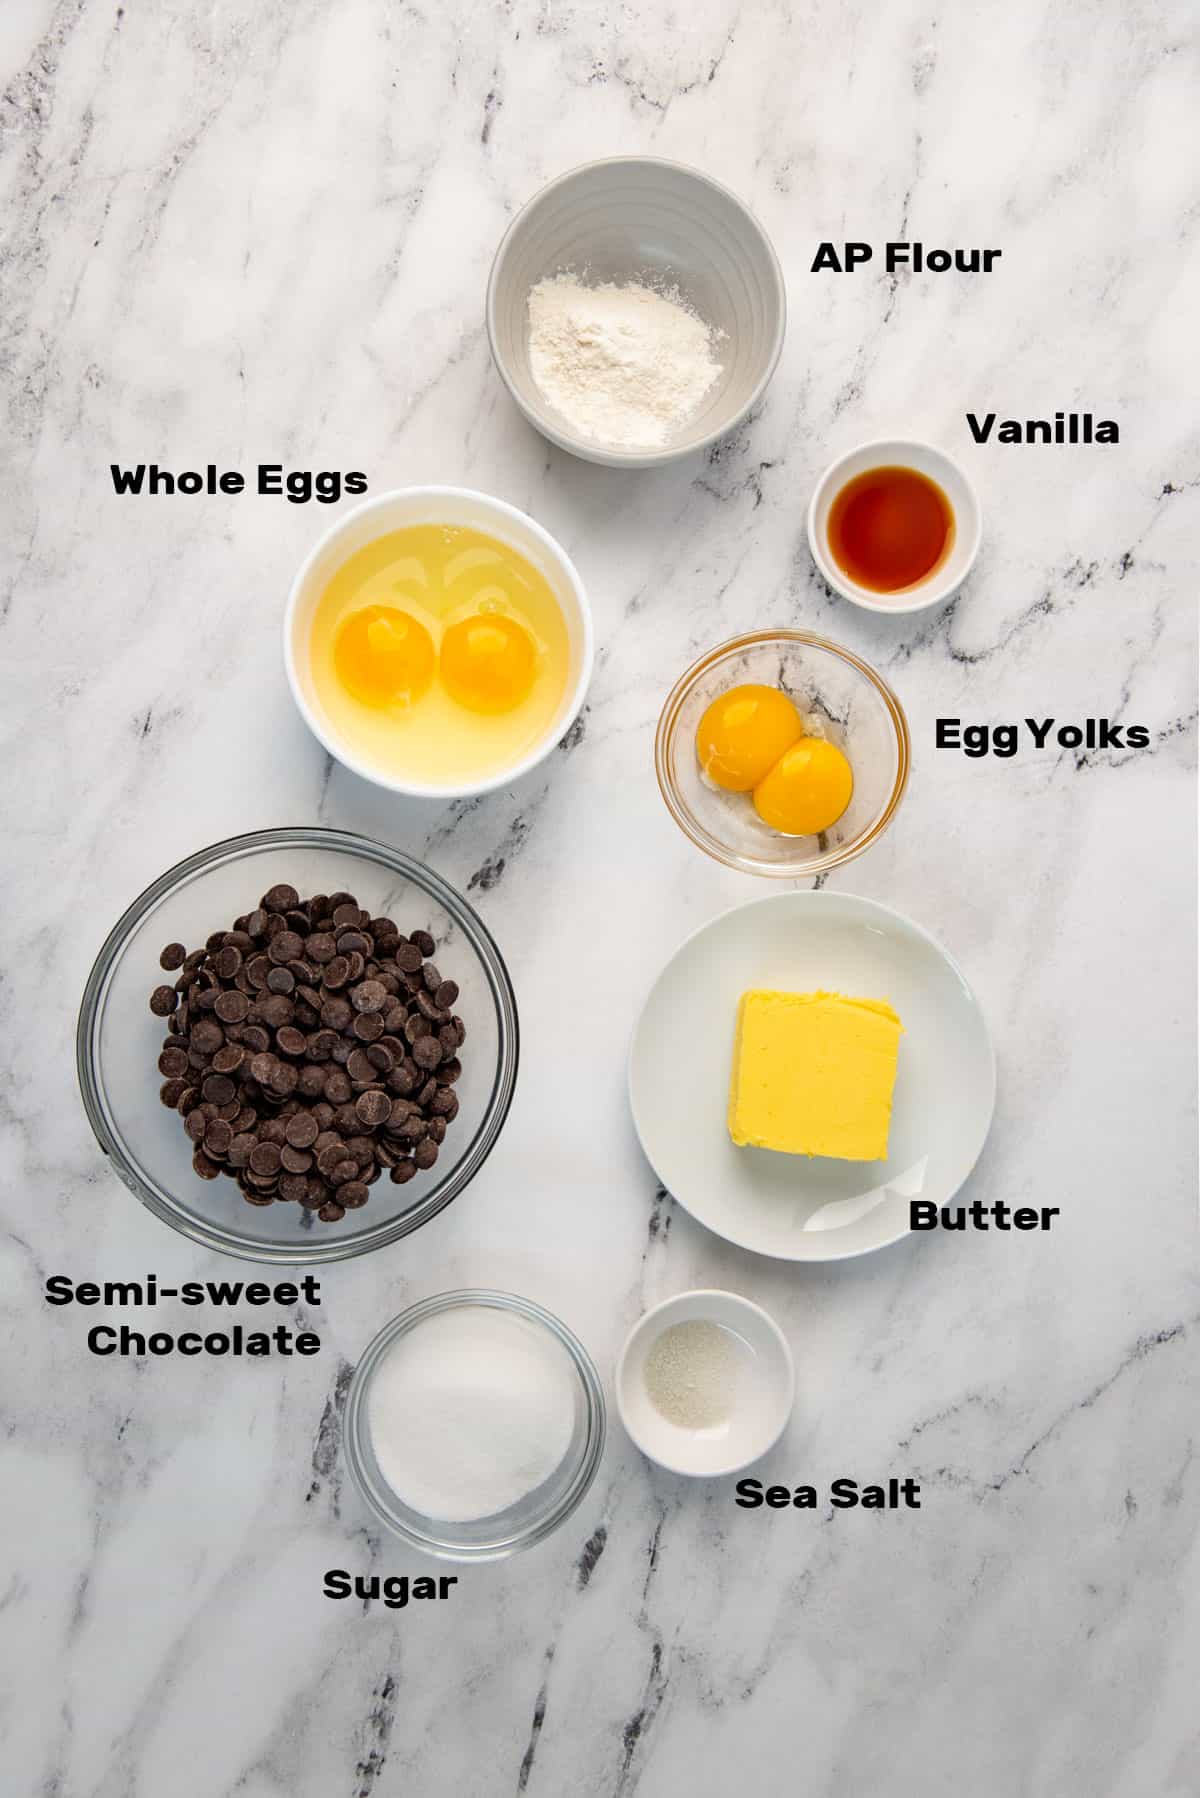
- 6 eggs large eggs
- 340 g bittersweet chocolate 12 oz (about 70% cocoa content)
- 226 g unsalted butter 8 oz / 2 sticks
- ½ tsp fine sea salt
- 3 tbsp water or bourbon, whiskey, rum, or brandy
- 1 tsp vanilla extract or coffee extract (optional)
- 200 g white sugar 1 cup
To serve
- Whipped cream or Greek yogurt
- Raspberries or strawberries
Instructions:
- Preheat your oven to 350°F / 180°C.
- Take a 9 inch springform pan with at least 3 inch tall sides, and butter the sides and bottom of the pan.
- Cut 4 inch strips of parchment paper and line the sides of the cake pan. Then cut a 9 inch circle with parchment paper to line the bottom of the cake pan. Set it aside until needed.
Making the cake batter
- All ingredients should ideally be at room temperature. Especially the eggs. If the eggs were refrigerated, place them in a bowl with very warm tap water for about 10 minutes to bring them up to room temperature. It's OK if the eggs are slightly warmer than room temperature as well.6 eggs
- I use chocolate callets in this recipe, but you can use good quality chocolate chips as well. Bittersweet chocolate bars can also be used, but chop the bars into smaller pieces.
- Place the chocolate, butter, and salt in a microwave-safe bowl.340 g bittersweet chocolate, 226 g unsalted butter, ½ tsp fine sea salt
- Heat the mixture in the microwave in 15 – 20 second increments, while stirring in between. Heat the mixture until the chocolate is melted and mixed through with the butter, with no lumps.
- Stir in the vanilla extract and the water (or the liquid of your choice).3 tbsp water, 1 tsp vanilla extract
- Set it aside to let it slightly cool down.
- Place the eggs in a mixing bowl. The eggs should be at room temperature or slightly warmer.6 eggs
- Add the sugar.200 g white sugar
- Place the mixing bowl in your stand mixer with the whisk attachment attached. Start whisking the egg and sugar mixture on high speed for about 5 – 6 minutes. The eggs should foam up and double in size.
- Once the eggs are beaten, the chocolate mixture is added. To do this, lower the speed to medium, and slowly pour in the chocolate to mix in with the eggs. You can also stop the mixer and add the chocolate in a few additions while mixing in between.
- Once all the chocolate is added, stop the mixer. The mixture won’t be uniformly mixed, as the chocolate will be mostly at the bottom of the bowl.
- Use a whisk to manually mix the chocolate and egg mixture together. You can also remove the whisk attachment and use this to mix the batter.
- Pour the batter into the prepared cake pan. Spread the batter inside the cake pan using a spatula so that it's evenly spread. Knock the cake pan on a surface a few times to make sure the batter is evenly spread in the cake pan.
- Bake the chocolate torte in the preheated oven for about 40 – 45 minutes. The cake should rise inside the cake pan and the top will look crackly. The sides of the cake will look baked through, with a little jiggle in the center of the cake.
- Remove the cake pan from the oven and let the torte cool completely. Then place the torte in the fridge and let it chill overnight.
Serving the cake
- Release the torte from the cake pan. Dust the surface with icing sugar or cocoa powder. Place the torte on a serving platter.
- Use a clean, warm knife to cut the torte into small slices.
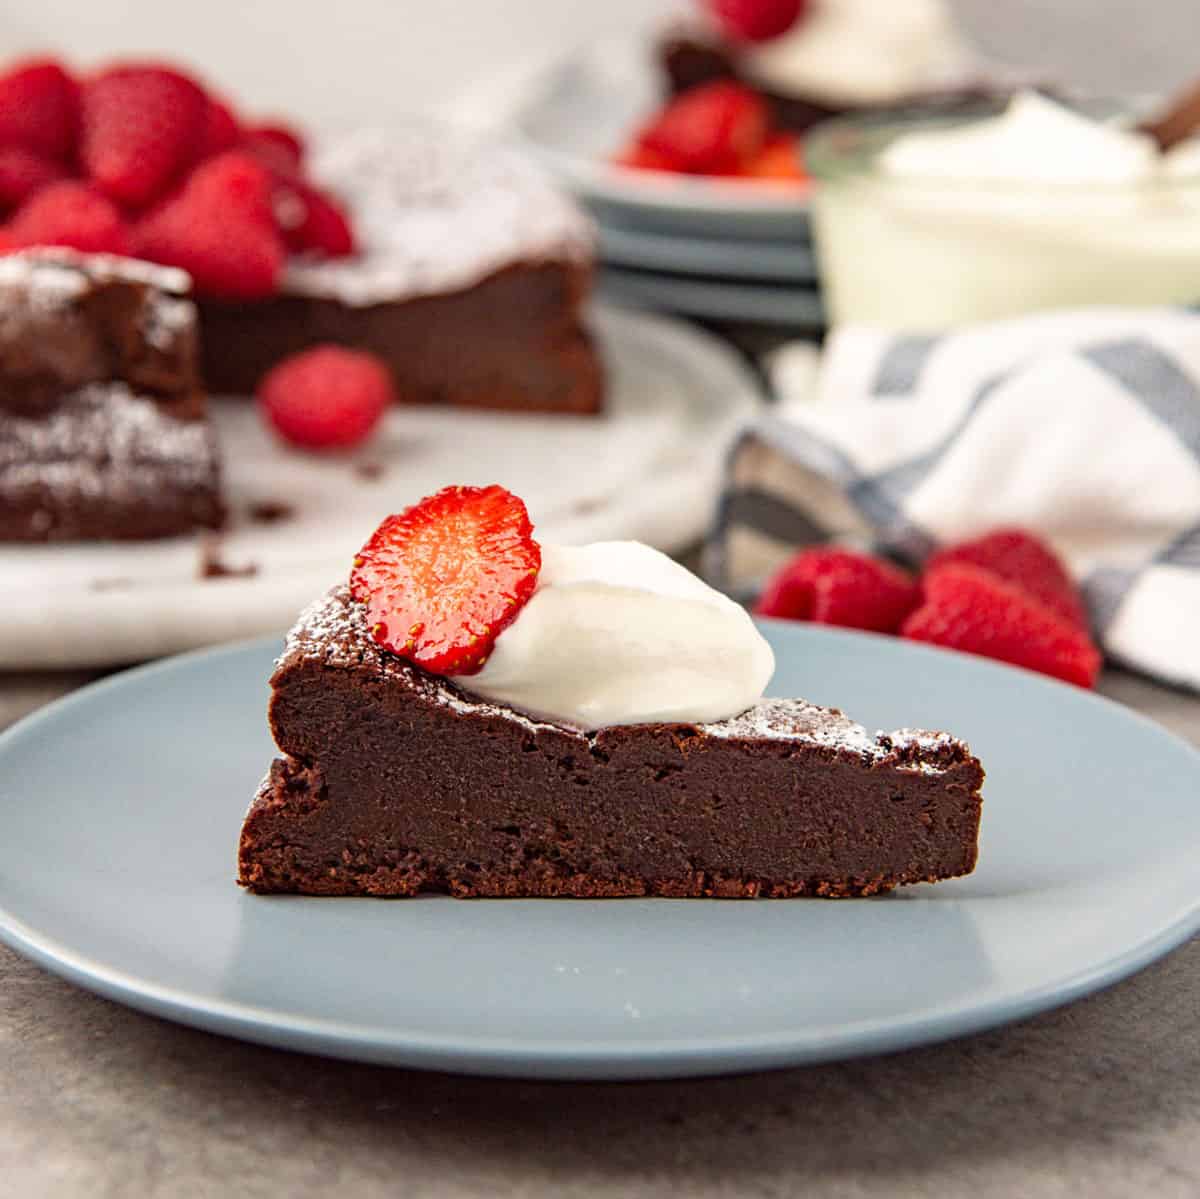
- Serve with whipped cream or Greek yogurt, along with fresh fruits (fresh berries are a great choice).Whipped cream, Raspberries or strawberries
Recipe Notes
Storing the torte
This torte can be stored in the fridge for up to 5 days. However, make sure it’s stored in an airtight container. The sooner you eat the chocolate torte, the fresher the taste will be. This can also be frozen. Cut the cake into slices and freeze, or freeze whole. Wrap the whole cake or the pieces in plastic wrap. Then wrap the whole cake (or all the pieces together) with foil (to prevent freezer burn). Then place this in an airtight container. This can be frozen for up to 3 months. Allow the cake to thaw in the fridge before eating.Nutrition Information:
“This website provides approximate nutrition information for convenience and as a courtesy only. Nutrition data is gathered primarily from the USDA Food Composition Database, whenever available, or otherwise other online calculators.”


Leave a Reply