


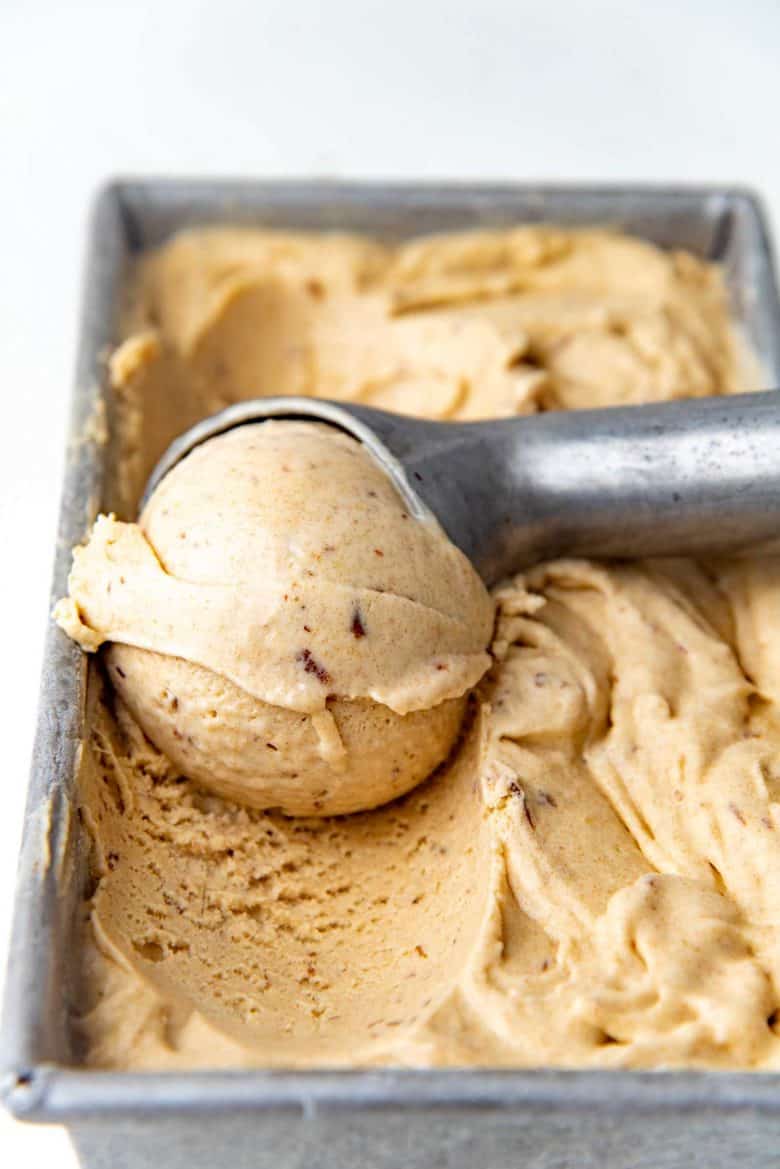
This Date and Tahini Ice Cream is a revelation! Creamy, and sweetened with only dates, with the nutty, savory flavor of tahini mixed through. A uniquely delicious ice cream unlike any you’ve tasted before!
Sweet, salty, nutty & uniquely delicious Date and Tahini Ice Cream!
This date and tahini ice cream needs a drum roll. It’s THAT good. And believe me when I say this, the idea for this ice cream came to me in a dream. Yup, no joke. So of course, I HAD to make it the next morning. I made it multiple times this summer. And it just keeps getting better.
It was such a fantastic flavor, I knew I had to share it, even if it’s officially autumn now here in the northern hemisphere.
Ingredients to make Date and Tahini Ice Cream
This homemade ice cream is made with dairy, dates, tahini, salt, egg yolks, and cream. It is gluten free and refined sugar free. You can also make this vegan. I’m sharing all those instructions in the recipe card below. The whole process of making the ice cream base should take less than 30 minutes.
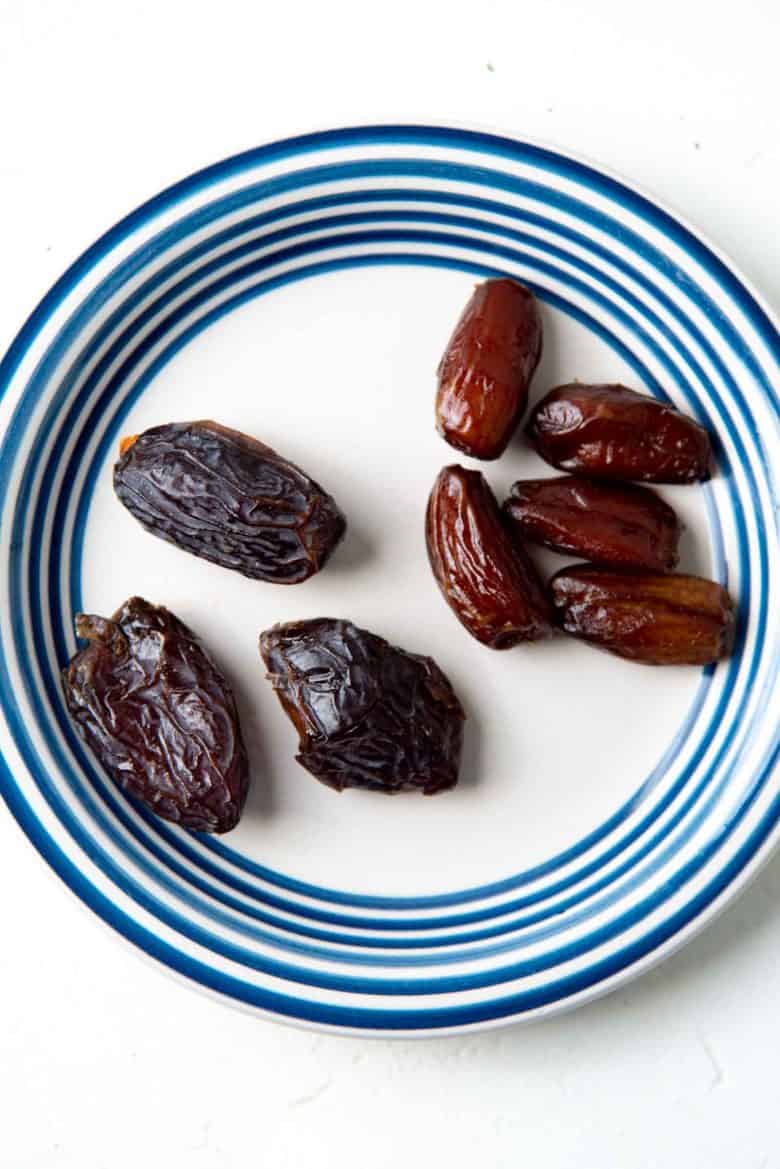
Dates
Dates are the only source of sweetness in this recipe. The dates not only add sweetness, but thickens the ice cream base as well and gives it a lovely creamy texture.
I’ve used both medjool dates and deglet noor dates to make this ice cream. Medjool dates give this ice cream a sweeter, more caramel like flavor, but deglet noor dates will also yield excellent results! You can read more about the differences here. I’ve found that I have to add a little extra sweetness when using deglet noor – and in that case I prefer to use honey or maple syrup to dial up the sweetness if needed.
I prefer not to use 100% date syrup to make this date and tahini ice cream, simply because the dates also serve to thicken the base here. The syrup is not able to do that.
Tahini
Tahini is made by grinding sesame seeds into a smooth paste. This is very popular in Mediterranean cuisine and I am a sucker for it. The tahini sesame is such a lovely nutty flavor, and perfect in sweets as well as savory dishes (think hummus!).
Tahini also thickens the ice cream base to an extent, but not as much as the dates and egg yolks do. The savory nuttiness that it adds perfectly complements the flavor of dates.
Milk and cream
Milk and cream are obviously important ingredients for any ice cream base. I have adjusted the amount from my regular vanilla ice cream to compensate for the dates and tahini here.
Egg yolks
While egg yolks are not necessary in this recipe, I like their addition because they add a richness which I love.
Usually the fat in the egg yolks helps keep the ice cream base creamy, thick, rich, and scoopable even when frozen (both sugar and egg yolks help with this).
In this recipe, the dates form a smooth paste that not only helps with thickening, but the sugar from the dates also helps keep the ice cream fairly soft after freezing. So if you want it to taste even richer, I highly recommend adding the egg yolks.
Salt and vanilla
These are extra additions to enhance the flavors of this date and tahini ice cream. Salt balances the sweetness and enhances the tahini flavor, while vanilla enhances the sweetness.
Vegan substitutions
You can turn this date and tahini ice cream into a plant based vegan ice cream (or a dairy free ice cream).
VEGAN OPTIONS FOR MILK AND CREAM – You can substitute the milk with cashew milk and the cream with unsweetened coconut cream. You could use almond milk too but I like the creamier mouthfeel of cashew milk. Do NOT use low fat options. You want the higher fat content, especially if you’re not using egg yolks.
If you can’t find coconut cream, you can use coconut milk instead. To use coconut milk, choose a coconut milk that will separate into two layers. Let the coconut milk can sit in the fridge overnight. The layers should separate and the top fatty layer should harden. THIS is the coconut cream layer. You can use the water for smoothies, so don’t discard it. Depending on the coconut milk brand, you may need multiple cans to get the right amount of coconut cream.
VEGAN OPTIONS FOR EGG YOLKS – If you want to keep this vegan, then leave out the eggs. The additional fat from the cashew milk and coconut cream should help keep the ice cream base nice and creamy.
The process of making the ice cream
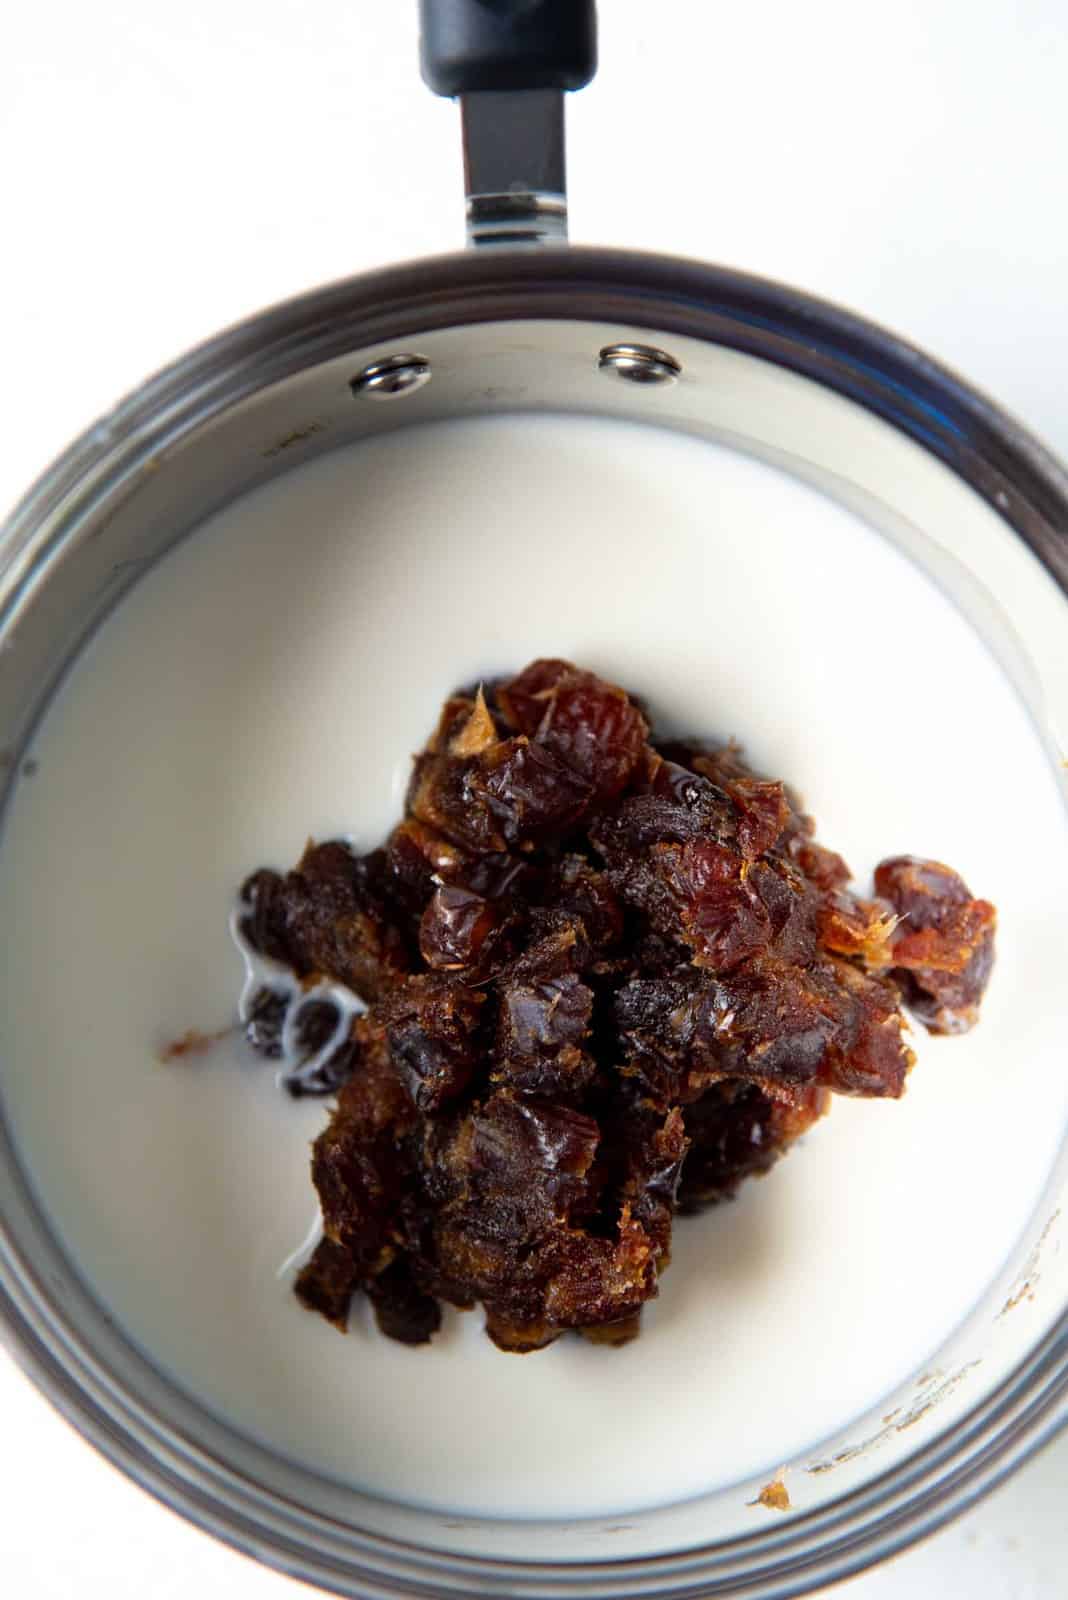
Puree the dates
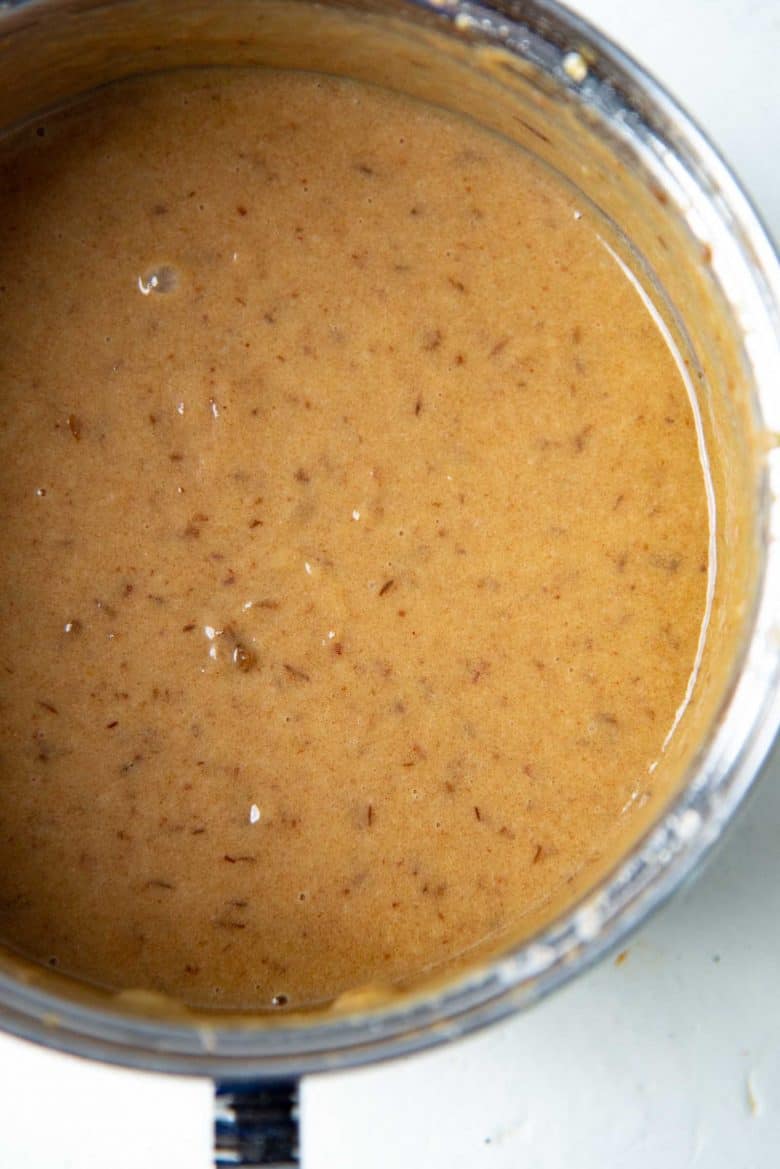
The first step to making this ice cream is to puree the dates. Dates are easier to puree if they are warm, so the first thing to do is to heat up chopped dates with the milk, until the milk is steaming hot. It’s OK if you let it come to boil too, but don’t let the milk boil for too long.
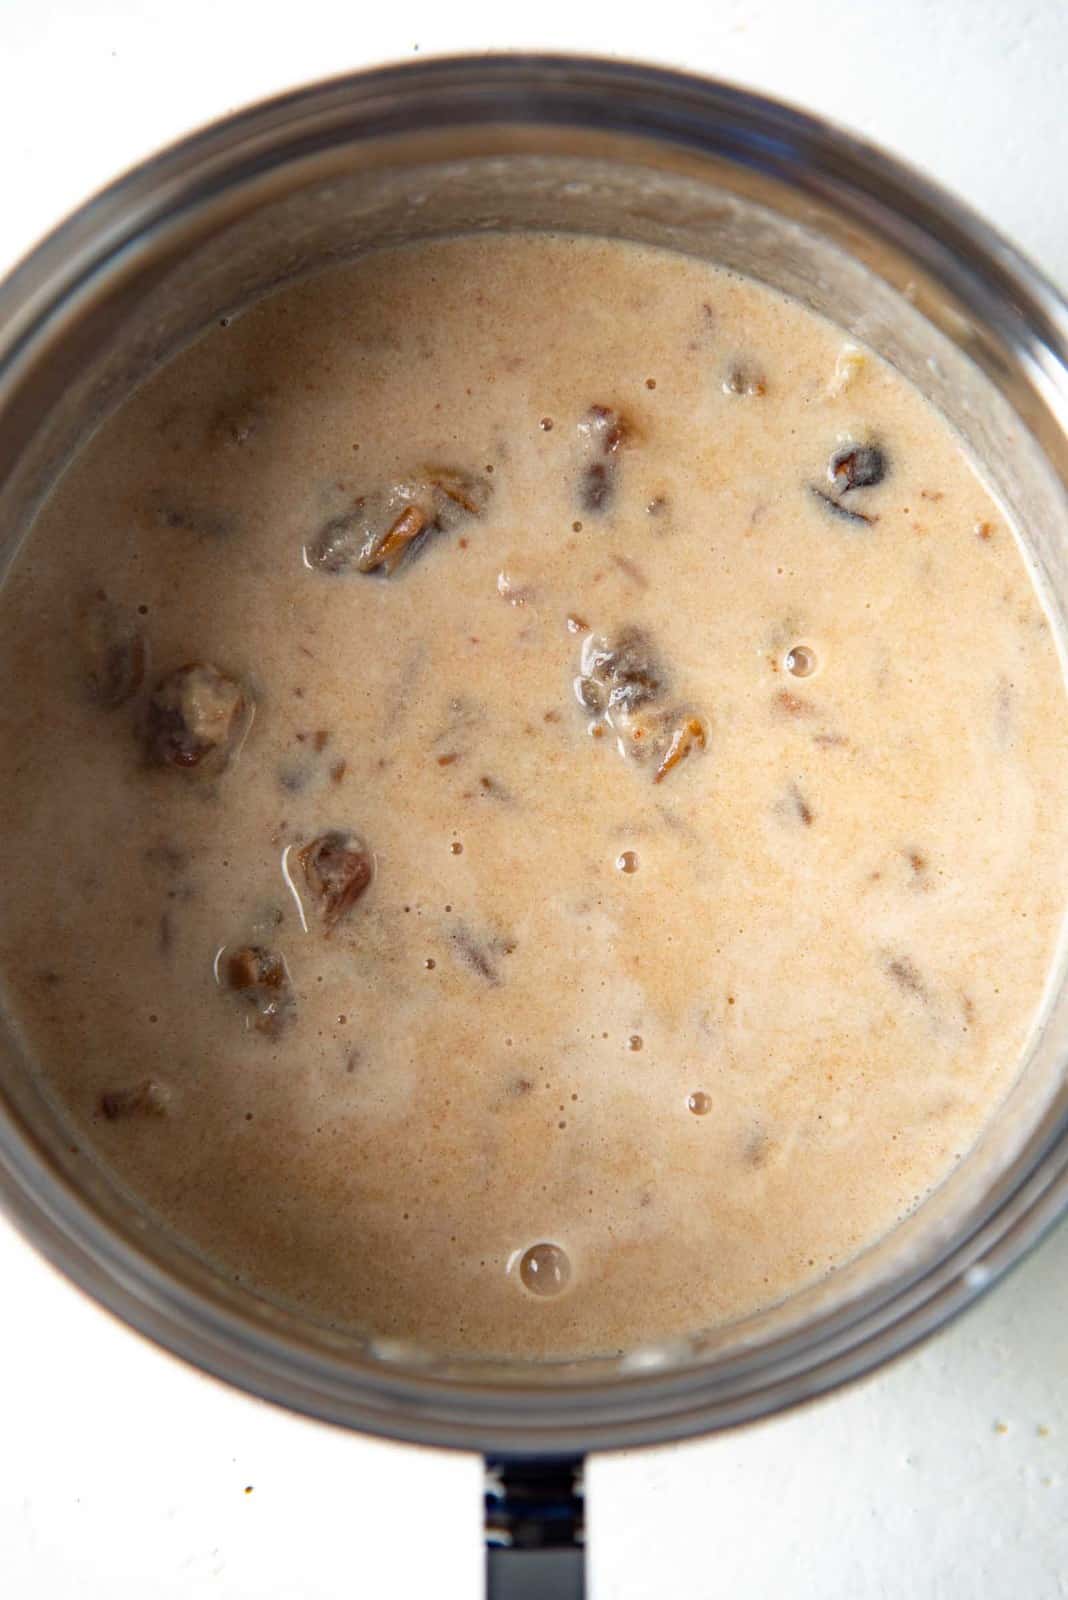
When the mixture is hot, you can puree the dates. You can do this with a stick blender or a regular blender. Puree until the mixture is fairly smooth, but I do like having some flecks of dates throughout the ice cream as well. You will end up with a milky, date paste.
If you’re making the vegan version, heat the cashew milk with the dates, and then puree the dates.
Temper in the egg yolks
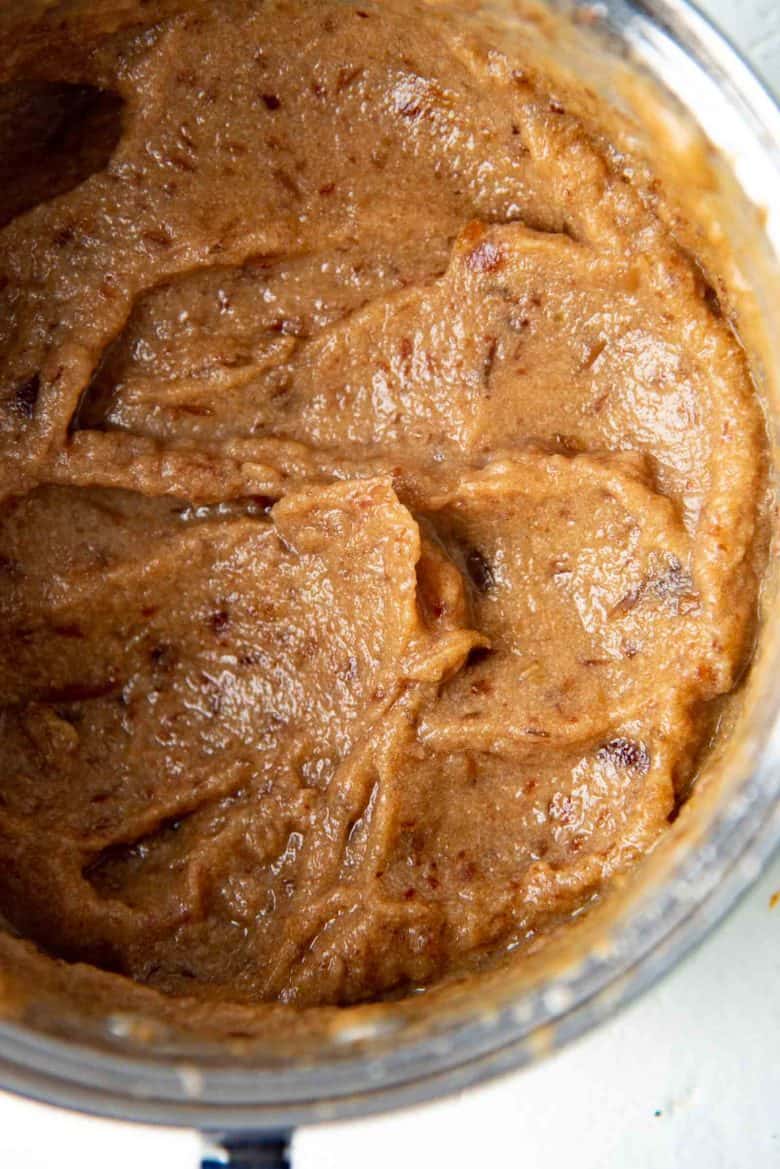
Whisk the egg yolks in a bowl. Add a few heaping spoonfuls of the heated milk date puree into the egg yolks while whisking the mixture. When the egg yolks, milk, and date mixture is warm (after adding enough of the milk date puree), add it back to the rest of the milk and date mixture.
Heat the date and milk custard base on medium high heat. Make sure to keep whisking the ice cream base, and heat the mixture until it reaches 165 F. Remove from the heat.
Add the salt and vanilla at this stage. Stir to dissolve.
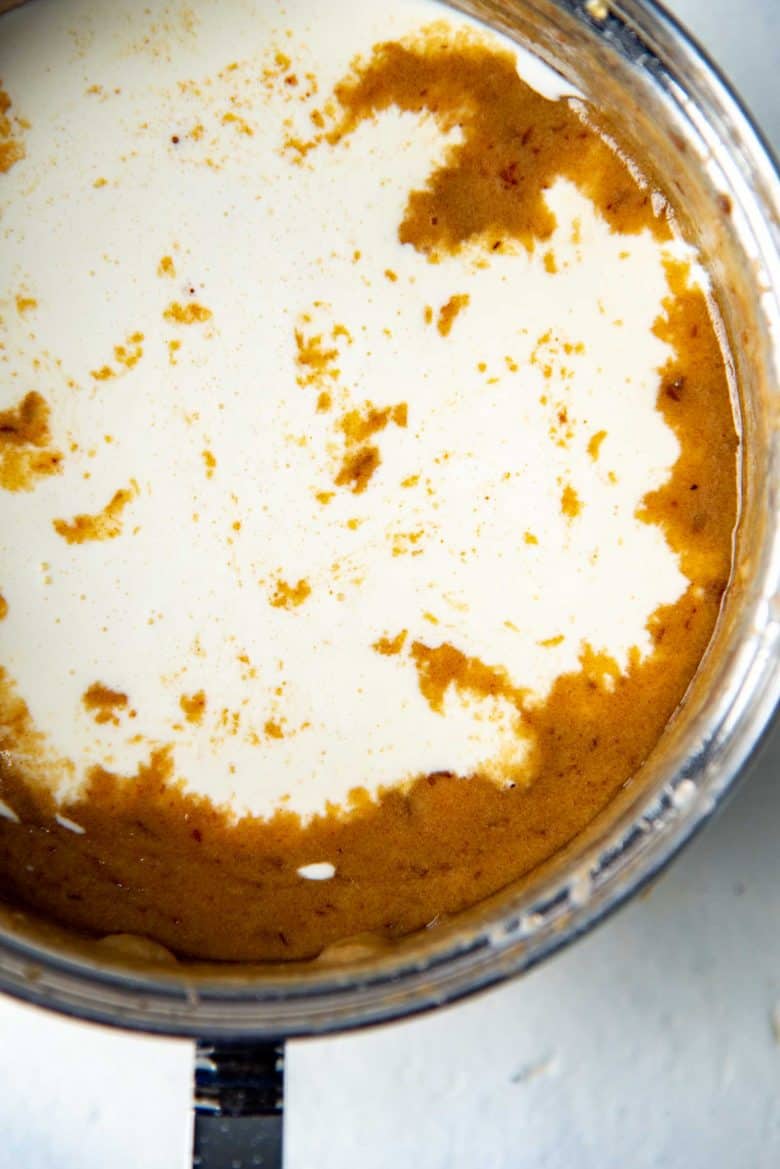
Adding tahini and cream
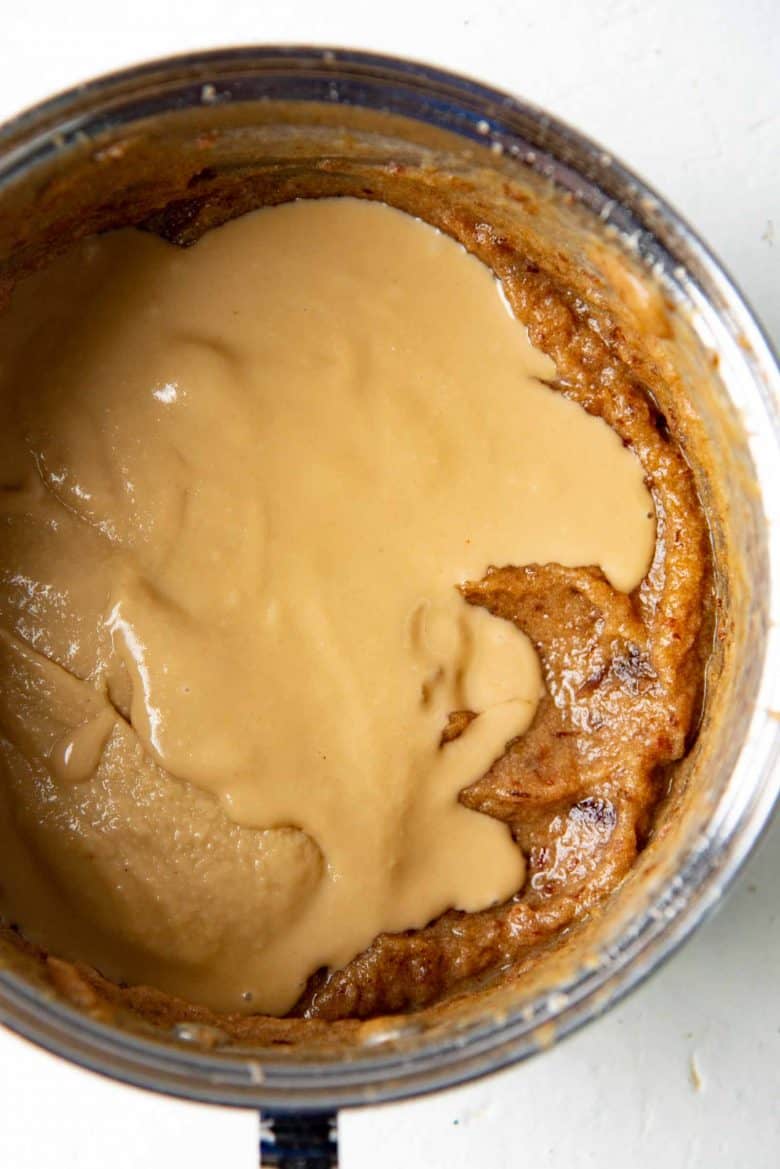
The final step is to stir the tahini and cream into the date custard to make the ice cream base. Add the tahini first and stir/whisk well to make sure the tahini dissolves in the mixture. This is followed by stirring in the heavy cream.
VEGAN OPTION – Stir in coconut cream instead of heavy cream.
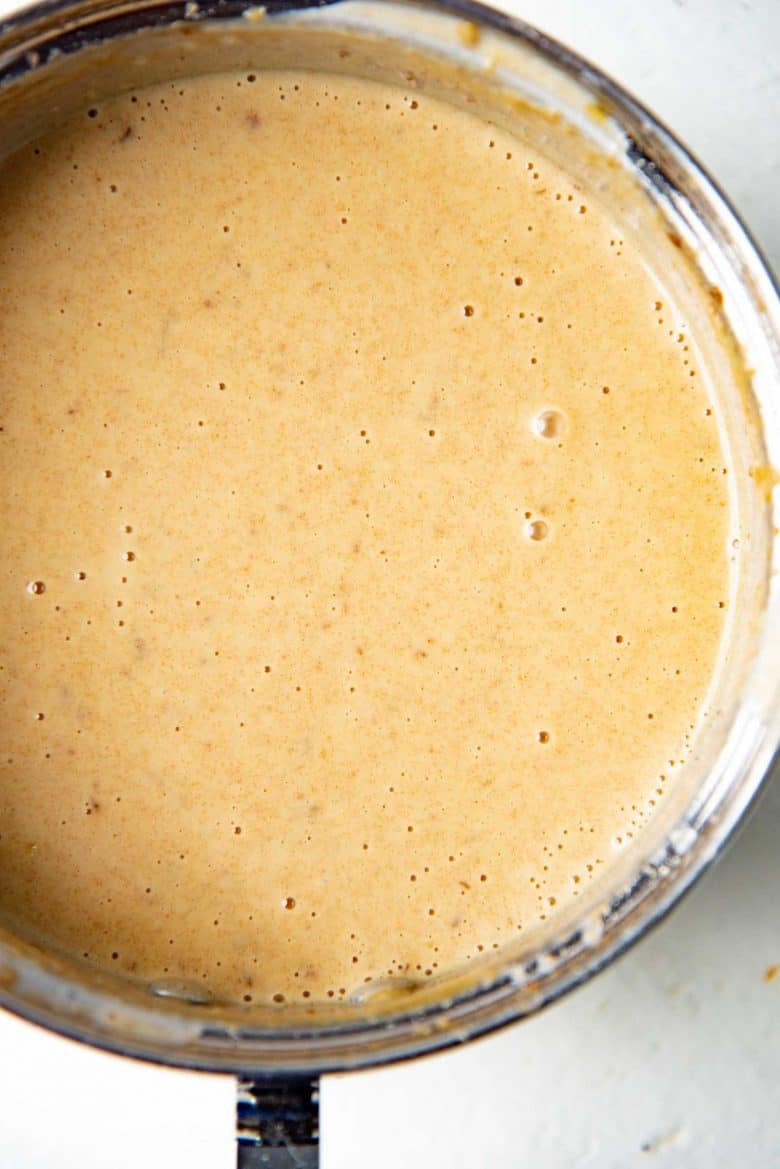
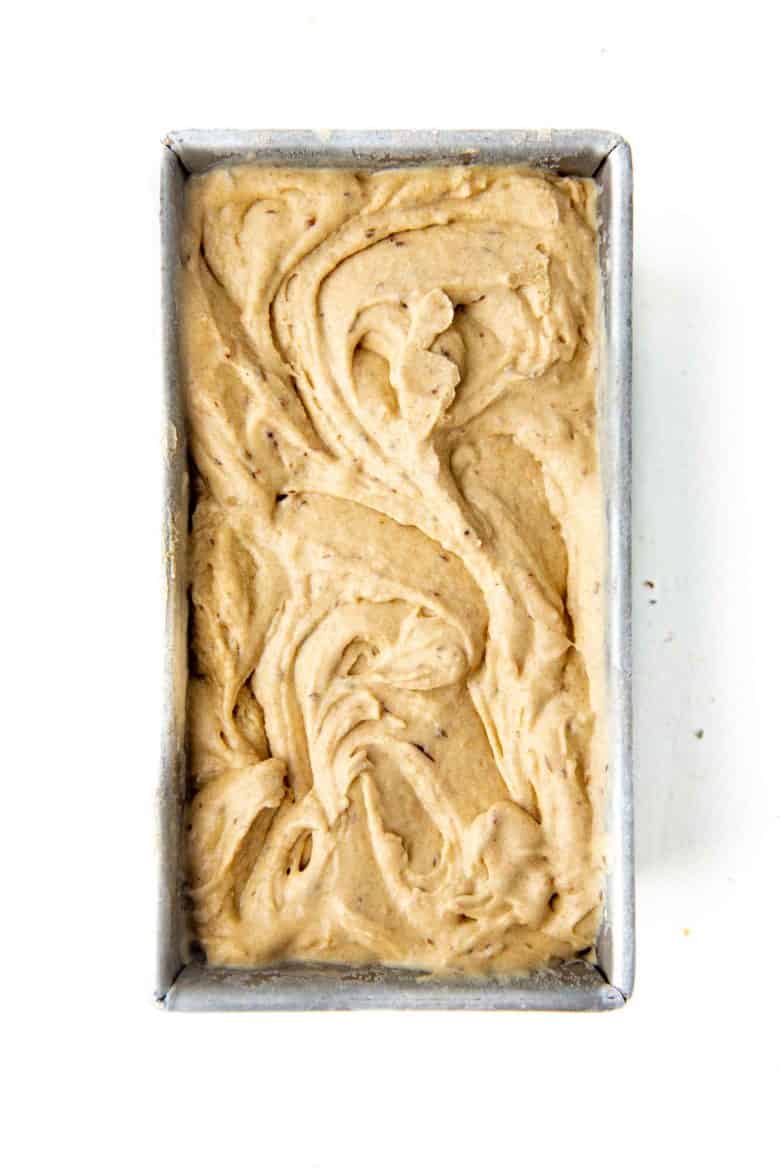
Chill the mixture overnight
Let the ice cream mixture chill at least 6 hours or overnight, so that the date and tahini flavors have a chance to mingle and get to know each other.
The result will be a thick ice cream base. You can taste the base and add more sweetener if you like. I prefer to use honey since it dissolves readily in the base. But I only use a little honey, IF I used deglet noor dates to make this ice cream.
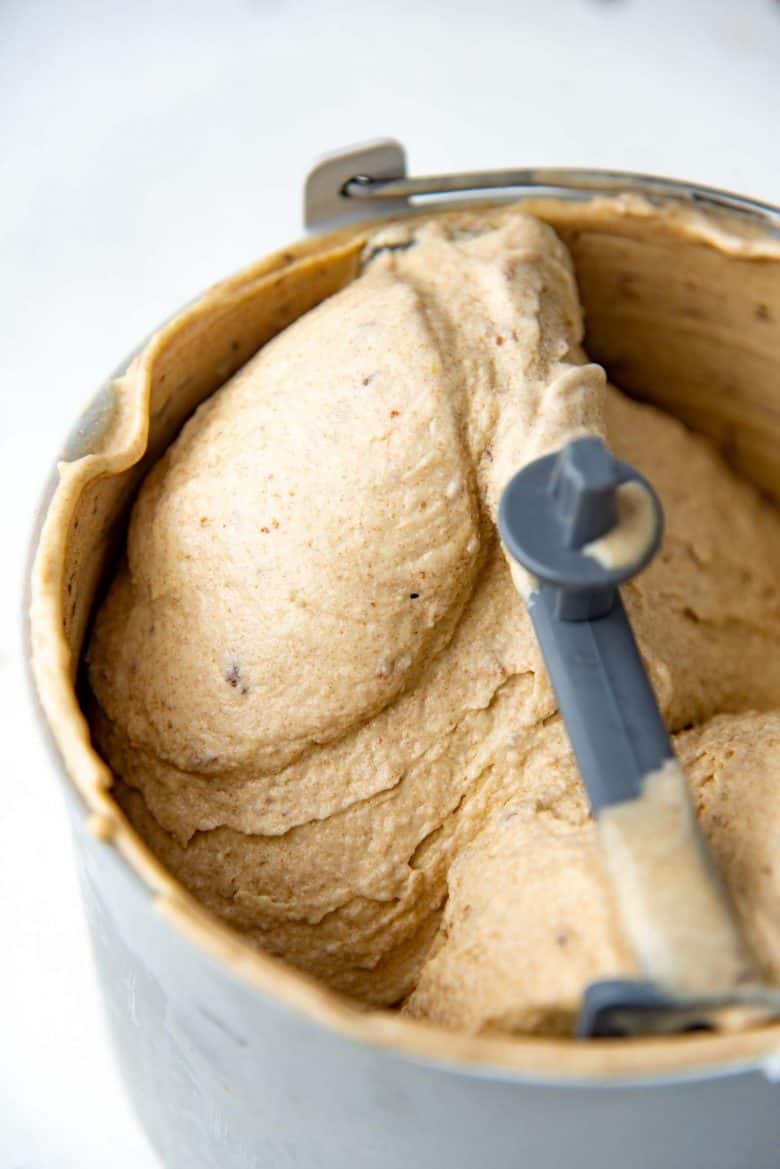
Churn in an ice cream maker
This date and tahini ice cream base requires an ice cream maker for best results.
Pour the mixture into the (frozen) bowl in your ice cream maker and churn according to the manufacturer’s instructions.
It typically takes me about 20 – 30 minutes to churn the ice cream to a soft serve consistency.
Ice cream maker recommendations
I use a CUISINART ICE-100 compressor ice cream maker. This is a more expensive ice cream maker that does NOT require you to freeze the bowl for each batch of ice cream. I personally make many batches of homemade ice cream in the summer, so this machine suits my needs.
However, if you don’t make ice cream too often, you can get an inexpensive freezer bowl ice cream maker like the Cuisinart ICE-30BC. This is what I used to own, and it served me so well!
But please make sure the freezer bowl is frozen for at least 2 days before using it. I have in the past frozen the bowl for just 24 hours (with my older ice cream maker), and found that this way it doesn’t hold the chill as much, and the ice cream doesn’t churn properly.
Can I make this ice cream without an ice cream maker?
Possible, but a lot more time consuming. And the final results may not be as smooth as ice cream that you’d make with the machine.
Place the mixture in an ice cream storage container or a large bowl, and then put it in the freezer.
Then remove the ice cream from the freezer periodically and use a hand mixer with a beater attachment to mix the ice cream. It’s important to crush any hardened parts of the base.
As you keep doing this, more of the ice cream base will harden and it will be harder to mix. At this stage, remove the ice cream from the freezer and blend it in a food processor. Continue to do this at intervals until the date and tahini ice cream has the desired soft serve consistency.
At the beginning, you may have to do this every 45 minutes, and more frequently (every 20 – 30 minutes) when you’re closer to the consistency you like. This can take anywhere between 4 – 8 hours for best results.
Serving suggestions
I’ve made tons of ice cream flavors over the years, and I can safely this is one of my favorites! It’s absolutely unique. The dates add a lovely sweetness and texture to the ice cream, and I can’t get enough of the tahini flavor! Don’t skip the salt either because that salty sweetness is a must in this recipe.
If you like black sesame ice cream, think of this as an upgraded version!
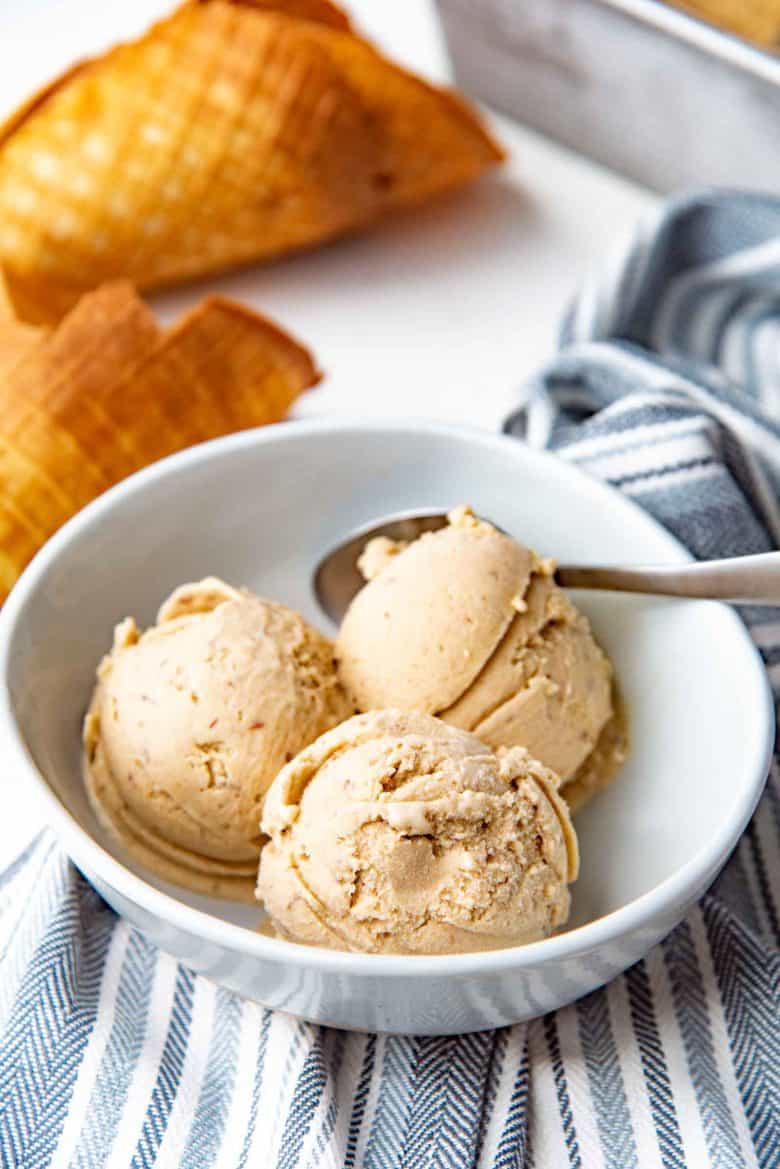
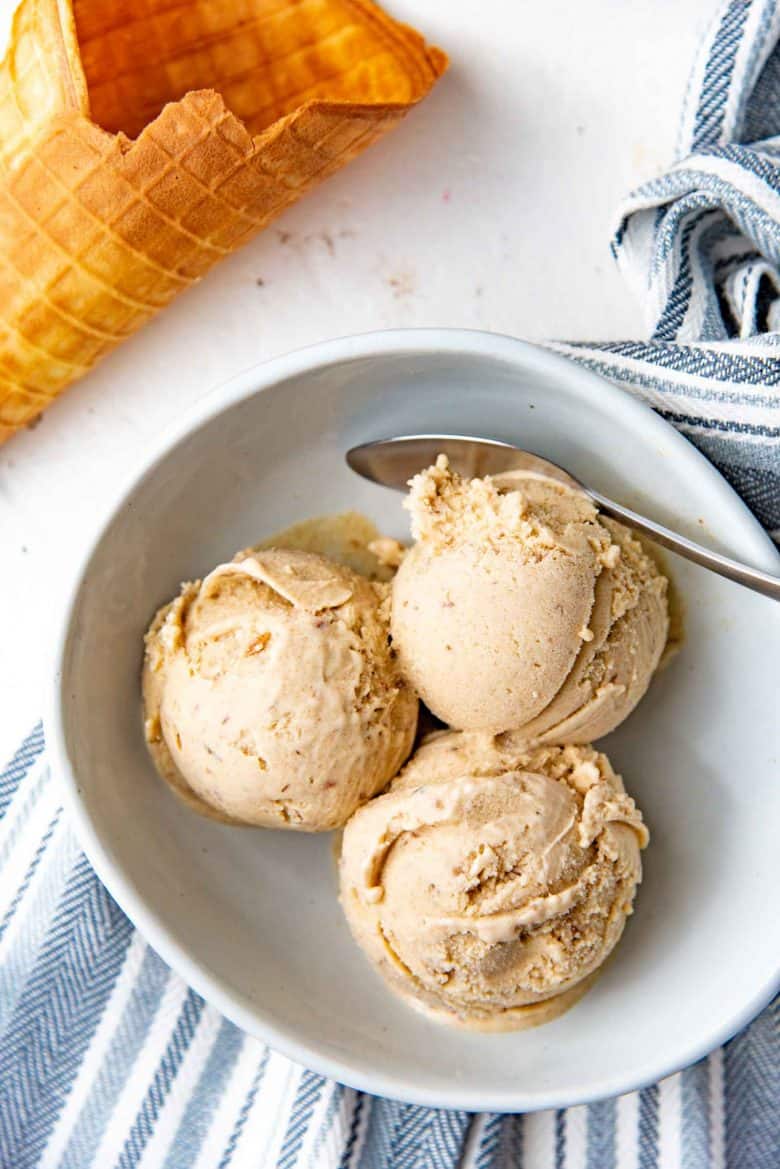
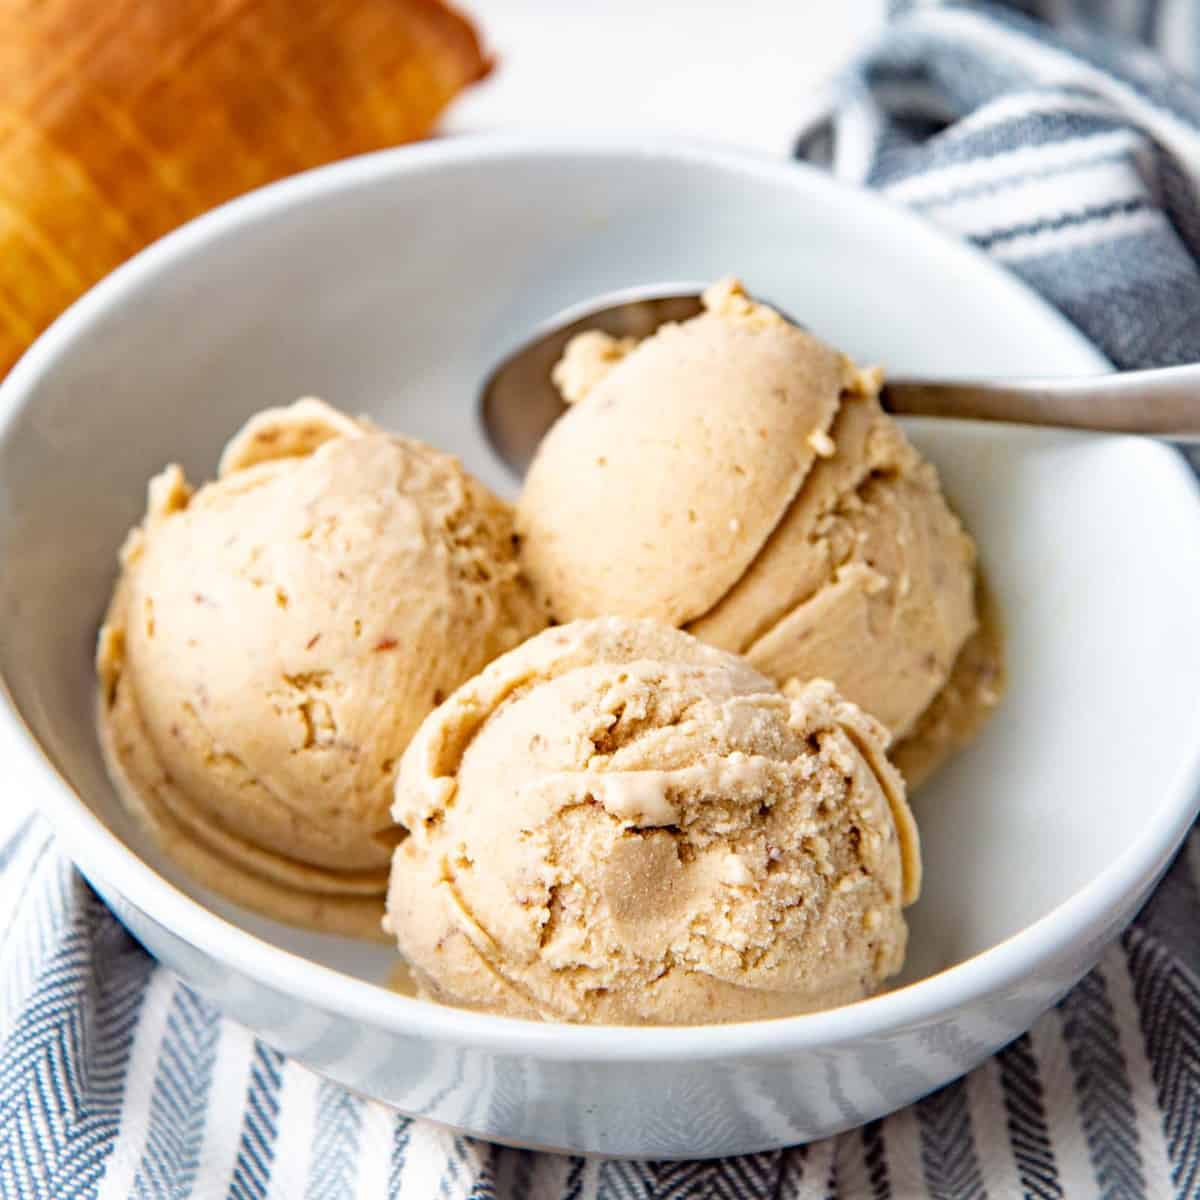
You can serve this just as is. It really doesn’t need anything. However, you can add some roasted nuts on top if you like. A drizzle or shavings of dark chocolate will complement this ice cream well.
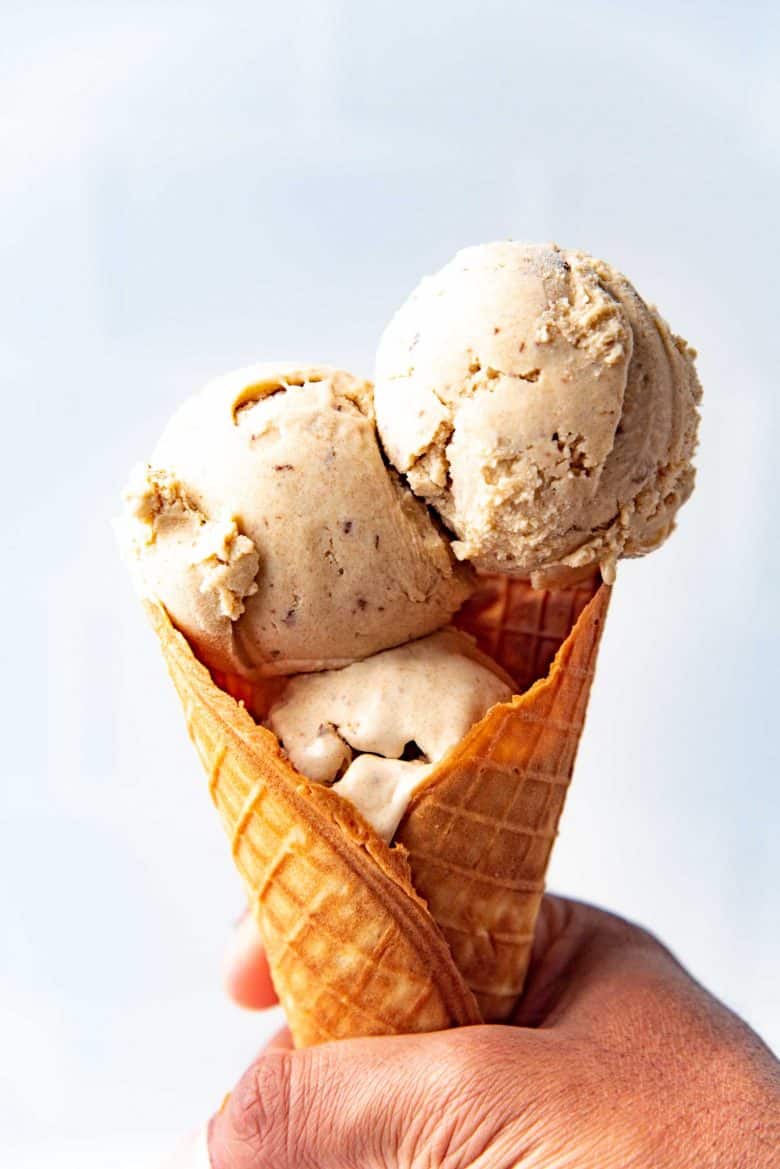
I also made some homemade ice cream cones and thoroughly enjoyed eating this date and tahini ice cream with these waffle cones!
If you like this recipe, you may also like
Salted butterscotch cookie dough ice cream
Recipe
Date and Tahini Ice Cream (Vegan Friendly)
US based cup, teaspoon, tablespoon measurements. Weight measurements are recommended for accurate results whenever available.
Common Measurement ConversionsEquipment:
- Stick blender or blender
- Ice Cream maker
- Instant read thermometer (if using eggs)
Ingredients:
- 200 g medjool dates or deglet noor dates
- 296 mL milk or cashew milk
- 15 mL vanilla extract
- ½ tsp sea salt see recipe notes
- 2 egg yolks from large eggs
- 140 g tahini increase to ¾ cup / 210 g if you're not using egg yolks
- 355 g heavy cream 35% fat (or coconut cream, see recipe notes)
Instructions:
Making the date and tahini ice cream base
- Chop the dates into smaller chunks.200 g medjool dates
- Place the dates and milk in a saucepan, and heat over medium heat until the milk starts to steam and the dates have softened.296 mL milk
- Blend the mixture with a stick blender, or a regular blender, until smooth or mostly smooth. It's OK for small flecks/pieces of dates remain. You should end up with a thick date and milk paste.
- Add the salt and vanilla, and stir them in.½ tsp sea salt, 15 mL vanilla extract
- If using egg yolks – whisk the egg yolks until smooth, in a small bowl. Add heaping tablespoons of the milk date mixture while whisking to temper the egg yolks. When the egg yolks mixture is warm, return it back to the milk date base, and whisk to combine.2 egg yolks
- Return this mixture back to medium heat, and heat to 165°F while continuously whisking.
- If you’re not using egg yolks (for vegan or egg free ice cream), skip steps 5 and 6 above.
- After blending the date and milk base, add the tahini (extra tahini if not using egg yolks as indicated in the ingredient list above), and stir it into the hot milk date mixture.140 g tahini
- Next, add the chilled cream and stir it in (make sure your pot or bowl is large enough to hold at least 5 cups of liquid).355 g heavy cream
- Cover and refrigerate the mixture to let it chill overnight (at least 6 hours).
Churning the ice cream
- If you're using a freezer bowl, make sure the freezer bowl has been frozen for at least 48 hours before churning the ice cream. Also make sure to keep the ice cream storage container in the freezer overnight (at least) as well.
- Pour the mixture into the bowl of your ice cream machine and churn according to the manufacturer’s instructions. It takes me about 20 – 30 minutes to churn to a soft serve consistency.
- Once churned, transfer the ice cream mix into the chilled ice cream storage container. Cover with plastic wrap and freeze for at least 2 – 4 hours (depends on your freezer), until hardened.
- Serve as is, or with chopped walnuts, and a drizzle of chocolate.
Recipe Notes
Notes on using salt
This is a salted dessert. If you don’t like salted desserts, then reduce the salt to ¼ tsp. However, I highly recommend the salt to enhance the flavors of this ice cream.Notes on using plant based milk (vegan version)
You can use cashew milk or almond milk instead of regular milk. Do NOT use low fat options. You want the higher fat content for a creamy texture, especially if you’re not using egg yolks. If you can’t find coconut cream, you can use coconut milk instead. To use coconut milk, choose a coconut milk that will separate into two layers. Let the coconut milk can sit in the fridge overnight. The layers should separate and the top fatty layer should harden. THIS is the coconut cream layer. You can use the water for smoothies, so don’t discard it. Depending on the coconut milk brand, you may need multiple cans to get the right amount of coconut cream Vegan option for egg yolks – If you want to keep this vegan, then leave out the eggs. The additional fat from the extra tahini, cashew milk, and coconut cream should help keep the ice cream base nice and creamy.Notes on churning the base without an ice cream maker
Please note this will result in an ice cream that is less creamy. This method is more time consuming as well. Place the mixture in a ice cream storage container or a large bowl / container, and then keep it in the freezer. Then remove the ice cream from the freezer periodically and use a hand mixer with a beater attachment to mix the ice cream. It’s important to crush any hardened parts of the base. As you keep doing this, more of the ice cream base will harden and it will be harder to mix. At this stage, remove the ice cream from the freezer and blend it in a food processor. Continue to do this at intervals until the date and tahini ice cream has the desired soft serve consistency. At the beginning, you may have to do this every 45 minutes, and more frequently (every 20 – 30 minutes) when you’re closer to the consistency you like. This can take anywhere between 4 – 8 hours for best results.Nutrition Information:
“This website provides approximate nutrition information for convenience and as a courtesy only. Nutrition data is gathered primarily from the USDA Food Composition Database, whenever available, or otherwise other online calculators.”


Leave a Reply