


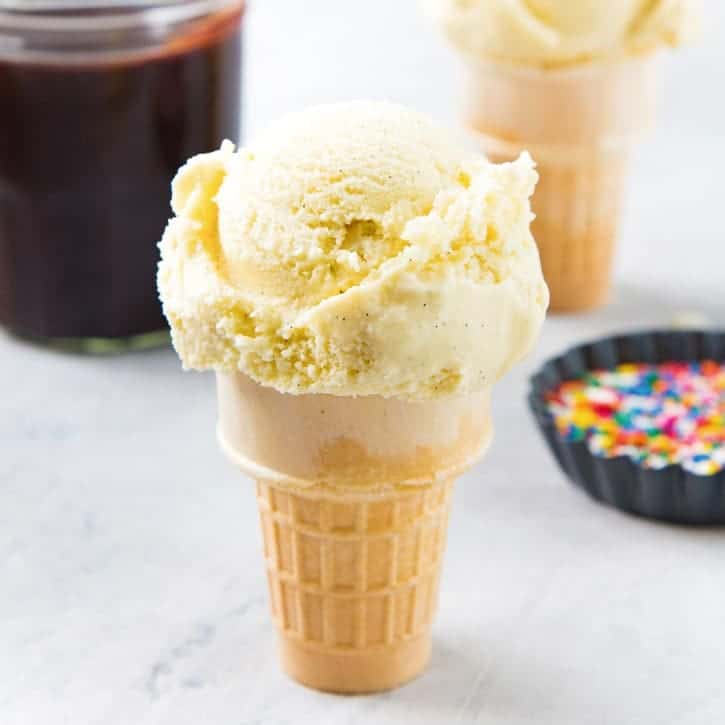
An always favorite, foolproof Homemade Vanilla Ice Cream Recipe with a rich, creamy, and easy custard base made with simple ingredients. Perfect to build extra layers of decadent ice cream flavors on.
I also show you the best way to make this delicious summer treat without an ice cream machine, and provide lots of ideas on how to vary the flavors, toppings, and mix-ins. This recipe is an instant classic!
- Ingredients (and ingredients notes)
- How to make vanilla ice cream (step by step instructions)
- How to make vanilla ice cream without an ice cream machine
- My tips for the best vanilla ice cream
- Flavor variations for homemade vanilla ice cream
- Serving ideas (toppings and mix-ins)
- Storage
- Commonly asked questions
About this vanilla ice cream recipe
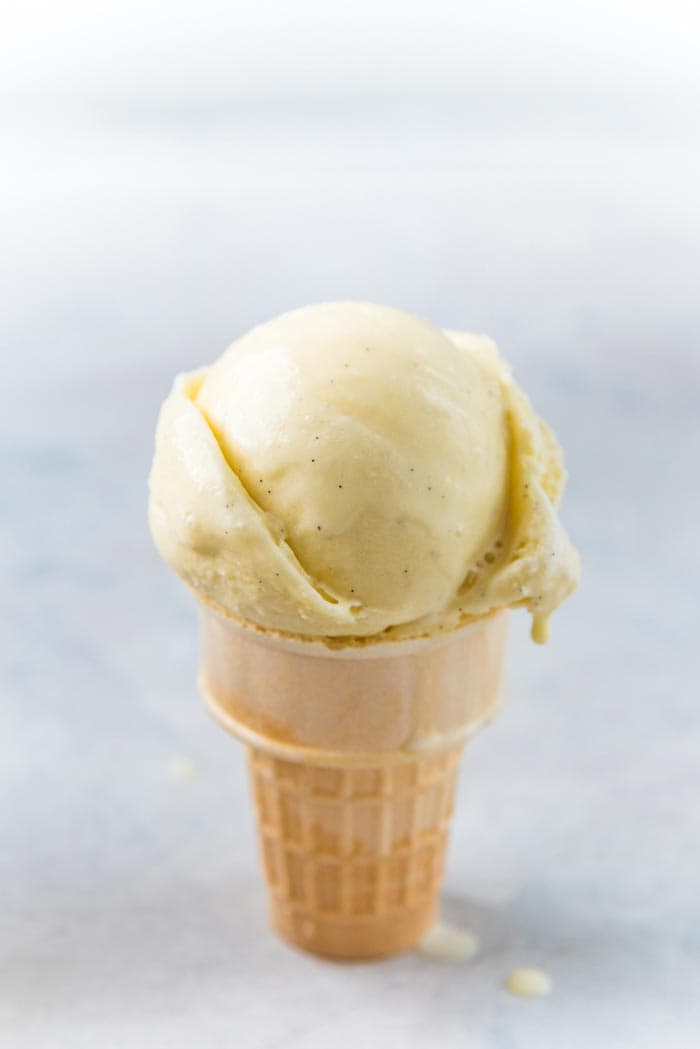
- This ice cream is packed with no holds barred vanilla flavor! So much better than store-bought ice cream.
- This is a French vanilla ice cream recipe with an unparalleled rich and creamy texture.
- While an ice cream machine gives you the best results, you can also make this in a blender for a delicious old fashioned French vanilla ice cream!
- Omit the eggs for an eggless American style classic vanilla ice cream.
This homemade vanilla ice cream recipe is a fantastic canvas on which to build extra layers of decadent, delightful ice cream flavors (like this cereal milk ice cream, popcorn ice cream, and basil vanilla ice cream).
Plus, it’s the perfect pairing for milkshakes like this classic falooda drink (a popular South Asian vanilla and rose flavored milkshake).
Classic vanilla bean vs old fashioned vs French vanilla ice cream
Vanilla ice cream is of course the most popular ice cream flavor out there. Just good ol’ plain vanilla ice cream is perfect no matter what day or time or season or reason. But did you know that there are different variations of vanilla ice cream too?
- Old fashioned ice cream
- Vanilla bean ice cream
- French vanilla ice cream
- Vanilla frozen custard
Some vanilla ice cream recipes do not contain any eggs. This generally depends on the locality. Eggless vanilla ice cream is also called Philadelphia-style ice cream or American-style ice cream, because in the Northeastern US states, eggs are typically not added to ice creams.
Whereas, ice cream made in the US Midwest is more likely to contain eggs. That’s because custard is more popular in the region, and is used to make ice cream. Frozen custard ice cream, where the ice cream base is more dense and thick due to the custard base is still very popular in the region.
So, old-fashioned ice cream can be eggless or made with eggs, depending on the region.
Vanilla bean ice cream is essentially any vanilla ice cream made with vanilla beans instead of vanilla extract. The defining characteristic is the black speckles from the vanilla bean that are present throughout the ice cream.
French vanilla ice cream is ice cream that’s made with egg yolks. The egg yolks add a pale yellow color to the final ice cream that is not usually present in old fashioned ice cream (especially eggless vanilla ice cream). My recipe is more of a French vanilla ice cream, or a richer old fashioned ice cream.
Vanilla frozen custard is the richest version of vanilla ice cream. Lots of egg yolks and heavy cream are used to make the richest custard base. My French vanilla ice cream recipe uses a 50 : 50 mix of whole milk and cream, but with frozen custard, the ratio of heavy cream would be much higher.
Ingredients (and ingredients notes)

- Milk. Preferably full fat milk. 2% milk is OK too.
- Heavy cream. This is cream with at least 35% fat. This is the cream that’s used to make whipped cream.
- Egg yolks
- White sugar
- Vanilla extract or vanilla beans
- Salt
Basic ingredient adjustments for this vanilla ice cream recipe
- The higher the cream amount, the richer the ice cream as this adds more fat to the ice cream base.
- The more egg yolks you add, the thicker and richer the ice cream (since this results in a more custard-like base).
- The higher the fat content (cream and egg yolks), the creamier and richer the ice cream.
- The lower the fat content (milk, fewer egg yolks or thickening agents etc.), the lighter the ice cream texture. This also increases the chances of your ice cream having an icy texture.
Since this is a classic vanilla ice cream recipe, making substitutions will change the final texture of your dessert. Using dairy free or vegan milk substitutes can lower the fat content, which can result in a less creamy ice cream.
While you can make this ice cream without egg yolks, if the fat content is very low, the resulting ice cream is going to have a sherbet / frozen milk texture than ice cream.
Other ways to thicken your ice cream base includes xanthan gum and other thickening gums (especially for eggless vanilla ice cream). Some commercial ice creams use gelatin, but the texture of the ice cream will be a little weird at room temperature.
You could also use corn syrup as a stabilizer to prevent the ice cream from being icy.
How to make vanilla ice cream (step by step instructions)

Prepare the vanilla (if using vanilla bean pod)
This is the optional first step. Cut the bean lengthwise and use the flat part of a knife to open up the bean (Image 1 a) Then use the flat edge of your knife to scrape along the center to get all of the vanilla caviar out (Image 1 b).
The seeds that are scraped out are what you add to the milk, BUT the empty pod can also be added to the milk to infuse. Alternatively, place the empty vanilla pod in sugar to infuse the sugar to make vanilla sugar.
If you’re using vanilla extract or bean paste, you can add it directly to the base.

Make the vanilla ice cream base
Next, separate the egg yolks from the egg whites. Make sure your hands are clean and dry. If you plan on making meringue with the egg whites, take care not to get any yolk in the whites. You can use as little as four egg yolks (for a less rich custard) or as many as 8 egg yolks (for a richer, fudgier custard) to make this French vanilla ice cream. I like to go with 5 – 6.

Place the egg yolks, sugar, vanilla bean caviar (or extract), and salt in a bowl and whisk until thick and pale. Transfer this mixture to a medium-sized pot (Image 2).
Pour the full cream milk and cream into the saucepan (with the egg yolks), and whisk until everything is fully mixed (Image 3).
Next, heat the custard. Make sure to stir or whisk the base while you’re heating to prevent the eggs from curdling. You want to heat the base until it reaches 165 – 170°F. This is the temperature at which the eggs will be pasteurized and are safe to eat.

If you don’t have a thermometer, then you can cook the custard base until it steams well, but is not simmering or boiling. It’s very important to not let it come to a boil as this will cause the eggs to curdle.
The next step is to chill the ice cream base. Let the cooked custard base cool down first, then place it in the fridge to chill. Some recipes call for covering the surface of the custard with plastic wrap (like you’d do with pastry cream), but I find that to not be necessary.
Chill the base until it’s very cold. Ideally overnight in the fridge, or a couple of hours in the freezer.
This is because a colder ice cream base will churn better in the ice cream machine. The colder the ice cream base, the quicker it will churn in a freezer bowl ice cream maker. If you have a compressor ice cream machine, then you could churn the base while it’s cool (and not chilled).
Now the base is ready.
Making the vanilla ice cream
Make sure that your ice cream machine is prepped according to the manufacturer’s instructions. The freezer bowl must be frozen well. Most brands recommend 15 hours. However, I would honestly recommend that the freezer bowl be frozen for at least a day! Mine works best when I freeze it for 2 days, especially during hot summer days.
Pour the ice cream base into the ice cream machine and churn according to the manufacturer’s instructions (image 4).
Once the base is churned, transfer the ice cream into a different container and freeze for at least 2 – 4 hours, or overnight until set. Then your homemade vanilla ice cream is ready to be enjoyed!

How to make vanilla ice cream without an ice cream machine
You can still make ice cream without an ice cream maker! But keep in mind that the results will of course be slightly different than if you used an ice cream machine.
Once you make the custard base for the ice cream, pour the liquid into ice cube trays. Ideally, the custard should be cooled down. Make sure you have enough ice cube trays for the whole amount of custard. Also keep about 1/2 cup of the custard in the fridge instead of in ice cubes.
Carefully transfer the custard in ice cubes to the freezer, and allow the custard base to completely freeze.
Place the frozen custard cubes in a high powered blender. Add the 1/2 cup of chilled custard and blend the mixture. You may need to pulse it first to break up the ice cubes, and then process on high speed until you have a thick, smooth mixture.
Don’t run the blender for too long because the heat will start to melt the ice cream.
Now transfer the ice cream into an airtight container and freeze for at least 2 – 4 hours until set. Preferably overnight. All done!
My tips for the best vanilla ice cream
Vanilla ice cream is a very forgiving recipe, so it’s hard to mess it up! But there are a few tips to make sure you get the best creamy vanilla ice cream with the best flavor!
- Use good quality ingredients whenever possible. Vanilla is so expensive these days, so it’s not always possible to get the good stuff. But if you can, use it! Imitation vanilla is fine too, but the flavor is better with vanilla extract or vanilla beans.
- Use heavy cream for a richer taste, OR you can substitute all of the milk and heavy cream with table cream that’s about 18% fat content.
- Most recipes call for tempering the egg yolks, but I’ve found that to not be necessary. Mixing everything together and heating the mixture eliminates the risk of eggs scrambling during the tempering process. Especially since the custard is only heated until steaming.
- Make sure the ice cream base is chilled very well! If you’re squeezed for time, chill the vanilla custard base in the freezer so that it cools down faster.
- If using a freezer bowl ice cream machine, then make sure the large bowl is chilled / frozen too. I like to give it at least 2 days. So plan ahead.
- If you’re making more than one batch, and you don’t have a compressor ice cream maker, invest in a second ice cream bowl.
- When the ice cream mixture has thickened, and you can see the ice cream at soft serve consistency, the ice cream is ready to be transferred and frozen.
- When adding additions and mix-ins, softer / smaller additions can be added during the last stage of churning. Some additions that are larger and harder, can be folded in AFTER you’ve churned your ice cream.
- Make sure there is enough room in the freezer to keep the ice cream overnight. A little detail, but better to be prepared!
Flavor variations for homemade vanilla ice cream
- Chocolate chip ice cream – Add mini chocolate chips, or drizzle melted chocolate (or chocolate syrup) in the last few minutes of churning (like I do with my mint chocolate chip ice cream).
- Fudge swirl ice cream – Add chocolate fudge sauce during the last two minutes of churning to create a ripple effect.
- Bourbon vanilla ice cream – Add about 2 – 4 tbsp / 30 – 60 mL of bourbon to the base.
- Cookies and cream ice cream – Add crushed Oreos after churning the ice cream and fold them in quickly. Do not churn with cookies and cream as the big pieces can damage the paddle.
- Fruit and nut ice cream – Add chopped, roasted almonds and dried fruit after churning the ice cream.
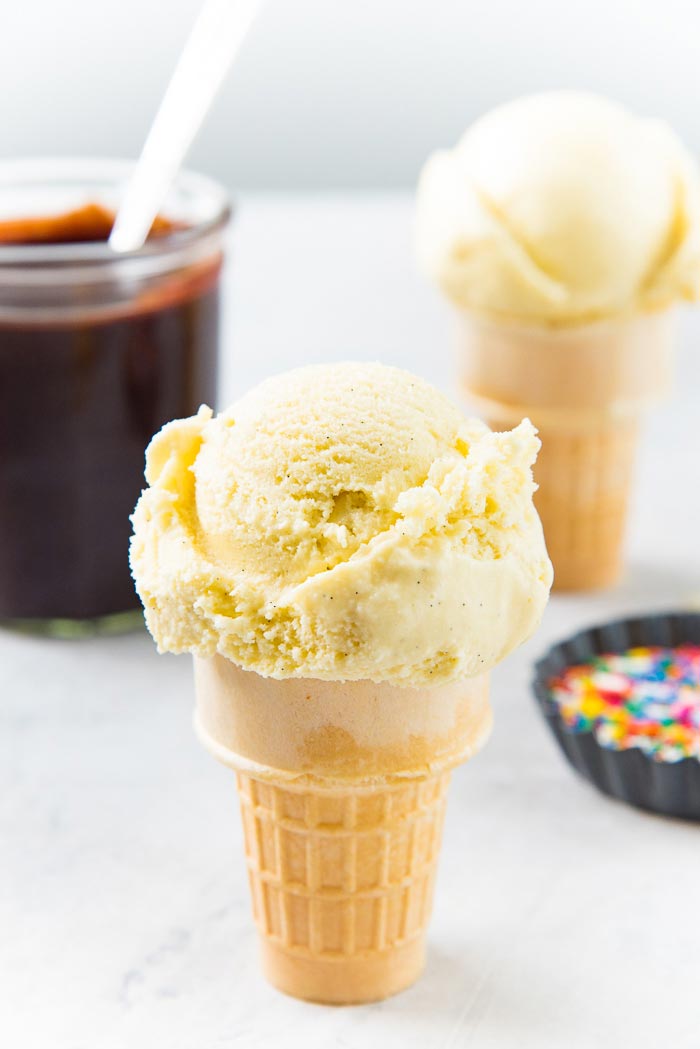
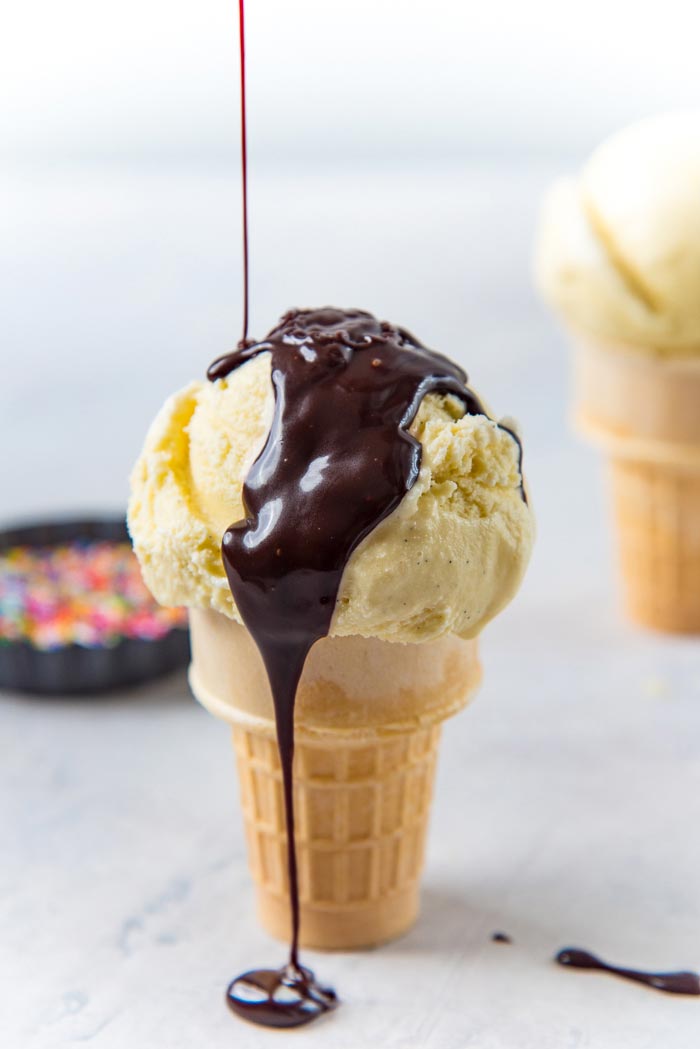
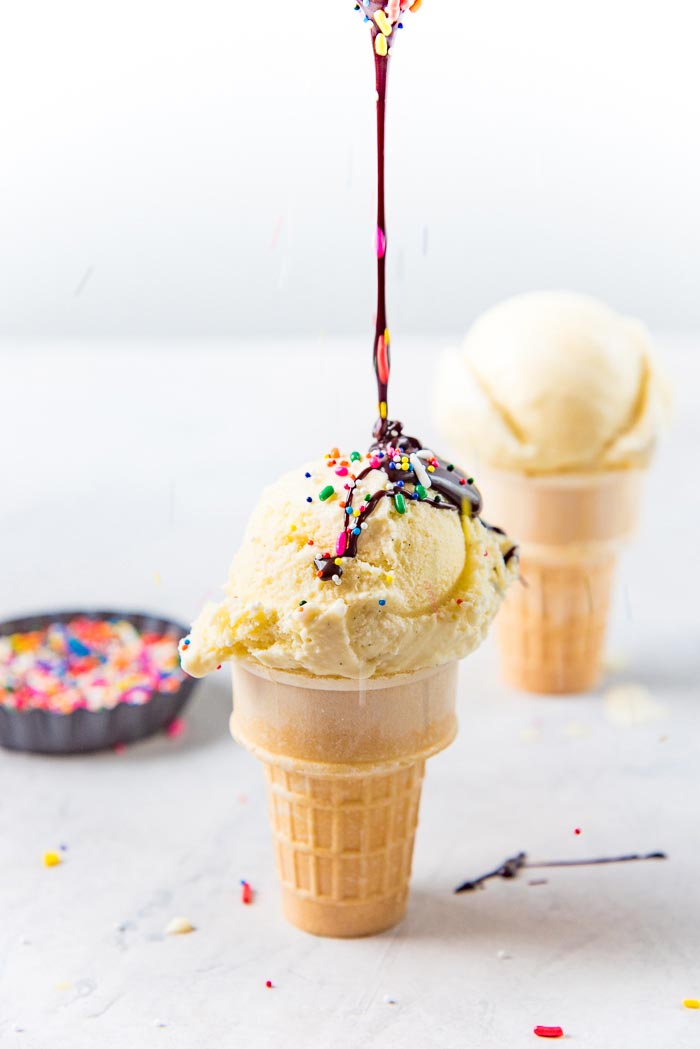
My favorite way to enjoy this homemade ice cream recipe is to simply eat it out of a cone, with lots of toppings! 🙂 Bring on the chocolate fudge sauce, sprinkles, candied nuts, brittle, crushed cookies…. oh the options!
Serving ideas (toppings and mix-ins)
- Hot fudge sauce or salted caramel sauce or maple syrup drizzled on top.
- Serve with other desserts such as pies, tarts, bread pudding, cakes etc. (like apple pie, banana cream pie, mixed berry pie, pumpkin pie, chocolate lava cake, chocolate torte, croissant bread pudding, chocolate cake, chocolate bundt cake, devil’s food chocolate cake etc.)
- Adding chopped chocolate brownie or blondies on top, OR fold it into the ice cream.
- Brittle (like peanut brittle) or praline or praline paste drizzled on top will give the ice cream a nutty and sweet flavor.
- Crushed honeycomb candy is delicious with vanilla ice cream, and tastes just like hokey pokey ice cream.
- Fresh fruit or fruit compotes (like this apple compote, passion fruit mango compote, roasted strawberries etc.) are perfect with ice cream.
- Add crushed meringue, or pavlova and raspberries for a pavlova or eton mess flavored ice cream.
- Nutella or hazelnut spread (like this vegan hazelnut spread) is delicious with vanilla ice cream.
- Growing up, ice cream and jello was a very popular dessert at parties!
- And my favorite way to eat vanilla ice cream – Affogato! A scoop of vanilla ice cream served with a double shot of espresso (like this coffee affogato ice cream sundae).
Storage
This old fashioned French vanilla ice cream needs to be stored in the freezer. Make sure the container has a good seal, so that you can store the ice cream for a longer time.
The ice cream will absorb different smells in the freezer, so a good lid will prevent that (an airtight container). Ice cream CAN be stored for 6 months, BUT only if you avoid repeated thawing and refreezing.
That means, that you don’t leave it out for a prolonged time while serving and then refreezing, multiple times. Otherwise the ice cream will become rancid much faster and have an off taste. Repeat thawing and refreezing will also cause the ice cream to become icy.
More ice cream recipes you’ll love
Equipment I use for this recipe
Ice cream maker – An inexpensive freezer bowl ice cream machine will be perfect for the average cook/baker. I have used and recommend this Cuisinart model.
If you do constantly make ice cream in summer, then I would recommend investing in an ice cream maker with a built in compressor. These machines do not require to be pre-chilled and you can make many batches of ice cream over and over again. I currently own and recommend this Cuisinart model.
Thermometer – An inexpensive cooking thermometer or a more expensive instant read thermapen.

Commonly asked questions
Can you make this without an ice cream machine?
Yes, you can. There are two methods to do so.
The first method (and most popular method) is to place the custard mixture in a container and then in the freezer. And then at 30 – 60 minute intervals, use a whisk to whisk and mixture as it becomes thicker and thicker in the freezer. This is time-consuming (and laborious!) and won’t result in the creamiest mixture, BUT you do not require any special tools.
The second method (my recommended and preferred method) is to freeze the mixture in ice cube trays, and then use a blender to blend the mix. This is easier and less time-consuming. The blender method will also result in a much more smooth ice cream! However, you will need a high powered blender to blend the custard cubes.
Can I make dairy free vanilla ice cream?
Substitute the milk with a dairy free milk option, and the cream with coconut cream or thick cashew milk. The taste and texture will change a little though, but it’ll still be delicious.
Can dogs eat vanilla ice cream?
I get asked this question often! And as a family with two adorable doggos, it’s an important question.
Technically, all the ingredients in vanilla ice cream are “safe” for dogs, provided you don’t use artificial sugar.
HOWEVER, the high fat and sugar content makes this an inadvisable treat to give your dogs, as it can lead to pancreatitis or diabetes, even when eaten occasionally.
My dogs have tasted ice cream on VERY special occasions, VERY rarely (like on their birthday, paired with homemade dog cake), and even then only just a spoonful!
Instead, we give them unsweetened whipped cream, mixed with low fat unsweetened yogurt as a healthy, dog friendly alternative treat during summer!
Recipe
Homemade Vanilla Ice Cream (French Vanilla Ice Cream)
US based cup, teaspoon, tablespoon measurements. Weight measurements are recommended for accurate results whenever available.
Common Measurement ConversionsEquipment:
- 3 qt saucepan
- Ice Cream maker
- Kitchen scale
- Whisks
- Cooking thermometer
Ingredients:
- 1 vanilla pod or 15 mL / 1 tbsp vanilla extract or vanilla bean paste
- 5 – 6 egg yolks from large eggs
- 150 g white sugar ¾ cup
- Generous pinch of sea salt or kosher salt or ½ tsp for a salted vanilla ice cream
- 355 mL full cream milk 1 ½ cups (full fat milk / around 3% fat milk)
- 355 mL whipping cream or heavy cream 1 ½ cups (35% fat)
Instructions:
- If you’re using vanilla bean, split the bean lengthwise and scrape off the caviar from the bean. Place the caviar in a medium-sized saucepan.1 vanilla pod
- Add the egg yolks into this saucepan, along with the sugar and salt. If using vanilla extract, add the extract to the egg yolks instead. Whisk until you have a creamy, smooth, and thick paste.5 – 6 egg yolks, 150 g white sugar, Generous pinch of sea salt or kosher salt
- Add about ½ cup of milk first and whisk to mix well. Then add the rest of the milk and the heavy cream, and whisk to combine.355 mL full cream milk, 355 mL whipping cream or heavy cream
- Heat over medium heat while whisking frequently. Heat the custard until the temperature registers between 165 – 170°F. If you don’t have a thermometer, then heat the custard until it steams while whisking. This takes about 10 – 12 minutes. Do NOT let it come to a boil.
- Remove from the heat and let it cool down. When the ice cream base is only a little warm, you can place it in the fridge or freezer to chill.
- Chill the custard base in the fridge for at least a few hours (or overnight) until completely chilled, or an hour or 2 in the freezer.
- Strain the custard to remove the pods, but do not use a fine sieve since this will remove the vanilla bean caviar as well.
- Churn the ice cream in your ice cream maker according to the manufacturer’s directions. Transfer the churned ice cream into a container and freeze for at least 2 – 4 hours until the ice cream is completely frozen.
Recipe Notes
A note about cooking the vanilla custard base
You can also cook the custard with just the milk first, and then add the heavy cream afterwards. If you want the custard to cool down faster, then add the heavy cream at the end after cooking the milk and egg mixture. Here’s how to make vanilla ice cream without an ice cream machine Commonly asked questionsNutrition Information:
“This website provides approximate nutrition information for convenience and as a courtesy only. Nutrition data is gathered primarily from the USDA Food Composition Database, whenever available, or otherwise other online calculators.”


Leave a Reply