


This easy Crustless Pumpkin Pie is refined sugar free and naturally gluten free, and deliciously creamy with just the right amount of sweetness. And you wouldn’t believe how EASY it is to make! Read the post for tips that will guarantee PERFECT results every time.
This crustless pumpkin pie pudding is so satisfying and silky smooth that you won’t miss the crust at all. Plus, you can make it all in ONE bowl!
- Why this is the BEST crustless pumpkin pie
- Recipe ingredients
- Two biggest problems with other crustless pumpkin pie recipes (including Libby’s recipe)
- My solutions to prevent weeping, curdling, overbaking of this crustless pie
- More expert tips for a PERFECT crustless pumpkin pie recipe
- Serving suggestions
- Storage instructions
- Frequently Asked Questions
Ladies and gentlemen, this here is THE BEST Crustless Pumpkin Pie in the world! No exaggerations really, as far as no crust pumpkin pies go, this one takes the… pie.
Let me first say that I’ve got nothing against pie crusts. In fact, I love to make pie crust and I have a detailed tutorial and recipe on how to make the perfect pie crust. I even shared a step by step recipe for the best traditional pumpkin pie with a buttery crust and all.
But, there’s something to be said about a pumpkin pie that is this easy and this good. Besides, if I’m making this for family on Thanksgiving day or for friends and guests, I’d rather make my life easier by not having to worry about a pie crust.
Why this is the BEST crustless pumpkin pie
- Simple ingredients. Pumpkin is nutrient-dense, high in vitamins, anti-oxidants, and fiber, and this crustless pumpkin pie makes for a fantastic and comparatively low calorie treat.
- Very easy to make. Can make it all in one bowl (or even in the blender!).
- This is a naturally gluten free crustless pumpkin pie. It’s also refined sugar free.
- Tastes just like classic pumpkin pie, minus the crust (so you don’t need to worry about pie crusts!).
- Incredibly adaptable recipe! I show you how to very simply adapt this recipe to make dairy free, vegan, sugar free (keto / diabetic-friendly) versions of this crustless pumpkin pie recipe.
- This is a foolproof recipe that has been tested countless times, and guarantees delicious, creamy, silky smooth, absolutely perfect results, every time (no weeping or curdling).
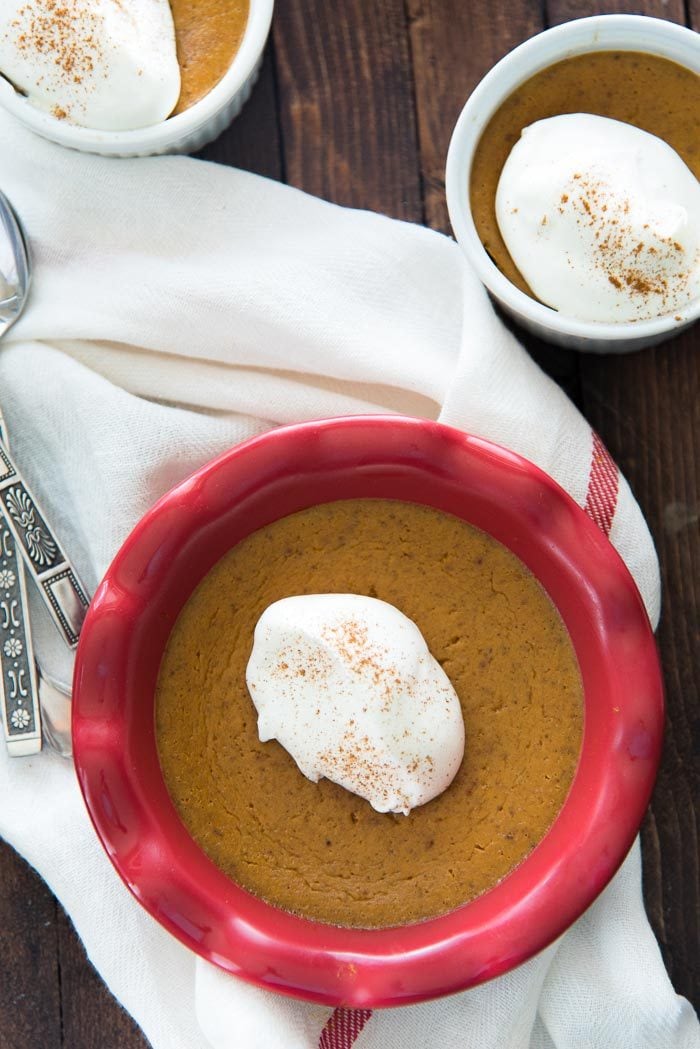
- Flexibility! You can make this no crust pumpkin pie either as one large pie to feed a crowd. Or in smaller/individual portions as mini crustless pumpkin pie (which is even faster to make).
- This is a healthy pumpkin pie that you could even have for breakfast, and any time of the year (not just during holiday season). You can also make this with a 1:1 sugar alternative such as monk fruit. Many of my readers have made this crustless pie with monk fruit with perfect results!
- This pie is a huge reader favorite! It’s been a popular recipe since the day I first published it. Just check the comments and feedback from all my lovely readers who have made this with great success and have also been able to adapt the recipe in numerous ways due to all the tips I provide.
I’ve made this recipe countless times. And made all the mistakes while trying to perfect this easy crustless pumpkin pie recipe, so that you don’t have to!
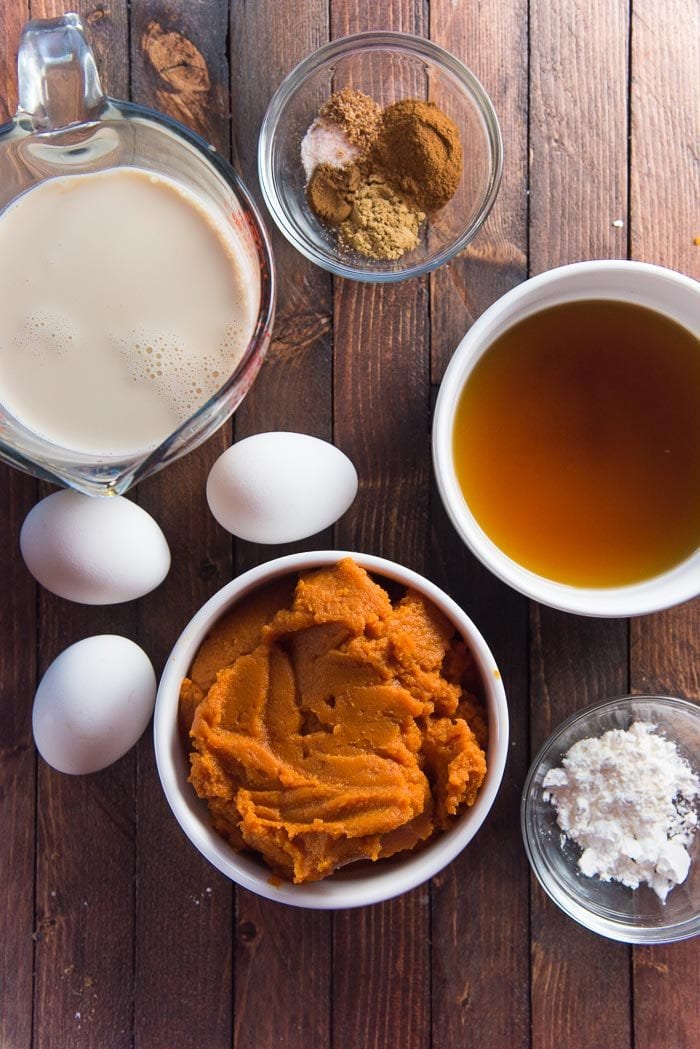
Recipe ingredients
- Pumpkin puree – Canned 100% pumpkin puree that you can easily find in the supermarket. In the US, you can find the classic Libby’s canned pumpkin. In Canada, I use ED Smith pumpkin puree. Make sure to use 100% puree, and NOT pumpkin pie filling!
- Evaporated milk – Classic pumpkin pie is made with evaporated milk, which is “concentrated milk”. You can absolutely substitute this with cream, coconut cream, or other plant substitutes. You can also use condensed milk if you have no evaporated milk. Higher the fat content, the richer and silkier the texture of the baked pumpkin pie custard will be.
- Maple syrup – My choice of sweetener. Maple syrup adds a lovely earthy flavor to this dessert that makes it extra special. It’s also refined sugar free. You can use brown sugar instead, if that is what you have at home. You can also use honey, white sugar, 1:1 sugar replacement (such as monk fruit).
- Pumpkin pie spice – I use a combination of cinnamon, ginger, nutmeg, and cloves for this crustless pumpkin pie. However, you can buy pumpkin pie spice from the store and use this instead too.
- Cornstarch – This is the (not so) secret ingredient. Cornstarch acts as a thickener and a stabilizer in this recipe. The starch molecules expand as they heat up, and absorbs moisture. The moisture is trapped inside the starch matrix. This helps to prevent the custard from curdling and weeping (by absorbing extra moisture), and also results in a creamy smooth texture too. If you have a corn allergy, then you can replace it with arrowroot starch.
- Eggs (and yolk) – Each large egg is about 2 oz / 56 g. The eggs also act as a thickener, but also helps to bind the custard ingredients. The fat in the egg yolks add richness to the custard as well, which is why I like to add an extra egg yolk! For a vegan or eggless crustless pumpkin pie, you can substitute the eggs with cornstarch.
- Salt and vanilla – Both of these ingredients are flavor enhancers! Salt provides balance to the sweetness, while the vanilla adds depth to the flavor.
My first attempt at making this gluten free pumpkin pie was to follow the famous Libby’s no crust pumpkin pie recipe with the refined sugar as well.
So, I followed the pumpkin pie recipe on the Libby’s pumpkin can, without the crust. Unfortunately, I was so disappointed with the results, even after following the recipe precisely as stated.
Here’s the one thing you need to keep in mind when making no crust pumpkin pie. Without the crust, the pumpkin pie filling is essentially a pumpkin flavored custard. Therefore, it relies on eggs to set it into a creamy, smooth filling.

Two biggest problems with other crustless pumpkin pie recipes (including Libby’s recipe)
- Weeping (technical term for that is syneresis)
- Curdling
When a custard is baked at a high temperature, the eggs in the custard bake too rapidly. This leads the eggs to coagulate and separate into curd and whey. That’s because the egg proteins form a very tight network (curds).
This tight network causes the water to be “squeezed out” (whey), causing the baked custard to weep. This also makes the custard taste and feel like it’s curdled.
The original Libby’s famous crustless pumpkin pie recipe tests the doneness with a knife inserted into the custard. Then checking whether it comes out clean.
I followed this recipe against my better judgement, hoping that the custard would somehow come out OK. But my gut feeling was correct. The problem is, your custard is already overbaked by the time you reach this level of doneness (or will be overbaked by the residual heat).
My solutions to prevent weeping, curdling, overbaking of this crustless pie
Solution #1
Reduce the oven temperature. Baking this crustless pumpkin pie at 350°F as suggested in the original recipe will most definitely cause the eggs in the custard to cook too quickly. This will lead to a curdled texture and weeping pumpkin pie custard.
I cook this crustless pumpkin pie at 300°F, so that it cooks low and slow. Allowing for more even baking, and reducing the chances of the eggs overbaking.
You can lower the chances of weeping and curdling even more by baking this custard in a water bath. But it’s not necessary. Also remember to preheat the oven before placing the crustless pumpkin pie inside.
Solution #2
Add cornstarch to the custard. The starch molecules expand as they cook with the water in the custard. Then they can act as a buffer to prevent the eggs from curdling. The result is a creamy, pudding like pumpkin pie.
Solution #3
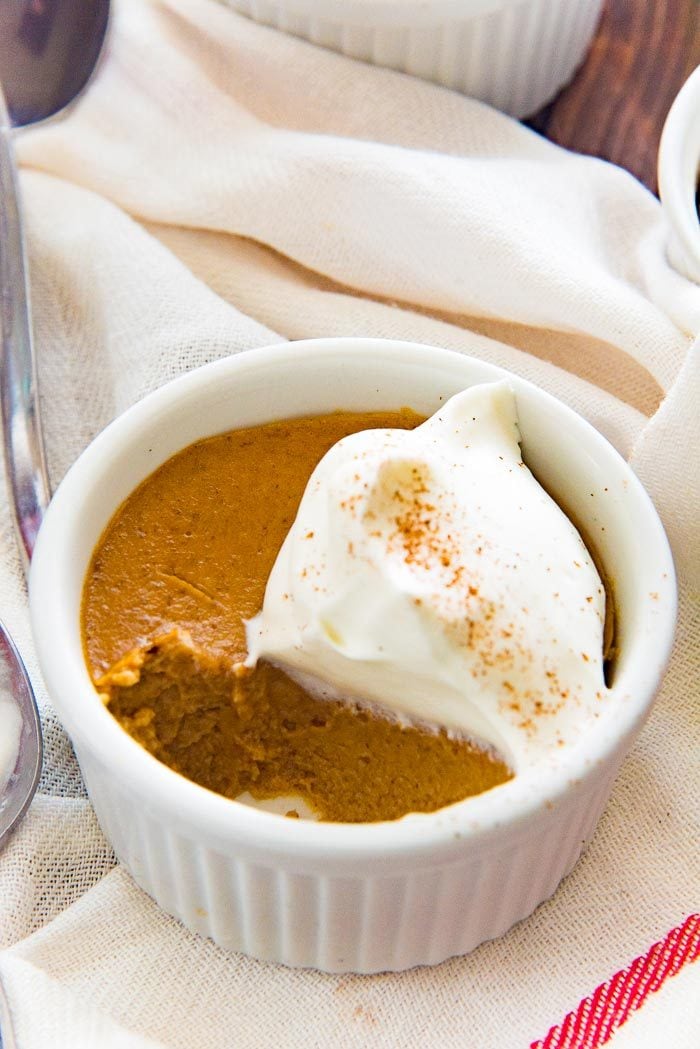
Don’t wait until the “inserted knife comes out clean” stage. I always remove this pumpkin pie pudding while the middle is still a bit runny or jiggly. The residual heat will continue to cook the custard to perfection.
Solution #4
Allow the crustless pumpkin pie to cool completely after baking. It’s important to let the pumpkin pie cool completely, before covering it with plastic wrap and refrigerating it. Let the excess water evaporate while it cools down, uncovered, to prevent the water re-entering the pumpkin pie pudding.
Solution #5
Use a thermometer. Since every oven and baking dish can transfer heat differently, it’s hard to say exactly when the custard is done. The foolproof way to know when the custard is perfect and is ready to come out, is to use a thermometer. Cooking this crustless pumpkin pie to an internal temperature of 170°F – 175°F ensures that you get perfect, creamy, smooth results. I prefer 170°F, and NEVER go over 175°F.

More expert tips for a PERFECT crustless pumpkin pie recipe
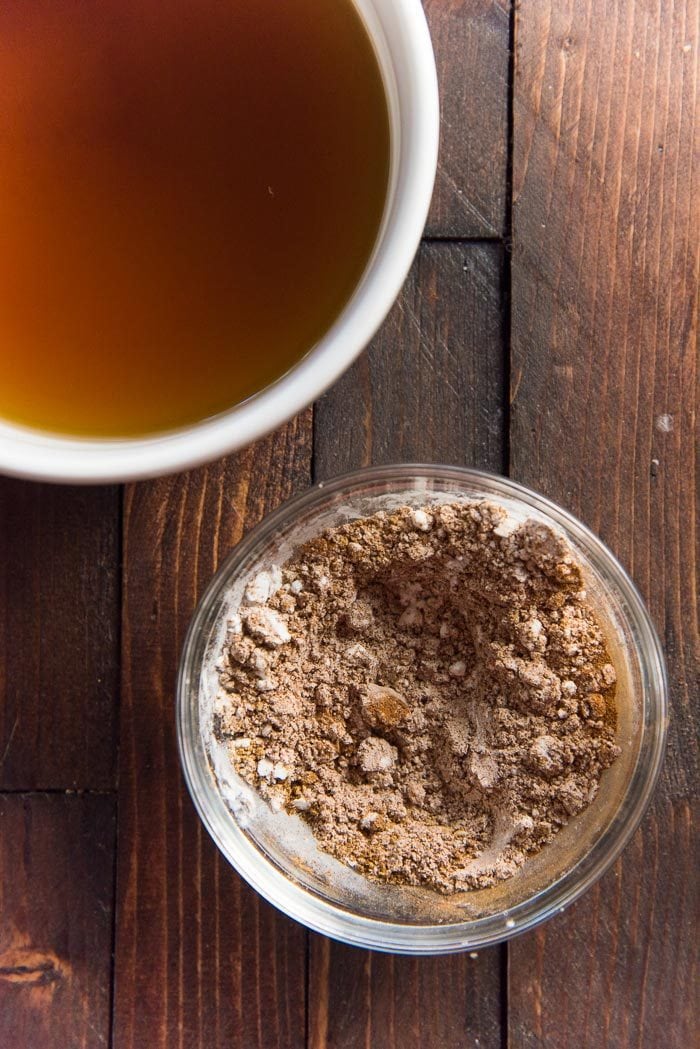
- Do not add the pumpkin pie spice mix into the egg mix. The eggs are gloopy and can cause the spices to clump up and not distribute evenly. So I prefer to always mix the spices with the cornstarch and maple syrup first. Make sure it’s well mixed through. Then add this to the egg mix and whisk. This way, the spices will disperse more evenly through the custard.
- By following the order of ingredients added that’s indicated in this recipe, you can make this no crust pumpkin pie pudding using only 1 bowl!
- Butter the baking dish or pie plate with a very thin coating of butter.
- Pour the custard into the dish and knock it on your kitchen counter-top a few times to knock out any excess air. Air bubbles on the surface of the custard can be removed easily. Use a blow torch to gently flame the surface of the custard.
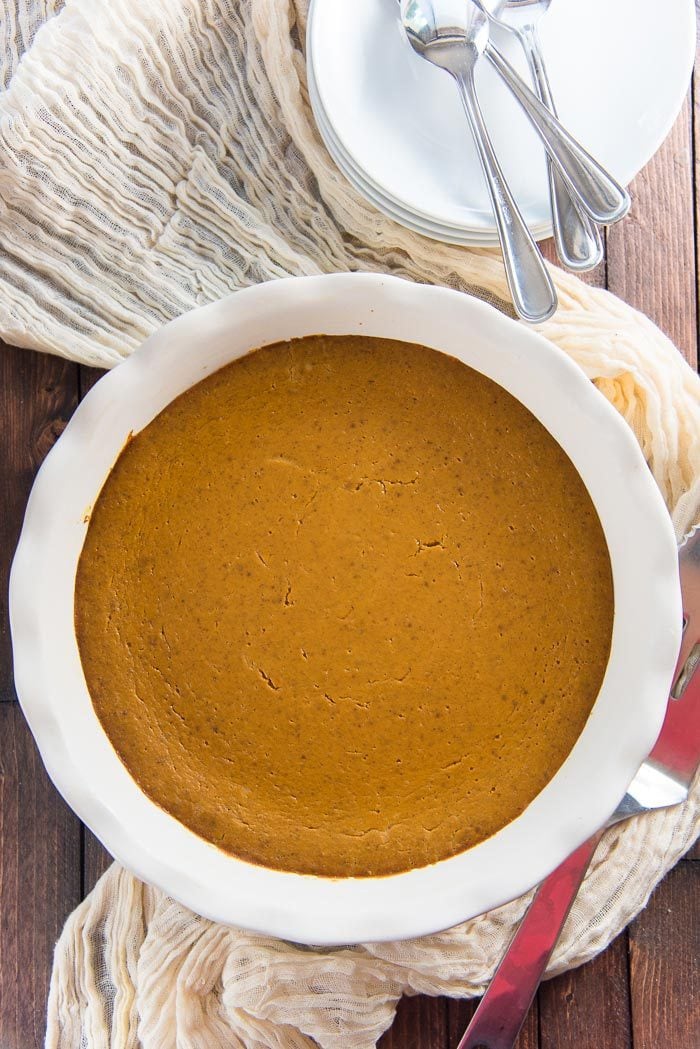
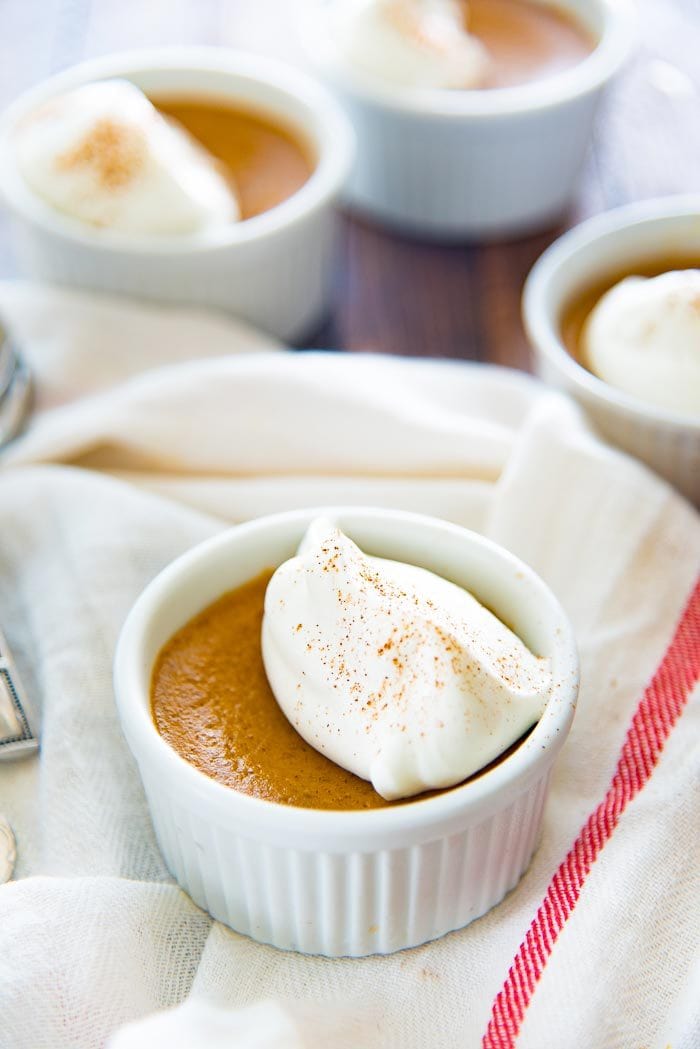
- I prefer making this in a 9 inch glass porcelain pie plate / dish. It guarantees consistent results every time. I’ve made this in 1/2 cup ramekins and in individual pie dishes (1 cup capacity) as well (see pictures in the post).
- I usually place the pie dish/dishes on a baking tray and bake them in a preheated oven. This way it’s easier to remove the dishes from the oven and even to rotate them half way through the cooking process.
- When the baking is done, I remove the baking tray (with the pumpkin pie dish) from the oven first. Then immediately transfer the pumpkin pie dish/dishes on to a cold surface. Otherwise, the residual heat from the baking sheet/tray will cook the custard further.
- When the crustless pumpkin pie custard has been transferred to a cooler surface, let it cool completely to room temperature. This can take 15 minutes on a very cold day, or up to 1 hour on warmer days. Only then, transfer it to the fridge, wrapped in plastic wrap. Otherwise, the condensation will cause the pumpkin pie to “weep”.
Serving suggestions
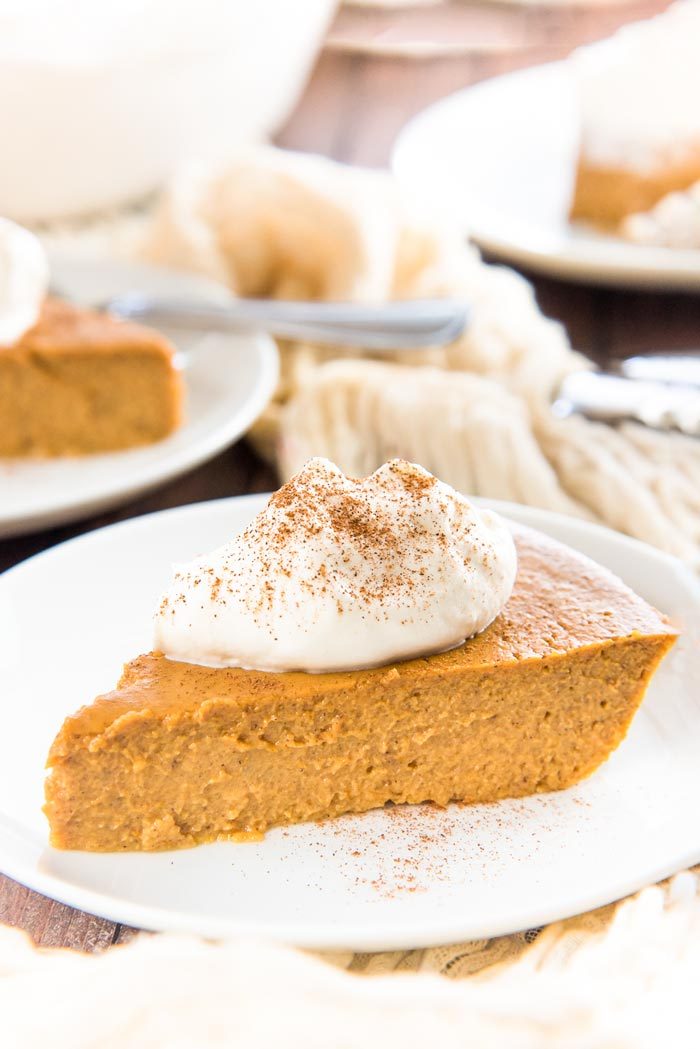
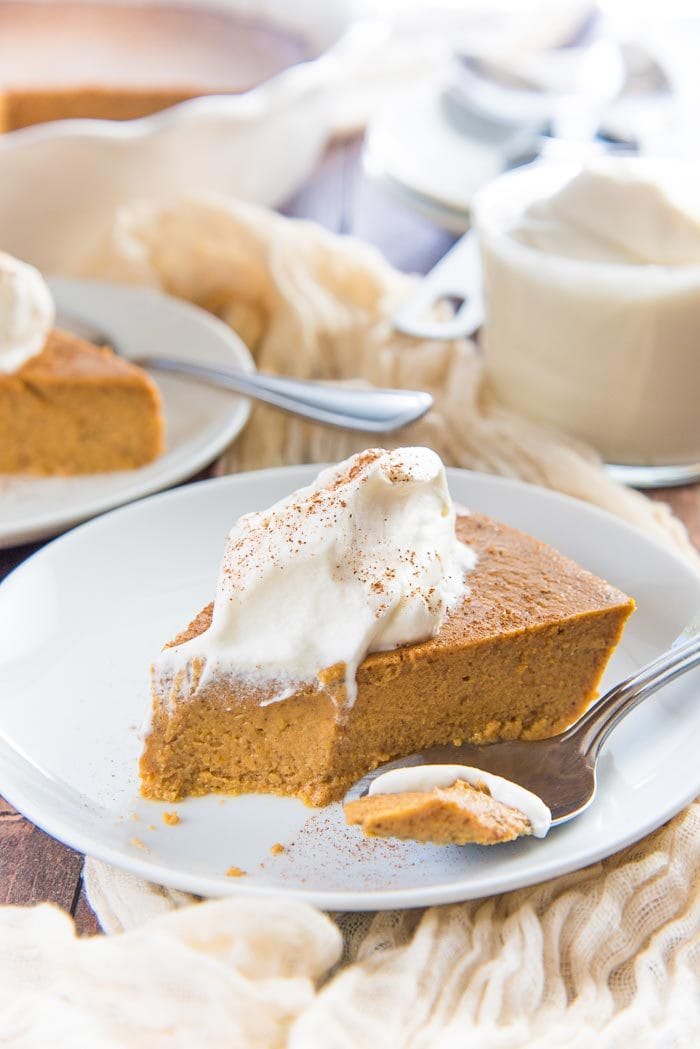
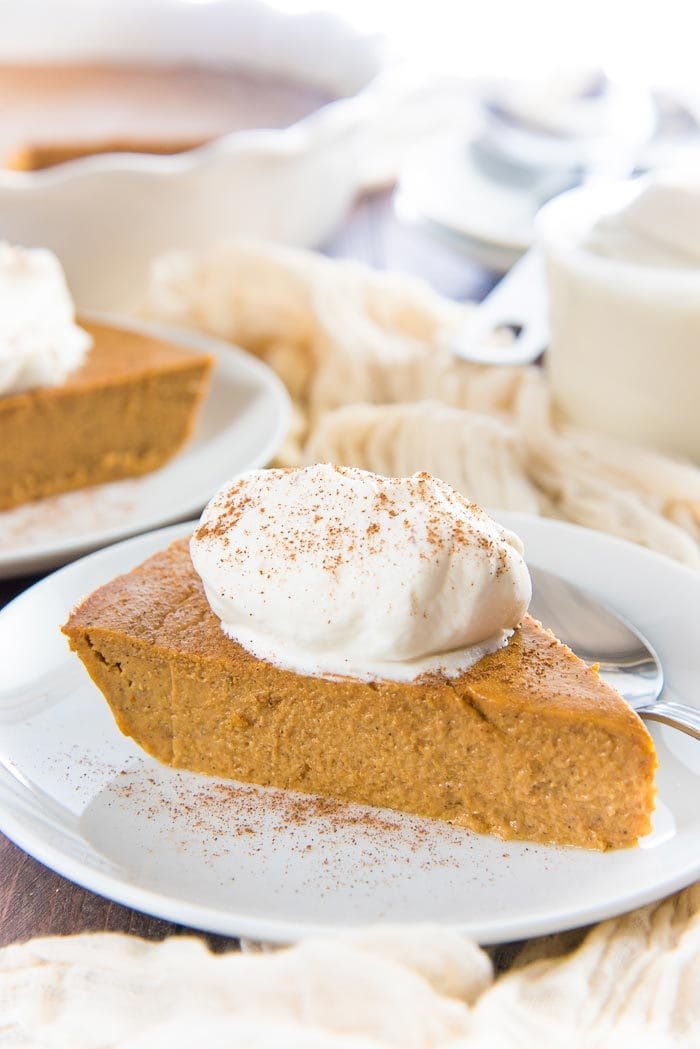
My favorite way to serve this crustless pumpkin pie pudding is to slice it like a pie (duh), and serve with whipped cream. You can do the same.
Or let your guests scoop it like a pudding into cups. After all, this tastes and feels like a really creamy pumpkin pie pudding too.
For even better results, you can flavor your whipped cream for even more flavor. Use maple syrup, brown sugar, bourbon, vanilla, coffee or any other flavor you like. You can also flavor it with spices such as cinnamon or pumpkin pie spice (spiced whipped cream).
My husband likes it with slightly sweetened whipped cream, I prefer it with a drizzle of extra maple syrup on top.
Coconut whipped cream is also a delicious topping for this crustless pie.
But the best part is that this no crust pumpkin pie is healthy enough for breakfast too! Just add some granola (for crunch), or Greek yogurt, or some roasted pecans and you have yourself a pumpkin pie parfait.
This refined sugar free, gluten free crustless pumpkin pie is guaranteed to be a hit as a Thanksgiving dessert. It’s one of the best pumpkin desserts you can make, and it’s such an easy recipe.
And you can make it any time you want to whip up some simple, delicious pumpkin pie! It’s incredibly creamy, smooth, full of pumpkin flavor and perfectly sweet, and just so satisfying that you won’t miss the crust at all.
Storage instructions
In the fridge
When your crustless pumpkin pie pudding has cooled down, and is only warm, you can transfer it to the fridge so that it cools down faster. However, keep it uncovered until it’s at room temperature, as water condensation may otherwise create water puddles on the surface.
Once at room temperature, wrap the crustless pumpkin pie with plastic wrap very well. This can be stored in the fridge for up to 5 days.
However, this will depend on basic food safety handling.
Keeping the baked custard at room temperature for long periods of time, or repeated temperature fluctuations may result in decreased shelf life.
Using utensils that are unsanitary to serve the dessert will also decrease the shelf life.
So, when eating leftovers, please make sure that the crustless pumpkin pie does not smell or look off (color changes, or looks spotty), or has any textural changes.
In the freezer
It is possible to freeze this no crust pumpkin pie. However, there might be some changes in texture in the baked pumpkin custard once it de-frosts.
To freeze, wrap the pie dish with plastic wrap very well. Followed by aluminum foil, making sure that you use as many layers as you need so that the whole dish is wrapped very well. You can freeze this for up to 2 months.
If you have leftovers, you can put them in an airtight container, and place this in the freezer for up to 2 months.
Let the leftovers de-frost gradually in the fridge over 1 – 2 days.
There might be some water that collects on top of the dessert as it de-frosts. Use a clean paper towel to absorb and remove that moisture before serving.
Frequently Asked Questions
Can I make this with canned pumpkin pie filling?
I wouldn’t recommend it. This is made with 100% pumpkin puree, and this is different from the canned pumpkin pie filling. Pumpkin pie filling is already spiced, and yet somehow less flavorful!
So, stick with 100% pumpkin puree and add your own spices to get the best results.
Can I use fresh pumpkin purée instead of canned pumpkin purée?
Yes, you can. However, please note that fresh pumpkin puree (i.e. homemade pumpkin puree) may contain more water than canned pumpkin puree. The flavor can also vary depending on the type of pumpkin / squash you use, and the season / ripeness.
I recommend using butternut squash that has been steamed or roasted. The puree should also be cooked to reduce the amount of water. The quality, taste, and texture of canned pumpkin puree are usually more consistent.
Can I make a dairy free crustless pumpkin pie?
Yes, you can substitute the evaporated milk with unsweetened coconut cream or full fat coconut milk at a 1:1 ratio.
You can also use any plant-based milk, but I do recommend something with a higher fat percentage which would make the crustless pumpkin pie taste better, with a richer and silkier texture. Which is why I wouldn’t recommend lite coconut milk.
Can I make vegan crustless pumpkin pie?
Yes, you can. As mentioned above, substitute the evaporated milk with a good quality coconut milk or plant-based milk. Use something with a higher fat percentage for best results.
And substitute the eggs and cornstarch in the recipe with 45 g total cornstarch.
Can I make a sugar free crustless pumpkin pie?
Yes, you can make this with any sugar substitute that is a 1:1 replacement. Such as monk fruit (or Truvia brown sugar baking blend as recommended by a reader).
What if I don’t have evaporated milk?
You can also make this crustless pumpkin pie pudding with condensed milk. To do so, substitute the evaporated milk and sugar in the recipe with 1 can of condensed milk (300 mL).
You can also substitute the evaporated milk with an equal amount of heavy cream (35% fat).
What if I don’t want to use cornstarch or have a corn-allergy?
You can replace the cornstarch with an equal amount of arrowroot or twice the amount of tapioca starch.
Can I make this recipe anti-inflammatory friendly?
Yes, I’ve had some readers tell me that they adapted this pumpkin pie pudding to make it anti-inflammatory by substituting the evaporated milk with a plant-based milk and cornstarch with arrowroot.

If you liked this crustless pumpkin pie (gluten free pumpkin pie) recipe, don’t forget to subscribe for new (and free) recipes by entering your email address on the side bar (and get all these recipes delivered straight to your inbox), so you don’t miss out on a thing. You can find me on FACEBOOK, INSTAGRAM, PINTEREST, YOU TUBE.
Recipe

Crustless Pumpkin Pie Pudding
US based cup, teaspoon, tablespoon measurements. Weight measurements are recommended for accurate results whenever available.
Common Measurement ConversionsIngredients:
- Butter or coconut oil to butter the pie dish/dishes
- 1 tsp ground cinnamon
- ½ tsp ground ginger
- ¼ tsp cloves
- ¼ tsp freshly grated nutmeg
- ¼ tsp salt kosher salt or sea salt (use slightly less sea salt, if desired)
- 1 ½ tbsp cornstarch 1½ tbsp (increase to 4½ tbsp / 45 g for the vegan version)
- 2 tsp vanilla extract 2 tsp
- ½ cup maple syrup ½ cup (you can also use ¾ cup / 150 g brown sugar or sugar substitute)
- 2 eggs
- 1 egg yolk
- 15 oz canned pumpkin puree 1 can (15 oz) or 398 mL
- 1 ½ cups evaporated milk 1 ½ cups / 1 can (use any plant-based milk as a substitute. I recommend full fat coconut milk or unsweetened coconut cream)
To serve
- Sweetened whipped cream optional
- Maple syrup optional
- Greek yogurt optional
- Whipped coconut cream optional (dairy free / vegan option)
- Granola optional (for texture contrast)
Instructions:
- Preheat the oven to 300°F / 149°C and butter a glass or porcelain 9 inch pie dish, OR 5 mini pie dishes (1 cup capacity), OR 9 ramekins (½ cup ramekins).Butter or coconut oil to butter the pie dish/dishes
- In a large bowl, whisk together the cinnamon, ginger, cloves, nutmeg, salt, and cornstarch. Whisk this mix until there are no lumps in the cornstarch.You can also use 2 tsp of pumpkin pie spice mix instead of the individual spices.1 tsp ground cinnamon, ½ tsp ground ginger, ¼ tsp cloves, ¼ tsp freshly grated nutmeg, ¼ tsp salt, 1 ½ tbsp cornstarch
- Add half of the maple syrup and whisk it in until the cornstarch is completely dissolved and there are no lumps. Then add the rest of the maple syrup and the vanilla, and mix well.½ cup maple syrup, 2 tsp vanilla extract
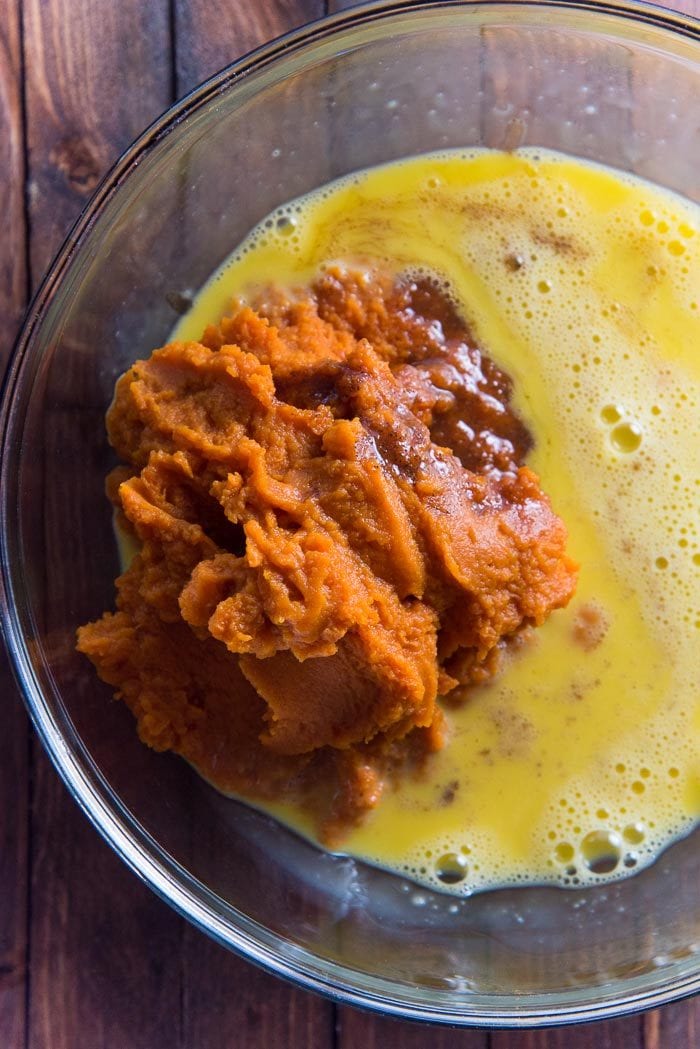
- Add the 2 eggs and yolk, and whisk to combine.2 eggs, 1 egg yolk
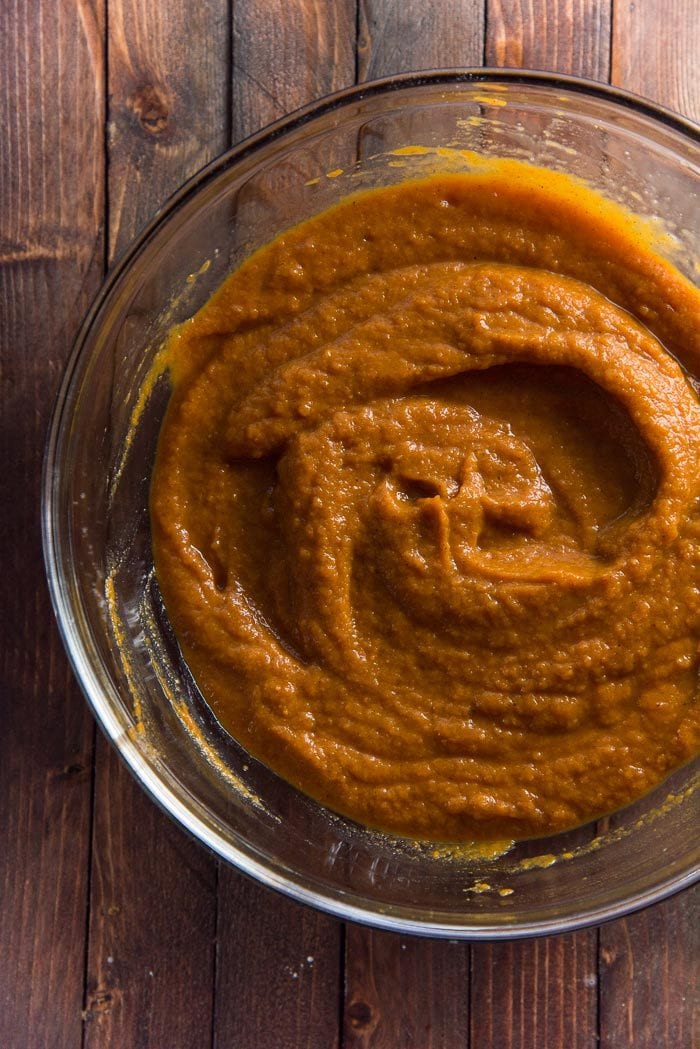
- Add the pumpkin puree and whisk until it’s mixed in well.15 oz canned pumpkin puree
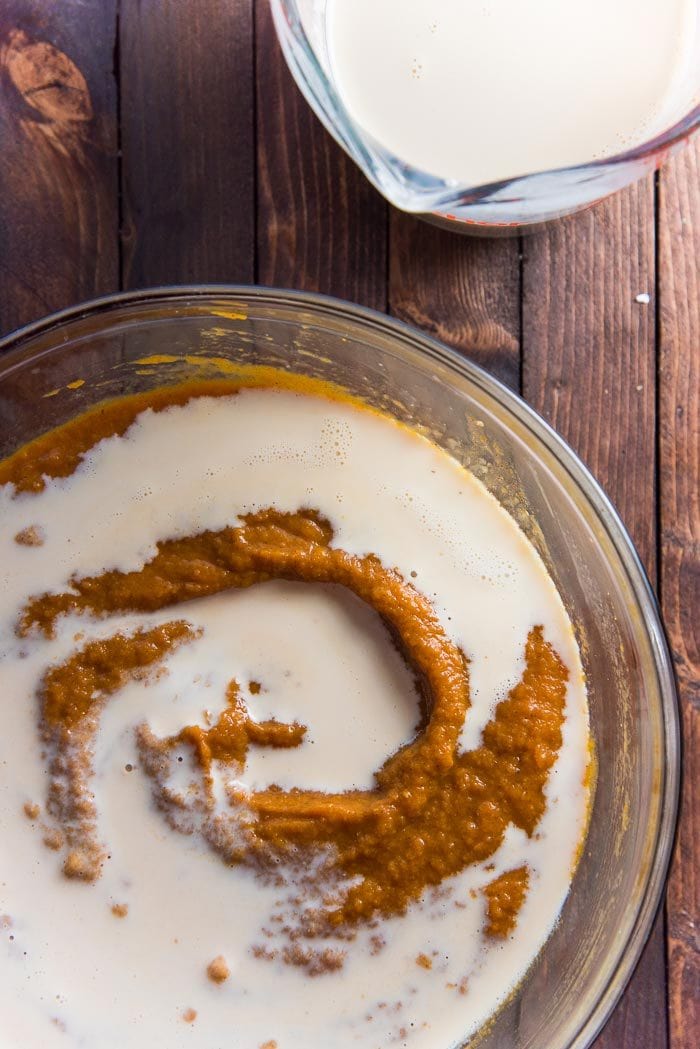
- Stir in the evaporated milk, or your choice of plant-based milk. Make sure the milk is also mixed in well.1 ½ cups evaporated milk
- Pour the prepared pumpkin custard into the 9 inch pie dish. Knock the pie dish on a hard surface like your kitchen counter firmly (don't break the dish though!), a couple of times, to remove any air bubbles. See recipe notes below on how to bake this crustless pumpkin pie in smaller dishes.
- Place the pie dish in the preheated oven and bake for 60 – 70 minutes, rotating the pie dish halfway through the cooking time (30 minutes).
- If you have a thermometer, check for an internal temperature of 170 – 175°F / 77°C – 79°C in the middle of the pie. If you don’t have a thermometer, remove the pie from the oven while the middle still seems a bit jiggly, but the edges are set – this should take between 60 – 70 minutes.
- Remove the pie dish from the oven and keep it in a cool, dry place to cool down, UNCOVERED. When the pie has completely cooled to room temperature, cover the pie dish and refrigerate overnight. Keep the pumpkin pie pudding in the fridge until you're ready to serve.
- Slice the crustless pumpkin pie pudding into 8 – 10 servings, and serve with your choice of topping (optional).Sweetened whipped cream, Maple syrup, Greek yogurt, Whipped coconut cream, Granola
To make the mixture in the blender
- Place all the ingredients in a blender, except for the eggs. Blend until everything is just mixed through. Be careful not to overmix. Then add the eggs, and pulse to break the eggs and to start mixing it. Blend for no more than 1 minute to mix in the eggs. Stir to make sure everything is mixed through well. Let the mix rest for about an hour. This is to remove any excess air.
- Pour into the dish and bake as per recipe. Blending the filling is easier, but it can lead to more cracks in the baked custard (due to more air incorporation).
Recipe Notes
Notes for baking this crustless pumpkin pie in smaller dishes
- Measure the pumpkin pie custard into the smaller ramekins using a measuring cup. Add ½ cup of the custard into the ½ cup ramekins, and 1 cup of the custard into the mini pie dishes.
- It’s easier to move the dishes in and out of the oven if you place them all on a larger baking sheet / tray. I use a half baking sheet.
- Bake the ½ cup ramekins for about 22 – 25 minutes. The ramekins I use are flat ramekins, where the pumpkin pie custard only fills up about 1 1/2 inches deep. If it’s a taller baking dish, the custard will take longer to bake.
- Bake the 1 cup mini pie dish for about 30 minutes (the pumpkin pie custard only fills up about 1 1/2 inches.)
- Remove the baking tray from the oven, and then transfer the smaller dishes onto a cold surface to let the individual pumpkin pie puddings cool completely.
Notes for cooling down the crustless pumpkin pie pudding
It’s important to allow the pumpkin pie puddings to cool completely before covering them. You can speed up the cooling process by placing the dishes in a water bath (where the water level travels halfway up the dish). The residual heat will continue to cook the custard, while the excess water evaporates. If you cover the pumpkin pie pudding with plastic wrap before it’s completely cooled down, there’ll be condensation that will drip back into the pie and make it watery.For a vegan option
In place of the eggs, use a total of 45 g / 4 ½ tbsp of cornstarch in the recipe.Note on maple syrup substitution
For a single pie – You can substitute the 1/2 cup maple syrup with 1/2 cup honey. If you’re using brown sugar or a sugar substitute, use 3/4 cup (150 g). Use up to ¾ cup /180 mL maple syrup / honey for a sweeter option.How to substitute with condensed milk
Replace the maple syrup/sugar AND the evaporated milk with 1 can / 300 mL of condensed milk.How to substitute the cornstarch
Arrowroot starch – Use an equal amount of arrowroot starch. Tapioca starch – Use double the amount of tapioca starch.Nutrition Information:
“This website provides approximate nutrition information for convenience and as a courtesy only. Nutrition data is gathered primarily from the USDA Food Composition Database, whenever available, or otherwise other online calculators.”
NEED MORE THANKSGIVING RECIPES?
Sous vide turkey breast roulade with lemon, herb and garlic
Slow roasted turkey breast roulade with sage and rosemary
Maple roasted brussels sprouts
Slow roasted turkey breast with Cajun spices
Slow cooker turkey breast with sage garlic butter
Looking for pumpkin treats? Then you may like these recipes too,
Overnight Pumpkin Pie Chia Pudding Parfait
Pumpkin and Chocolate Hot Fudge Pudding Cake


Leave a Reply