

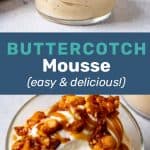
Butterscotch mousse that is light, creamy, and incredibly delicious, while being not too sweet. This is one of my favorite no bake desserts, because it’s so simple to make.
Just like my classic chocolate mousse, this easy butterscotch mousse is a guaranteed crowd favorite!
I am a sucker for anything butterscotch flavored. Like these butterscotch marshmallows, butterscotch ice cream, butterscotch cookie dough ice cream, butterscotch apple pie, or just butterscotch sauce by the spoonful! And this butterscotch mousse is pure decadence in a glass jar..
Butterscotch mousse recipe highlights
- It’s luscious and creamy,
- Yet incredibly light,
- Not too sweet,
- And best of all, so simple to make.
And it always goes down well at parties and gatherings. A guaranteed crowd pleaser.
How to make butterscotch mousse
There are only a few steps to this delicious dessert recipe. BUT, there’s one extra step if you’d like to add even more flavor to your mousse. That extra step is making brown butter. Since butter is such a key flavor in this butterscotch mousse, brown butter enhances the flavor profile of this mousse in ways you couldn’t even imagine. So the process will be,
- Make the brown butter (optional step).
- Make the butterscotch custard.
- Prepare the stabilized whipped cream.
- Mix and let it set.
That’s it. So let’s go through these steps briefly.

Making the brown butter
To make brown butter butterscotch mousse, you gotta start with making brown butter first.
Brown butter is essentially caramelized butter. As the butter is heated, the milk solids are separated first, which will then start to caramelize and brown, making the butter smell and taste even nuttier. This is brown butter. Also known as heaven. And it makes the best chocolate chip cookies, rice krispie treats, brown butter blondies etc.
To intensify the flavor of the brown butter, you can add some dry milk powder to the butter as it melts. The milk powder will caramelize along with the milk solids, creating MORE brown butter molecules of flavor! Yes, more is always better.
You can check out my detailed post here on how to make brown butter.
Making the butterscotch custard
The base of any mousse is a concentrated, rich custard of flavor. With chocolate mousse, it’s a chocolate ganache-like base. With butterscotch mousse, it’s a concentrated butterscotch flavored custard. Sort of like a rich, sweet, thick butterscotch pudding. Nothing but good stuff.
This thick butterscotch custard is made the same way as any other custard. However, because it has extra cornstarch, the custard will be extremely thick.
Place the brown sugar, salt, and milk in a pot. Heat over medium high heat, while stirring, until the sugar has melted and the milk is steaming hot.
Whisk the egg, egg yolk, and cornstarch in a large bowl or jug. This mixture should be smooth and free of lumps.
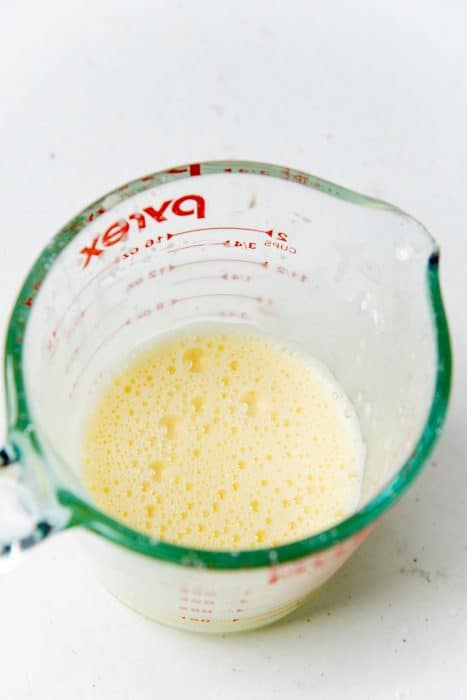
When the milk mixture is ready, add the hot milk in a thin stream into the egg yolk mix, while whisking continuously. This is tempering the eggs, so that you avoid scrambling the eggs with the hot milk. Add the warm and tempered egg mixture back into the saucepan with the remaining milk.
Cook the custard over medium heat while whisking frequently until the mixture thickens. Keep cooking the custard until it comes to a boil. Cook the custard for a further 1 – 2 minutes after it comes to a boil, but make sure to whisk the custard continuously to prevent the custard from burning or curdling. Now remove the custard from the heat and whisk in the vanilla and brown butter (or regular unsalted butter).
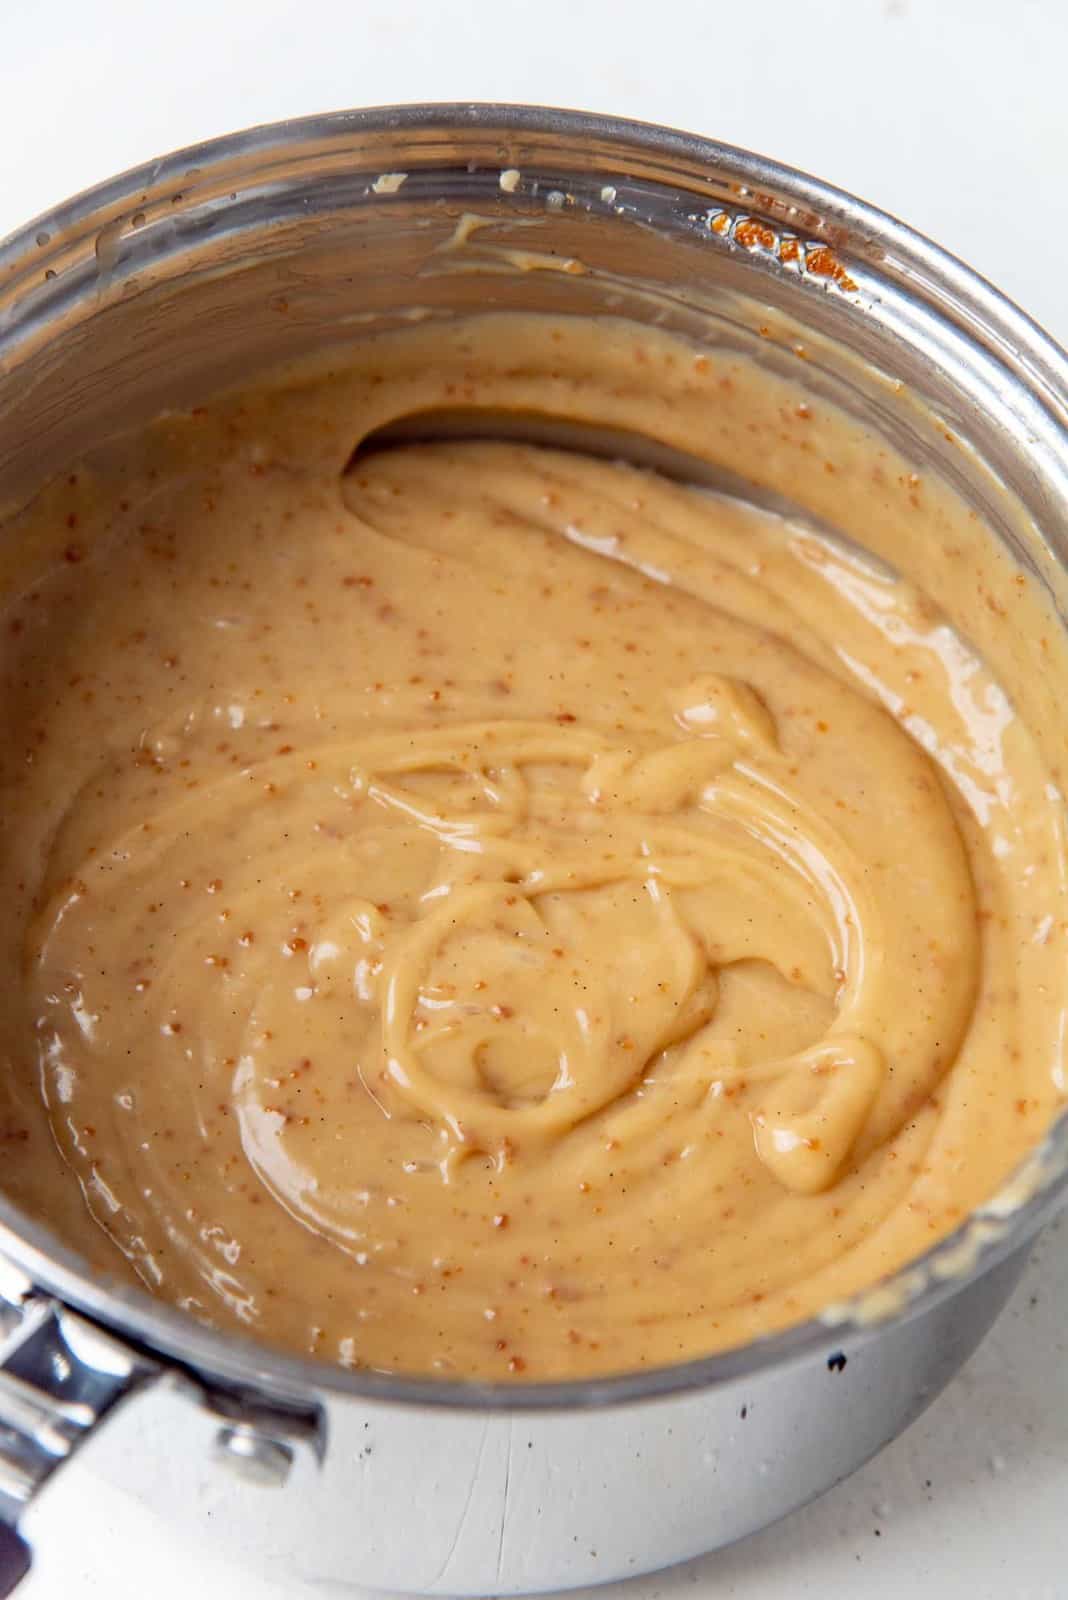
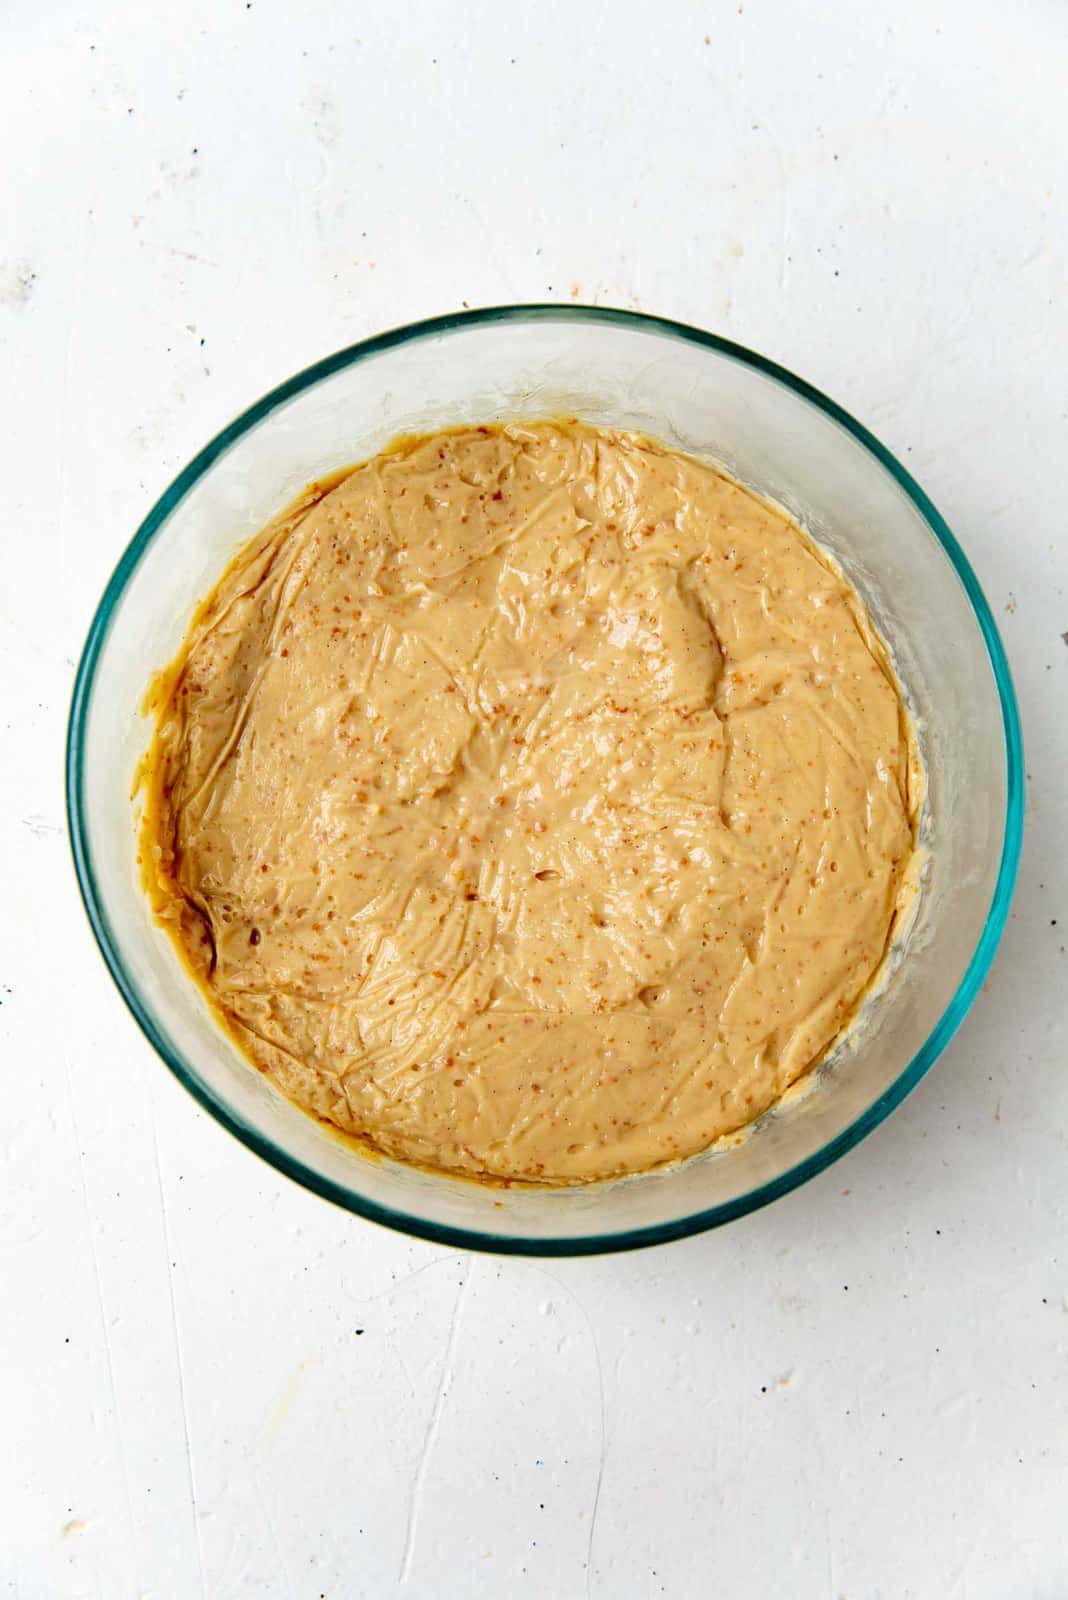
Place the cooked custard in a bowl, and cover it with plastic wrap. Make sure the plastic wrap is touching the whole surface of the custard to prevent a skin from forming on top.
Chill the custard completely for at least 4 hours or overnight. A chilled custard will make a more stable butterscotch mousse.
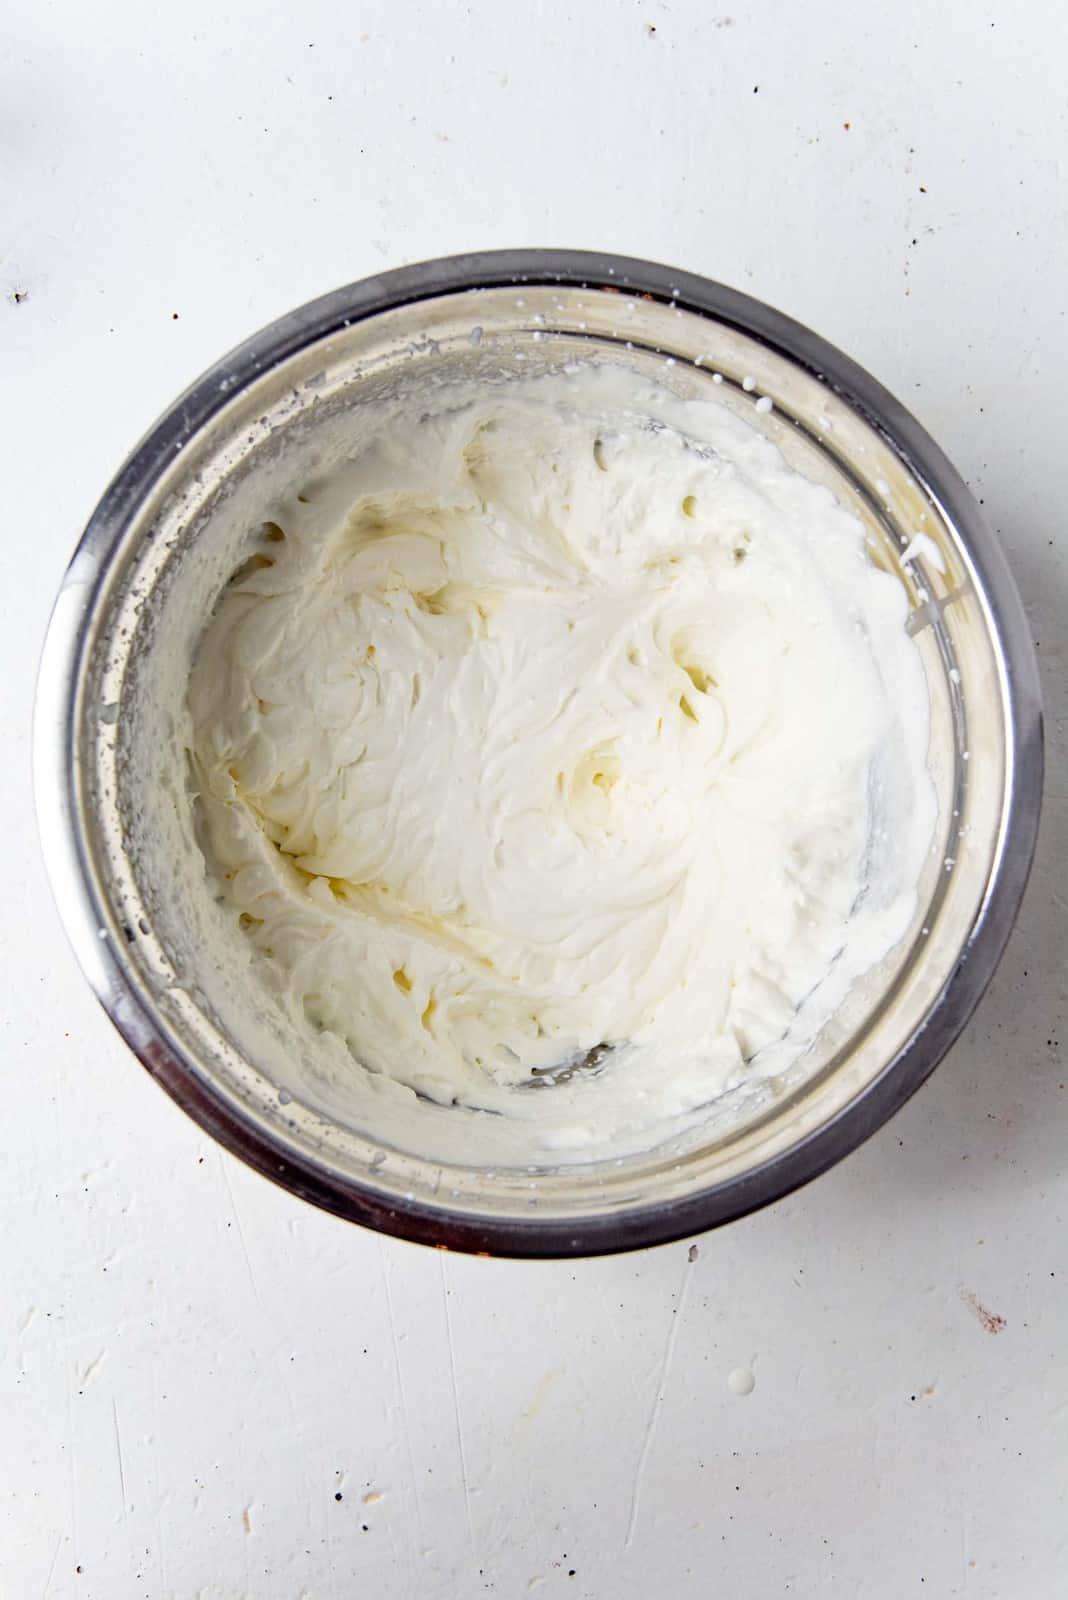
Making the stabilized whipped cream for butterscotch mousse
The whipping cream will lighten the butterscotch custard and turn it into an airy butterscotch mousse. To help the butterscotch mousse set properly, and retain its texture, it’s important to add just a little gelatin. This will prevent the mousse from weeping and losing the airiness.
To make stabilized homemade whipped cream, the first step is to bloom the gelatin with some water. Then melt the bloomed gelatin.
In a chilled medium bowl, add the heavy cream (35% fat). Start whisking the cream with an electric mixer, and add the melted gelatin. Whisk until you get stiff peaks, but make sure not to let the cream curdle.
Tips to make sure the whipped cream has the perfect consistency to make butterscotch mousse
- Do not over-beat the cream. This can lead to curdled or separated cream.
- Whisk on high while adding the gelatin, but then lower the speed to medium and whisk the cream for longer. Gentler whisking will ensure good consistency, while making it easy to monitor the stage of the whipped cream.
- Once you melt the gelatin, temper the mixture with 1 – 2 tbsp of chilled heavy cream. It’s not a good idea to add very hot liquid to cold cream. This can interfere with how well the cream whips.
- When adding the gelatin, do not add it directly onto the whisks of your mixer. This will cause the gelatin to clump up. Add the gelatin in one go, while the mixer is running, to a spot where you can see the cream is moving rapidly (to ensure fast mixing).
Can I use egg whites?
You can use whisked egg whites instead of whipped cream if you prefer. But I do prefer the richness that whipped cream adds.
If you use egg whites, just know that this dessert will contain raw eggs.
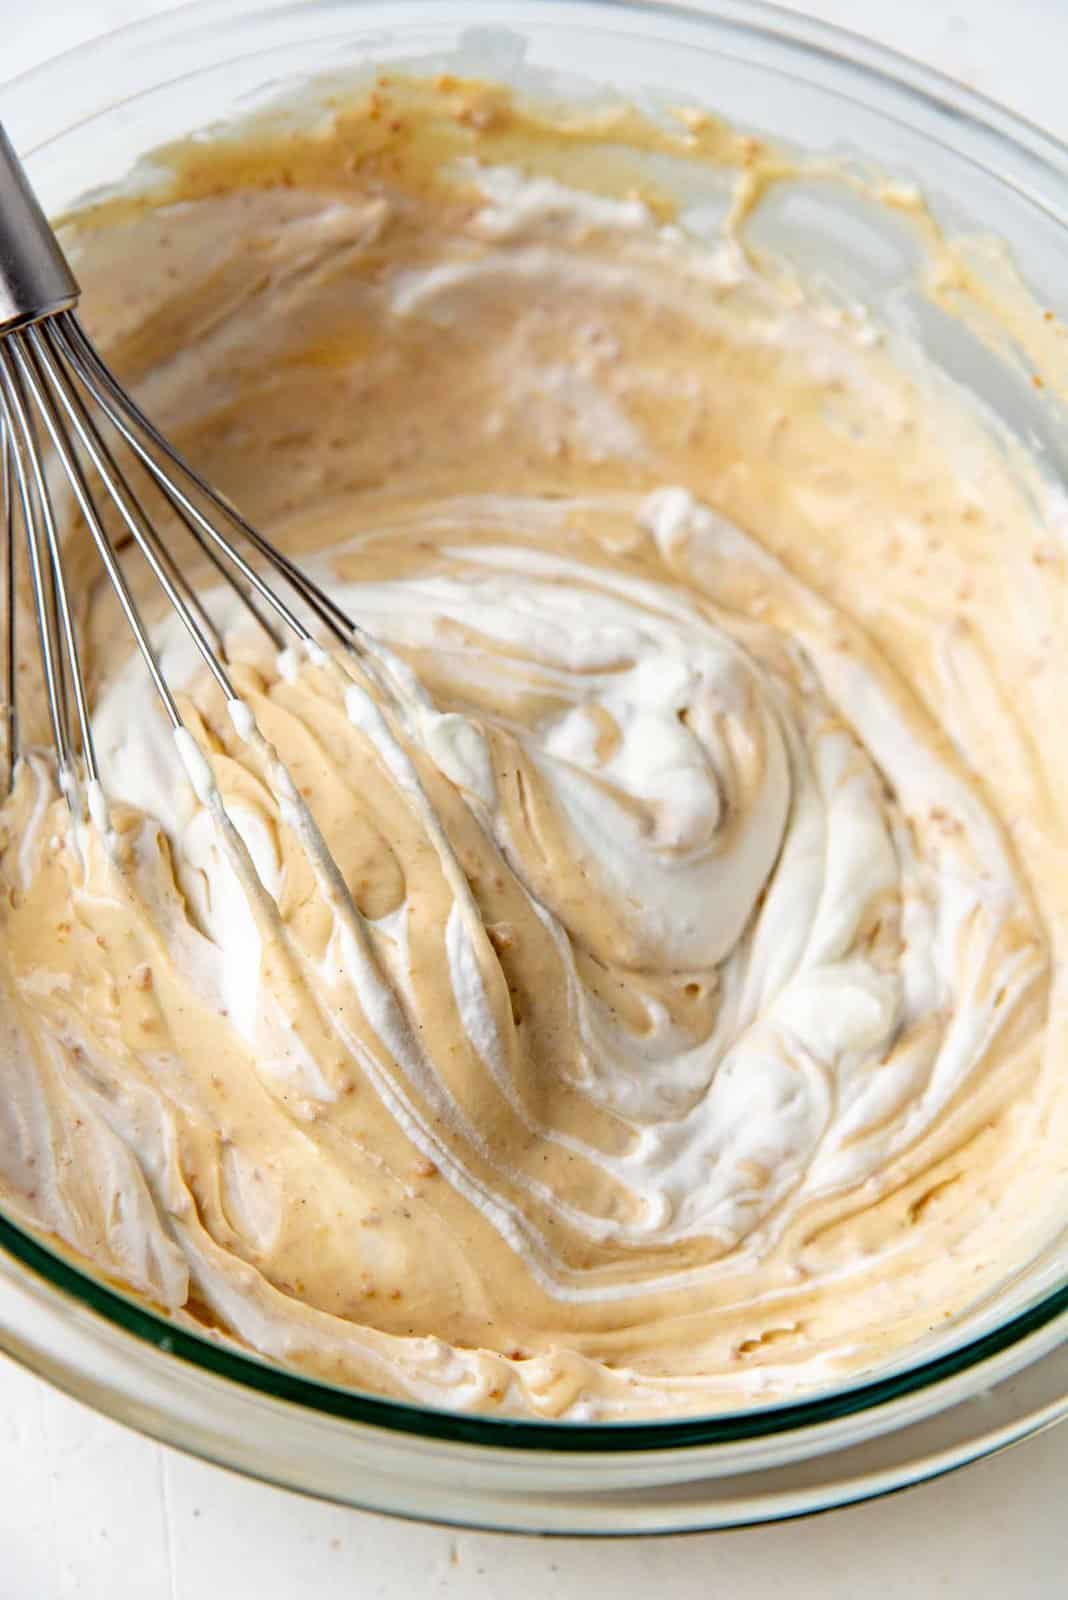
Making the butterscotch mousse
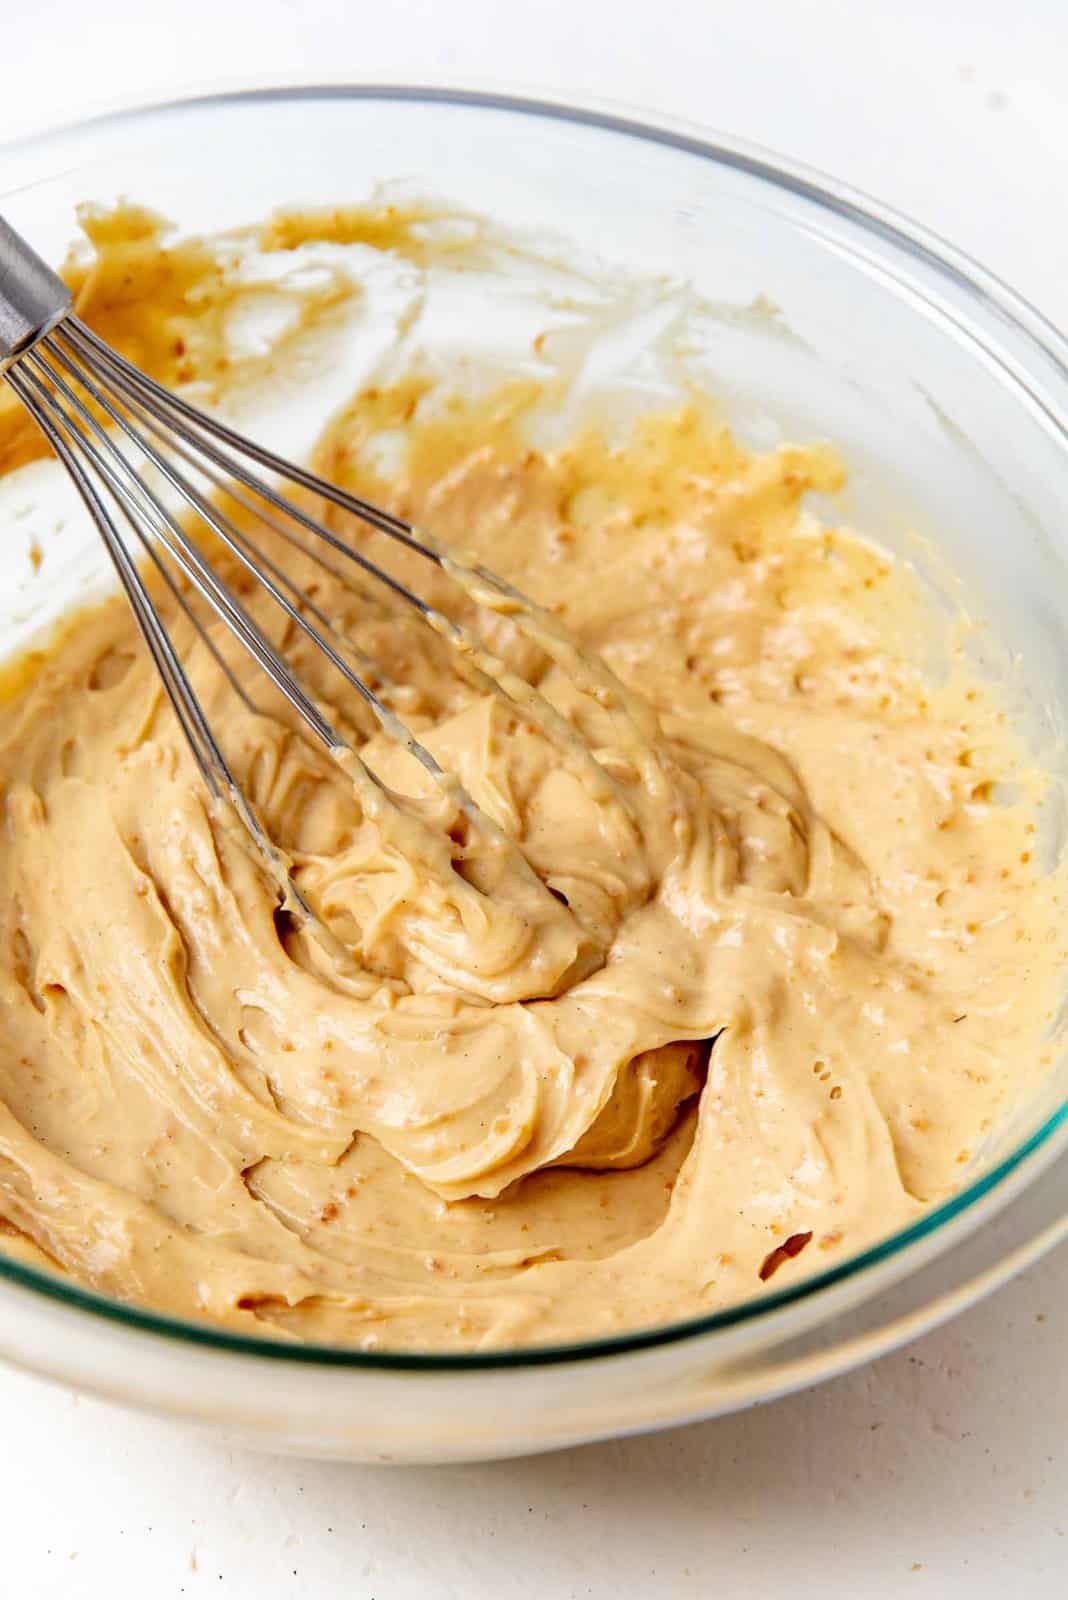
Remove the completely chilled butterscotch pudding / custard from the fridge, and transfer it into a large bowl. The pudding base will be set like a thick jello, so you need to whisk the base to get a thick but creamy and smooth mixture.
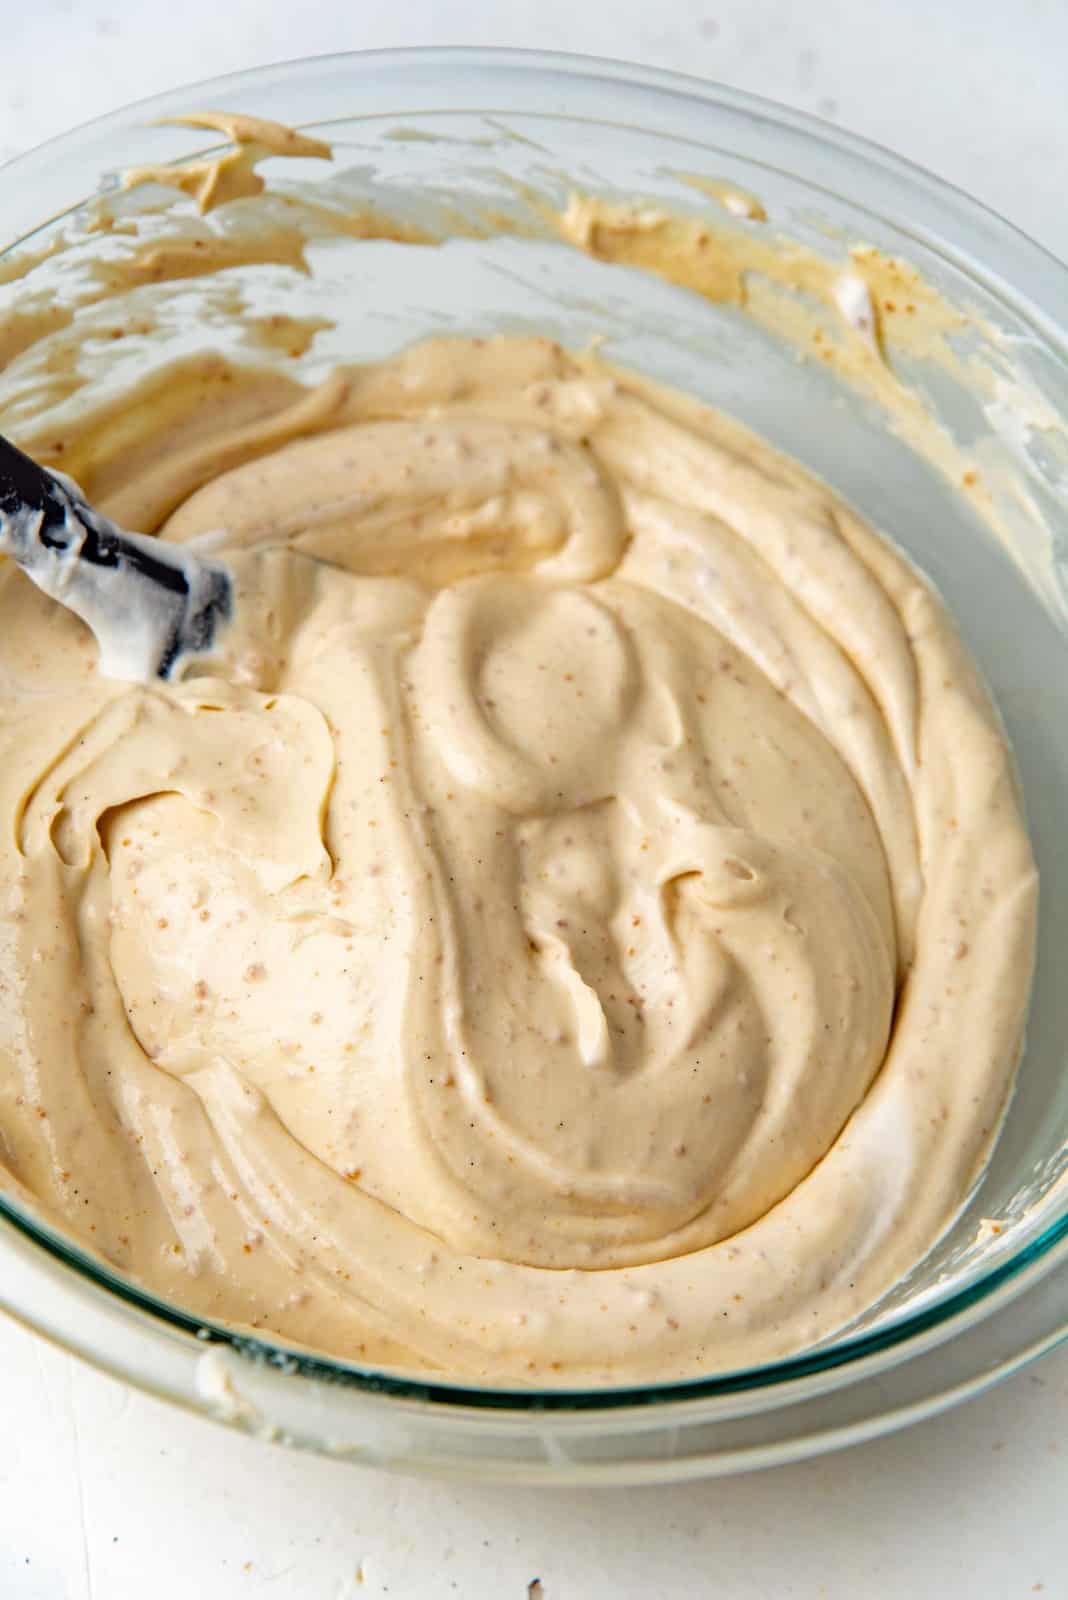
Add about 1/4 of the whipped stabilized cream into the butterscotch pudding base and whisk it in. This will help loosen the base. Add the remaining whipped cream in 2 – 3 additions and gently fold in until mixed through.
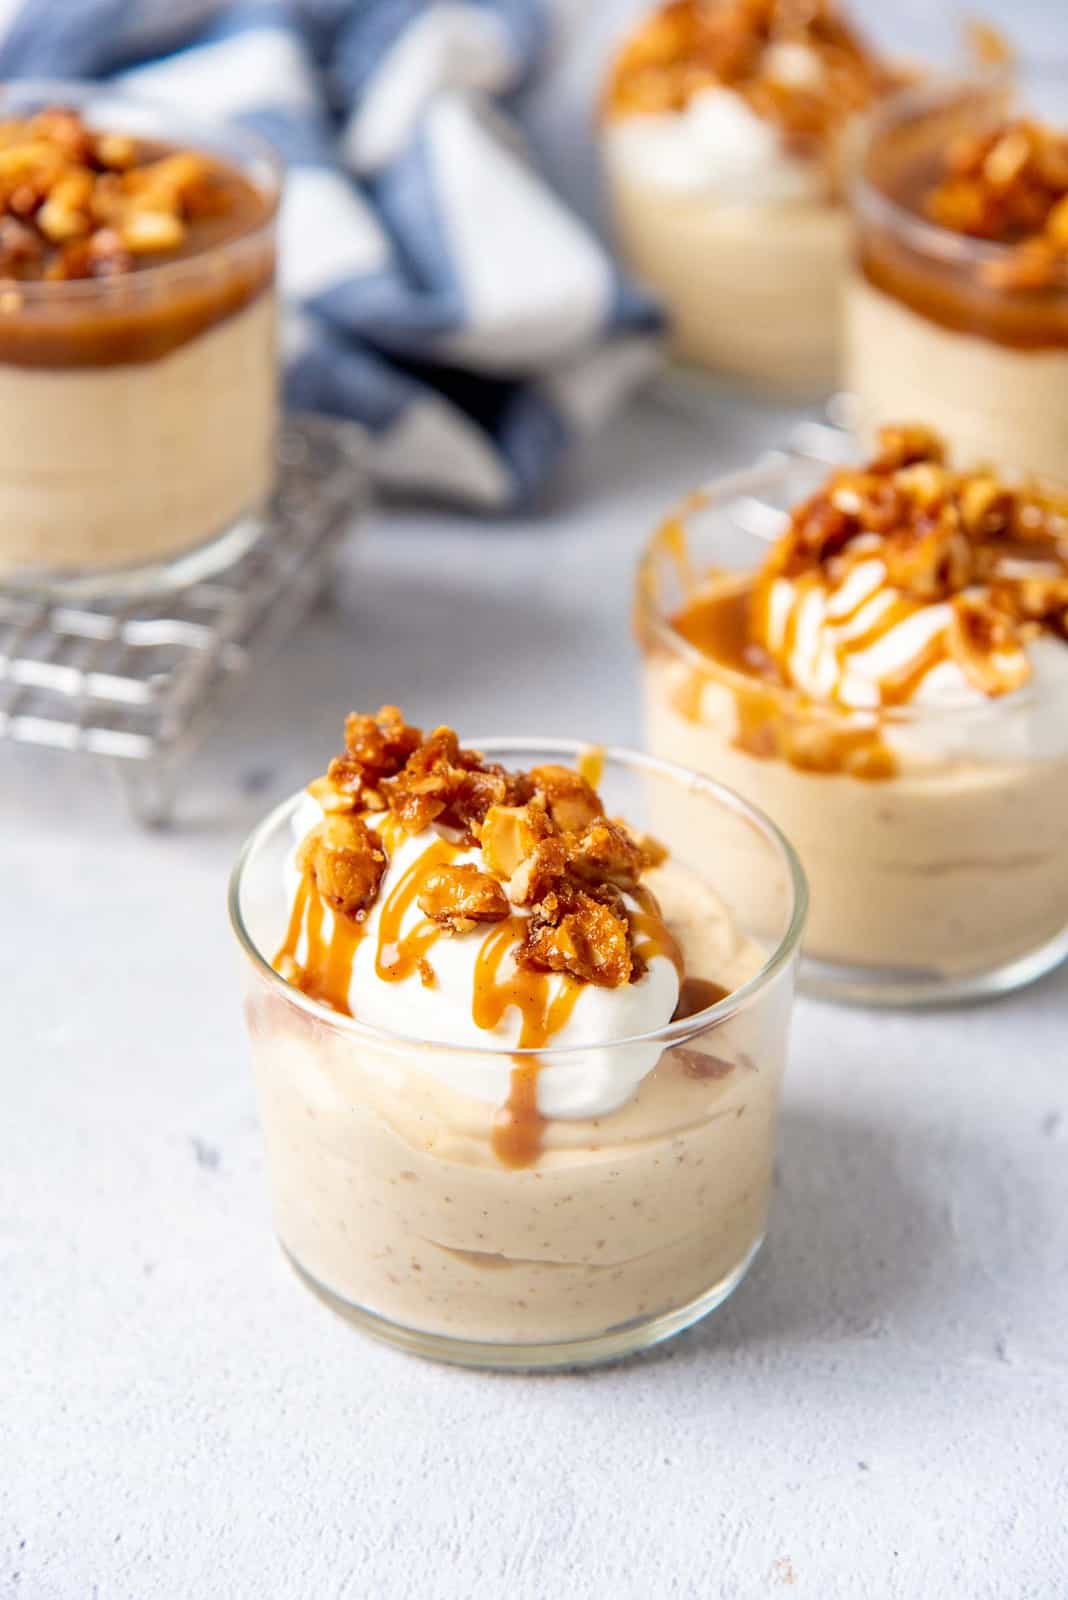
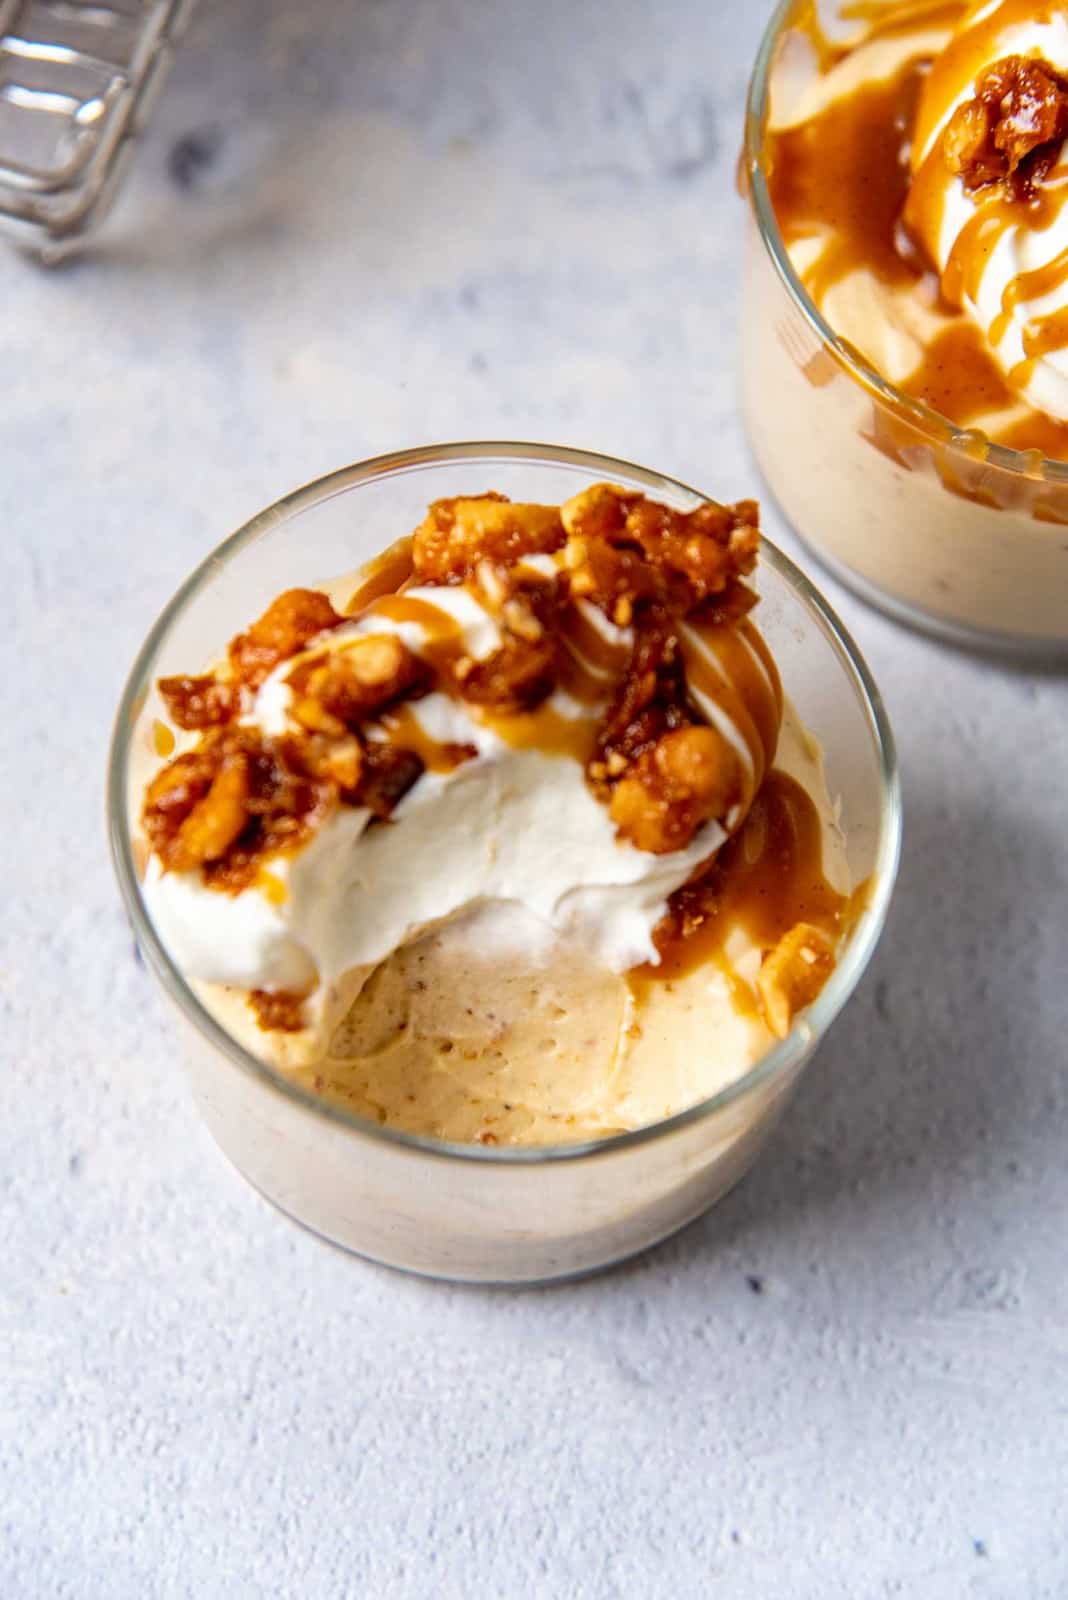
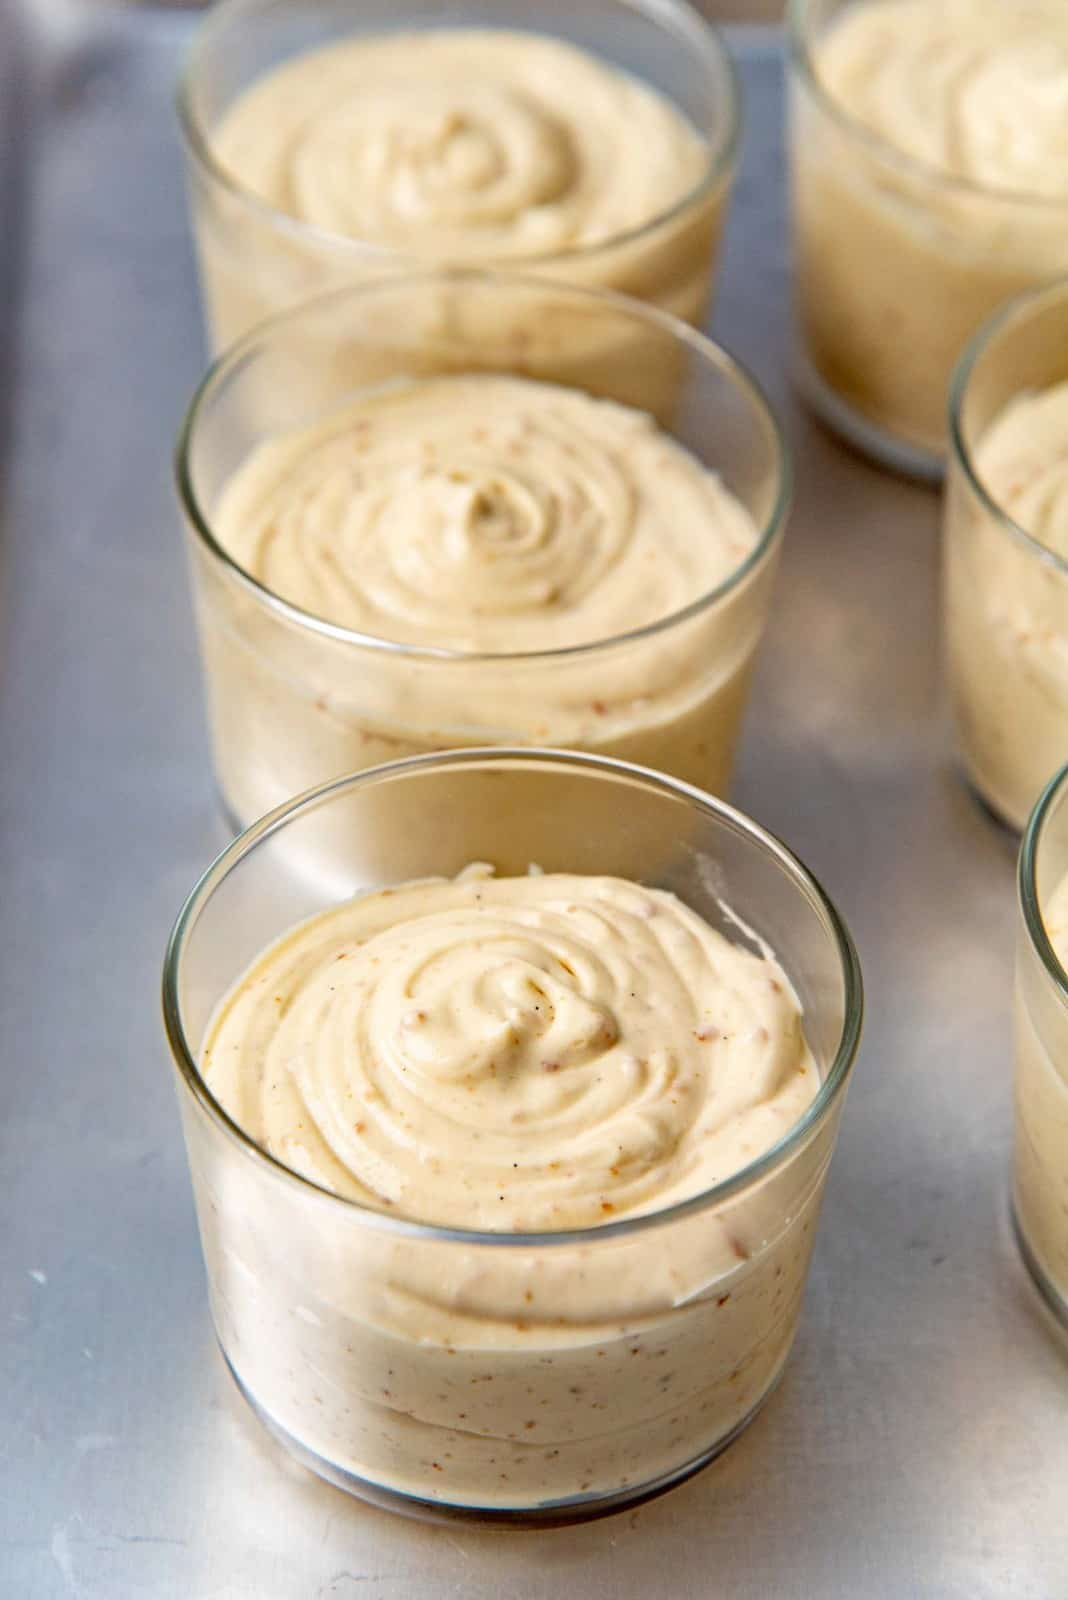
Next, scrape the butterscotch mousse mixture into a large bowl or serving dish, or divide it into individual serving dishes. Cover and let it chill in the fridge for at least a couple of hours (for the smaller dishes), or overnight.
The butterscotch mousse is now ready to be served, once completely chilled.
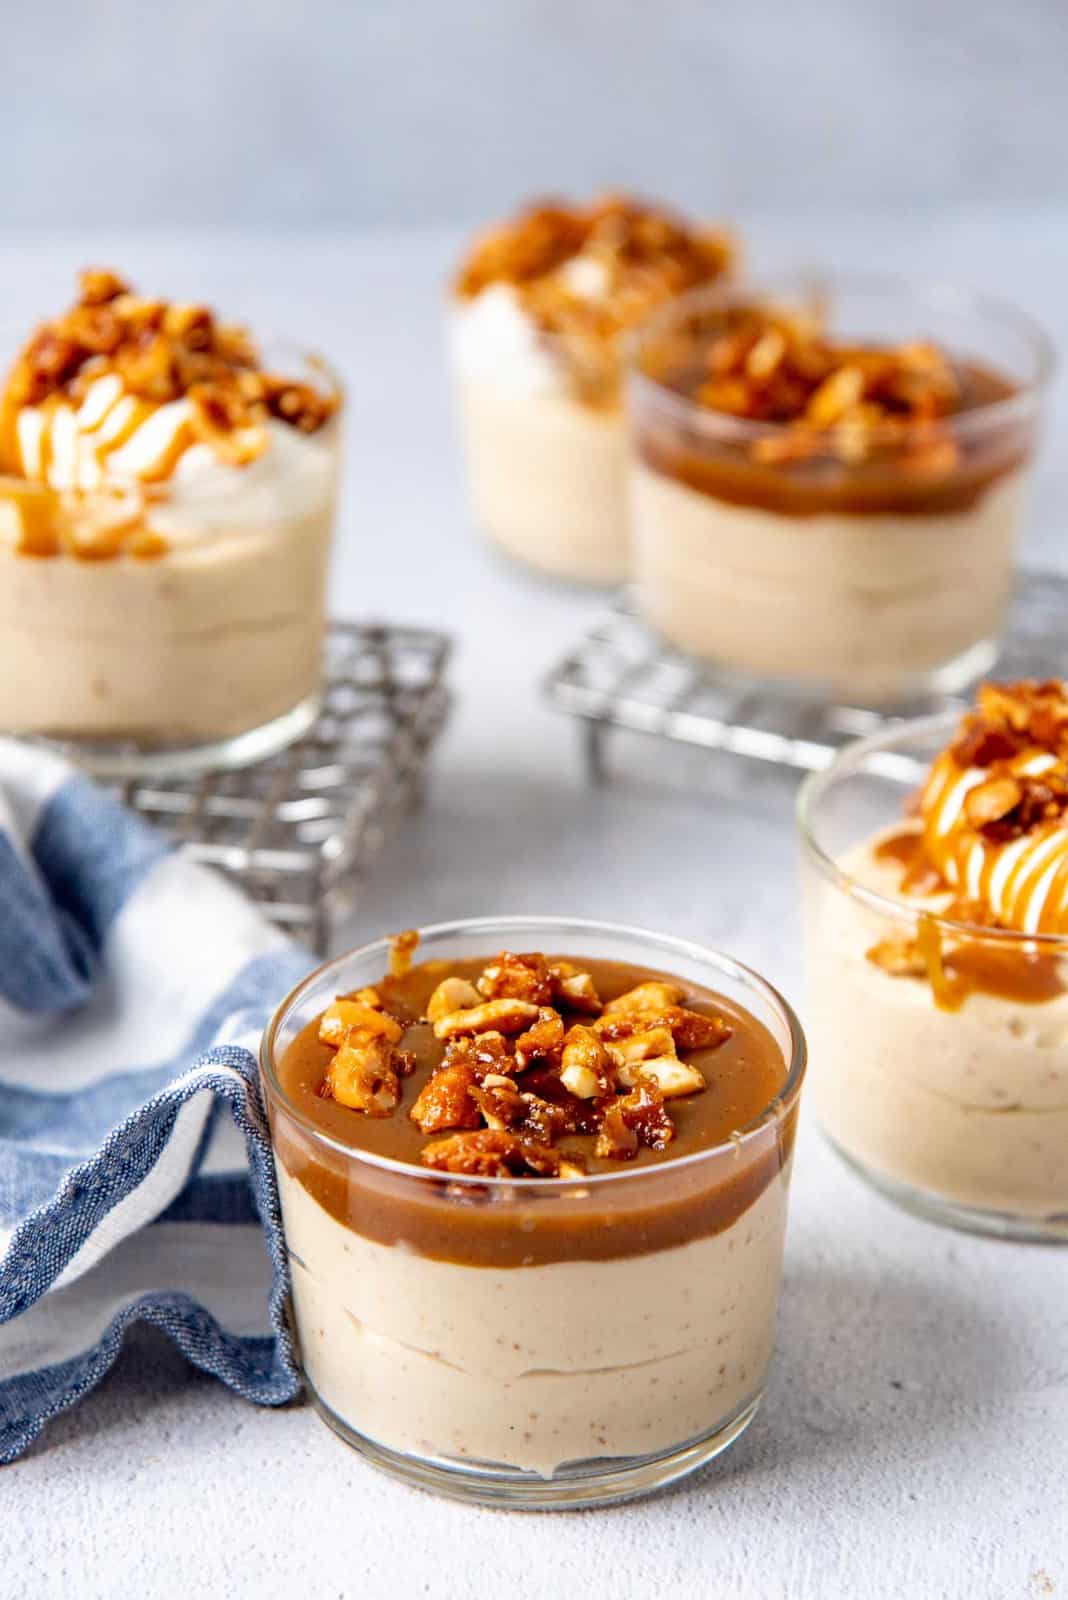
Serving suggestions
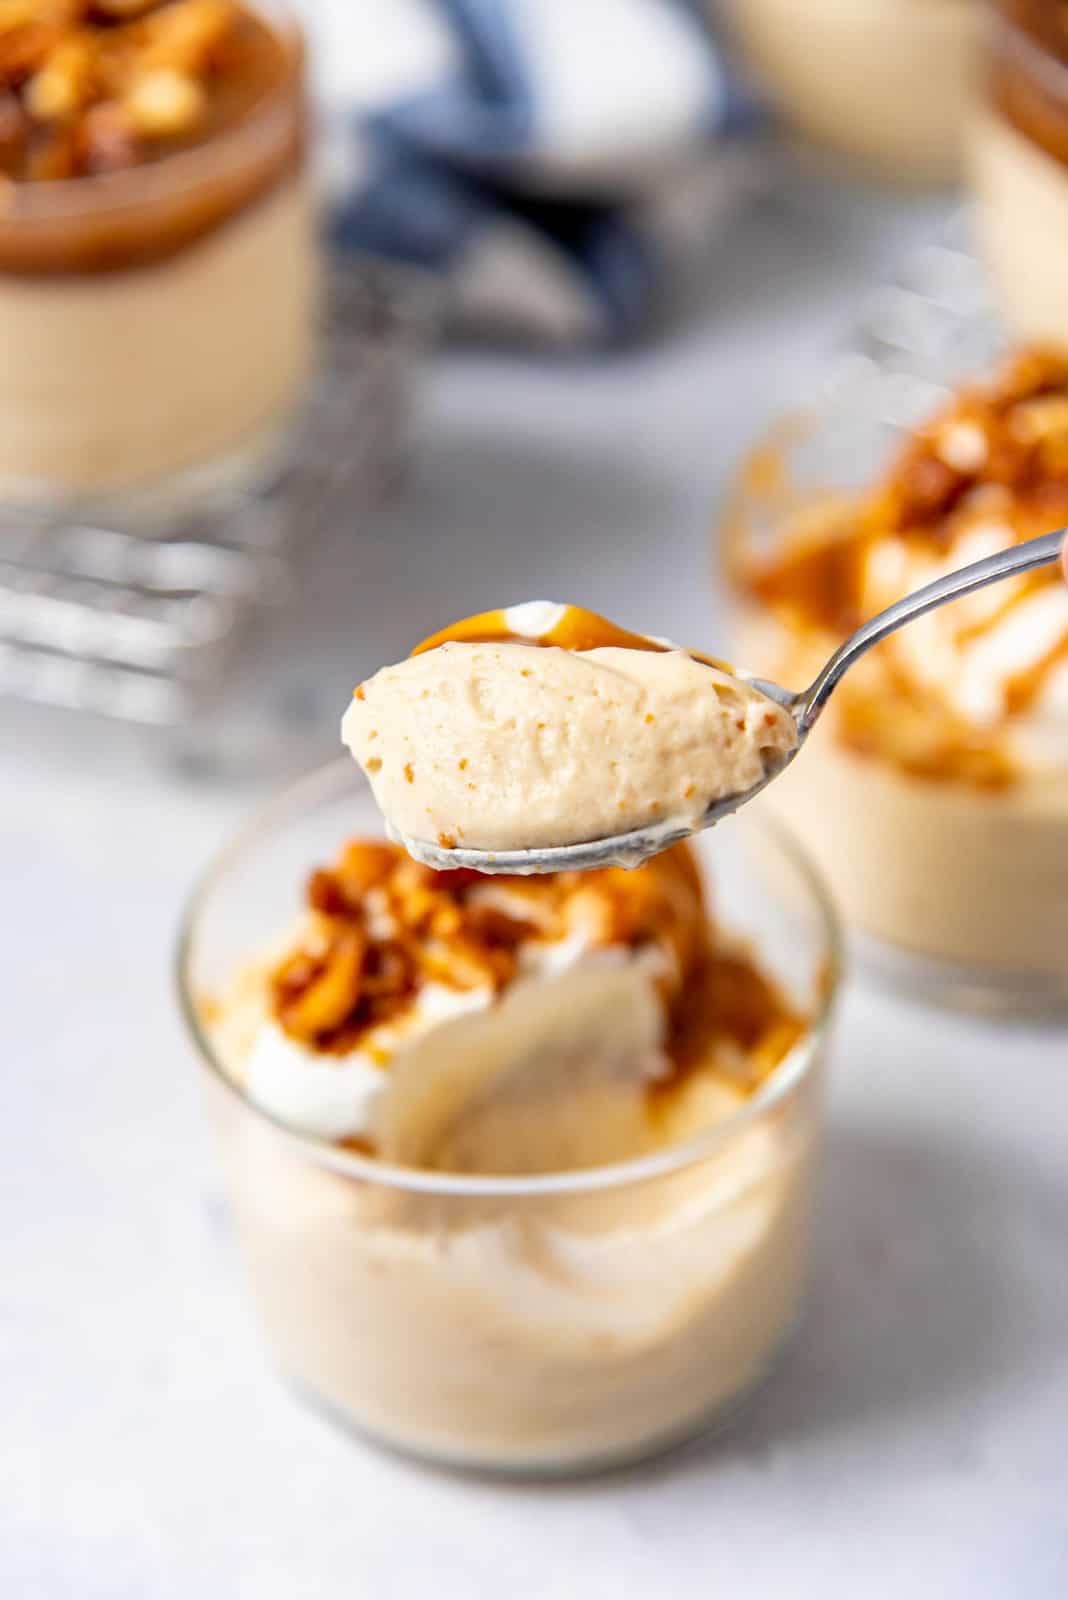
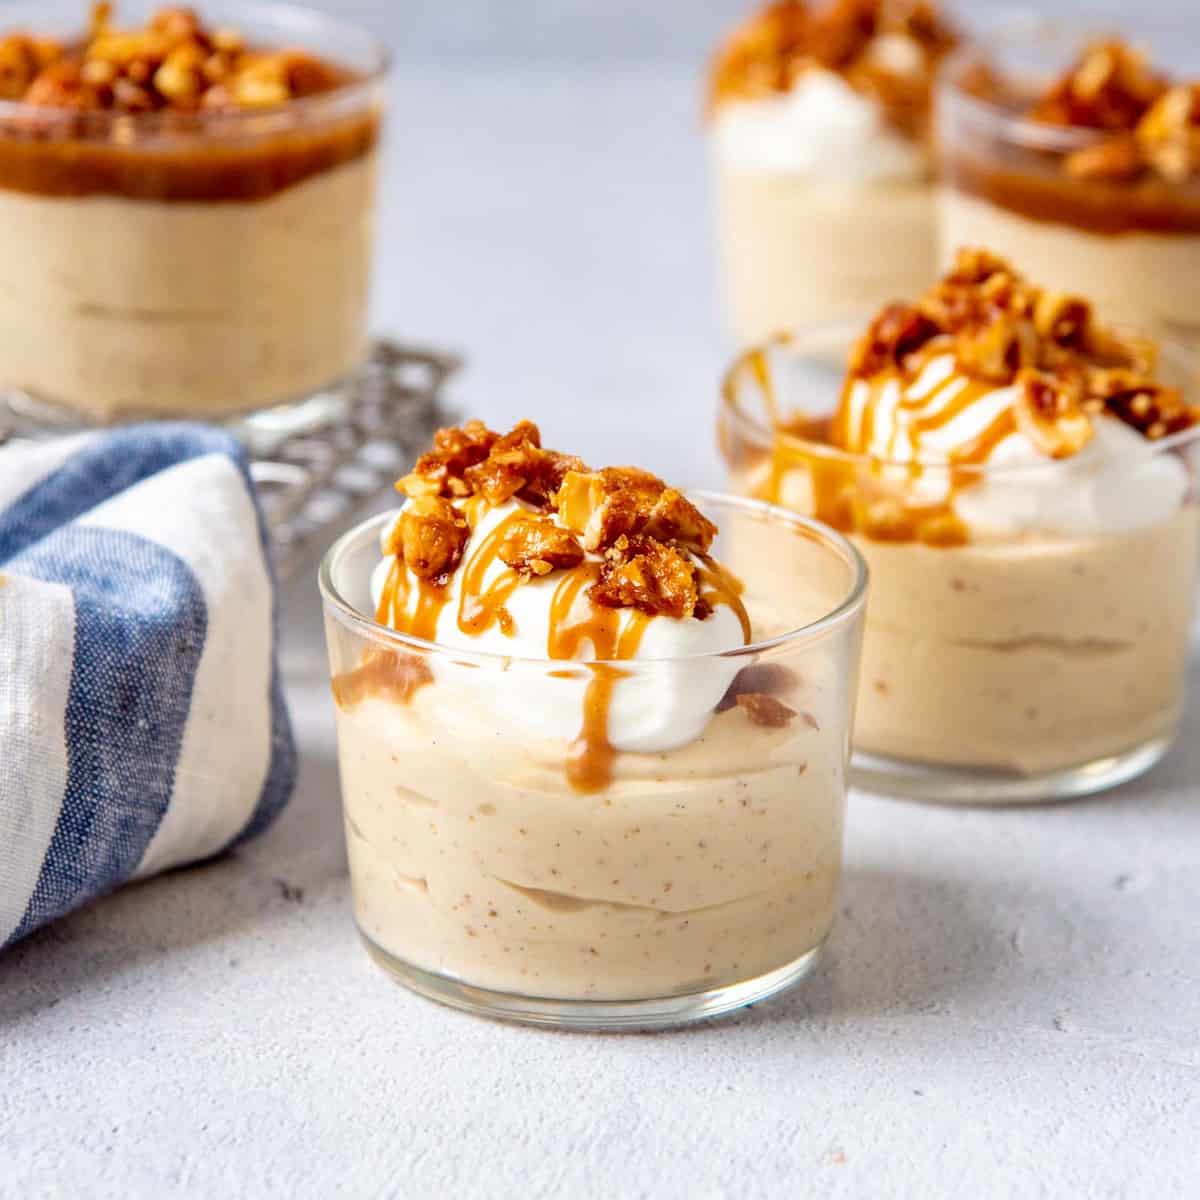
This butterscotch mousse is so decadent, it really doesn’t need anything else. It’s not overly sweet, but it’s ultra creamy. However, you can serve it with some garnishes to make it extra fancy. Such as,
- Drizzle of butterscotch sauce
- Whipped cream on top
- Crunchy chopped praline
- Crushed oreo cookies
- Chocolate fudge sauce (for a butterscotch / chocolate combo)
Why I love this recipe
- Brown butter butterscotch is such an irresistible flavor! But the trick is to get the perfect balance in terms of flavor, sweetness, and consistency. And I can happily say that I nailed it with this butterscotch mousse recipe! At least in my opinion. 😀
- This recipe is not overly sweet. But the good thing is, if you want to make this dessert sweeter, you can simply top it with a drizzle of butterscotch sauce or praline. So it’s very versatile.
- This butterscotch mousse dessert is super simple to make as well. The different components do not take much time to prep at all. If anything, it’s the chilling time that makes me impatient more than anything.
- Even better, this mousse works well as a delicious filling for choux pastry and doughnuts too!
- Plus, mousse is always a fantastic, crowd-favorite, potluck and party dessert. Just like my chocolate mousse recipe and this healthy silken tofu chocolate mousse, this is always perfect for any occasion!

Recipe
Butterscotch Mousse Recipe
US based cup, teaspoon, tablespoon measurements. Weight measurements are recommended for accurate results whenever available.
Common Measurement ConversionsIngredients:
Brown butter
- 72 g unsalted butter cut into smaller pieces
- 2 tbsp dry milk powder optional
Butterscotch custard
- 414 mL full cream milk or 2% milk
- 100 g brown sugar
- ½ tsp sea salt
- 40 g cornstarch
- 15 mL vanilla extract / paste
- 2 large eggs
Stabilized whipped cream
- 240 mL whipping cream 35% fat, chilled
- ¾ tsp gelatin powder
- 23 mL water
- 23 mL whipping cream chilled
To serve
- Whipped cream optional
- Butterscotch sauce optional
Instructions:
Brown butter
- Cut the butter into smaller pieces, and place it in a saucepan.72 g unsalted butter
- Heat over medium heat (or medium high heat) to melt the butter.
- When the butter melts and starts to foam, add the dry milk powder and stir it in well.2 tbsp dry milk powder
- Continue to heat the butter, while stirring frequently to prevent the milk solids from sticking to the bottom of the pan. The milk solids will first separate and float to the top, and then sink to the bottom (along with the milk powder).
- Once the milk solids separate and sink to the bottom, they will turn color as they caramelize.
- Keep an eye on the milk solids as they go from white, to yellow, to golden brown and then amber, in color.
- Remove the pan from the heat as soon as the milk solids turn light amber in color, and then pour it into a bowl. The butter will continue to cook a little further from the residual heat. Set aside until needed.
Butterscotch custard
- Place the milk, and salt in a saucepan. Heat over medium heat while stirring occasionally to melt the sugar.414 mL full cream milk, ½ tsp sea salt
- Place the eggs, brown sugar, cornstarch, and vanilla in a separate bowl or heat-proof jug, and whisk until you get a smooth mixture that is free of lumps. Place the jug on a non-slip surface (non-slip mat or a damp towel).100 g brown sugar, 40 g cornstarch, 15 mL vanilla extract / paste, 2 large eggs
- Heat the milk until steaming hot (almost simmering).
- Add some of the hot milk in a thin stream into the whisked egg mixture. Make sure to constantly whisk until enough milk is added to warm the egg mixture. The non-slip surface should help keep the bowl in place.
- Add the warm egg mixture back into the saucepan with the leftover hot milk mixture, and stir to combine.
- Heat over medium heat while stirring occasionally until the mixture starts to thicken. Keep heating and whisking / stirring until the custard starts to boil (i.e. large bubbles reaching the surface in-between stirring).
- When the custard is boiling, lower the heat and continue to cook the custard for 1 – 2 more minutes, while stirring constantly.
- Remove the saucepan from the heat, and add the brown butter (or regular butter if you're not using brown butter).
- Stir it in with a whisk until the butter is emulsified in the custard.
- Scrape the custard into a bowl or dish and spread it evenly. The shallower the dish, the larger the surface area, which will help the custard cool down faster. Cover the custard with plastic wrap, making sure the plastic wrap is touching the whole surface of the custard (to prevent a skin from forming on top).
- Allow the custard to cool down, and then transfer it to the fridge to chill completely. At least 2 hours (depending on the dish), but I prefer to chill it in the fridge for at least 6 hours.
Stabilized whipped cream
- In a small microwave-safe bowl, place the water, and sprinkle the gelatin over the surface of the water. Make sure all the gelatin is saturated with water, and then let it sit for at least 10 minutes to bloom.¾ tsp gelatin powder, 23 mL water
- In a large bowl, place the heavy cream. Have it ready to be whisked with an electric hand mixer or stand mixer by the time the gelatin is ready.240 mL whipping cream
- After 10 minutes, microwave the gelatin in 10 second intervals to dissolve it. Do NOT let the gelatin mixture boil.
- Stir in the 1 – 1.5 tbsp of cold cream or milk into the hot melted gelatin.23 mL whipping cream
- Start whisking the heavy cream mixture on high speed, and add the gelatin into it. Do NOT add the gelatin directly onto the whisk. Instead, add it where the cream is moving quickly due to whisking action. Alternatively, as soon as you add the gelatin, move the mixer around in the cream to make sure that the gelatin is mixed in well. The idea is to get the gelatin mixed into the cream as fast as possible, without the gelatin mixture directly touching the whisk when added.
- Once the gelatin is mixed in, lower the mixer speed to medium (or medium high), and whisk the heavy cream until you have stiff peaks. Keep a close eye on it since the cream can go from stiff peaks to broken in a matter of seconds. For this reason I prefer to whisk the cream on a lower speed.
- The stabilized whipped cream is ready and should be used immediately.
Butterscotch mousse
- Transfer the chilled custard into a large bowl. Whisk until smooth and creamy and lump free (the chilled custard will have set in the fridge).
- Add about a ¼ of the stabilized whipped cream and whisk it into the custard. This will loosen up the custard making it easy to fold in the rest of the whipped cream.
- Add the rest of the whipped cream in 2 – 3 additions, and gently fold in each addition until it’s evenly mixed in the custard.
- Place the mousse in a large serving dish, or individual serving dishes (about 6 – 7 half cup servings), and then let it set in the fridge for at least 2 hours (for individual servings) or overnight (for a large serving dish).
- Serve with whipped cream and/or butterscotch or salted caramel sauce or chocolate fudge sauce.Whipped cream, Butterscotch sauce
Recipe Notes
Note on brown butter
You can skip the step of making brown butter, and add regular butter at the end without cooking it first. In this case, you can either leave out the dry milk powder, or add it to the milk and sugar mix when making the custard.Nutrition Information:
“This website provides approximate nutrition information for convenience and as a courtesy only. Nutrition data is gathered primarily from the USDA Food Composition Database, whenever available, or otherwise other online calculators.”


Leave a Reply