


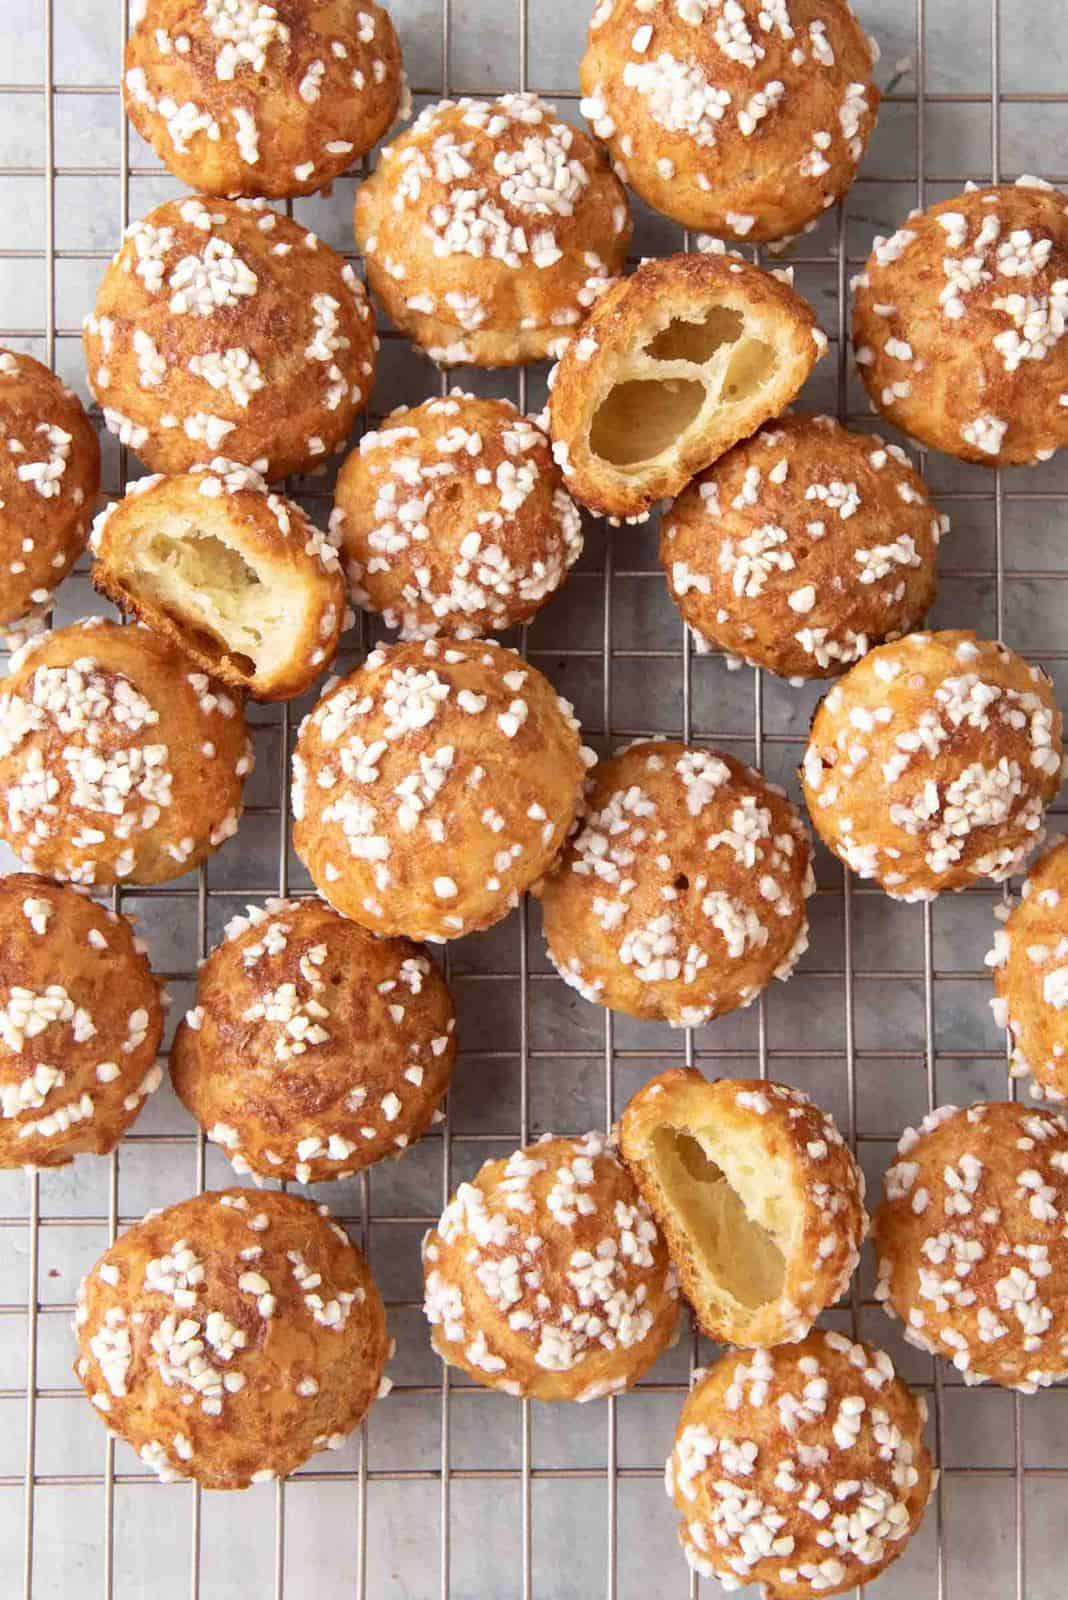
Chouquettes are little morsels of delight. These French pastries are round, airy choux pastry, with custard-like insides, and a sweet, crunchy pearl sugar topping on the outside. Elegantly simple and delicious.
Chouquettes are fast and easy to make, and addictively delicious!
Let’s start with the important question.
What are chouquettes?
These are little choux pastry puffs that are baked with Swedish pearl sugar on top.
The pearl sugar is generously sprinkled on top before the pastry is baked.
The result is a puffy, light choux pastry, with an addictively crunchy sweetness on the outside.
Fair warning though, it is SO easy to gobble these babies up one after another. You’ll need a heavy dose of self-restraint to stop from turning into a chouquette yourself.
How to make chouquettes
There are only two components to this sweet, simple snack.
Choux pastry
I adore making choux pastry! I could make it with my eyes closed. OK, maybe not quite, but I’ve made it hundreds upon hundreds of times over many years, it’s pretty much muscle memory for me by now.
Choux pastry is a very simple dough, and the fact that these chouquettes don’t even need a filling means that these babies can enter my gullet after being baked that much sooner.
I have a separate post on all the basics of choux pastry, with plenty of troubleshooting tips. You can use that recipe and guide to get perfect results for your choux pastry too.
Here’s just a quick run down of the choux pastry recipe
Melt the butter and milk in a saucepan, along with a pinch of salt and sugar. Bring the mixture to a boil.
Add the flour (off heat), and stir to form a dough. You will need to cook it for a few minutes to get the right consistency.
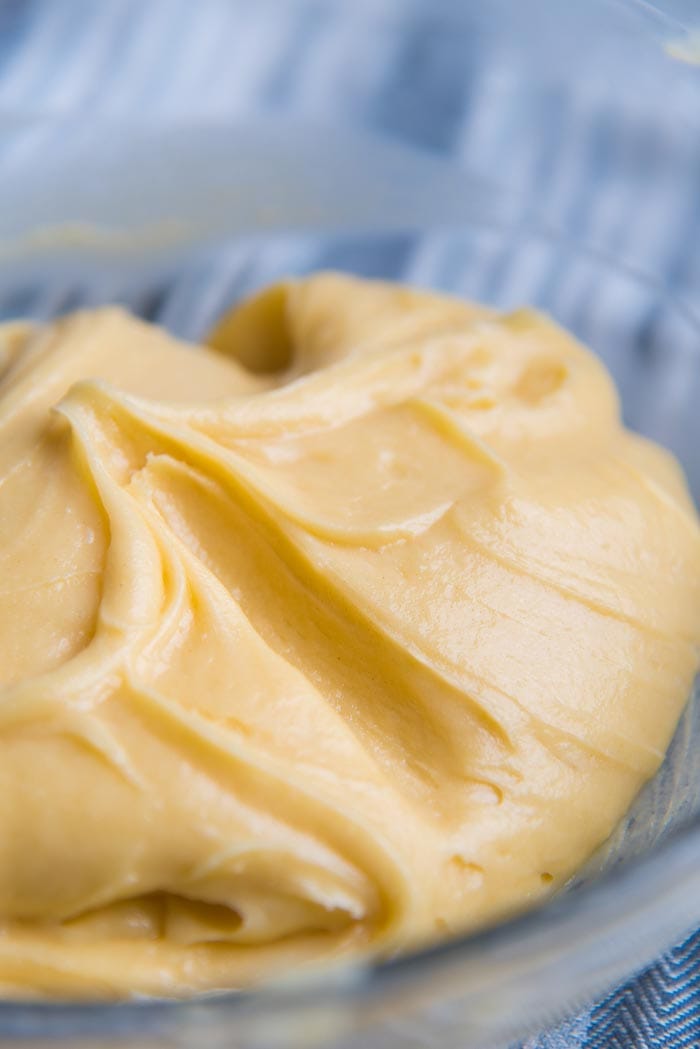
Let it cool and then add the eggs (a little, or one egg at a time), just until you get the correct, pipeable consistency.
Store any unused pastry dough in a piping bag, or ziploc bag to prevent the dough from being exposed to air and forming a skin. You can also store the dough in an air-tight container, as long as you place a plastic wrap over it, touching the surface.
It’s very easy to make choux pastry, if you know what to look for at each step. If you’re new to making choux, I highly recommend reading my in-depth post on how to make choux pastry.
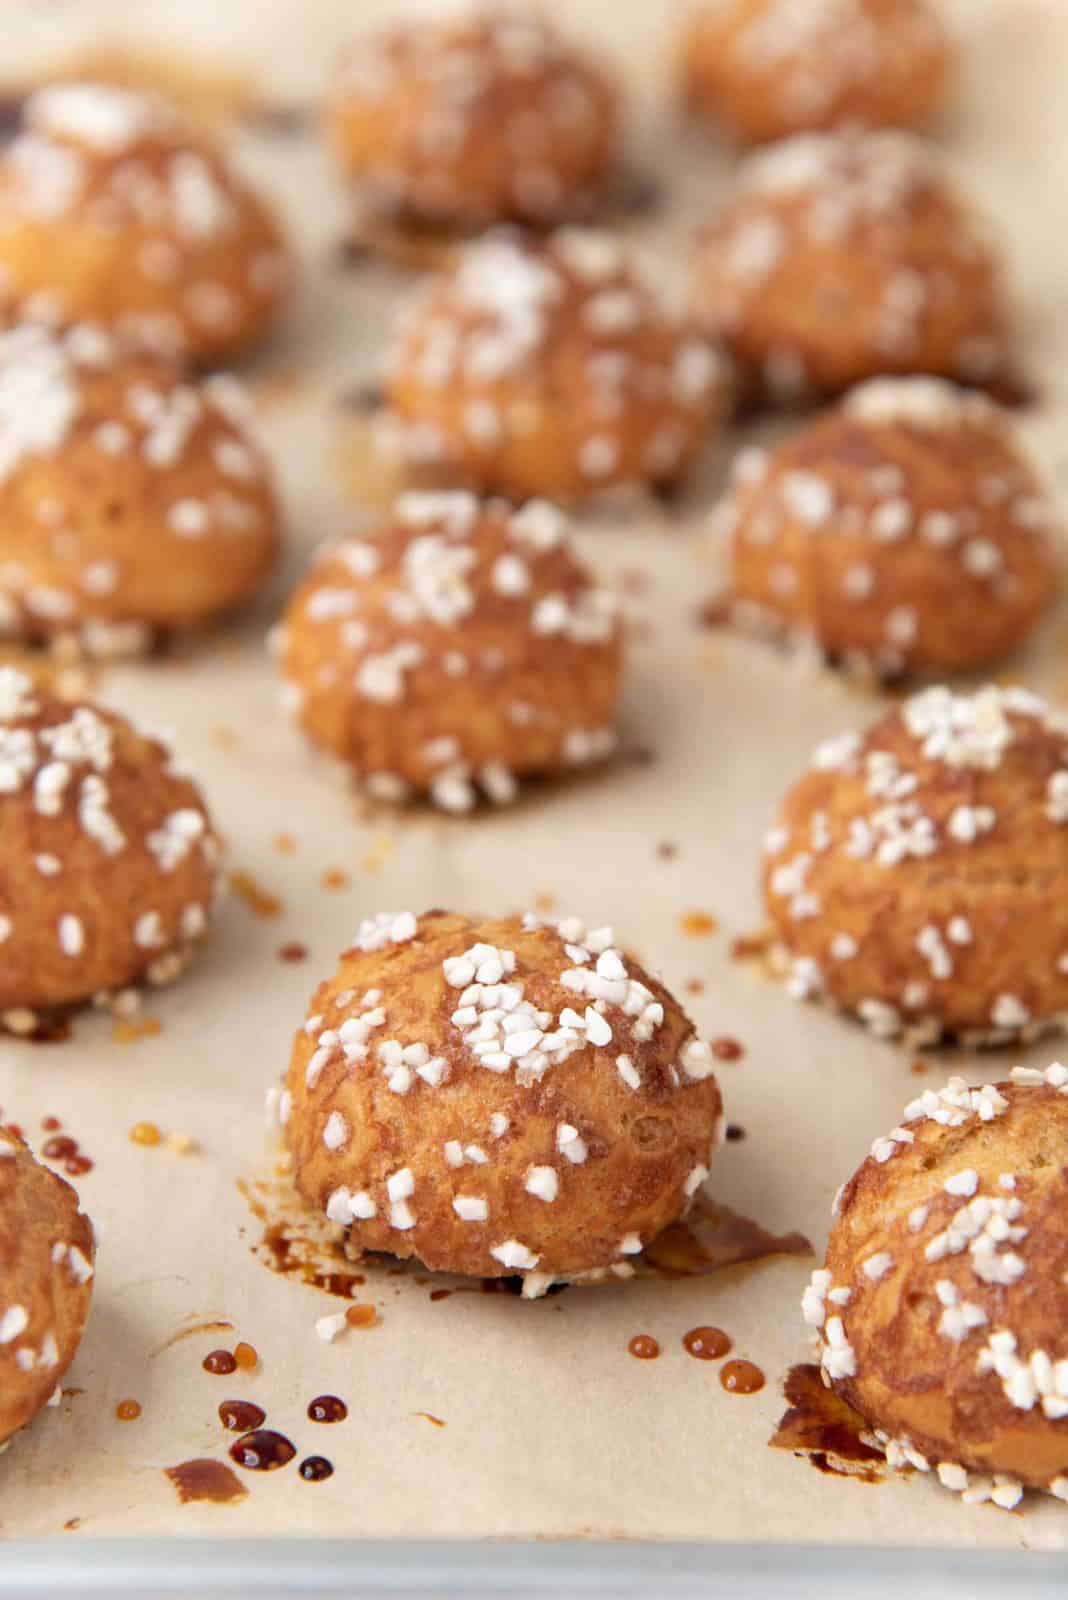
Make sure to line a baking sheet with parchment paper or a silicone mat. The sugar pearls that are on the tray will melt and caramelize, so a lined pan is easier to clean.
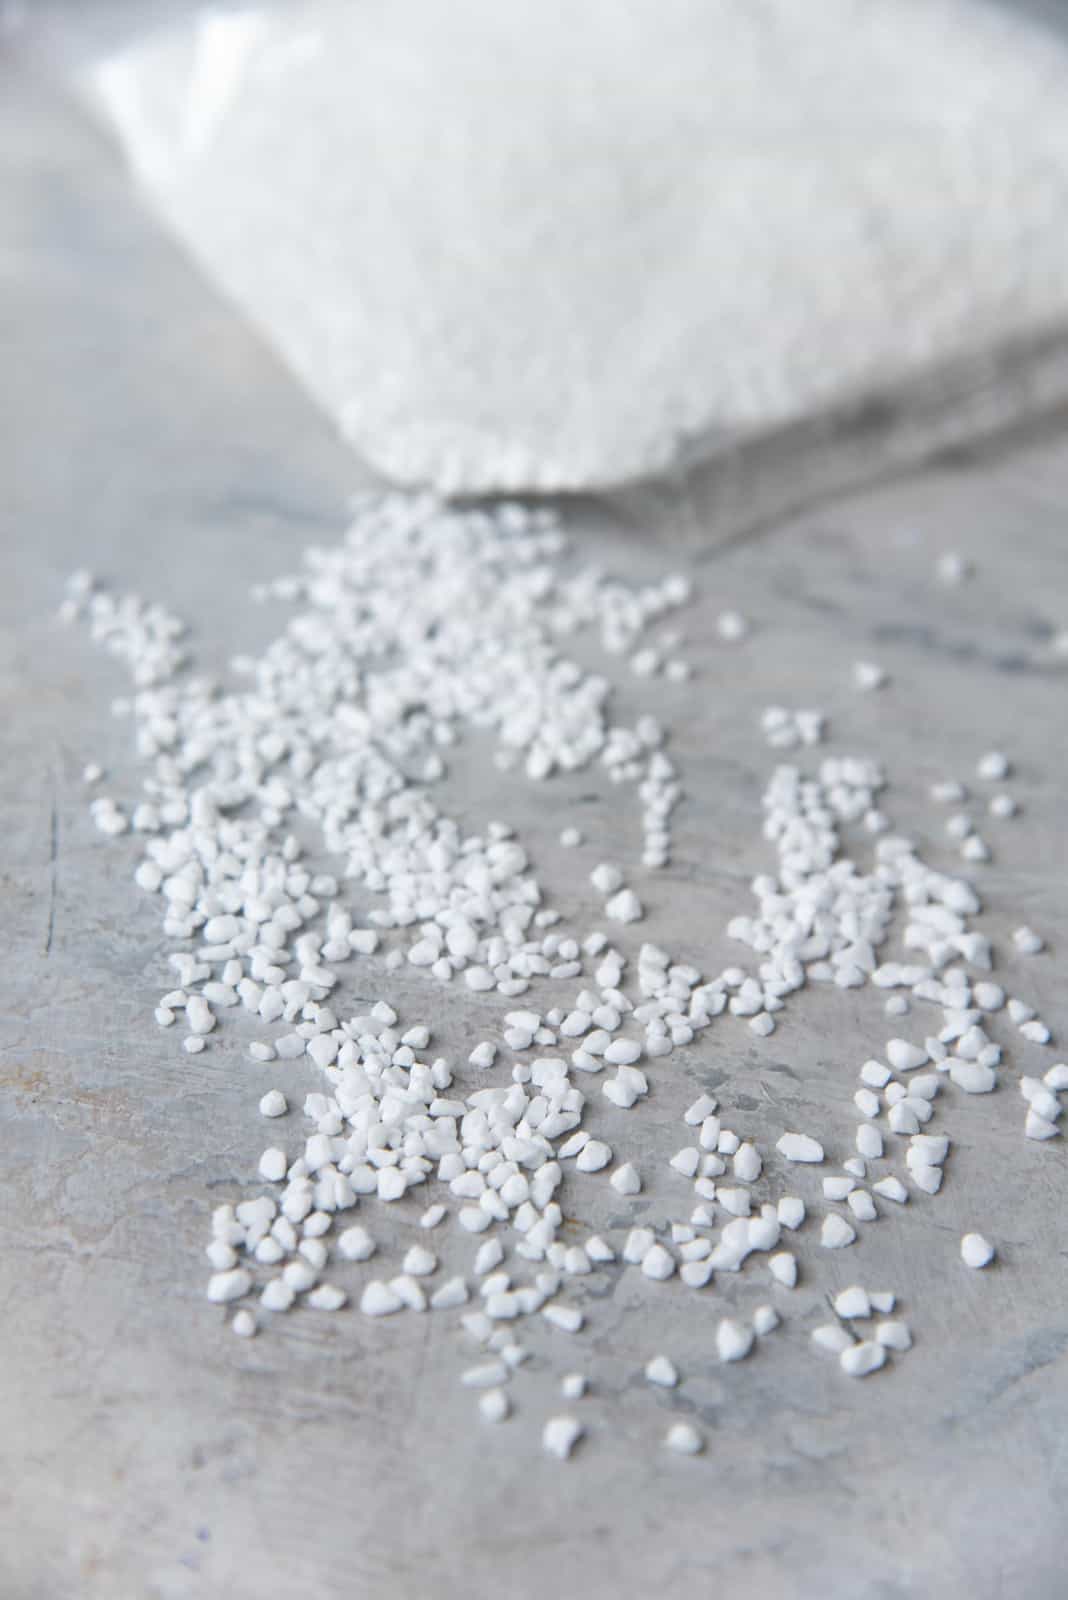
Swedish pearl sugar
Pearl sugar is compressed sugar crystals, formed into large pieces. The large, round-ish particles don’t melt inside baked goods, and retain a nice crunch.
Pearl sugar usually comes in two sizes.
- Swedish pearl sugar – smaller compressed sugar particles.
- Belgian pearl sugar – larger compressed sugar particles.
For chouquettes, the smaller pearl sugar (Swedish pearl sugar) is used, because the chouquettes are small themselves. You can have more of the smaller pearl sugar covering a surface area (compared to the larger ones), resulting in a more crunchy texture in the final baked product.
Belgian pearl sugar is used for Belgian waffles. These larger sugar pearls have a bigger crunch, and hide well in larger “baked” goods; like the thick liege waffle.
Baking chouquettes
If you’ve made profiteroles before, then these will be eeeaaasy.
I prefer to make chouquettes slightly smaller than the profiteroles that I usually make. So that these will be bite-sized desserts that can easily be popped in to your mouth. They will also bake faster.
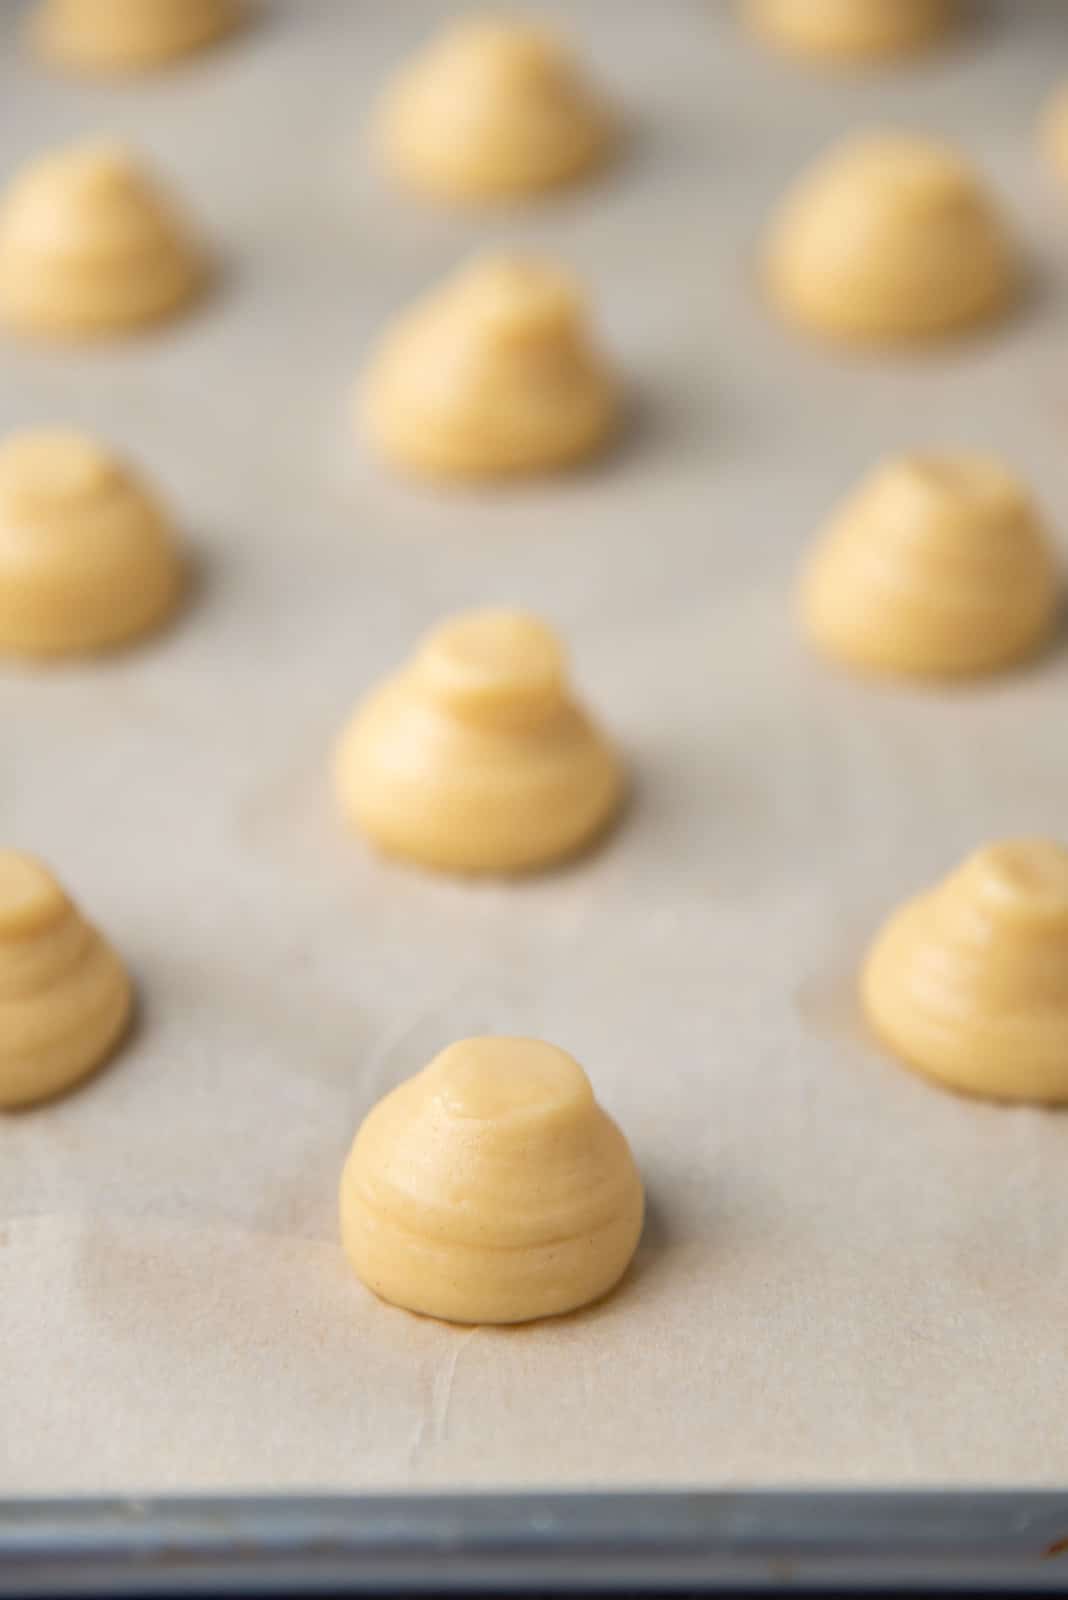
Once you’ve piped the choux pastry on a tray, keep the remaining choux pastry in the piping bag.
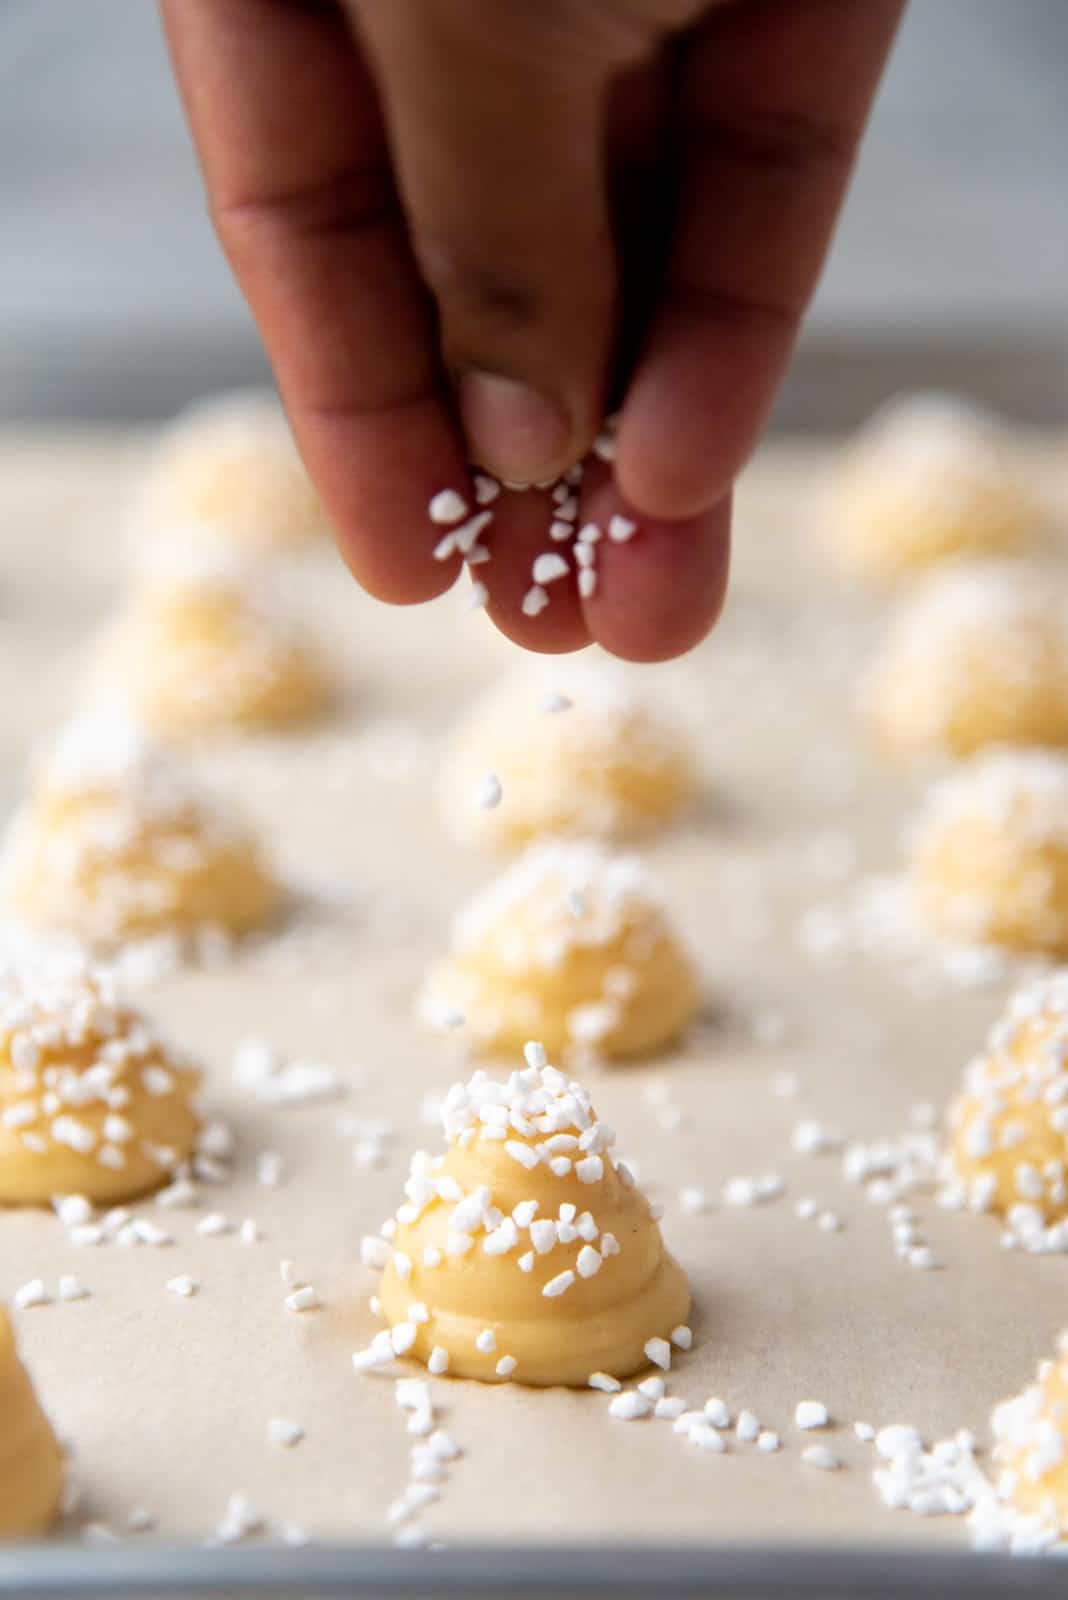
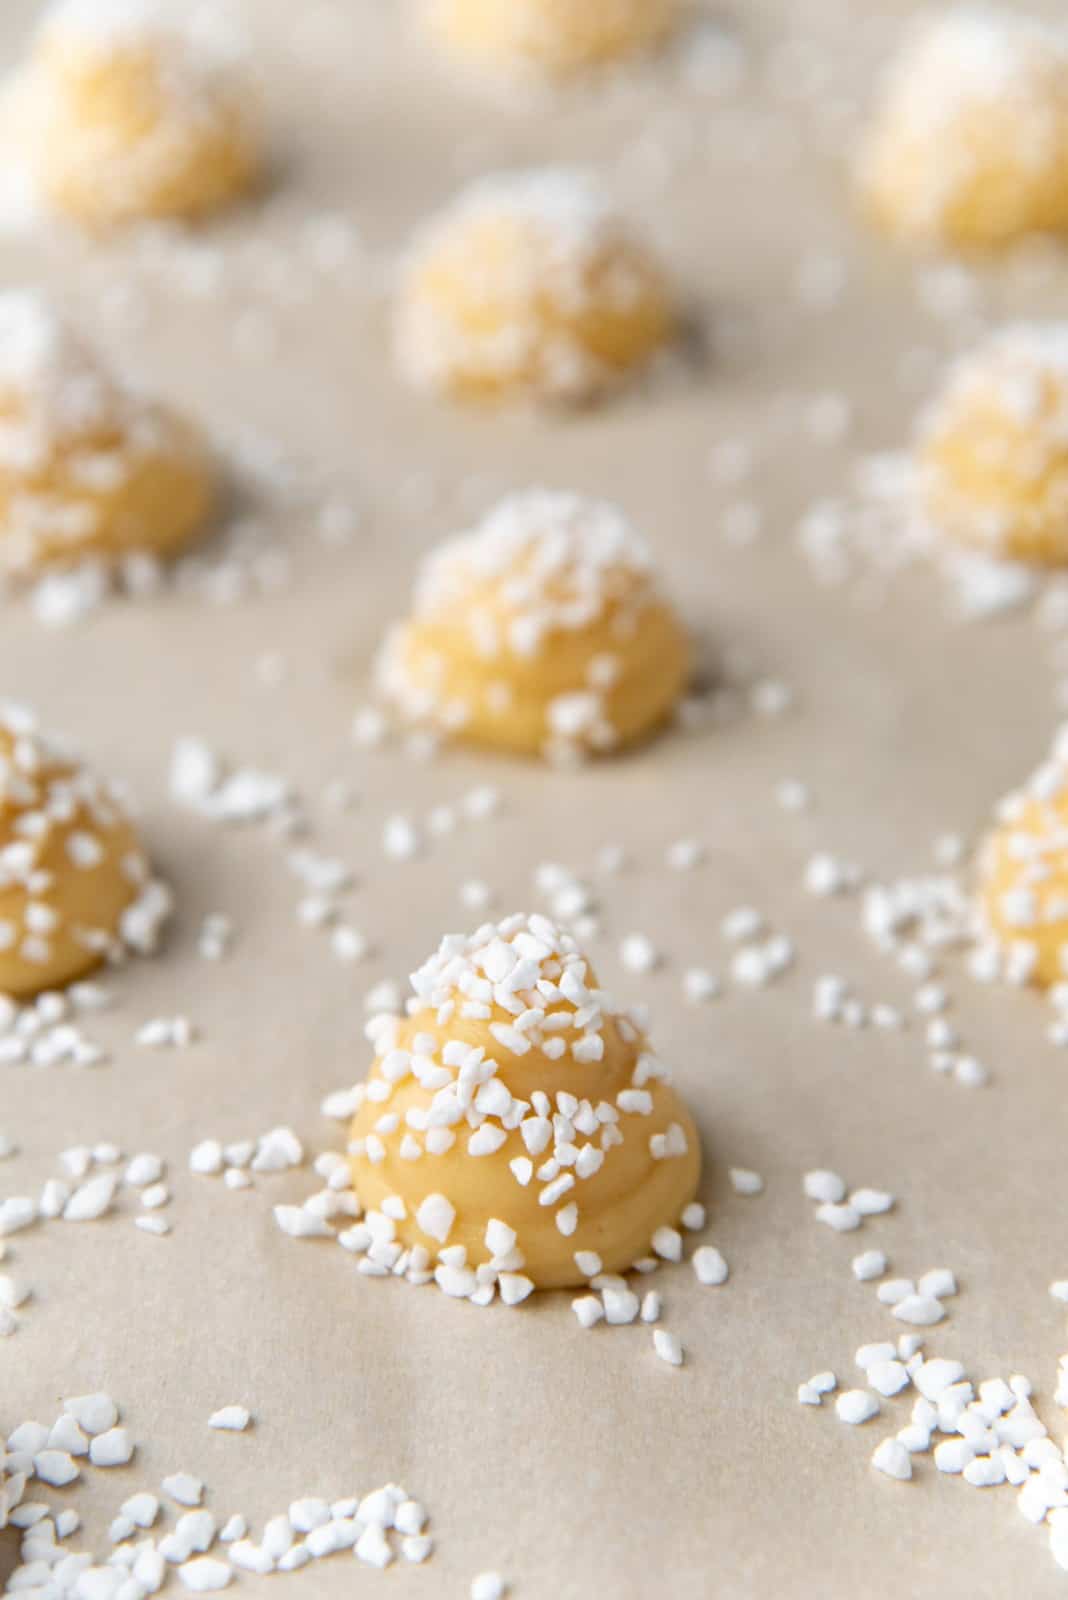
Generously sprinkle the tops of the choux pastry with Swedish sugar pearls. It’s important that they’re sprinkled with pearl sugar densely, because as the pastry bakes and expands, the sugar pearls will spread out as well.
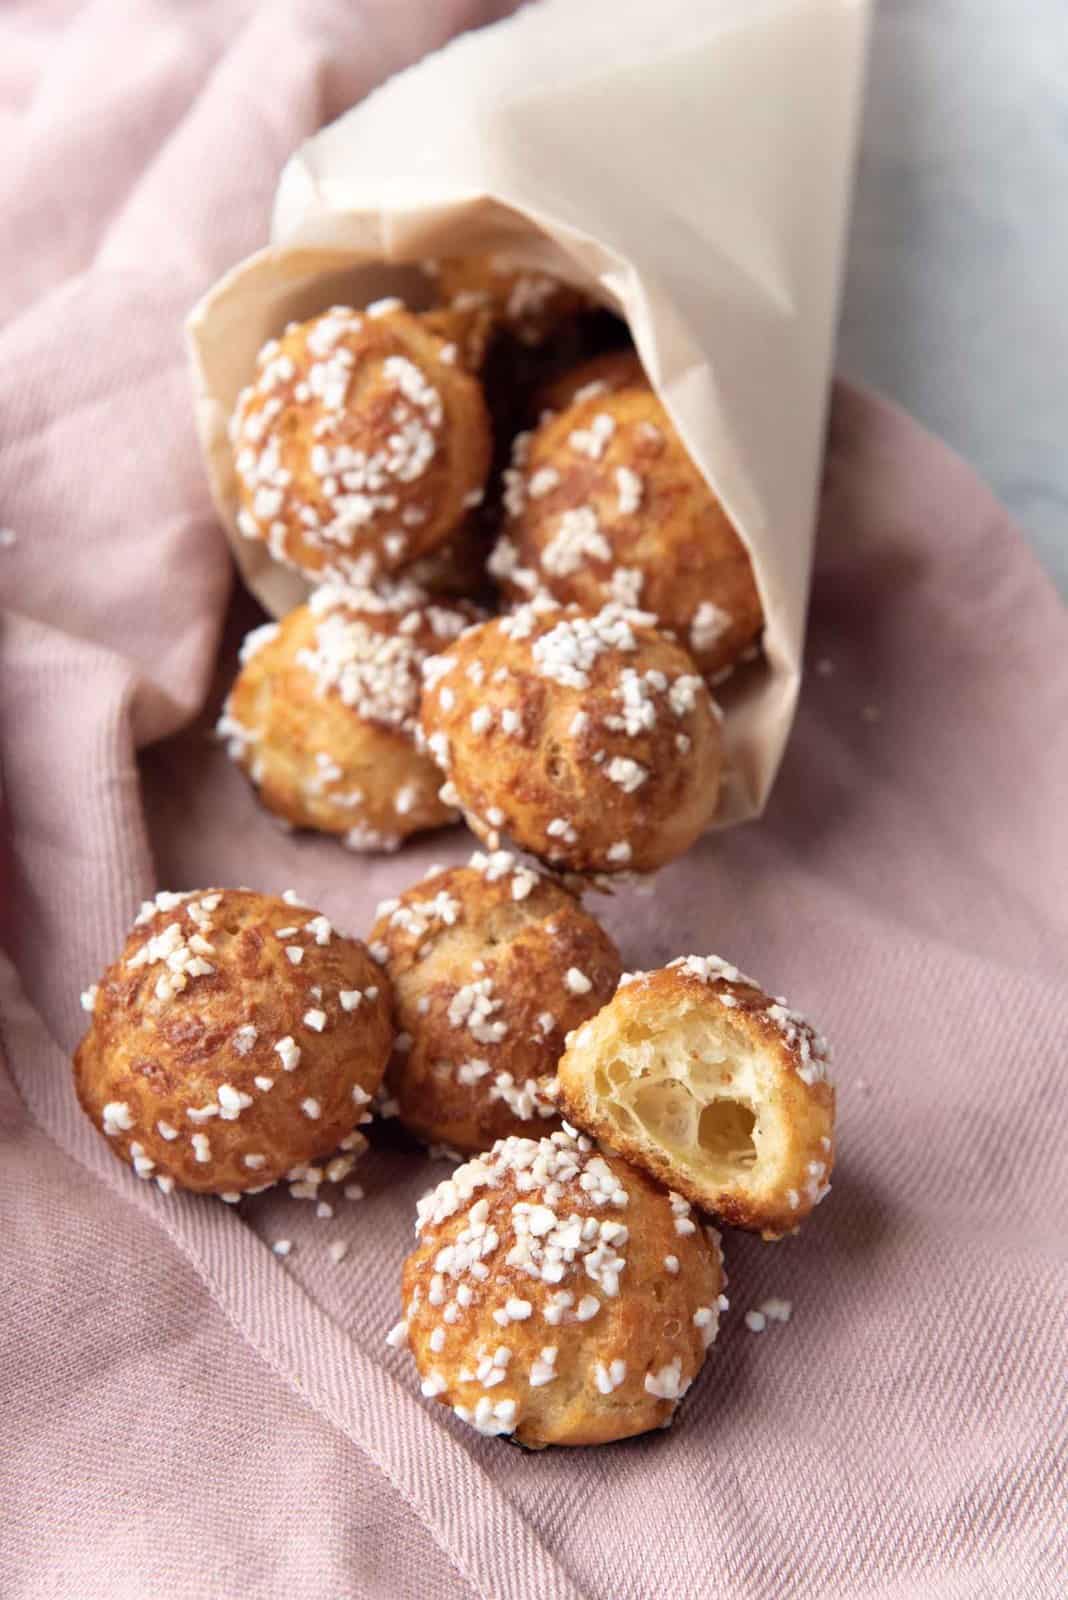
Once the chouquettes are baked, let them cool down to room temperature. And then devour them immediately!
These are perfect just the way they are. Cue the Bruno Mars song…
Tips for perfecting this recipe
Make sure you get the choux pastry dough right. Pipeable but not runny consistency, and glossy. All the tips and secrets for that are in this post on making perfect choux pastry.
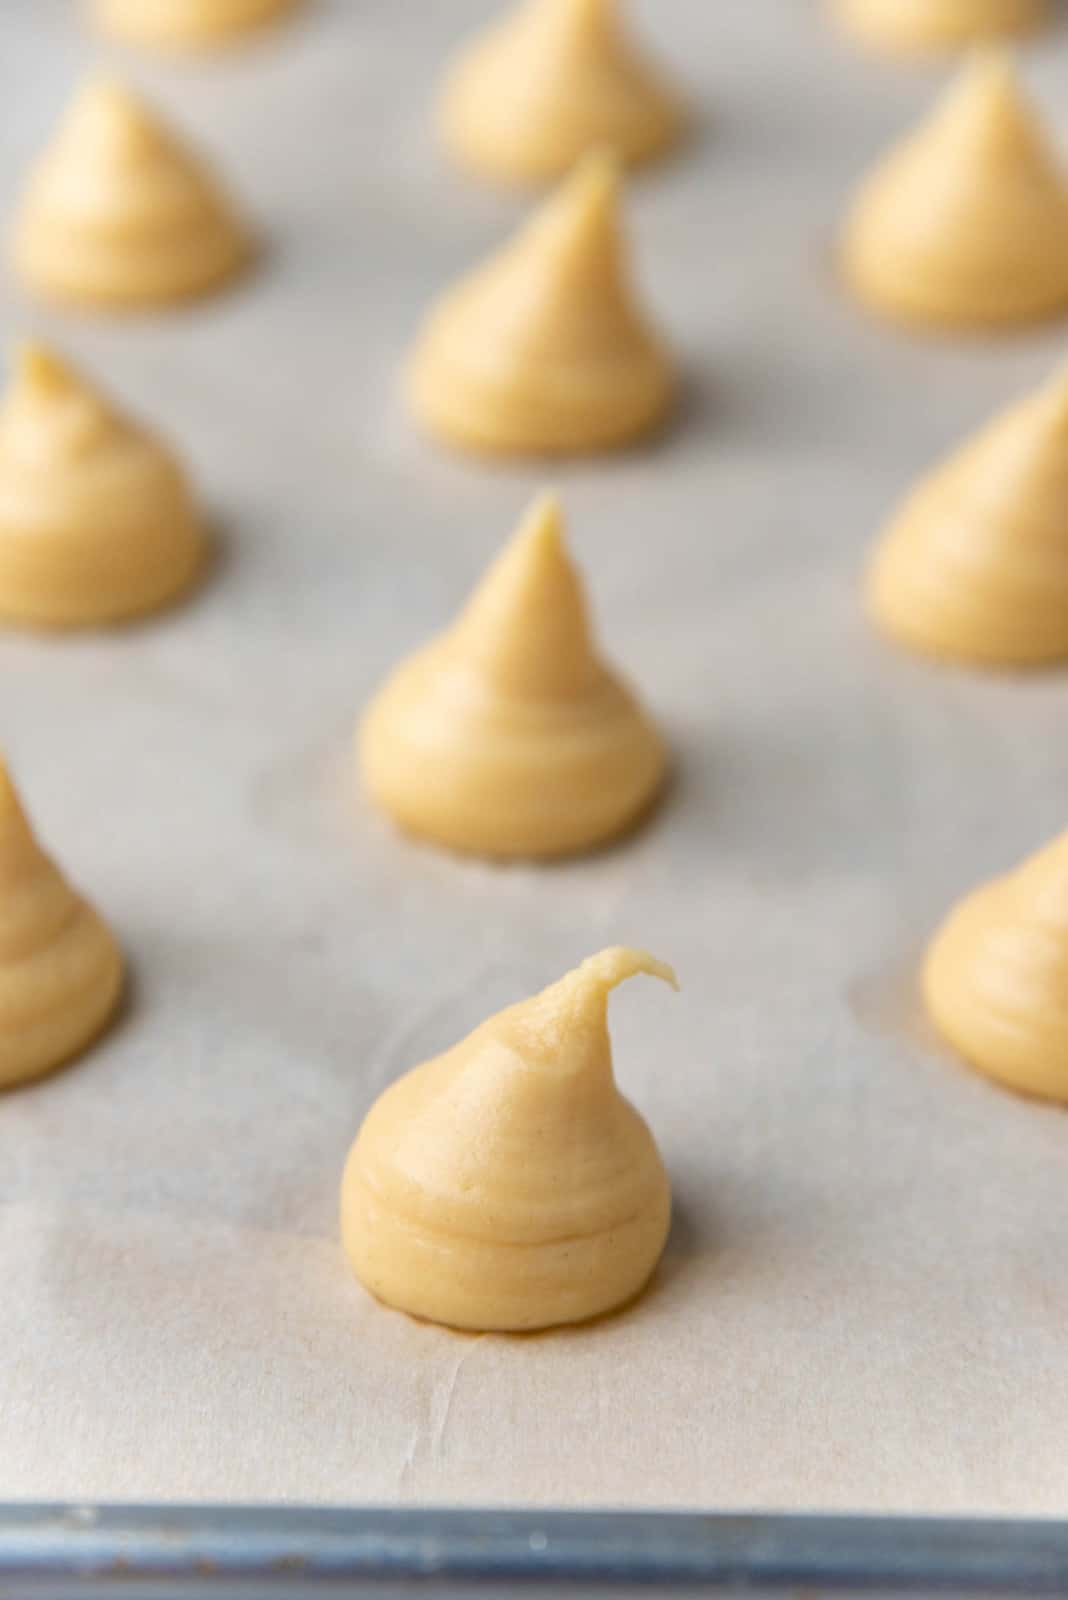
Get the size of the chouquettes right. Piping them at the appropriate size might take some practice, but it’s easy. You can watch the video here to see how I pipe consistent shapes (I count up to 2 when piping these chouquettes).
When piping, keep the tip just below the surface to avoid poop emoji shapes. 🙂 Then flatten the tip with a little water to prevent them form burning.
Sprinkle with pearl sugar generously. There will invariably be some extra pearl sugar that end up on the baking sheet instead.
Since these are smaller pastries, I prefer to bake them at one specific temperature. So no changing temperatures halfway through the baking process.
Allow the pastries to get some color during the baking process. If you take them out while they are only a light golden color, the insides might not have dried enough, and this can lead to collapsed and flat chouquettes.
Don’t forget to prick the cases to allow excess air to flow out of the hot pastry puffs. This also prevents the pastries from collapsing or getting soggy.
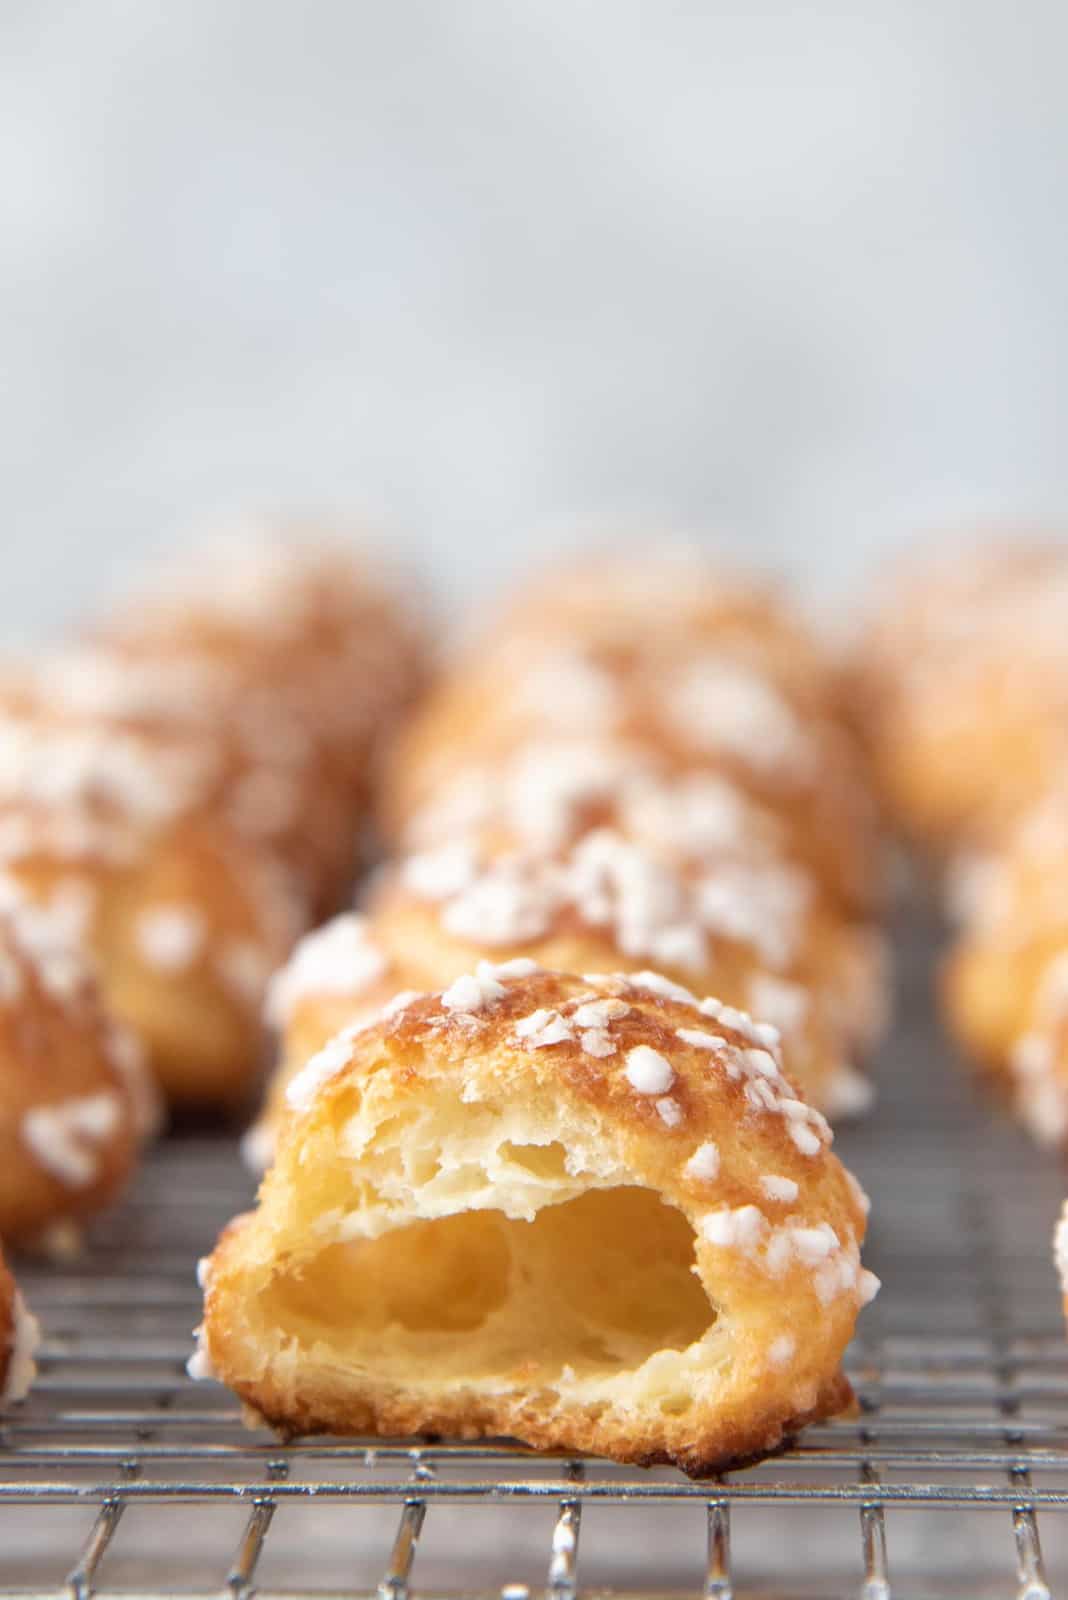
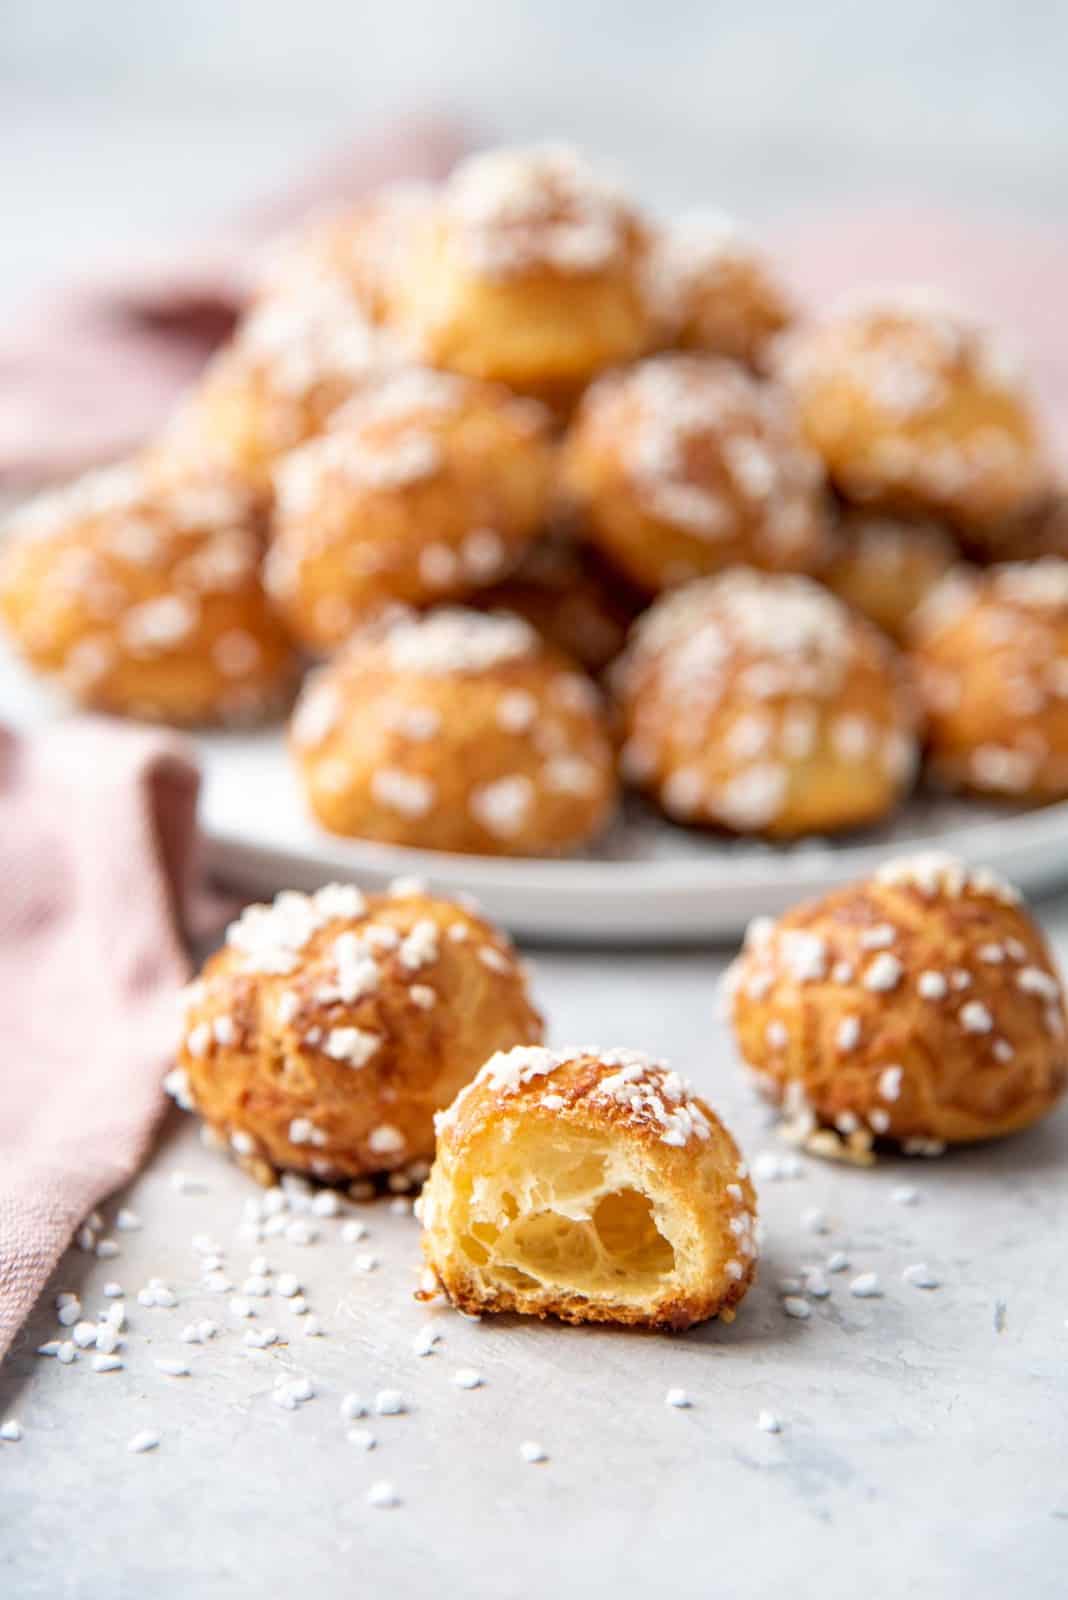
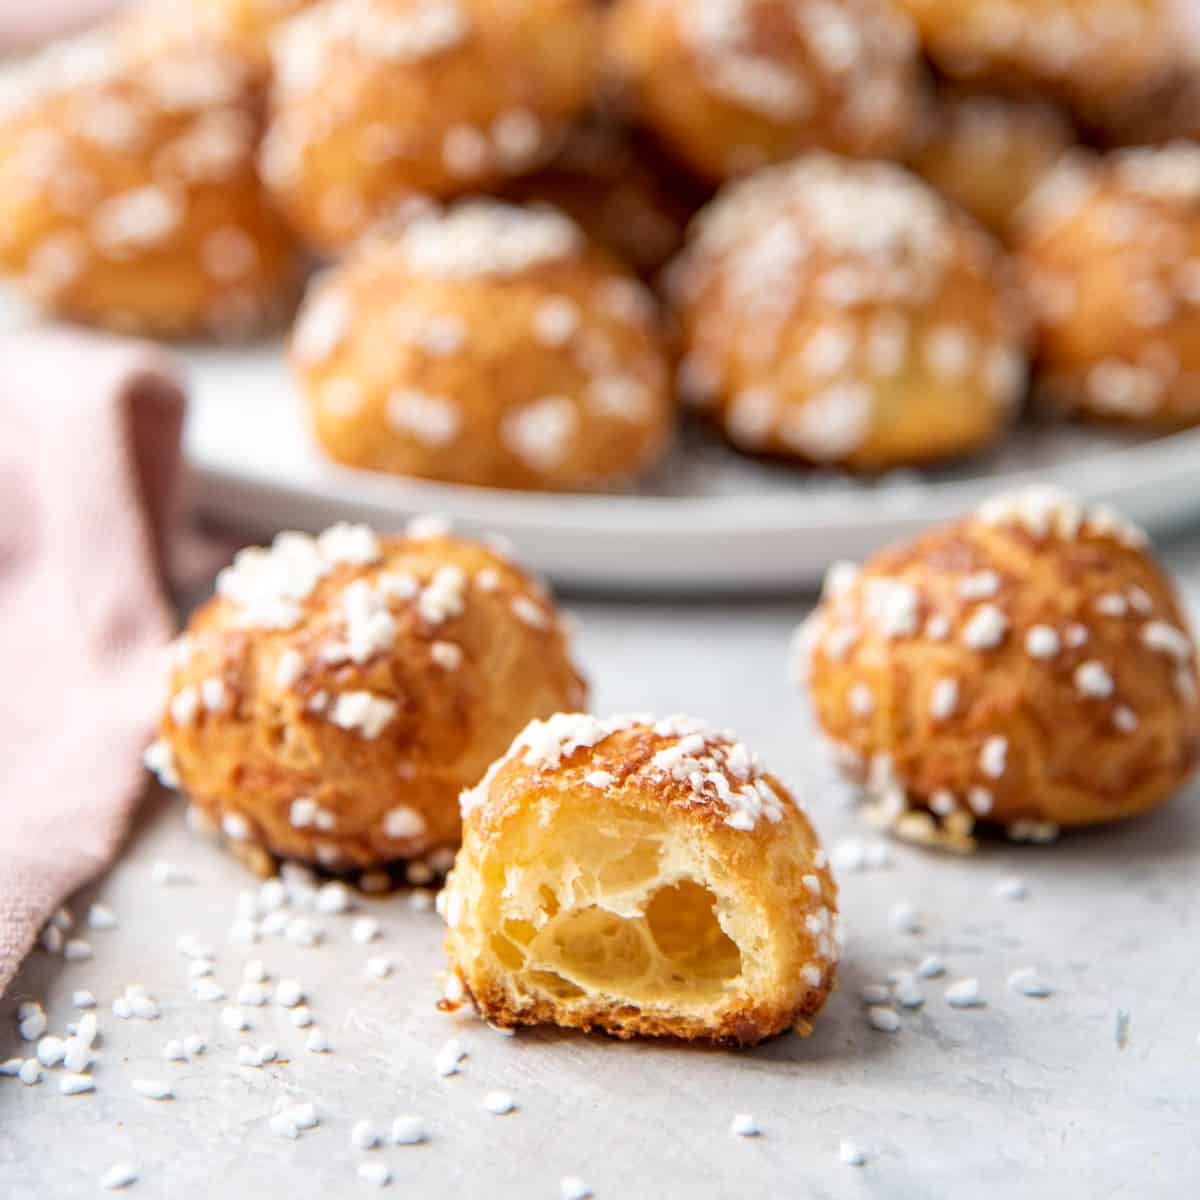
The insides of your chouquettes should be airy, soft, and custard-like, with a crisp shell on the outside. If you find that the insides are raw, then consider these possibilities,
- Was the dough pipeable, or was it hard to pipe (too thick)? If so, the pastry wasn’t light enough to expand and the insides remained raw.
- Did you pipe larger choux patries? If so, you will need to increase the baking time to cook the insides through.
- Still raw? Maybe your oven runs a little hotter, and you may need to reduce the temperature slightly to get the pastries to bake all the way through.

How to serve chouquettes
They can be served just the way they are.
The soft, milky interior, and crisp outer pastry shell are delicious, but the crunchy sugar pearls put these babies over the top!
But if you’d really like to, you can fill these with a little whipped cream for an upgraded version of cream puffs (French cream puffs).
Just like choux pastry, cream puffs, classic eclairs, profiteroles, choux au craquelin, and even delicious churros, these are also great when served with a thick, luscious mug of French hot chocolate (Parisian hot chocolate)!
How to upgrade this chouquettes recipe
THIS is the fun part! 🙂
You can easily upgrade these chouquettes with some simple changes.
- Brown butter chouquettes – replace the butter with browned butter to give these a lovely flavor boost. See my in-depth post on how to make brown butter.
- Or add some lemon extract to the dough to turn these into lemon chouquettes.
- Scrape some fresh vanilla (or use good quality vanilla extract) to make these chouquettes very vanilla forward.
- Sprinkle some sea salt flakes along with the pearl sugar for a sweet and salty treat.
- Fill the chouquettes with whipped cream for French cream puffs, or you can opt for a pastry cream (vanilla pastry cream or chocolate pastry cream) if you like too.
Recipe
Classic Chouquettes
US based cup, teaspoon, tablespoon measurements. Weight measurements are recommended for accurate results whenever available.
Common Measurement ConversionsIngredients:
Choux pastry
- 240 mL milk 8 fl oz / 1 cup
- 115 g unsalted butter, cubed and at room temp. 4 oz / 1 stick
- 135 g AP flour 4.7 oz / 1 ⅛ cup, spoon and leveled
- 4 large eggs you may not use the whole amount
- ½ tsp sea salt use less if using table salt or fine salt
- 2 tbsp white sugar
- ½ tsp vanilla extract optional
Topping
- 1 cup Swedish pearl sugar you may not need the whole amount.
Instructions:
Chouquettes
- Preheat oven to 375°F. Prepare 2 baking trays by lining them with parchment paper.
- Place the salt, milk, sugar, and butter in a saucepan, and heat over medium heat, stirring occasionally.240 mL milk, 115 g unsalted butter, cubed and at room temp., ½ tsp sea salt, 2 tbsp white sugar
- When the milk is starting to boil (butter should be melted at this point), add the flour in one go and vigorously mix in the flour while the saucepan is off heat, so that it absorbs all of the milk (use a wooden spoon or spatula to do this).135 g AP flour
- When the flour has absorbed the water and it's coming together as a dough, return the pan to the stove (medium heat). Cook the dough for 1 – 3 minutes while you mix and move it around in the pan. Do this until you get a dough that pulls away from the sides of the pan. If you gather all of the dough on one side of the saucepan, you should be able to stick a tablespoon in the dough and it should stay upright, and the texture of the dough should look like mashed potatoes. This is the correct consistency.
- Transfer the dough into a bowl, and let it cool down slightly for a few minutes. In the meantime, whisk all the eggs in a jug. The eggs should be whisked to mix the yolks and egg whites.4 large eggs
- Add the vanilla extract to the dough, and then add the eggs in 4 – 5 additions, while mixing each portion into the dough well, between additions. You can use a handheld mixer or a whisk to do this. For larger batches, you can use a stand mixer.½ tsp vanilla extract
- Only add enough eggs to get the right consistency (i.e. a dough with a glossy sheen, and a pipeable consistency. You may or may not use up all of the eggs).
- Place the dough in a large piping bag.
- Pipe small, circular mounds of choux pastry dough, using a piping bag fitted with a large round tip (I use Wilton 1A or 2A tip, or you can snip the pastry bag to create an opening instead). The triangular pastry mounds are about 1 inch at the base, and roughly ¾ inch in height.
- Flatten the tips of the pastries with a wet finger to prevent burnt tips.
- Once you’ve piped one baking tray, leave the remaining dough in the pastry bag. Only pipe the choux pastry dough just before you’re ready to bake the second tray (otherwise the dough will form a skin when exposed to air).
- Generously sprinkle the tops of the piped dough with Swedish pearl sugar. Make sure the sugar pearls are slightly pressed into the dough.1 cup Swedish pearl sugar
- Bake in the preheated oven for about 20 – 25 minutes (in the center of the oven), or until the choux pastry shells puff up and are golden brown on top. Do not open the oven door, at least until you have reached the 15 – 17 minute mark.
- When the chouquettes have turned a beautiful, deep golden color, remove them from the oven. Immediately (and carefully) prick each of the pastries with a toothpick, or skewer, or the tip of a small, sharp knife, and let the choux pastry cases cool completely in a draft-free area. The pastries should form a nice crust, with white sugar pearls studded on the surface.
- Repeat with the remaining dough.
- When the cases are at room temperature, they are ready to be served (and devoured!).
Recipe Notes
Nutrition Information:
“This website provides approximate nutrition information for convenience and as a courtesy only. Nutrition data is gathered primarily from the USDA Food Composition Database, whenever available, or otherwise other online calculators.”


Leave a Reply