


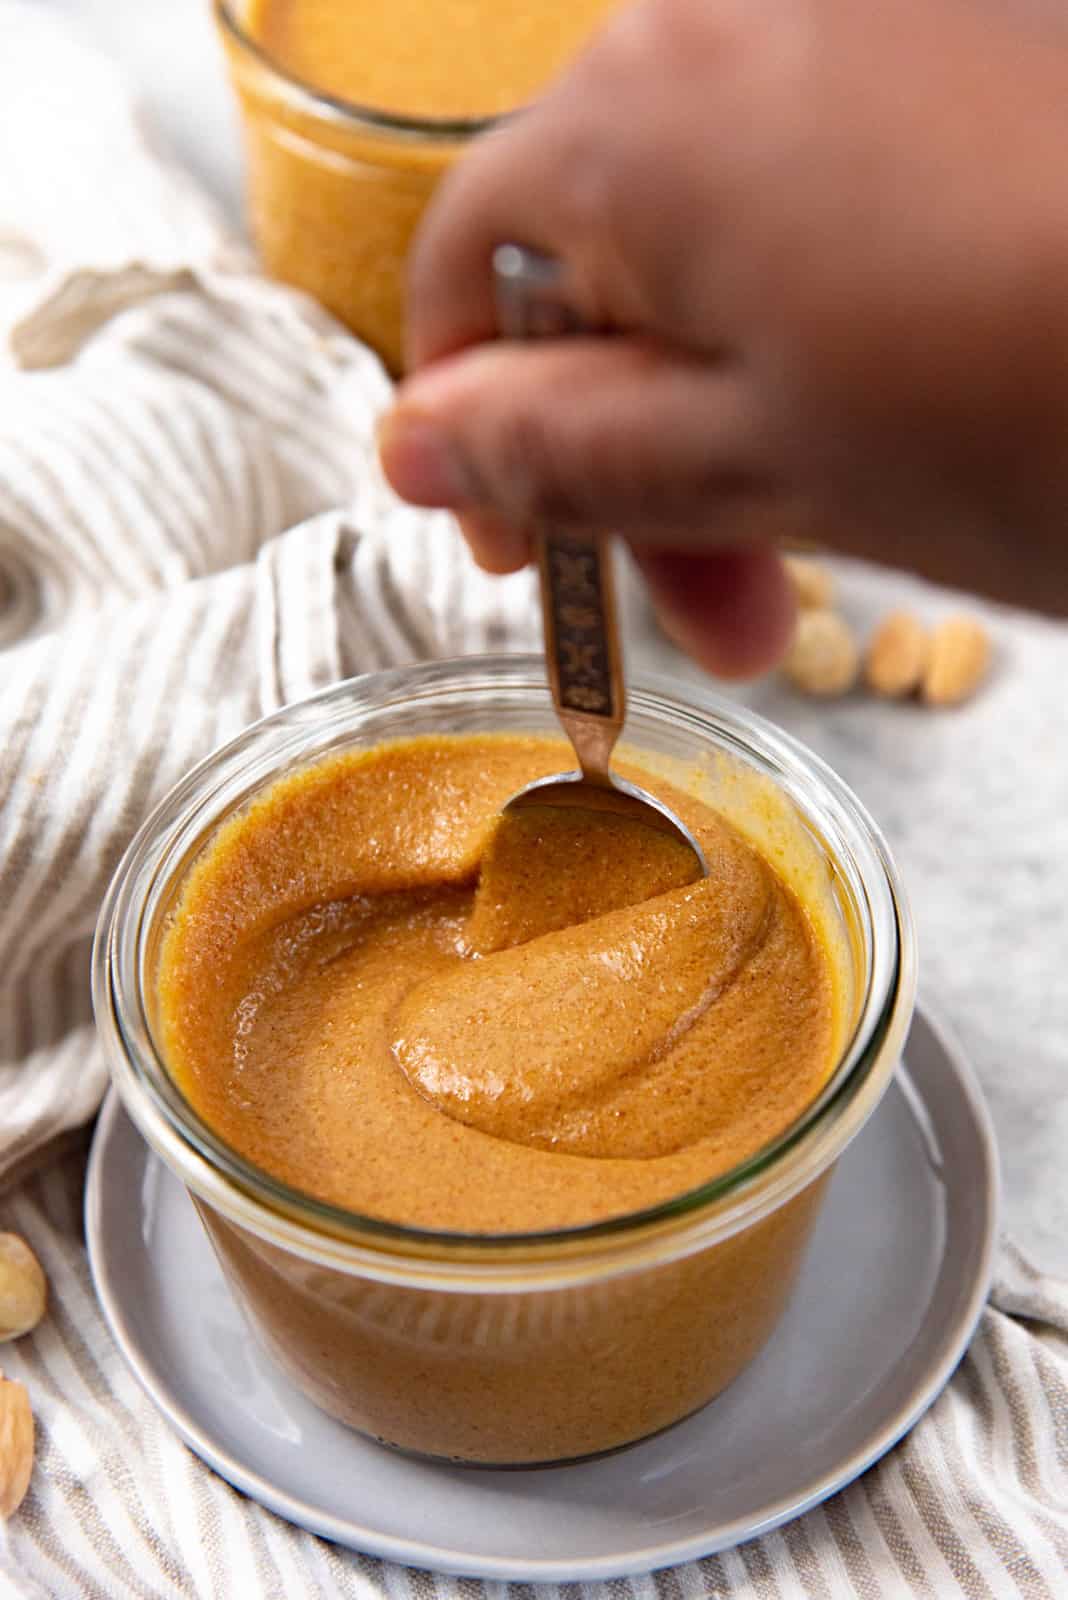
The most delicious, easy praline paste recipe that will give you perfect results, every single time! A super adaptable recipe because you can make this with hazelnuts for a hazelnut praline paste, OR with almonds for an almond praline paste. Or you can use a mix of both, like I did, to get the best flavors from both praline pastes.
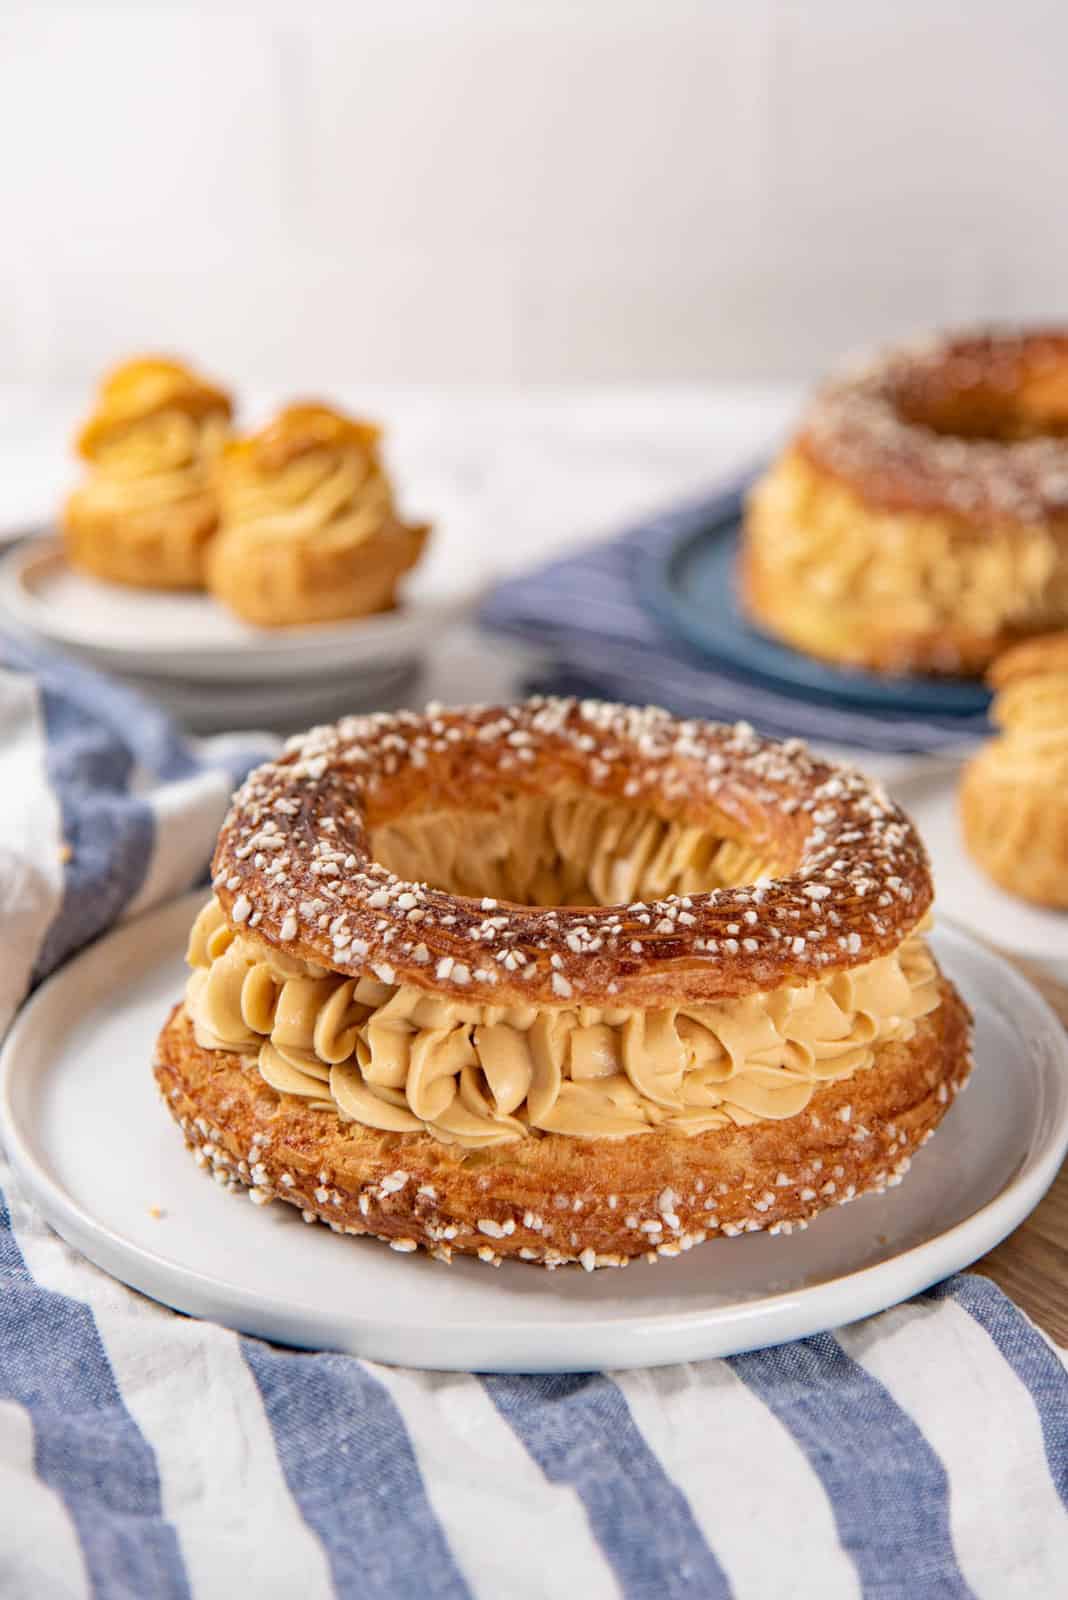
A detailed, step by step recipe for a super easy way to make delicious praline paste that you can use for baking, as a spread, or as flavoring for any dessert or filling. Like this Paris Brest recipe with a praline mousseline cream filling.
This recipe has been in my to-be published folder for over a year! Better late than never, right?
Why I love this recipe
- This is such an easy recipe to make. I show you the shortcut to make praline paste, which still retains the texture and flavor of the classic version!
- Super adaptable. You can use 100% hazelnuts or 100% almonds or 100% pistachios (or you can also make my delicious pistachio paste instead)! Or you can use a mix like I did here for this almond and hazelnut praline paste.
- I explain the classic, authentic version, and why I prefer to use this easier version to make praline paste instead.
- I go through some of the common issues people encounter when making praline paste, and how to fix these.
- Incredibly flavorful, with the nutty, toasty flavor of the nuts, AND the sweet and bitter flavor from the caramel.

Equipment you need
Powerful food processor or blender – You do need a powerful food processor or blender for this recipe for the best and smoothest results. You can still make this without a powerful food processor, but it won’t be as smooth. See the FAQ section below to find out how to adapt the recipe for a less powerful food processor.
Half sheet pan – For roasting the nuts.
Spatula – A silicone spatula to stir the very hot caramel.
A pan – Preferably a stainless steel pan so you can see the color of the sugar as it cooks. I like to use a skillet, so that the bottom of the pan is wider and the pot is shallow. A wider surface allows the sugar to have more contact with the heat and cook faster.
Ingredients for the praline paste recipe
White sugar – I use regular granulated sugar. Caster sugar will melt faster and more evenly, but I haven’t had any issues using regular granulated sugar either. So you do not have to buy caster sugar just for this praline paste recipe. Do NOT use brown sugar though – this is not what is used for a classic caramel flavored praline paste.
Nuts – I use a combination of hazelnuts and almonds. I use almonds and hazelnuts at a 2:3 ratio here, with more hazelnuts. That’s simply because I love the flavor of hazelnuts more! You can decide how much of which nuts to use (almonds or hazelnuts) for this praline paste recipe.
Salt – Praline paste is not complete without a little salt. Add just a touch of salt to balance the sweetness from the paste. Do not skip this ingredient because it really does deepen the flavor of the praline. For a little sweet and salty flavor combo, you can add more salt too.
These are the ONLY three (or four) ingredients you need to make authentic praline paste!
Different methods to make praline paste
There are a few different ways to make praline paste. I was taught how to make praline paste the classic way. This was quite a few years ago. But through the years, I’ve changed my method and now make it this way.
Traditional method
The traditional method involves making praline.
To do so, the nuts are first lightly roasted in the oven. If you use hazelnuts, the skins have to be removed as well.
Next, you make wet caramel (water and sugar), and then as the sugar syrup cooks and thickens, the warm, roasted nuts are added and then this mixture is agitated very quickly with a spatula or spoon.
This agitation causes the sugar to crystalize and coat the nuts. Continue to cook the sugar-coated nuts while constantly moving them around. The sugar will change color and turn an amber color around the nuts.
Scrape the mixture onto a parchment paper-lined baking tray and let it cool, and then break up the nuts. Now you have classic praline nuts.
Place these in the food processor, and process until you have a paste. Now you have praline paste!
This traditional method is fairly difficult. The nuts and caramel need to be mixed and monitored the whole time to get the correct level of caramelization. You also have to be quick so that the sugar can crystallize as well. And especially if you’re a beginner, there’s a high likelihood of you burning and hurting your hands!
This process is really not worth the effort, if you don’t want to have nut pralines (and only want the praline paste).

Easy method
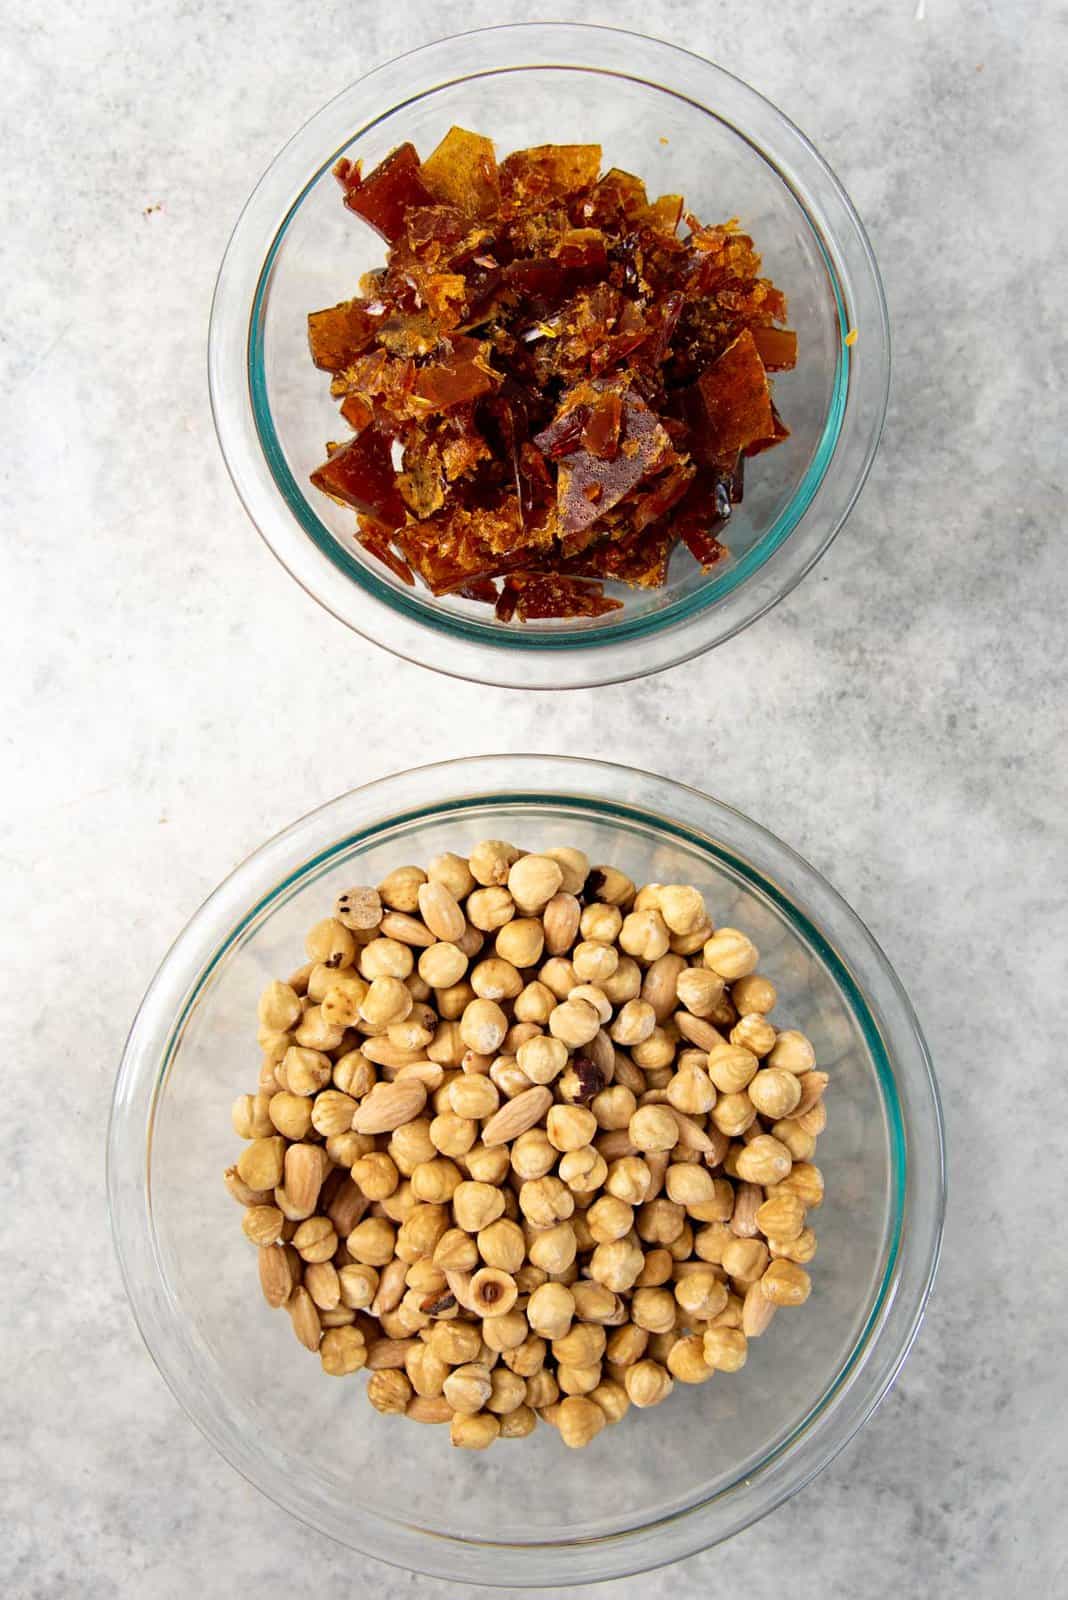
Essentially, the praline paste is made out of,
- Caramel
- Roasted nuts
So, you can make each component separately, and then process them together to get the same end result – praline paste!
With this easy recipe for making praline paste, the caramel is made with the dry caramel method that does not use water. What that means is that the sugar is added into the pan with absolutely no other ingredients, and heated to melt and caramelize. I personally prefer this method of caramelizing sugar because it’s faster and there’s less chance of the sugar re-crystalizing.
Step by step easy praline paste with hazelnuts and/or almonds
Caramel component
The first step is to line a baking tray with parchment paper or silpat. It’s important that the tray is kept on a heat-proof surface, so use a trivet under it if necessary.
Next, place the sugar in a large, shallow pan that is preferably made from stainless steel. A larger cooking surface will help cook the sugar more evenly since the sugar will be in a thinner layer.
Stainless steel pans will let you clearly see the color of the caramel, and you can use a metal spoon to break up lumps of sugar as well. A dark colored non-stick pan will make it much harder to check the color of the sugar, and the sugar may caramelize and burn VERY quickly.
Also, PLEASE DO NOT TOUCH THE CARAMEL! It is extremely hot and you will burn yourself if you come into contact with it.
Sprinkle the sugar over the surface of the pan and heat over medium heat. You will also need a heat-proof rubber spatula.
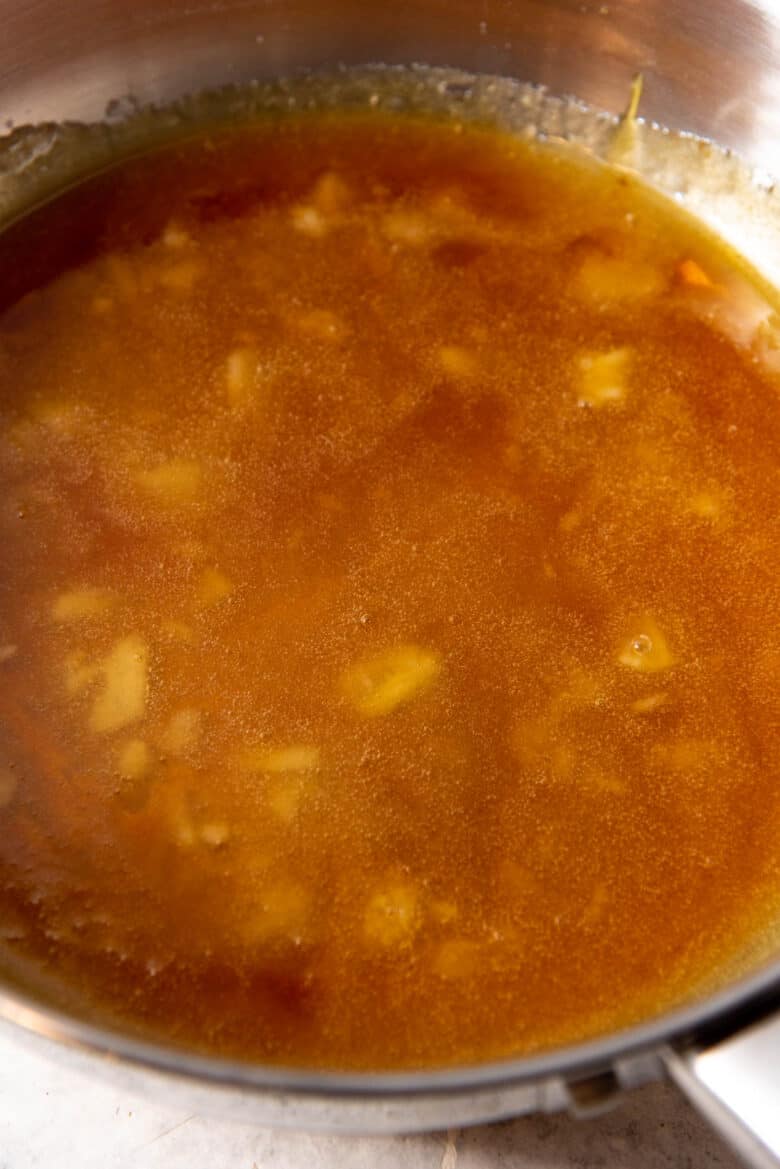
As the sugar heats, the sugar layer touching the hot surface of the pan will start to melt and become a clear liquid. Using the spatula, move the sugar around to allow the rest of the sugar to start to melt as well. If the sugar is turning yellow or amber too quickly, remove the pan from the heat and gently stir the mixture. You can also lower the heat to slow down the cooking process.
The sugar mixture should largely be turned into a light colored caramel with big chunks of sugar. You can gently break the sugar lumps with a stainless steel spoon and continue to mix to dissolve the lumps and caramelize the sugar.
As soon as the caramel turns amber color, pour the caramel over the parchment paper or silpat. The caramel may darken in color a little at the beginning. If you want the caramel to have more sweetness and less caramel, then you can remove it from the heat when it’s a little more light in color. The darker the caramel, the bitter the caramel notes will be in the praline paste – which I personally prefer. But you do you!
Allow the caramel to completely cool down, and harden.


Preparing the nuts
I use skinned raw hazelnuts for convenience. But you can use hazelnuts with the skin on. Here’s how to remove the hazelnut skin.
Method one – Oven roasting
Place the hazlenuts on a baking tray (lined with parchment paper or foil for easy clean up). Roast the nuts in a preheated oven (350 F) for about 10 – 15 minutes. This will toast the hazelnuts AND dry out the outer skin.
Remove the hazelnuts from the oven and let them cool for a few minutes. While still fairly hot, transfer the nuts onto a large dish cloth, and fold it over to enclose the hazelnuts. Agitate the hazelnuts inside the dishcloth by moving them around vigorously moving them around (like rolling with a rolling pin). Uncover the hazelnuts. Most of them should have their skin removed at this point. Repeat, as needed, with just the hazelnuts with the skin on to remove the skin from all of them. A few might be stubborn and that’s OK.
The skinned nuts are now ready to be used! They should be toasted already, but if you feel like they could be roasted a little bit longer, return them to the oven to roast for just a few more minutes.
Method two – Boiling
This method works for hazelnuts AND almonds.
Bring a pot of water to a boil. When the water is boiling rapidly, dunk the nuts in the boiling water and let them blanch for about 1 minute.
Remove the nuts from the water and rinse with cold water to immediately cool down. Next, press each individual nut, and the hazelnut (or almond) should slip right out of its skin.
Place the skinned nuts on a dish cloth and pat dry.
Roasted nuts component
Preheat your oven to 350 F / 180 C.
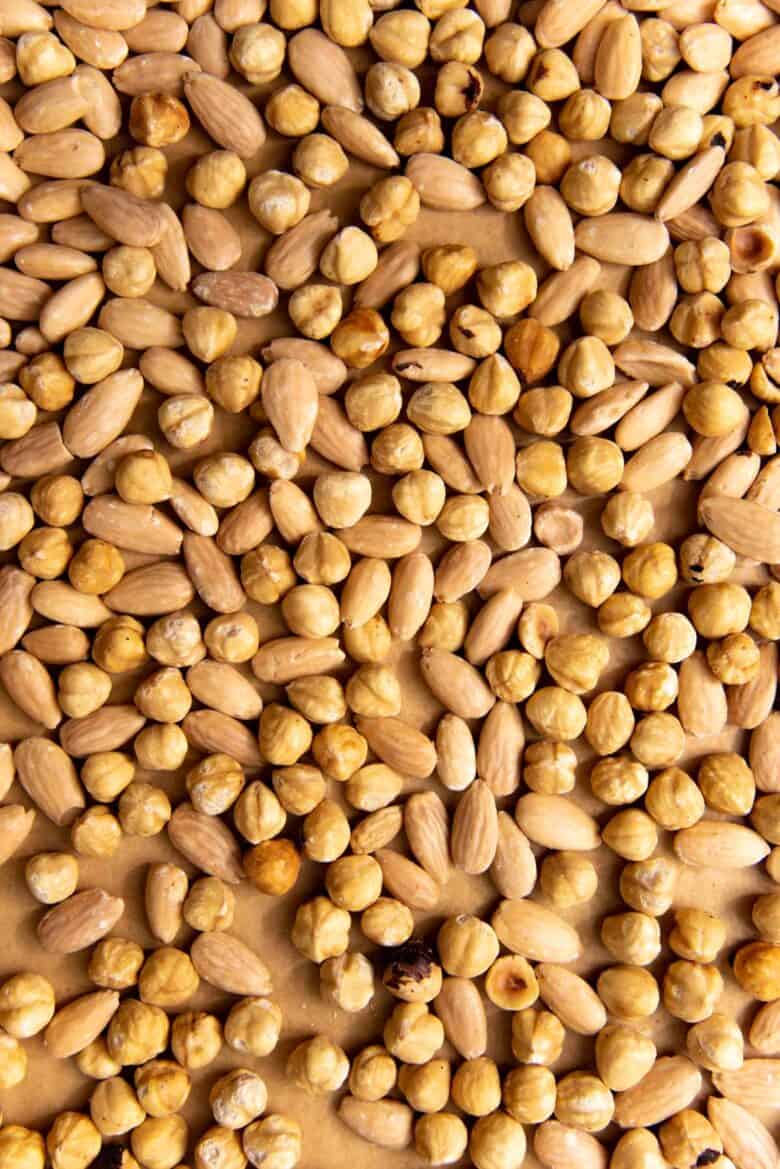
Line a half sheet baking pan (or any large oven-safe tray) with parchment paper. Spread your choice of nuts out in a single layer. I used 300 g hazelnuts and 200 g almonds here. Use all hazelnuts for a hazelnut praline paste, or all almonds for an almond praline paste.
For pre-skinned raw whole nuts – Roast the nuts in the preheated oven until the nuts are lightly toasted. This can take anywhere between 10 – 20 minutes, depending on the size of the nuts. So keep an eye on them and stir the nuts so that they roast evenly.
If you roasted the hazelnuts to remove the skin, OR you have sliced or slivered nuts, this roasting time will be much less. So keep an eye on them and do not let the nuts burn.
If you boiled the nuts to remove the skin, you will need to roast the nuts longer, to allow them to dry out first and then roast / toast.
Once the nuts are toasted, remove them from the oven and let the nuts cool down until you’re ready to make the praline.
Alternatively, you can also pour the caramel all over the roasted nuts and let the caramel set over the roasted nuts. Either way should work in the end.

Making the praline paste
Break the caramel into smaller pieces. The caramel may be hard to break if it’s a fairly thick piece. I cover the caramel piece with another piece of parchment paper and then whack it against the countertop. After it breaks into larger pieces, then I use a heavy object and break it into smaller pieces.
If you coated the nuts with the caramel, you can do the same thing to break ’em up. The nuts do make it easier to break up the caramel, since the nuts are the “weak spots” and you can use a knife to cut through them.


Place the roasted nuts and caramel pieces in a food processor or blender. Make sure the food processor or blender is powerful enough to be able to make nut pastes. This will ensure that you end up with a smooth praline paste.
Add some salt to the nuts and caramel. Process the nuts and caramel until you have chopped all of it until they are all very finely chopped. This is the first stage.
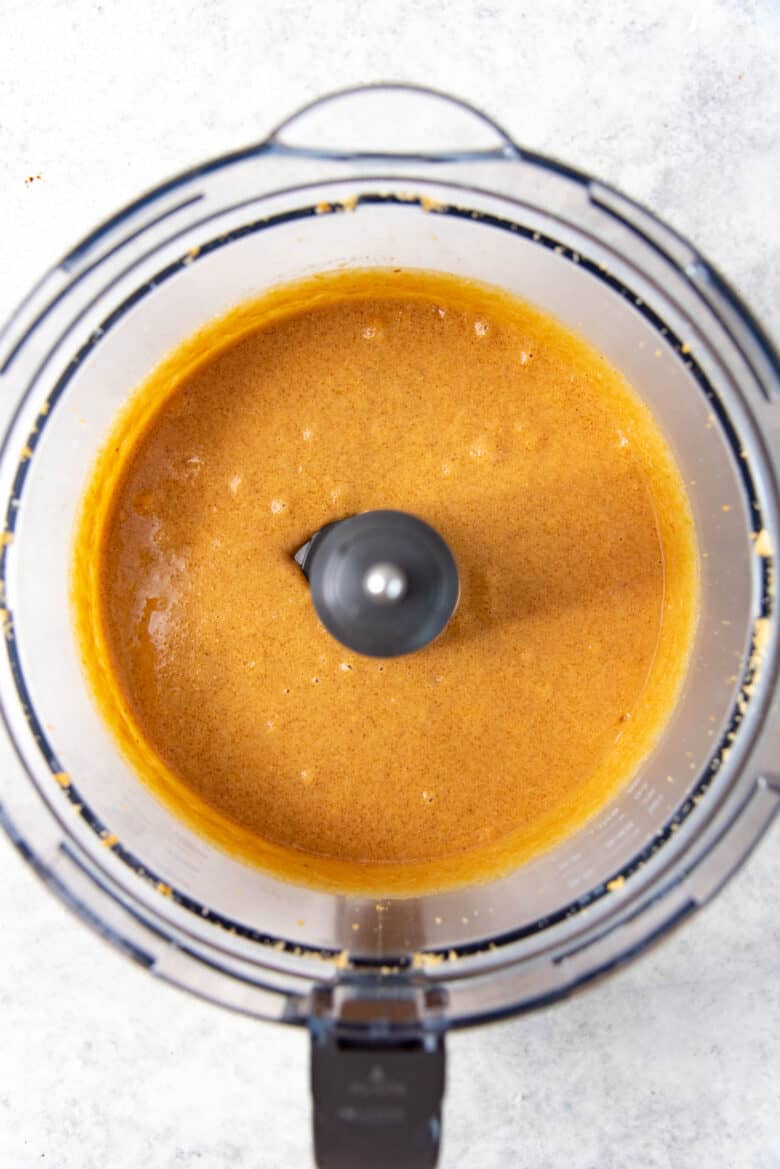
Process it for a total time of about 4 – 5 minutes until you have an incredibly smooth praline paste. At the 3 minute mark, you can taste the paste and add a little more salt IF you prefer. The processing time will vary depending on your food processor or blender. If you have a less powerful food processor, then it’ll take longer to make the praline paste.
After processing for about 1.5 – 2 minutes, you should have a very thick, grainy praline that is mostly sticking together with some dry nut mixture in there as well (resembling coarse sand).
After about 3 minutes, the praline paste will look very thick and sticky. Almost like a thick peanut butter. You can stop here if you like if you prefer a thicker paste. There could still be some smaller pieces of nuts and caramel pieces though.
At 4 minutes, the praline paste is very smooth and still thick, and would start to feel a little warm. The praline paste is perfect at this stage as well. However, I want my praline paste to be less thick.
Which is why I process my praline paste for 5 minutes. At this stage, the praline paste is very warm. The warmth of the nuts help release more of the oil within them, making the paste smoother and more fluid. The paste WILL thicken as it cools down.


Storage
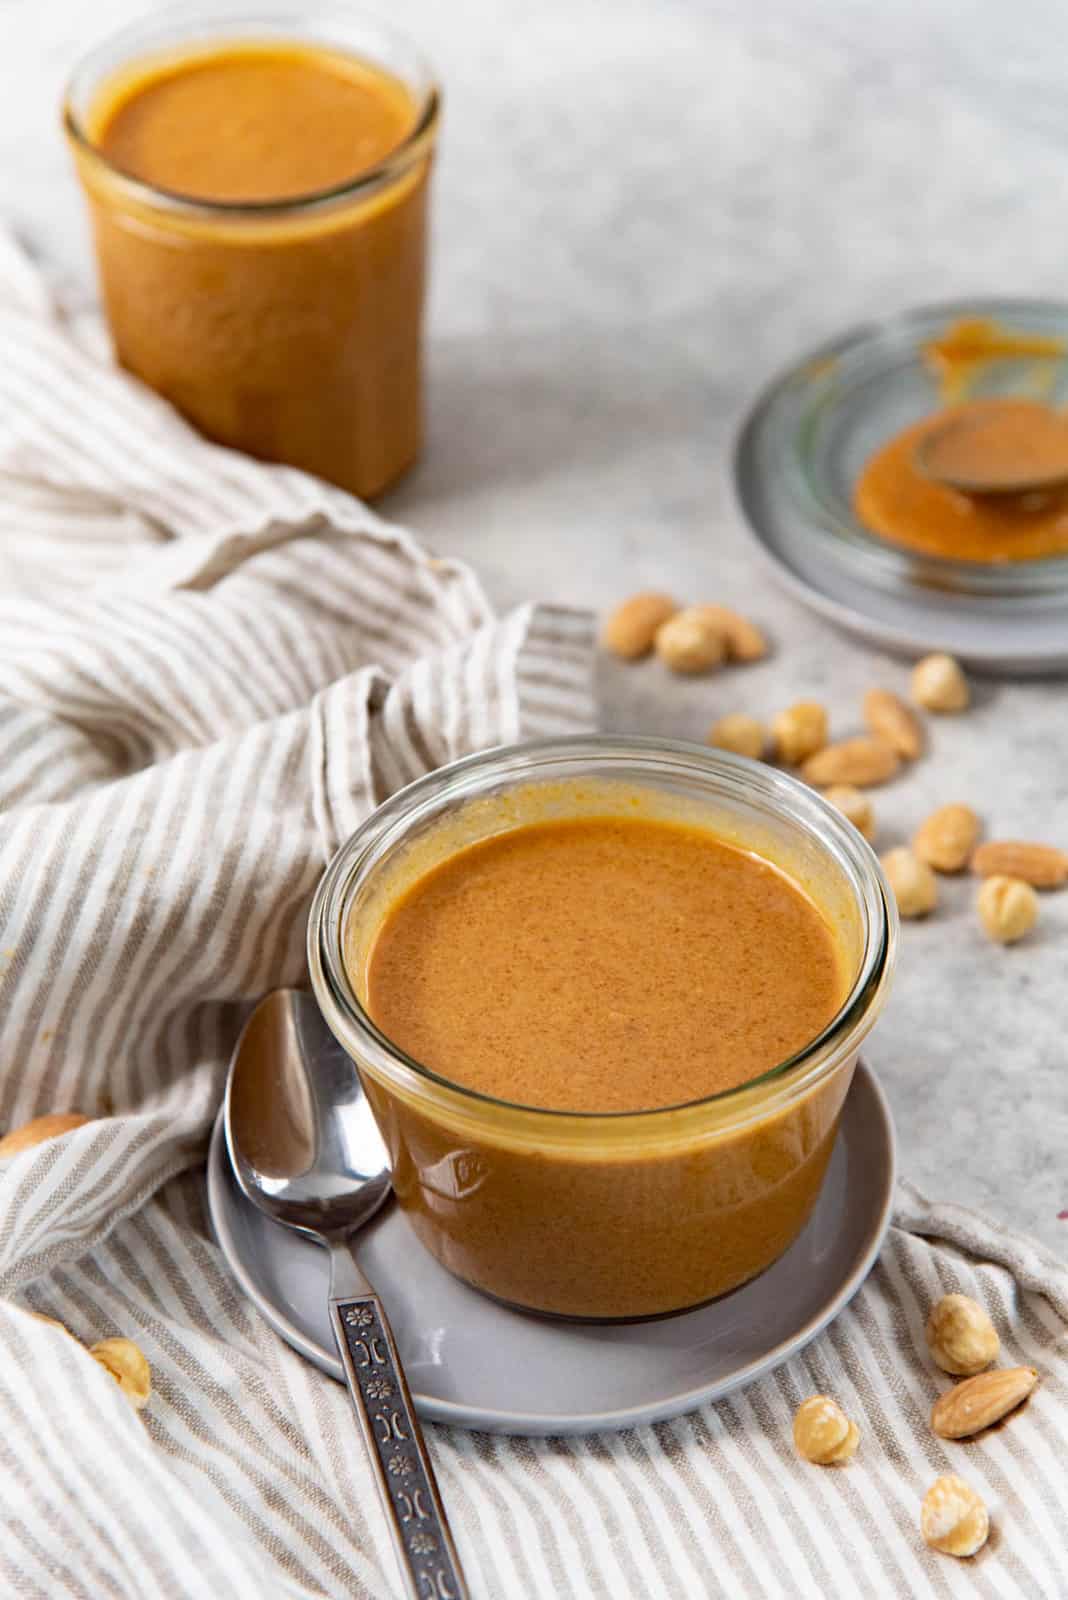
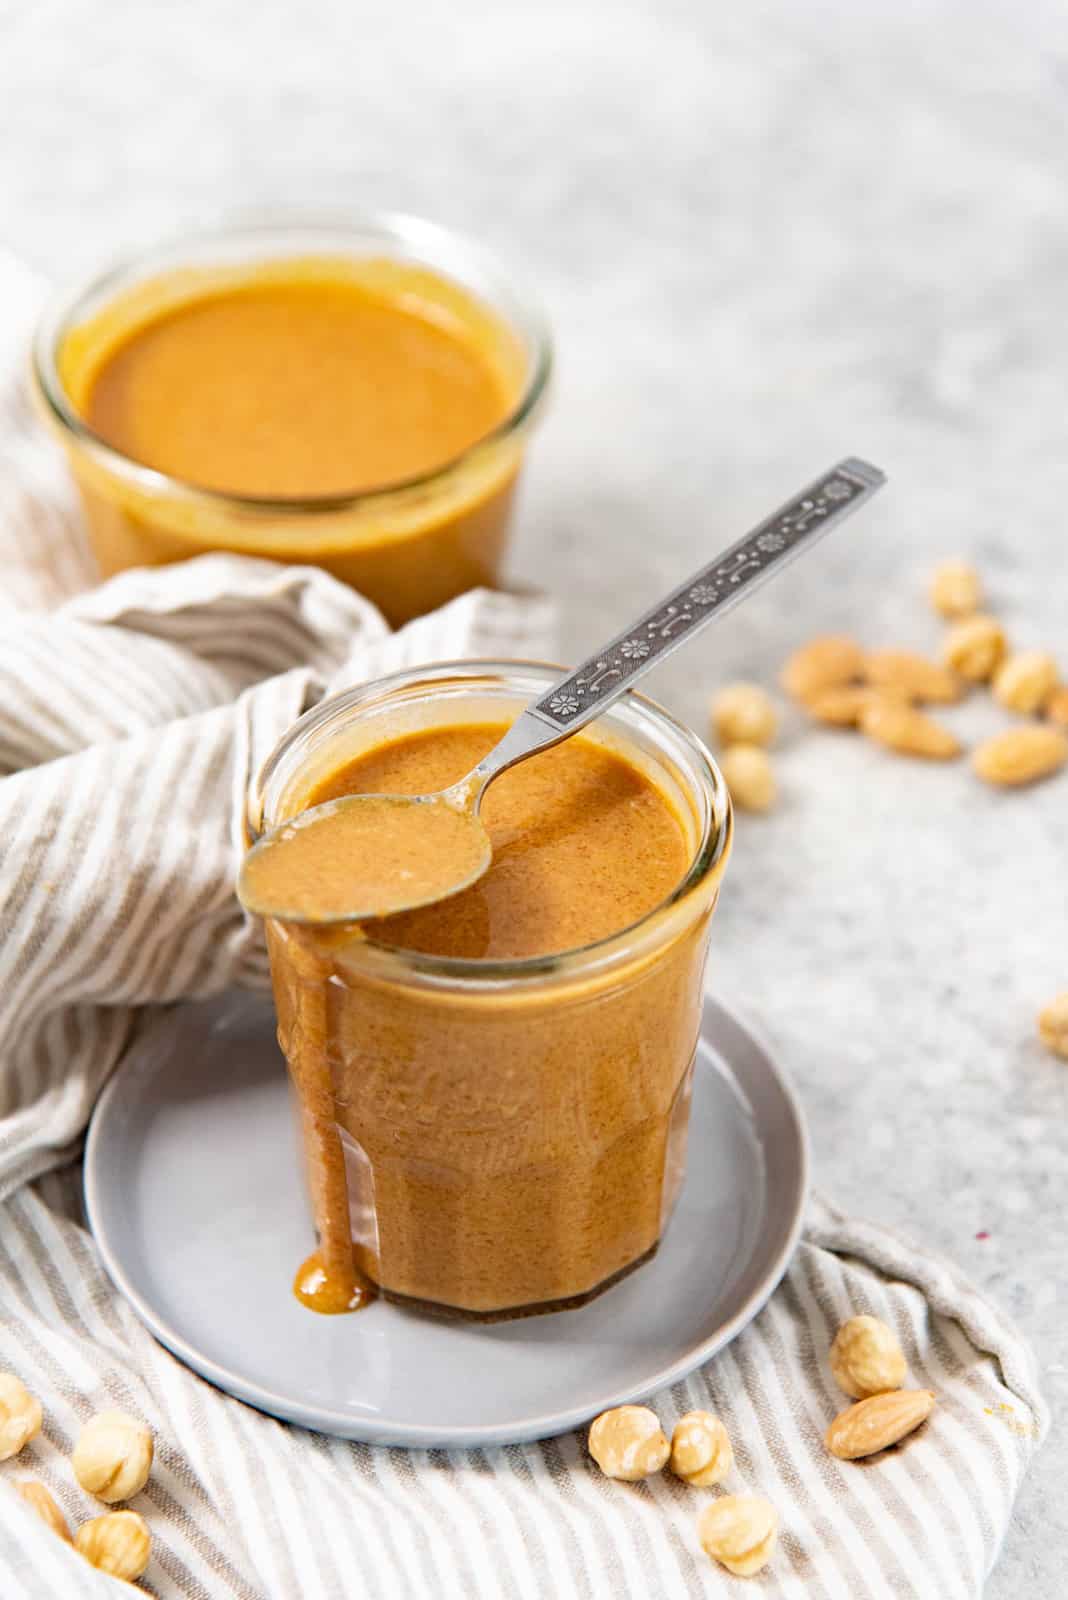
When the almond and hazelnut praline paste is ready, scrape it all into prepared jars or containers. Make sure the containers are air-tight, with tight-fitting lids. More importantly, also make sure the jars are clean and dry prior to filling them with the praline paste.
The praline paste should last about 4 – 5 months in the fridge, IF it is stored properly. If you use dirty spoons to use the praline, or leave it out for prolonged periods of time in between refrigeration, the paste will obviously spoil sooner.
I always check if the paste looks good, has no off smell, and the texture is normal, before using. Especially if I keep the praline paste in the fridge for longer than a month.
Usually, I prefer to store my praline paste in the freezer if I know that I won’t be using it right away. I’ve kept praline in the freezer for up to 18 months (without thawing and re-freezing) and have had NO issues with the taste and texture. But it is important to keep it in an air-tight container so that it won’t pick up any other freezer smells.

Praline paste adaptations
- Add a little bit of cocoa powder while blending the paste to add some chocolate flavor. Hazelnut praline with cocoa powder will definitely taste like an elevated, high end Nutella paste.
- You can also add some vanilla to add depth of flavor.
- Coffee praline paste is also a fantastic variation. Instant coffee granules will add an extra bitterness to the praline paste with the coffee flavor.
How to use the paste
As a paste – Spread praline on toast for a delicious sweet toast snack! If you like Nutella and peanut butter (or almond butter), then you’ll love praline spread on toast!
Flavoring – Add praline paste to buttercream frosting recipes, whipped cream, or even custard desserts to make flavored fillings and toppings! Imagine adding praline into your vanilla ice cream base? Nutty, sweet vanilla praline ice cream will be your next favorite ice cream flavor! This mousseline cream recipe is the perfect example of how to use praline to flavor a filling.
Filling – It can be used just as is, as a filling! How about praline filled chocolate truffles or bon-bons? Pipe it into the middle of croissants to make praline filled croissants or praline filled pastries!
Baked goods – Add praline into the middle of cinnamon rolls for praline bread rolls. Or how about cake recipes with praline added to the batter?
Praline paste is also known as praline spread! It’s the same thing, so if your recipe calls for praline spread, it’s the same as this paste. There are some sources that might also call it praline butter. However, some may refer to praline paste MIXED with butter as praline butter in those instances.
Frequently asked questions
My food processor is not very powerful. What can I do to make my paste smooth?
Here are some tricks to achieve a smooth paste if your food processor is making a gritty or lumpy praline paste.
Add the nuts while they are still warm. The warmth of the nuts will help release the oils sooner and help with making a smoother paste.
Chop the nuts and break the caramel into smaller pieces before adding them to the food processor. This can help especially if you break the caramel into smaller pieces.
Give your food processor a break. While powerful food processors should not take longer than 5 minutes to produce a smooth praline paste, all food processors will not be as fast. If your food processor is warming up and the paste isn’t as smooth as you like, GIVE IT A BREAK. Let it cool down, and you can process the paste again a few hours later.
Add a little bit of oil. This is how I used to make praline paste in my previous (reliable but not as powerful) food processor. The nuts should have natural oils to help, but sometimes adding just a few tsps of neutral oil can help your food processor along. If you have access to hazelnut oil, you can add this to the praline to enhance the flavor.
Embrace the pieces! It’s absolutely OK for your praline to not be smooth too! Think of it as a “crunchy” praline paste. It’ll still taste AMAZING!
Can I make praline with nut butters?
Actually, yes!
If a recipe calls for praline paste and you don’t have it, you can add nut butters instead. However, nut butters have a different flavor profile from roasted nuts in the praline and are not sweet at all (no caramel!). So you could add some sugar to nut butters and get a similar flavor (similar, but not the same).
Alternatively, you can make the caramel as per the recipe. And then process the caramel in your food processor until it’s very finely ground. Then you can add nut butter (at the same weight as the recipe), and process until smooth. The flavor will be somewhat different, but fairly similar.
Just make sure that the nut butters are 100% nuts, and have no other additions.
How do I choose which nuts to use to make praline paste?
The main deciding factor is what you like and can afford!
If you like hazelnut and can afford it, use 100% hazelnut for a classic hazelnut praline paste. If you cannot afford to buy a lot of hazelnut, then substitute some of the nuts with almonds. The more hazelnuts you have in your mix, the more hazelnut you will taste!
Use almonds if you don’t like hazelnuts, or if you want a more neutral tasting praline paste. You will taste almonds (obviously), but almonds have a more subtle taste compared to hazelnuts. Almonds are also cheaper and more accessible. So you can use all almonds, for an almond praline paste as well.
Cashews and pecans can also be used to make praline paste. Cashew praline paste will be more creamy due to the higher fat content.
Pecan praline paste will have a very distinct pecan flavor! It’ll almost taste like pecan pie, but as a spread!
Recipe

Easy Praline Paste Recipe (Almond or Hazelnut praline paste)
US based cup, teaspoon, tablespoon measurements. Weight measurements are recommended for accurate results whenever available.
Common Measurement ConversionsIngredients:
- 330 g white granulated sugar 1 ⅔ cups. You can use 350 g / 1 ¾ cups for convenience
- 300 g raw skinned hazelnuts see recipe notes for hazelnuts with the skin on
- 200 g blanched raw almonds see recipe notes
- ½ tsp sea salt you can reduce this to ¼ tsp if you are sensitive to salt
Instructions:
Making the dry caramel
- Line a baking pan with parchment paper OR a silpat, and keep it ready next to the stove. Ideally, keep a heat-resistant trivet or pad under the baking pan to protect your countertop.
- You will need to use a stainless steel pan to make the dry caramel. Ideally, a pan that is about 8 – 12 inches wide. Wider the pan, the faster the sugar will melt and caramelize. Make sure the pan is completely clean and dry. There should be no fat residue or water in the pan.
- Sprinkle the sugar in an even layer over the surface at the bottom of the pan. Then put the pan on your stove over medium heat.330 g white granulated sugar
- Do NOT leave the sugar unattended as this process will happen fairly quickly and you need to keep an eye on the sugar.
- Let the sugar cook on the stove. After a few minutes, the sugar that is in contact with the bottom of the pan should start to melt.
- Gently move the sugar around in the pan using a heat-resistant spatula (clean and dry), and shake the pan so that the unmelted sugar can come into contact with the bottom of the pan and melt.
- The dry sugar will clump with the melted sugar, and that’s OK. Keep cooking the sugar while gently moving the sugar around to melt it. This sugar is VERY HOT, so please make sure that it does not come into contact with your skin.
- The sugar will go from a colorless liquid to a golden color. Mix the sugar with the spatula to break up the lumps so that it'll cook and caramelize evenly. Remove the pan from the heat if needed to control the heat.
- The sugar should be almost lump free and golden in color. Keep cooking the sugar until it turns a light amber color. This will happen very quickly so keep an eye on it.
- As soon as the sugar turns a light amber color, remove the pan from the heat and carefully pour the sugar over the parchment paper or silpat that is on the baking sheet.
- The caramel will darken a little from residual heat. This is why you remove the caramel from the heat when it's a shade lighter than the final caramel stage that you desire for this recipe. You can remove the caramel from the heat even earlier if you want an even lighter colored caramel.
- Set it aside at room temperature to allow the caramel to set up and harden.
Preparing the nuts
- Try to use nuts that are already skinned for convenience. However, if you can only find nuts with the skin on, see recipe notes below on how to remove the skin from the nuts.
- Preheat the oven to 350°F / 180°C. Line a half sheet baking tray with parchment paper or a silpat.
- Spread out the nuts in an even layer on the parchment paper-lined baking tray.300 g raw skinned hazelnuts, 200 g blanched raw almonds
- When the oven is preheated, roast the nuts in the oven for 8 – 15 minutes, while moving the nuts around 2 – 3 times to make sure they are toasting evenly.
- The time will vary depending on the size of the nuts. You will know the nuts have roasted when you can clearly smell the roasted nuts when you open the oven door, and the nuts have darkened to a slightly darker shade in color than before.
- Remove the nuts from the oven and let them cool slightly.
Making the praline paste
- Ideally, you want to use a high powered food processor or blender for this step.
- Once the caramel is hardened, break it into smaller pieces. Use a sturdy and heavy item to break the caramel into smaller pieces. Place these small pieces in the bowl of your food processor.
- Place the roasted nuts and the salt in the food processor along with the caramel pieces. The nuts can be at room temperature or slightly warm.½ tsp sea salt
- Process the nuts and caramel until they are all very finely chopped. This can take about 1 minute at high speed (depends on your food processor or blender).
- Process the mixture for about 3 – 5 minutes, taking breaks to check on the praline paste. Use a spatula to scrape the bottom and sides of the food processor in between to ensure everything is evenly blending.
- The praline paste will go through several stages. First stage – Finely chopped. Second stage – Rough and grainy paste that is still fairly dry. Third stage – Thick, sticky paste.Fourth stage – Smoother paste, and still quite thick. Fifth stage – Smooth paste that is very thin in consistency.You can choose which stage you prefer for your praline paste to be at. I recommend at least stage 3 (depending on your preference). Please see pictures in the post for reference.
- When the praline paste has been processed to your liking, scrape the paste into a clean, dry container or jar with an air-tight lid. If you know that you will not be using all the praline at once, make sure to store the praline in two separate containers.
- Praline paste will last in the fridge for about 4 – 5 months IF it's stored properly (no contamination and no prolonged time at room temperature). Anything extra can be stored in the freezer for up to 18 months (without thawing and refreezing).
Recipe Notes
Notes on nut quantities
This recipe is for a total of 500 g of nuts. You can use any combination of hazelnuts and almonds for this recipe. This recipe can be made with 100% hazelnuts or 100% almonds, or any ratio in between. I only provide weight measurements for the nuts, since volume measurements (cup measurements) are simply not consistent enough. There will be more nuts in 1 cup if the nuts are small, compared to larger nuts.Notes on using nuts with the skin on
If you are using almonds OR hazelnuts with the skin on, you will need to remove the skin before making the praline.Dry method (works for hazelnuts)
Place the hazelnuts in a single layer on a baking sheet. Roast the nuts in a preheated oven (350 F / 180 C) for about 10 – 15 minutes. Remove the hazelnuts from the oven and let them cool for a few minutes. While still fairly hot (but not too hot to burn your hands!), transfer the nuts onto a large dish cloth, and fold the napkin over to enclose the hazelnuts inside. Agitate the hazelnuts inside the dishcloth by moving them around vigorously moving them around (like rolling with a rolling pin). Uncover the hazelnuts. Most of them should have their skin removed at this point. Repeat, as needed, with just the hazelnuts with the skin on to remove the skin from all of them. A few might be stubborn and that’s OK. They should be toasted already, but if you feel like they could be roasted a little bit longer, return them to the oven to roast for just a few more minutes.Boiling method (works for almonds and hazelnuts)
Bring a large pot of water to a boil over medium-high heat. When the water is boiling, add the nuts into the water. Blanch the nuts in the boiling water for about 1 minute. Remove the nuts and let them cool down under cold running water OR in an ice water bath. When the nuts are cold, press each individual nut between your fingers, and they should easily slip out of their skin. Repeat with all the nuts. Let the skinned nuts dry on a dishcloth. Roast them as per the recipe, but you may need to roast them for a couple minutes longer since they will be damp at the start.Note on yield amounts and servings
I have provided the total yield as the serving size. This is so you can adjust the recipe for how much praline paste you would like to make. Adjust the serving size to how many “grams” of praline paste you would like to get an estimate for ingredient amounts. When in doubt, make extra so you don’t run out of praline paste for a recipe. Especially because you can freeze the extra for a different recipe at a later date.Nutrition Information:
“This website provides approximate nutrition information for convenience and as a courtesy only. Nutrition data is gathered primarily from the USDA Food Composition Database, whenever available, or otherwise other online calculators.”


Leave a Reply