


Homemade chocolate marshmallows that are perfectly soft, fluffy, sweet, and deeply chocolatey? This is the only recipe you’ll ever need!
If you like making regular vanilla marshmallows, you’ll LOVE these homemade chocolate marshmallows!
After some rigorous recipe testing, it’s time to share my detailed, step by step recipe to make the most perfect chocolate marshmallows!
Just like my vanilla marshmallow recipe (which is a HUGE reader favorite and one of the most popular posts on my blog!), you’ll have foolproof results with this recipe too.
My vanilla marshmallow recipe is a troubleshooting guide on how to make classic marshmallow. For more details about all the fundamentals of making marshmallow, please see that post.
Why this chocolate marshmallow recipe works
- Well tested recipe that guarantees consistent, foolproof results.
- Does not result in heavy, dry chocolate marshmallows.
- Melts in your mouth, with a deep chocolate flavor. (Imagine pairing this with a thick, creamy French hot chocolate?)
- It’s actually easier than you think! Check out all my reader feedback on my vanilla marshmallows to see how many of my readers love making their own marshmallows!
Most chocolate marshmallow recipes online add cocoa powder directly to the marshmallow base, which will result in very dense, dry marshmallows.
This recipe uses a cocoa powder paste instead. The bloomed cocoa powder not only has a more intense chocolate flavor, but the hydration ensures that the cocoa powder doesn’t dry out the marshmallow base.
To compensate for the extra water and ingredients that are being added to the marshmallow base, there are a couple of adjustments that need to be made.
- Heat the sugar syrup mixture to a higher temperature, so that more water evaporates.
- Whisk the marshmallow base for longer to achieve the same texture and consistency.
Ingredients to make chocolate marshmallows
For the gelatin bloom
- Powdered gelatin – Powdered gelatin is what is widely available where I live. Each teaspoon is about 3g.
- Water

For the sugar syrup
- White granulated sugar – You can use brown sugar as well, but then you may need to increase the whisking time.
- Corn syrup – You can substitute the corn syrup with honey or golden syrup. You can also replace it with a little extra sugar, but inverted sugar syrups help prevent crystallization.
- Salt – Salt balances the sweetness and enhances the chocolate flavor.
- Water
For the cocoa powder paste
- Cocoa powder – Use a good quality cocoa powder, since much of the flavor comes from this. I use callebaut extra brute cocoa powder, which is a dutch cocoa powder. It has an intense cocoa flavor without much of the bitterness.
- Vanilla extract – Just adds more flavor. But you can add coffee extract only as well.
- Instant coffee – This is optional, but a little coffee deepens the chocolate flavor. Increase the amount of instant coffee that you add if you want to make mocha marshmallow.
- Boiling water – This is what will bloom the cocoa powder. So make sure to measure boiling water (instead of measuring the water first, and THEN boiling it).
How to make chocolate marshmallows
Bloom the gelatin and cocoa powder (separately)
Place the water and gelatin in the mixing bowl, and gently mix to saturate the gelatin. Let it sit until the gelatin is fully hydrated (at least 10 minutes).
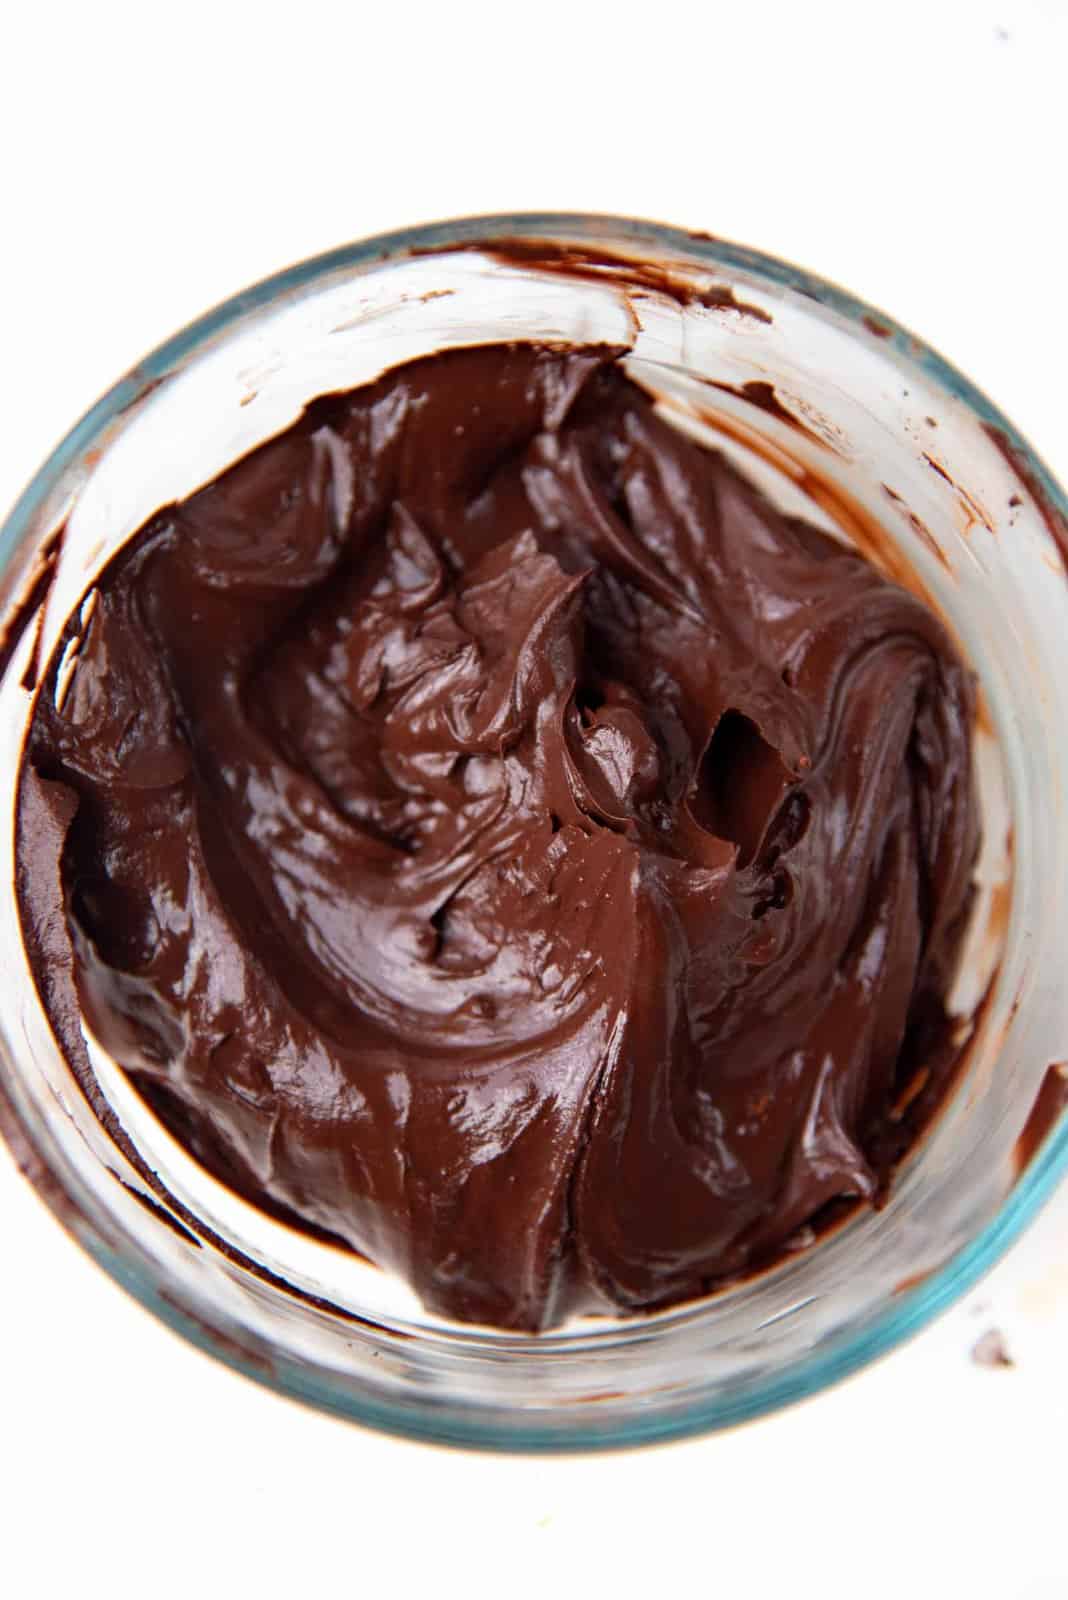
Mix the cocoa powder and boiling water in a bowl. Make sure you have a smooth paste with no lumps. Dissolve the instant coffee in the vanilla extract (or same amount of water), and stir it into the cocoa paste. Cover and set aside to cool. This will be your cocoa mixture.
Also prep a 8 or 9 inch square pan for the marshmallows. I usually rub a thin layer of butter or coconut oil on the pan, but now I line the pan with parchment paper instead. This way I can easily lift the marshmallows out from the pan and peel off the parchment paper. Some like to use cooking spray, but I prefer not to.
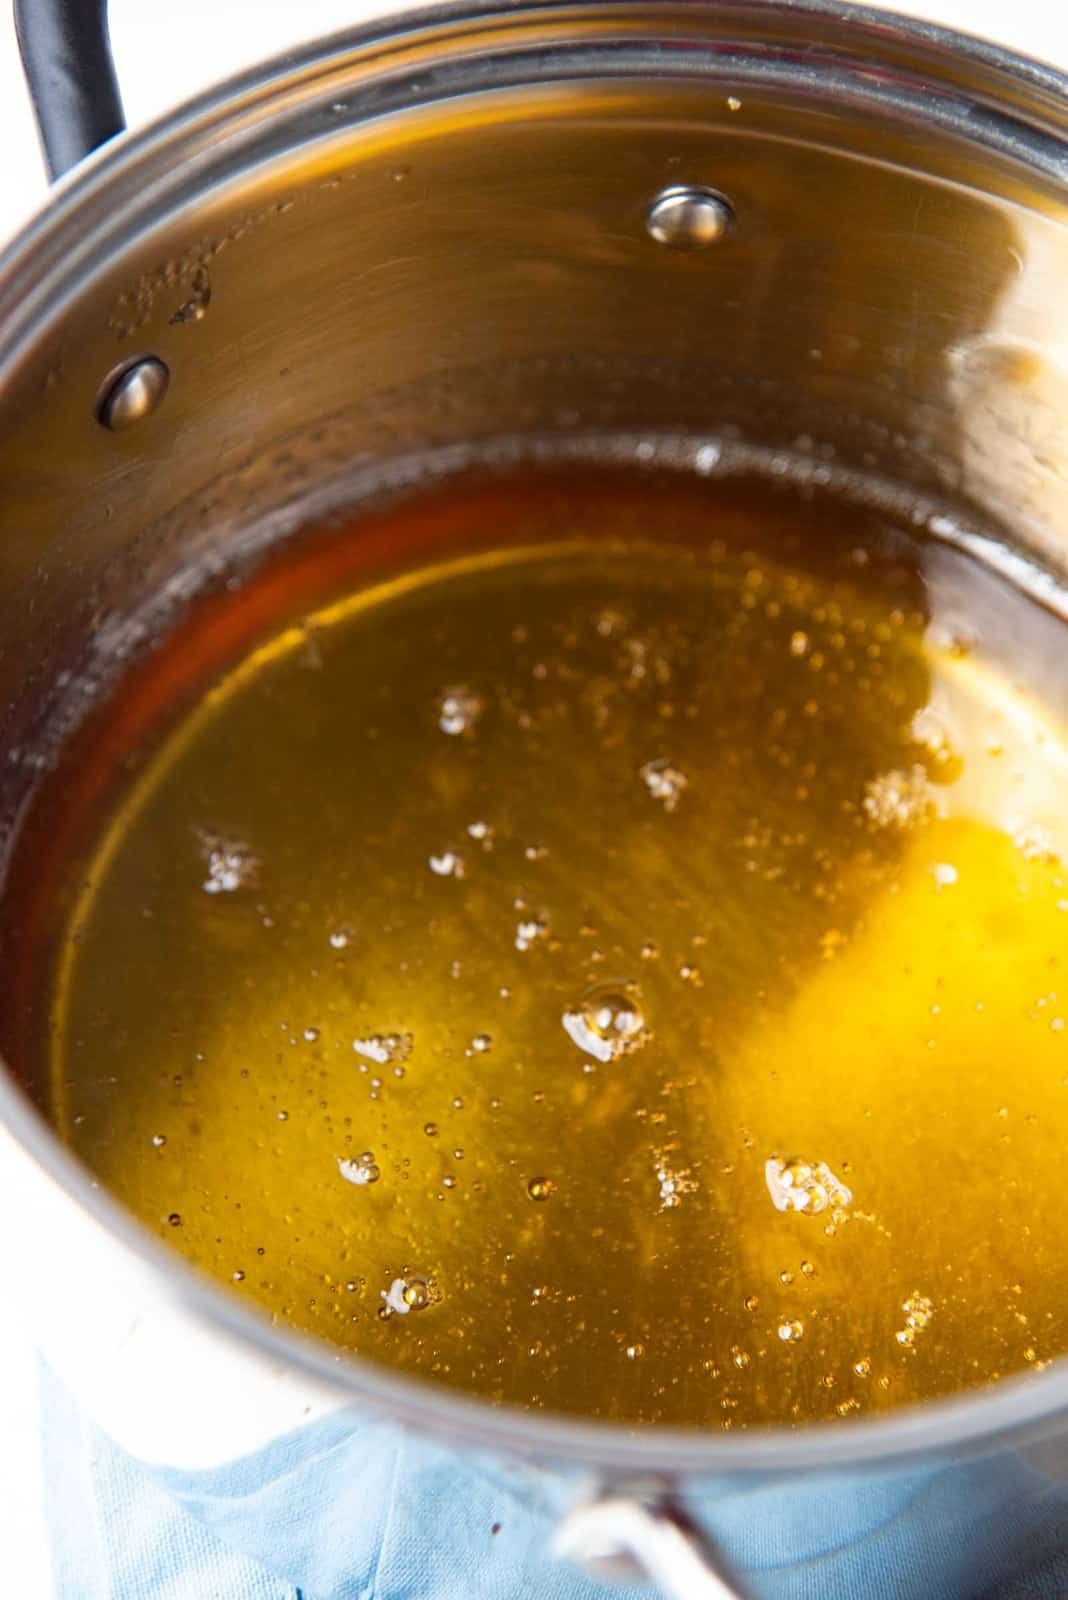
Make the sugar syrup
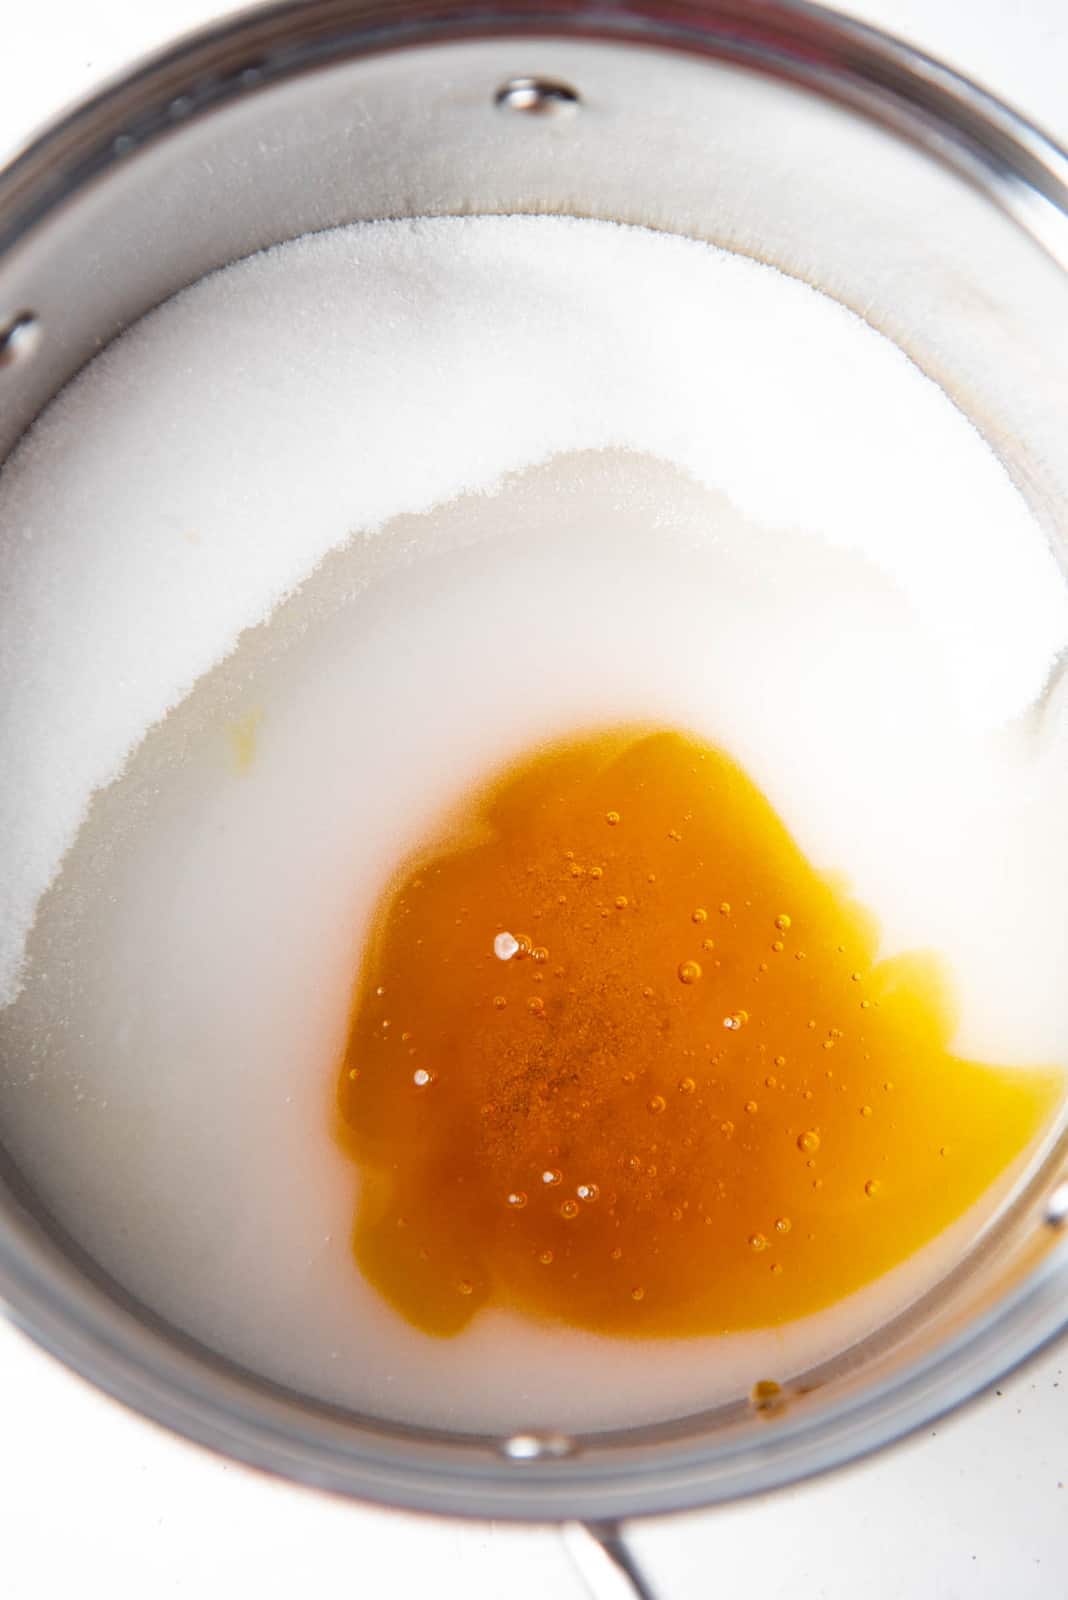
Place the sugar corn syrup salt and water in a saucepan (I like using golden syrup instead of corn syrup).
Create an “x” with a fingertip in the center of your ingredients to slowly distribute the water and saturate the sugar. Alternatively, you can stir the mixture gently to saturate.
Heat the sugar mixture while swirling the pan occasionally to make sure the sugar dissolves.
Once the sugar is dissolved, brush the sides of the pan with a pastry brush saturated with cold water. This is so that the sugar on the sides of the pan will dissolve back into the syrup. Alternatively, you can cover the pan with a lid and let it simmer for about 2 minutes. The condensation will help wash down any sugar crystals as well.
Heat the sugar syrup until it reaches about 250 F on your candy thermometer. This is higher than the 240 F I recommended for my regular marshmallows. At 240 F, the sugar syrup is at a soft ball stage, but at 250 F, the sugar syrup will be at the hard ball stage, and have less water in the sugar syrup. See my post on cooked sugar stages (candy temperature chart) for detailed information on different stages of cooked sugar.
Let the sugar syrup sit for a few seconds until the bubbles subside, and use immediately.
Making the chocolate marshmallow base
Attach the whisk attachment in your stand mixer, and the mixer bowl with the bloomed gelatin. Start running the mixer on medium low speed, and pour the hot sugar syrup down the side of the bowl into the gelatin. Once all the sugar syrup is added, the gelatin should also be dissolved in the hot syrup.
Mix for about 1 minute, and then add the cocoa powder paste.
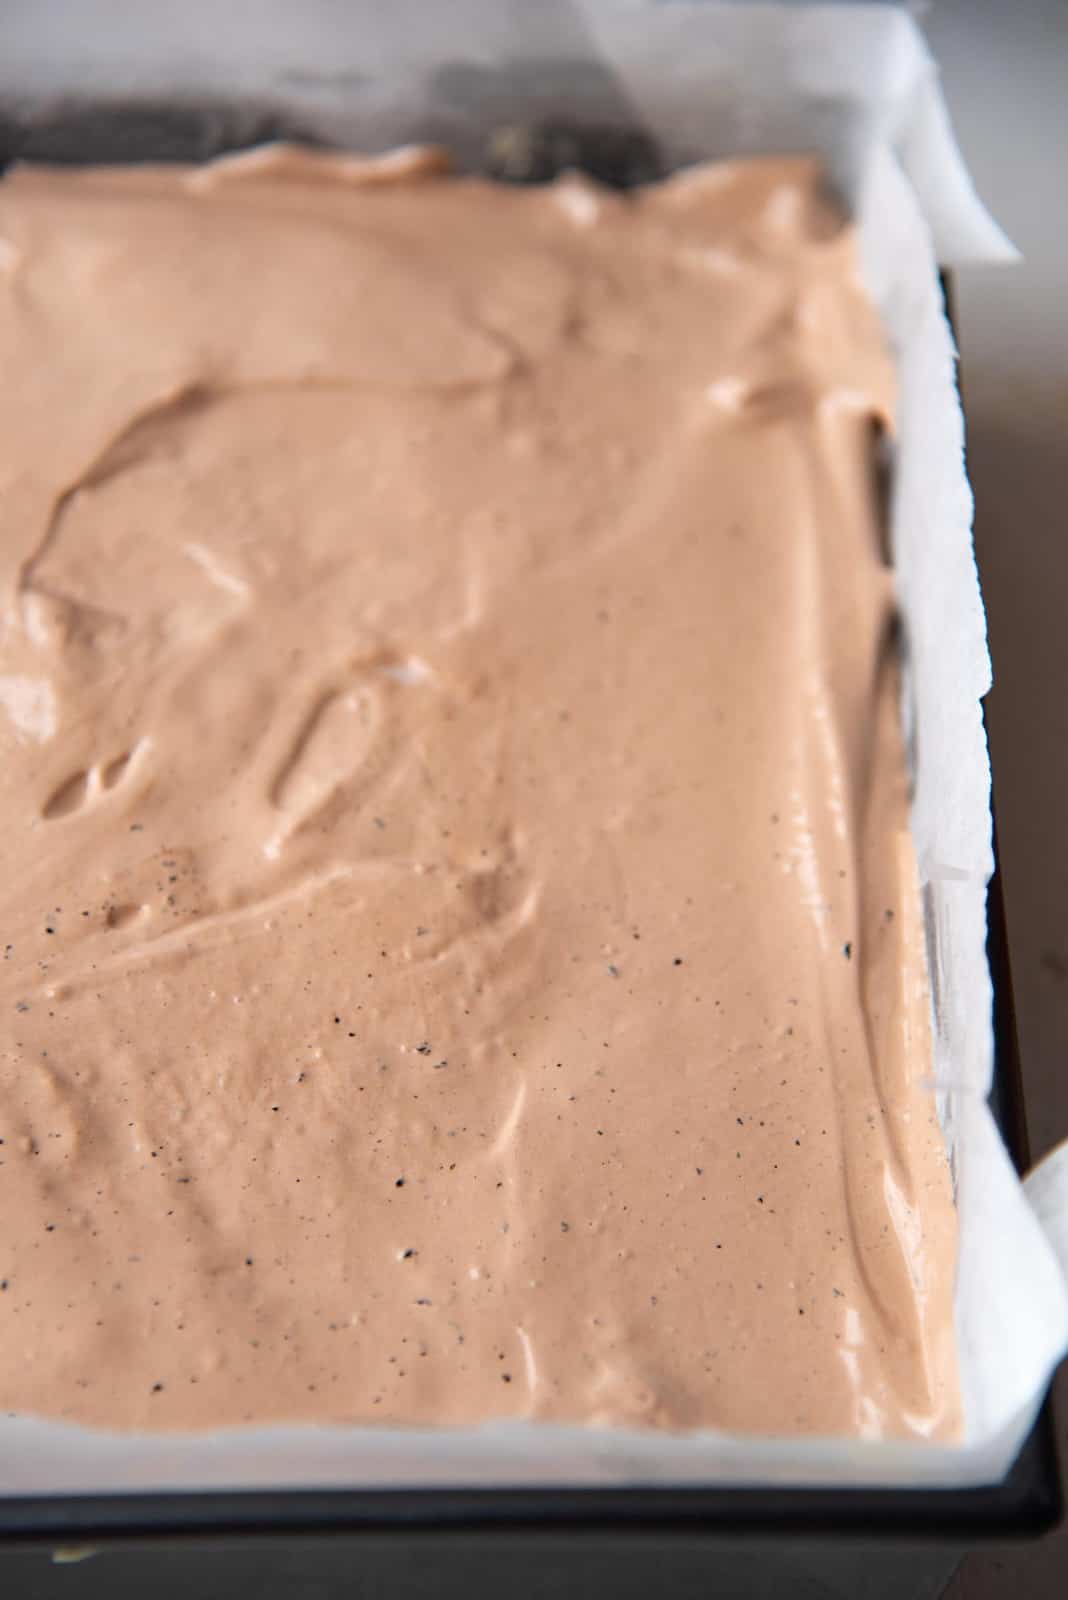
Whisk the marshmallow mix on medium high for 3 – 4 minutes. The marshmallow mix will seem very liquid, but keep whisking.
After about 3 – 4 minutes, increase the stand mixer speed to high and whisk until the marshmallow base turns into a light brown, meringue like mixture. The mix should have at least doubled in size and you will see the mixture forming strings on the side of the bowl during whisking.
This should take an additional 6 – 8 minutes depending on the speed of your mixer.
The marshmallow mix should also be slightly warm (when you touch the metal bowl). A slightly warmer marshmallow mix is easier to scrape out of the bowl. As the marshmallow mix cools, it will start to get thicker and set faster. So you want to scrape the marshmallow mix while it’s still a little warm so that it can be spread more easily in the pan.
Curing the marshmallows
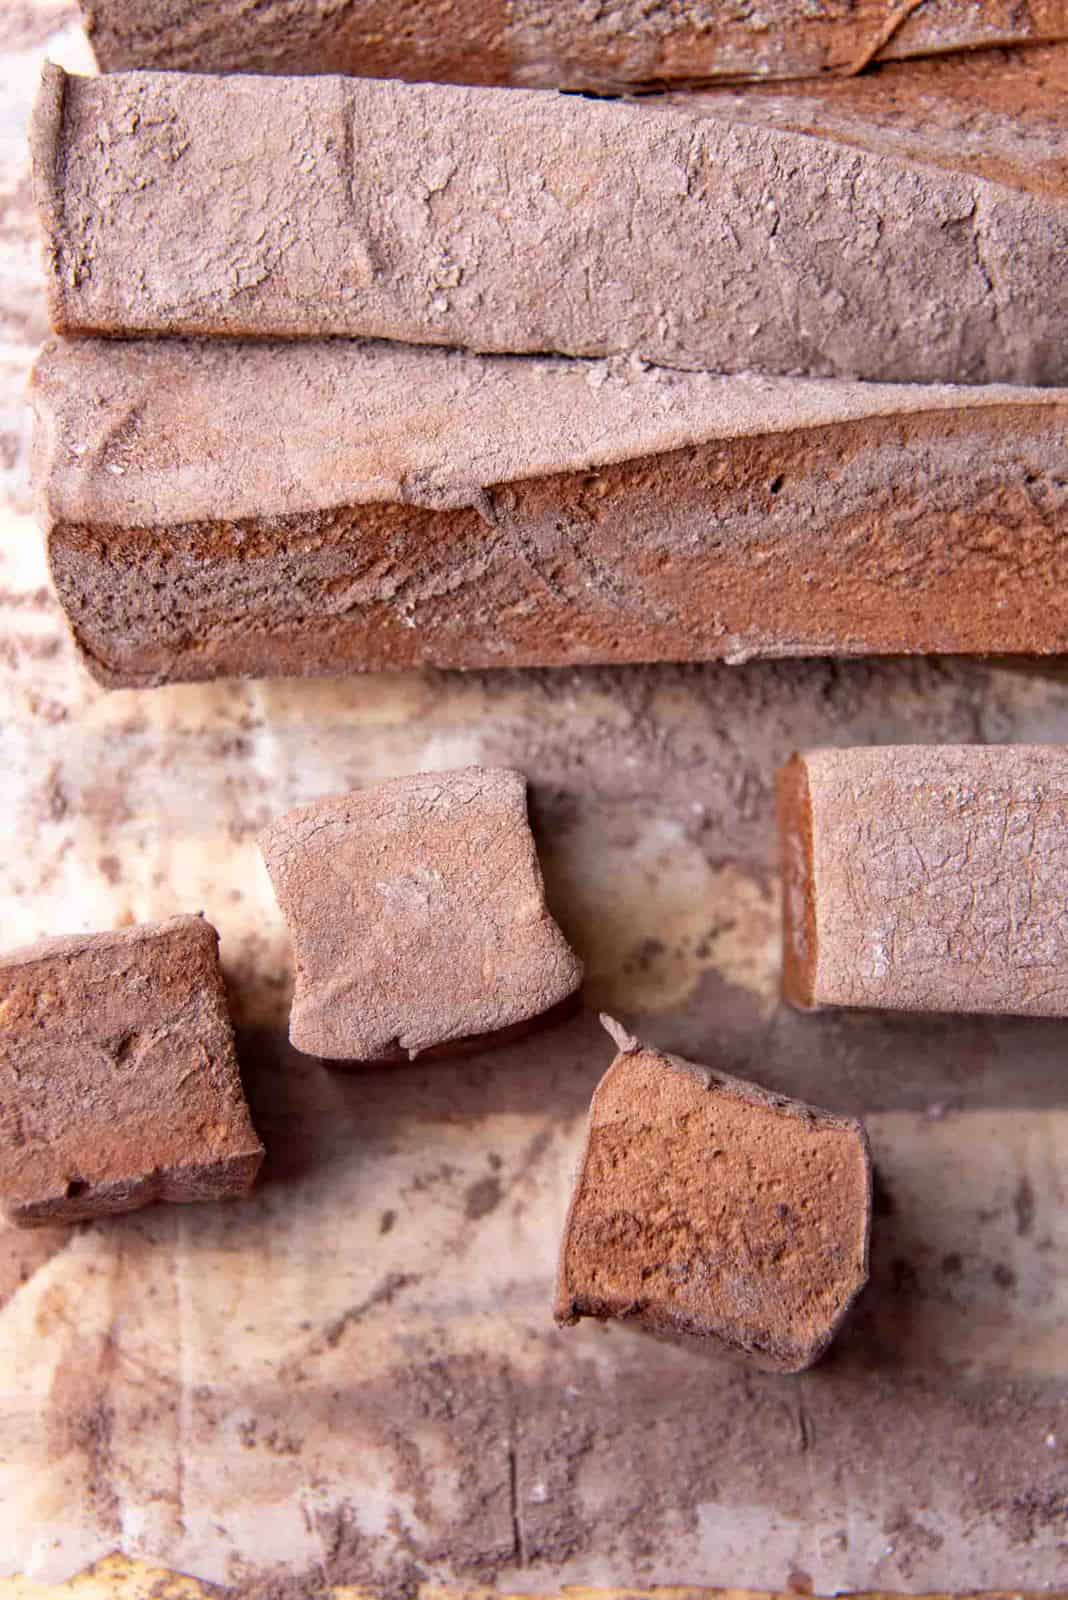
When the chocolate marshmallow mix is ready, scrape it into the prepared pan and use an offset spatula to evenly spread the mix.
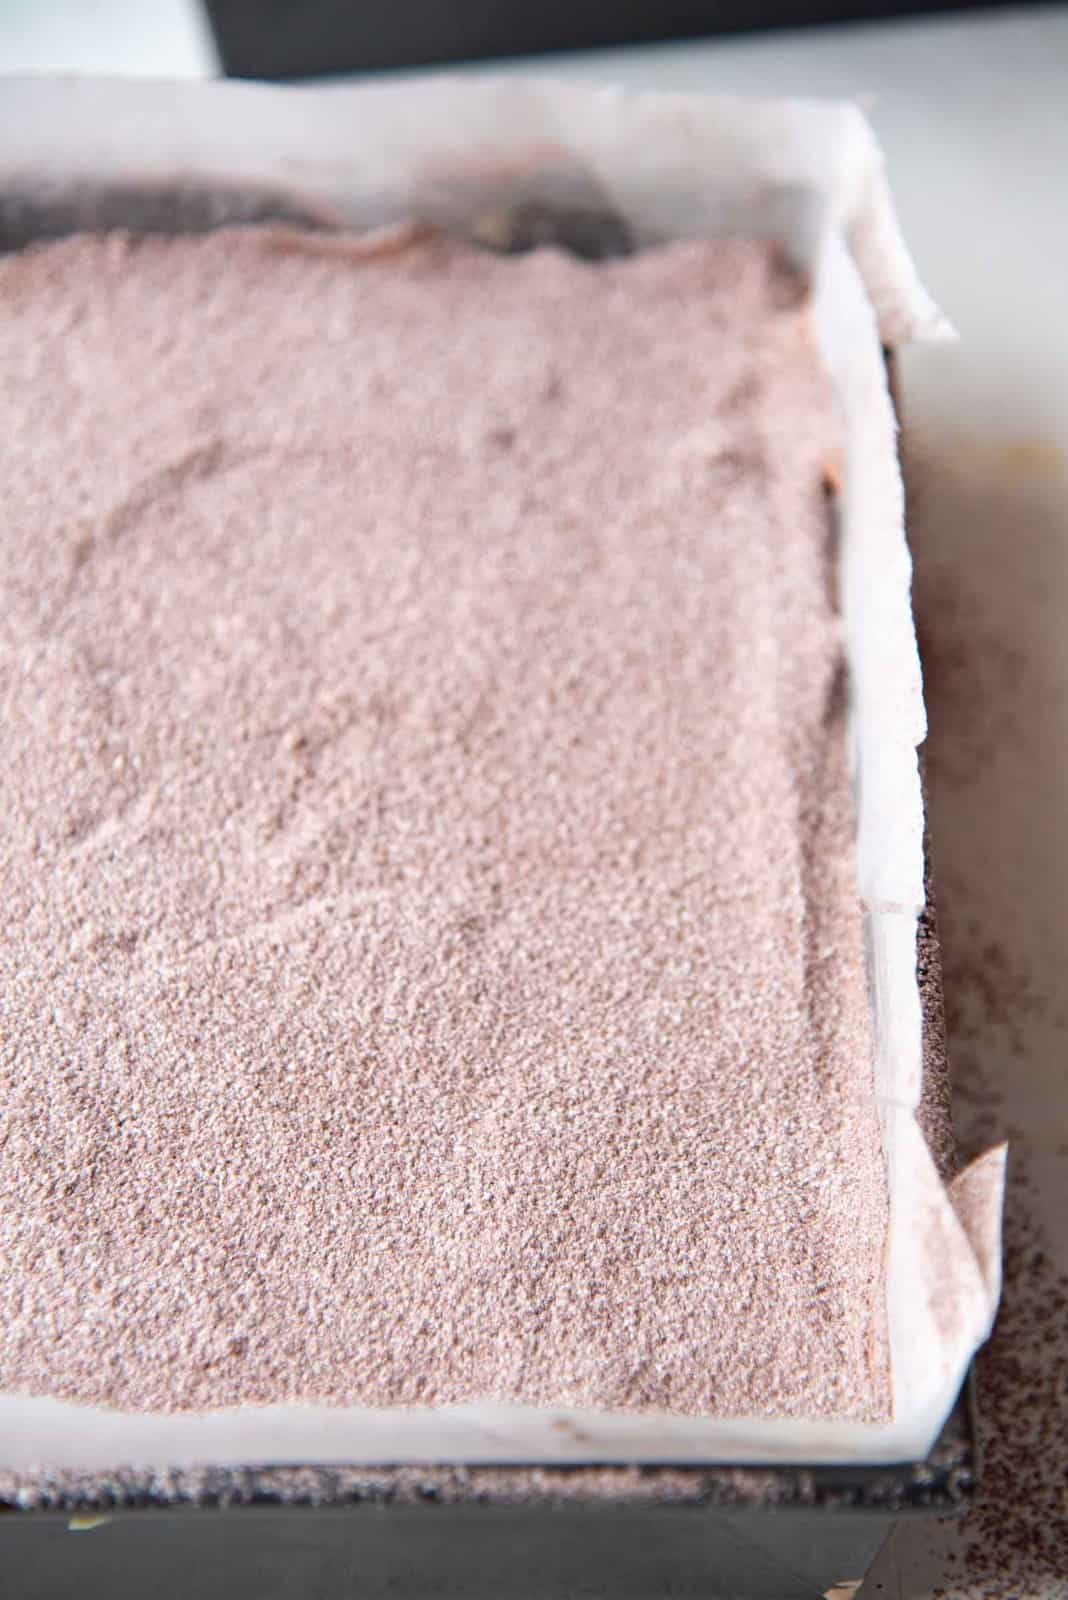
Whisk equal amounts of confectioner’s sugar and cocoa powder together (the mallow mix), and evenly sieve this mixture all over the chocolate marshmallow mix. Make sure the whole surface is covered with the powdered sugar and cocoa powder mix. This creates a barrier between the marshmallow surface and air as it cures for at least 6 hours.
I like to make my homemade marshmallows in the evening or at night and then let it cure overnight.
Cutting the chocolate marshmallows
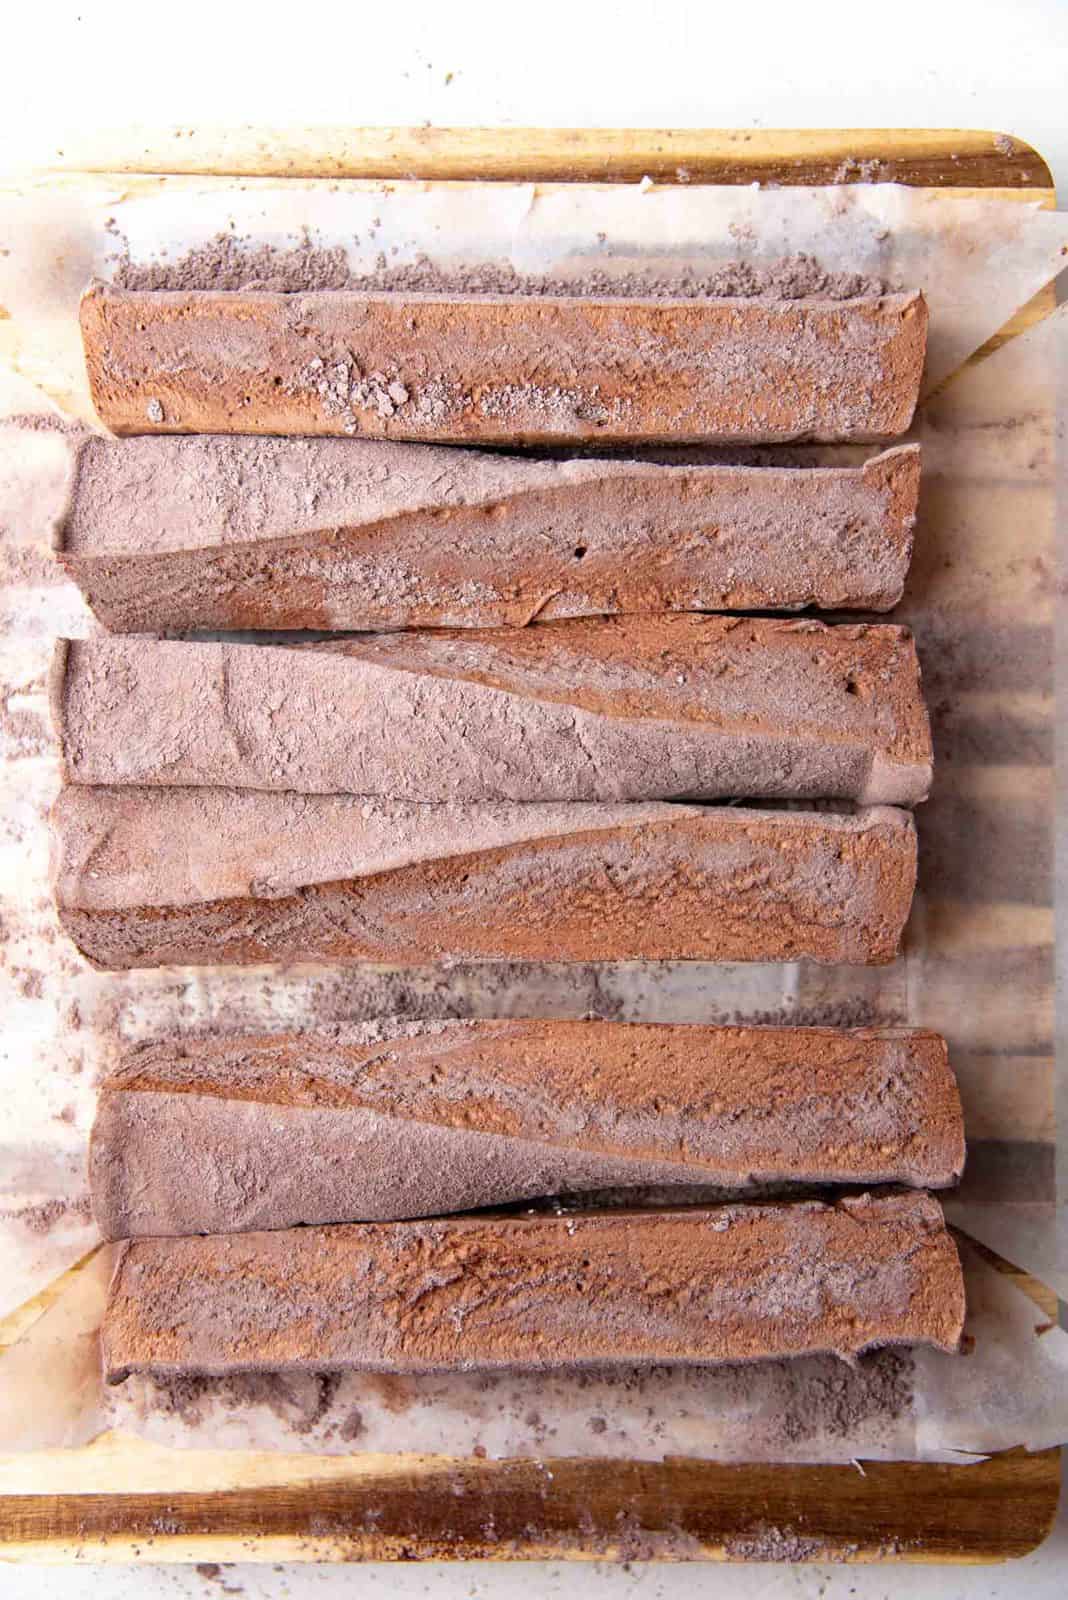
Once the marshmallows are cured, lift the marshmallow mix (with the parchment paper) out of the pan and place it on a cutting board.
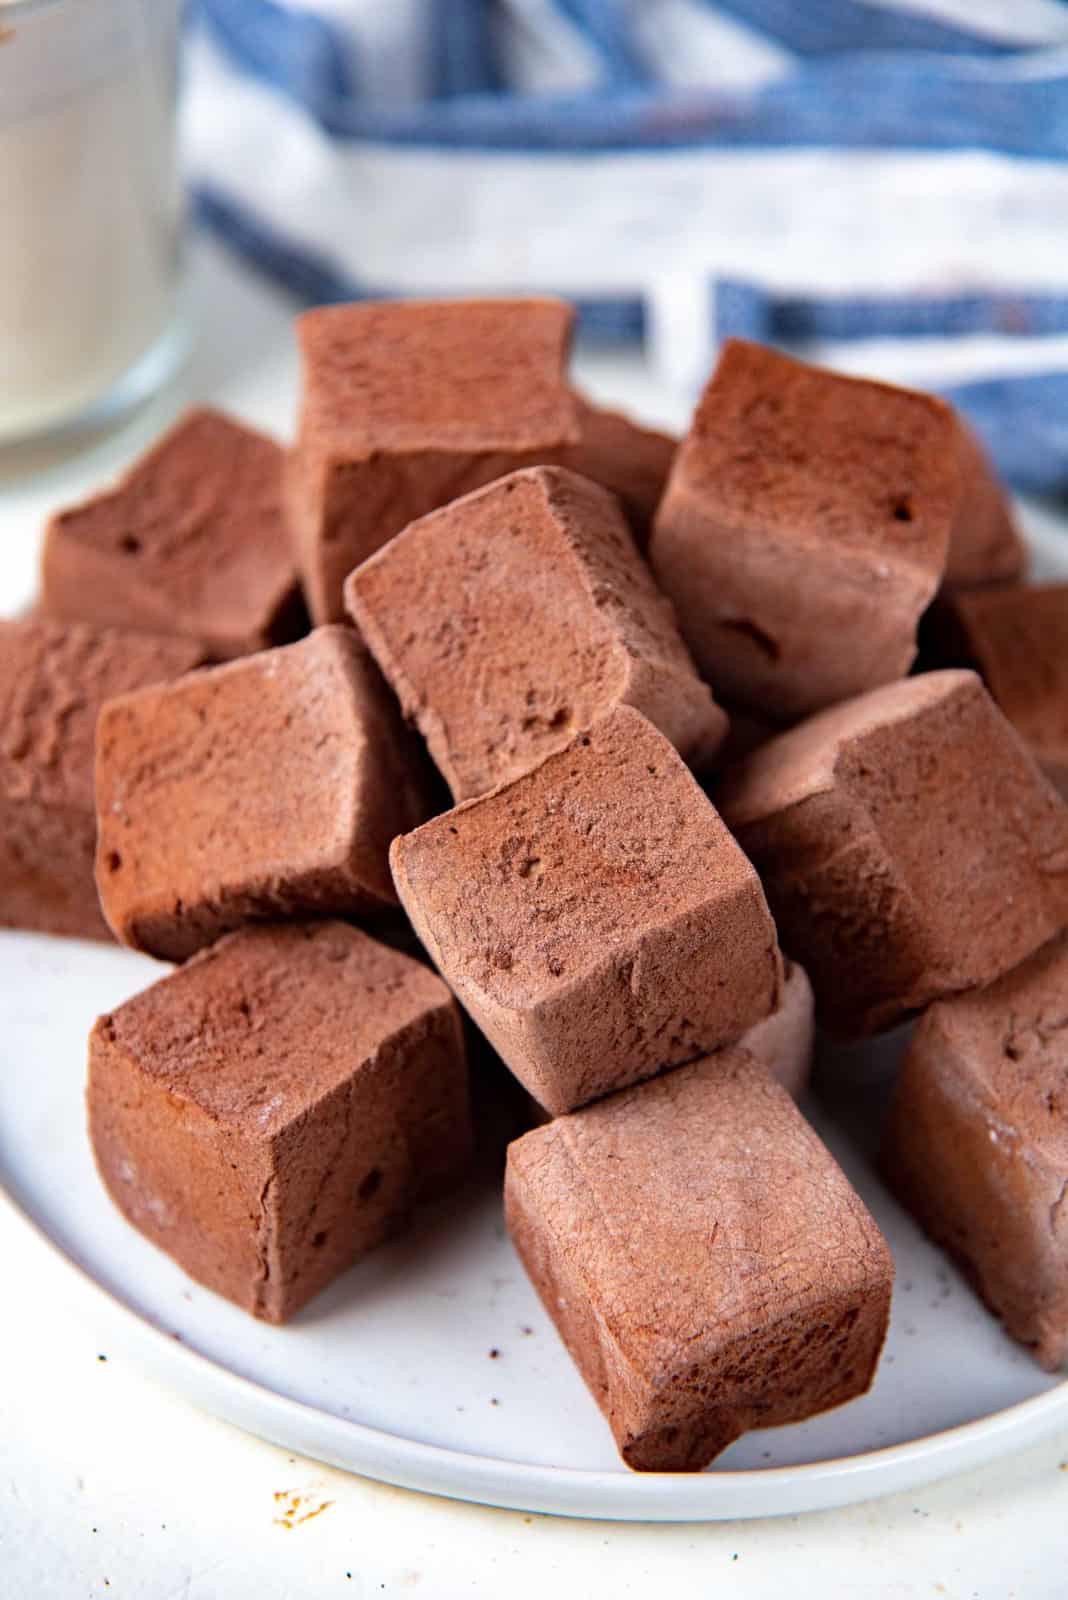
Use a sharp, clean knife to cut the marshmallows into whatever shape you like. I usually cut them into 6 x 6 squares, but you can make them larger or smaller.
You can also use a greased knife (with butter or coconut oil) to make it stick less. But I find that if you clean the knife between cuts, you can also get nice clean cuts.
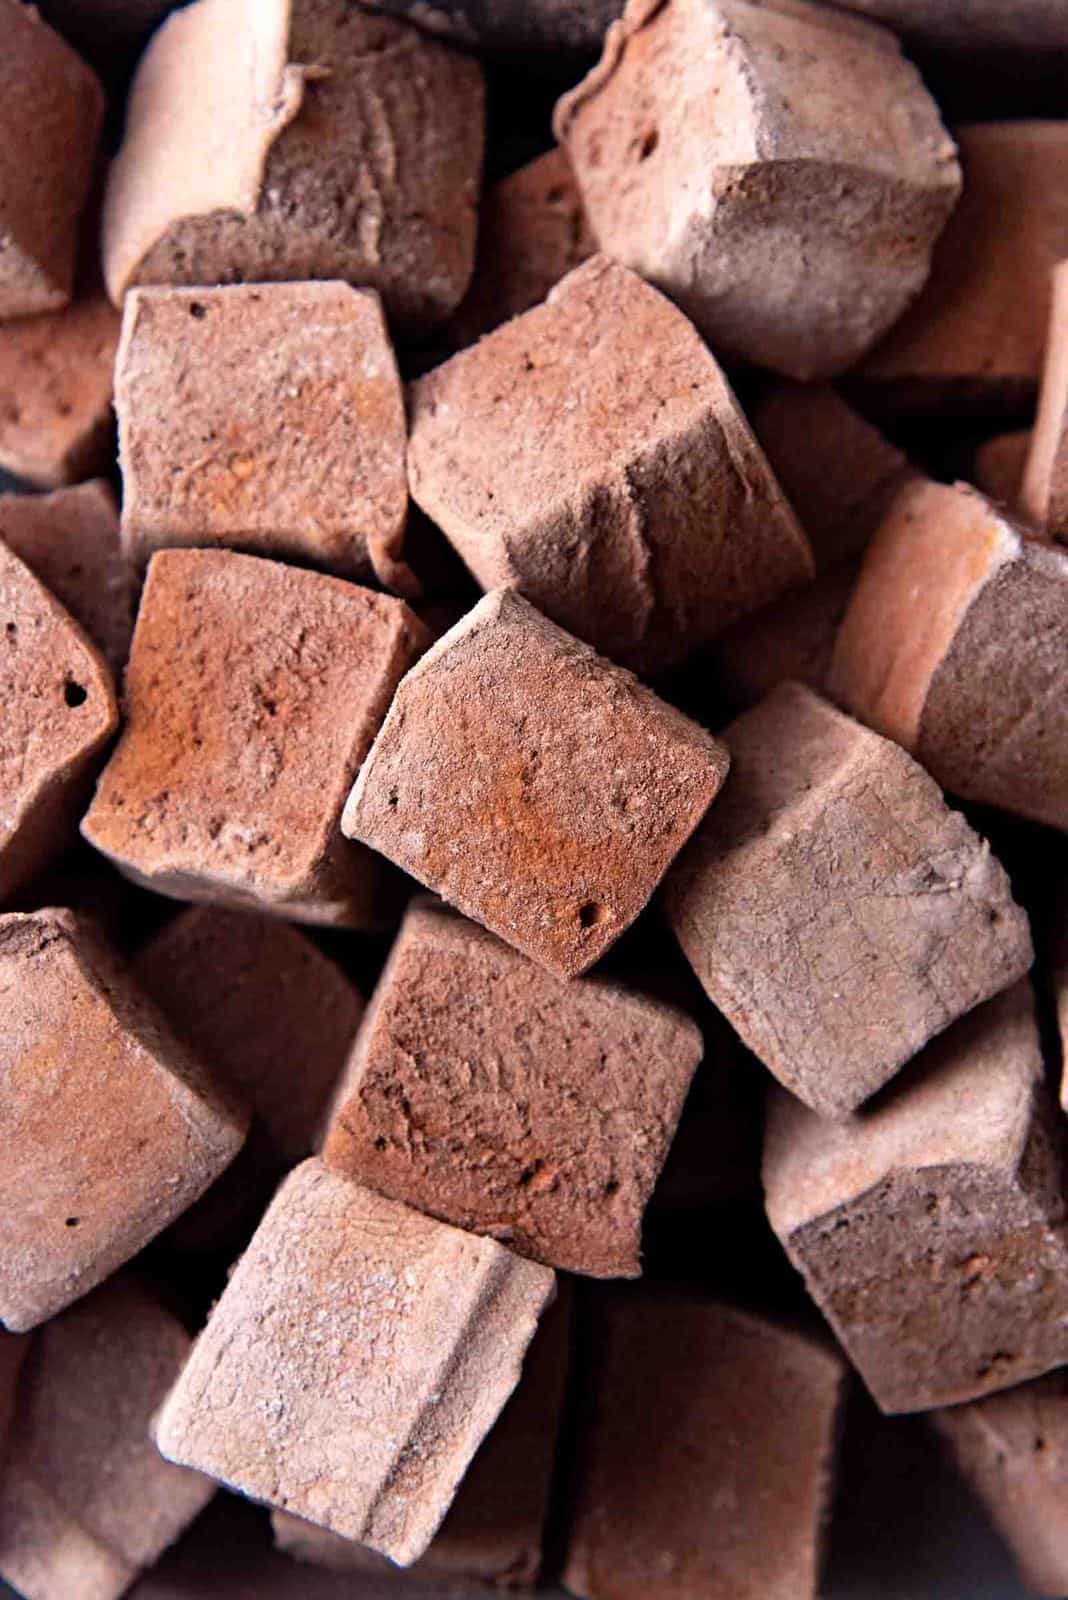
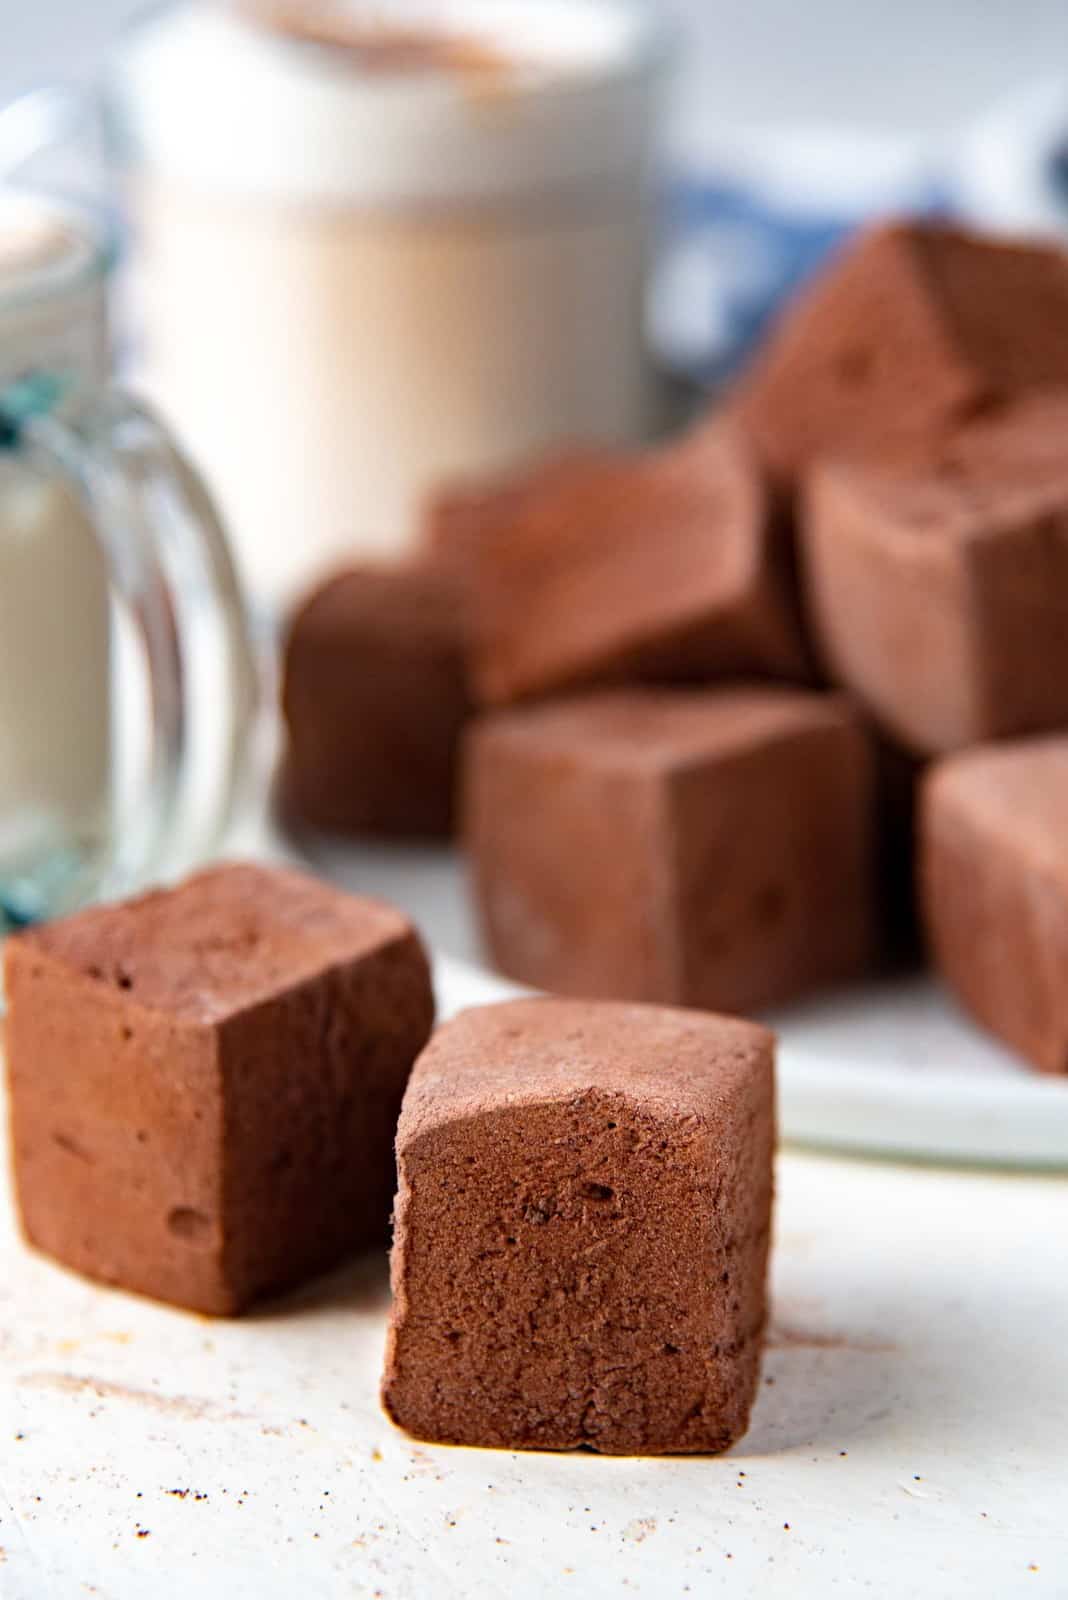
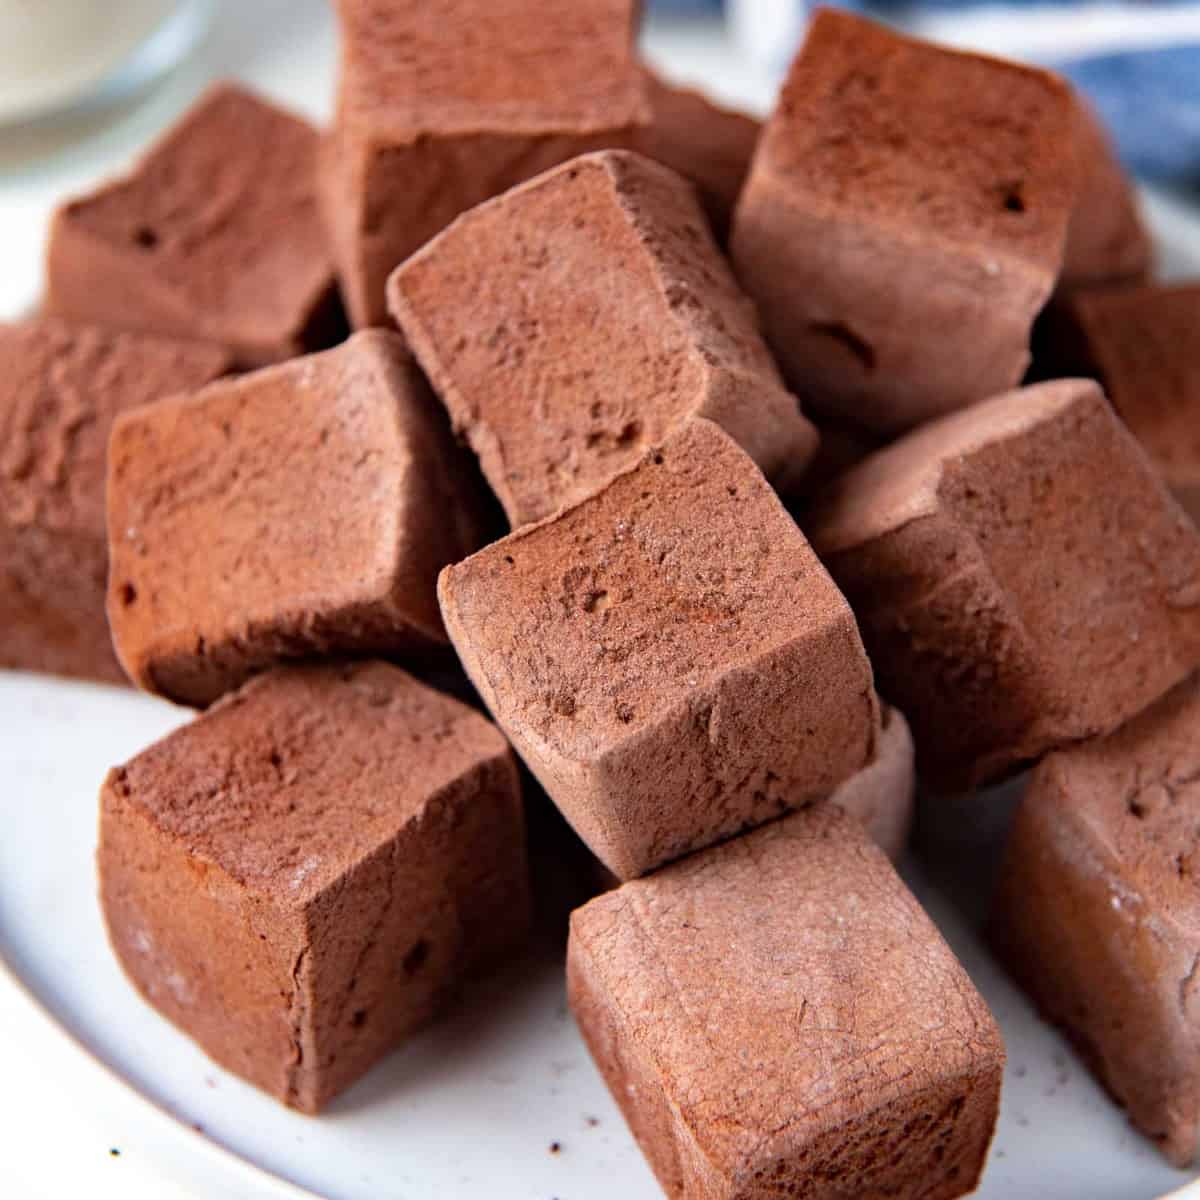
After the marshmallows are cut, coat each chocolate marshmallow with a light dusting of the mallow mix (roll the marshmallow in the mallow mix).
Storage instructions
These marshmallows have a very long shelf life as long as they are stored well. Store them in a jar or container that is air-tight and leave them at room temperature. Do NOT store marshmallows in the fridge or freezer.
Other variations of chocolate marshmallows
- Mocha marshmallows – Add more instant coffee to the cocoa powder paste.
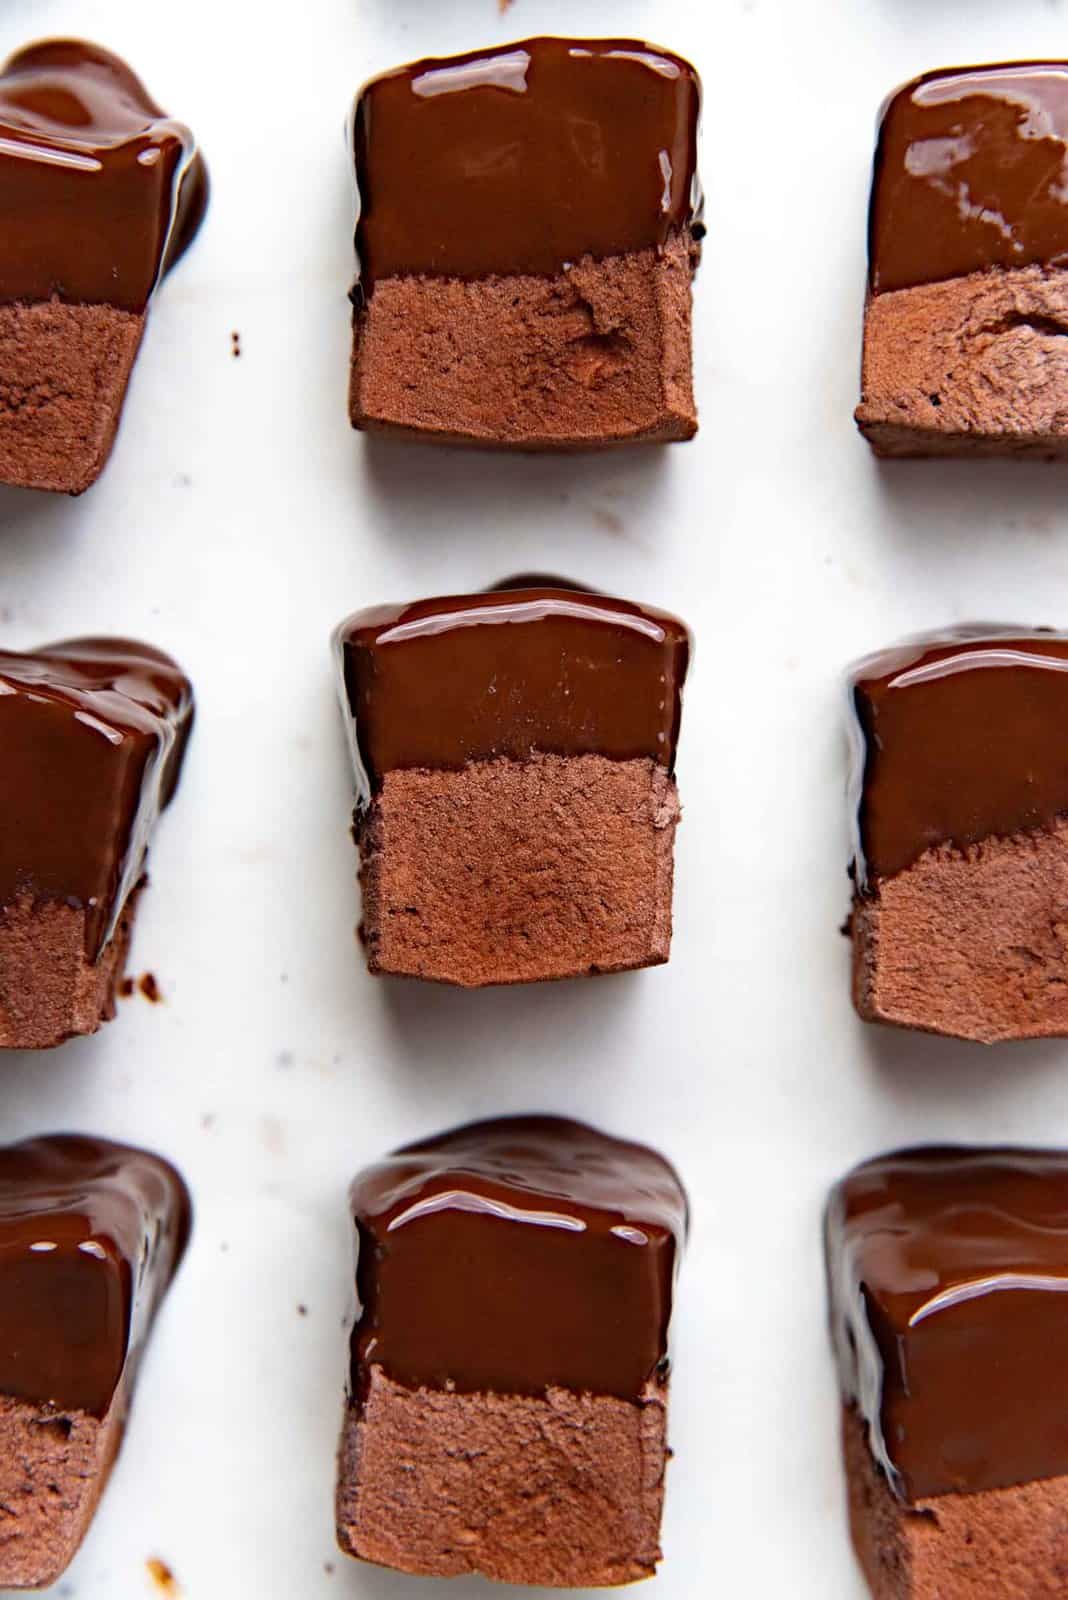
- Chocolate dipped chocolate marshmallows – Melt some chocolate in a microwave safe bowl, and then half dip the marshmallows.
- Chocolate orange marshmallows – Add 1 1/2 tsp of orange extract to the cocoa paste.
- Mexican hot chocolate marshmallows – Add 1 tsp cinnamon + 1/2 tsp cayenne pepper to the cocoa powder and bloom them together.
- Chocolate peppermint marshmallows – Add 2 tsp peppermint extract to the cocoa paste.
Serving suggestions
These marshmallows can be eaten just as they are. I mean they are freaking chocolate marshmallows! What more can you ask for? 😀 BUT, they are also fantastic in the following ways.
- Add them to hot chocolates (like this authentic French hot chocolate, peanut butter hot chocolate or even dairy free hot chocolate) or hot mochaccinos,
- Add them to a deliciously spiced vanilla steamer (my current favorite!),
- Make double chocolate s’mores!

Final recipe notes
Making marshmallows is SUPER easy! Chocolate marshmallows require an extra step than vanilla marshmallows, but they are still not complicated.
Make sure to use a candy thermometer. But if you don’t have one, you can do the water test to check the sugar stages as explained in my in-depth baking 101 article on cooked sugar stages and candy temperature chart.
Because of the cocoa powder, the inherent sweetness of marshmallows is perfectly balanced too.
These chocolate marshmallows are so soft and fluffy, and infinitely better than ANY store-bought marshmallows. They melt in your mouth.
Really, once you’ve made homemade marshmallows, you’re NEVER going back to store-bought again!
Frequently asked questions
Can I use plastic wrap instead o confectioner’s sugar and cocoa powder to cover the marshmallow mix?
I haven’t tried that before, because my grandmother always did it this way. And I wouldn’t want to mess with my grandmother’s way. But you can try it and let me know if it works!
My marshmallow mix doesn’t seem to be thickening into strings? What happened?
It is possible that your candy thermometer might be a little off and the sugar syrup was not as hot as the recommended 245 F.
If it’s still meringue like, but just more fluid, it will still set but the marshmallows will be a lot softer. Still DELICIOUS though!
Can I use agar agar or vegetarian gelatin?
No. This recipe works with regular gelatin. I wouldn’t recommend substituting gelatin with replacements.
Can I use natural cocoa powder?
Yes. I recommend weighing the cocoa powder, so you get the right amount for perfect results. Cup measurements can give you varying results.
Can I use melted chocolate instead of cocoa powder?
Unfortunately no. The fat in regular chocolate will deflate the marshmallow mix.
Can I use a 9 x 13 pan instead?
Yes you can. The marshmallows will be less tall, however. This is ideal if you want to cut shapes because the marshmallow “sheet” will be shallower.
Recipe
Chocolate Marshmallows Recipe
US based cup, teaspoon, tablespoon measurements. Weight measurements are recommended for accurate results whenever available.
Common Measurement ConversionsIngredients:
Mallow mix
- ¼ cup confectioner's sugar
- ¼ cup cocoa powder
For blooming the gelatin
- 27 g gelatin powder 9 tsp OR 3 ¾ gelatin packets
- 120 mL water ½ cup
Cocoa powder paste
- 50 g dutch cocoa powder about ⅓ cup
- 80 mL boiling water ⅓ cup
- 1 tbsp vanilla extract
- ½ tsp instant coffee granules optional
Sugar syrup
- 450 g white sugar 2 ¼ cups
- 112 g golden syrup or corn syrup ⅓ cup
- 60 mL water ¼ cup
- ¼ tsp sea salt I prefer to use ½ tsp
Instructions:
Prep the pan and mallow mix
- Apply a thin layer of butter or coconut oil on a 8 or 9 inch square pan. Alternatively, line the pan with parchment paper.
- Whisk the confectioner's sugar and cocoa powder and set aside. You will not need to use all of it for the marshmallows.¼ cup confectioner's sugar, ¼ cup cocoa powder
- Lightly grease a rubber spatula and a small offset spatula with butter or coconut oil – you'll be using these later.
Bloom the gelatin
- Place the water in the bowl of your stand mixer. Sprinkle the gelatin over the water and stir to saturate the gelatin.27 g gelatin powder, 120 mL water
- Set aside for at least 10 minutes to let the gelatin bloom. By the time the sugar syrup is ready, the gelatin will have bloomed.
Make the cocoa powder paste
- Place the cocoa powder in a small bowl. Add the boiling water and stir until you have a smooth paste.50 g dutch cocoa powder, 80 mL boiling water
- Dissolve the instant coffee in the vanilla extract and stir it in with the cocoa paste to get a smooth mixture. Set aside until needed.1 tbsp vanilla extract, ½ tsp instant coffee granules
Make the sugar syrup
- Place the sugar, golden syrup or corn syrup, salt, and water in a saucepan.450 g white sugar, 112 g golden syrup or corn syrup, 60 mL water, ¼ tsp sea salt
- Gently stir to saturate all of the sugar with the water, or make an “x” in the middle of the pot with your fingertip to allow the water to slowly saturate the sugar.
- Heat the sugar mixture over medium high heat. Swirl the pot to make sure the sugar is dissolving in the liquid.
- Brush the sides of the pot with a pastry brush dipped in cold water, OR close the pot with the lid and let the sugar syrup simmer for about 1 – 2 minutes. The condensation will help wash down any sugar crystals on the side of the saucepan.
- Cook the sugar syrup further, swirling the pot frequently (do NOT stir), until the syrup temperature reaches 250°F – 255°F with a candy thermometer.
- Remove the saucepan from the heat. Let it sit for about 30 – 60 seconds until the bubbles subside.
Making the chocolate marshmallow mix
- Place the mixing bowl (with the bloomed gelatin) in your stand mixer with the whisk attachment. While running the mixer on medium low speed, pour the hot sugar syrup along the side of the bowl. The heat from the syrup will dissolve the gelatin. PLEASE BE CAREFUL, as the syrup is very hot.
- Mix the gelatin and sugar mixture for about 1 minute, and then add the cocoa paste.
- Increase the speed to medium – medium high and mix for about 3 – 4 minutes.
- Increase the speed to high (the mixture should be slightly thicker), and whisk for a further 6 – 10 minutes, or until the mixture is ready. Because the marshmallow mix has more water content than regular marshmallows, it will take longer for it to whip into a pillowy marshmallow texture.
- The mixture is ready when it has doubled in size, and the marshmallow is a pale brown color with a glossy meringue like texture.
- The marshmallow mix is softer than regular marshmallows, but should have increased in volume and the bowl should still feel a little warm.
- When the marshmallow mix is ready, scrape it all out into the prepared pan using the rubber spatula.
- Working quickly, evenly spread the marshmallow mix in the pan with the offset spatula.
- With a small sieve, sift the mallow mix over the surface of the marshmallow. Make sure the whole surface is coated in a thin, even layer.
- Allow the marshmallow to cure (at room temperature) for at least 6 hours.
Cutting the marshmallows
- Once the marshmallow is cured, lift it out of the pan and place it on a cutting board. Gently peel off the parchment paper from the sides, so it’s easier to cut it.
- Cut the marshmallow into the size you prefer. I prefer to cut them into 6 x 6 for 36 pieces.
- Use a clean, dry, sharp knife to cut through the marshmallow, wiping the blade clean between cuts.
- Coat the cut marshmallows with the mallow mix to prevent the sides from being sticky.
- The marshmallows are now ready to be eaten.
Storing the marshmallows
- The marshmallows should be stored in an airtight container or jar. Keep them at room temperature. NOT in the fridge or freezer.
Recipe Notes
Nutrition Information:
“This website provides approximate nutrition information for convenience and as a courtesy only. Nutrition data is gathered primarily from the USDA Food Composition Database, whenever available, or otherwise other online calculators.”


Leave a Reply