


A detailed, step by step recipe and troubleshooting guide with a recipe video on how to make doughnuts with a vanilla glaze!
Donuts are one of our favorite pastry recipes. These are deliciously fluffy and airy on the inside and tender on the outside. These homemade doughnuts (homemade donuts) with a sweet glaze are an absolute treat!

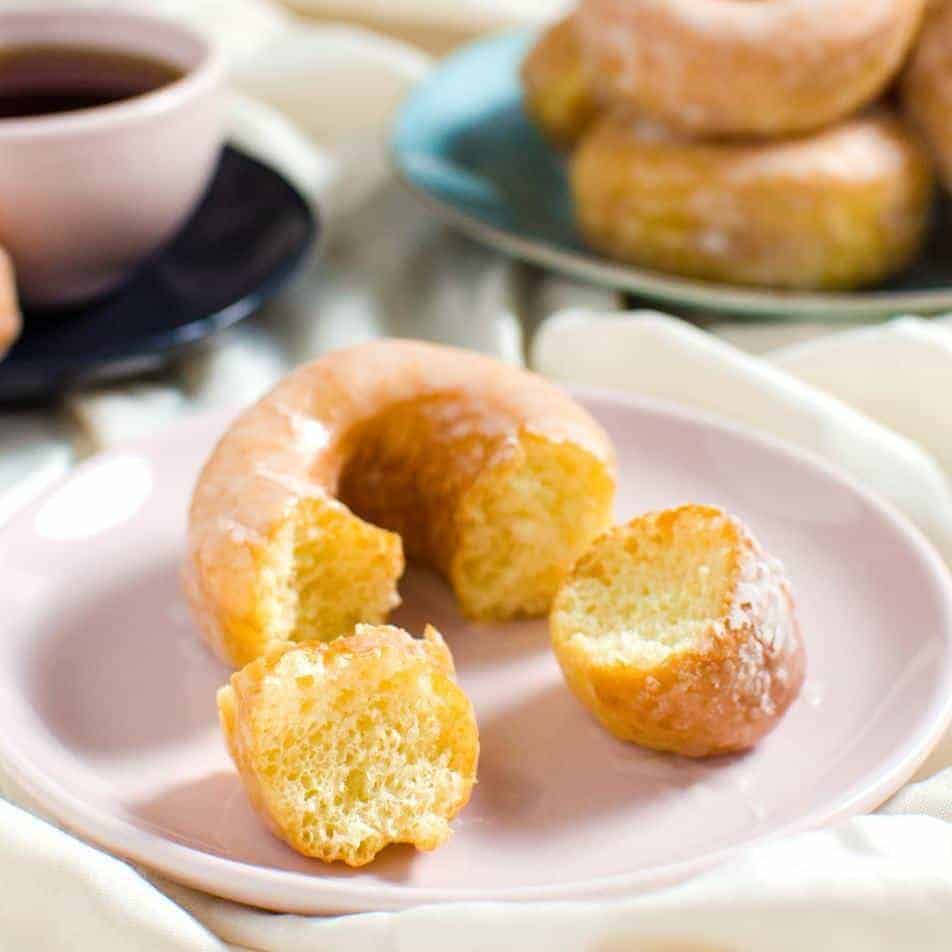
Perfect homemade doughnuts
Deliciously fluffy and airy (on the inside), and tender (on the outside) fried pieces of dough coated with a sweet glaze? What’s not to love about that? Doughnuts (or donuts, I’ll be using both spellings interchangeably in this post) have been around for centuries.
Glazes, fillings, and other little twists aside – there’s a reason why these breakfast pastries are still so popular in essentially the same way they were first conceived. Yes, there are baked, raw “donuts” out there now, but a deep-fried donut is where it all started, and there’s nothing like it in terms of flavor and texture.
I made doughnuts for the blog for the first time when I made these Simpsons doughnuts, a while back. Since then, I’ve also shared these delicious blueberry glazed doughnuts, coffee doughnuts, and even these fun mini unicorn rainbow doughnuts!
But here’s the holy grail of doughnut recipes, the basics of how to make doughnuts with all of my troubleshooting tips and advice.
How to make doughnuts (troubleshooting tutorial)
Flavor
These doughnuts (donuts) are made with 1 tbsp of active dry yeast. This may seem like a lot, but it ensures that the dough rises well, especially when it’s resting in the refrigerator, and it gives the donuts that characteristic flavor that we all love.
The overnight rise is preferable for developing flavor. Much like my favorite pizza dough, the cold rise of any yeasted dough lends characteristic flavor and texture to the doughnut, which a “warm place rise” simply cannot replicate.
Why? A cold rise slows down the process of yeast growth, allowing the yeast to develop a deeper flavor as they grow and multiply. Plus, a chilled dough is easier to handle as well. I talk more about this in my hot dog buns recipe and brioche bread recipe as well.
Butter plays an important part in this recipe too. Butter or oil, softens the gluten structure that you develop during the kneading process. This makes the dough soft and shiny and adds flavor too.
It’s important to incorporate the butter properly. You could possibly melt the butter and add it in a stream while kneading, but the method I’ve described in this recipe is what works best for me to get perfect donuts. I add the butter at the end, so that the flour has had a chance to completely hydrate with the milk and water that were added before.
Kneading while adding butter one table spoon at a time helps distribute the butter evenly throughout the dough. If you need to, you could increase the speed of your mixer to help the butter incorporate into the dough better.
Preparing the dough
You can roll out the dough and cut out circles (or any donut shape you like). For regular doughnuts, I use round cutters (as you can see in the photos and video) to get the shapes and sizes I want.
You could use a custom doughnut cutter too, but I prefer using 2 cookie/biscuit cutters, since I find them sharper and they cut through the dough cleanly.
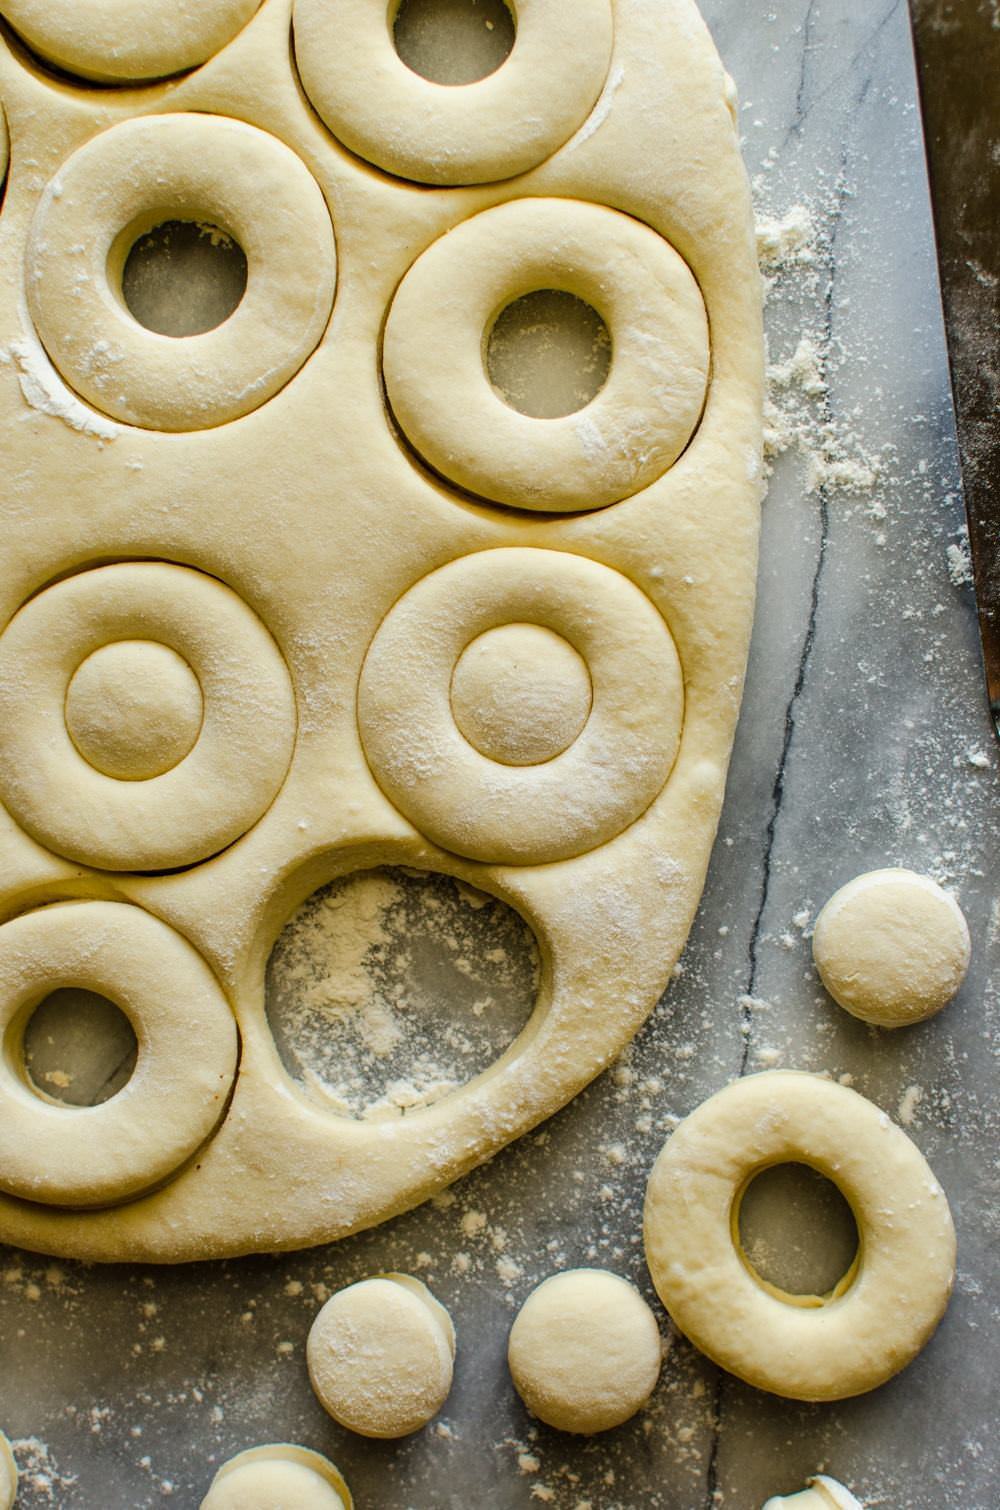
When you cut out circles, or regular doughnut shapes, you’re going to end up with scraps. These scraps can be re-rolled (after a one hour resting time in the fridge) and then cut again, once.
Remember, you want to cut out as many as you can from the first roll, because the 2nd re-rolled dough is harder to handle and can end up being thicker than your first batch (due to over handling of the dough and not enough resting).
So re-rolling the scraps a second time isn’t really ideal if you’re looking for PERFECT donuts. To avoid that, I try to use up as much of the dough scraps to make donut holes instead! 🙂
If you want filled donuts, then you can simply cut/divide the dough in to portions more or less equally, and roll them into smooth balls.
How to know when the doughnuts are ready to be fried
The second proofing usually only takes 1 hour at a room temperature of around 72°F- 75°F (22°C- 25°C) – a little less in the summer if it’s warmer, and a little longer in the winter if it’s cooler.
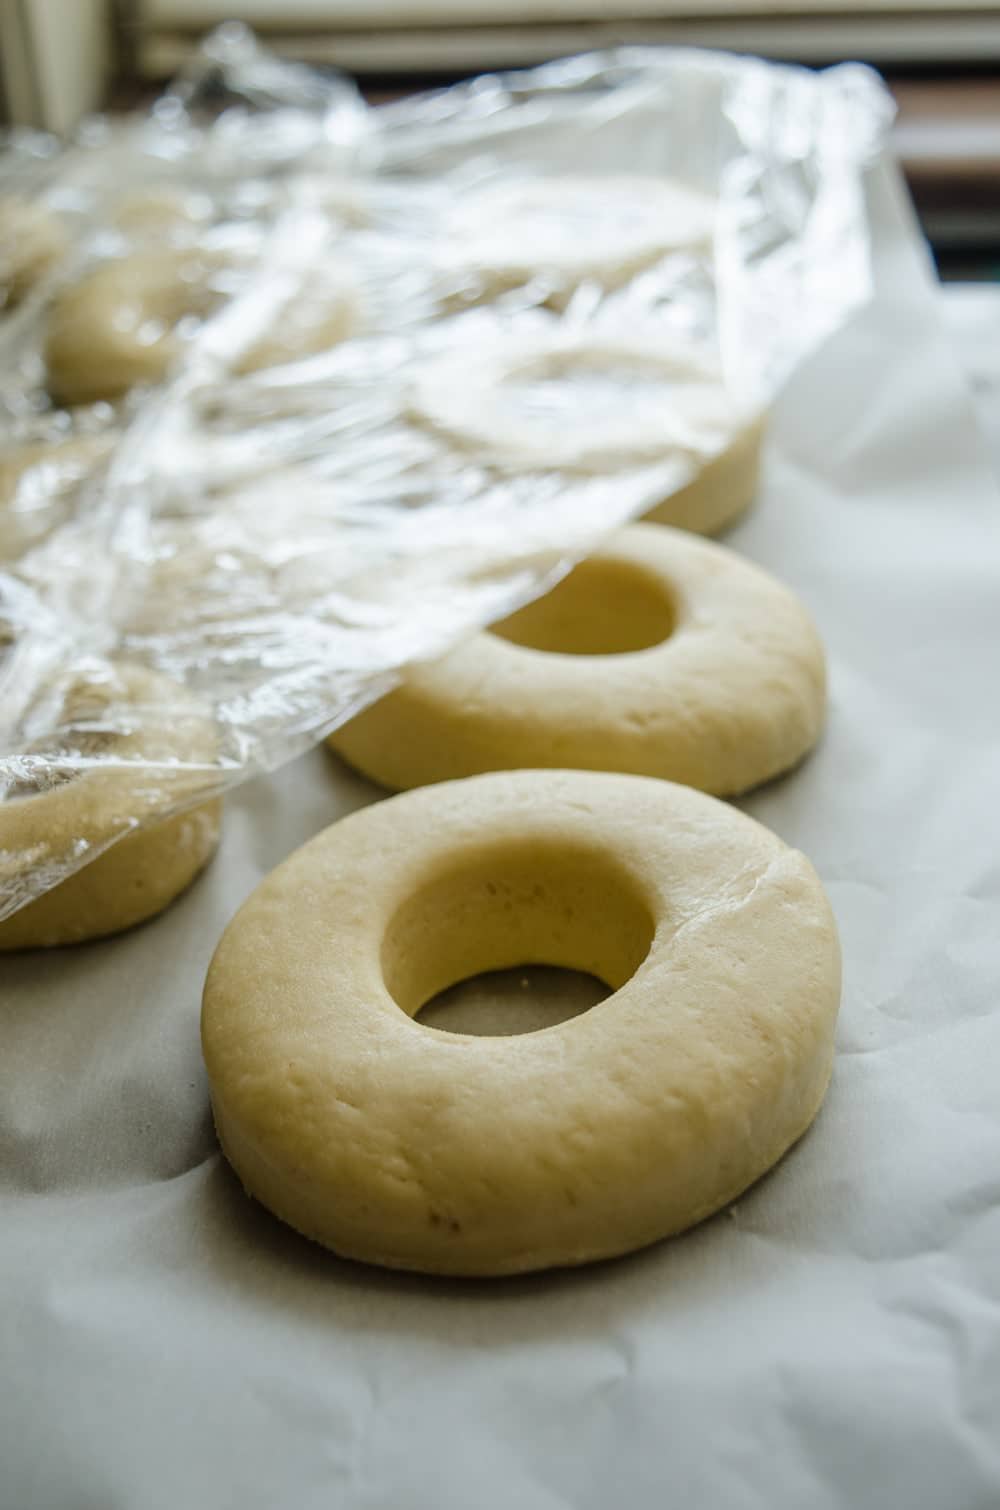
After I leave the doughnuts (covered with plastic wrap) for this second rise, I check on them after 30 minutes and then every 10-15 minutes. Check the first doughnut you cut out/rolled up and lightly press/prod it.
If the indentation you make with your finger immediately disappears, the dough is not done yet (underproofed).
If the indentation stays (see the recipe video below) – it’s ready! Remove the plastic wrap, and it’s time to heat up that oil.
However, if the cut dough starts to deflate, then it has been overproofed (which is why you should keep an eye on them after the first 30 minutes of your second proofing step), and will need to be re-kneaded, and re-chilled in the fridge for at least one hour (to rest).
Here’s another important tip that works for me – once the doughnuts have been perfectly proofed, take off that plastic wrap cover and let the dough “dry” for about 10-15 minutes. This will form a crust on the surface of the doughnuts and will make it easier to handle them and protects the donuts while they are being fried.
This step is not required, but I’ve found that it makes it easier for me to pick up the donuts, and it also helps them keep their shape better during frying.
What happens if the doughnuts haven’t proofed properly?
- Overproofed – leads to oily, collapsed, flat donuts.
- Underproofed – leads to stiffer (denser) donuts that don’t puff up well when fried.
- Cracked donuts – this may have happened if you used a cutter and it wasn’t sharp enough to cut through the dough cleanly. Or the dough is underproofed or too cold.
- Balled up donuts – if the dough has not had enough time to rest (especially donuts cut from the second re-roll), they tend to shrink (in width, not in height) and ball up when fried.
If your donuts were rested and proofed correctly, frying is the next step.
Frying the perfect doughnuts
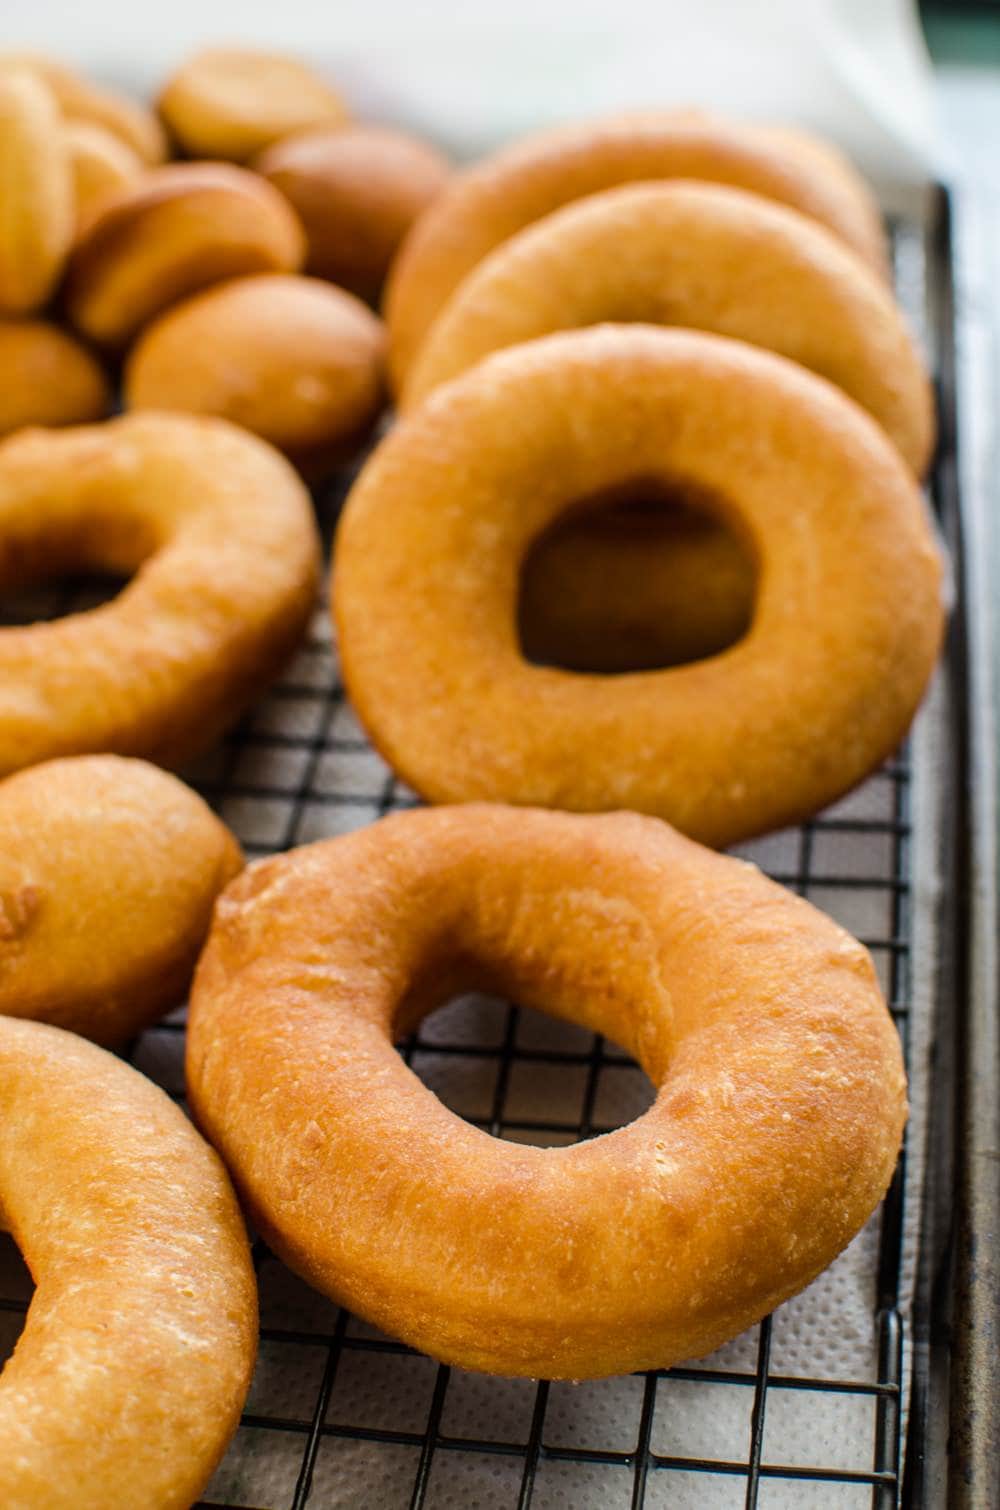
The optimum temperature for the oil/shortening should be 370°-375°F (188-191°C).
If your oil is at this optimum temperature, then the oil does its job, and when you drain your fried doughnuts, any excess oil gets drained out cleanly so that you don’t end up with any oily residue on your doughnuts.
But if the oil temperature is too low (lower than around 360ºF/183°C), you will end up with very oily doughnuts, since the oil gets trapped and absorbed by the dough.
Conversely, if the oil/shortening is too hot, this results in your doughnuts browning too fast and leaving a raw center, or burnt doughnuts, or both!
Another tip for frying doughnuts – you want your doughnuts to float in the oil/shortening. Since only half of the doughnut gets fried at a time (only half is submerged in the oil due to buoyancy resulting from that light, airy inside), you might be tempted to shallow fry it with less oil. DO NOT do that!
Please make sure there’s a good amount of oil, allowing the doughnuts to freely float while being fried.
Plus, it’s easier to maintain the temperature of the oil when there’s a sufficient volume of it too. The oil heats more evenly resulting in evenly browned/fried perfect donuts.

Glazing doughnuts
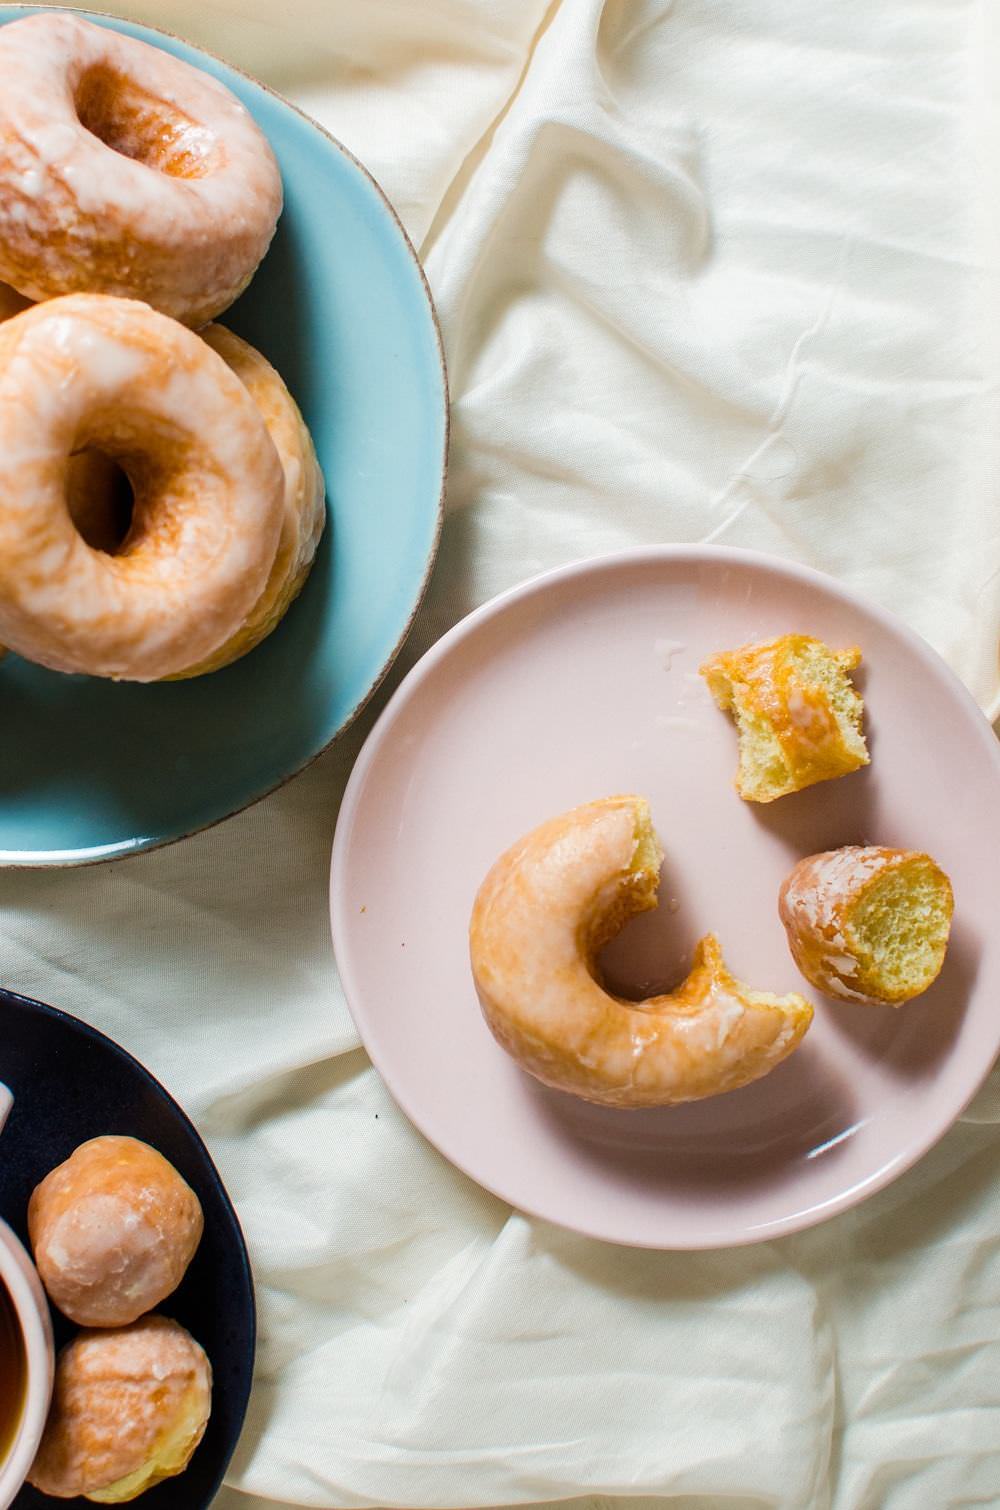
If you’re only glazing doughnuts (for classic glazed doughnuts), then wait till the doughnuts are cool enough to handle, but still warm.
Warmer doughnuts are easier to glaze than cold doughnuts and it results in a thinner, more even glaze. However, I have glazed doughnuts that were at room temperature as well without an issue.
But if I’m planning on filling my doughnuts, then I prefer to let them cool first, then fill and finally glaze them, especially because I work alone. If you have someone lending you a helping hand – you can have them glaze the doughnuts while they’re still warm.

Doughnuts are best eaten on the same day they are made! Really. Unglazed doughnuts really don’t taste that great the next day – unless they were stored in an air-tight container.
Glazed doughnuts withstand time and drying slightly better because they are protected by that glaze which prevents them from going stale rapidly.
These taste pretty good even the next day. But so-so by the third day, by which time, you could probably consider making bread pudding out of those doughnuts! 🙂 That’s what I do if we have leftovers and that tastes pretty amazing as well!

We have stored glazed doughnuts in the freezer as well, which helps keep them fresh for longer (up to a week). Each doughnut was stored separately in a ziploc bag. They thaw out fairly quickly at room temperature when you’re ready to snack!
Recipe Video
Recipe
How to make glazed doughnuts (doughnut troubleshooting)
US based cup, teaspoon, tablespoon measurements. Weight measurements are recommended for accurate results whenever available.
Common Measurement ConversionsIngredients:
Dough for the doughnuts
- 500 g AP flour approximately 4 cups, spoon and leveled
- 120 mL lukewarm water ½ cup
- 120 mL lukewarm milk ½ cup
- 1 tbsp active dry yeast
- 1 large egg
- 1 large yolk
- 50 g sugar ¼ cup
- 115 g butter 1 stick / ½ cup. Softened
- ½ tsp sea salt
- Oil or shortening for deep frying
Glaze
- 226 g icing sugar or confectioner’s sugar approximately 2 cups, spooned and leveled
- 80 – 100 ml whole milk about ⅓ cup
- 1 tsp vanilla
Instructions:
Doughnut dough
- Dissolve about 1 tsp of sugar in lukewarm water. Sprinkle the yeast over the water and stir to combine. Set aside for 10 – 15 minutes to activate the yeast. The yeast should become frothy when activated.120 mL lukewarm water, 1 tbsp active dry yeast, 50 g sugar
- Add the activated yeast into the mixing bowl, along with the rest of the sugar, milk, egg and yolk.120 mL lukewarm milk, 1 large egg, 1 large yolk, 50 g sugar
- Set aside about ¼ cup of the flour and place the rest in the mixing bowl with the other ingredients. Finally add the salt.500 g AP flour, ½ tsp sea salt
- Mix on low speed with the paddle attachment or kneading hook on your mixer, until the mix comes together. You can also use a spatula for this as well.
- If you used the paddle mix, switch to the dough hook and start kneading the dough for about 5 minutes.
- Add the softened butter (½ – 1 tbsp at a time) until it's all incorporated. Add some flour, if you need to get the dough off the sides of the bowl. Add the rest of the flour if needed, to form a soft dough ball. The dough should be tacky and soft.115 g butter
- Knead the dough for about 5 – 7 minutes until you have a soft, shiny, slightly tacky dough. Check if the dough is kneaded well with the window pane test.
- Knead the dough for a couple of minutes in your hands till you have a smooth dough ball.
- Place this ball of dough in a lightly oiled bowl (with enough room to rise) and cover with plastic wrap. (remember to place the dough with the seam side down).
- Let the dough rise at room temperature (70-75°F) until it is has doubled in size – this should take about an hour, maybe less depending on how warm the ambient temp. is. (If you are pressed for time, you can let it proof in the fridge – for at least hours upto 24 hours, and continue from step 10).
- If you allowed the dough to rise at room temperature – gently release the air in the dough.
- OPTIONAL BUT RECOMMENDED – Reshape the dough, and place it in the bowl again for an overnight proof in the fridge. This helps develop the flavors of the dough better and the dough is also easier to handle when chilled. The nxt morning you can remove the dough from the bowl and proceed with the recipe. If you want to skip the overnight proof, then skip this step.
- Place the dough out on to a floured surface and roll it out to a ½ inch thickness.
- With a 3 to 3.5 inch diameter cookie cutter / donut cutter, cut out the donuts from the dough. Use a smaller cookie cutter to punch out the center whole.
- Place the donuts and donut holes on a parchment paper lined baking tray and cover with plastic wrap or towel.
- Knead the left over dough lightly and let it rest for about 30 minutes, and repeat rolling and cutting once more.
- Cover the cut donuts and donut holes with plastic wrap and let them rise for about 1 hour or until proofed properly. (see tips in the post to check if the doughnuts are proofed properly).
- Heat a good amount of oil or shortening (the donut needs to float at least 2 inches above the bottom of the pan) in a heavy bottomed pan.Oil or shortening
- When the oil is heated to 375°F/190°C, carefully drop in a doughnut. After 30 – 45 seconds, check to see if the donut has turned a golden brown. If it has, flip it over. If it hasn't, leave it for a few seconds longer and then flip it over (the doughnut will darken as they cool down, so be careful not to let it darken too much while frying). If the donuts brown too quickly, lower the heat of your stove.
- Transfer the donut to a wire rack to let it cool.
- To glaze, place a donut in the prepared glaze and turn to coat it completely. Then keep it on a wire rack to let the excess glaze drip. Sprinkle with funfetti or sprinkles if you like, before the glaze sets.
For the glaze
- Sift the icing sugar, add vanilla and whisk in the milk or water – 1 tbsp at a time, until you get a pourable consistency. Add coloring if you like.226 g icing sugar or confectioner’s sugar, 1 tsp vanilla, 80 – 100 ml whole milk
- Make more as needed.
Recipe Notes
If you have too many doughnuts, freeze them individually, then thaw them out later when ready to eat. Activating Yeast – If I know my active dry yeast is fresh, I add it directly to the dough. However, if you are unsure whether your active dry yeast is fresh, you can activate it first.
Nutrition Information:
“This website provides approximate nutrition information for convenience and as a courtesy only. Nutrition data is gathered primarily from the USDA Food Composition Database, whenever available, or otherwise other online calculators.”
You can use this dough to make your favorite doughnuts. Like these Simpsons donuts, or blueberry cardamom doughnuts, or coffee doughnuts filled with white chocolate creme patisserie!
I have other favorite ways to prepare doughnuts too! Maple bacon bars (with bacon and maple glaze, lemon meringue dougnuts, chocolate truffle doughnuts (with Lindt truffles inside), Nutella stuffed caramel doughnuts (Nutella inside, caramel outside!), and so many more flavors. Stay tuned for all these delicious recipes!
If you liked this tutorial on how to make perfect doughnuts with vanilla glaze (perfect donuts) and this comprehensive troubleshooting tutorial, don’t forget to subscribe for new (and free) recipes by entering your email address on the side bar (and get all these recipes delivered straight to your inbox), so you don’t miss out on a thing. You can find me on FACEBOOK, INSTAGRAM, PINTEREST, YOU TUBE and GOOGLE-PLUS too.


Leave a Reply