

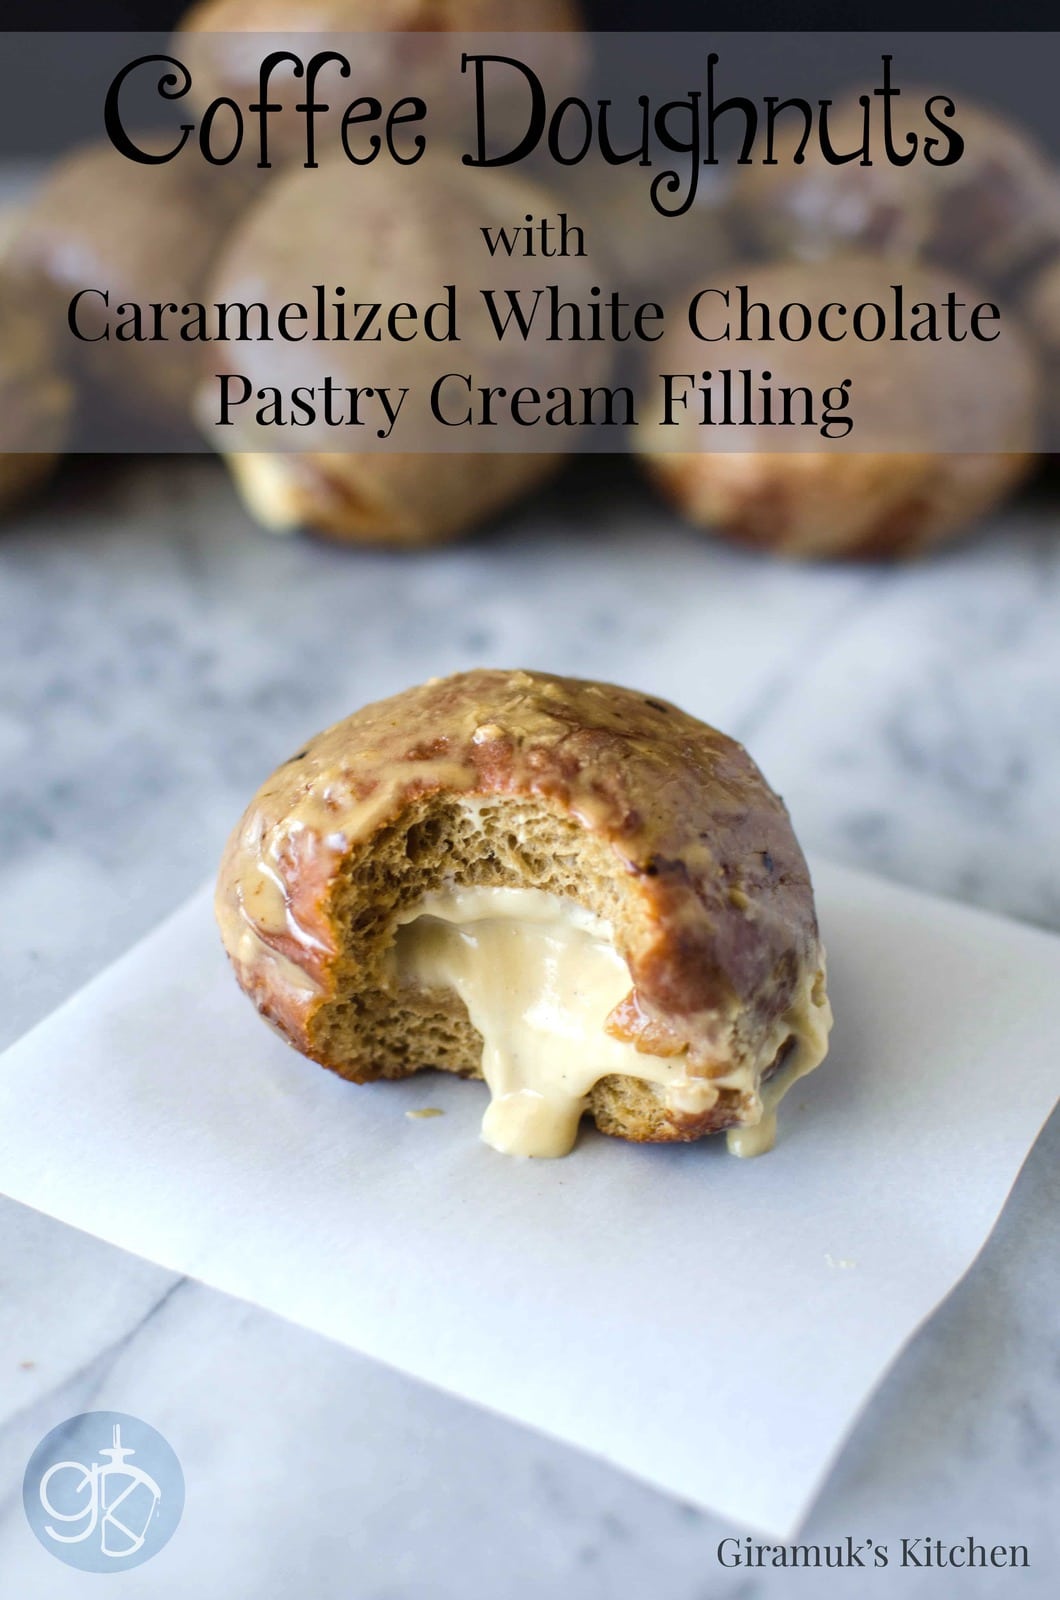
These Coffee Doughnuts with a Caramelized White Chocolate Pastry Cream are every coffee fan’s dream treat! Perfectly cooked doughnuts that are crisp on the outside and soft and fluffy on the inside, and filled with a decadent white chocolate pastry cream filling!
I’ve shared several doughnut recipes on the blog before like these blueberry glazed doughnuts, Simpsons doughnuts, and these colorful and adorable mini rainbow donuts! And I even shared a comprehensive post and recipe how to make doughnuts with all the troubleshooting tips and tricks on how to make foolproof and failproof fried doughnuts!
As someone who enjoys coffee and tea drinks a lot, I wanted to bring the two elements together and create a decadent coffee flavored treat, and these glazed coffee doughnuts were the inevitable result! 🙂
After all, so many people enjoy a warm cup of joe with a doughnut most mornings, correct? So why not integrate the two for a true coffee aficionado’s delight?
Classic fried doughnuts
As far as making your own donuts go, I feel like they’ve gotten a bad rap as being something difficult to make. It may be because of the need to deep fry them, or maybe because you’re working with a dough (as opposed to donut batter), but I’m here to tell you that you need not fear anymore! 🙂
While I have nothing against baked donuts (in fact I do love eating those too), they are just not as satisfying as a fried doughnut with a crispy outside and a light and fluffy inside.
Yes, it takes a little longer to make them than baked ones, but to me it’s worth it, at least once in a while. And if they are made properly, they aren’t oily at all.
What I love about these coffee doughnuts
- These coffee donuts are absolutely delicious with a strong hit of coffee flavor!
- Thin coffee glaze (you can make it thicker if you like), for an extra coffee flavor kick!
- The indulgent, sweet and salty white chocolate pastry cream (caramelized!) that transforms these form basic coffee donuts to the best fried coffee donuts you’ll ever have!

Brief donut tutorial
Flavor
These doughnuts are made with 1 tbsp of instant dry yeast. This may seem like a lot, but it ensures that the dough rises well, especially in the refrigerator, and gives the doughnut that characteristic flavor we all love.
The overnight rise is preferable for developing flavor. Much like my favorite pizza dough, classic donuts recipe, brioche bread, milk bread, and several other dough recipes on the blog, the cold rise of any yeasted dough lends characteristic flavor to the doughnut, which a “warm place” rise just cannot replicate.
Why? A cold rise slows down the process of yeast growth, allowing the yeast to develop a deeper flavor as they grow and multiply. On the plus side, it also makes the dough easier to handle.

You can roll out the dough and cut out circles or doughnut shapes. In this coffee doughnut recipe, I simply divided the dough more or less equally in to 20 rolls. When you cut out doughnut shapes, you end up with scraps. These scraps can be re-rolled (after a one hour resting time in the fridge) and then cut, once.
You want to cut out as many as you can from the first roll, because the 2nd re-roll is harder to handle, and can end up being thicker than your first batch (due to over handling and the dough not resting enough).
So re-rolling a second time is not really ideal. To avoid that I try to use up as much of the remaining dough scraps to make doughnut holes instead! 🙂

Knowing when the doughnuts are ready to be fried – The second proofing usually only takes 1 hour at 72°F- 75°F (22°C- 25°C). However, if it’s summer and it’s hot, it might take a little less time, and in winter, a little longer.
Overproofing – leads to oily, collapsed, flat doughnuts.
Underproofing – leads to stiffer (or denser) doughnuts with low volume.
Cracked doughnuts – If you used a cutter, it may not have been sharp enough to cut the doughnuts cleanly. Or the dough is underproofed or too cold.
Balled up doughnuts (applies mostly to cut doughnuts) – If the dough has not had time to rest (especially doughnuts cut from the second re-roll) they tend to shrink in width (not height) and ball up when frying.
After I leave the doughnuts to rise (covered with plastic wrap), I check on them after 30 minutes and then every 10-15 minutes. Check the first doughnut you cut out/roll up and lightly prod/press it.
If the indentation you make with your finger disappears – dough is not done yet (underproofed).
If the indentation stays – It’s ready! Take the plastic sheet off and it’s time to heat up the oil!
If the cut dough starts to deflate – It has over proofed, and will need to be re rolled, and re-chill the doughnut dough for at least an hour (to rest).

If the doughnuts have been made, rested and proofed correctly, frying is the next step.
Importance of using shortening that’s heated to the right temperature
Oil Temperature too low – [lower than 360ºF/ 183°C – Optimum 370°-375°F (188-191°C)] you will end up with very oily doughnuts. Frying in oil/shortening that is not heated correctly means the oil gets trapped and absorbed by the dough.
If you use oil that is at the correct temperature (~190°C) the oil does its job, and then when the doughnut is being drained, the excess oil gets drained out, so no oily residue!
Using oil/shortening that is too hot results in doughnuts that have a raw center, or burnt doughnuts (or even both). We don’t want that either!

Another tip for frying – You want the doughnut to float in the oil/shortening. Since only half of the doughnut gets fried at a time (due to buoyancy only one half will be submerged in the oil), you might be tempted to shallow fry it (with less oil). Please don’t do that! Make sure there is a good amount of oil allowing the doughnuts to float freely while cooking.
I find it easier to maintain the temperature of the oil when there is a sufficient amount of it, and this prevents uneven heating and results in evenly browned/cooked doughnut.
If you are only glazing the doughnuts, you don’t have to wait till the doughnuts have cooled completely. Once they are cool enough to handle, you can go ahead and glaze your doughnuts. But if you’re filling them as well, I prefer to let them cool first, then fill them and finally glaze them.
The glaze tends to protect the doughnut from drying out too quickly. They are best eaten the same day they are made, but are still great the next day. They are so-so on the third day, by which time you could probably consider making doughnut bread pudding instead? That tastes amazing too! 🙂
It’s important to incorporate the butter properly too. You could possibly melt the butter and add it in a stream while kneading, but the method I’ve described in this recipe is what works best for me.
I love the way the dough turns out and feels this way. Why change something that works right? Kneading while adding the butter distributes the butter evenly through the dough.

Coffee doughnuts recipe verdict!
- There’s no mistaking these for anything else, the coffee flavor is present throughout! The perfect classic coffee donuts for all coffee lovers.
- I add an extra bit of sugar to the dough (compared to my Simpson’s doughnuts or classic doughnuts with vanilla glaze), because the addition of coffee tends to make the dough taste slightly bitter, as you might expect.
- The doughnut itself is cooked perfectly, with a crispy exterior and soft, light, fluffy interior.
- The coffee glaze (sweet espresso glaze) really kicks that coffee flavor up a notch with a little added sweetness too.
- The deliciously creamy caramelized white chocolate pastry cream filling is unlike any other! You can use vanilla pastry cream or chocolate pastry cream or salted caramel pastry cream (which I’ve shared in this choux au craquelin recipe) for different flavor variations too if you prefer. You will need 1 recipe of my caramelized white chocolate pastry cream for this.
Serving suggestions
- No mystery here. You can pair these coffee donuts with any of these coffee and tea drinks for a classic combo.
- I also love pairing these with hot chocolate. From rocky road hot chocolate to Parisian hot chocolate, dairy free French hot chocolate, peanut butter hot chocolate, and even this delicious rum and peppermint white hot chocolate.
- For an even more decadent treat, you could pair these with some vanilla ice cream or chocolate ice cream, or a dessert sauce or dip such as hot fudge sauce, butterscotch chocolate fudge sauce, salted caramel sauce or dulce de leche.
- Fresh fruits or yogurt.
- Cheese and / or bacon.

Recipe
Coffee Doughnuts with Caramelized White Chocolate Filling
US based cup, teaspoon, tablespoon measurements. Weight measurements are recommended for accurate results whenever available.
Common Measurement ConversionsIngredients:
Coffee Doughnuts
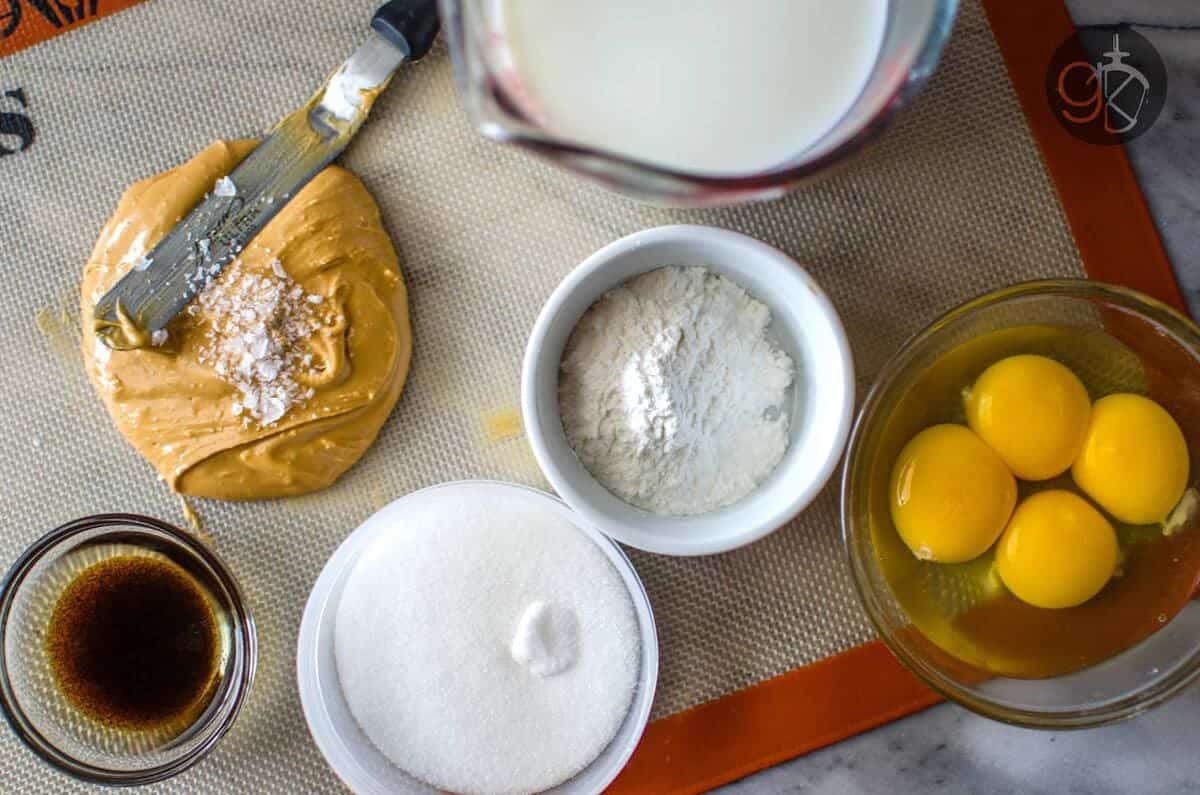
- 500 g All purpose flour approximately 4 cups (Spoon and leveled)
- 120 mL water (room temperature) ½ cup
- 120 mL milk (room temperature) ½ cup
- 10 g instant yeast 3 tsp
- 3 tbsp instant coffee granules like nescafe
- 100 g white sugar ½ cup
- 1 large egg
- 1 egg yolk
- ½ tsp salt
- 4 tbsp unsalted butter softened at room temperature
- Shortening to deep fry Oil can be used if you cannot find shortening.
Caramelized White Chocolate pastry cream
- 1 batch White Chocolate pastry cream
Coffee Glaze
- 2 tsp instant coffee granules like nescafe
- 340 g confectioner's sugar 3 cups (spoon and leveled)
- Milk or water to thin out the glaze
Instructions:
Coffee Doughnuts
- In a large mixing bowl, place the flour, sugar, and yeast. In a separate jug/container, dissolve the instant coffee in the water and add the milk and eggs to it. Whisk until mixed well. With the dough hook attached to the mixer, add the wet ingredients to the flour mix and knead until you form a dough. Knead for a further 10 minutes.
- Add the butter in 4-6 additions, mixing well between each addition, ensuring each time that the butter has incorporated properly. Scrape the bottom to ensure all the dough is being kneaded and knead for a further 10 minutes after all the butter has been incorporated. You should end up with a beautifully shiny, soft, slightly sticky dough.
- Oil a large bowl and place the dough in it. Turn the dough once so that the dough is covered with oil as well. Cover with plastic wrap and leave it in the fridge overnight (at least 8 hours)
- Next day, line two sheet pans with parchment paper. Turn out the dough on to a floured surface and divide the dough into 20 portions (medium sized doughnuts – about 2 ½ inch balls) or 30 portions (small doughnuts about 2 inch balls).
- Lightly knead the dough portion and shape them into smooth balls using lightly floured hands, making sure there are no cracks or creases on the formed ball.
- Place each ball on the parchment paper and cover the tray with plastic wrap. Leave these to rise until they almost double in size. About 1 hour. However, check after 30 minutes and every 10-15 minutes thereafter to make sure it’s proofed and not over-proofed (tips in the tutorial section above).
- When the doughnuts have proofed, heat the oil/shortening in a heavy bottomed saucepan with a thermometer attached, until it has reached 365°F/185°C. The temperature of the shortening should never go below 360°F and it shouldn’t go beyond 395°F/ 200°C. (The right temperature will brown a 1 inch cube of bread in about 8-10 seconds).
- Slowly and carefully drop a doughnut into the oil (avoid splashing!). You can fry 2-3 doughnuts at a time if the saucepan is wide enough, but make sure the oil temperature doesn't drop too low.
- Once you drop the first doughnut in, set your timer for 1 minute and 15 seconds. Flip the doughnuts over and fry the other side for a further 1 minute and 15 seconds. There is no hole in these doughnuts so this is long enough to cook the doughnut all the way through.
- Place the doughnuts on paper towels to drain the oil. Repeat until you have fried all the doughnuts.
- Fill the pastry bag with a bismark tip or similar piping tip, with the chilled pastry cream filling. Make a cut on the side of the doughnut with a sharp knife. Insert the nozzle tip deep into the doughnut.
- With medium pressure, pipe in the filling (adjust the amount of filling to your preference).
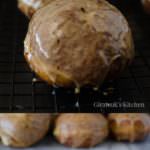
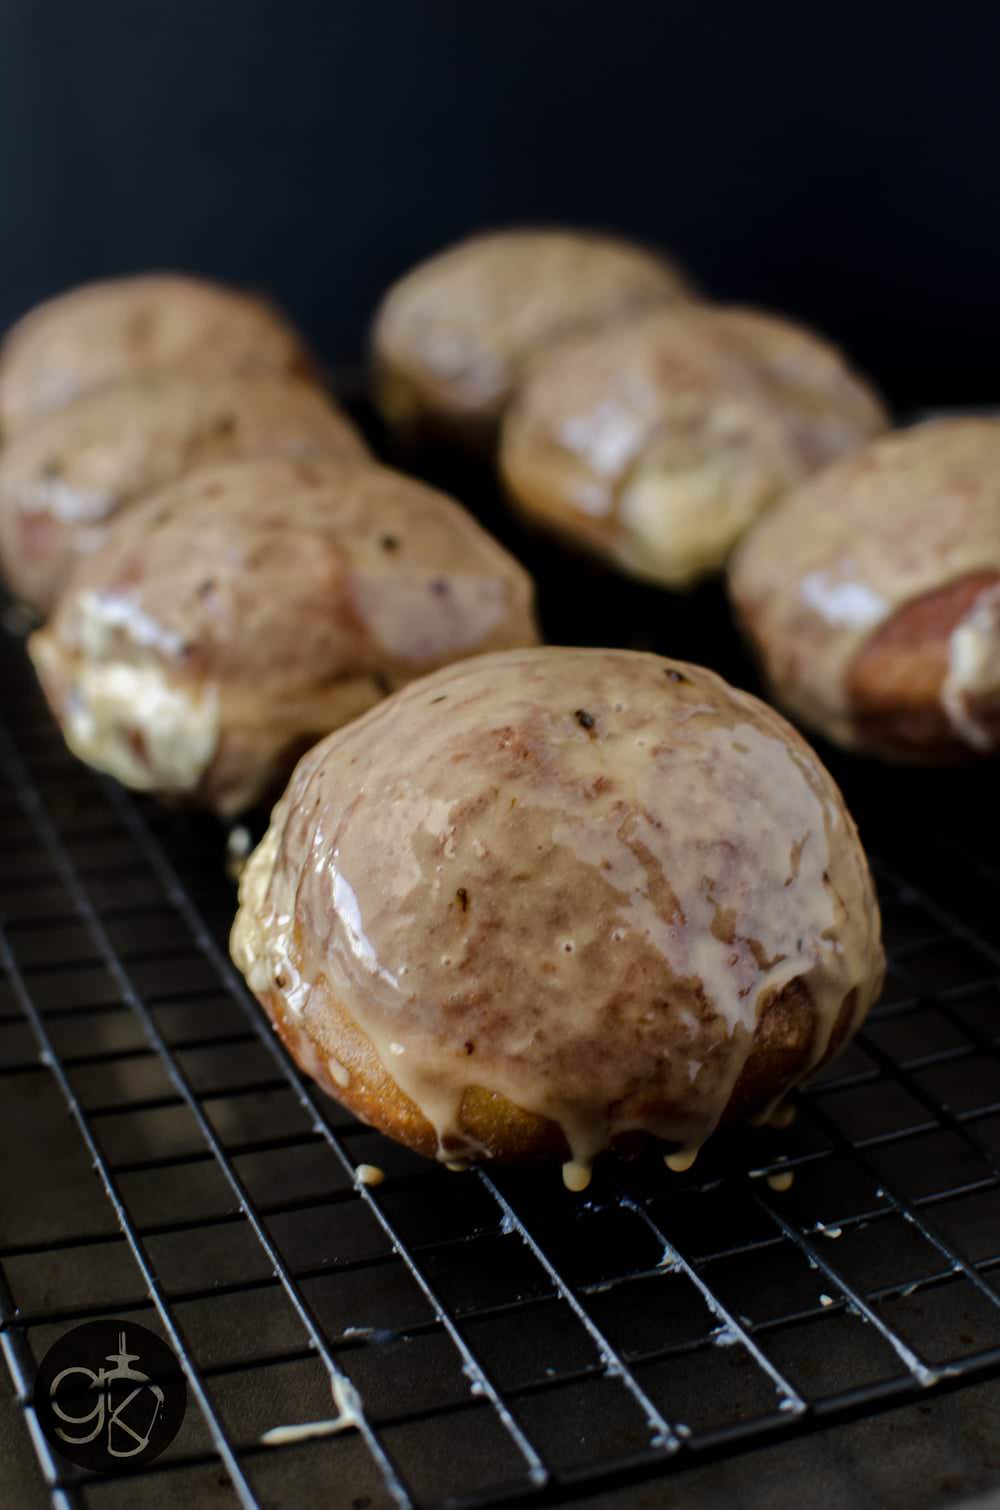
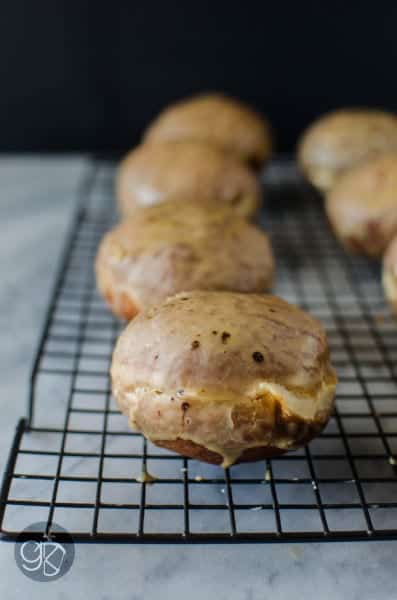
- Dip each side in the glaze and place it on a cooling rack to let the excess drip off.
- These doughnuts can be stored in an airtight container and kept in the fridge for up to two days.
White chocolate pastry cream (make this the day before you will be filling the doughnuts)
- Make the caramelized white chocolate pastry cream according to the recipe link provided, the day before you need to use it. Leave the pastry cream in the fridge to chill completely overnight.
- Whisk the pastry cream well, and place the filling in a piping bag with a bismark tip, or similar piping tip attached.
Coffee Glaze
- Place the Confectioner’s sugar/Icing sugar and the coffee powder in a large bowl.
- Add 2 tbsp of milk/water, while whisking. Add more, a tablespoon at a time (I used a mix of milk and water), until you get the consistency you prefer – I wanted it thin, but you make it thicker if you prefer. I liked having visible flecks of instant coffee granules in the glaze, but you can dissolve it prior to mixing as well.
Nutrition Information:
“This website provides approximate nutrition information for convenience and as a courtesy only. Nutrition data is gathered primarily from the USDA Food Composition Database, whenever available, or otherwise other online calculators.”


Leave a Reply