

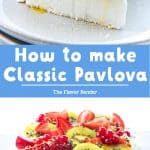
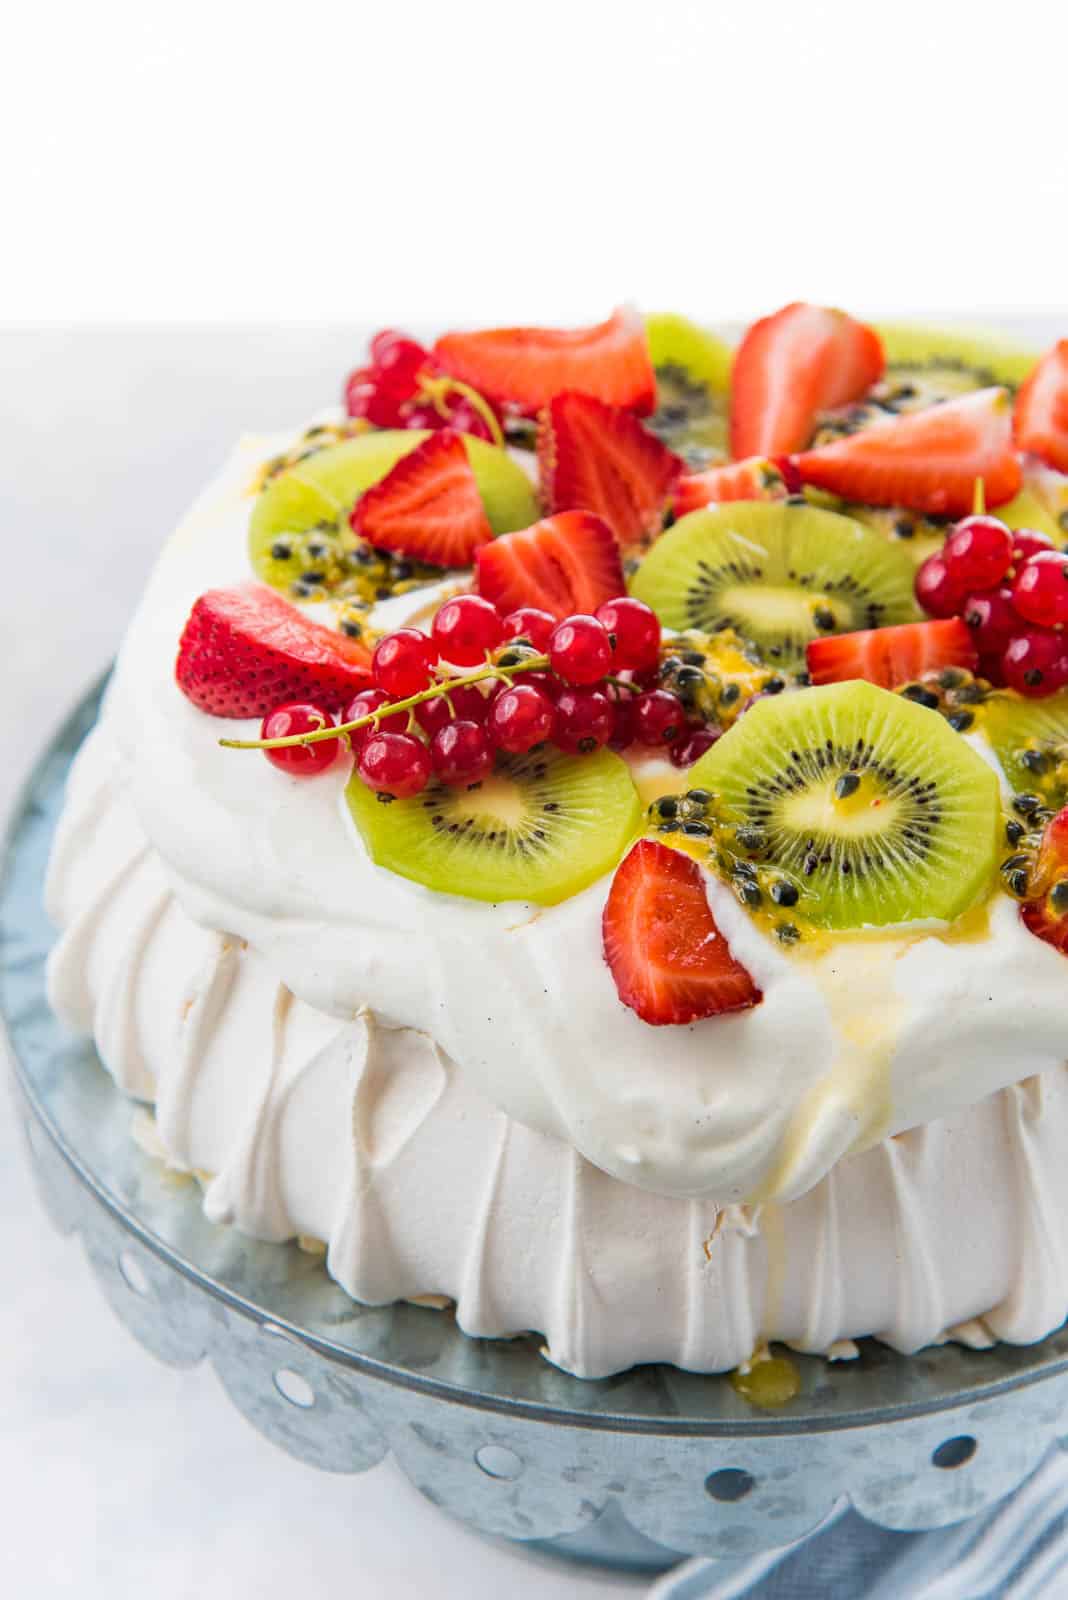
Here’s everything you need to know about how to make the Perfect Pavlova! Pavlova is an exquisite meringue dessert with a crisp outer shell, a melt-in-your-mouth soft, airy, fluffy marshmallow center, and topped with delicious fresh fruits of your choice!
This step by step recipe and video will show you how to make pavlova, with all the troubleshooting tips and advice that I can give from making hundreds upon hundreds of pavlovas over decades.

- Why this is the best recipe on how to make pavlova
- What is pavlova?
- Ingredients (and ingredient notes)
- How to make pavlova (step by step instructions and tips)
- Comprehensive account of all the pavlova problems (pavlova troubleshooting)
- Frequently asked questions (very important questions!)
- BONUS – what to do with failed pavlova
Pavlovas are a creation of love. They take some time, some planning, and patience. The results however are absolutely worth your while!
However, I’ll also say this. Do not make a pavlova if you’re striving for perfection every single time. Most of us do not have the type of climate-controlled professional kitchen you would need to guarantee perfect results every time for such an exquisite dessert.
So, some imperfections will be part of making a pavlova. But these are nothing that a little whipped cream cannot conceal, and your show-stopping pavlova dessert will still taste just as delicious!
As a kiwi, pavlovas (along with a gingerbread house and yule log cakes) were an integral part of summer (and Christmas) for me growing up, and it’s a dessert that I’m so very fond of!
For all the Kiwis and Aussies out there who are homesick and want to make your own pavlova like me, or you have watched Bluey and want to make the famous Bluey pavlova, this is the ultimate pavlova recipe for you!
Why this is the best recipe on how to make pavlova
- This is a detailed step by step recipe and guide with video showing you what to expect at each stage of the recipe, to ensure success!
- This recipe has been tested countless times, under different conditions, so I have detailed all the ways to make sure you get the best pavlova that you can make.
- This post will explain the role of each ingredient that makes a perfect pavlova.
- This recipe will also explain the science of pavlova, so you’ll know why each step is important.
- If your pavlova doesn’t come out perfect, this post will help you understand what went wrong, and how you can still serve your pavlova to friends and family. And you can troubleshoot and ensure better results next time.
- Plus, I also provide a couple of ideas on what to do with completely failed pavlovas.
What is pavlova?
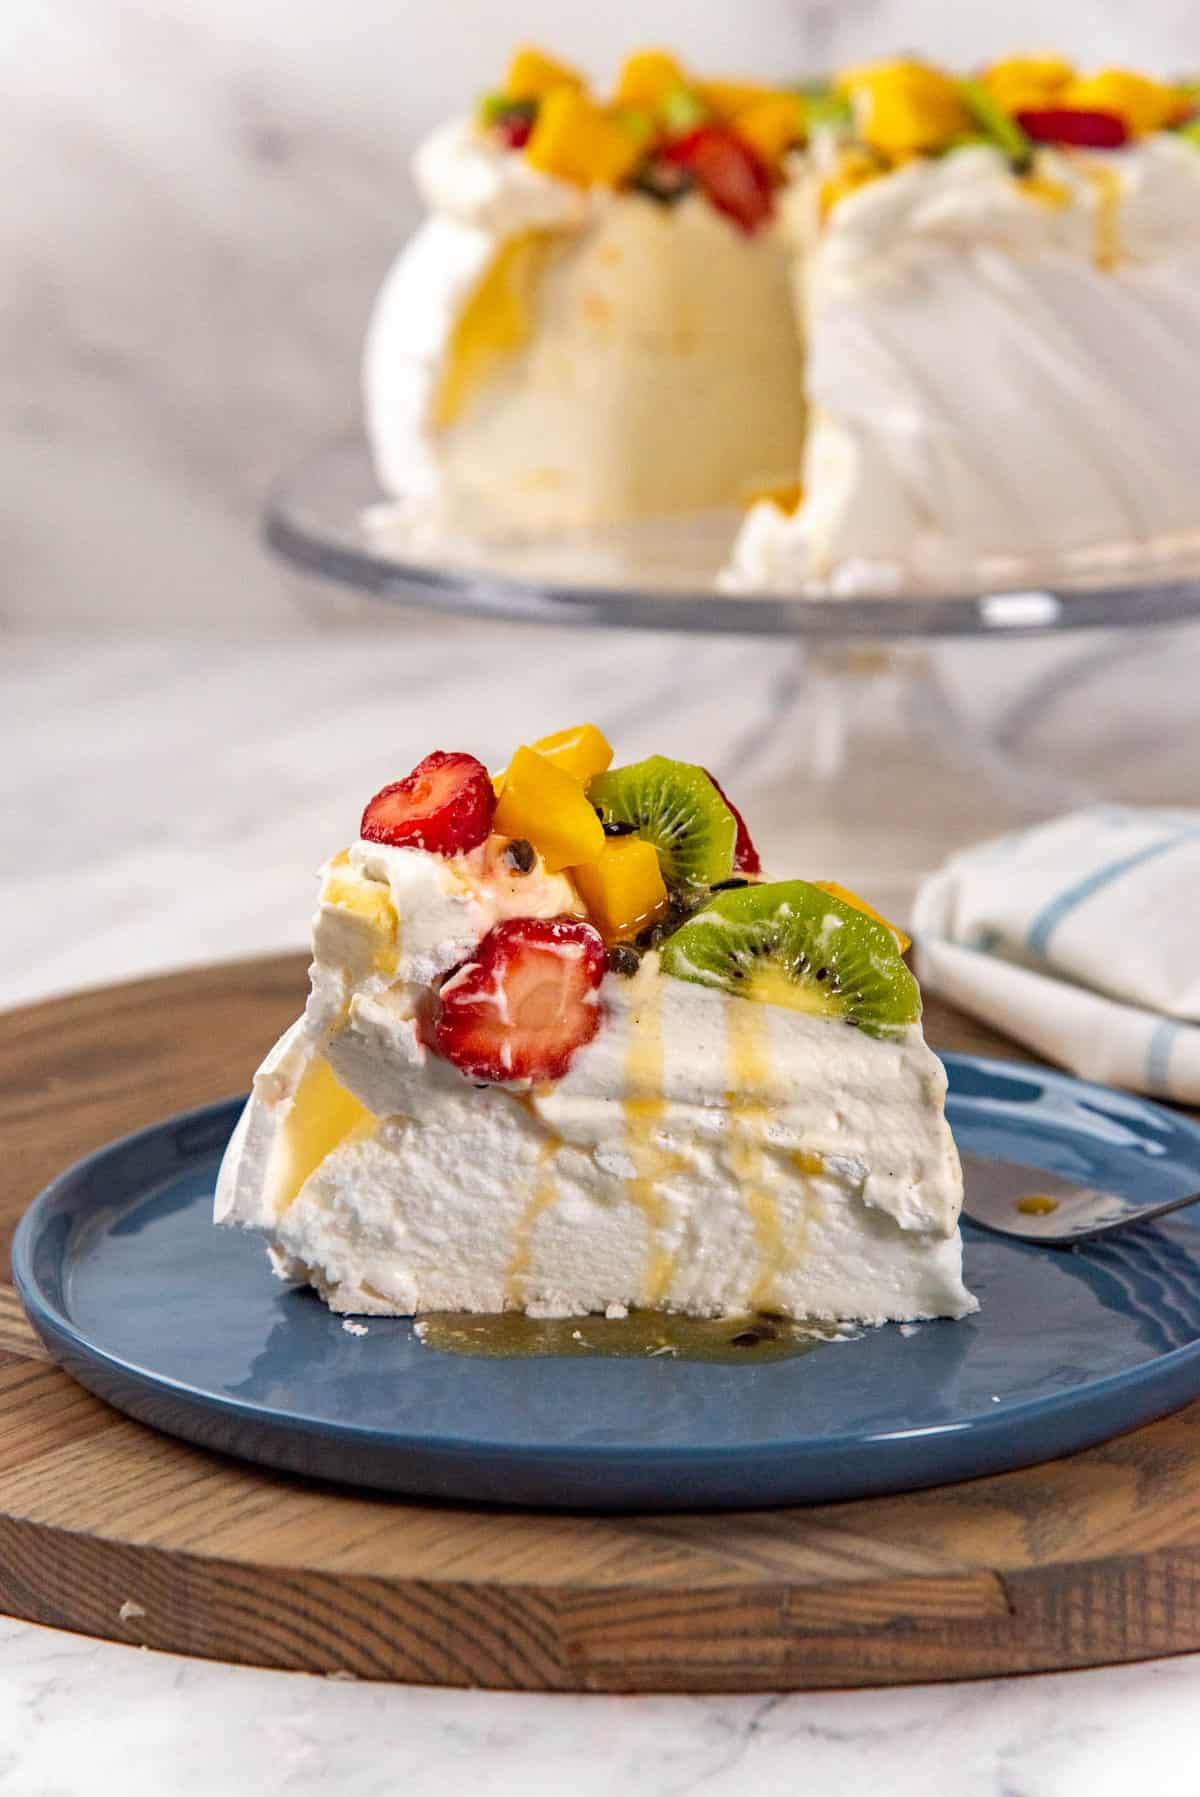
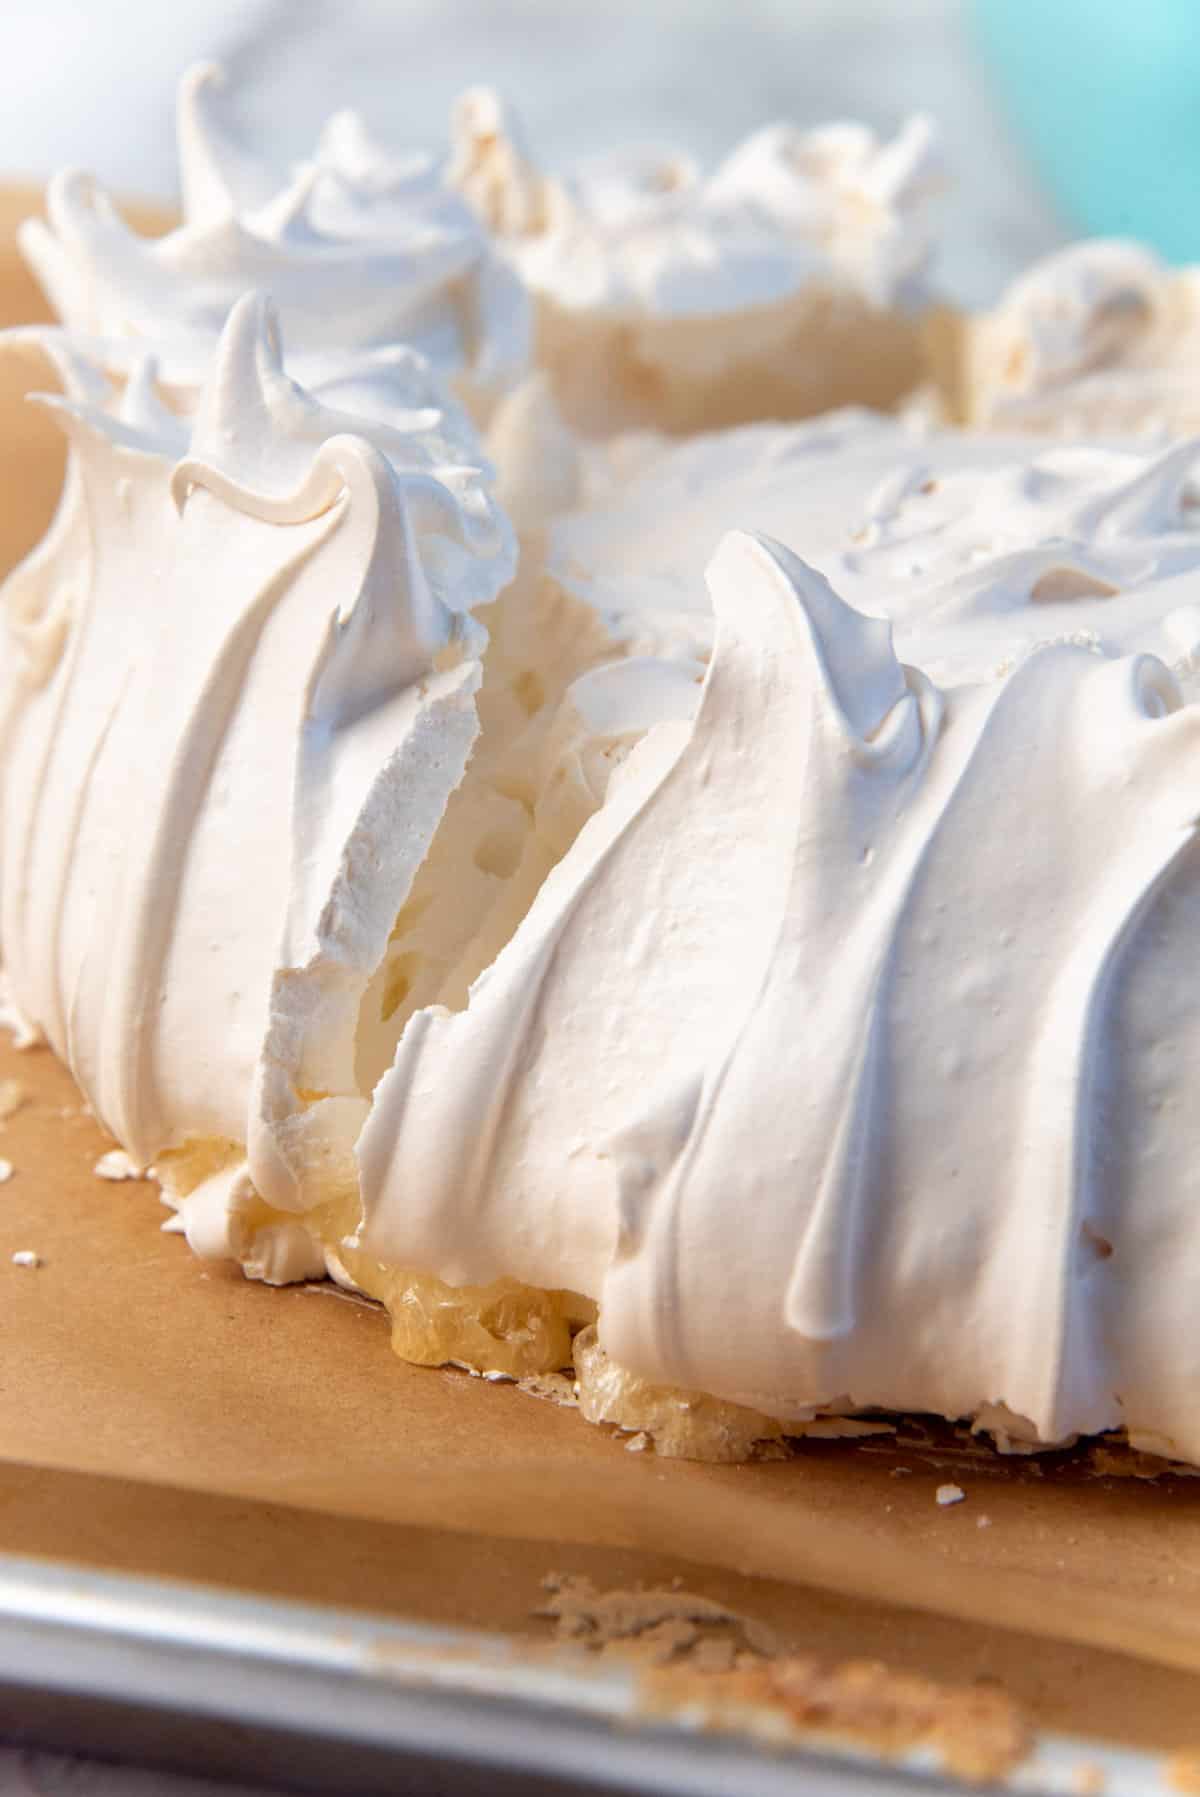
This perfect pavlova is a supremely light and fluffy dessert, with an amazingly crisp texture on the outside, and contrasting marshmallow-like, melt-in-your-mouth texture on the inside.
A pavlova is topped with sweetened whipped cream (or chantilly cream) and lots of sweet and tangy seasonal fruits. Summer pavlova is a classic in New Zealand and Australia, and no BBQ (or Christmas) would be complete without a pav.
There is some debate about whether a pavlova should be marshmallowy or chewy on the inside. But as a Kiwi, who grew up eating pavlovas all my life, a marshmallowy pavlova is most definitely the best and classic version.
Pavlova origin
As a Kiwi, I’m just going to go ahead and say, yes, pavlovas are a New Zealand creation (no matter what the Aussies say, haha!).
It’s a popular dessert in that part of the world, and one of several national desserts for both New Zealand and Australia, and both countries claim the dessert as their own.
It is said that the recipe was created in honor of Anna Pavlova, a Russian ballerina, in the 1920s, when she toured New Zealand and Australia. The pavlova is so light and airy – just like a ballerina’s dance performance, hence the name. And for more proof of pavlova origins, Anna Pavlova’s autobiographer has stated that the dessert was created by a chef in Wellington, NZ when she toured the country in 1926. So there.
That being said, there have been a number of recipes called pavlova that existed before that in Europe. However, these “pavlovas” were more like torte-like cakes, not the airy, marshmallowy, meringue-based dessert that we all know and love, and have come to recognize as pavlova today.
But whatever the origin, we can all agree on one thing. Pavlovas, in every form and flavor (Christmas pavlova, Easter pavlova, winter pavlova, summer pavlova, fruit pavlova, berry pavlova etc.) are always a show-stopping dessert.
What’s the difference between meringue and pavlova?
Both meringue and pavlova are egg white desserts, and are made in a similar way. They both require egg whites to be whipped into a foam, with sugar mixed in, and are then baked at a low temperature until dry.
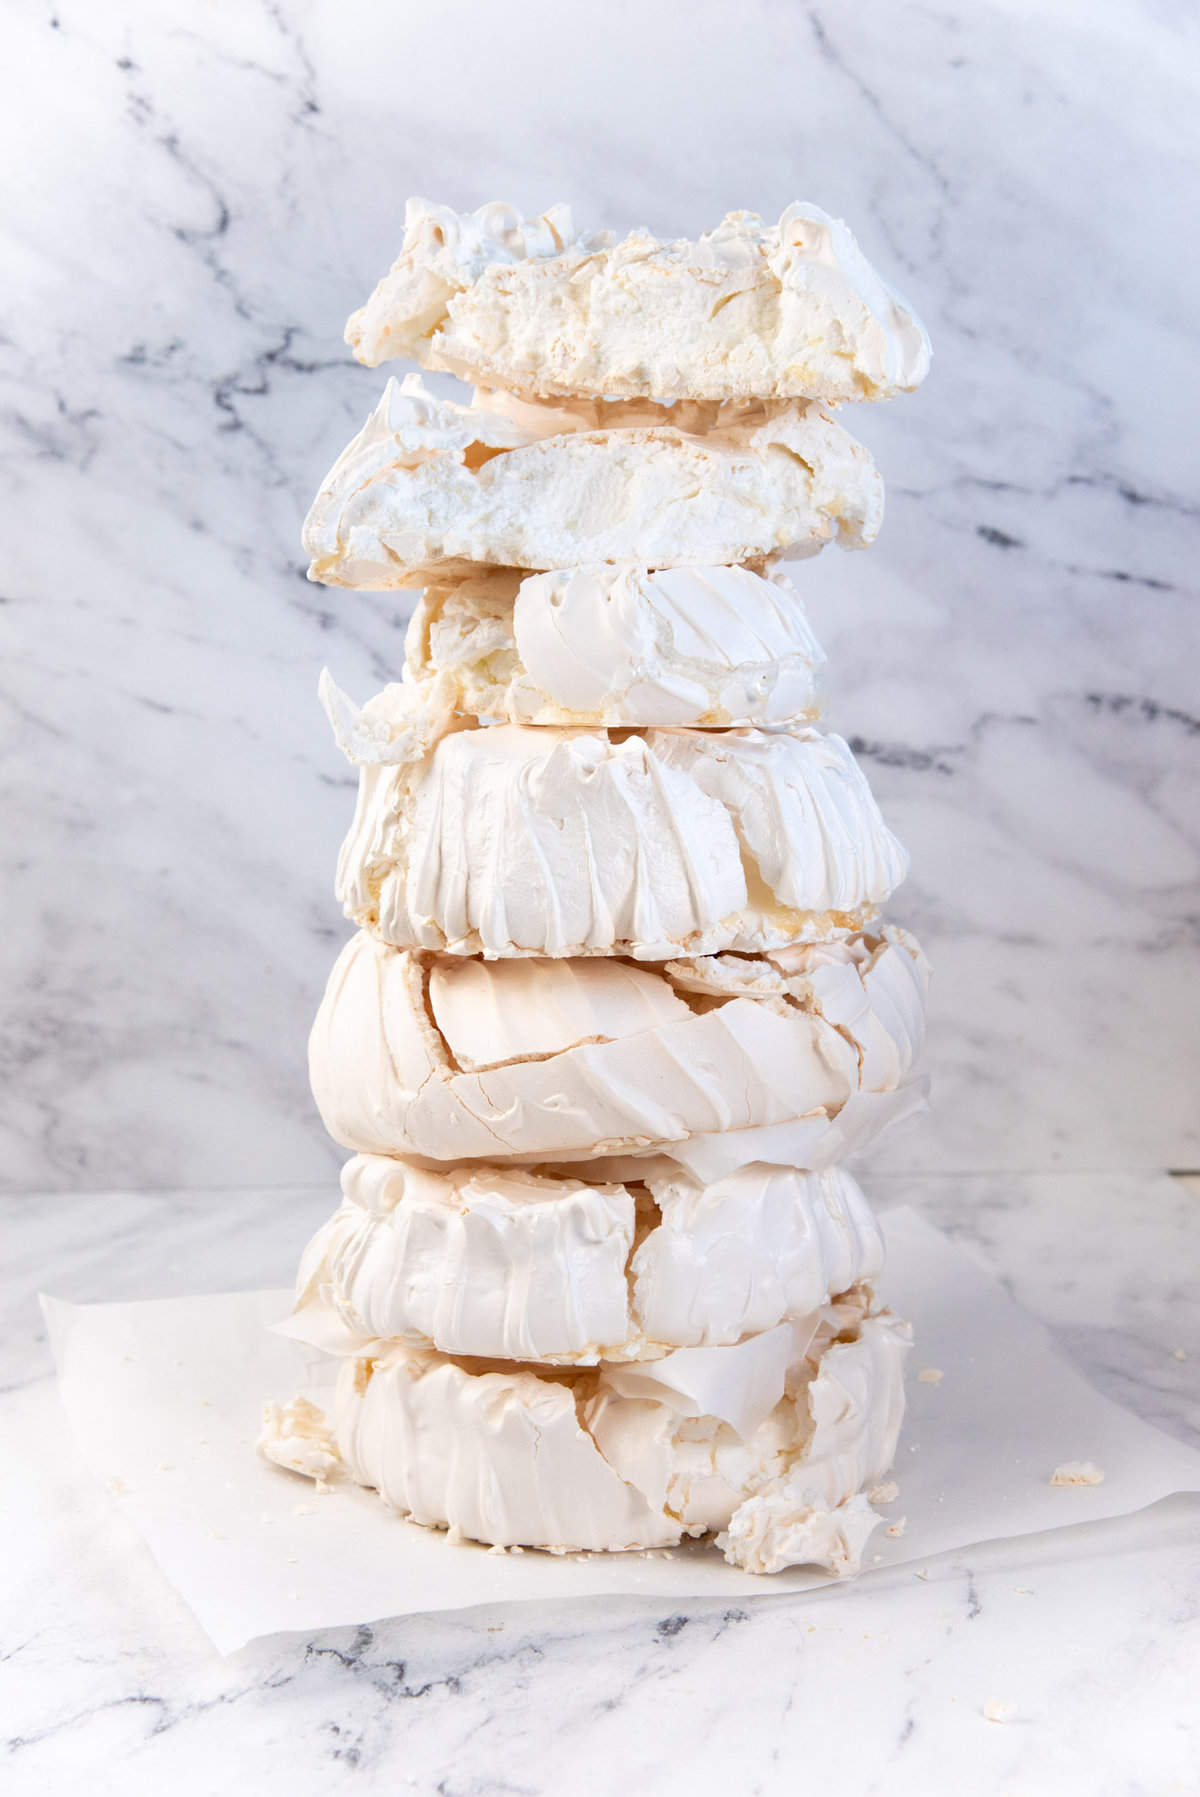
However, meringue is crispy and dry throughout, while pavlova is crispy on the outside, but fluffy, soft, and marshmallow-like on the inside. So, a pavlova is a meringue-based dessert, but not a classic meringue.
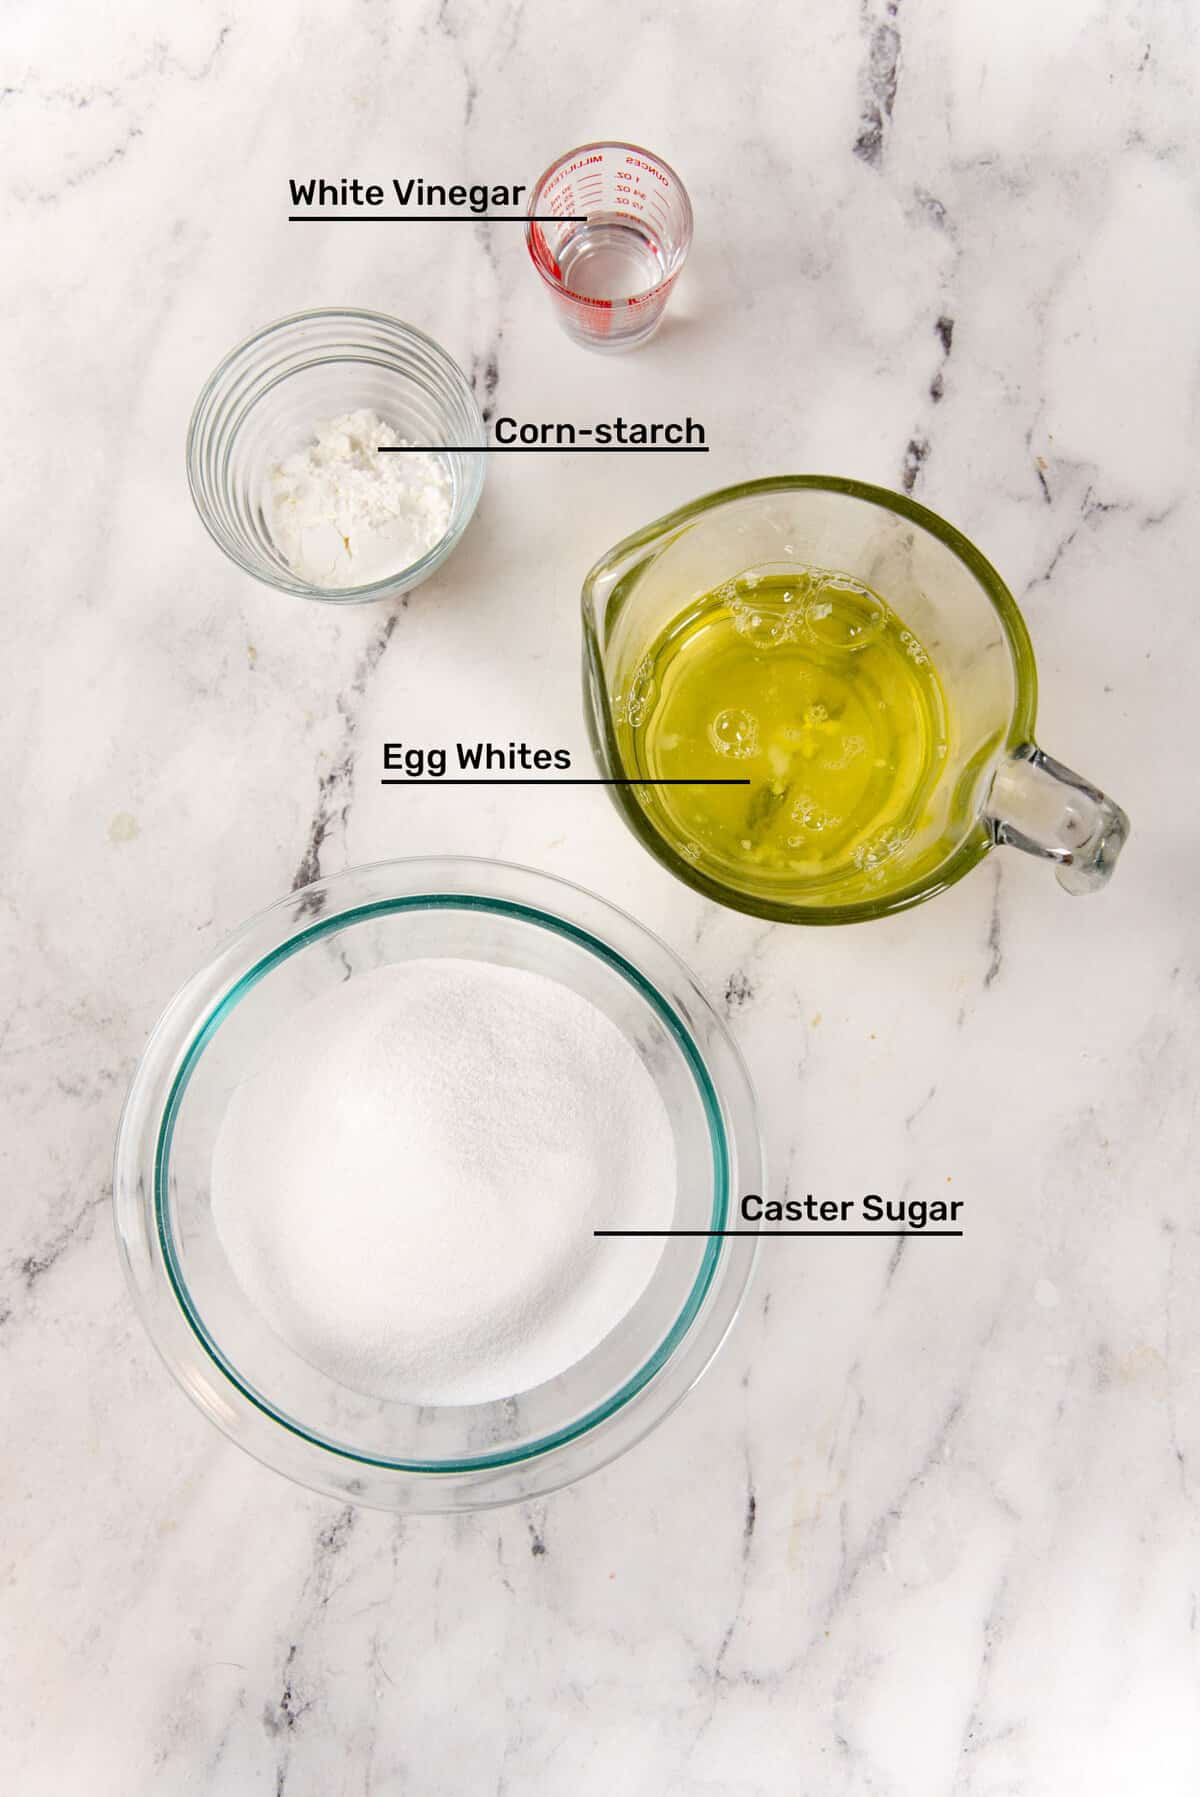
Ingredients (and ingredient notes)
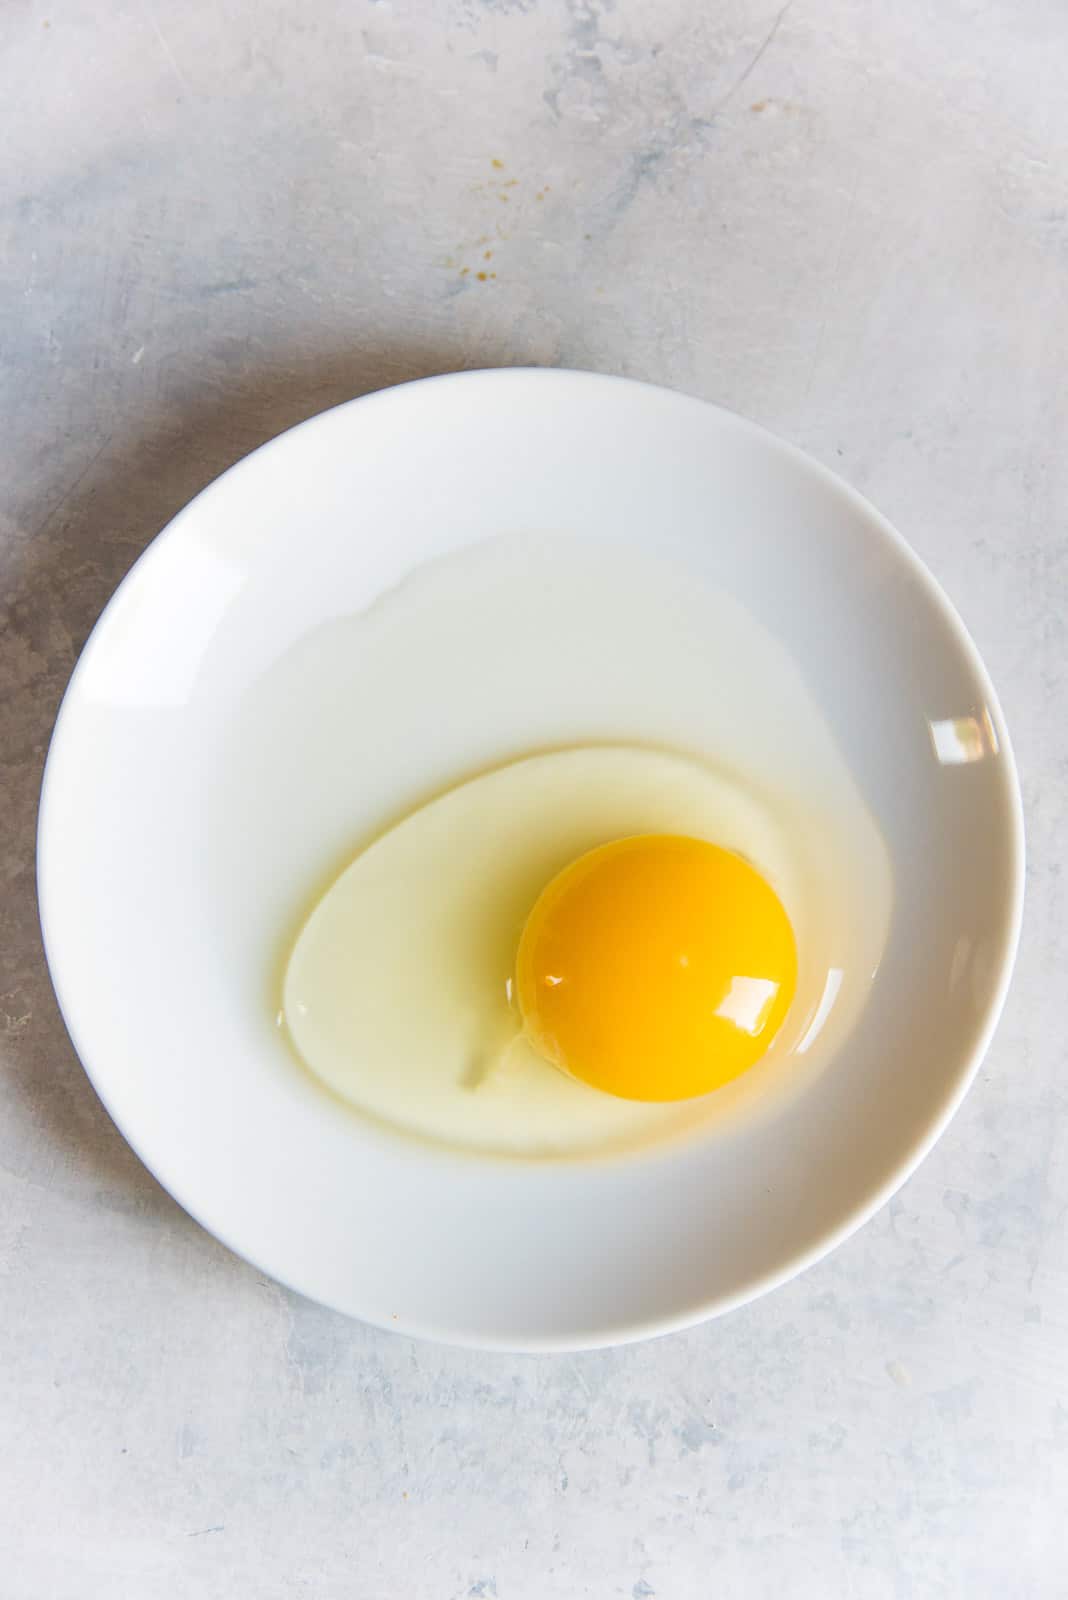
Egg whites
Egg whites are one of two main ingredients in this pavlova recipe. So make sure to prepare them properly.
There can be absolutely no fat in your egg whites either. So special care must be taken to ensure they are clean.
How to choose the right eggs for pavlova (using old vs fresh eggs)
You must use fresh egg whites from fresh eggs. Not egg whites from a carton. Carton egg whites are pasteurized and will not form a stable meringue.
Older egg whites have a weaker protein structure. This also means the air will escape more easily, and deflate easily as well. So avoid using aged egg whites if you can.
Egg whites from fresh eggs may not whip as much as older egg whites, but the air that is whisked into it is much more stable. This is because the protein structure in fresh egg whites is stronger than that of older egg whites.
So whenever possible, use fresh egg whites to make pavlova.
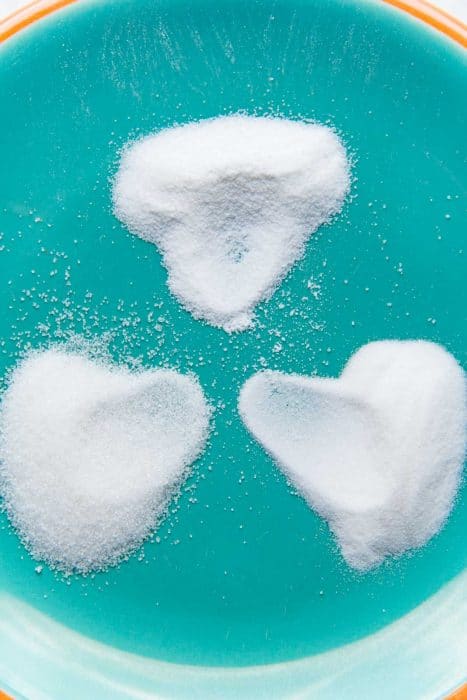
Fine white sugar
Sugar is the other main ingredient in this classic pavlova recipe.
Make sure to use white sugar that has not been contaminated with any kind of fat. For example, do not use sugar that you use as a pie weight when you make pie crusts, as this sugar may have absorbed some of the butter from the crust.
How to choose the right type of sugar to make pavlova
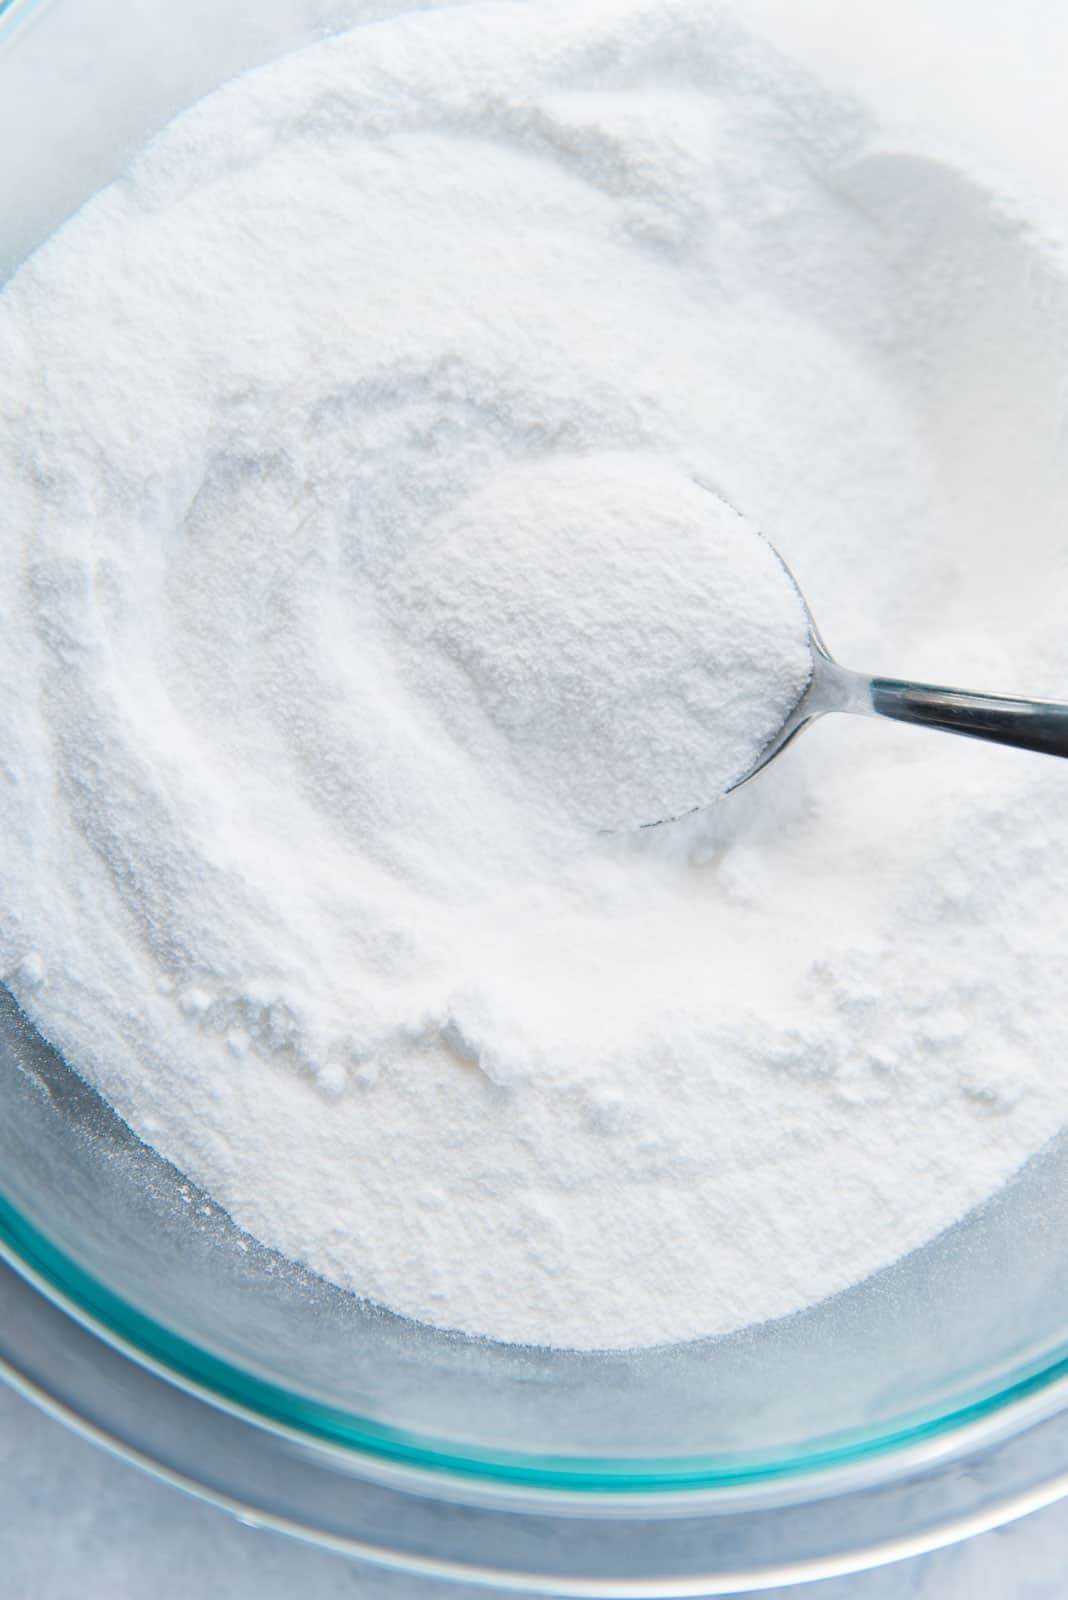
The sugar needs to be dissolved easily in the meringue mix, so try to use caster sugar, which is ultra-fine sugar that has small sugar granules that dissolve easily.
If you don’t have access to caster sugar, you can use regular granulated sugar, but make sure to process it for a few minutes in a food processor first to make it finer.
DO NOT use confectioner’s sugar. Confectioner’s sugar (icing sugar) is not pure sugar (it has cornstarch mixed in) and will not create desirable results. (See my guide to types of sugar for baking for more information.)
Cornstarch
Cornstarch acts as a stabilizer in two different ways. The starch in the cornstarch gives the pavlova some structure and helps to keep the center soft and marshmallowy.
The cornstarch also absorbs water, which helps to prevent the sugar from weeping, and drying out the meringue as it bakes. However, adding too much cornstarch can lead to a starchy taste as well.
The combination of vinegar and cornstarch helps to create a more lofty and soft marshmallow center in a pavlova. A pavlova without cornstarch and vinegar can still produce a marshmallow-like center, but it might collapse more.
White vinegar OR cream of tartar
Vinegar added to the meringue will lower the pH of the egg whites. This acidic environment will also help to stabilize the egg white foam, preventing the meringue from collapsing too much.
The acidity helps to unravel the protein and prevent the proteins from binding together too tightly. This makes the proteins more stable and capable of holding the air without splitting easily.
Instead of vinegar, you can add cream of tartar too! While white vinegar is the classic addition, cream of tartar can be more reliable.
I do not recommend using apple cider vinegar, or any other vinegar substitute. For pavlova, I recommend only using white vinegar or cream of tartar.
Other ingredients for serving
- Heavy cream to make whipped cream
- Sugar and vanilla to sweeten and flavor the whipped cream
- Fresh fruits
Importance of measuring the ingredients
I have emphasized this before with a lot of baking recipes on my blog, and it’s even more important when you’re trying a dessert pavlova recipe.
Pavlovas are delicate desserts that are sensitive to just about any variation. Using precise measurements will help you create the perfect pavlova!
Each egg will have slight variations in terms of how much egg white is in it.
But let’s go with 1 large egg (2 oz / 57 g) having 1.1 oz (30 – 32 g) of egg white.
The egg white to white sugar ratio for perfect pavlovas
For a perfect pavlova, the egg white to sugar ratio is crucial. This is about 1 : 1.7
For each 30 – 32 g of egg whites, use a minimum of 50 – 55 g of sugar for a stable meringue. That is for every 1 g of egg white, I add between 1.6 – 1.8 g of white sugar.
A ratio less than 1.6 will result in a pavlova that is not stable, and a ratio higher than 1.8 will result in a pavlova that has a thick, cracked crust, and may result in weeping.
How to make pavlova (step by step instructions and tips)
Equipment for this pavlova recipe and how to prep them
- An egg separator. Optional, but it’ll make the job easier if you’re nervous about separating egg whites.
- Stand mixer with a whisk attachment – I prefer this over a hand mixer.
- Mixer bowl – Metal or glass. Avoid plastic bowls.
- Two spatulas – Avoid wooden spatulas. I like to use one spatula while the meringue is whisking, and the second spatula to transfer the meringue mixture to the parchment paper.
- Half sheet baking tray.
- Parchment paper.
- Offset spatula.
- Clean glass or metal bowls – To help separate egg whites from egg yolks and to hold sugar.
- Blender/food processor. This is my food processor, but you can also use a basic one for this as well. If you have a smaller food processor, then you can process the sugar in small batches.
- Kitchen scale.
- Clean hand towels and paper napkins.
- Plus, white vinegar to wipe the equipment.
Make sure all equipment is clean and dry. Use the hand towels and paper napkins to keep your hands clean and dry, as well as the equipment. To remove any residual fat that might be on your equipment, wipe it all down with white vinegar (or lemon juice) and then wipe it with a clean napkin to dry.
You’ll be checking to see if the meringue is ready by rubbing the meringue between your fingers, so you will need to wash your hands and thoroughly dry them off while getting the pavlova mix ready.
Now let’s go over the step by step instructions on how to make pavlova.
Step 1 – Prepare the baking tray and oven
First prepare the baking tray for the pavlova, and preheat the oven.
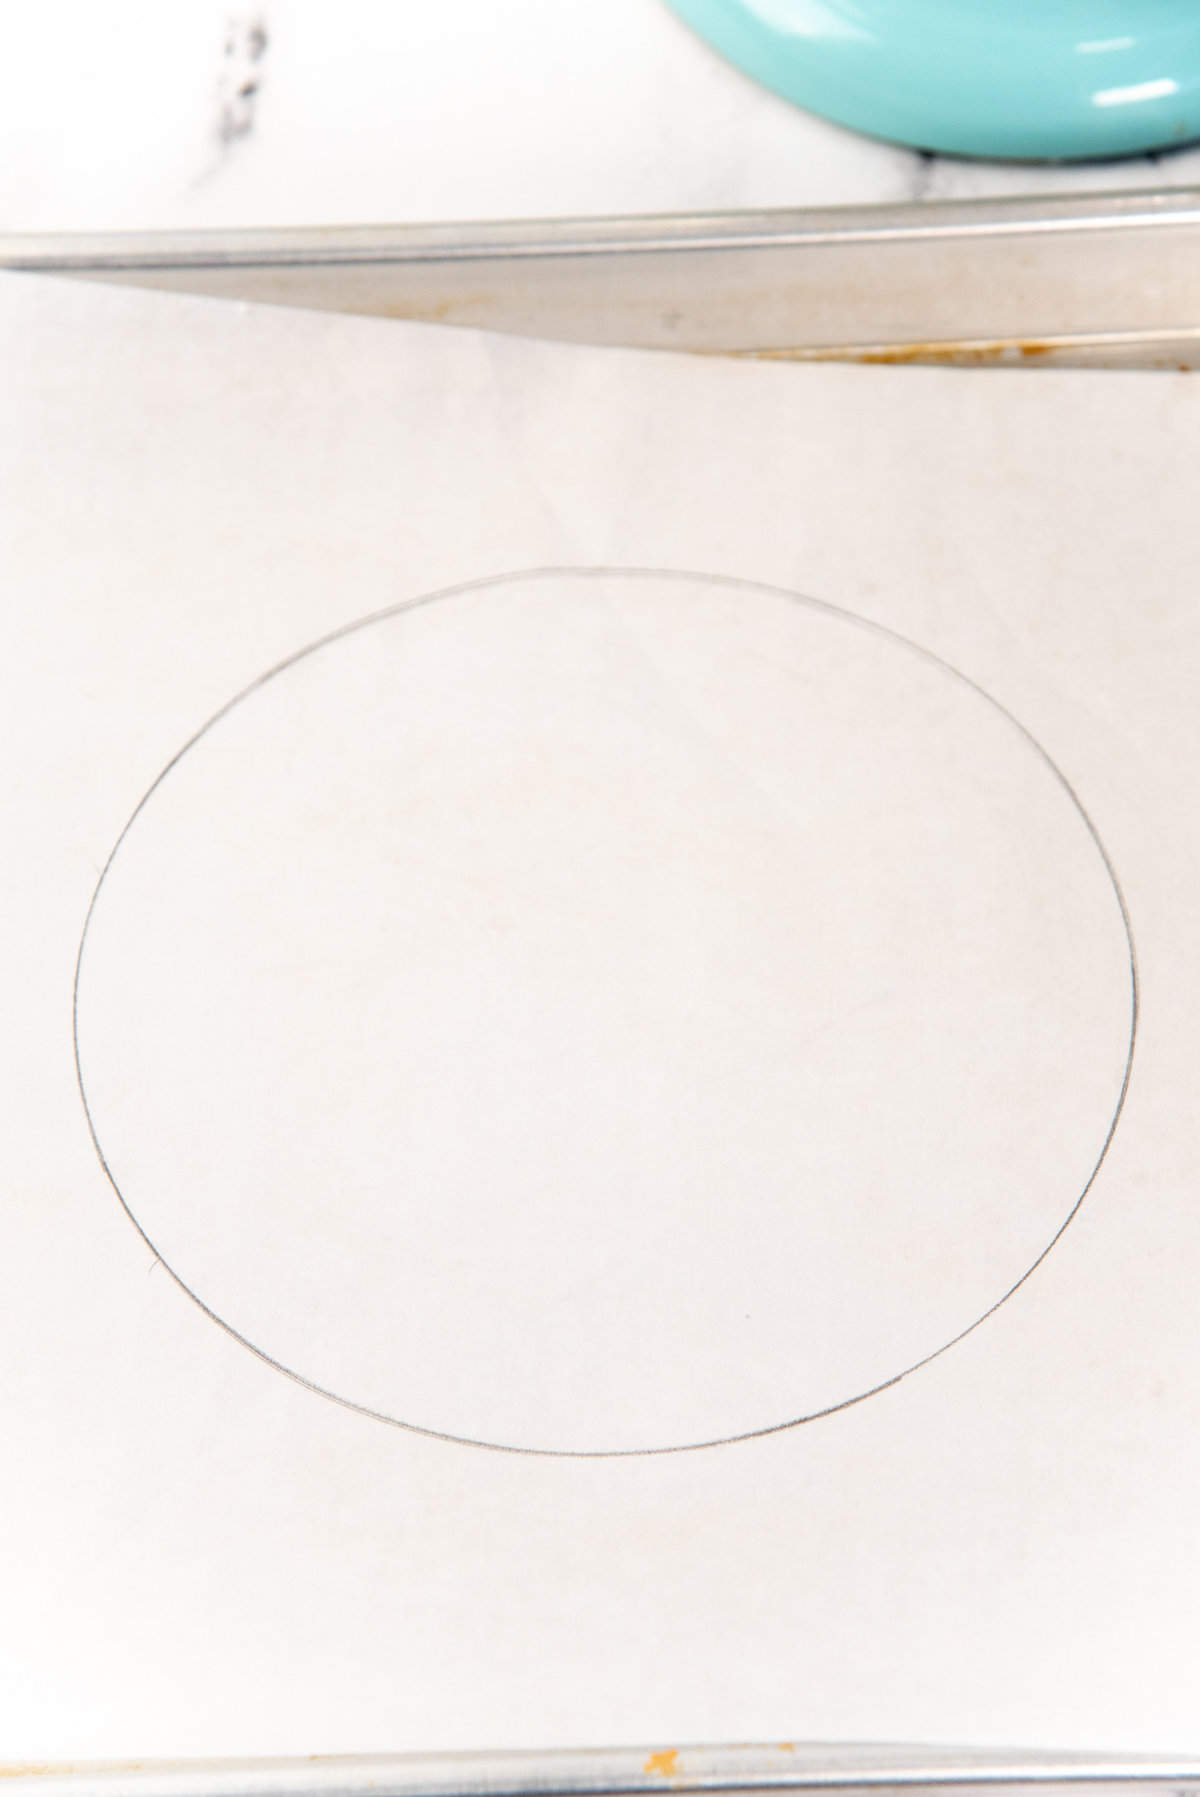
Take a parchment paper that will fit inside a half sheet pan. Draw a circle that is about 7.5 inches in diameter. Or 8 inches is fine too, but the pavlova will be slightly shallower if its diameter is 8 inches.
Place the parchment paper in the baking tray, with the drawn side down. A parchment paper will ensure that your pavlova doesn’t stick to the baking tray once baked. You should still be able to see the circle through the back of the parchment paper, so that you can use it as a guide to shape the pavlova.
Preheat the oven to 275 F / 135 C. Assuming that the center of your oven is where food bakes evenly, place the rack one level lower than the middle rack.
This step is optional, but you can place another baking tray in the oven to help heat the pavlova from the bottom. This helps to form a more stable crust at the bottom of the pavlova.
Pavlova is baked in a low heat oven to make sure it dries out slowly. So, the oven is preheated to 275°F/135°C, but immediately lowered to 212°F/100°C when you place the pavlova in the oven.
The initial higher temperature of the oven helps the meringue pavlova expand and kick start the process of forming and setting of its crust. The lower temperature is needed to cook the center without drying it out, and to dry out the crisp shell. The lower heat also prevents the pavlova from caramelizing, and keeps it white.
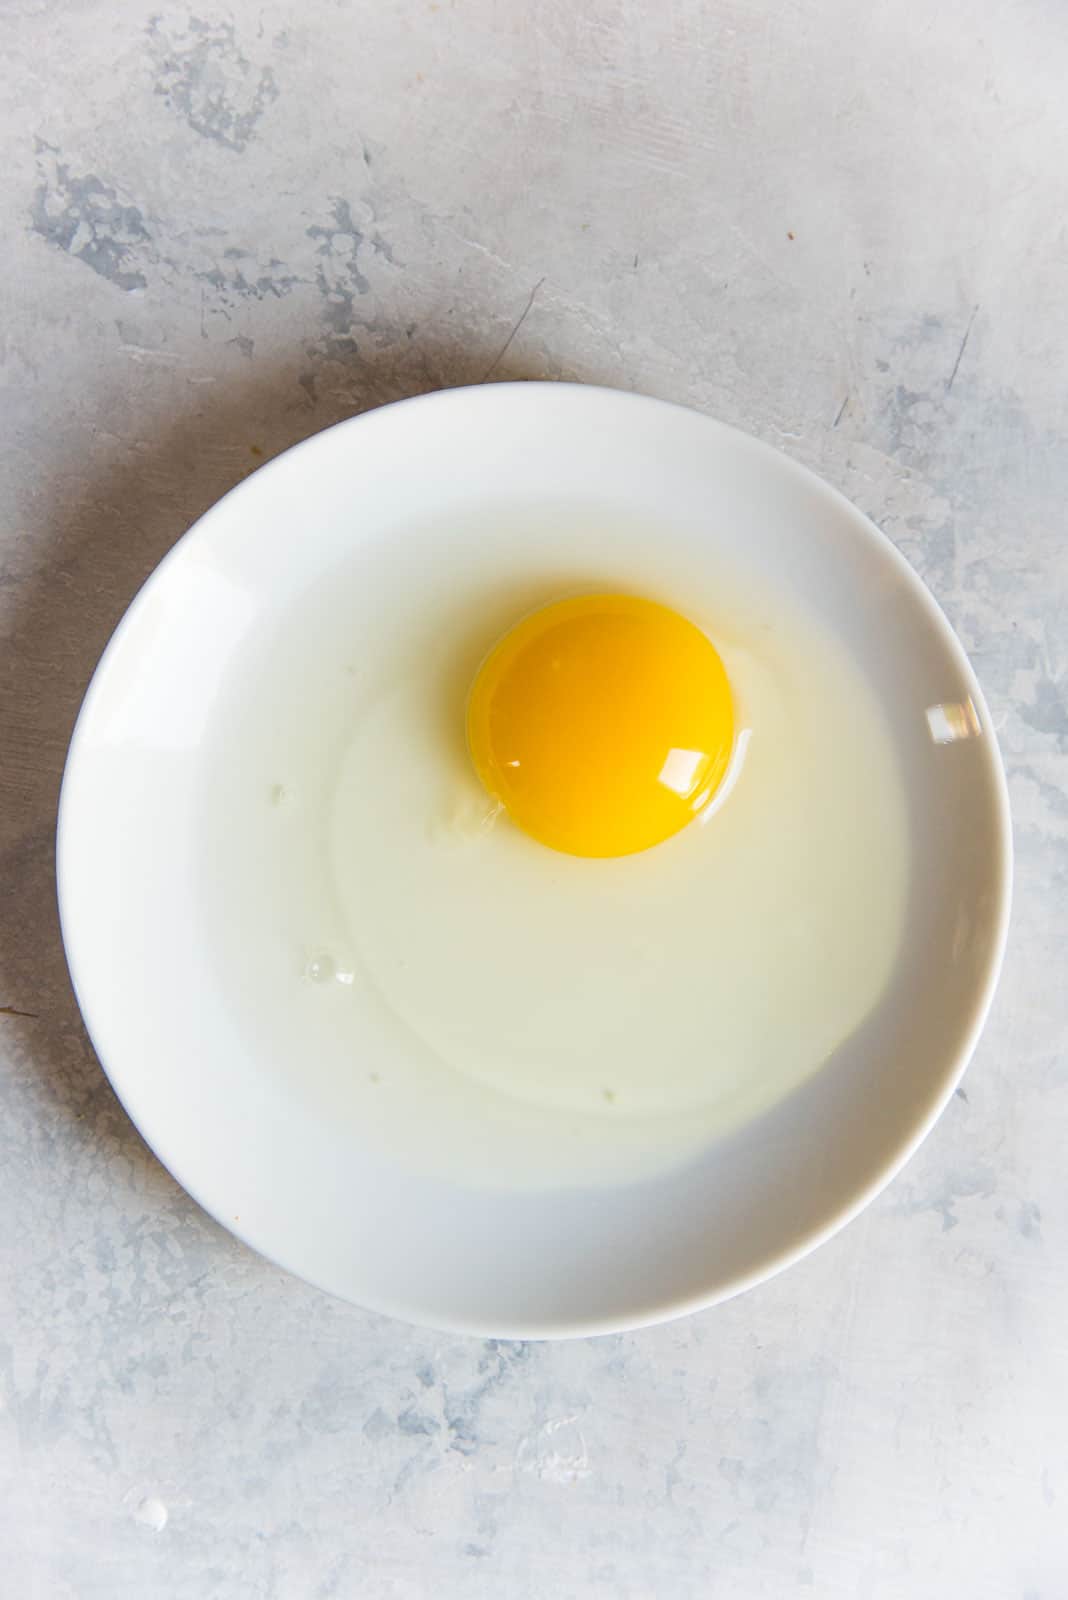
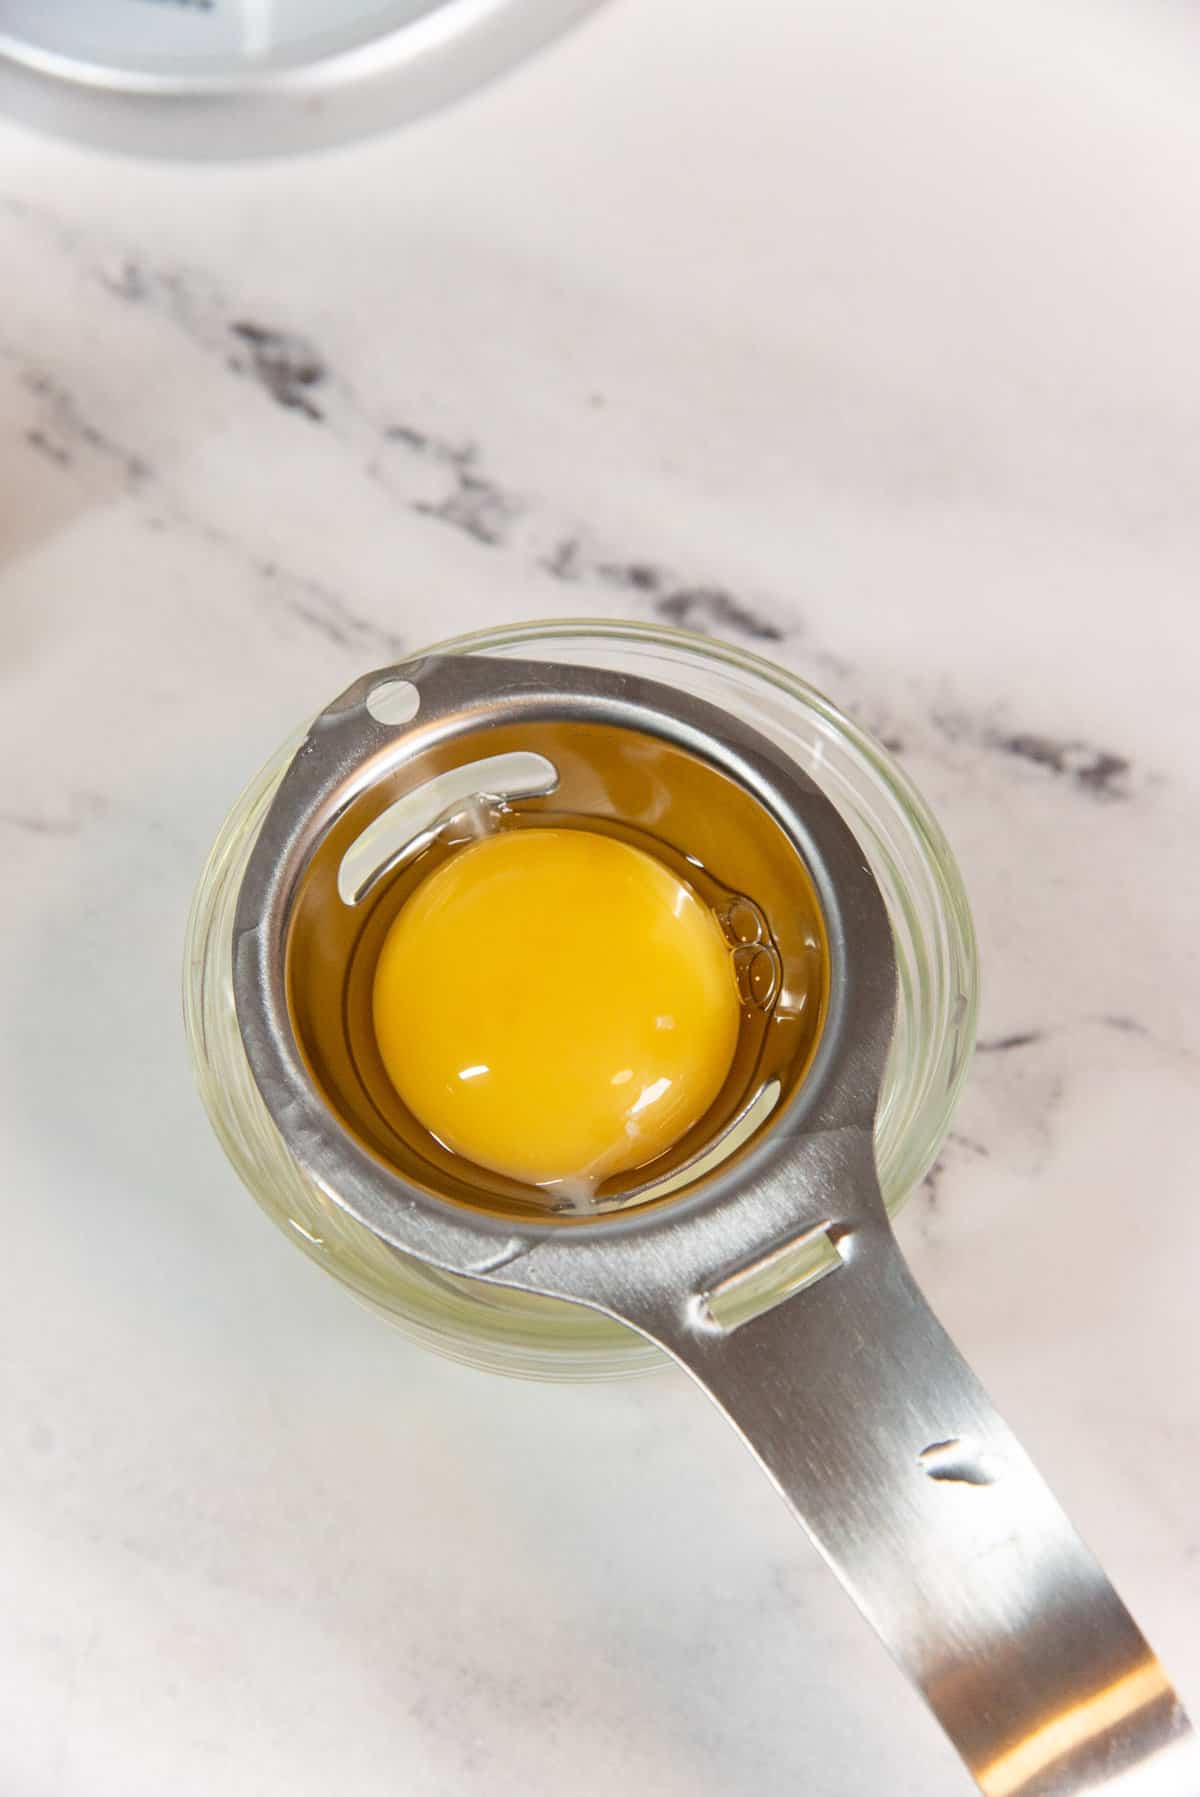
Step 2 – Prepping the egg whites (separating egg whites and yolks)
I like to separate the egg whites from the yolk into a smaller bowl first, before adding them into the mixing bowl to be measured.
This way, if you accidentally break a yolk and get it into the whites, you can just replace that one egg rather than having to discard ALL the egg whites that were contaminated with the egg yolk.
To make sure your egg whites whip properly, it’s important that you do NOT let even the tiniest drop of yolk, or any other fat, be mixed in with the egg whites. Avoid adding water as well, as this can affect the final pavlova.
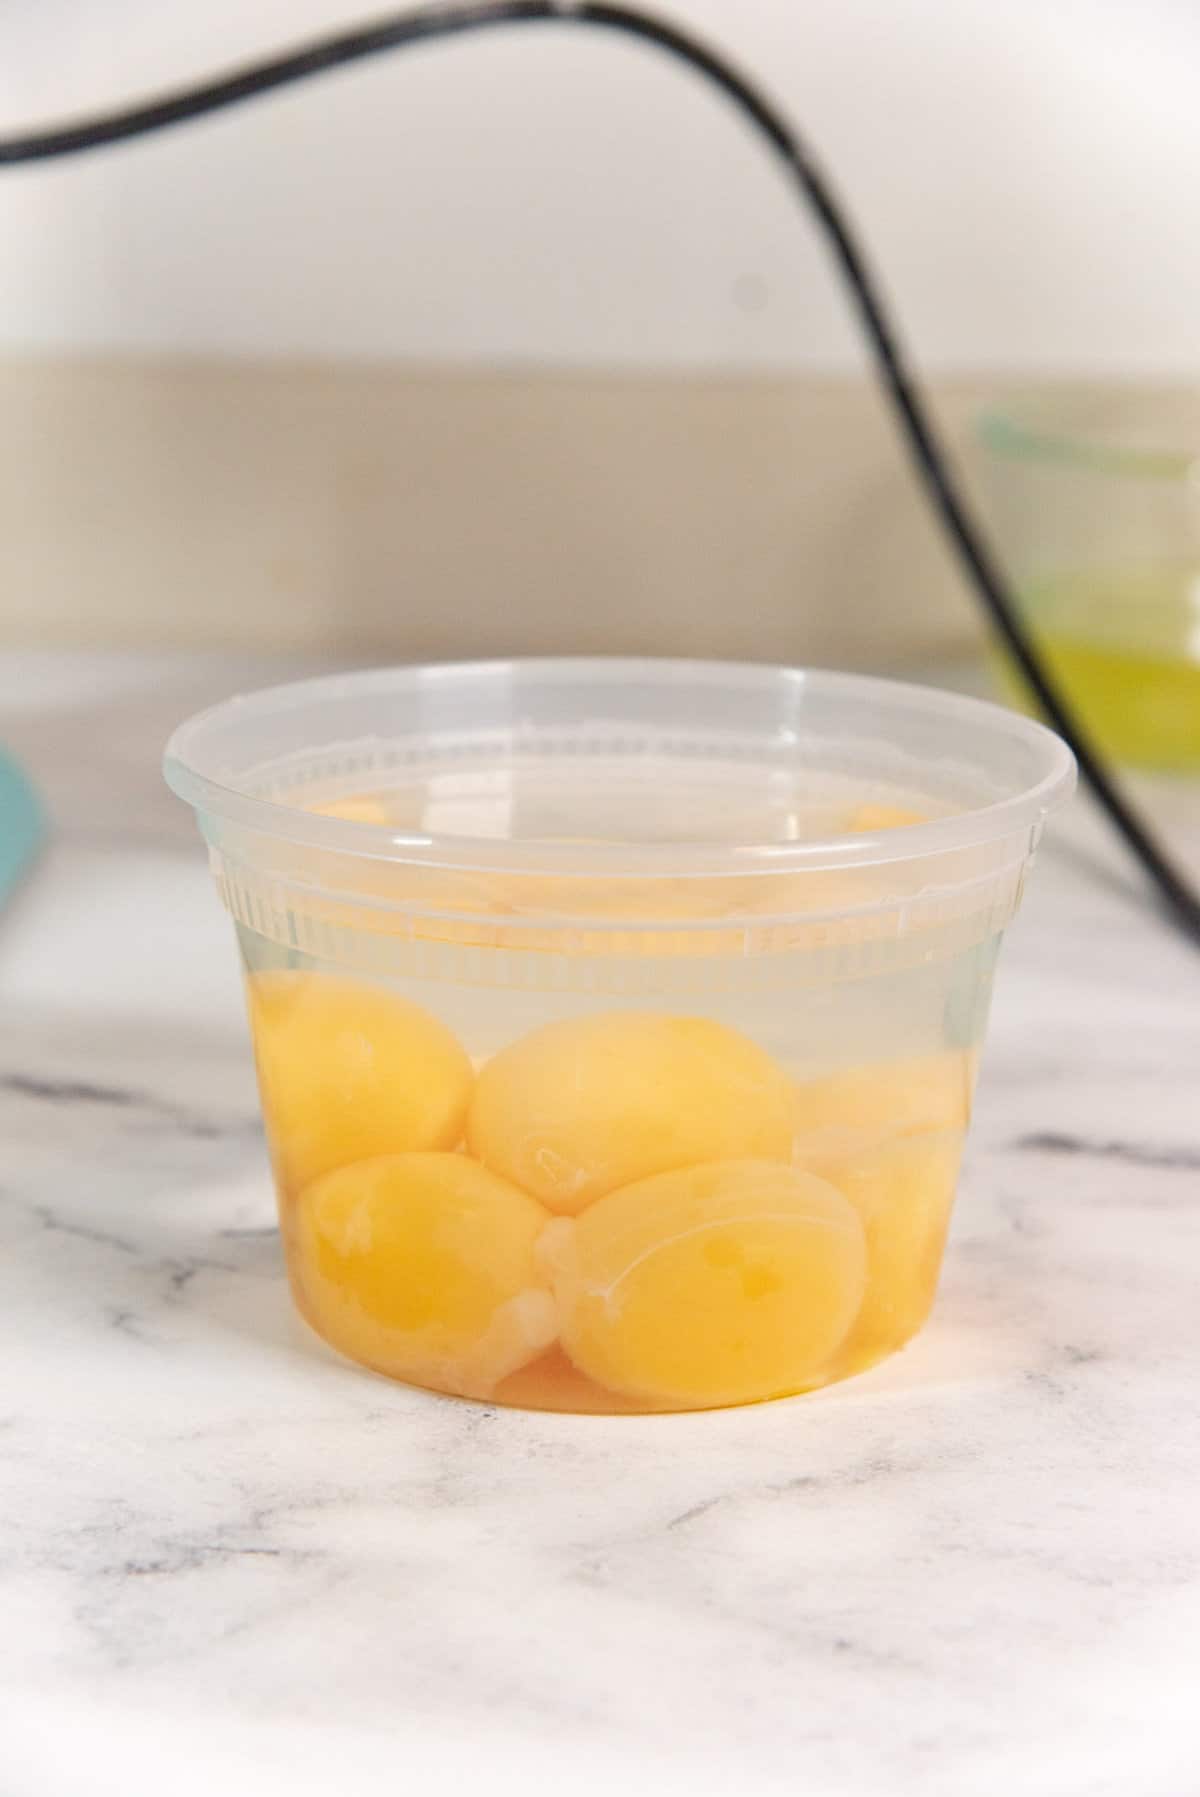
If you’re a novice, then you can separate the eggs while they are still cold, and then allow the egg whites to come to room temperature. Colder eggs are easier to separate than room temperature eggs. Yolks can be stored submerged in water, in a container.
Temperature of the egg whites
Colder egg whites don’t whip as readily as eggs at room temperature or warmer. This is also why room temperature eggs are vital for all baking recipes.
In summer, room temperature would be about 75 F+ (24 C+). But in winter, the room temperature could be about 67 F (19 F). So, in winter the egg whites may need to be warmed a little bit for best results (more on that below).
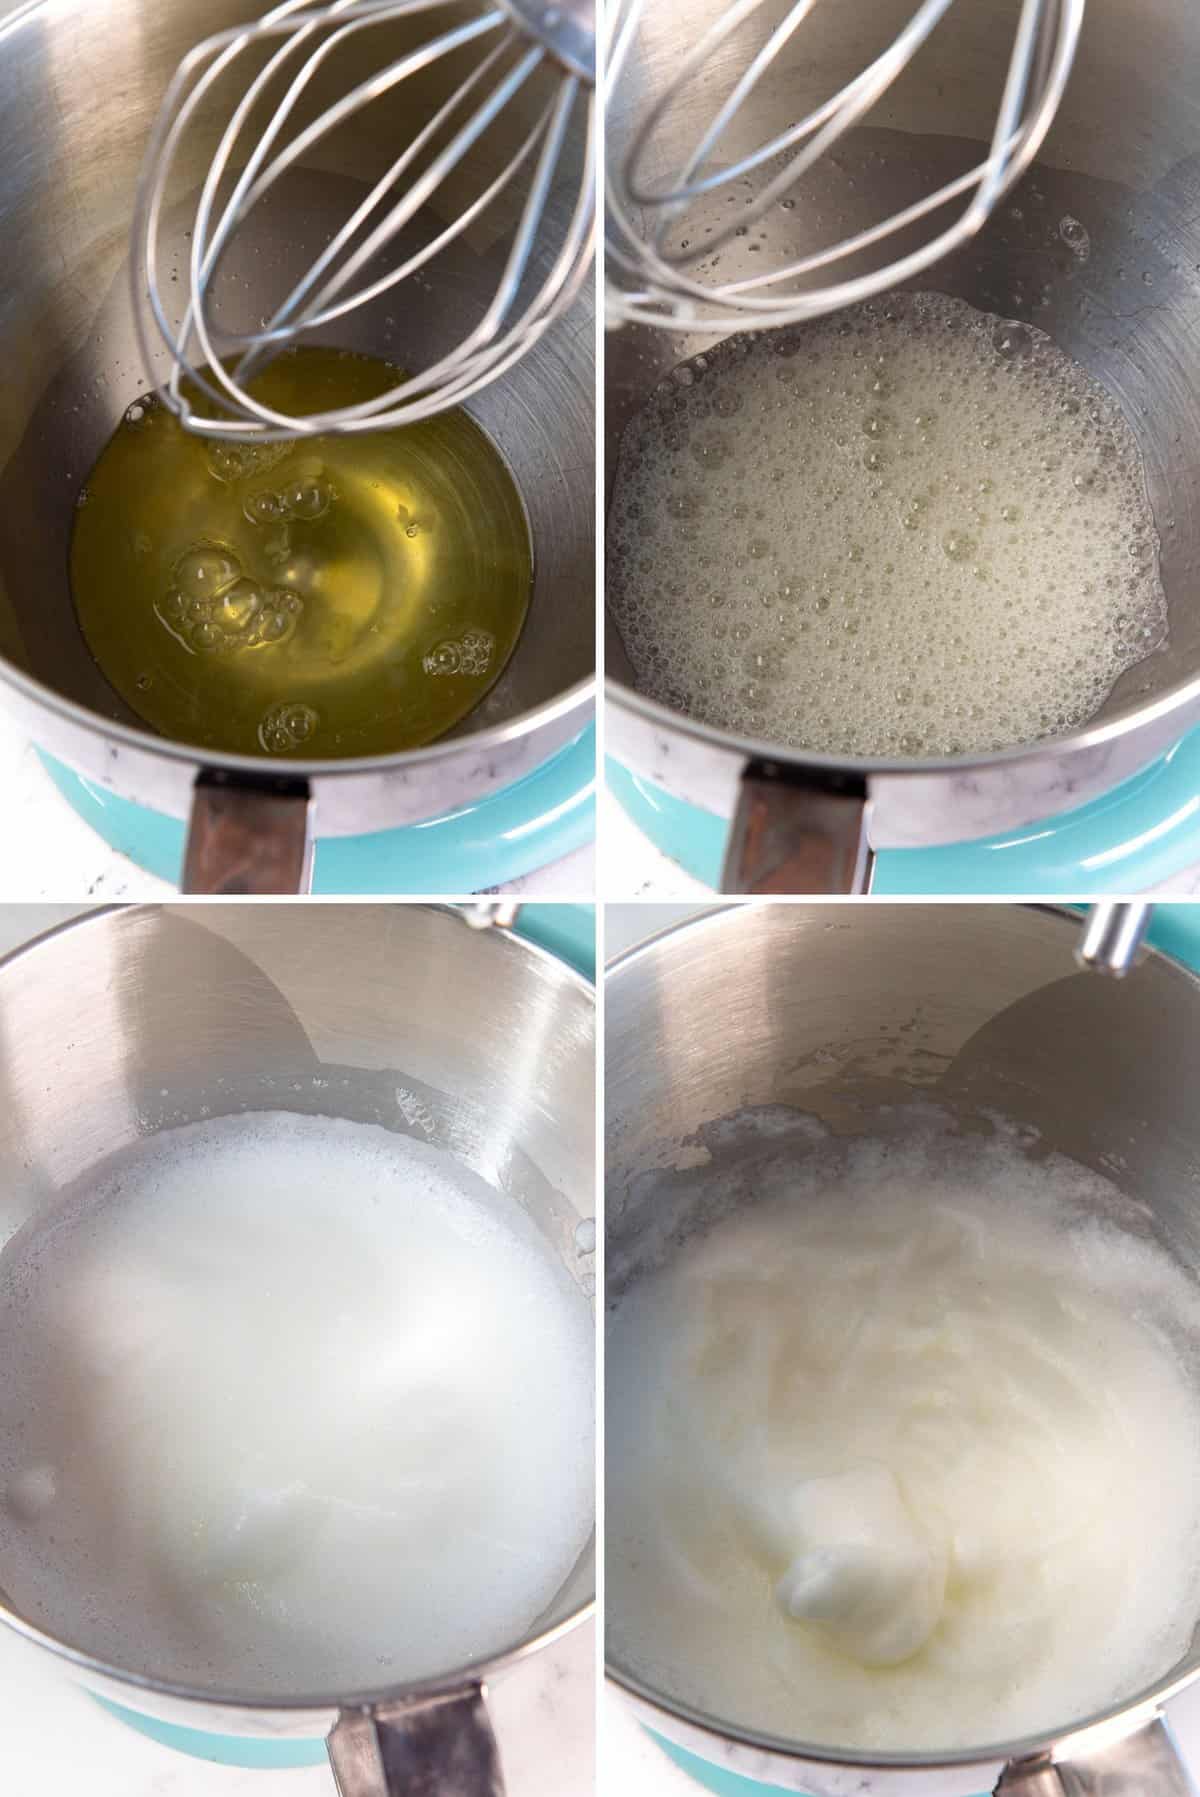
Step 3 – Whisking egg whites
Whisking on low speed is the key for a stable meringue. In a mixer with 10 speeds, I never go beyond speed 4 for the whole duration of whisking my pavlova base. I only increase the speed to 5 in the last few minutes (to mix the cornstarch and vinegar).
Using fresh egg whites, and whisking slowly means air is introduced slowly, and you get a more stable foam structure. This prevents over-whisking the egg whites as well.
It also means it takes a while to get that pavlova ready. But you must be patient.
So, at first, you will only be whisking the egg whites at speed 2 or 3 until it reaches the soft peak stage. This can take up to about 10 minutes. The warmer the eggs, the faster they will reach soft peaks.
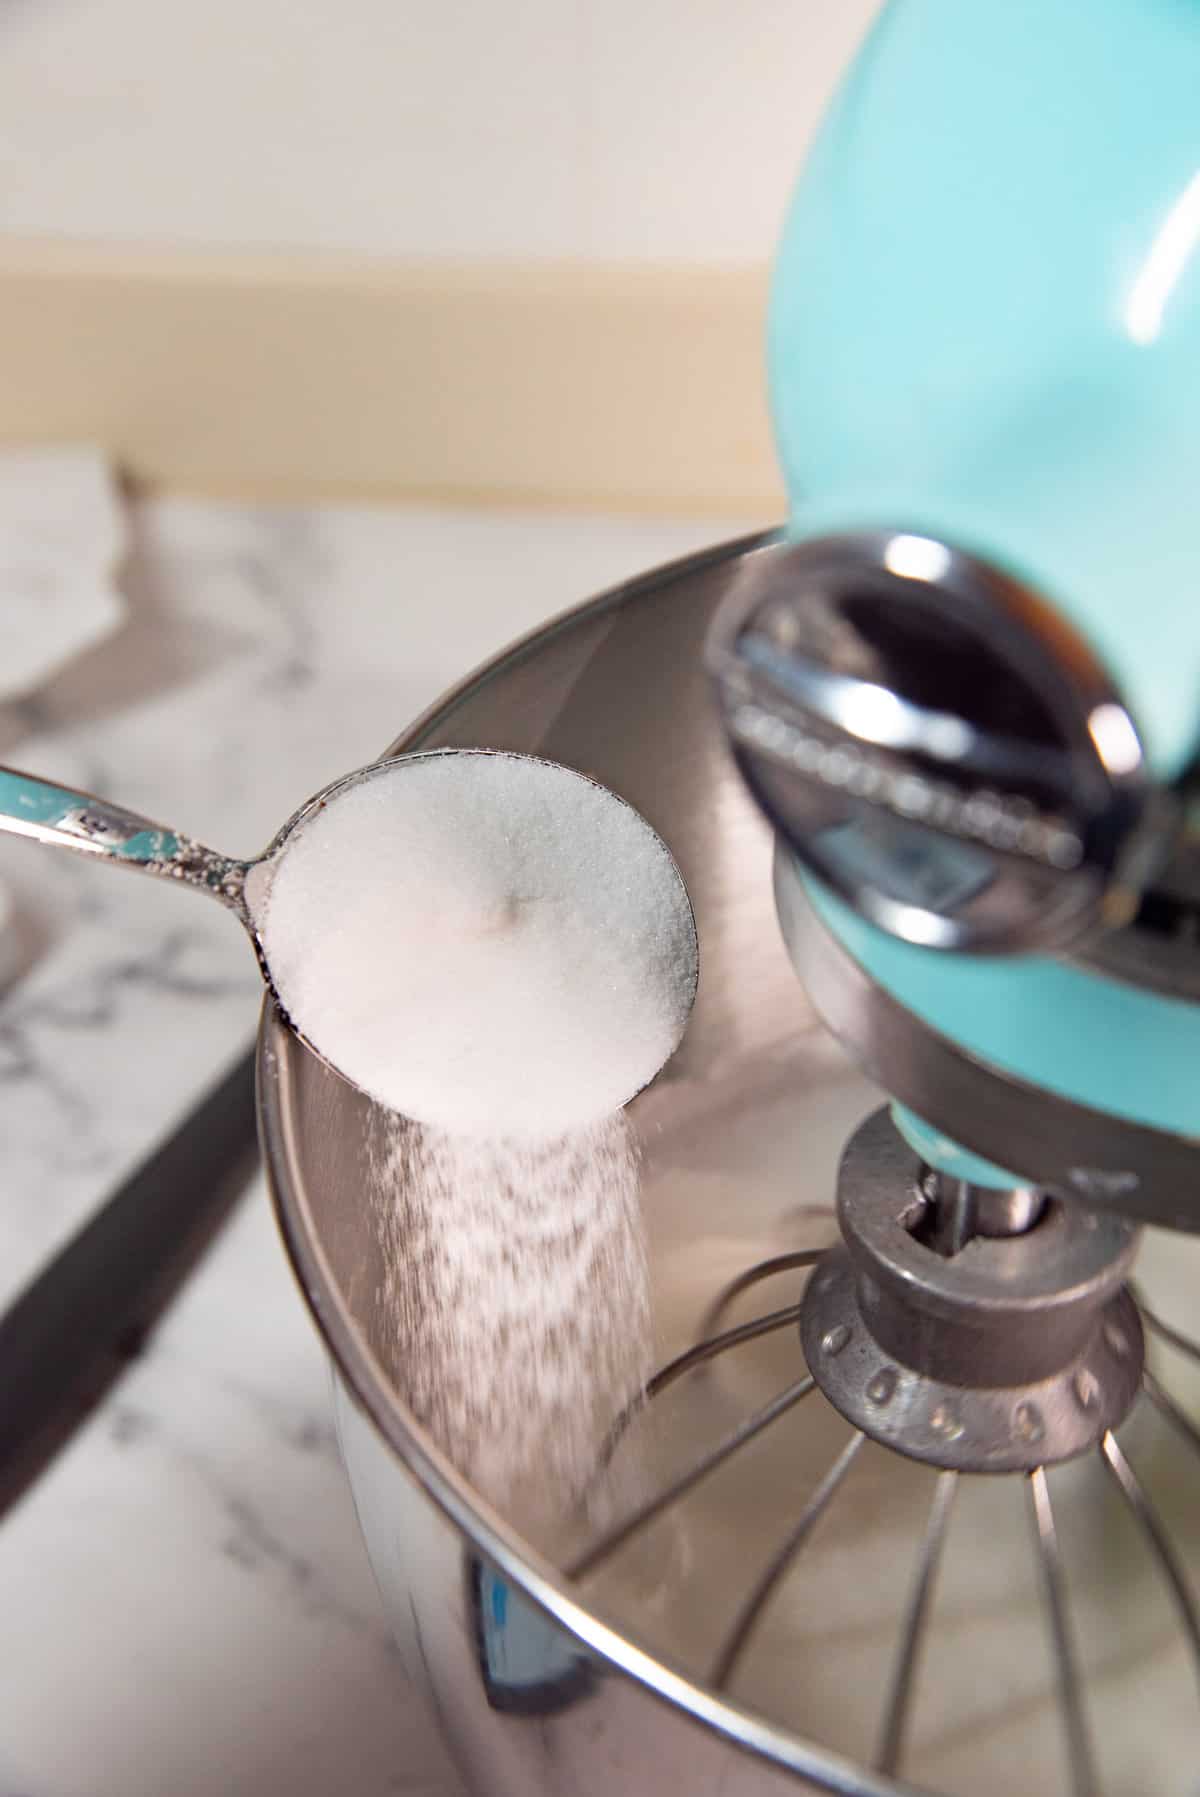
Step 4 – Adding sugar to the egg white mixture
The best time to add the sugar is when the egg whites are at soft peak stage.
Don’t be in a rush to add the sugar. I prefer to add them 1 spoonful at a time (using a regular tablespoon), and letting it mix for 10 – 15 seconds before adding the next spoonful.
Keep the speed of the mixer at a 3 or 4 at this stage.
- Adding the sugar too quickly can deflate the mixture, which means you will have a less airy pavlova.
- If you mix in the sugar too quickly, then you risk adding too much air quickly, which can also destabilize the meringue.
This can take about 10 – 15 minutes.
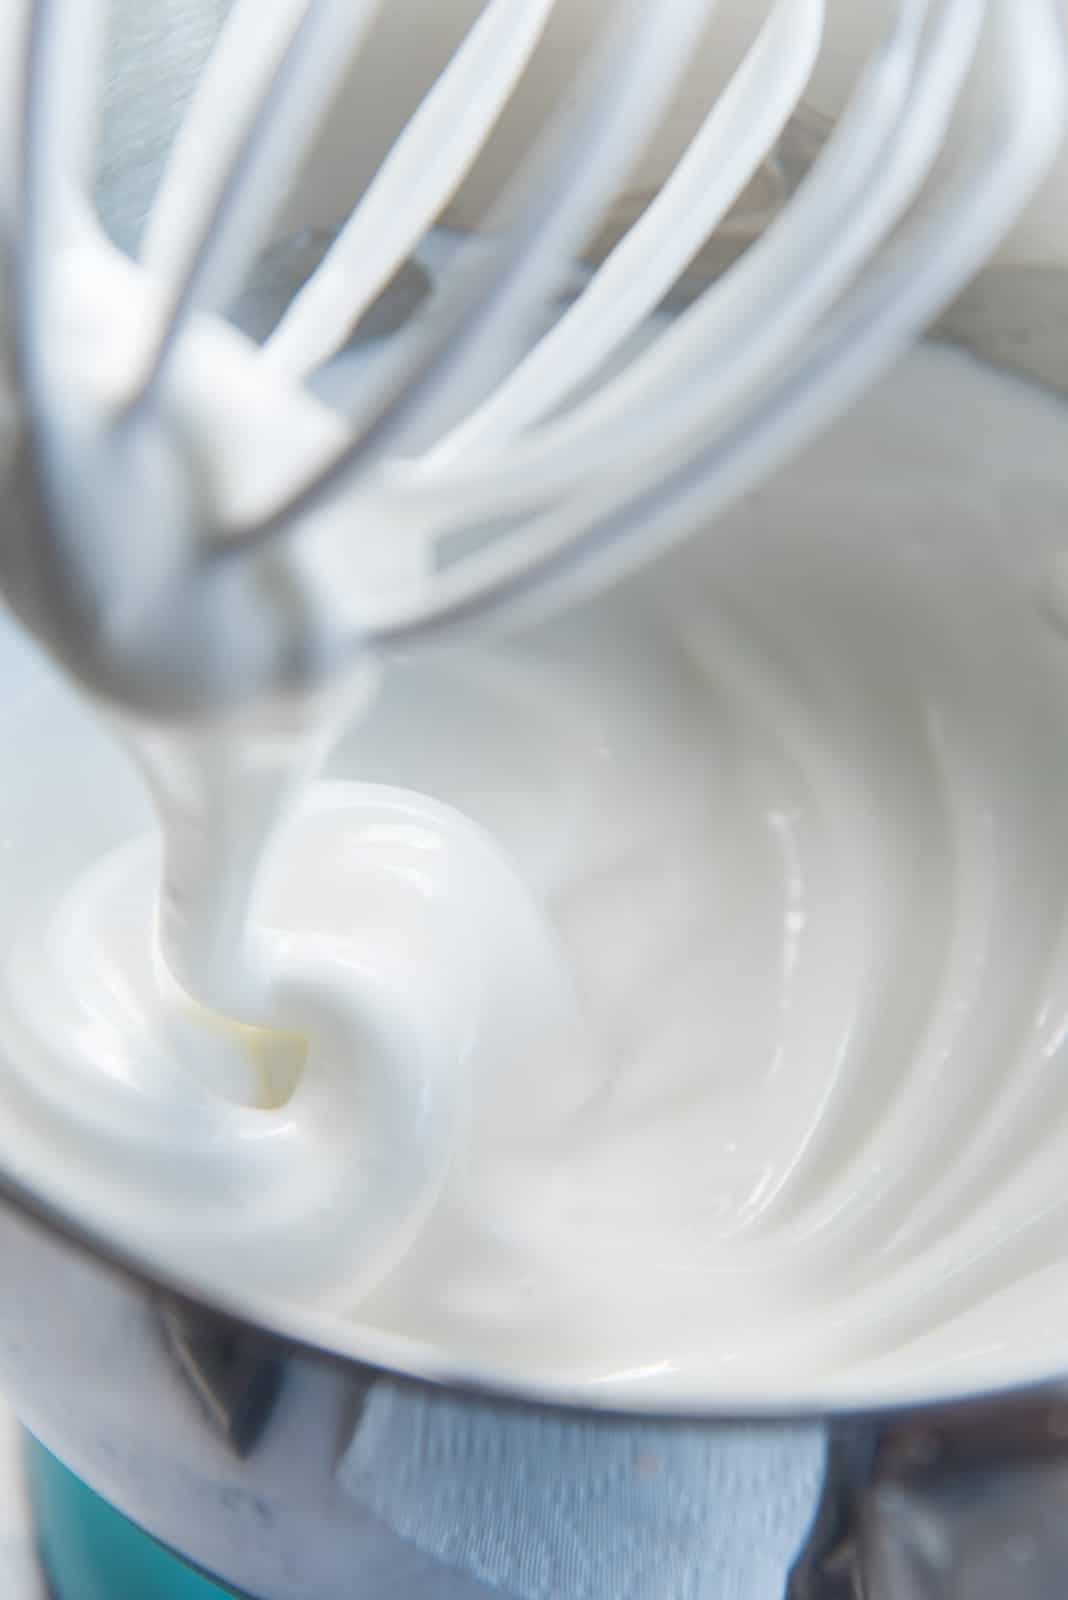
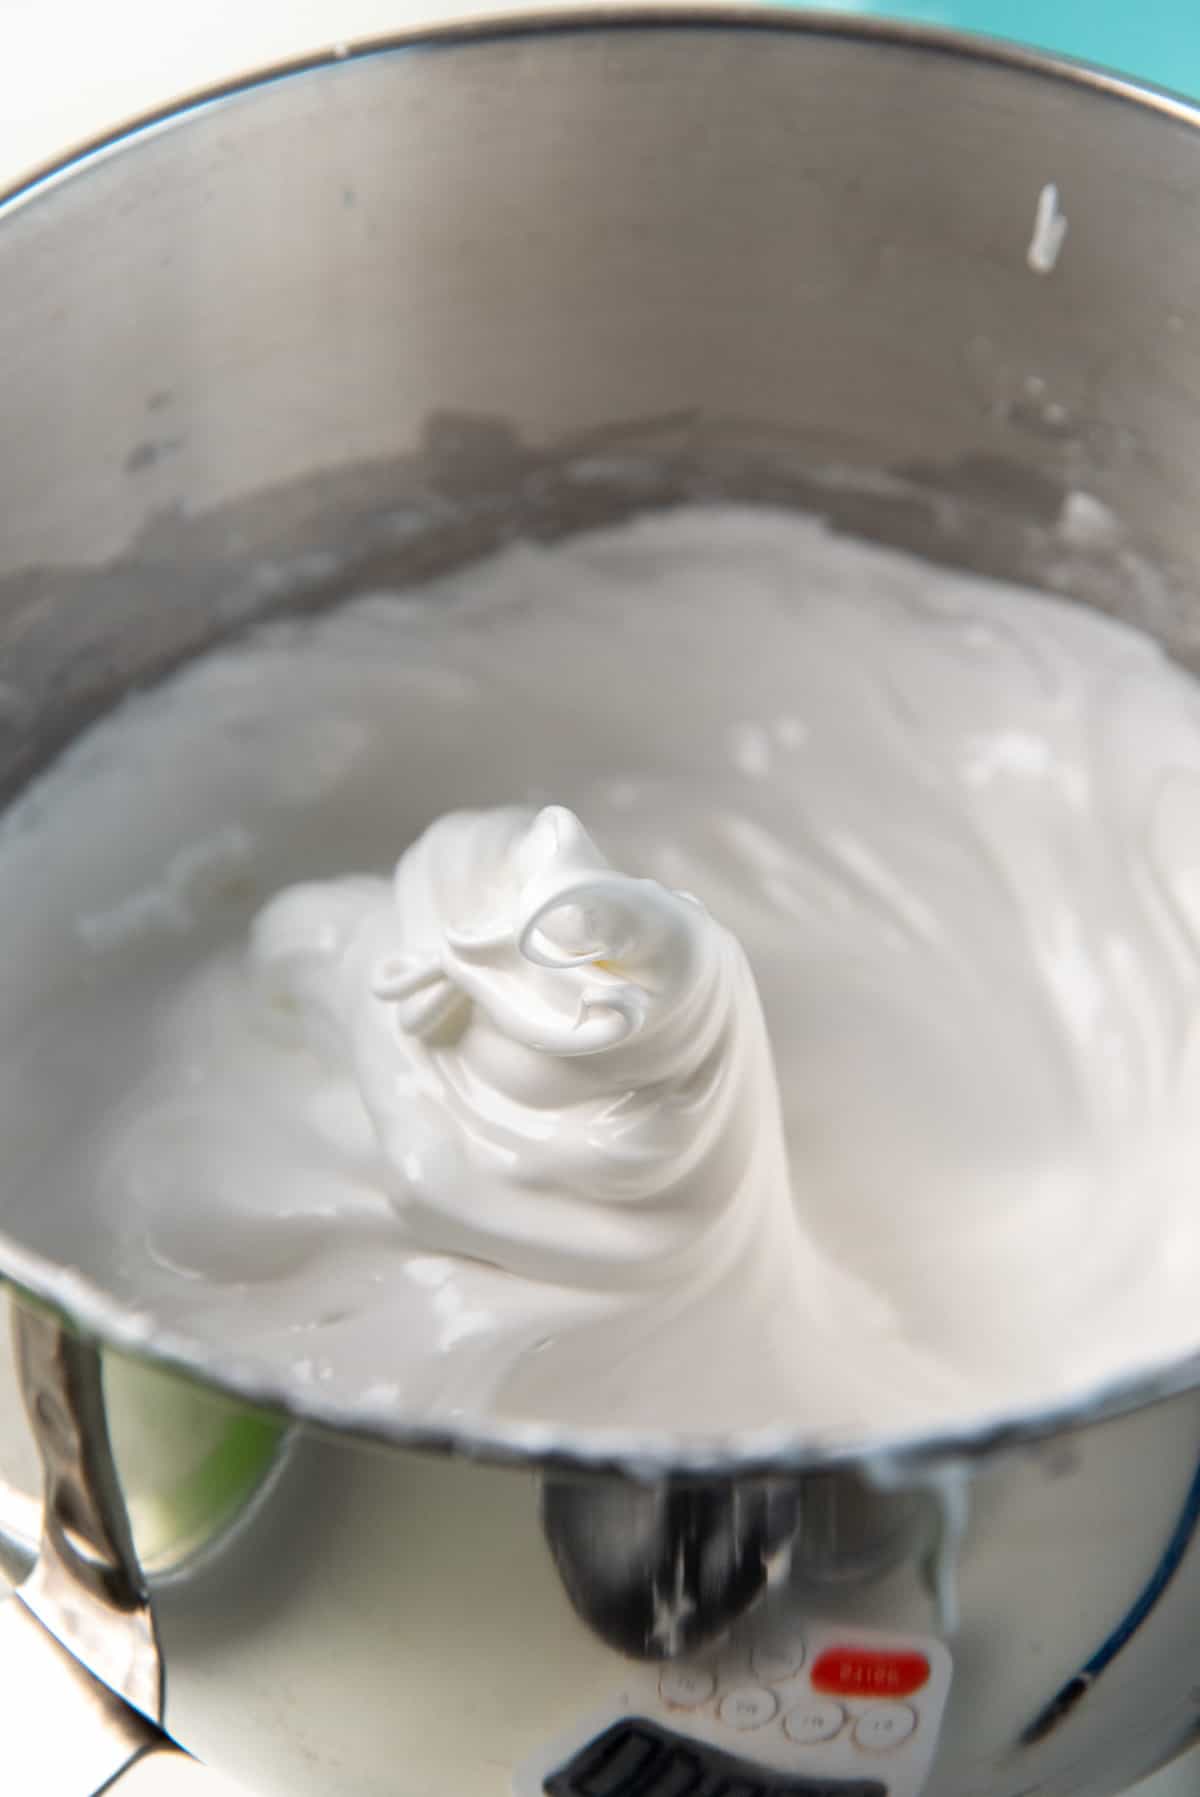
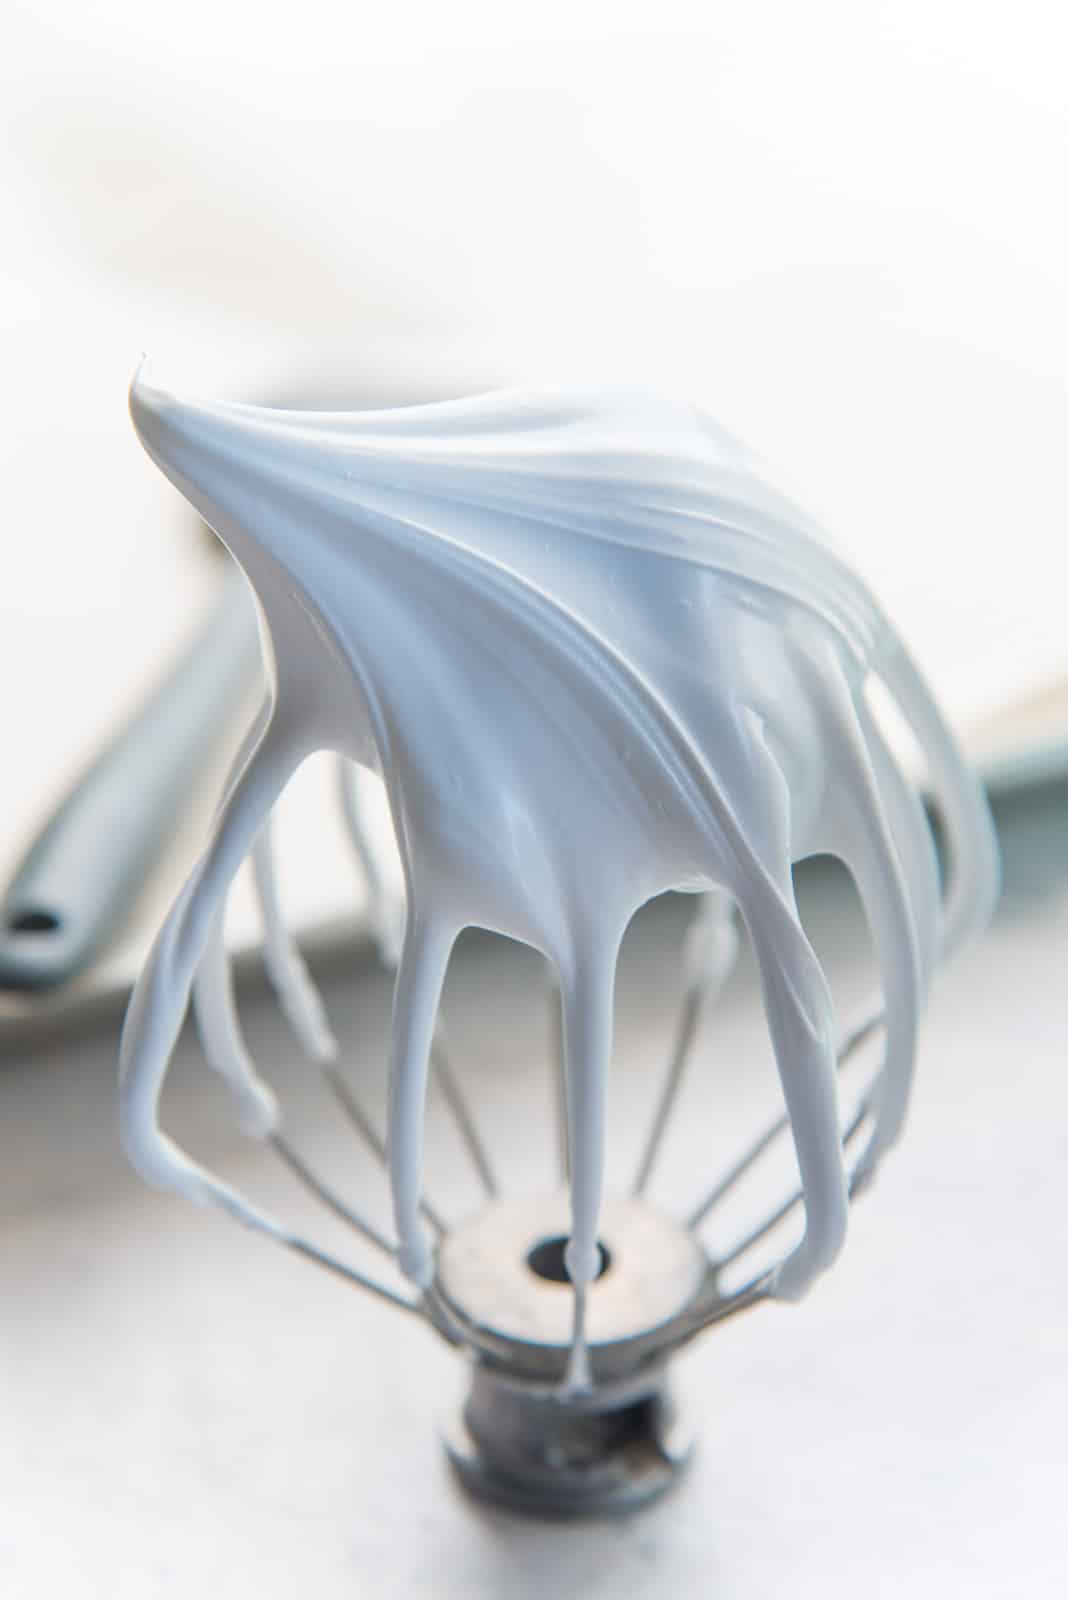
Whisking to make the meringue (how to know when mixing is done)
Once all the sugar is added, scrape the sides of the bowl to incorporate any sugar that is stuck there, back into the meringue. Then keep whisking it at speed 3 or 4 (I vary the speed depending on how the meringue is going).
The mixture would have deflated slightly, and look a little runny. But whisk the meringue steadily, and the meringue will become thick and glossy. Once ALL THE SUGAR IS DISSOLVED, the meringue is ready.
This can take as little as 10 – 15 minutes, or as long as 30 minutes. The pavlova meringue should not take longer than 35 minutes for the sugar to dissolve.
Step 5 – Adding the vinegar and cornstarch
Vinegar and cornstarch are added to the base when the sugar in the meringue pavlova base is almost dissolved (during the last 5 or so minutes of whisking).
In this updated recipe, I add extra cornstarch to help stabilize the pavlova, so it’s easier to add both the vinegar and cornstarch into the meringue directly and letting them mix in. So it’s not necessary to create a cornstarch-vinegar slurry as I used to do previously.
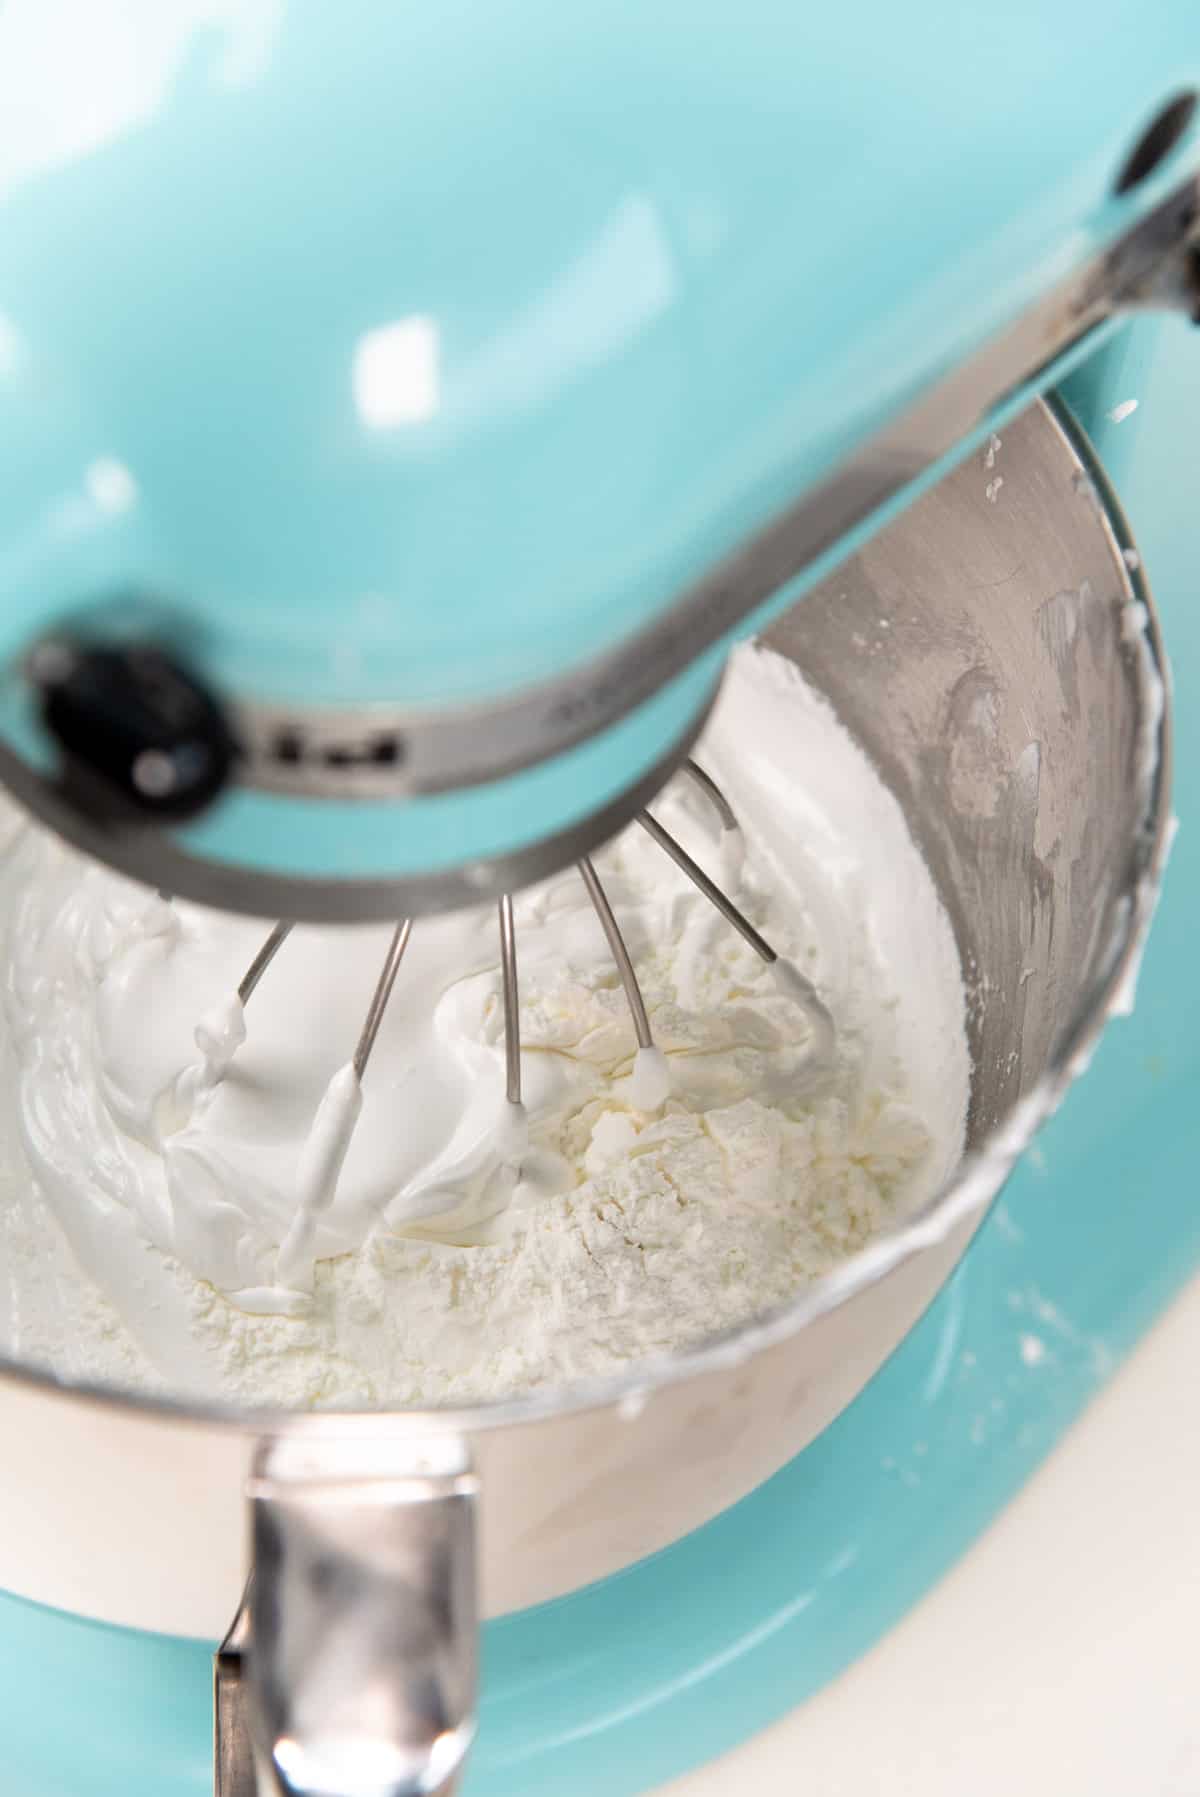
Since the cornstarch and vinegar are added during the last 5 minutes of mixing, there is ample time for the cornstarch and vinegar to incorporate well into the meringue. Pulse the mixer on low speed until the cornstarch has incorporated, and then slowly increase the speed to 4 or 5.
This is the only time I would increase the speed to 5 (if I need to), to get the sugar to be completely dissolved, and the meringue to be thick and glossy.
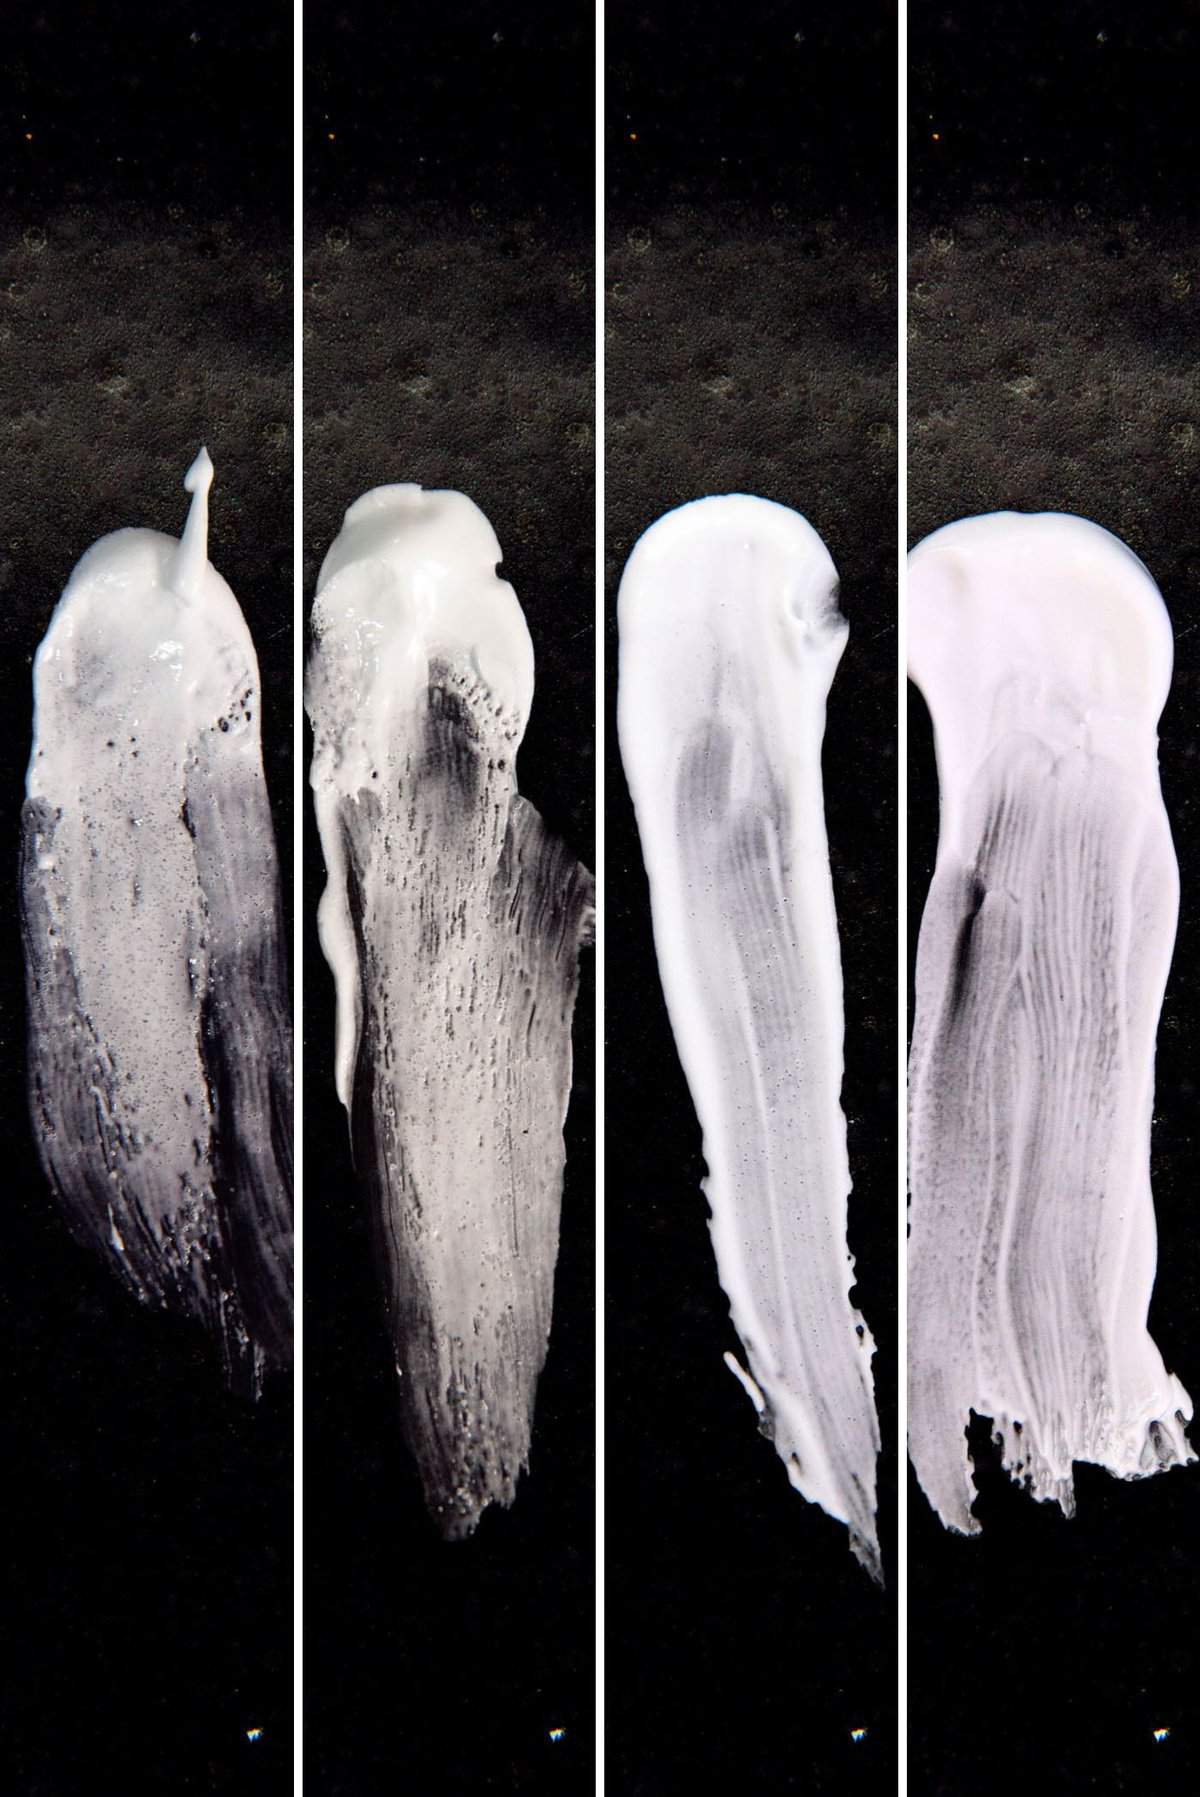
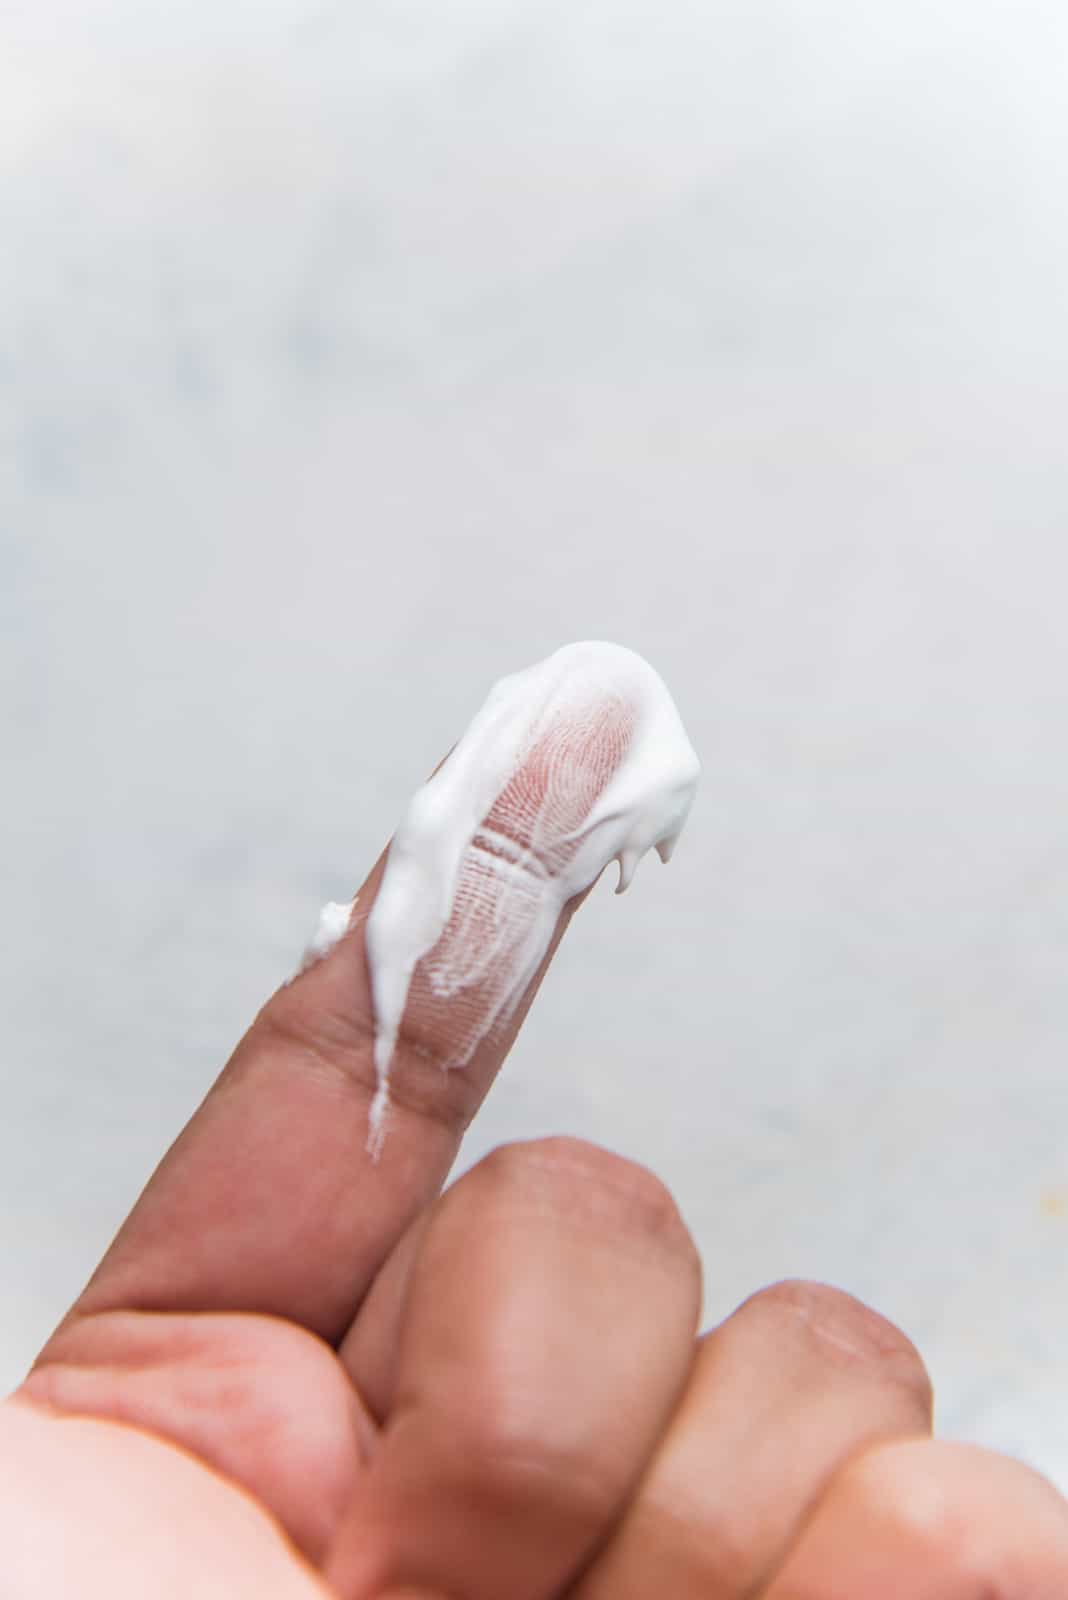
To check if the sugar is dissolved – take a little meringue to your finger tip and rub it between your thumb and index finger. If you feel any sugar granules, then it needs more time to whisk.

Step 6 – How to shape a pavlova
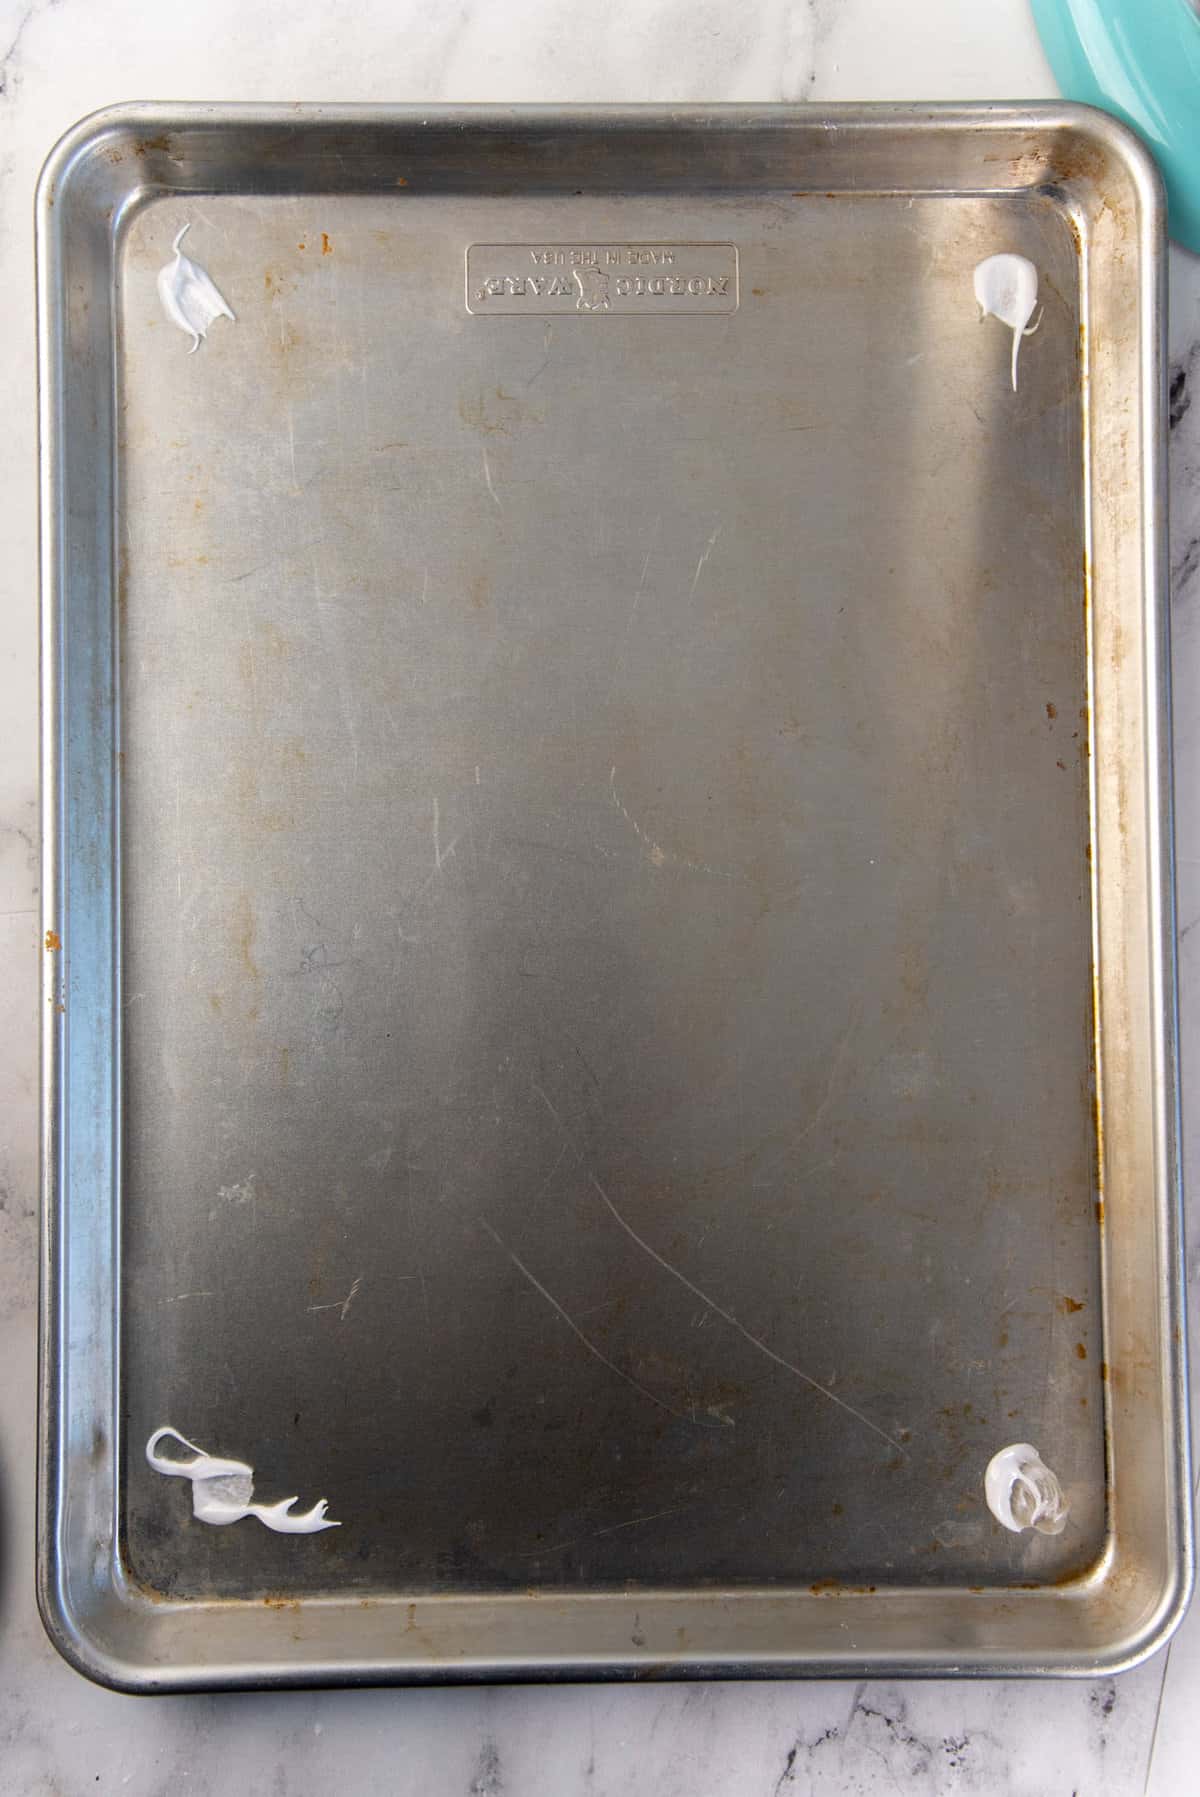
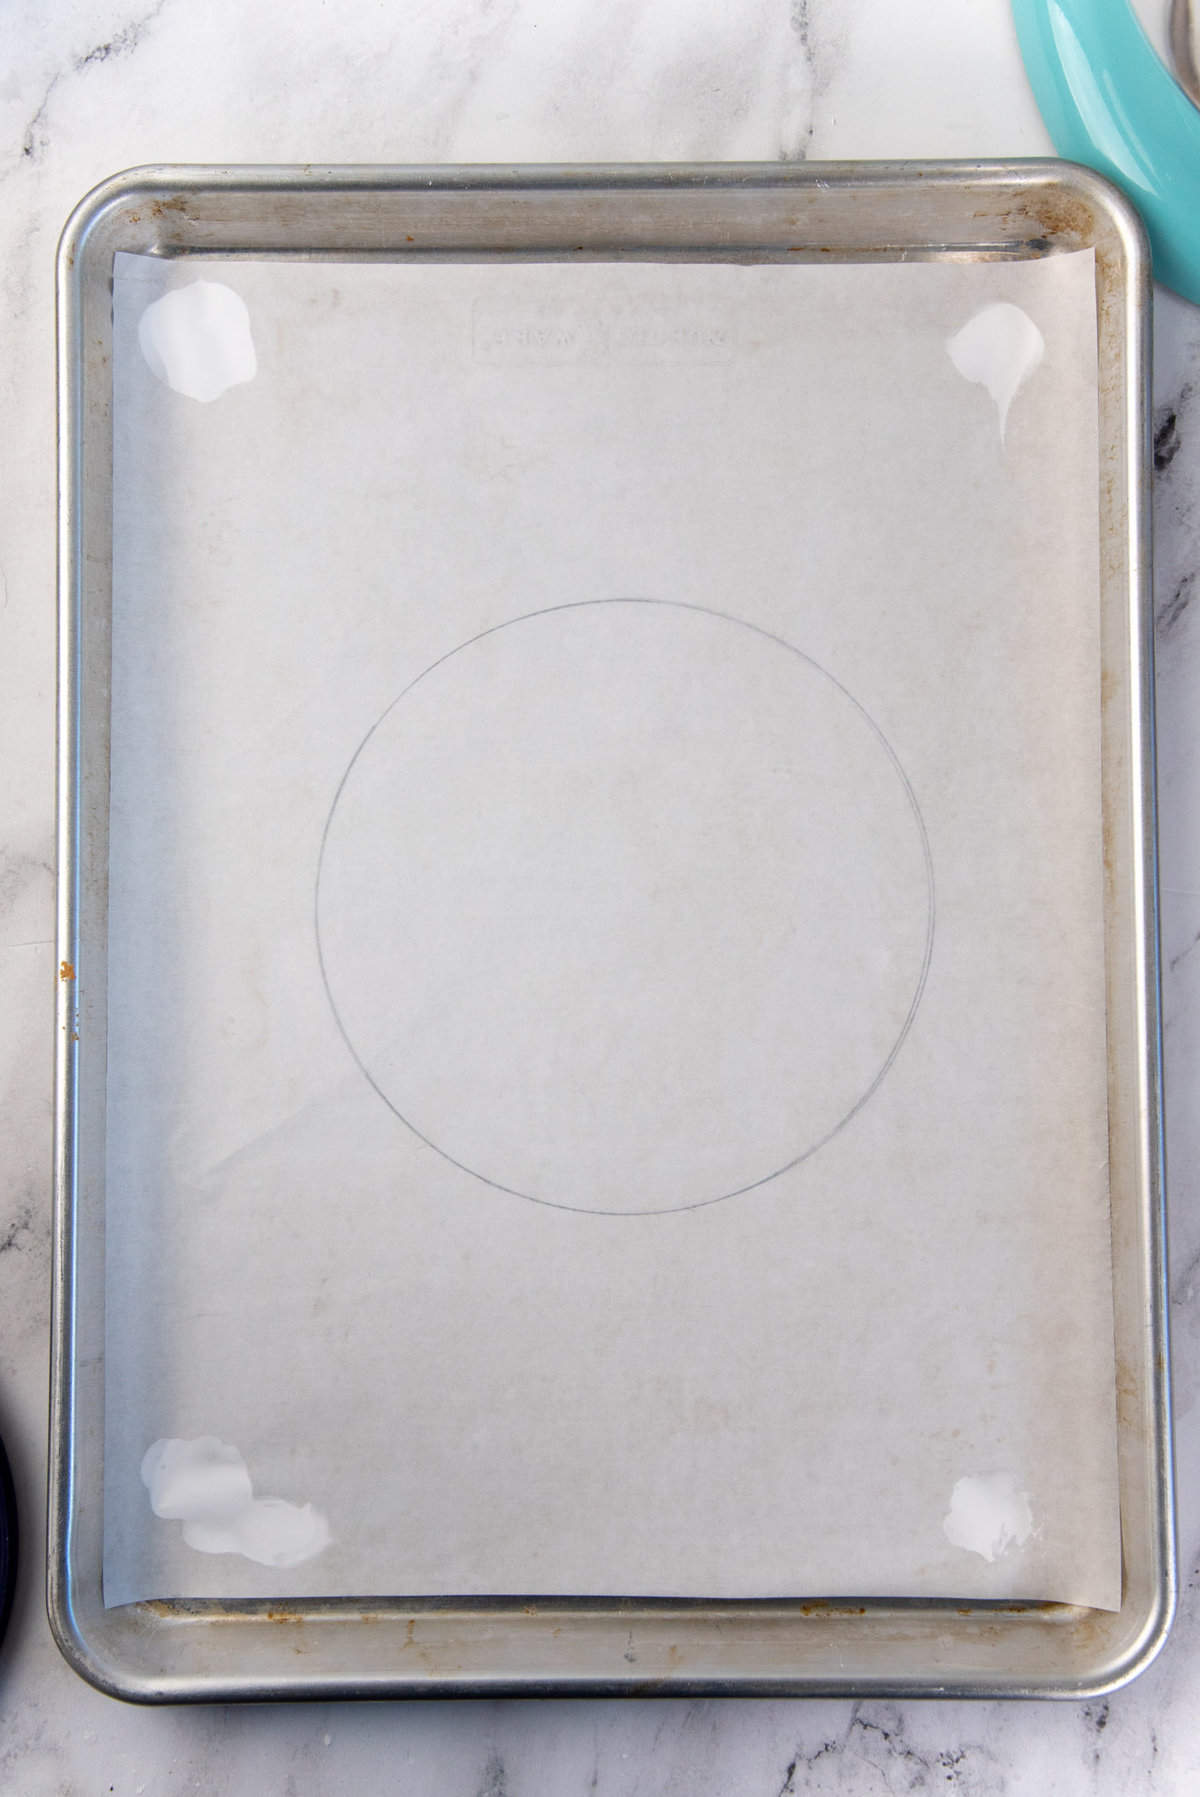
Using a little of the meringue, dab the four corners of the half sheet pan. Then place the parchment paper on the baking tray with the drawn side down. The meringue that you dabbed will help to stick and keep the parchment paper in place.
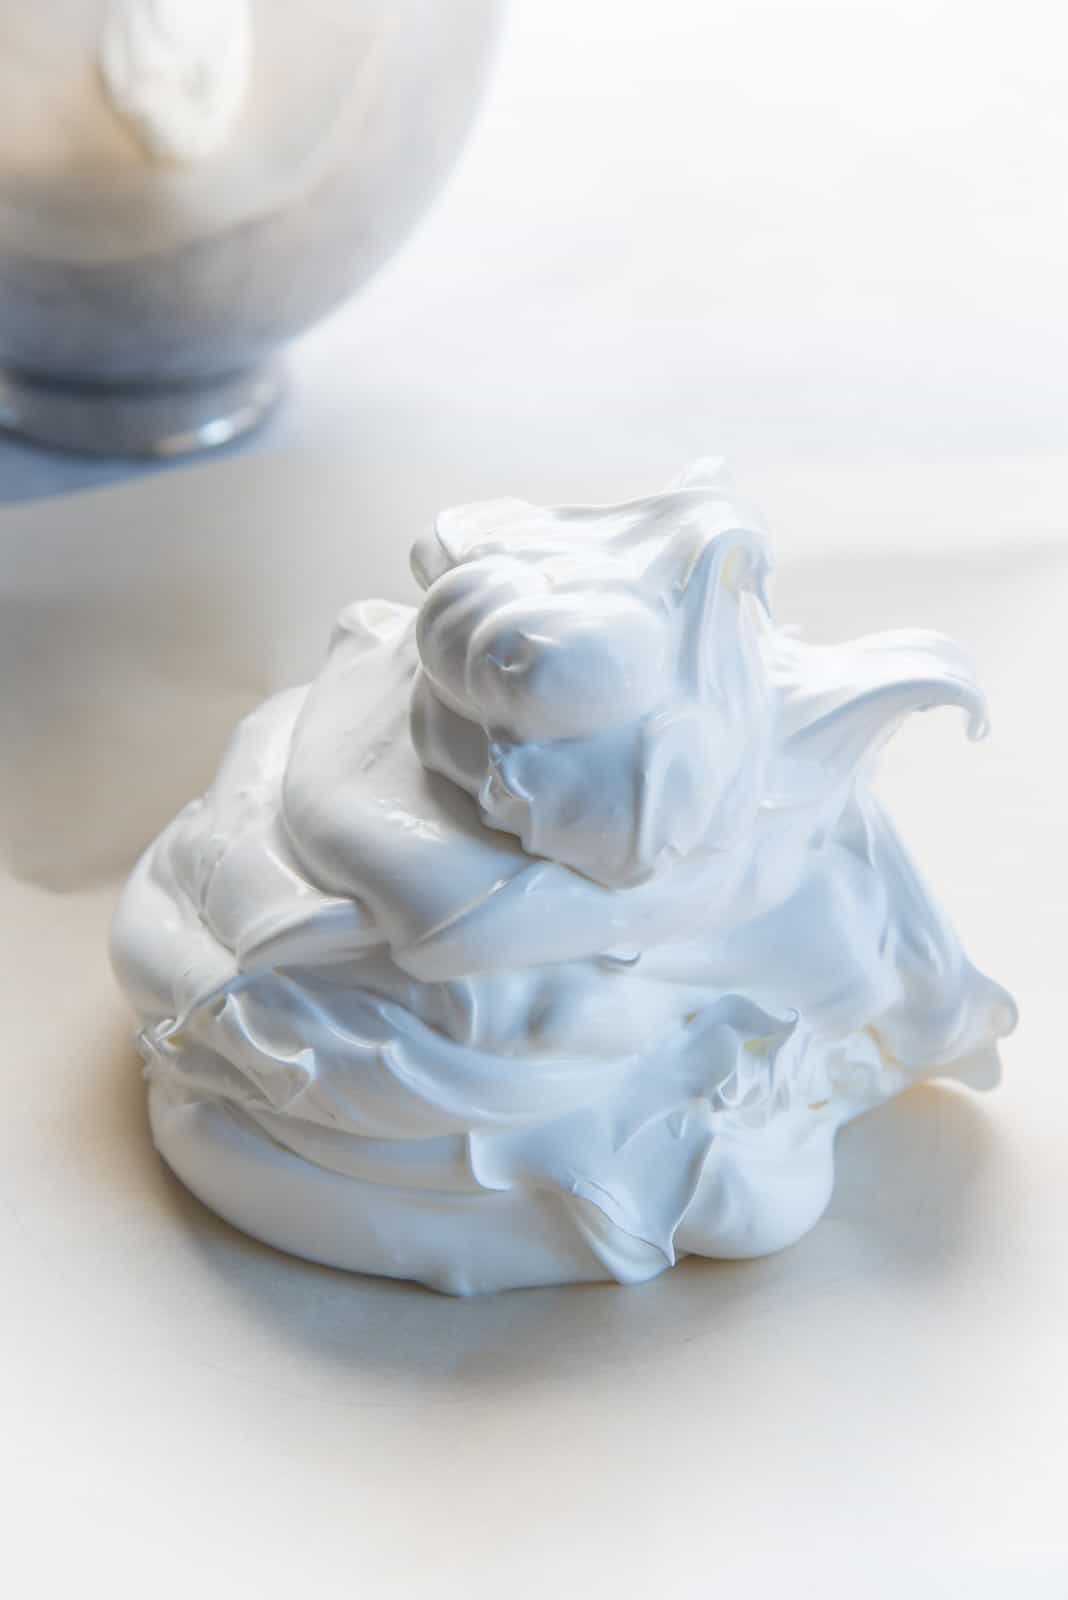
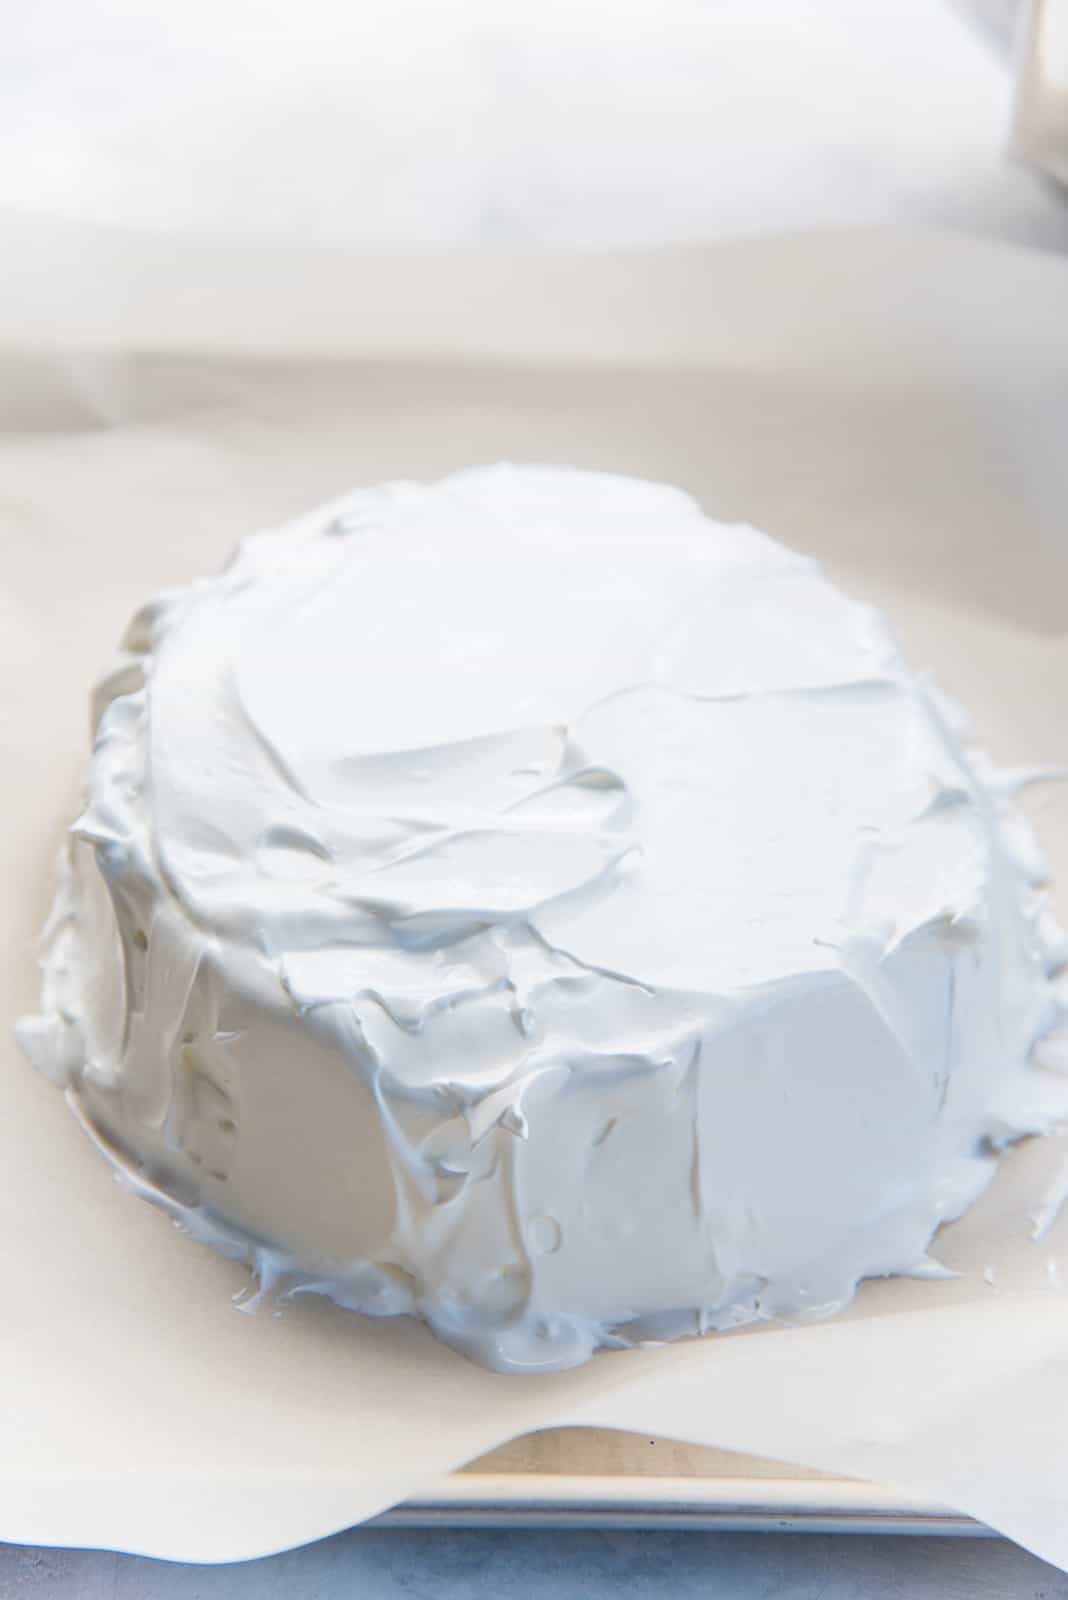
Next, use the spatula to scoop out the meringue mix from the bowl and pile it on top of the parchment paper, within the drawn circle.
Then use an offset spatula to spread the meringue mix within the circle, and to have an even thickness, and flat top. Run the spatula along the sides, so that you have straight-ish smooth sides within the drawn circle.
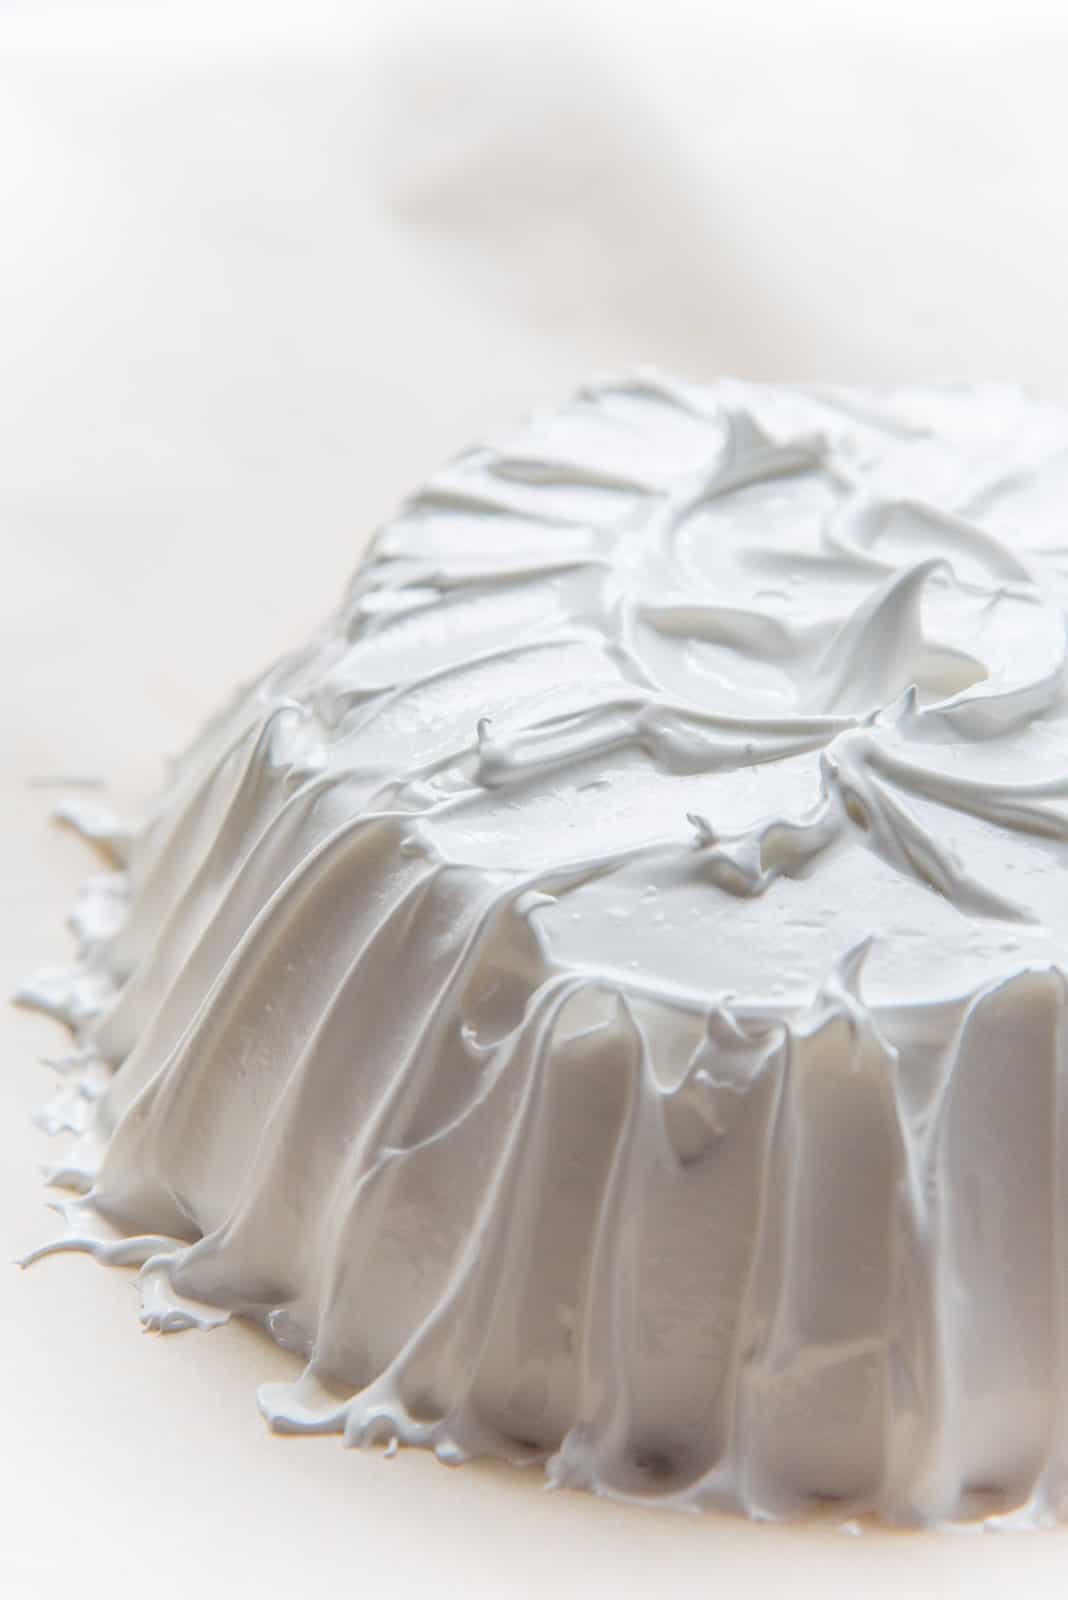
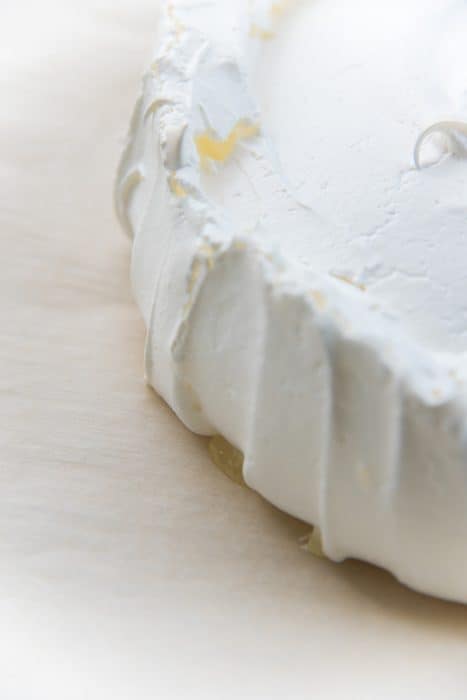
Once you have the basic shape of the pavlova ready, use the offset spatula to create vertical or angled furrows on the side of the pavlova, while moving the offset spatula from bottom to top.
Create soft edges and flatten any pointed meringue. Flatten the surface of the meringue to be even, and then create a shallow depression in the middle of the pavlova.
This shallow depression should only be about 1 inch deep, and allows the pavlova to rise more evenly. The final height of the pavlova should be about 3 – 4 inches.


Step 7 – How to bake pavlova (the correct temperature and bake time)
Once the pavlova is shaped, immediately place it on the rack / preheated baking tray in your oven, and reduce the oven heat to 212°F / 100°C.
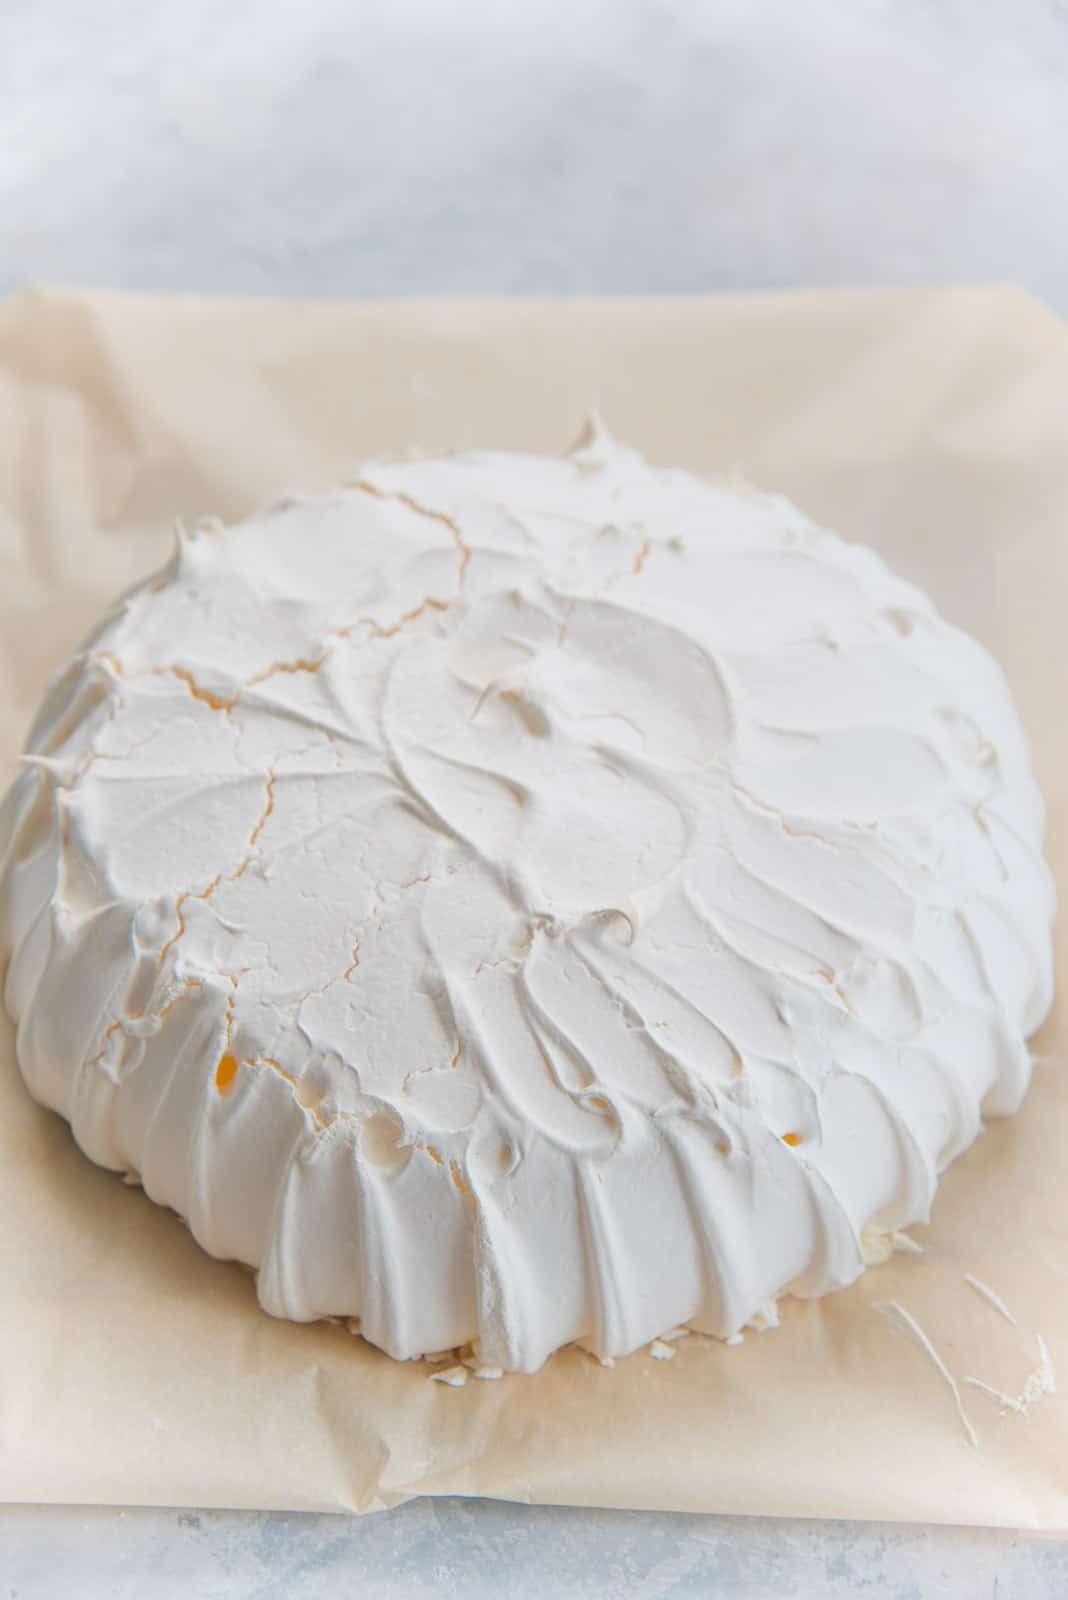
DO NOT OPEN THE OVEN while the pavlova is baking. A pavlova should only be baked until you have a crisp, dry shell. And no longer. In my oven this takes about 80 – 90 minutes.
If this is your first time, and you have to check the crust (just once), do not open the oven fully! Just a crack to take a peek.
You might be tempted to keep checking on the pavlova, but don’t! Your pavlova is now in the hands of the meringue gods, and there’s nothing more you can do.
How long to let it cool in the oven
Once baked, you have to let it completely cool down in the oven, to prevent the pavlova from collapsing. Usually this takes about 3 – 4 hours.
You can leave the pavlova in the oven overnight too. A baked and cooled pavlova can be kept in an airtight container, or even in the oven for up to 24 hours.
Extra tips on how to make a successful pavlova during winter
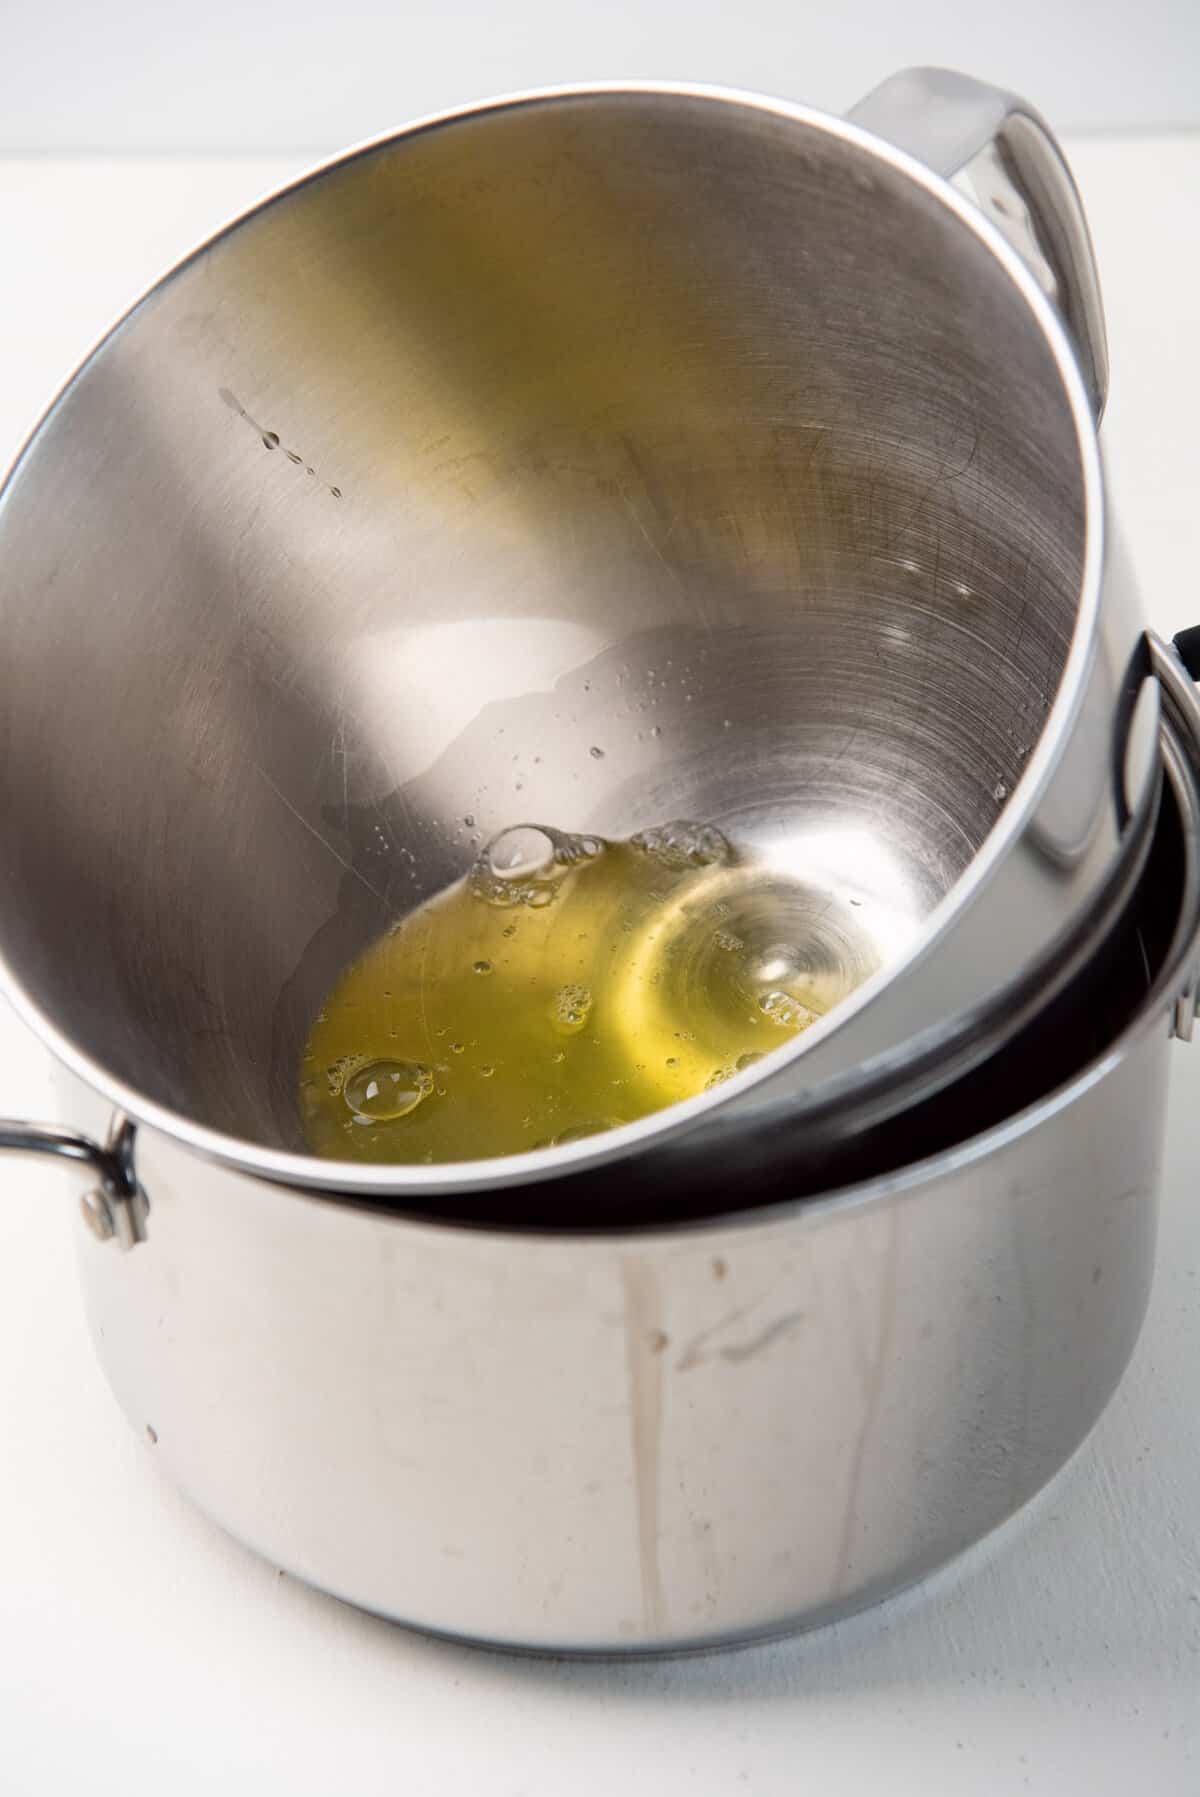
If the weather is very cold (as it gets in winter here in Ottawa), this can lead to the sugar taking a longer time to dissolve in the egg whites. In summer, the egg whites can heat up during the whisking which will help dissolve the sugar.
Once you have measured the egg whites, place the mixing bowl (with the egg whites), in a bain marie with hot tap water (about 115 F). Stir the egg whites to increase the temperature to about 90 F.
The warmer eggs will whisk and foam much faster, so keep an eye on them. The warmer egg whites could also dissolve the sugar faster.
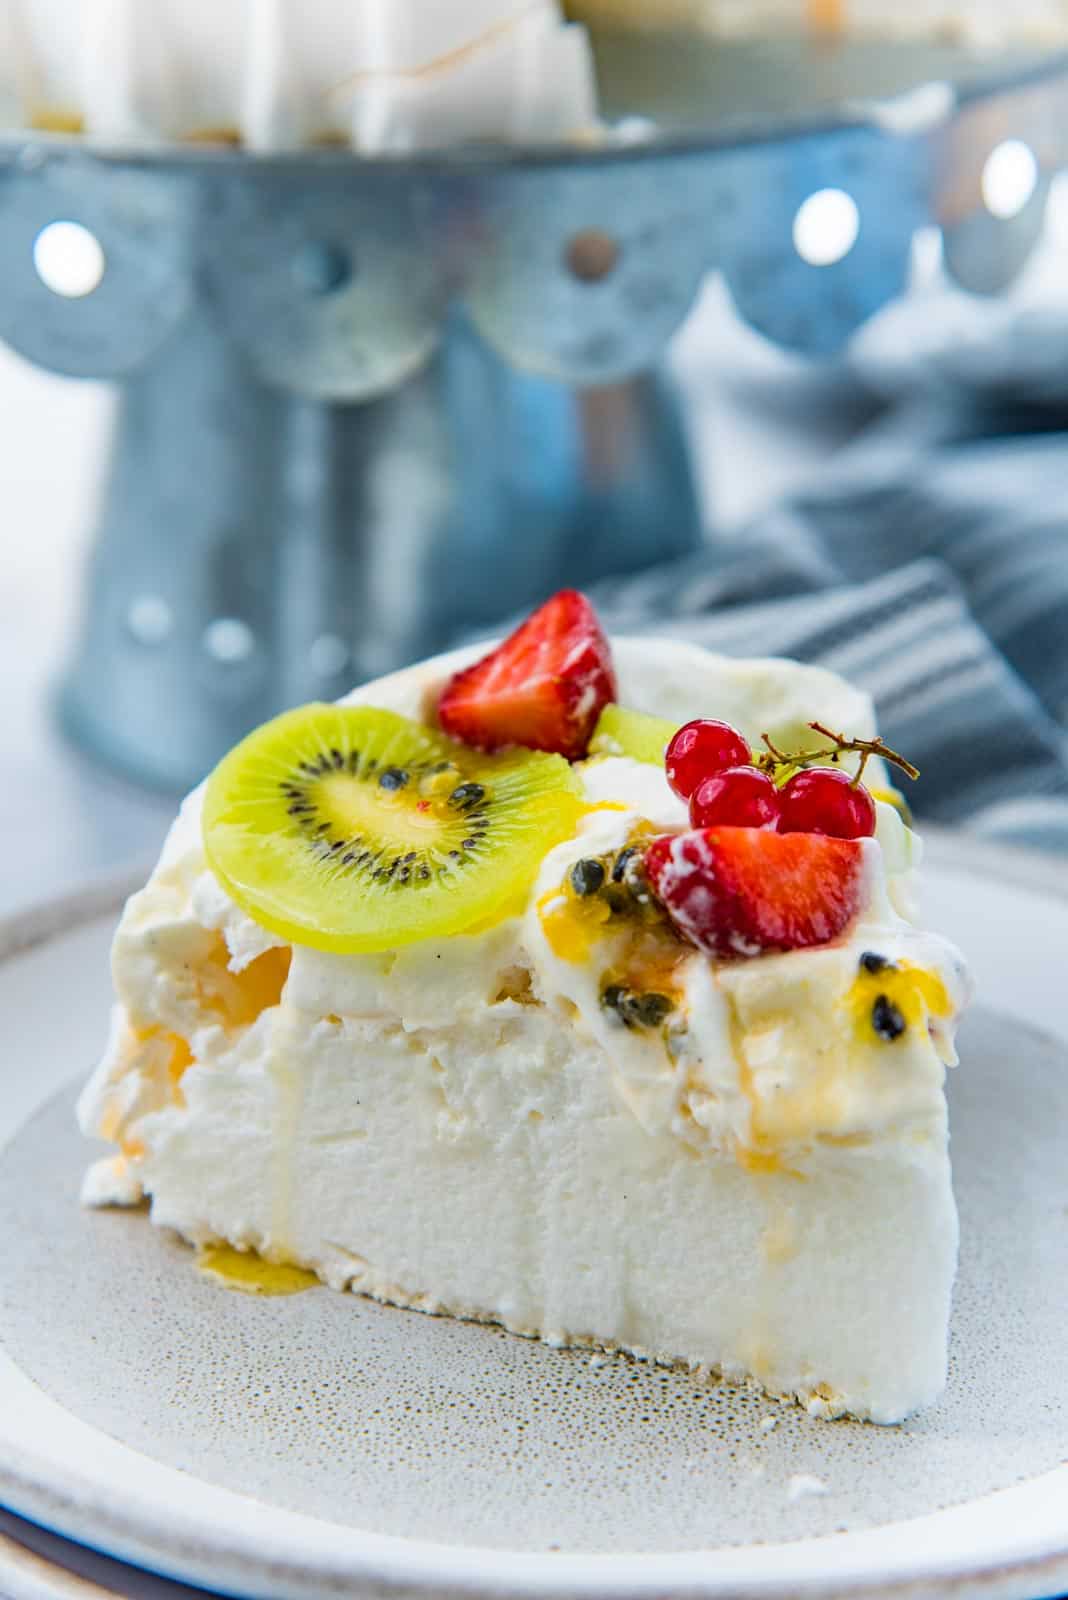
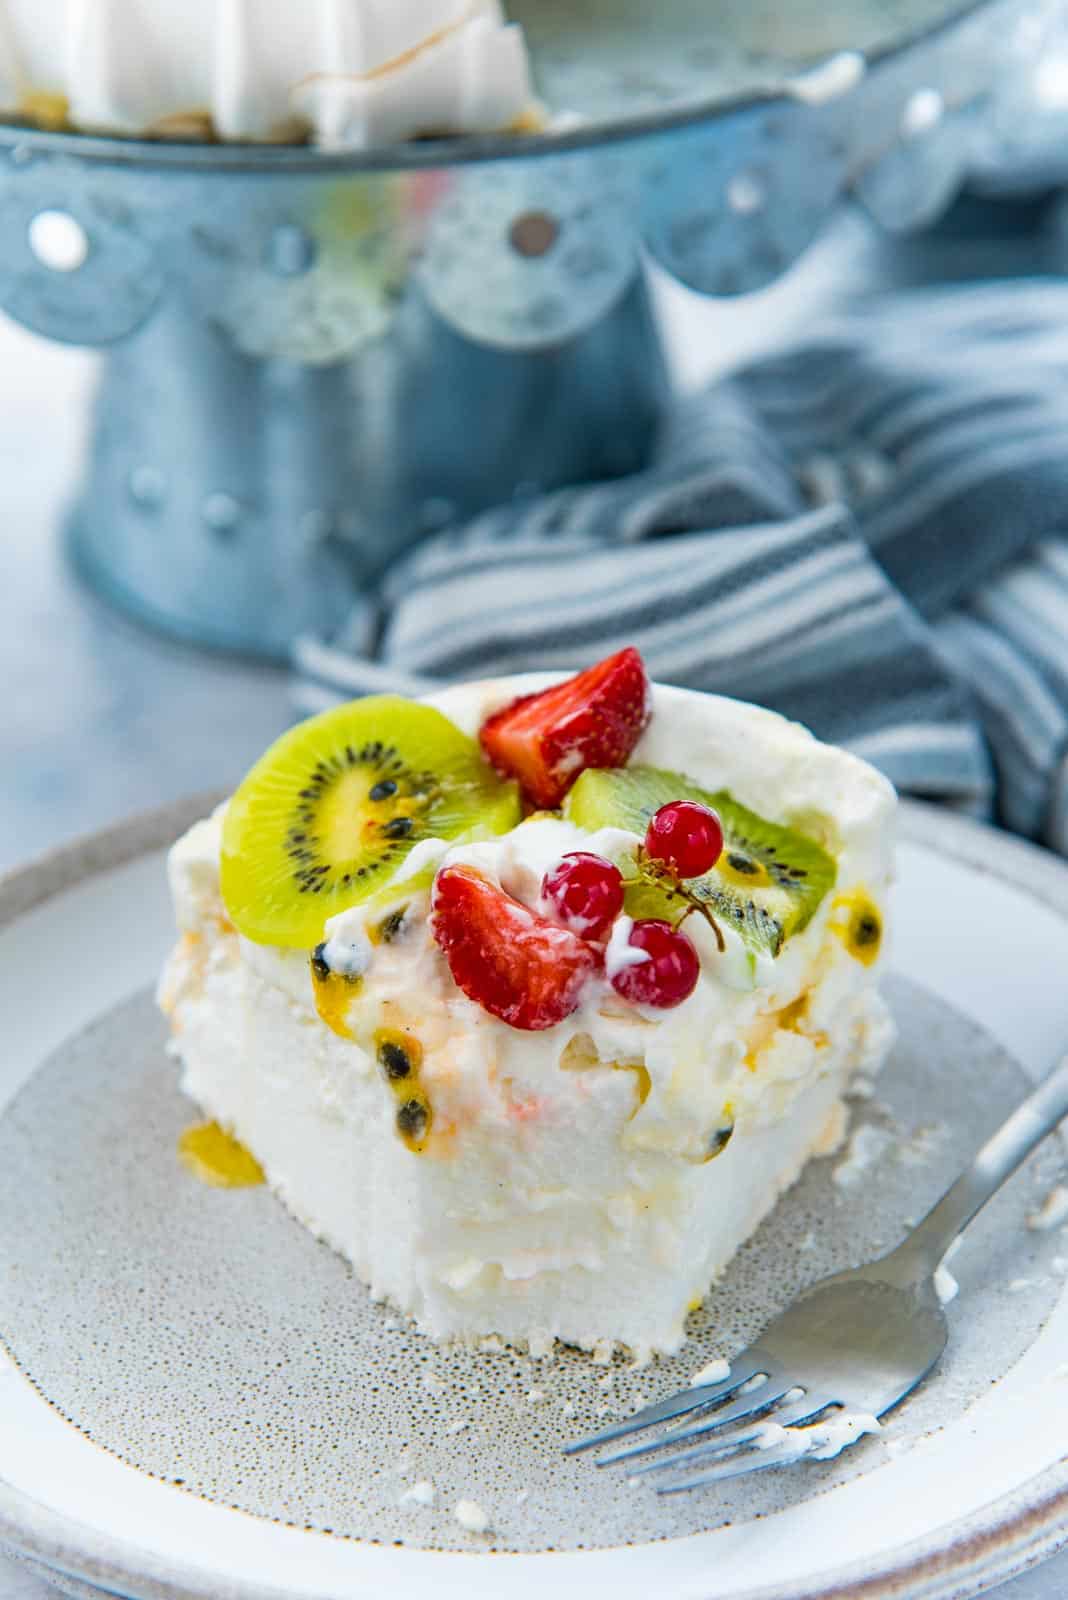
Step 8 – How to serve a classic pavlova
Now that you know how to make the best pavlova base, you’ll also want to know how to decorate a pavlova!
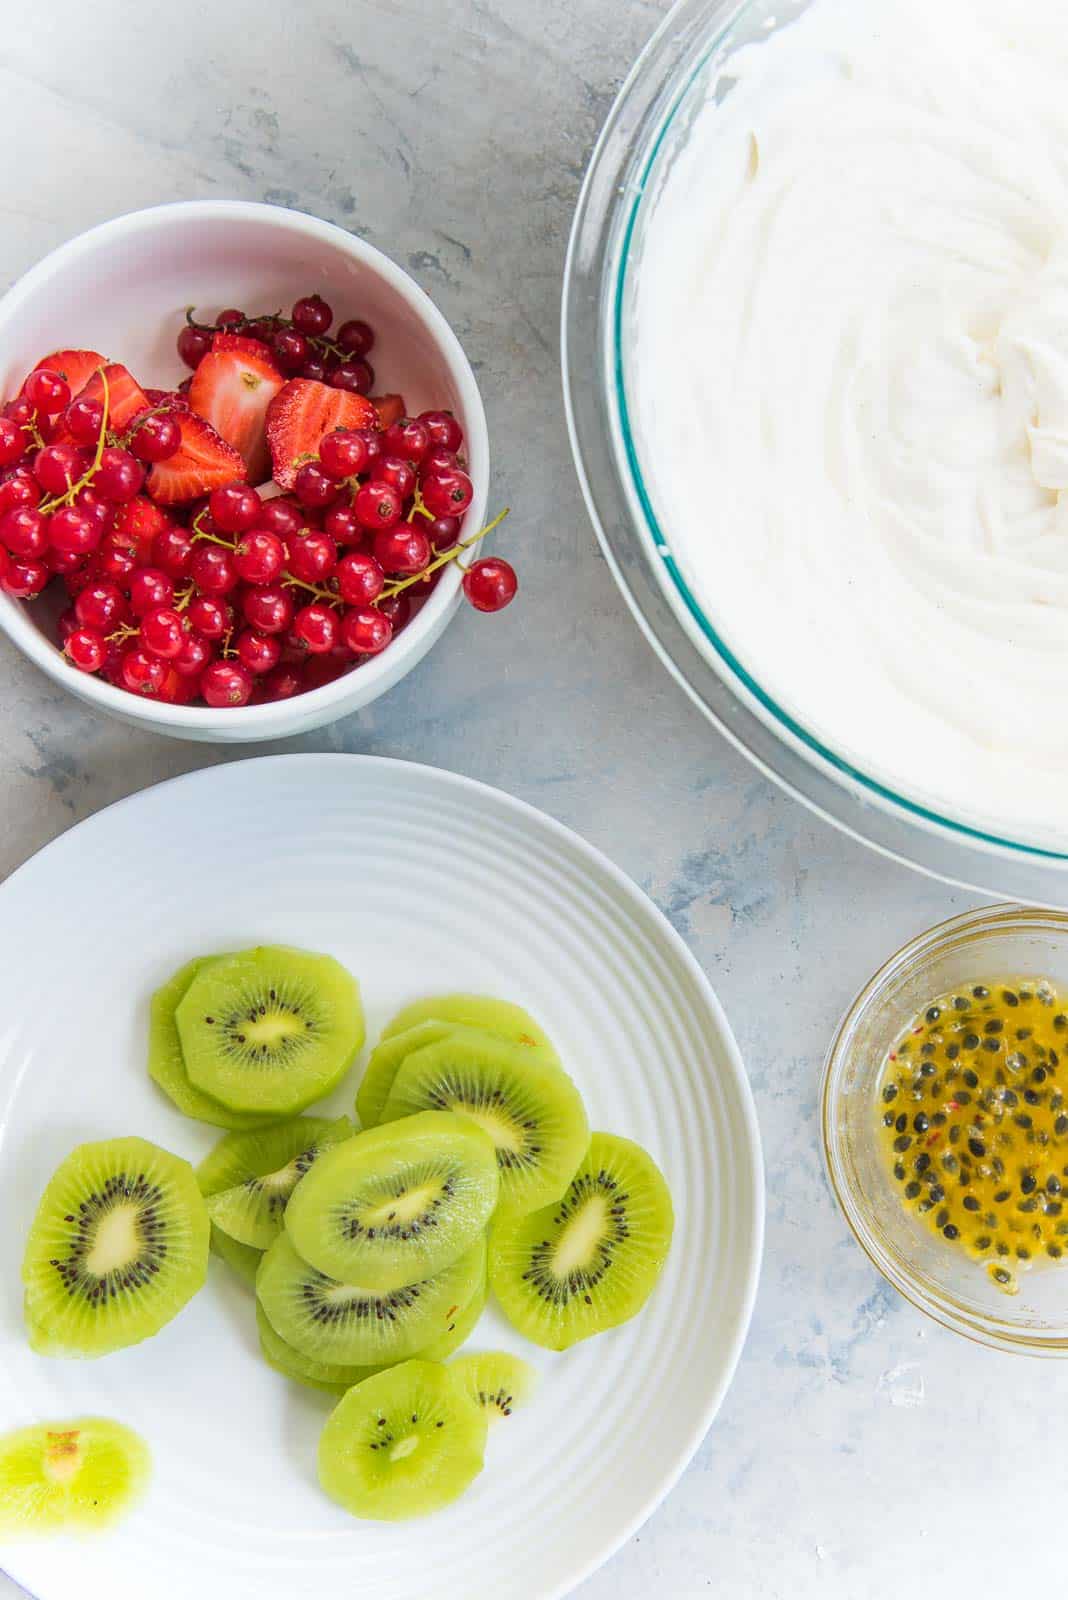
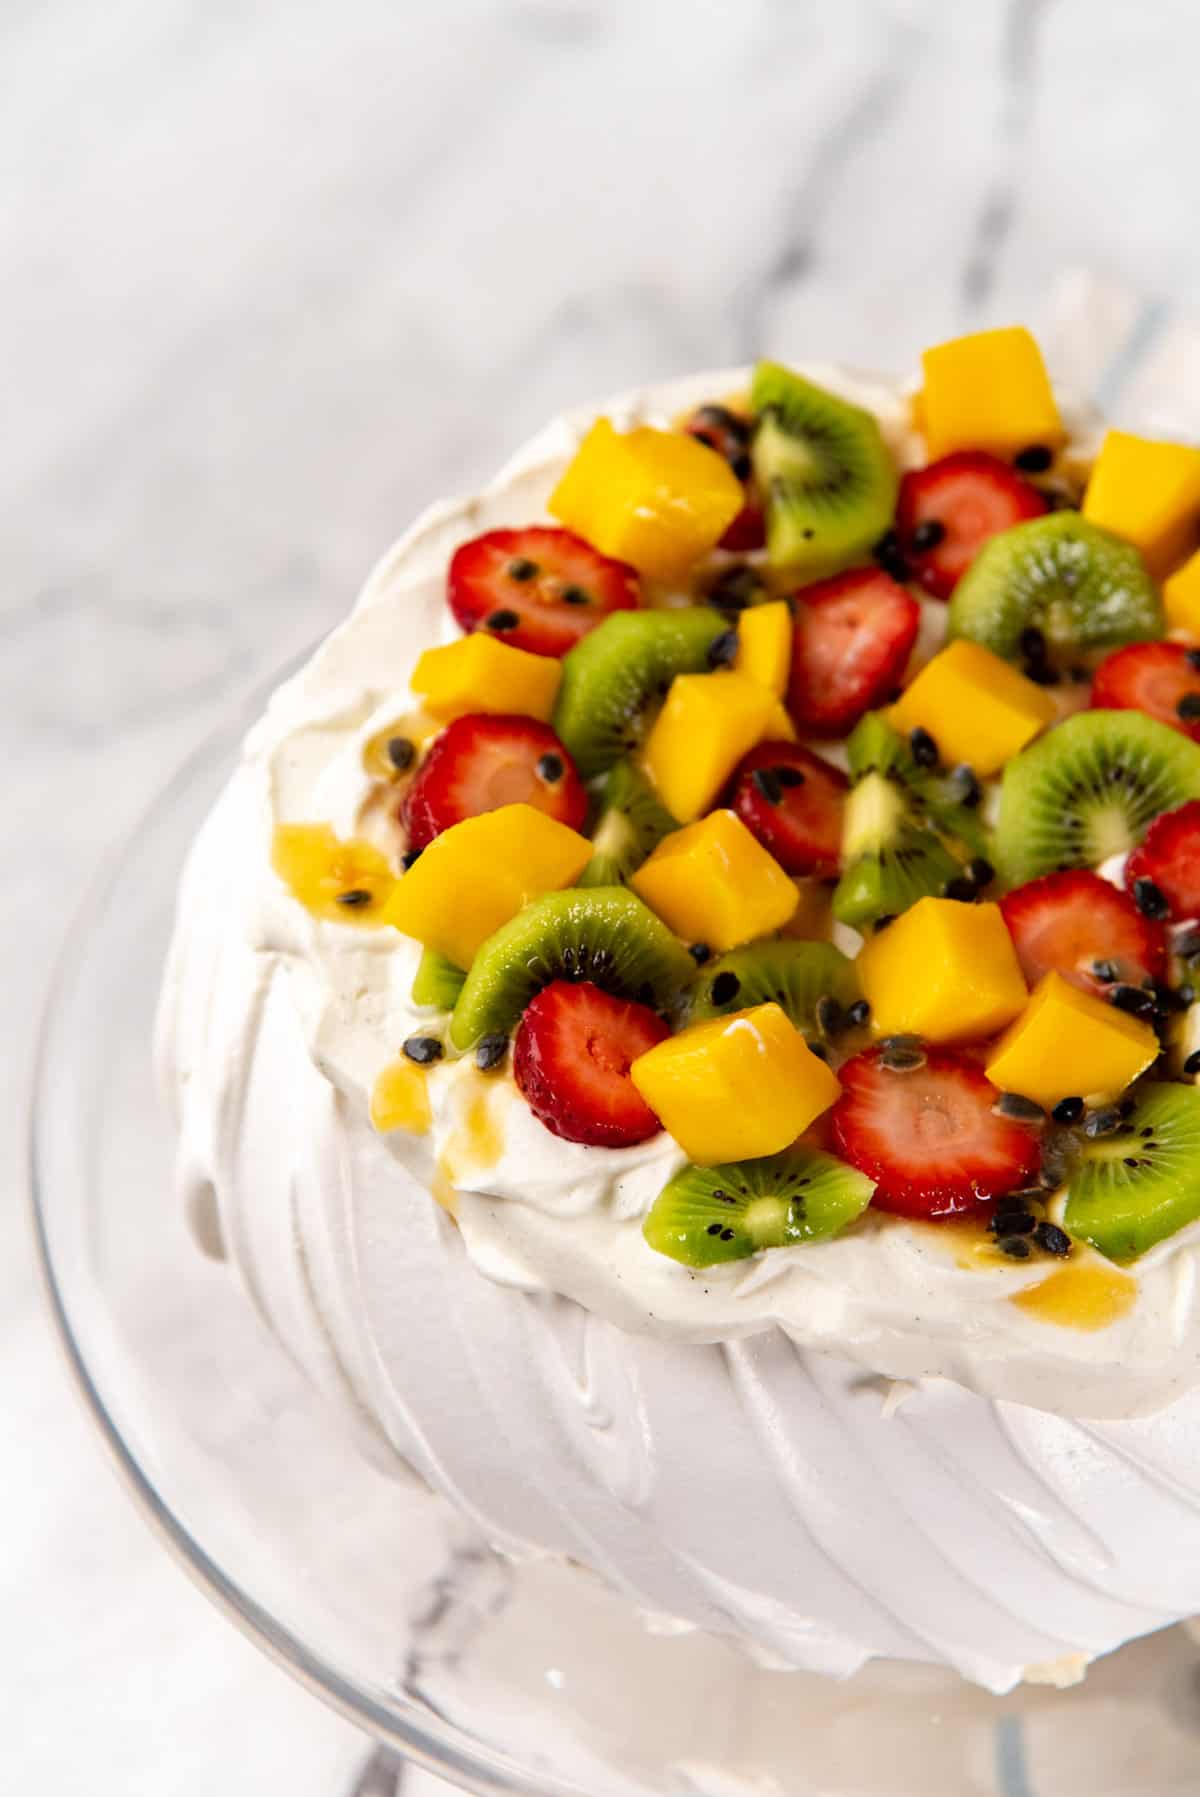
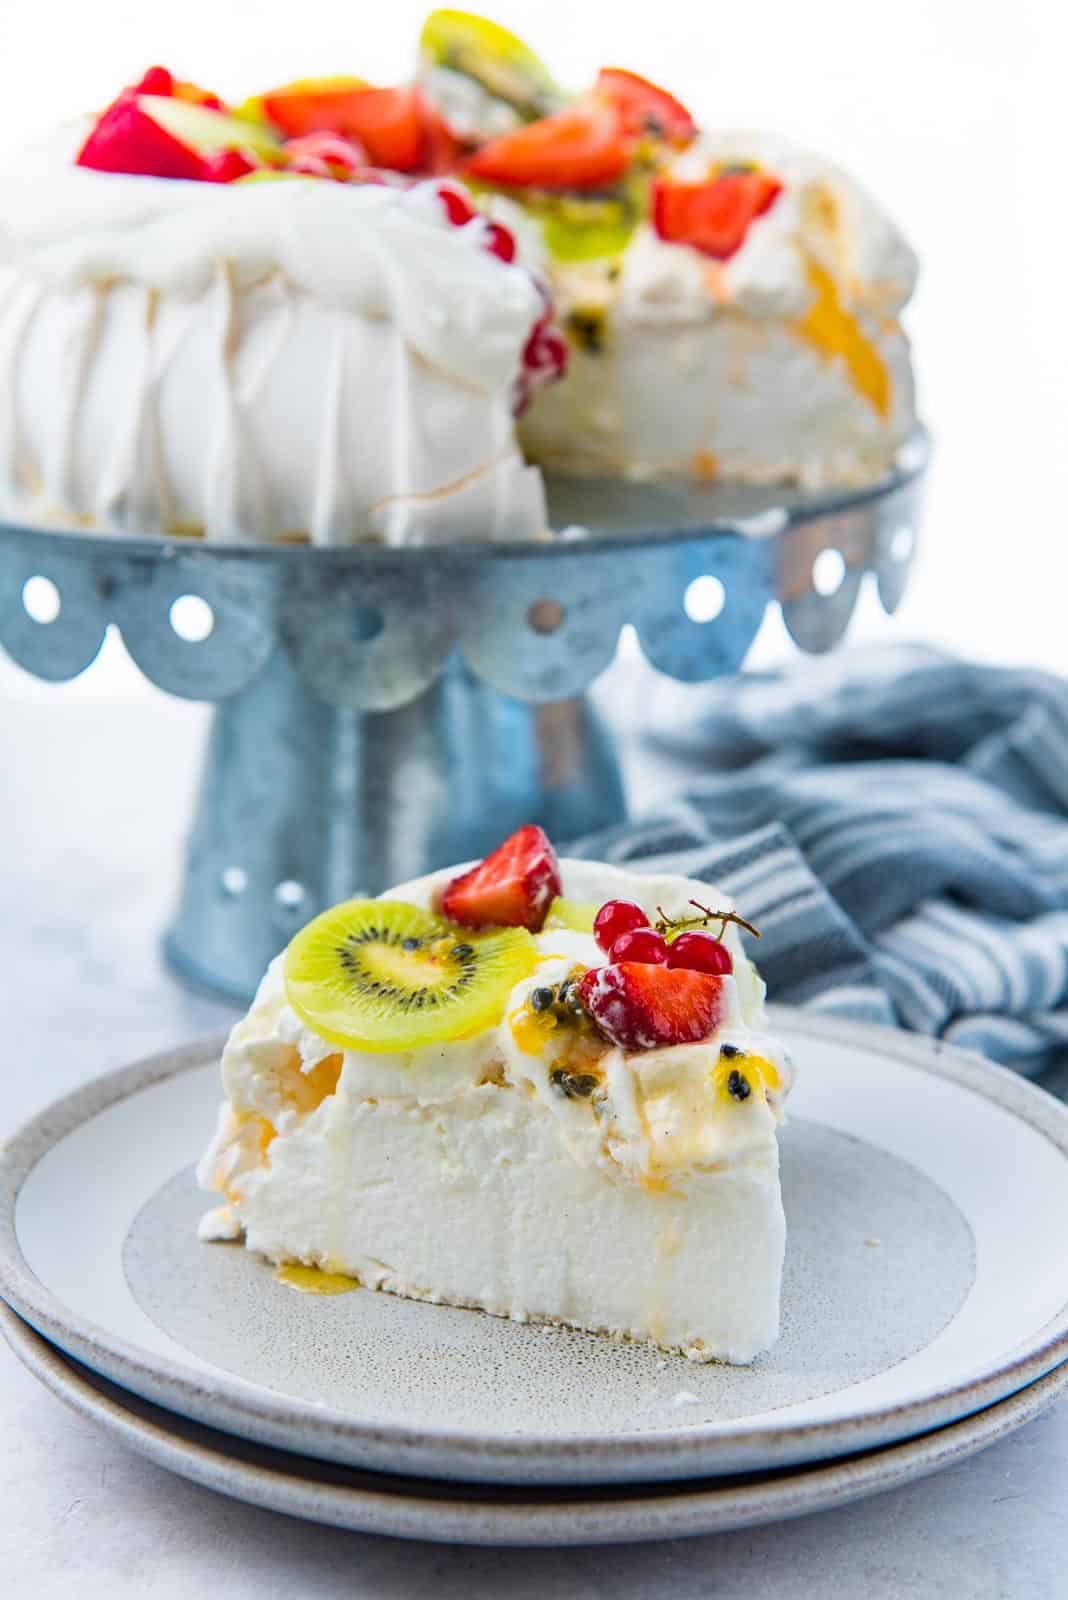
A classic pavlova is topped with sweetened vanilla whipped cream (i.e. creme chantilly), and beautiful summer fruits.
A classic version usually always has kiwi fruit (especially in NZ and Australia), but you can use whatever is available.
The most important thing is to balance the sweetness of the pavlova with sweet and tart fruit flavors. Tropical fruits are preferred, but you can use whatever you have. Classic fruit toppings include kiwi fruit, passion fruit, and mangoes (tangy but sweet fruits).
Wash and prepare the fresh fruit for your fruit pavlova in advance.
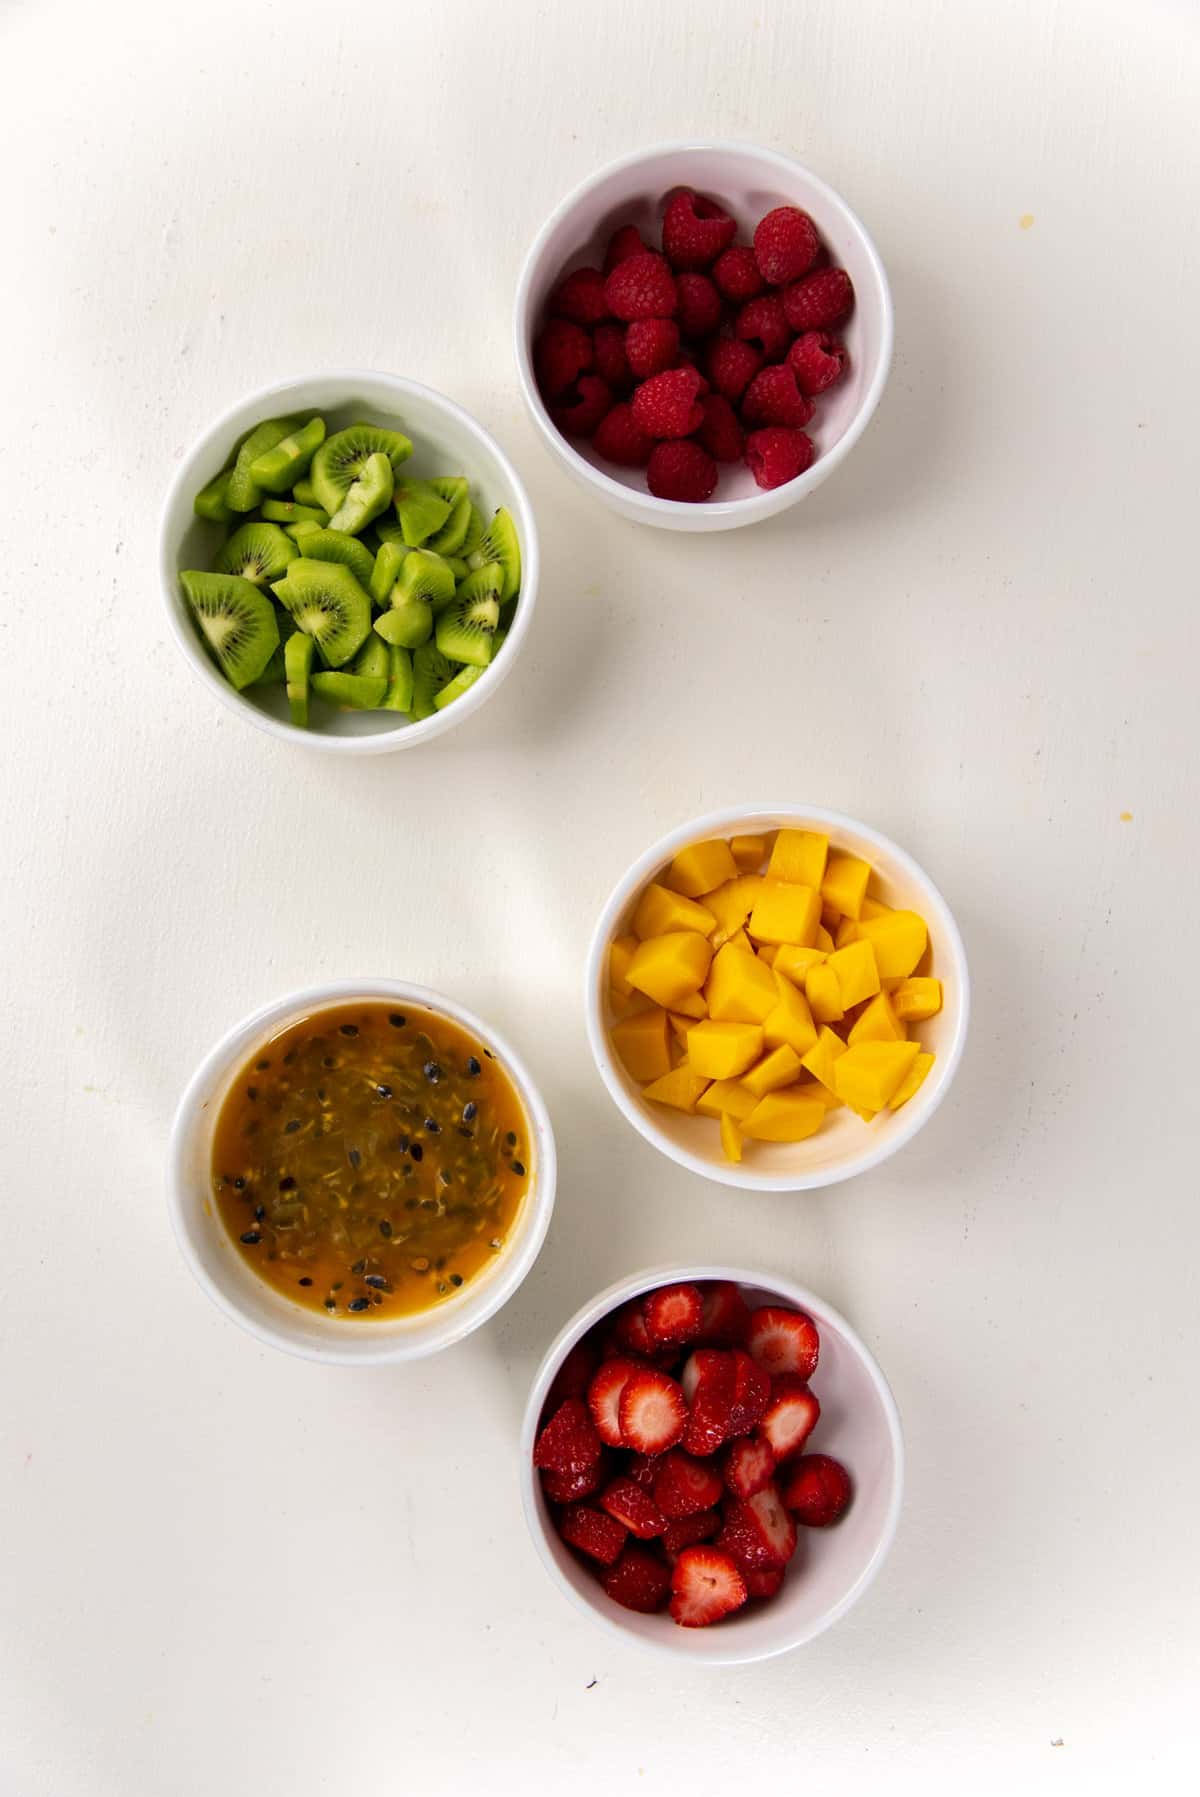
Toppings
- Kiwi fruit – I prefer green, but you can use gold kiwi as well. Peeled and sliced or cubed.
- Mango – if in season. Can be cut into cubes as well.
- Strawberries – easy to find option any time of the year to make an easy berry pavlova. If you have smaller strawberries, they can be halved, or you can slice or quarter them.
- Raspberries or blackberries – these can be kept whole or halved.
- Red currants – I love red currants in pavlovas! The sweet and sour flavor is perfect for pavlovas.
- Pomegranate
- Grapes – Halved, seedless grapes are great for pavlovas.
- Passion fruit – The pulp from passion fruit is a great addition to pavlovas if you can find it. In New Zealand and Australia, you can buy passion fruit pulp in syrup. Passion fruit pavlova is very popular, and I still like to add the fruit, pulp, and syrup any chance I get.
- Lemon curd or lime curd or passion fruit curd – In the absence of passion fruit syrup or curd, I like to drizzle or dollop lemon or lime curd on top of the cream.
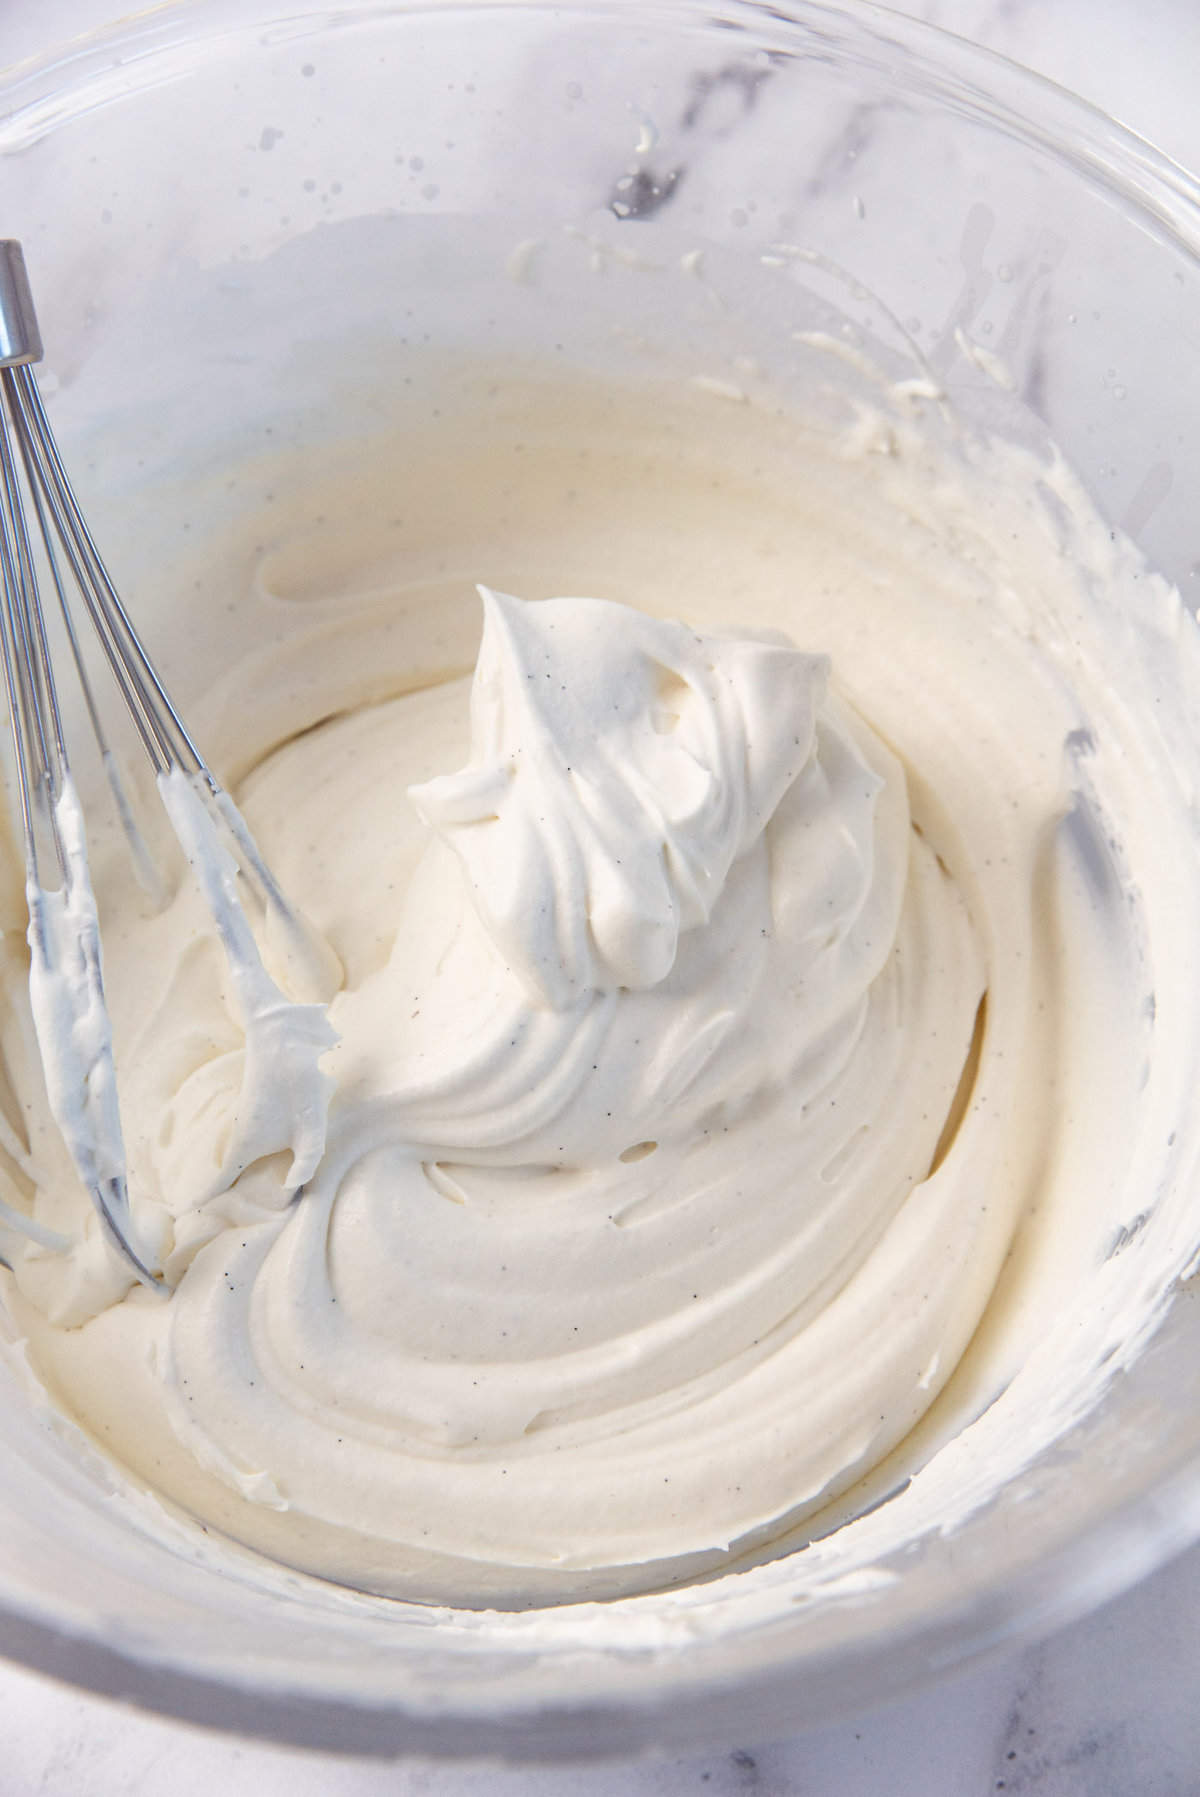
Making the whipped cream
Making whipped cream for pavlova is very easy. You might think there is no wrong way to make it, but there is! So let me show you the best way to make basic sweet whipped cream or cream chantilly.
Just like making meringue, when whipping heavy cream you must whisk it at low speed, slowly. Slow and low whisking leads to incorporating air slowly, while creating small air bubbles in the whipped cream that will make the whipped cream more stable.
Place the chilled heavy cream in a chilled mixer bowl. Whisk on medium low speed until frothy, and then add the sugar and vanilla.
Keep whisking on medium low speed until you get medium peaks (between soft and stiff peaks).
Then switch to a manual whisk and gently stir the cream until you have stiff peaks. This will prevent your cream from over-whisking and becoming grainy.
If you want your heavy cream to be more stable, you can add instant vanilla pudding (1 tbsp per 1 cup cream), or instant ClearJel (1 tsp per 1 cup of cream).
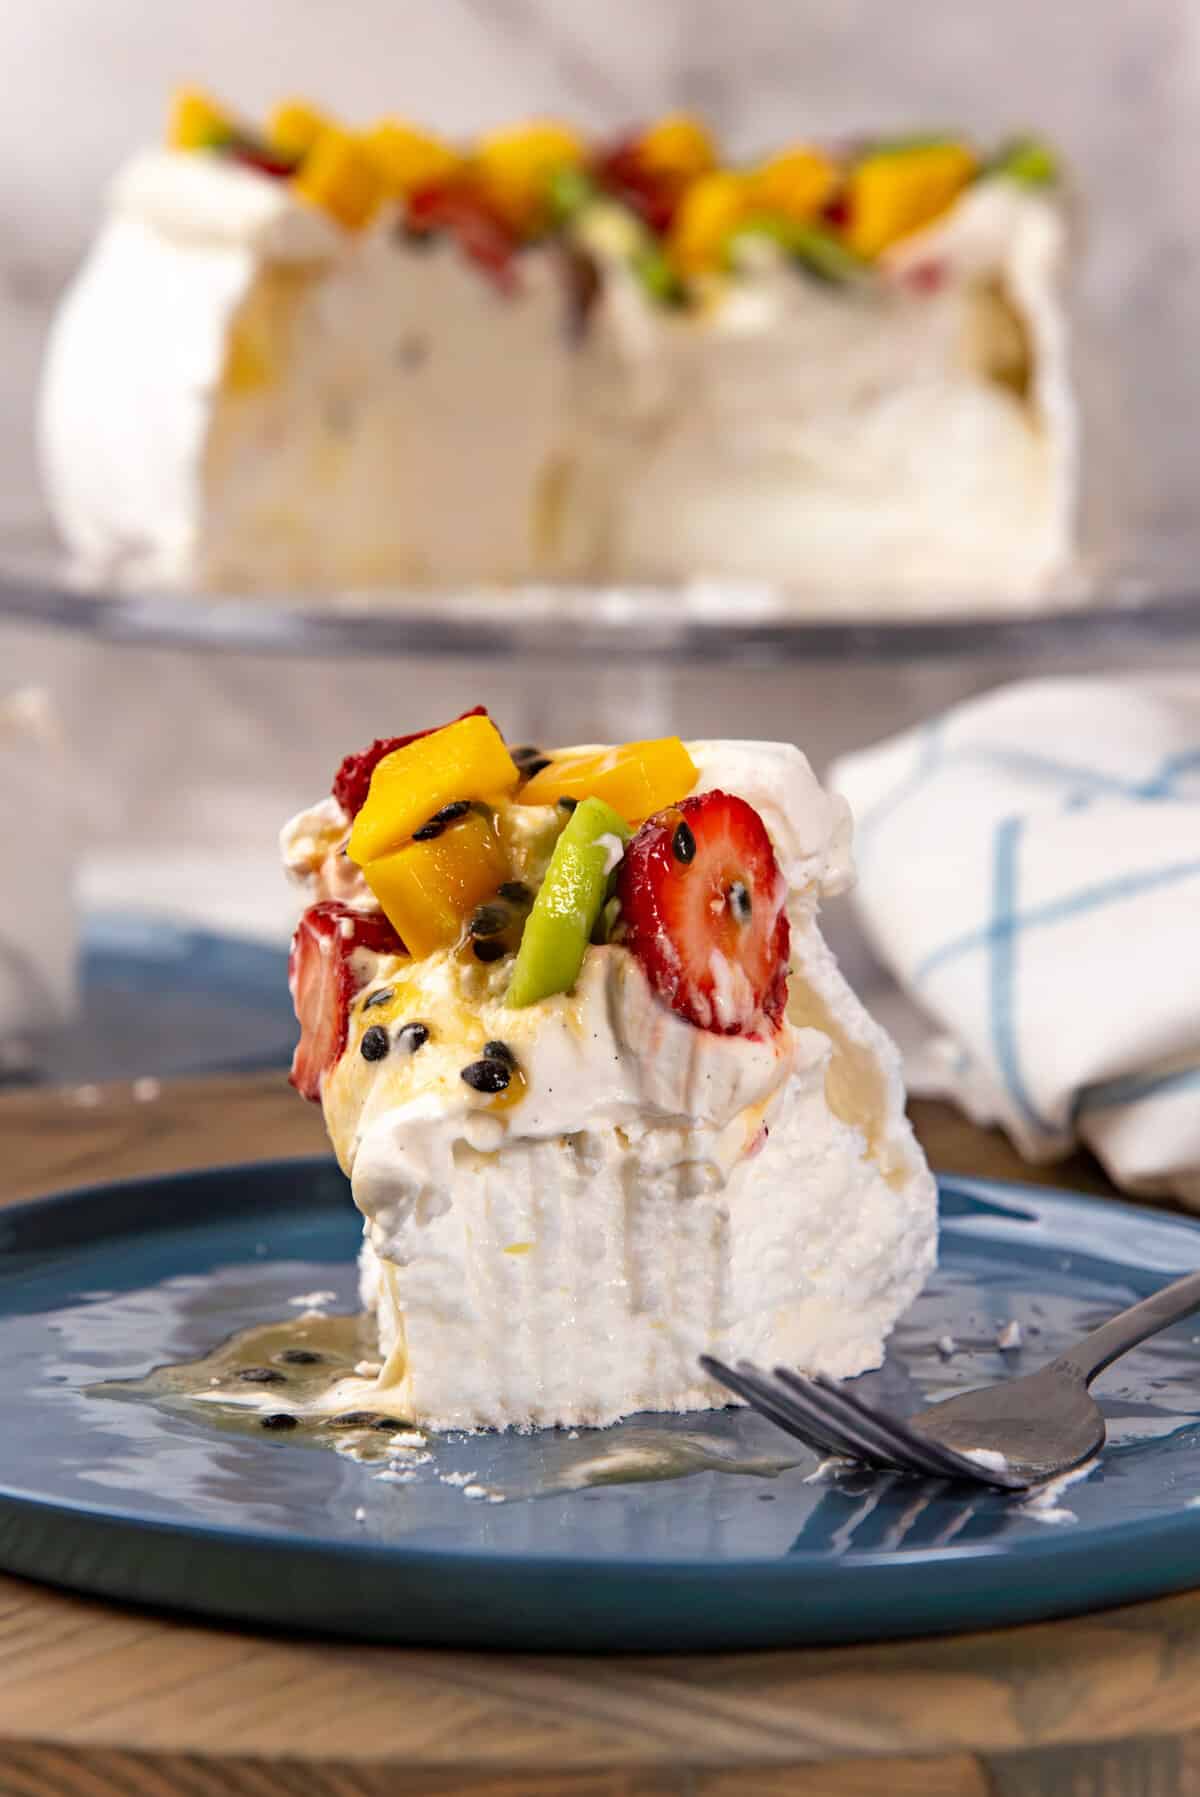
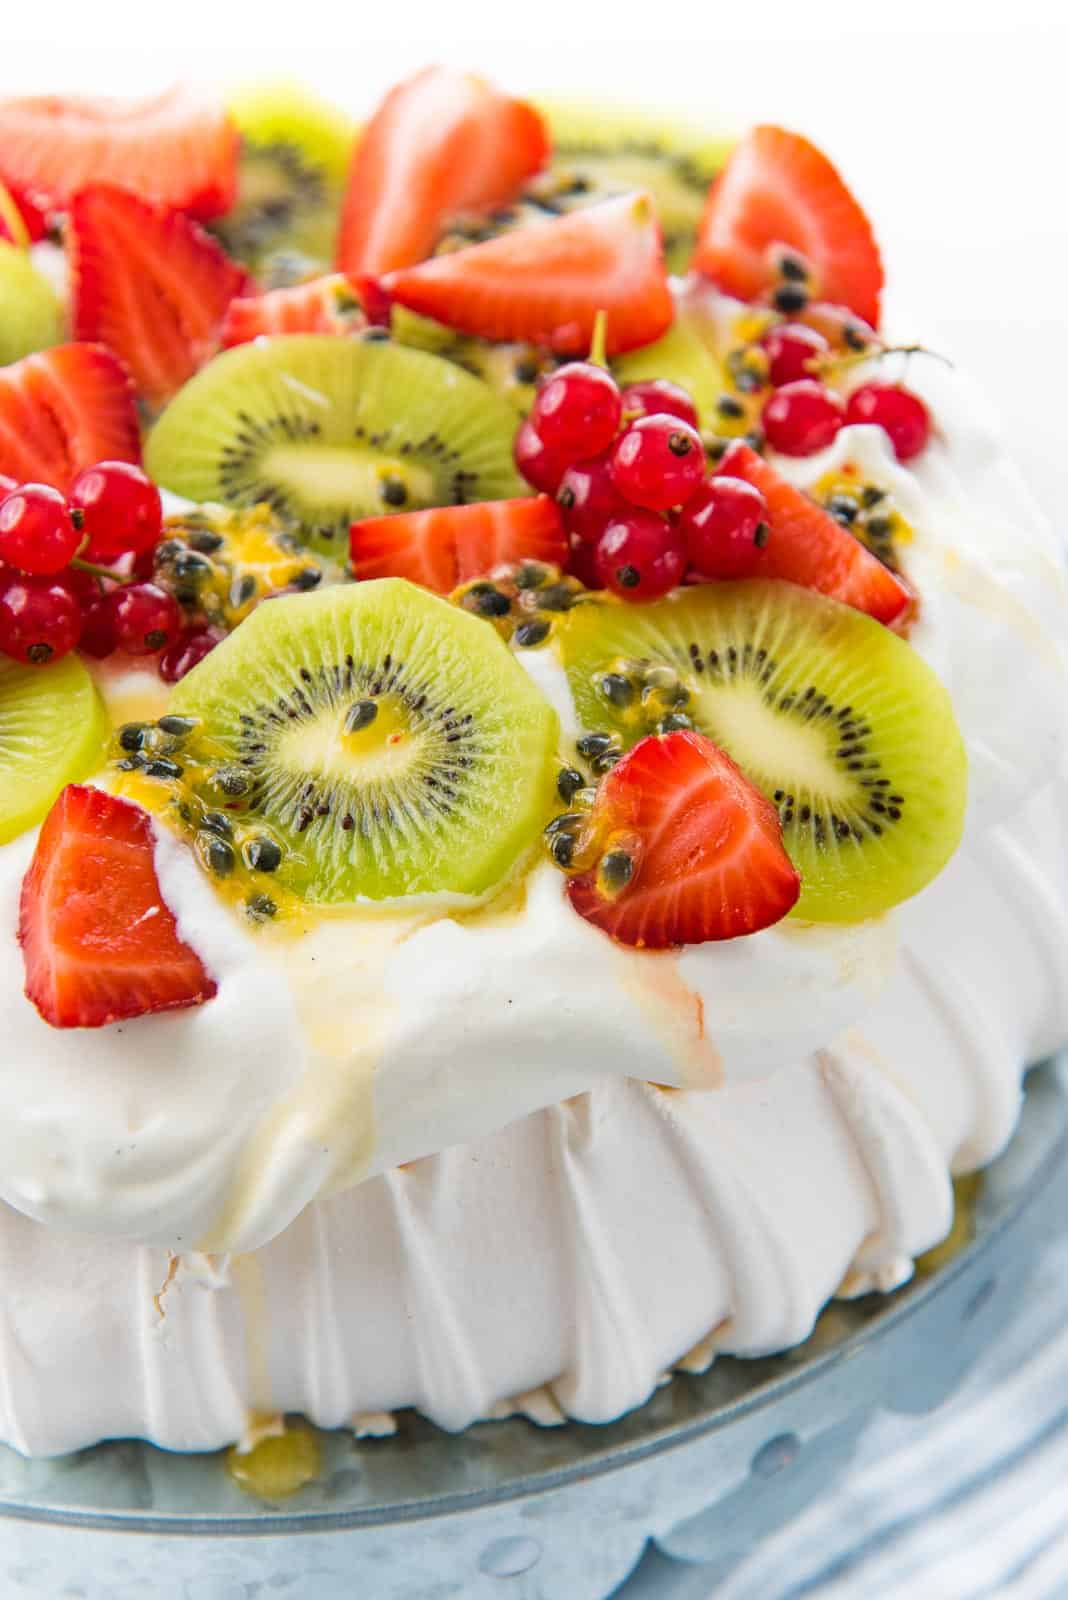
Serving suggestions
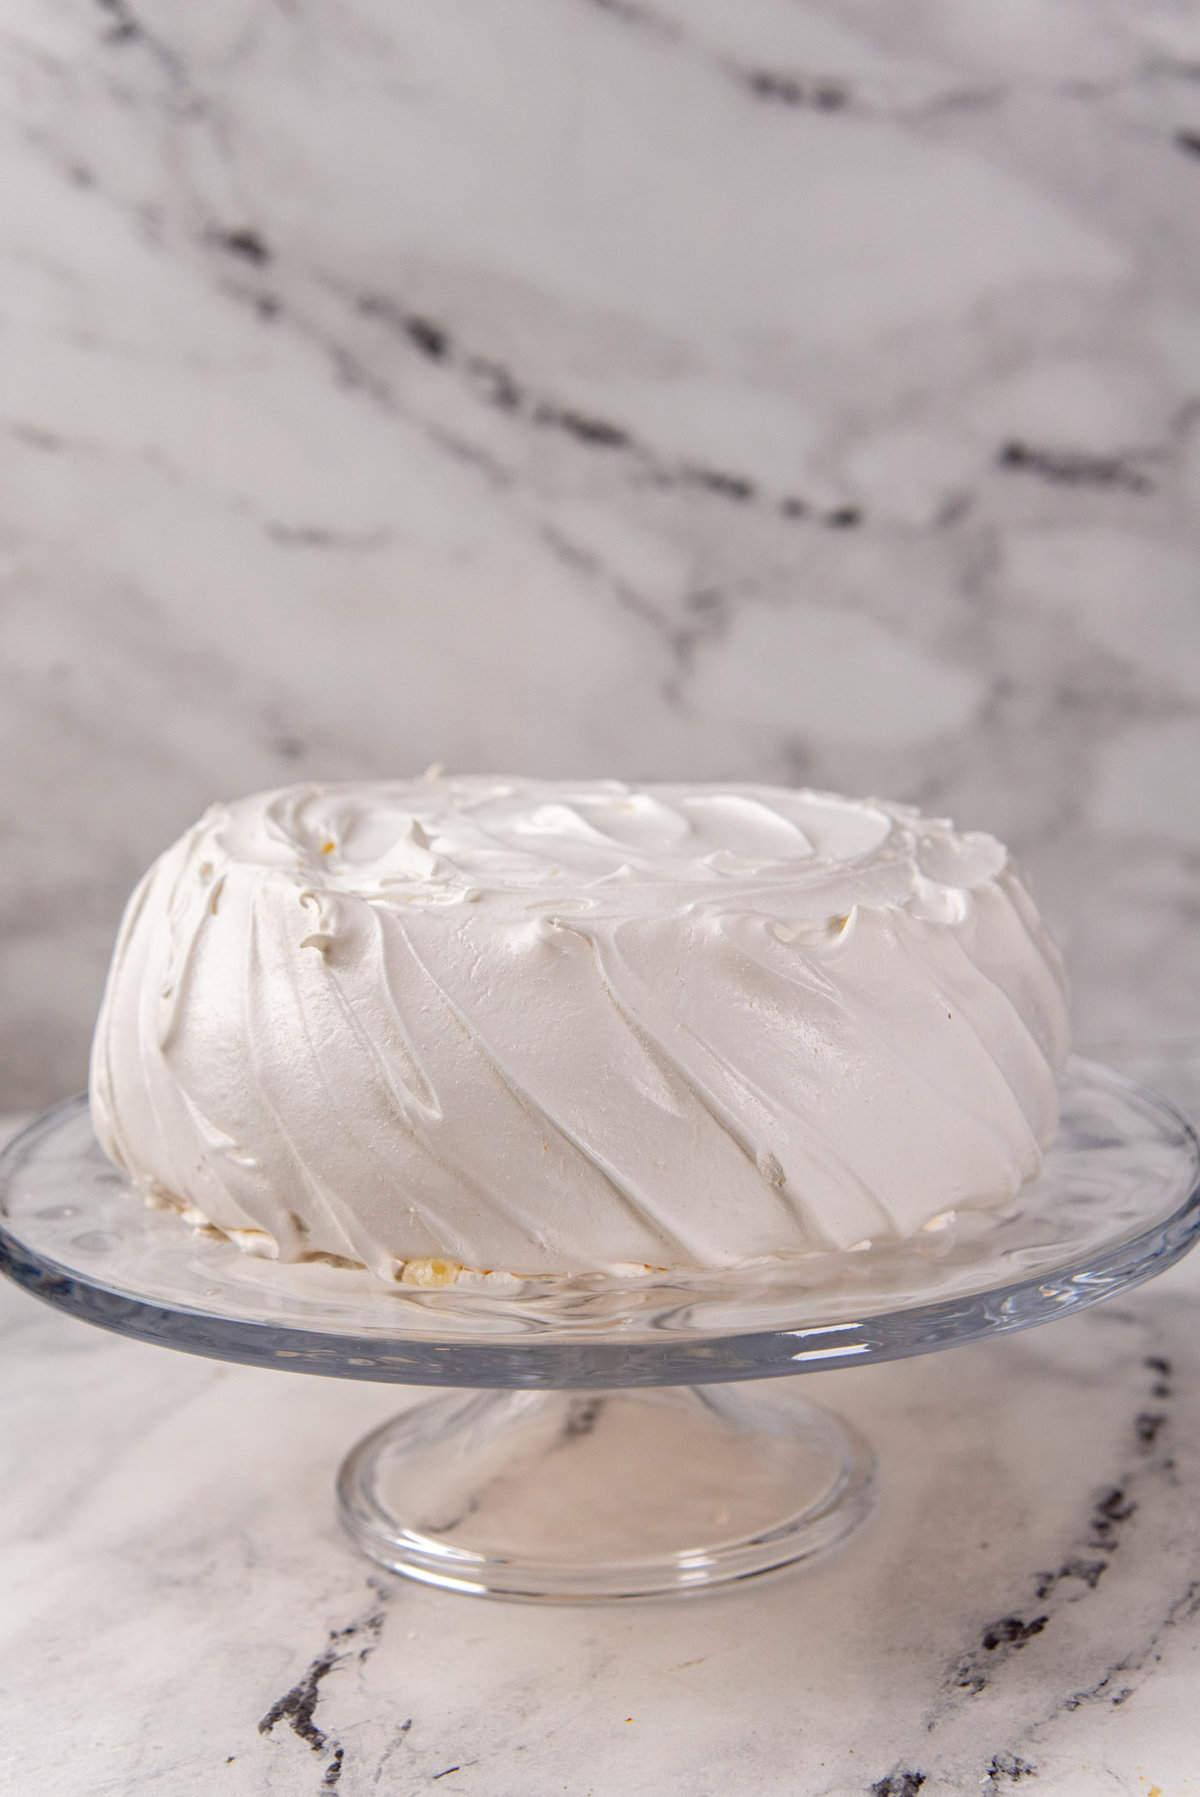
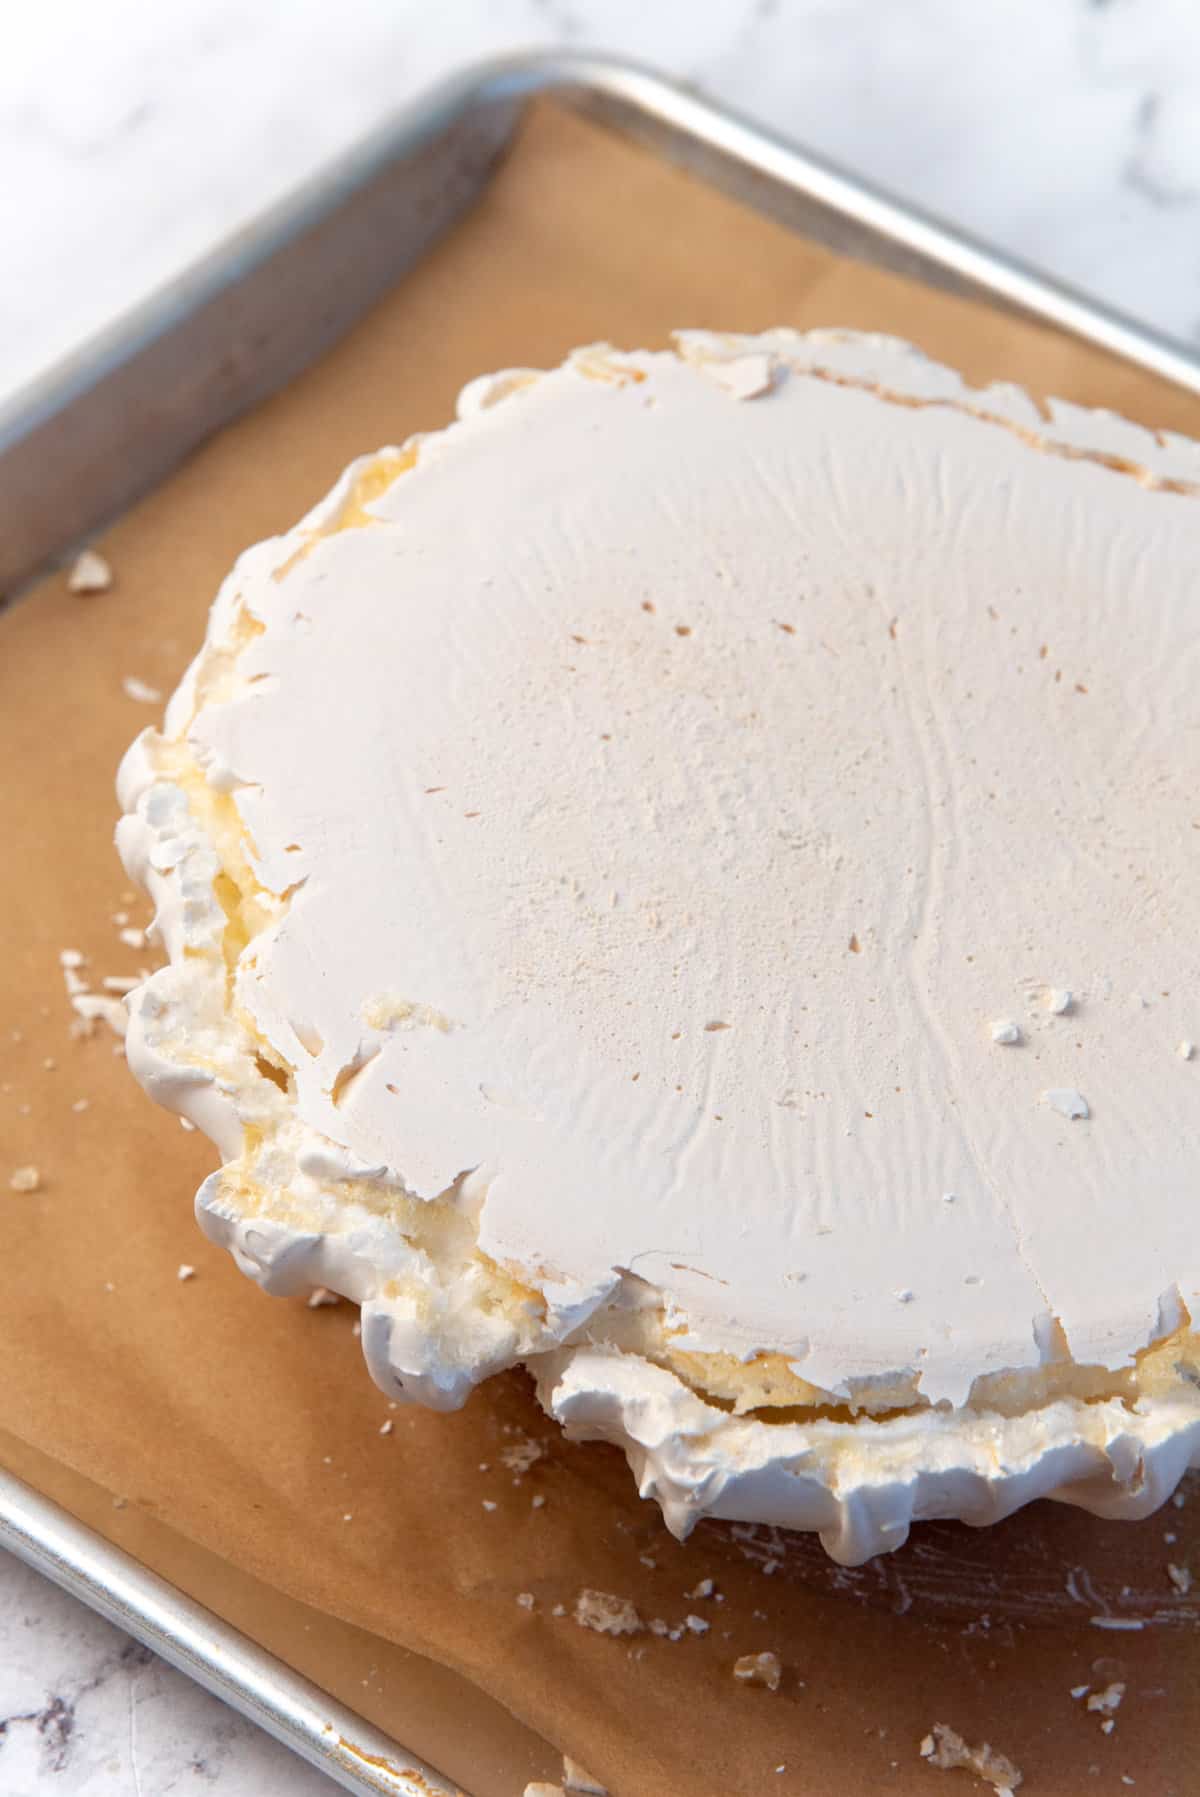
Just before serving, place the baked and cooled pavlova on a serving plate or platter.
Gently crack the top surface of the pavlova, so that the meringue shell can lay on top of the marshmallowy center of the pavlova. Since the center can shrink a little as it bakes, doing this will prevent the pavlova collapsing AFTER putting the cream on top.
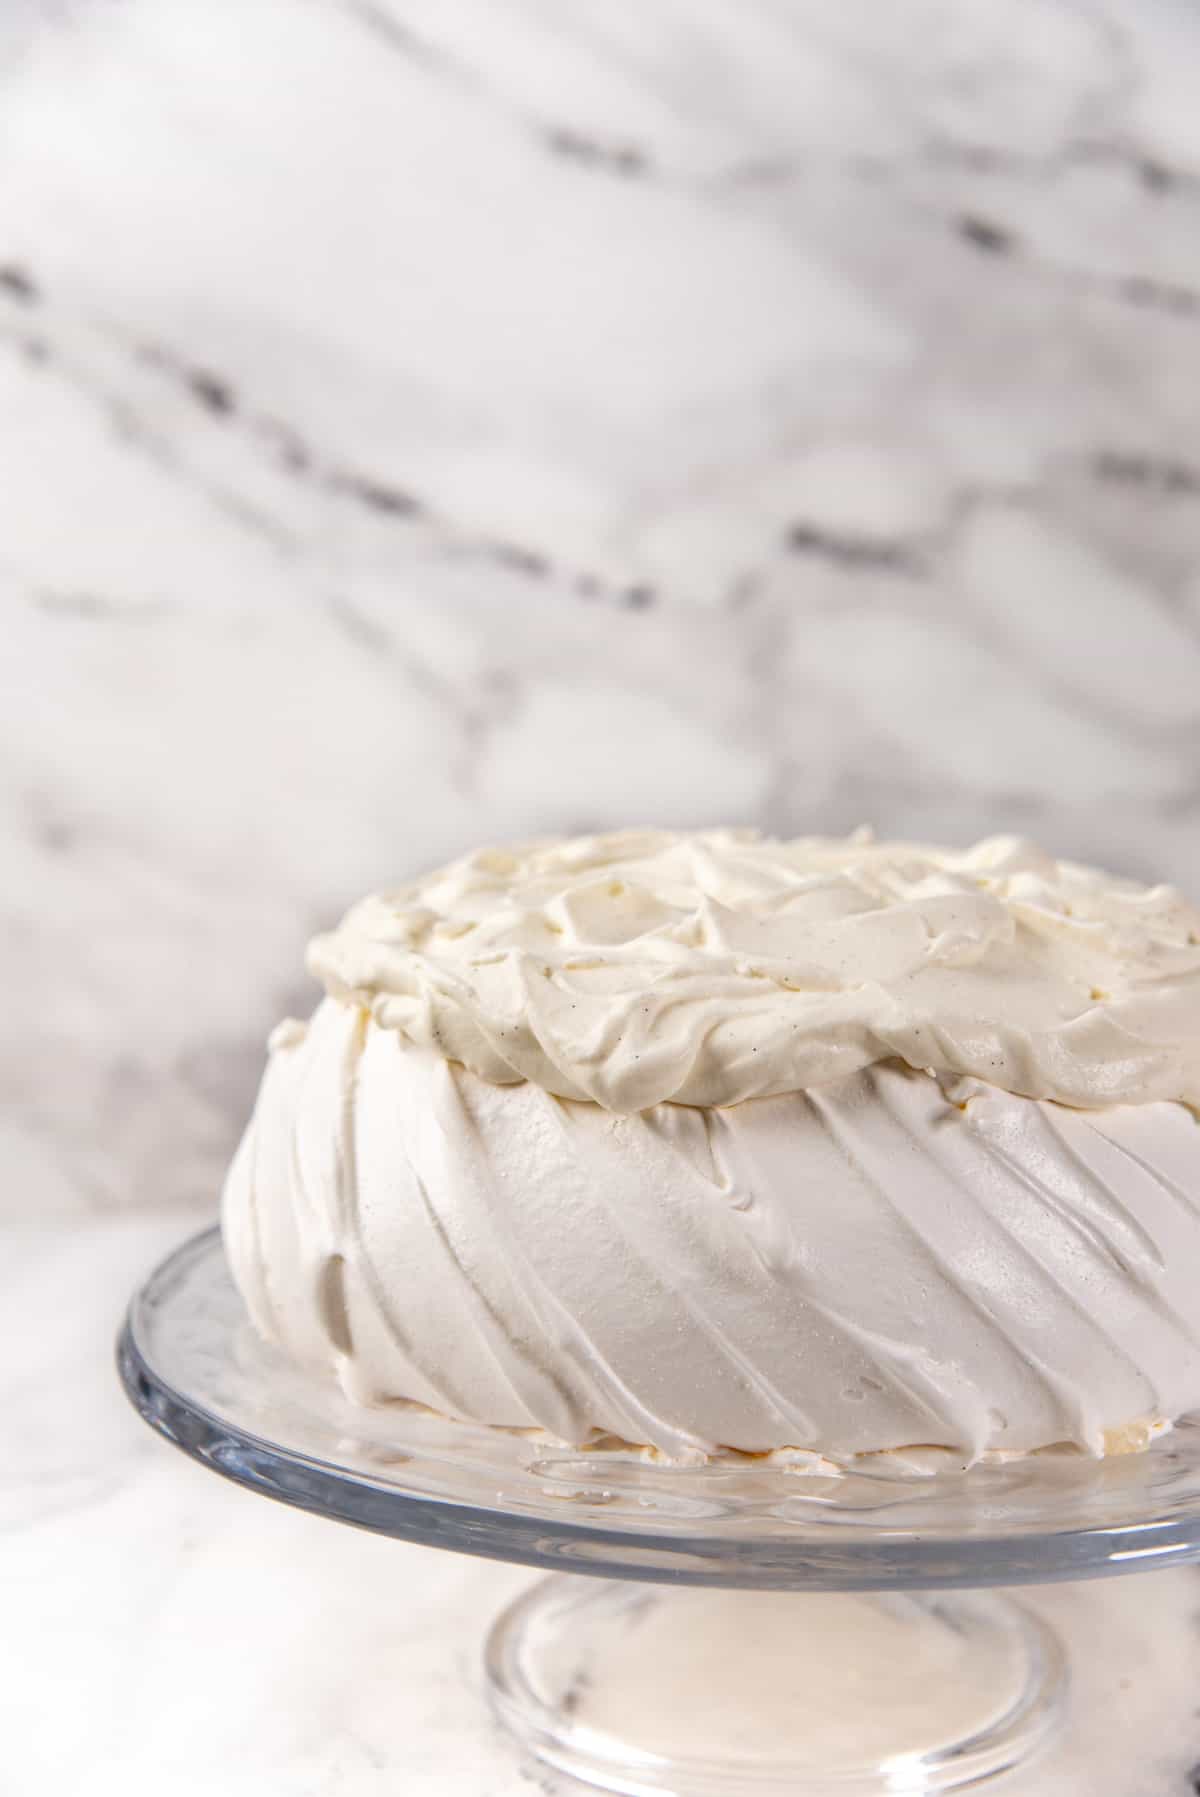
Spread the whipped cream over the surface to get a level surface. This means the middle of the pavlova may have a thicker layer of whipped cream than the edges.
Then place the prepared fruits over the whipped cream. Be as generous as you can with the fruits, and place the fruits all over your pav, not just along the edge of the pavlova as I’ve seen with some other recipes.
The point of a pavlova is to have lots of fruits along with the cream and meringue underneath.
Drizzle the passion fruit or lemon curd on top, and serve. You can serve any extra fruit along with the pav, so that others can help themselves to extra fruit too.
Here are some other alternatives
- To keep the pavlova dairy free – you can top it with sweetened whipped coconut cream. It won’t be as thick as regular whipped cream, but still a great alternative.
- Whipped cream + Greek yogurt is another great option. The yogurt adds a lovely tang that pairs very well with the sweetness of the pavlova.
- You can also stir in some lemon curd with the whipped cream, to create a marbled look and use this as the topping as well.
Comprehensive account of all the pavlova problems (pavlova troubleshooting)
Let’s take a look at some very common pavlova recipe fails, and why they happen.
Why is my sugar not dissolving no matter how much I whisk the egg whites?
If the sugar has not dissolved in about 30 – 35 minutes, the egg whites may over-whisk. This can happen sometimes.
Especially if the egg whites were cold to start with, or your kitchen is cold (like in winter). Or if you use granulated sugar where the granules are too large.
In warmer months, whisking egg whites creates friction which heats up the egg whites slightly as you make your meringue base. In colder weather, this does not happen and you might find that your sugar doesn’t dissolve in your egg whites as readily.
How to fix this issue
Make sure that your sugar is as fine as possible. Pulse your sugar in the food processor until it’s super fine. This can take as little as 1 minute for a small amount of sugar, or up to 4 minutes for larger amounts. You can even process your caster sugar to make it even finer.
Make sure your egg whites are at least 75 F in summer, or warmer in winter. Place the egg whites in a clean metal bowl, and place this bowl in a bigger bowl with hot water from the tap (not boiling water). Stir the egg whites to warm them to about 90 F, but be careful not to introduce any water into the egg whites.
Why is my pavlova weeping?
Weeping is when liquid is leaking out of your pavlova or meringue. This liquid is actually sugar syrup (i.e. the sugar in the meringue, which “melts” out of the pavlova). This can make the pavlova collapse, and make it soggy too. This can happen while the pavlova is cooling, or even while it’s baking.
Weeping can occur due to,
- Undissolved sugar – Sugar that never dissolved in the meringue before baking will readily absorb moisture and melt out of the pavlova and leak out.
- High humidity – If there is high humidity, then the sugar is even more likely to absorb moisture. Even if the pavlova was baked through, the humidity can re-introduce moisture into the pavlova.
How to prevent a weeping pavlova
So as you can tell, pavlovas can be a little temperamental and fussy. So avoid baking pavlovas on high humidity days if possible. Rainy days should also be avoided, since this also increases humidity.
A dry climate will make baking a pavlova that much easier. If you do live in a high humid environment, these following precautions will help you achieve that perfect pavlova.
Avoid running the dishwasher or doing any dishes or boiling water in the kitchen before, during, and after making a pavlova (until the pavlova has cooled down completely), to help reduce the ambient humidity in the kitchen.
Make it easier for the sugar to dissolve in the meringue. Use caster sugar, or finely ground sugar (in the food processor) for your pavlova.
Adding cornstarch does more than stabilize egg whites, it also absorbs some of the water in the meringue. This also helps to prevent any weeping as well.
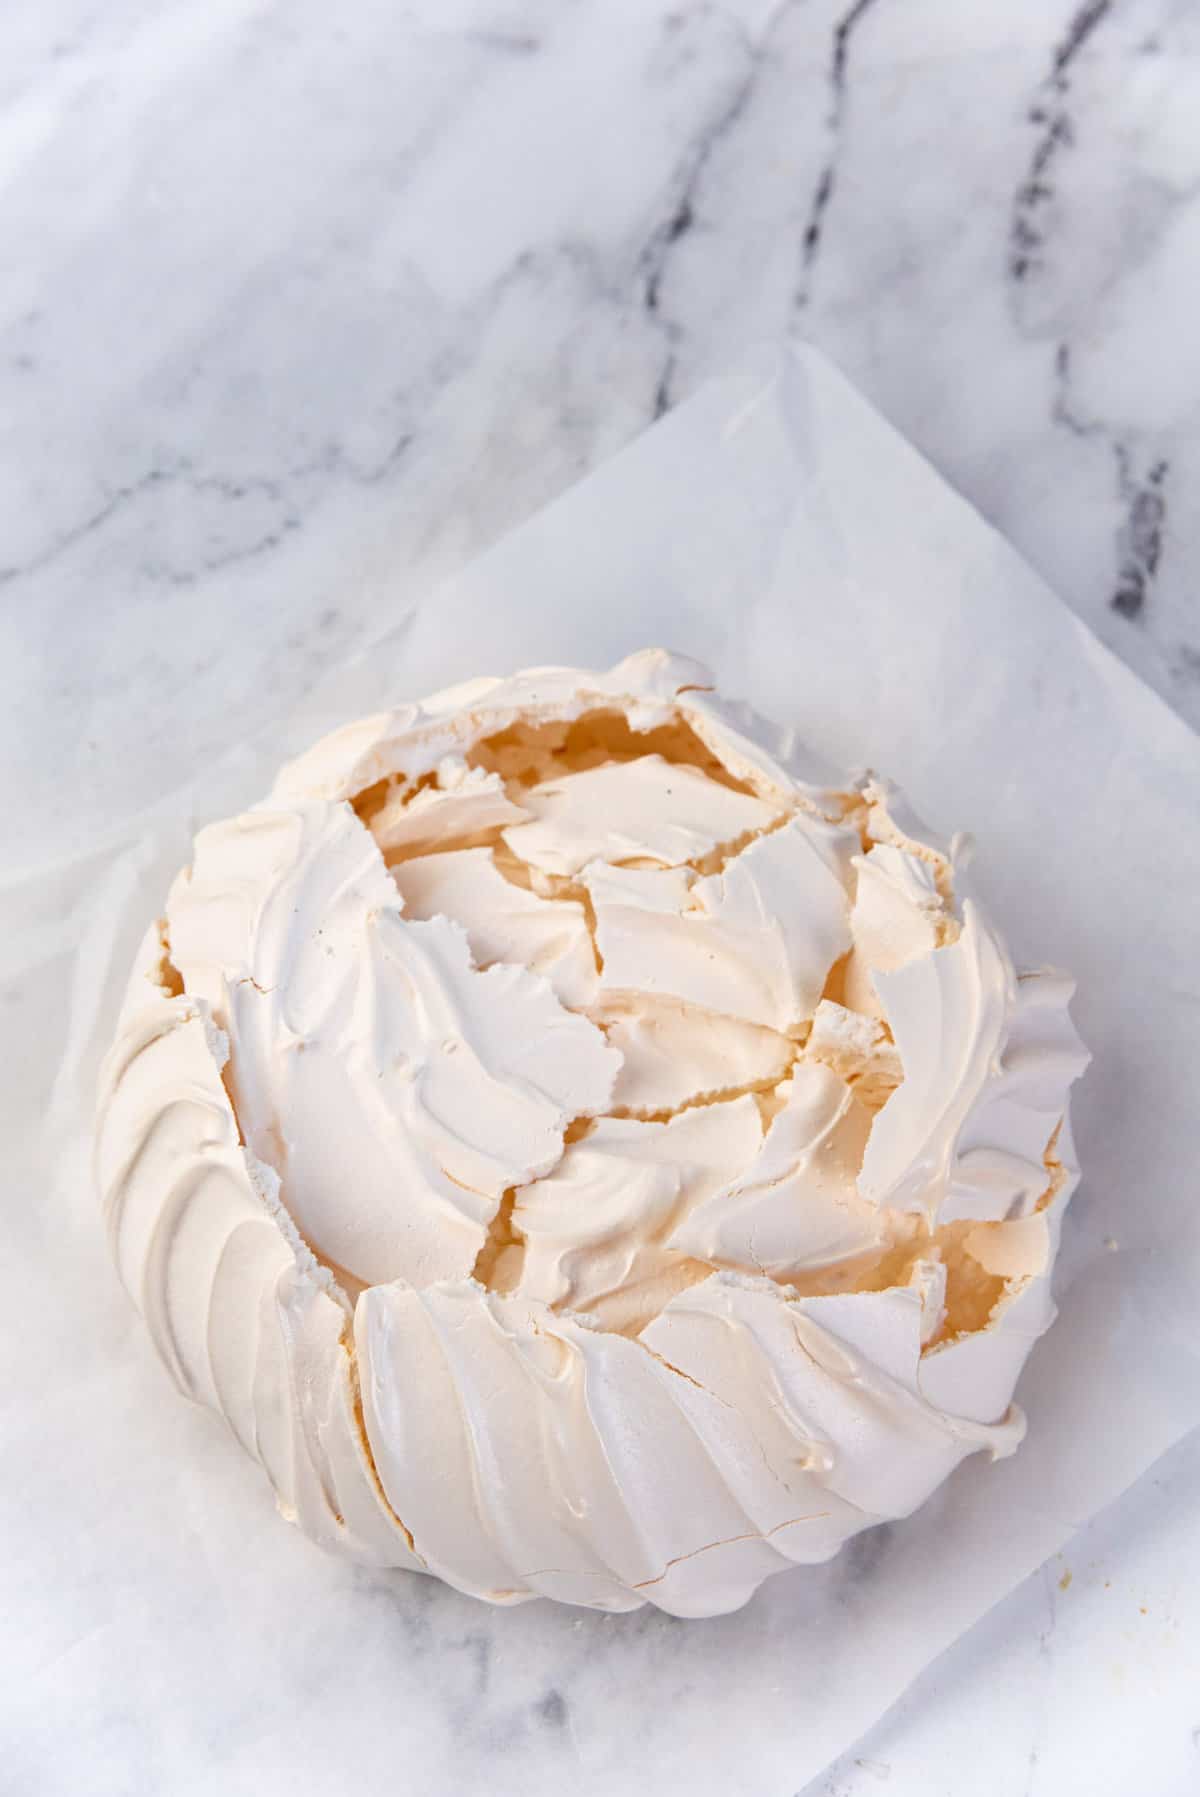
Why did my pavlova crack and collapse?
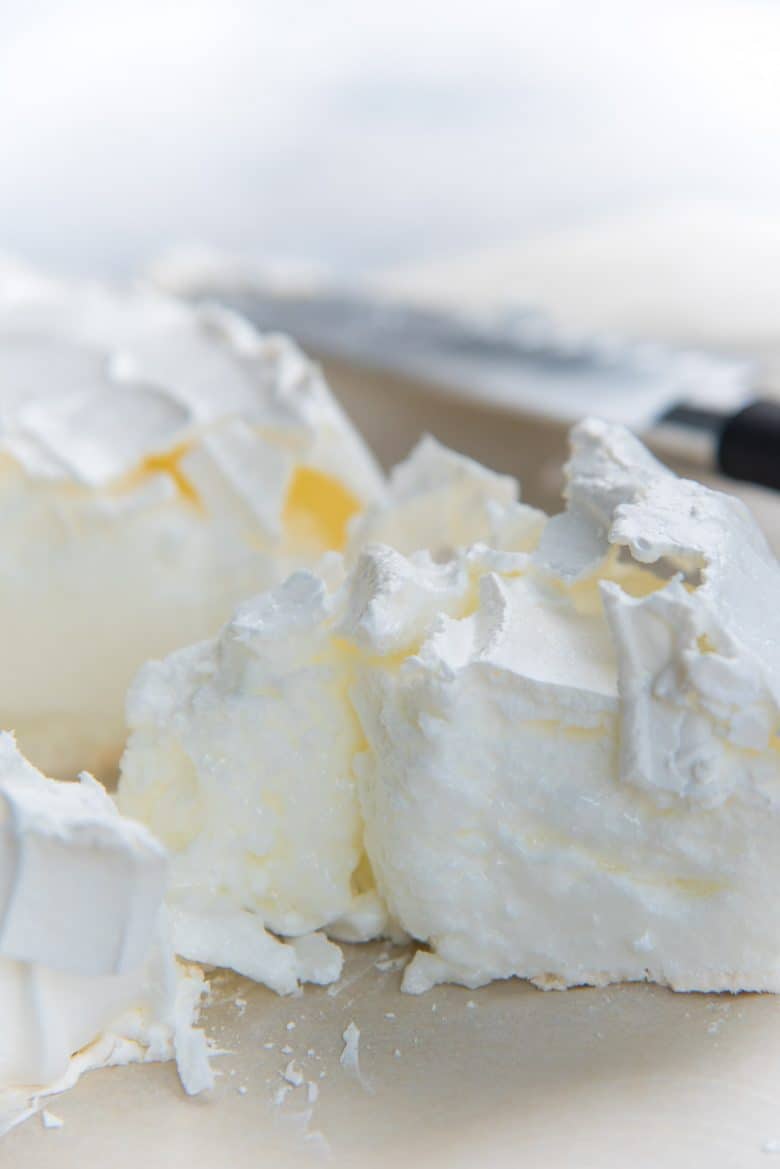
If your pavlova has cracks on it, or it collapsed, it’s usually because the mallow center shrunk away from the meringue, causing the outer shell to collapse.
It’s normal for the mallow center to shrink a little bit. We do not have climate-controlled kitchens, and some shrinking is absolutely OK!
Egg whites whisked at high speed – Most people tend to increase the speed to get the egg whites to the right consistency faster. This can introduce a lot of air quickly. But can also deflate the egg whites just as quickly, because the egg white foam structure is unable to hold on to all that air.
As a result, the air (and sometimes the sugar) in the structure will be “pushed out” causing the structure to deflate. This causes the pavlova to crack, collapse, and sometimes even weep.
Over-whisked meringue – It’s hard to over-whisk the meringue. The sugar acts to stabilize the egg whites. Meringue stabilized with sugar can only be over-whisked if it’s whisked on high speed for too long, or whisked longer after the egg white is saturated with the sugar. Over-whisked meringue leads to,
- The meringue mix deflating and becoming denser because the egg proteins will break up and cause the cross-links in the foam structure to break apart as well.
- A smaller pavlova that doesn’t expand.
- Cracks in the pavlova crust and bottom.
Baking in an oven that is too hot, and cooling too quickly – In a hotter oven, the pavlova will expand too much, too quickly. As the pavlova cools, it will collapse and crack as well.
If the pavlova cools down too quickly, this can cause the mallow center to shrink rapidly, causing the pavlova to crack and collapse.
High humidity – More humidity can cause the sugar to absorb more water as well. And during baking, the water evaporates and shrinks the pavlova center as well. This can also lead to a soft, sticky pavlova.
How to prevent a cracked or collapsed pavlova
Use fresh eggs, and whisk the egg whites at a low speed as per the recipe. Adding vinegar or cream of tartar also helps with the stability of the egg whites.
Make sure the sugar can easily dissolve in the egg whites.
Bake the pavlova in a low heat oven, and do not open the oven during the baking process. Once baked, let the pavlova cool down in the oven.
This will allow a gradual cool down, preventing it from collapsing. This is another reason why I like to bake pavlova at night, because I can leave the pavlova in the oven overnight to cool down.
Also make sure to follow the tips for preventing a weeping pavlova (explained above), which can also contribute to a cracked and collapsed pavlova.
Why is my pavlova brown (or not white)?
Oven too hot – If the oven temperature is too hot, the pavlova can caramelize and have an off-white color.
How to prevent pavlova from browning
Reduce the oven temperature. If you followed my recipe, and still had a burnt pavlova, then just check and make sure there are no hot spots in your oven.
If you’re not sure about hot spots, then simply reduce the oven temperature another 25°F for next time.
My pavlova is soft and sticky/soggy (there is no crisp shell)
Baking the pavlova on a high humid day can make it become soft and sticky to the touch. This happens because the pavlova is weeping too.
A soft sticky shell can also be caused by not baking the pavlova long enough.
Another reason for a soft shell is that the amount of sugar in the recipe was reduced.
How to prevent a soft and sticky pavlova
- Avoid baking your pavlova on high humid days (and rainy days).
- Let the pavlova cool completely in the oven.
- Also make sure the steam option in your oven is turned off.
- If the bottom of the pavlova is too soft, then bake the pavlova on top of a preheated baking sheet so that the bottom gets extra heat to form a firm crust.
- Do not lower the amount of sugar in the recipe. This will cause a soft and weak crust.
My meringue base is too runny and won’t thicken
If your egg whites were contaminated with any fat, then they will not thicken at all. Even a speck of fat will cause a runny meringue.
This is why you need to make sure the egg whites, sugar, and all the utensils have no trace of fat in them.
How to prevent a meringue base that is too runny
Make sure ALL your utensils are bone dry. This includes the mixer bowl, whisk, spatulas and any other bowls you use to transfer ingredients.
If you use “dirty” spoons in your sugar, then open a new bag of sugar to make pavlova. Even a spoon used to stir coffee or tea can introduce fat into sugar.
Another tip is to avoid plastic mixer bowls for your egg whites. Plastic bowls can cling on to fat molecules that can contaminate the egg white mix. Metal bowls are preferred, with glass bowls being my second preference.
Wipe your mixing bowls, whisks, spatulas, and other utensils with white vinegar to remove any fat, and use a clean dry cloth to dry them.
Why is my pavlova flat?
Pavlovas can go flat if the meringue base was not whisked enough, or whisked too much.
If the meringue base did not reach stiff peaks, the resulting meringue will spread on the baking tray as you try to shape it. This would yeild a flat pavlova.
If the shell is sticky and the pavlova is flat, this is because of high humidity.
How to prevent a flat pavlova?
Make sure you whisk the egg whites until they are thick and glossy and have stiff peaks.
I also prefer to create furrows on the side of the pavlova with a small spatula, in an upward motion, to help the rising of the meringue. Just make sure that you use a spatula to shape the pavlova in an upward motion, before baking it in the oven.
These common pitfalls can be very frustrating and may sound intimidating, but I promise if you understand WHY these things happen, you’ll soon be a master of this finicky but easy pavlova recipe! AND you’ll be making the best pavlovas ever!
Frequently asked questions (very important questions!)
Can I use less sugar in this recipe?
No.
Using less sugar will cause the pavlova to have a weak structure and collapse. See ratio of egg whites and sugar above for the explanation.
Can I substitute the white sugar in the pavlova?
Unfortunately, you cannot.
Brown sugar cannot be used successfully because it has molasses and extra moisture, which will also affect the pavlova.
I have also not made pavlova with sugar replacements. Sugar is important for the structure of the pavlova, so replacing it with sugar-free substitutes is complicated. If you’re looking for a sugar free pavlova or want to reduce the sugar amount, I recommend following a recipe for a sugar free pavlova or low sugar pavlova.
My pavlova tastes eggy?
The addition of vinegar or cream of tartar is more than enough to remove the eggy smell.
But if you do find your pavlova to have an eggy smell, you can fold in some lemon zest at the very end. This will add a subtle lemon flavor, and a wonderful fragrance to the pavlova. Just make sure the lemon is completely dry before zesting.
Can I make pavlova ahead of time?
While meringues can be made a few days ahead and stored in an air-tight container, pavlovas cannot be made more than 24 hours in advance.
I do recommend making the pavlova the day before you will be serving it, and then letting it cool down in the oven completely (about 6 hours at least), to prevent it from collapsing or cracking.
You might get lucky and may be able to keep it for two days, especially if you live in a particularly dry climate, but I wouldn’t risk it. There is also the possibility of the marshmallow center becoming chewy as it dries out and becomes stale.
I frost the pavlova with whipped cream only minutes before serving it. As soon as you introduce whipped cream, it’ll start to get soft and soggy, and you want that crust on the sides to be crisp.
How to store pavlova
Once baked and cooled down in the oven, store the pavlova UNFROSTED, in an air-tight container.
I like to keep the container in the driest room in the house, away from bathrooms and the kitchen where the humidity can be higher. I even like to add some silica packets in a small container and keep that next to the pavlova (do not let the silica packets come into contact with the pavlova).
Avoid storing the pavlova in the fridge at all costs. The fridge will make the pavlova soggy.
Can you freeze pavlova?
Unfortunately, no.
If you freeze and then thaw before serving, the shell will lose its crispness and the marshmallow center will weep and dissolve.
Why do you add cornstarch and vinegar to the pavlova?
Both cornstarch and cream of tartar are important in stabilizing the meringue, and providing structure.
The acid lowers the pH of the egg whites, making it more stable. The cornstarch absorbs moisture and provides structure. Read more about why these ingredients are important here.
BONUS – what to do with failed pavlova
If the pavlova has collapsed a little in the center and on top, you can still serve the pavlova. There is nothing that whipped cream topping cannot hide when it comes to pavlova.
And I’ll bet that your guests and family most likely won’t care either because your pavlova will still taste fantastic!
If it has cracked on the sides, but is still holding up well with a mallow center, still top it with cream and serve it.
However, if you over-baked the pavlova and the center is too dry, or it has collapsed more than 50% in the center, the pavlova is still delicious and can be served with some creativity.
You can chop up the pavlova just before serving, and fold in some whipped cream. Layer this meringue and cream mixture with the fruits that you were going to use.
You now have a pavlova “trifle” or ambrosia salad (sort of a deconstructed pavlova) with crunchy bits of meringue. (Not an eton mess exactly, because there will be marshmallowy bits in there.)
BONUS – what to do with leftover egg yolks
- Make ice cream! Egg yolks are crucial for great-tasting ice cream, so choose from all of these amazing ice cream recipes and flavors!
- Make lemon curd – this is also perfect to top the pavlova.
- Make passion fruit curd – passion fruit curd is also a fantastic topping for pavlova!
- French buttercream – a rich and delicious buttercream made with egg yolks and butter.
Recipe

Perfect Pavlova Recipe
US based cup, teaspoon, tablespoon measurements. Weight measurements are recommended for accurate results whenever available.
Common Measurement ConversionsVideo
Equipment:
- Digital kitchen scale
- 1 Stand Mixer (I use a KitchenAid)
- 1 Food Processor (to blend sugar if using granulated sugar)
- 1 Small offset spatula
- 2 Silicone spatulas
- 1 Half sheet baking tray
- Prep bowls
Ingredients:
Classic pavlova base
- 225 g egg whites, at room temp about 7 large eggs (210 – 225 g)
- 370 g caster sugar or granulated sugar that is pulsed to make it finer. 1¾ cups (about 1.6 – 1.7 times the amount of egg whites)
- 1½ tbsp cornstarch tightly packed tbsp, (15 –17 g)
- 2 tsp white vinegar 10 mL OR use 1 tsp / 5 g cream of tartar
- 1 tsp grated lemon zest optional (from a dry lemon)
To serve the pavlova
- 1 ½ cup whipping cream 35% fat
- 50 g caster sugar ¼ cup, OR ½ cup / 50 g confectioner's sugar
- 2 tsp vanilla extract
- 2 kiwi fruits peeled and sliced or diced into 1 inch pieces
- 1 cup halved strawberries or more
- 1 cup diced mangoes or other fruits such as blueberries, raspberries, red currants etc.
- ¼ cup passion fruit pulp / syrup OR lemon curd
Instructions:
Pavlova base
- Make sure all the equipment is clean and dry (mixer bowl, whisk, two spatulas, sugar bowl, bowls to separate egg yolks and whites etc.).
- Preheat the oven to 275°F / 135°C. Cut a piece of parchment paper that's big enough to line a baking tray. Draw a circle that is 7.5 in / 19 cm in diameter on the underside of the parchment paper. Or 8 inches / 20 cm is OK too. Line the baking tray with the parchment paper (with the drawn circle on the underside). Set aside until needed.
- Carefully break an egg and strain the egg white into a small clean bowl, taking care not to break the egg yolk. Once you've successfully separated the egg white, transfer this into a mixer bowl that is on a weighing scale. See recipe notes for tips.
- Repeat with more eggs, until you have about 220 g of egg whites (give or take 5 grams). If you get any yolk into the egg white, you must discard the contaminated egg white and start again with another egg. This is why I advice to break the egg into a separate smaller bowl, before adding it into the mixer bowl.225 g egg whites, at room temp
- Do not throw away the egg yolks, since you can make other recipes with them (see notes in the post for some ideas). Store egg yolks in an air-tight container, with a layer of water to coat them on top.
- Make sure the egg whites are at room temperature (minimum 75°F / 24°C). If the kitchen is very cold (e.g. in winter), you may want to slightly warm the egg whites. To do this, place some hot tap water in a large bowl or pot, and carefully place the mixer bowl in the water. Stir the egg whites for about 1 – 2 minutes to warm them up to about 85 – 90°F (29 C – 32 C). (See recipe notes.)
- Once the egg whites are measured and in the mixer bowl, whisk the egg whites on speed 2 or 3 (on a 10 speed mixer) until they reach soft peak stage (i.e. when you lift the whisk, soft peaks should be formed in the egg whites). This may take between 5 – 10 minutes. Soft peak stage should form foam that has very small bubbles that easily pile up on the meringue (and do not disappear), almost like home-frothed cappuccino foam.
- Add the sugar when the egg whites are at soft peak stage, 1 spoonful at a time, at speed 3. Let the egg white mix whisk for about 10 – 15 seconds after adding each spoonful of sugar. (Add sugar every 20 – 30 seconds.)Also scrape down the sides of the bowl at least once, while adding the sugar. Do not rush this process. This can take about 5 – 12 minutes.370 g caster sugar
- Once all the sugar is added, stop the mixer and scrape down the sides of the bowl with a clean spatula. Make sure the sugar on the sides of the bowl is incorporated into the meringue.
- Increase the speed to 4 and whisk the egg whites just until the sugar has completely dissolved, and the egg whites are thick and glossy, and hold their shape well. You can also increase the speed up to 5 if you like, but that shouldn't be necessary.
- Here's how to check if the sugar has dissolved – take a small amount of the meringue mix and rub it between your finger tips. If it feels grainy or has any granules, then there's undissolved sugar. If you don't feel any granules or grittiness, then the sugar is completely dissolved. I also like to make sure that I don’t see any undissolved sugar in a few other places in the meringue (under the whisk, in the bowl etc).
- Whisking egg whites until the sugar completely dissolves can take between 12 – 30 minutes, depending on the sugar you use, and the temperature of the kitchen and egg whites. Do not rush this, and check on the meringue periodically to make sure you don’t over-whisk it.
- While the egg whites are being whisked, get the cornstarch and vinegar ready in separate bowls. You can also use cream of tartar instead of vinegar.1½ tbsp cornstarch, 2 tsp white vinegar
- Once the sugar is almost dissolved (in the last 2 – 5 minutes of whisking), and the meringue is glossy and thick and is at stiff peaks, add the vinegar and cornstarch into the meringue. Mix in the cornstarch and vinegar on the lowest speed for a few seconds, so that the cornstarch does not fly off, and incorporates fairly well.
- Increase the speed to about 5 and let the cornstarch slurry mix into the egg whites for about 2 – 5 minutes, until the sugar has completely dissolved. Then stop whisking and remove the bowl from the mixer.
- If you choose to add lemon zest, fold it into the meringue at this stage. But I personally prefer not to add any zest.1 tsp grated lemon zest
- Take a little bit of the meringue mix and dab a little on each corner of the baking sheet. Place the parchment paper on top of this meringue so that it sticks to the baking sheet and is secure.
- Using a clean spatula, scoop out the meringue in the bowl on to the parchment paper with the drawn circle. Pile the meringue in the middle of the drawn circle. Be careful not to scoop out the top edge of meringue in the mixer bowl, in case there are any sugar crystals along the edge of the meringue mixture. This will prevent any undissolved sugar getting into the meringue (see picture in the post).
- Using an offset spatula, spread the meringue mix to fill the drawn circle on the parchment paper. Make sure the meringue mix is evenly tall, about 2.5 – 3 inches.
- Once you have shaped the pavlova (see pictures in the post), use an offset spatula or palette knife to create furrows along the sides of the pavlova, going from bottom to top. Smoothen the edges to get rid of meringue points (which can easily brown and burn). The pavlova will have a wide base and a slightly narrower top at this stage.
- With the offset spatula, create a very shallow depression in the middle of the pavlova. This will make the pavlova have more even sides as well. The middle should not be hollow, but just a small, shallow depression.
- Transfer the cake into the preheated oven, and immediately reduce the temperature to 212°F / 100°C.
- Bake the pavlova for 80 – 90 minutes. Do not open the oven door during this time.
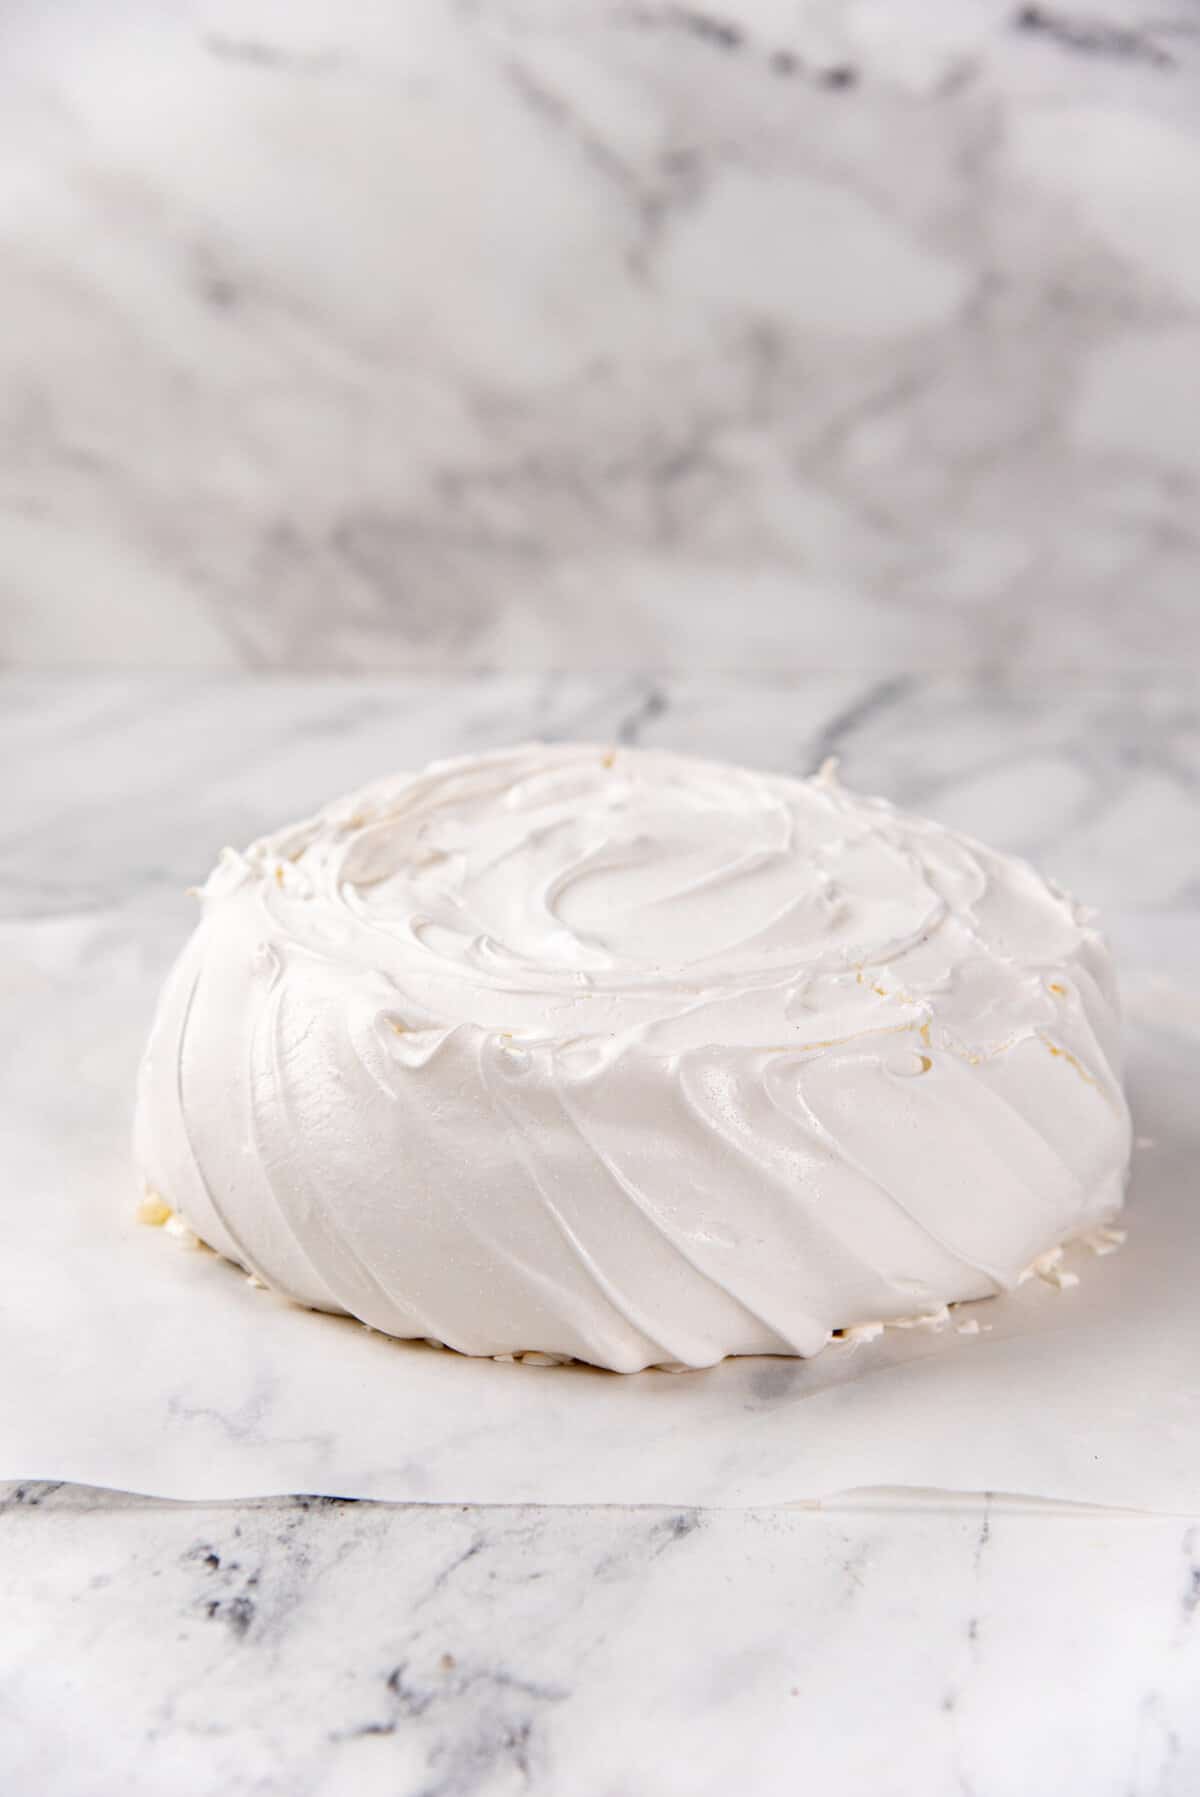
- At 80 minutes, open the oven door slightly to check if the pavlova has formed a dry crust. If it has, then you can switch off the oven. If not, let it bake for another 10 minutes, and then turn off the oven. Allow the pavlova to cool down in the oven overnight (a minimum of 4 hours, until completely cooled down).
- Transfer the pavlova into an air-tight container and store in a cool, dry place (free of draft), until ready to serve. You can also leave it in the oven if you're able to, but it's not necessary. Do not store in the fridge or freezer.
To serve the pavlova
- Place the chilled whipping cream in a chilled bowl. Whisk the cream on medium low – medium speed. Whisking the cream at a lower speed results in whipped cream that is slightly more stable, that does not deflate too quickly.1 ½ cup whipping cream
- While whisking the cream, add the sugar and vanilla into it. Mix until you have semi-stiff peaks (the peaks stand up, with the tip just drooping). At this stage, whisk the heavy cream with a hand whisk by stirring it. This gentle movement will bring the whipped cream to stiff peaks without over-whisking.50 g caster sugar, 2 tsp vanilla extract
- Over-whisked whipped cream will become grainy, so be careful to gently whisk the cream. If you whisk the cream on high, you risk over-beating it, and the cream will deflate faster too. If your cream does become grainy, add a little chilled heavy cream and stir it into the whipped cream with a whisk until it becomes smooth and stiff.
- Using a spoon, carefully crack the surface of the pavlova so that the top crust of the pavlova sits on top of the marshmallow center. The marshmallow center of the pavlova may have deflated 1 – 2 cm. This will prevent the pavlova from collapsing after you put the whipped cream on top.
- Generously spread the cream on top of the pavlova, and make sure the top is level. You can just use a spoon and spatula to spread the cream. Top the cream with the prepared fruits. Drizzle/spread the passion fruit or lemon curd over the top as well. The tangy sweetness from passion fruit or lemon curd will brighten up the dessert!2 kiwi fruits, 1 cup halved strawberries, 1 cup diced mangoes, ¼ cup passion fruit pulp / syrup OR lemon curd
- Serve immediately.
Recipe Notes
Note about egg whites
Use egg whites from whole eggs, not carton egg whites. Egg whites are easier to separate when the eggs are chilled, but allow the egg whites to come to room temp. before whisking. You can also use a metal egg white separator to make it easier to separate the eggs. If you’re making a pavlova in winter, then the egg whites may need to be warmed up before whisking. In summer, the egg whites will be warmer at room temperature, and will also heat up while being whisked. This will likely not happen during winter however, which may cause the egg whites to have to be beaten for longer. To slightly warm the egg whites, Fill a large bowl or pot with hot water from the tap (about 115 F / 46 C). Place the egg whites in the clean mixing bowl. Place this mixing bowl in the pot with hot water, making sure that no water is getting into the egg whites. Gently stir the egg whites until they reach a temp. of about 85 – 90 F / 29 – 32 C, about 2 – 5 minutes. Then remove the bowl from the water. Wipe the outside of the bowl dry, and proceed with the recipe.A note about sugar
The minimum ideal ratio for egg white to sugar for a stable meringue for pavlova is 1 : 1.6 – 1.7. So, for every 30 g of egg white (which is about 1 egg white), you must use 50 – 51 g sugar. If you reduce the sugar, this will lead to a pavlova that is not as stable. This recipe uses the minimum amount of sugar required for best results. For a more stable pavlova, you can increase the ratio to 1.8. So, for this recipe, that will be 400 g / 2 cups of caster sugar or powdered granulated sugar.Nutrition Information:
“This website provides approximate nutrition information for convenience and as a courtesy only. Nutrition data is gathered primarily from the USDA Food Composition Database, whenever available, or otherwise other online calculators.”


Leave a Reply