


This is the most citrusy lime curd ever! Not too sweet, deliciously tart, and made with only lime juice (no water to dilute the flavor),
And I show how to thicken it with eggs and butter for a smooth and spreadable consistency, so you can even use it as a spread or filling too.
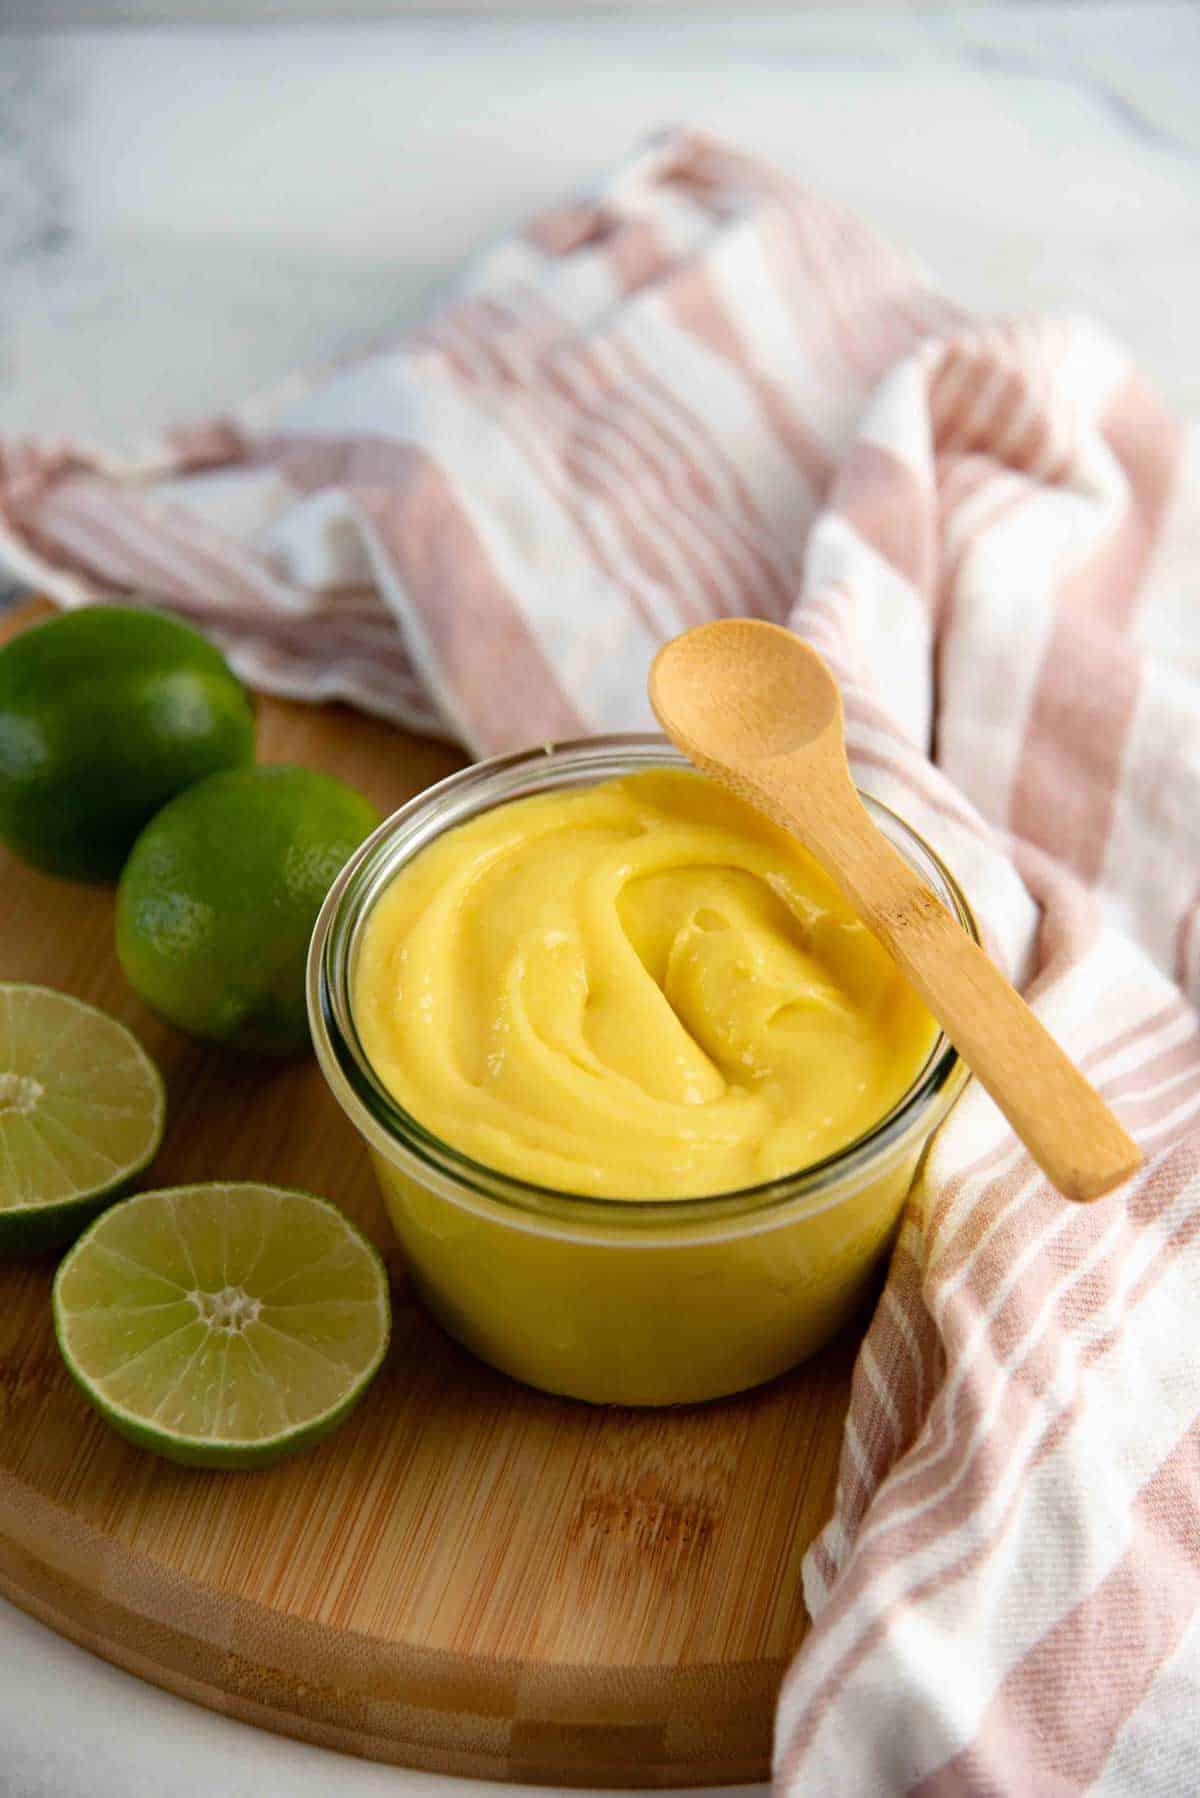
I’m a sucker for anything citrus! I know a lot of people enjoy the flavor of lemon curd, but this lime curd is definitely my favorite of the two.
I also find a lot of curd recipes out there to be too sweet, with the sourness of the citrus masked with too much sugar.
So, I wanted to make a version that was still sweet, but the tartness was front and center. So, if you’re looking for a lime curd that celebrates the tartness of this citrus fruit, this is the recipe for you!
Why this recipe works

- Not overly sweet, with the tartness of lime shining through.
- Most recipes use water with lime juice, but this recipe only uses lime juice, so the flavor is not diluted.
- I use butter in addition to eggs as a thickener, so that this curd is smooth and spreadable when chilled!
- You can cook the lime curd to have a soft consistency, or cook it a little further (carefully), to get a thicker, more luscious consistency as well.
- You don’t have to use a double boiler if you don’t want to, but it does take a little practice to cook this properly without scrambling the eggs that way.
- Step by step instructions to guarantee perfect results.
What’s lime curd?
Just like lemon curd, but made with lime juice instead. Fruit curds are a type of custard dessert where fruit juice is thickened on the stove with eggs. Compared to a true custard, where milk (or dairy) is cooked with eggs.
You can make fruit curd with almost any fruit juice, but for the best taste, I often like to add a bit of citrus such as lemon or lime juice. Like I do with my passion fruit curd and pineapple curd.
What’s different about this recipe?
Most lime and lemon curd recipes are soft. They are spoonable, but don’t hold their shape if used as a filling.
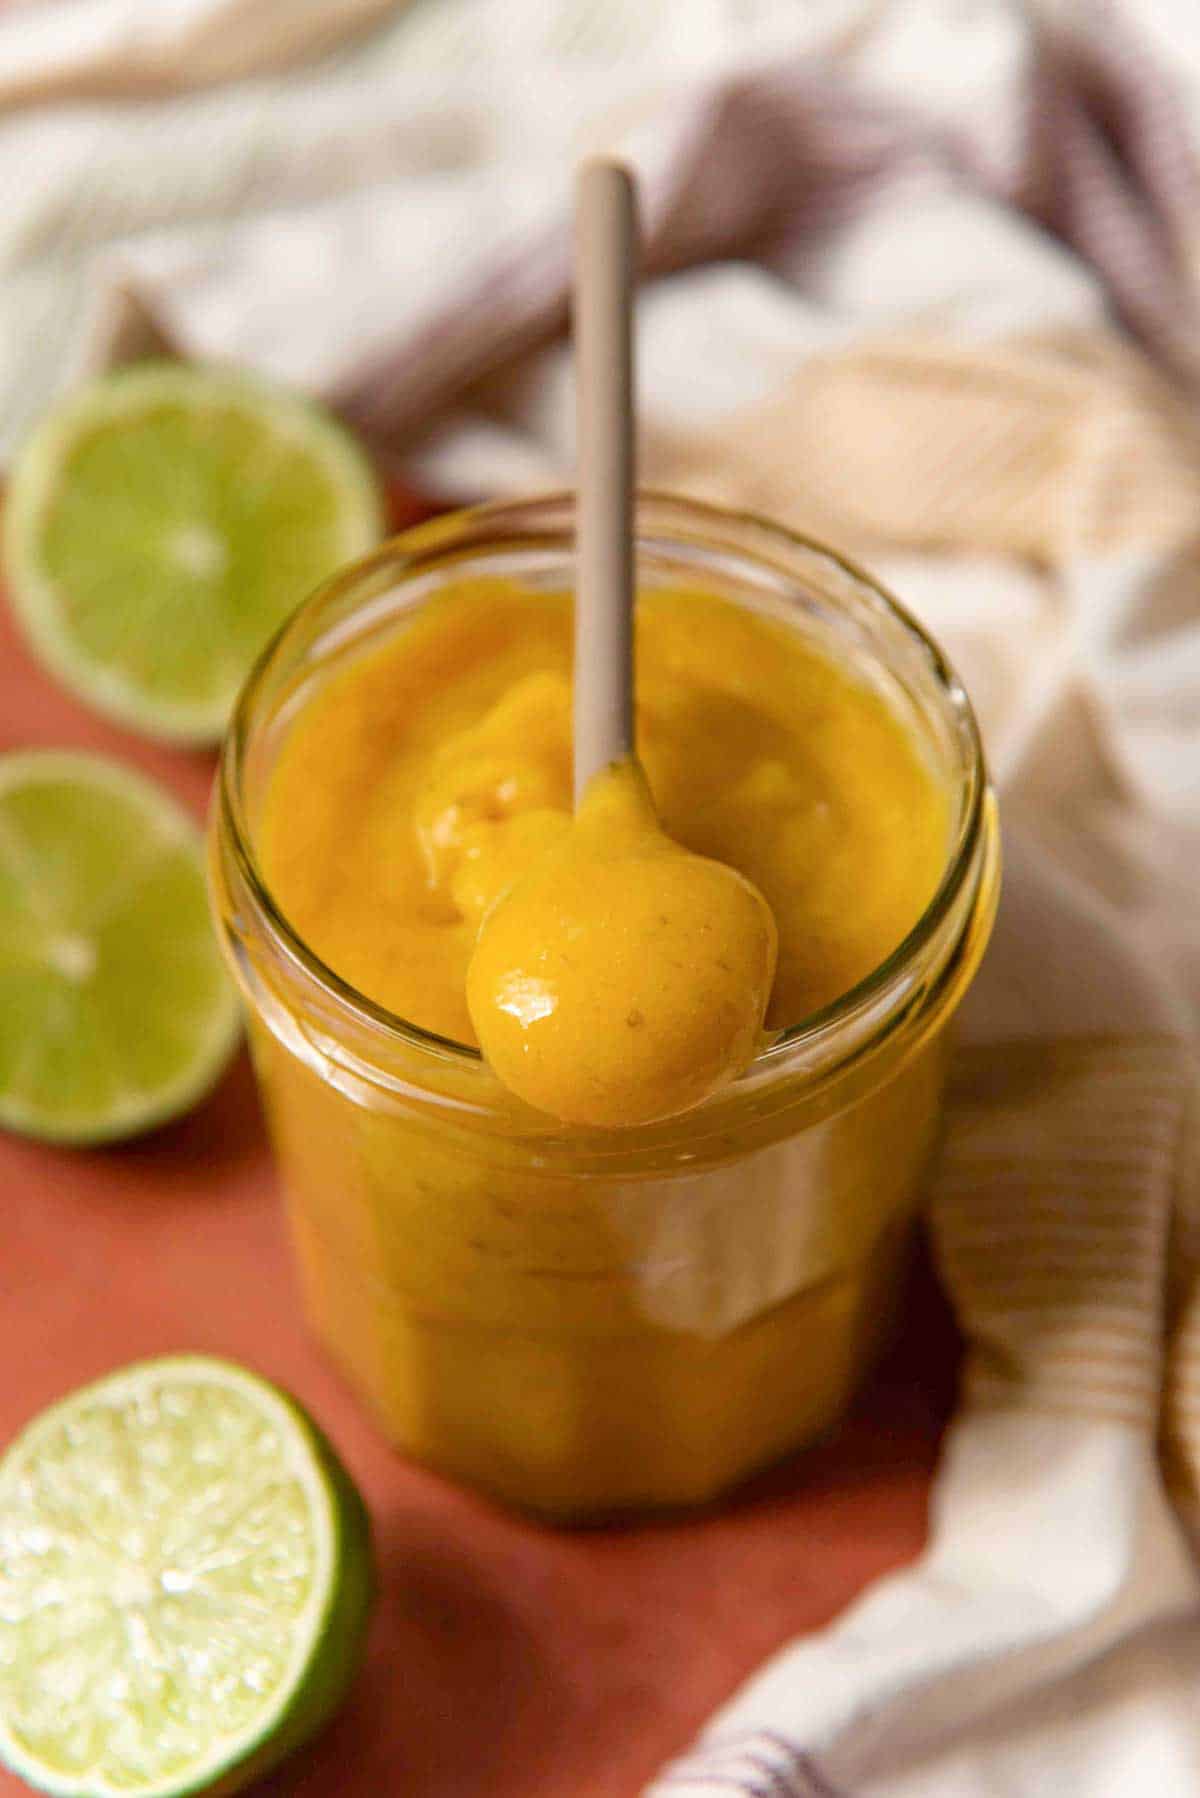
This lime curd CAN be used as a filling on its own without using gelatin (as a stabilizer), and results in a very thick, buttery lime curd that’s rich in flavor!
The trick is the cooking temperature. If you cook this to about 190°F, it’ll have a similar texture to other lime curd recipes. I.e. soft and spreadable.
However, if you cook this further to about 210 – 212°F, this lime curd will transform into a jelly-like semi-translucent curd that’s pipeable and spreadable like a thick jam or butter.
This has to be done very carefully and with very vigorous whisking to prevent the egg yolks from scrambling. If you don’t do this properly, you run the risk of ending up with grainy or scrambled lime curd.
This is an optional step, and I would only recommend it if you’re experienced with making custards and fruit curds. Or if you’re willing to learn the technique and practice it!
Ingredients you’ll need
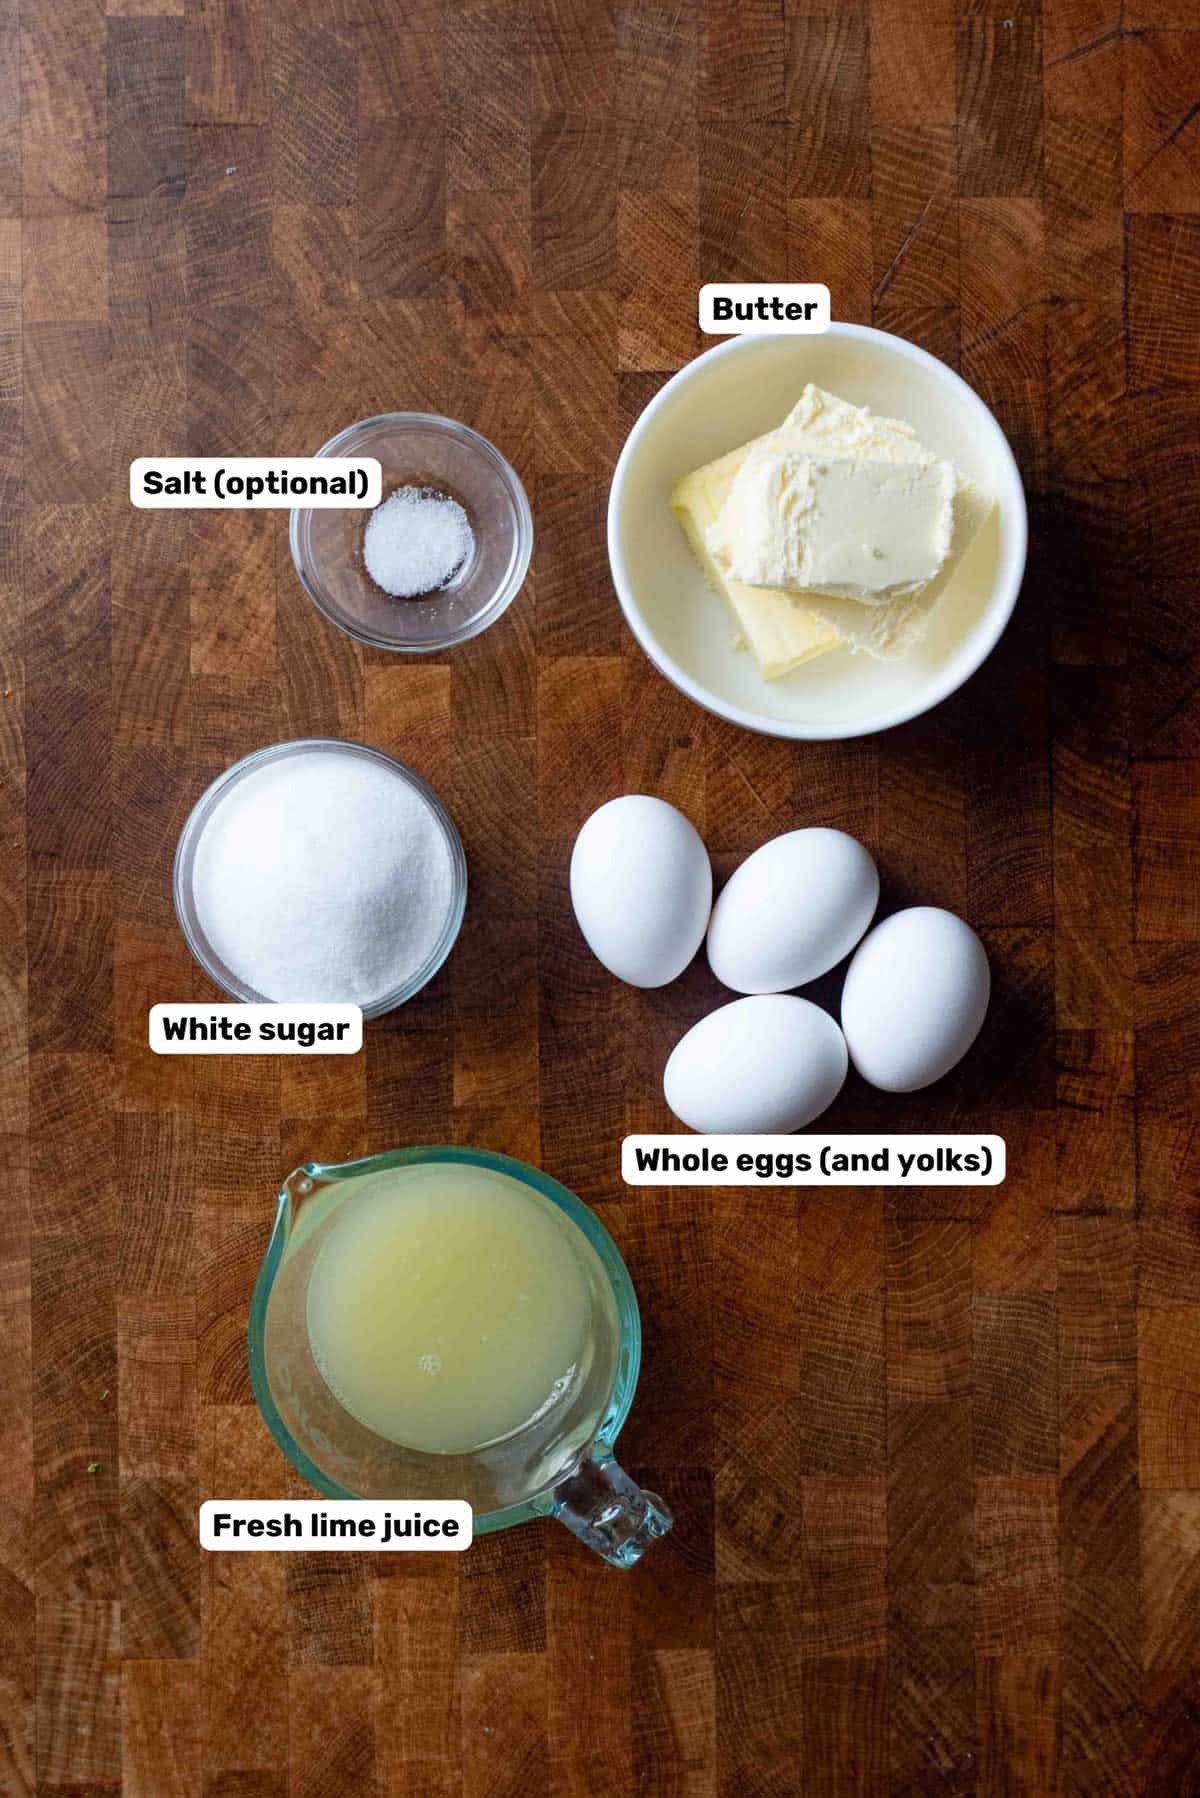
- Lime juice
- White sugar
- Eggs (whole eggs + yolks)
- Butter (unsalted butter)
I prefer to use freshly squeezed lime juice. You can use bottled lime juice instead, but ONLY if you like the taste of it!
Remember this lime curd will intensify the flavor, so if you don’t like bottled lime juice, you definitely won’t like the final flavor profile either.
Step by step method for making lime curd
Step 1 – Prepare the lime juice and eggs
You can use lime zest as well if you like. Use a micro planer to zest half of the limes BEFORE juicing them. (It’s just easier to zest limes while they’re whole.)
Then juice the limes to get the correct amount of lime juice.
How to avoid bitter lime juice
When juicing the limes, it’s CRUCIAL to avoid over-juicing them.
The white pith inside the limes can get rubbed into the juice if you try to squeeze the lime after most of the juice is taken out.
There is a bigger risk of this happening if you use a citrus reamer, and you’re forceful with trying to scrape the pith.
If this happens, the lime juice will be bitter, and there’s not much you can do to fix it, unfortunately.
Separate some of the eggs into egg yolks and egg whites. We’ll be using the egg yolks and not the egg whites.
You can store the egg whites for later, but make sure they are not contaminated with any fat (including egg yolks), if you want to use them for meringues and such. Egg whites can be frozen for up to 2 months!
Step 2 – Mix the ingredients
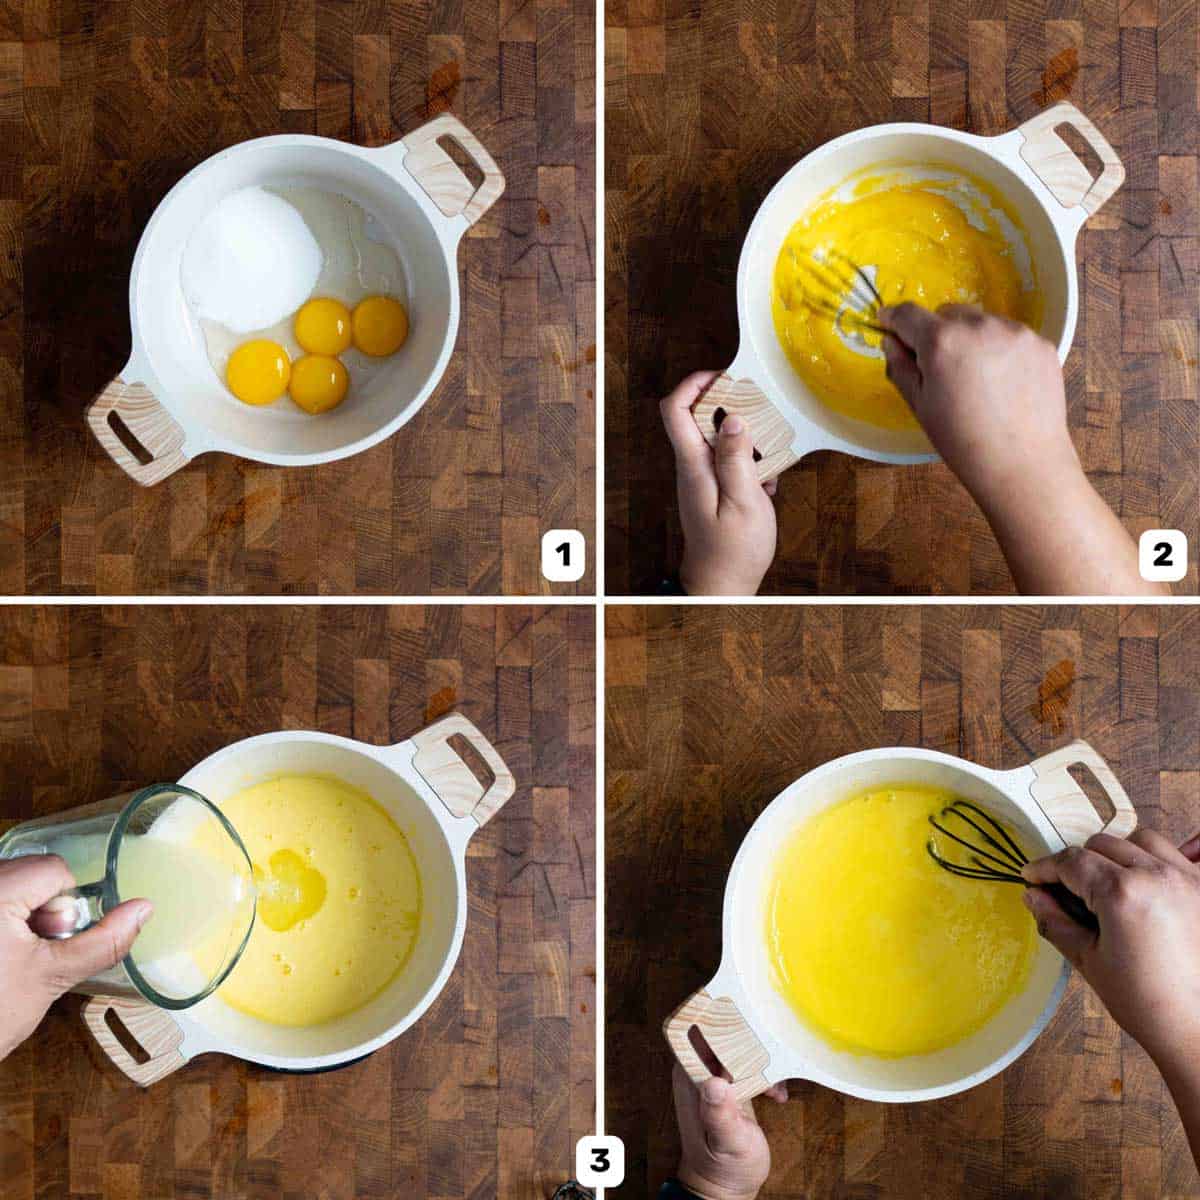
Place the whole egg, egg yolks, and sugar in a non-reactive saucepan (image 1). Whisk together really well until the eggs start to look pale and the yolks are whisked in really well. (image 2).
This ensures the eggs are completely broken down and there are no lumps. If the eggs have lumpy pieces, these will solidify when they’re cooked (in the acid or heat).
Then add the lime juice and whisk it in really well (image 3). Add the butter pieces (they won’t be mixed in, as they are still solid at this stage), and now we’re ready to cook.
Step 3 – Melt the butter (start cooking the lime curd)
Place the pot over medium heat and stir the mixture with a whisk regularly as the mixture heats up and the butter starts to melt (image 4).
As the heat increases and the butter melts (image 5), whisk more frequently until you’re whisking it at a steady speed most of the time. Make sure to whisk the edges and bottom of the pot as well to prevent the eggs from catching on the bottom and creating lumps.
If the mixture is heating too quickly, then reduce the heat. Whisking also helps to keep the lime curd smooth and homogenous.
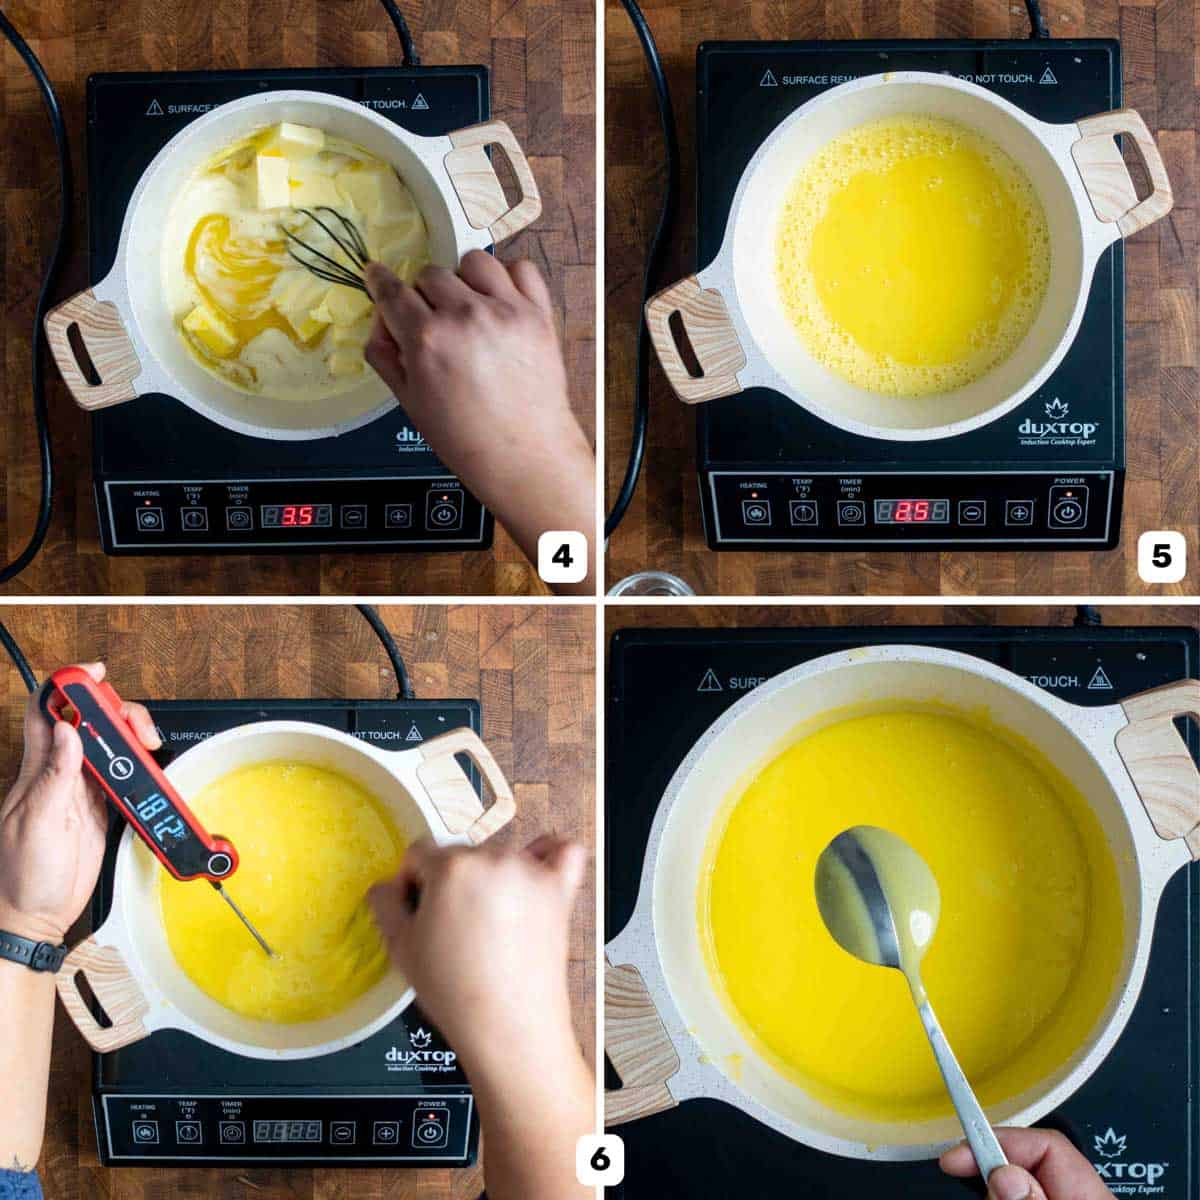
Step 4 – Thicken the lime curd
Once the butter is melted, you have to whisk the lime curd continuously, taking breaks only to check the temperature and consistency.
Keep whisking and the curd will thicken smoothly. If needed, whisk faster, OR reduce the heat to keep the curd smooth.
When the lime curd reaches 180 – 185°F, the curd is cooked and ready to be passed through the sieve (optional) (image 6).
The lime curd is cooked through at 180 – 185°F. It’ll be thick, but not too thick at this stage.
It will have a nappe consistency. Which is when the curd coats the back of a spoon. And when you run your finger through it, the curd doesn’t flow back in to fill the gap either (image 6).
Step 5 (OPTIONAL) – Thicken the curd further
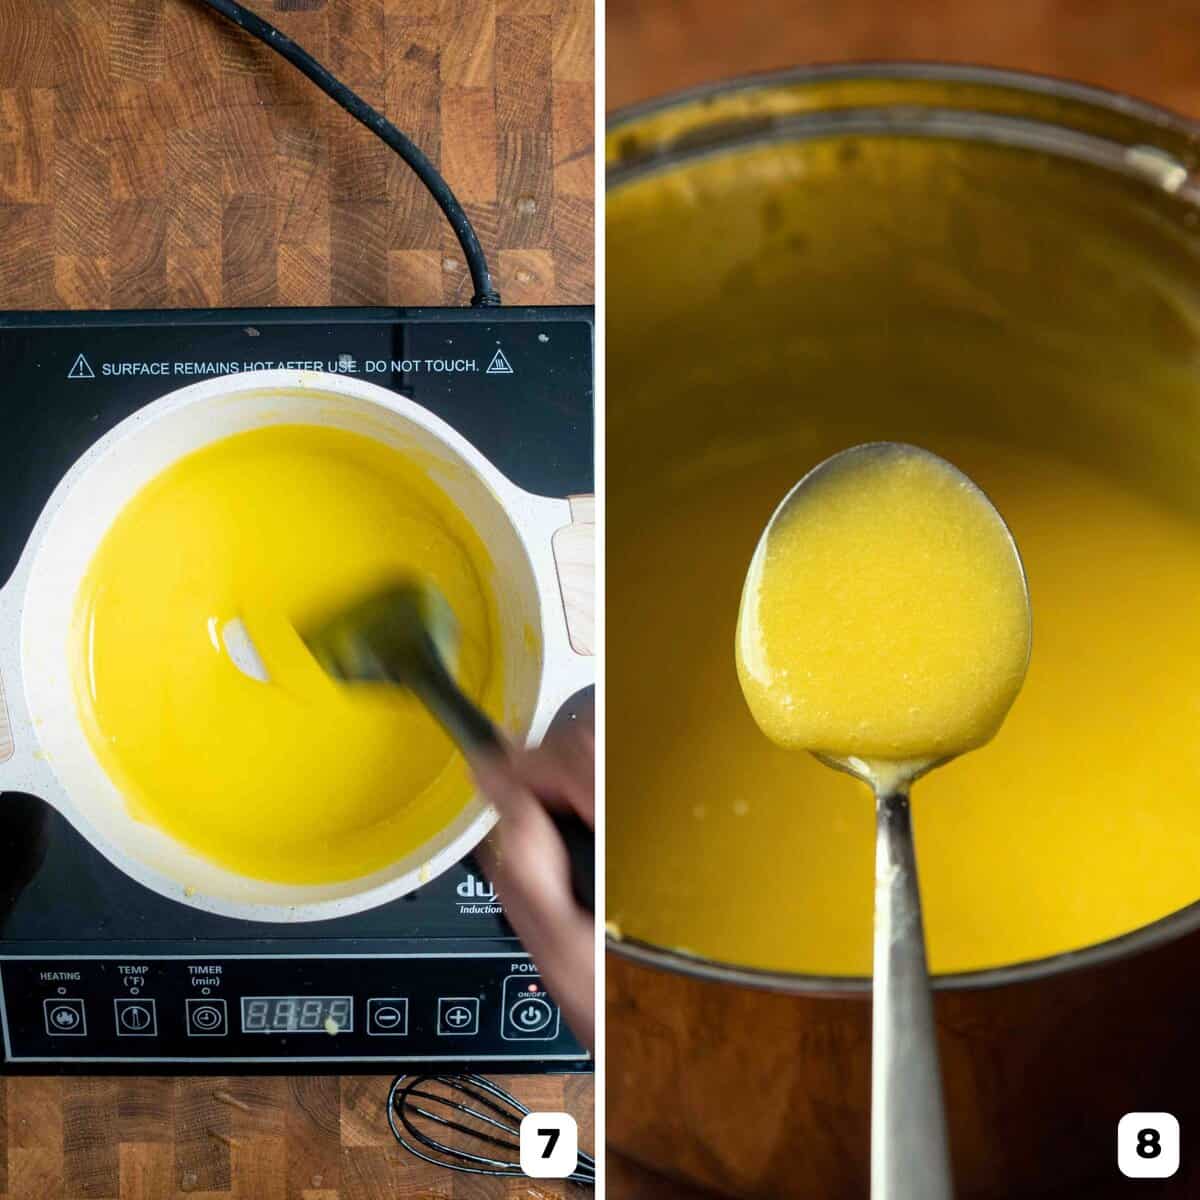
To make the lime curd thicker and turn it into a spreadable consistency – whisk it further, while letting the water evaporate further (on low heat).
The lime curd will turn from an opaque color to a semi-translucent mix that has a glossier appearance and thicker consistency. The curd will start to simmer, but keep mixing to prevent scrambling the curd.
If this curd is not whisked or stirred with a spatula continuously and with even speed, the eggs can scramble.
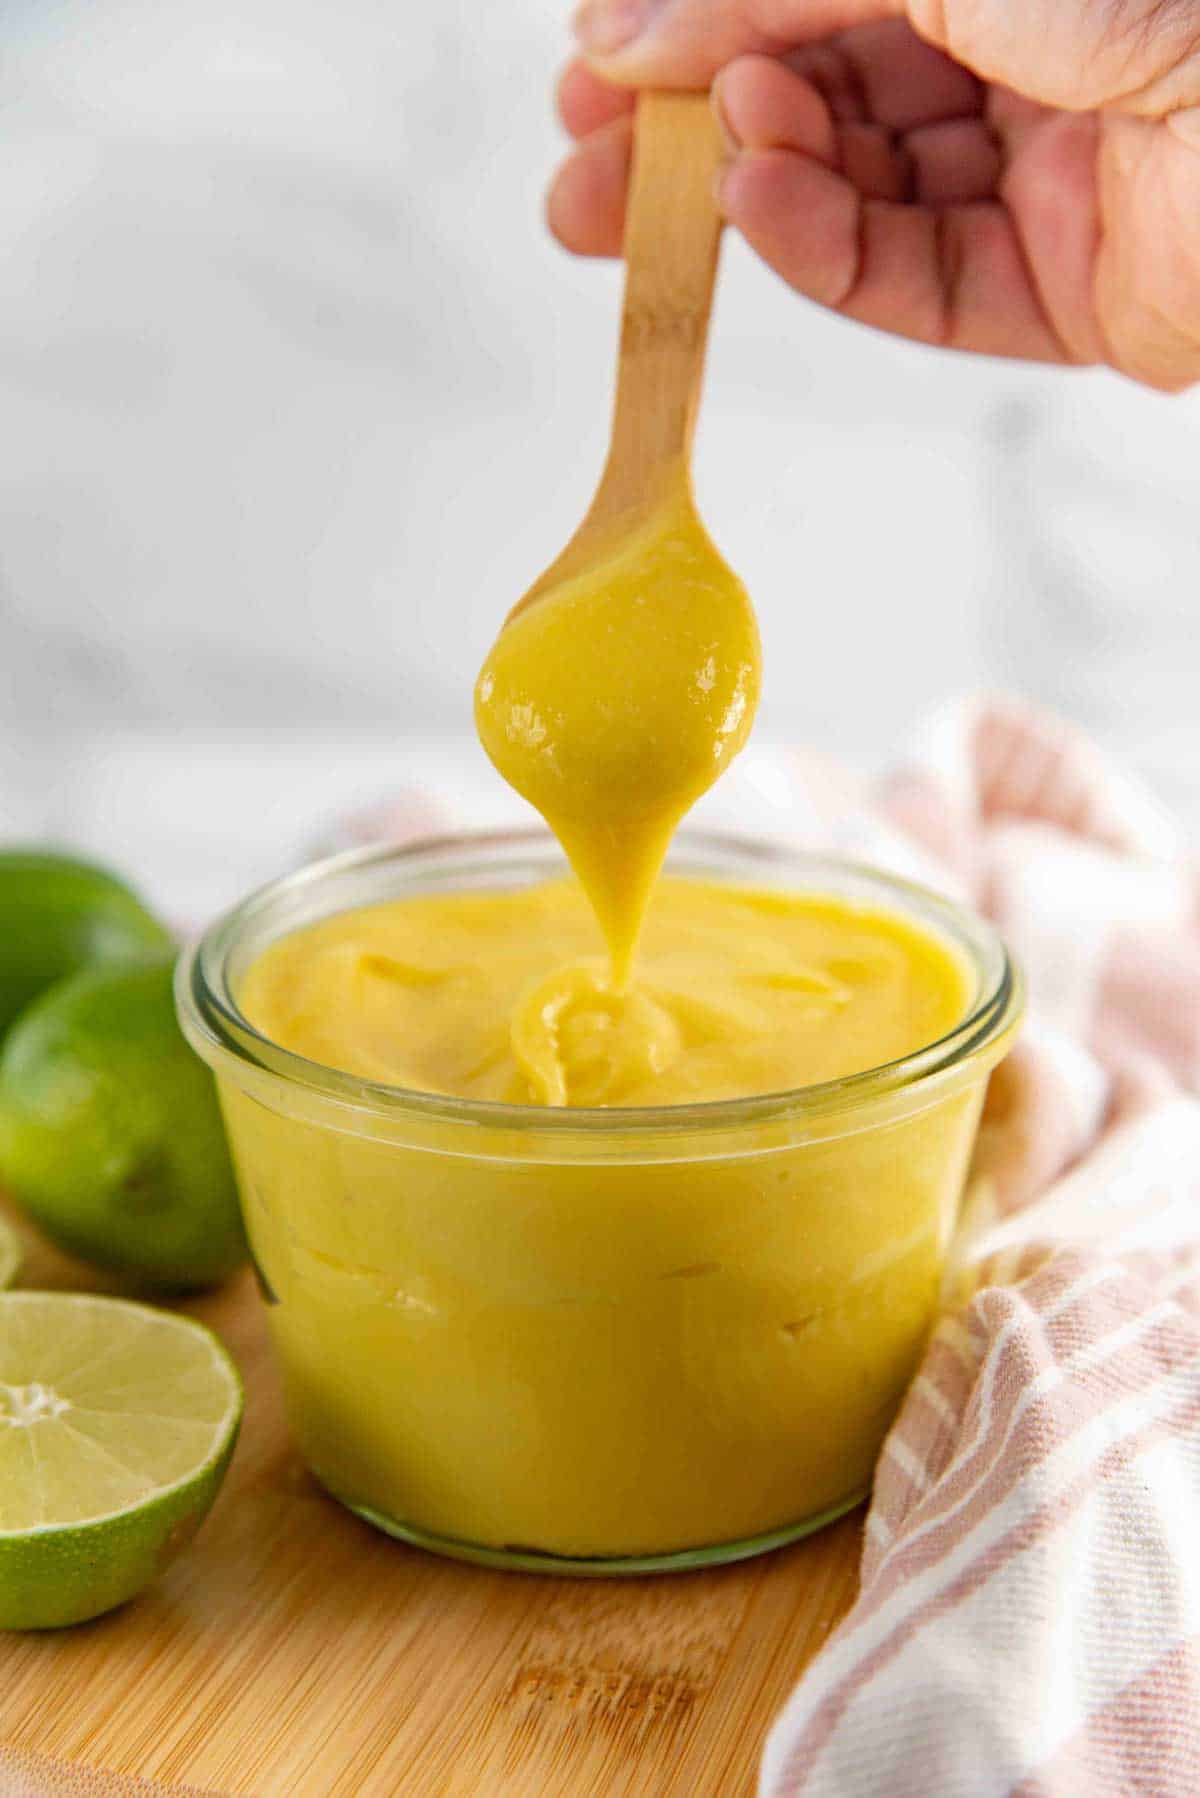
Step 6 – Transfer the lime curd into a container or jar
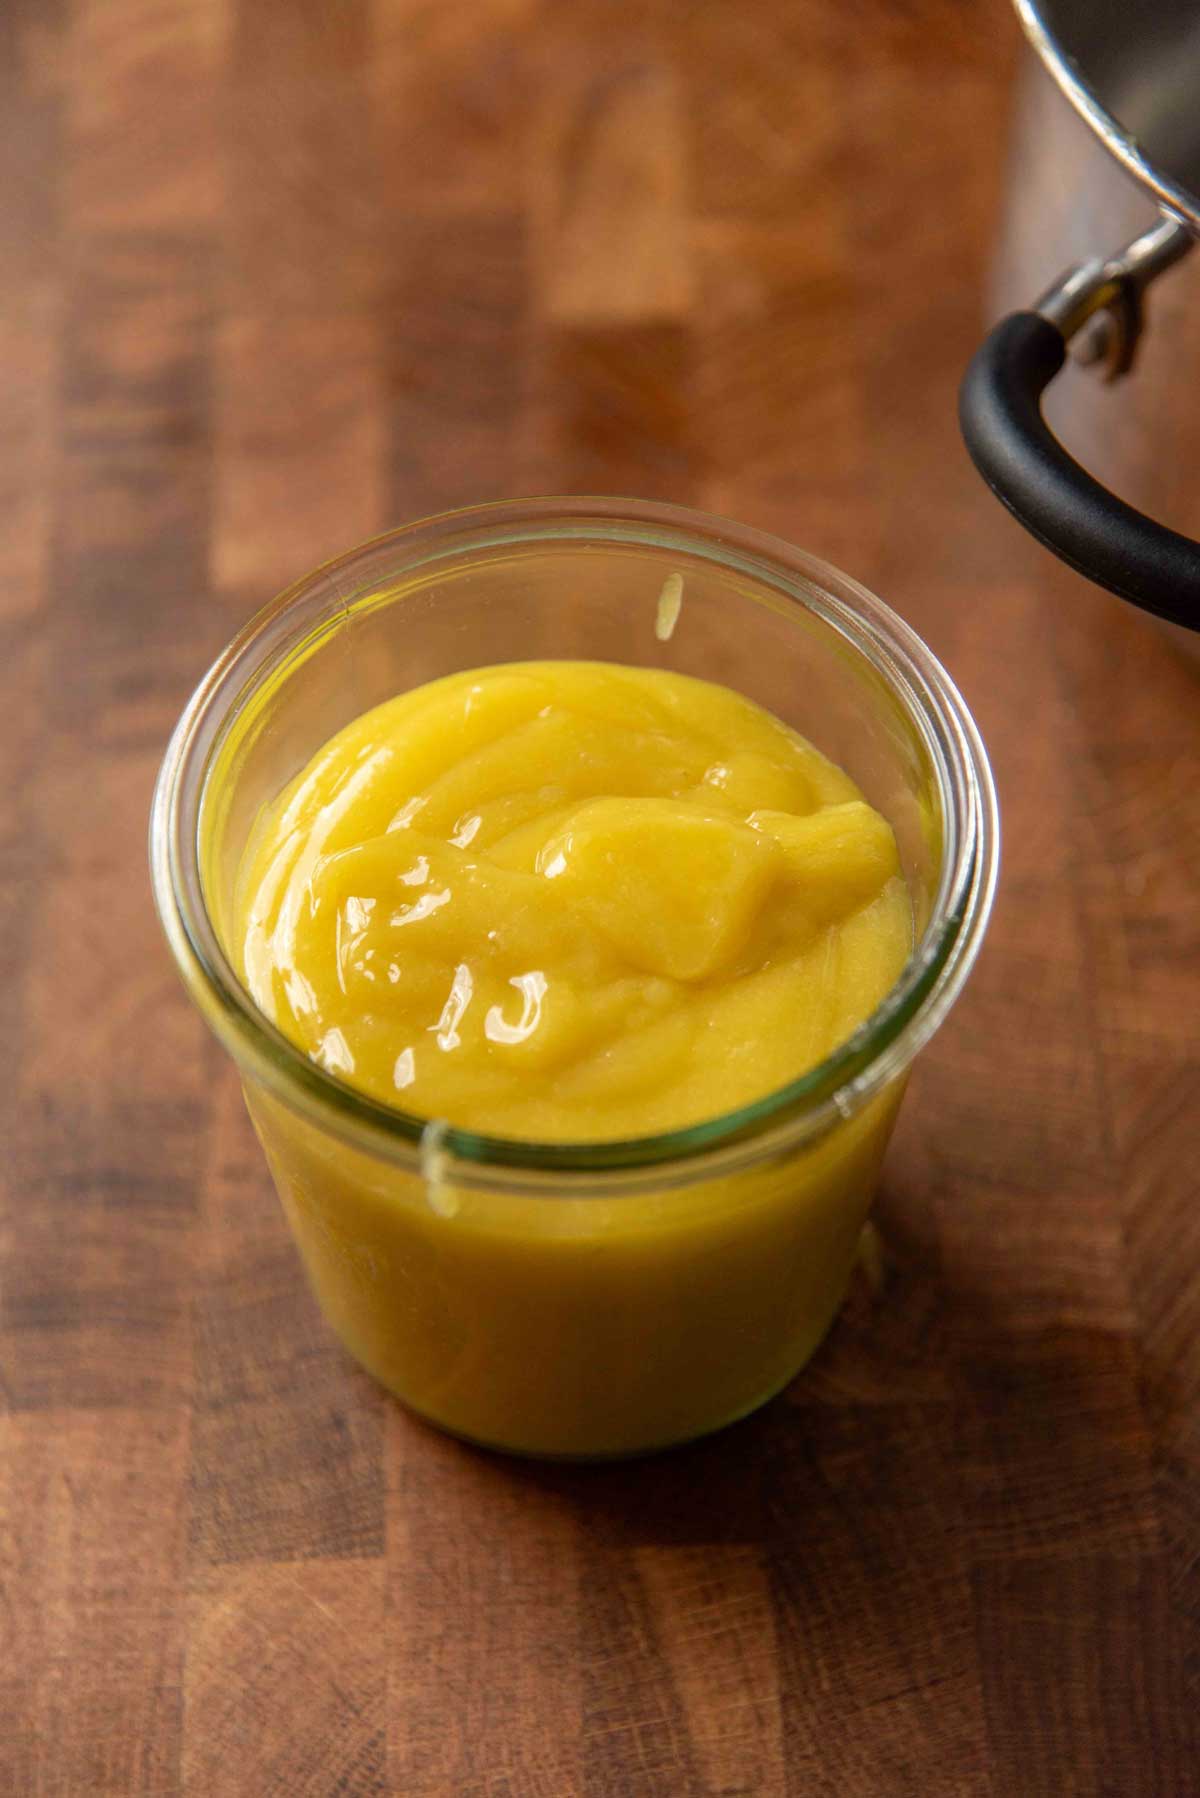
You also can use an immersion blender to blend the cooked lime curd. This is not needed, but if there’s just a small amount of curdling, the immersion blender can help get the curd back to the right consistency.
Pass it through a sieve while it’s still hot. I don’t usually do this step, because I haven’t had a lime curd curdle on me. Plus, if you used lime zest, passing it through the sieve will remove the zest too.
Step 7 – Chill
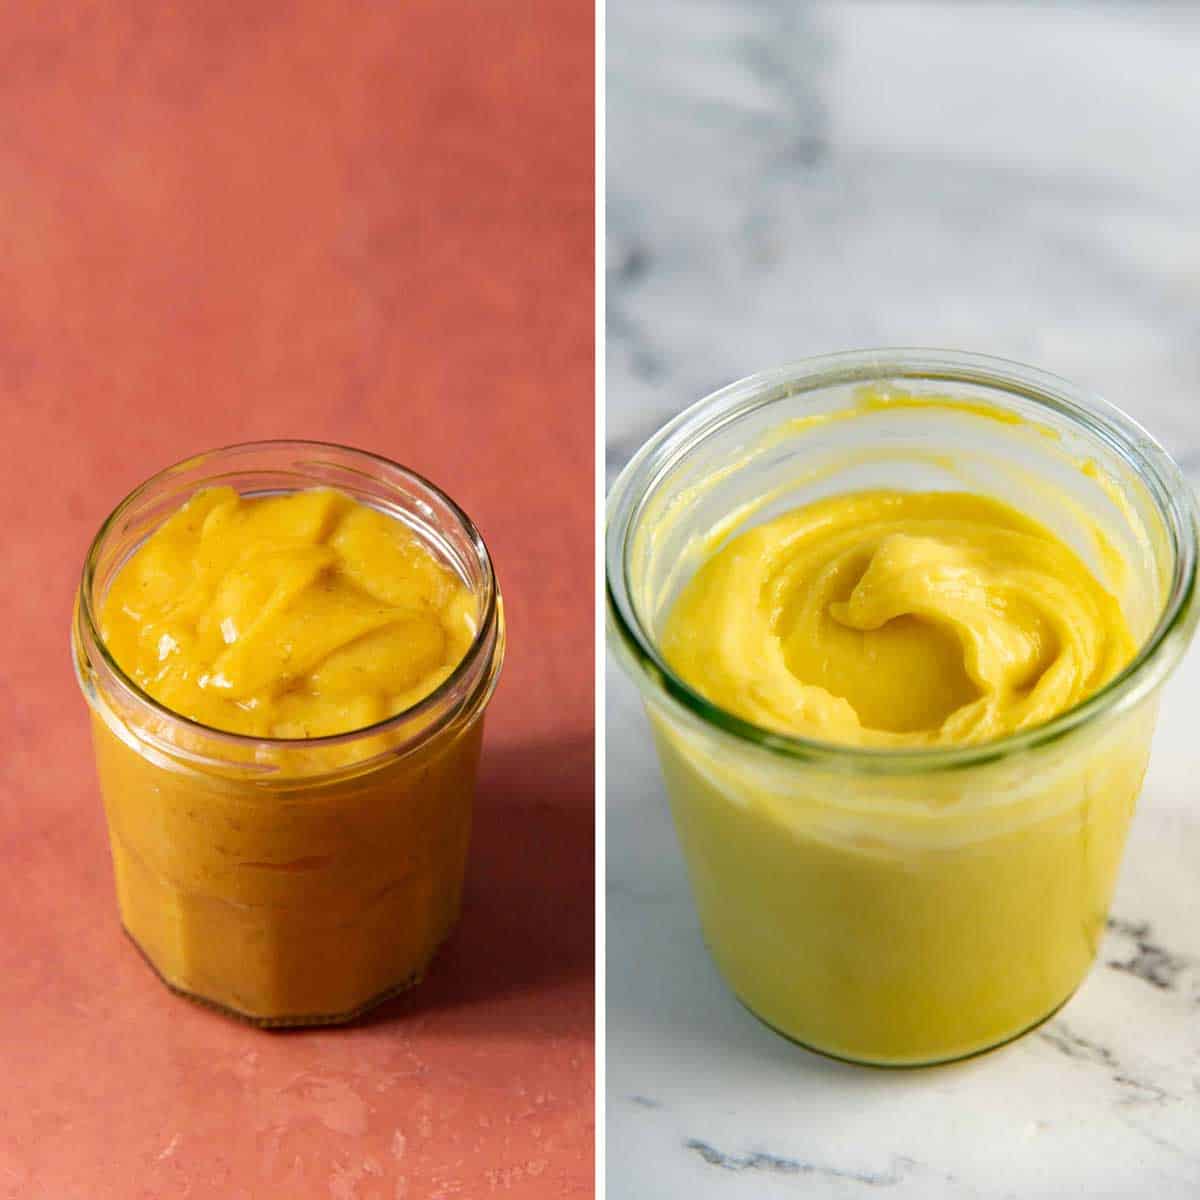
Allow the lime curd to chill completely in the fridge overnight. This will thicken it further!
It’s ready to use, after chilling.
You may need to stir the lime curd really well after the first chill, especially if you cooked this to the thicker consistency. This isn’t necessary for the thinner consistency though.
Storage
I store my lime curd in the fridge for about 5 days, but keep it in the freezer if I want to store it for longer.
I’ve often used frozen lime or lemon curd even after 2 months. I let it thaw in the fridge, and then use it as normal. Avoid repeated thawing and refreezing.
My best recipe tips
- Use fresh lime juice for the best flavor.
- If you use bottled lime juice, check the label and try to use 100% lime juice instead of concentrate. And make sure you like the flavor of the bottled lime juice.
- For a more interesting flavor, you can use half lime juice and half lemon juice for a lemon-lime curd.
- Whisk the eggs really well to make sure there are no lumpy bits.
- Control the heat of the lime curd to prevent the eggs from curdling! You cannot walk away from the stove as you will need to whisk it frequently, if not continuously, to get the correct smooth, silky consistency.
- Use a digital thermometer to check the temperature of the curd to know when it’s done (especially for 185 – 190°F). The curd will have a nappe consistency, but the temperature is more accurate.
- Pass the lime curd through a sieve to remove any lumps.
- Chill completely before using it.
- The chilled lime curd can be whipped to make a creamier lime curd too. I have only tried this with the thicker version of lime curd, but it should work for the thinner version too!
Uses for lime curd
So many!
- Perfect to spread on toast, because it’s like lime butter!
- Spread on cakes or muffins or scones, or use it as a topping or filling (like this lemon raspberry cake, but with lime curd).
- Use as a filling in cupcakes. Vanilla cupcakes with a lime curd filling are DE-lightful!
- Mix with whipped cream to make lime whipped cream to top desserts or as a filling for desserts.
- Use as a filling for pastries or cookies – like thumbprint cookies, or to fill tart shells.
- Make cocktails, like my lemon meringue cocktail, but with lime!
- Add to ice cream bases to make lime ice cream or lime sherbet.
Recipe FAQs
Why is my lime curd runny?
Lime curd can be runny if it’s not cooked to the right temperature, or if additional ingredients were added that had too much liquid.
For example, adding extra sugar, or adding all whole eggs instead of the yolks.
Why does my lime curd taste metallic?
This happens when the curd is made in a reactive metal pot, or using a whisk made with a reactive material.
I prefer to avoid aluminum pots or copper pots to make lime curd, as these are reactive metals.
Make lime or lemon curd in stainless steel pots, or ceramic coated pots, or enamel coated pots. Also make sure to use stainless steel or silicone whisks or spatulas.
Can I fix grainy lime curd?
If the curd is cooked through and grainy, unfortunately there’s no way to fix it.
However, if it’s starting to scramble, then it can be saved by using an immersion blender to re-temper the mixture.
Why is my lime curd bitter?
Lime curd can be bitter if the pith was introduced into the juice when using a citrus reamer to juice the limes.
If you used bottled lime juice, it can also make the curd bitter if the juice had any bitter notes in it.
Can I make my lime curd sweeter / less sour?
Yes! I do prefer this with less sweetness and more tanginess. But you can add some extra sugar to make it sweeter.
Recipe

Lime Curd
US based cup, teaspoon, tablespoon measurements. Weight measurements are recommended for accurate results whenever available.
Common Measurement ConversionsIngredients:
- 120 mL lime juice ½ cup, about 5 – 6 limes
- 100 g white sugar ½ cup
- 1 large egg
- 3 egg yolks from large eggs
- Generous pinch of salt
- 170 g unsalted butter 1.5 sticks
Instructions:
- Optional – Zest half or all of the limes. Make sure to use a micro planer and ONLY zest the green part of the skin. Ideally, the zest should be very fine.
- Cut the limes in half and squeeze the juice to make ½ cup of juice (strained). Make sure not to agitate the pith inside the limes when squeezing as this can lead to bitterness.
- Place the sugar, eggs, egg yolks, and salt in a medium-sized saucepan. Whisk until you have a smooth and pale mixture.1 large egg, 3 egg yolks, Generous pinch of salt, 100 g white sugar
- Whisk in the strained lime juice well, and add the butter. You can also mix in the zest if you choose to add it.170 g unsalted butter, 120 mL lime juice
- Heat the mixture over medium heat while frequently whisking to melt the butter. When the butter is melted, increase the heat to medium high and whisk the mixture more frequently, until it registers at 180°F for a total cook time of about 10 minutes (the cook time will vary depending on the stove heat and the pot you use).
- At 180°F, the lime curd will have a nappe consistency, where it coats the back of a spoon fairly thinly. At this stage, the lime curd can be strained into a jar / container and stored in the fridge to chill.
- However, for a thicker lime curd spread – You can cook the lime curd further to thicken it more to a slightly translucent consistency. This can take up to a further 5 – 8 minutes (depending on the stove and pot used). The curd will reach 210 – 212°F, and may simmer, so it's important to keep whisking. Make sure you're CONSTANTLY whisking at a constant pace to prevent the lime curd from scrambling or splitting.
- As soon as the lime curd reaches the right consistency, strain it immediately into a jar or container. Then put a plastic wrap on top, touching the whole surface of the lime curd (to prevent a skin from forming on top), and let it cool down slightly. You also have the option of using an immersion blender to briefly blend it to make sure the curd is homogenous.
- Let the lime curd chill overnight in the fridge. I don't like to place hot lime curd in the fridge, but I don't like to keep the curd at room temperature for too long either. So, transfer it to the fridge within 30 – 60 minutes of making it.
- Use as needed. The lime curd will keep for up to 7 days in the fridge, or 2 months in the freezer.
Nutrition Information:
“This website provides approximate nutrition information for convenience and as a courtesy only. Nutrition data is gathered primarily from the USDA Food Composition Database, whenever available, or otherwise other online calculators.”


Leave a Reply