




This fresh tomato tart is the ultimate tribute to summer! A simple pâte brisée (buttery shortcrust pastry) crust, with a thin layer of good quality dijon mustard, topped with fresh tomato slices, and a sprinkle of salt and cheese on top. You only need 4 basic ingredients, but you have lots of ways to upgrade the flavor too!
You can make this with store-bought tart crust dough, or pie crust, or even puff pastry too. And you could even make it without a tart pan in the style of a rustic galette. I give all the tips and details on how to do so!
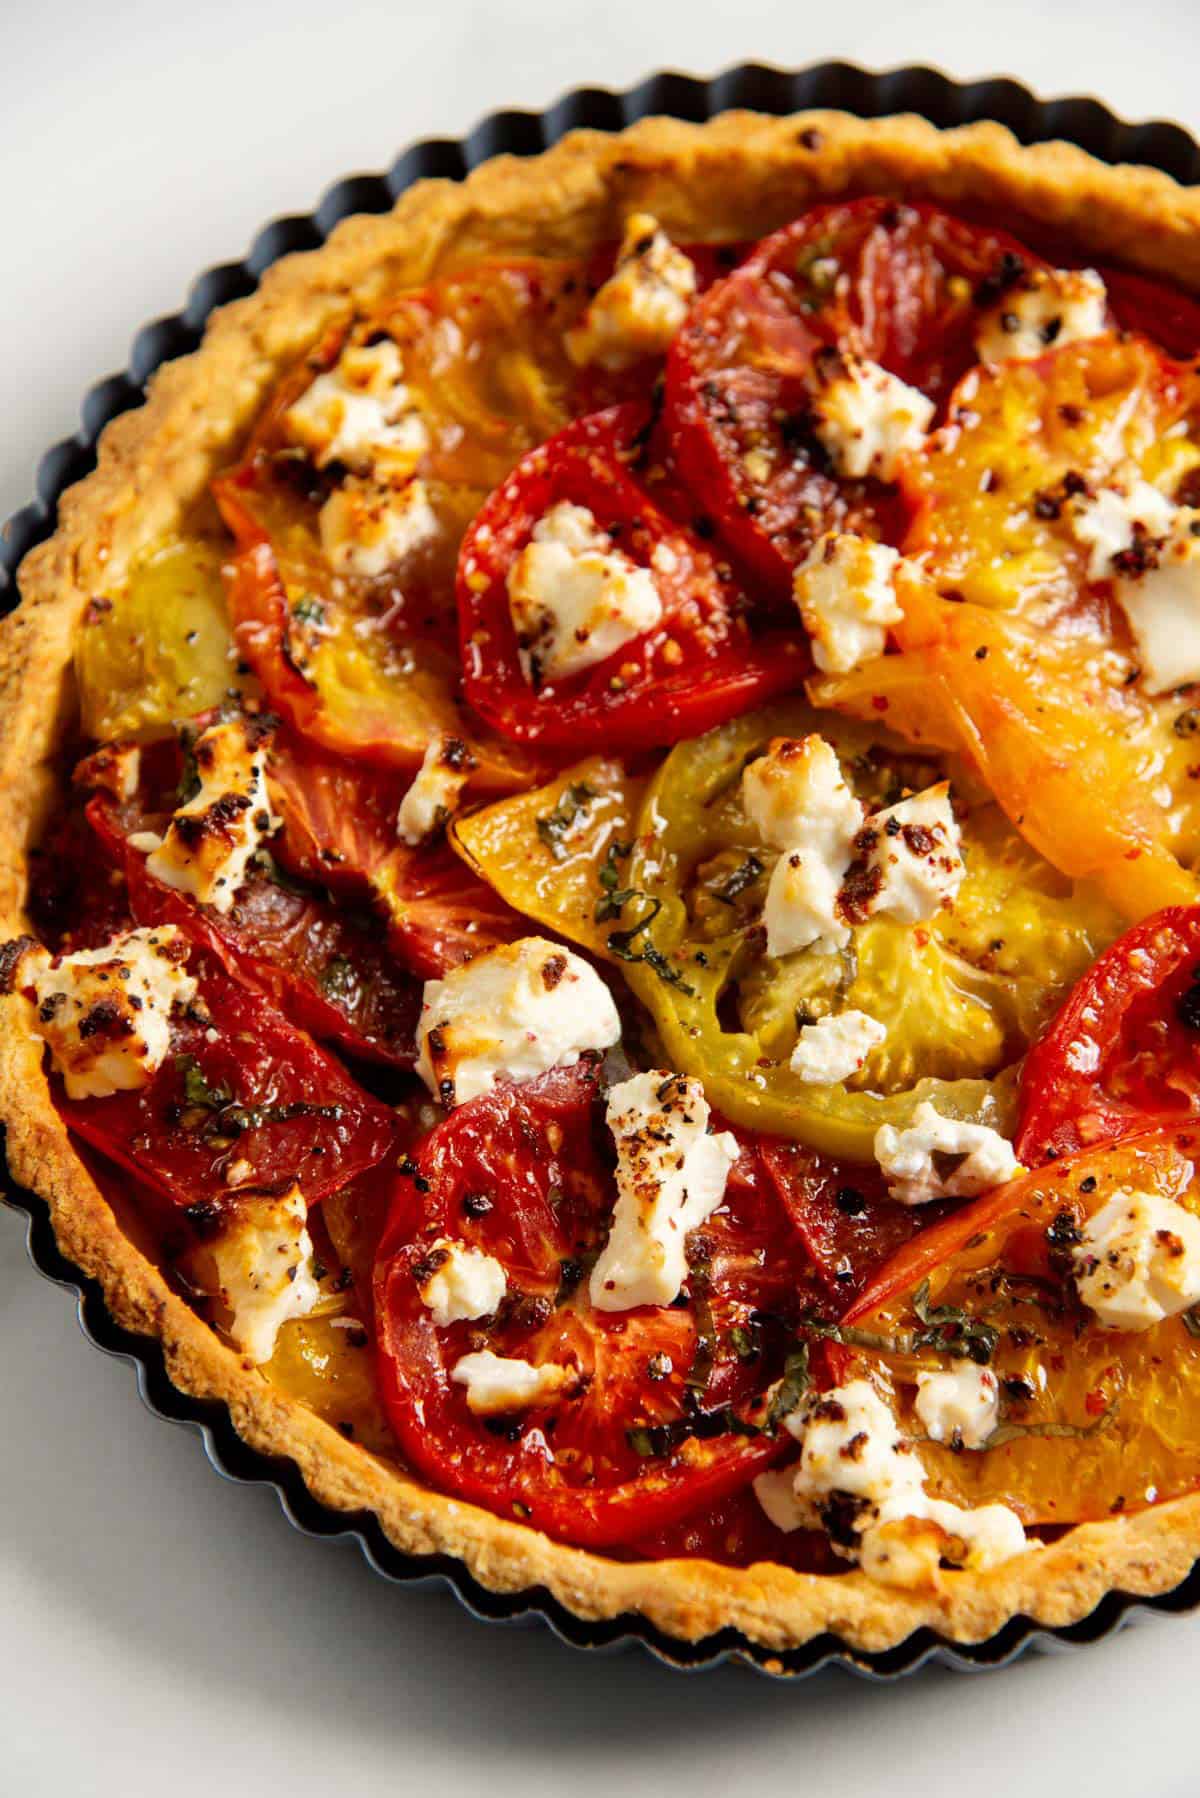
I’ve been wanting to share this tomato tart with you guys pretty much every day for the last three months! And I’m finally getting to it. It’s better late than never, and the tomatoes in my garden are still going strong, so I think there’s still lots of time and room for this little masterpiece in your kitchen.
In French, this tart is called tarte à la tomate, and this tomato tart doesn’t really divert too much from the classic. The combination of fresh tomatoes, mustard, and cheese is always guaranteed to work!
Why this recipe works

- Such a simple recipe to put together.
- This tart is honestly the most glorious way to serve and highlight summer tomatoes and their fresh flavor!
- While I do make the tart dough from scratch here, you can make this with store-bought crust as well.
- You can make this with a tart pan, OR as a galette (a rustic tart) without a tart pan.
- The tart filling only needs 4 ingredients, but you have the option of elevating the flavor with a few other ingredients as well, IF you prefer.
I always wait for my heirloom tomatoes and slicing tomatoes to ripen just to make this tart! In fact, I like to use unripened tomatoes with my ripened tomatoes here too for a lovely contrast in flavor and color.
Ingredients for this tomato tart
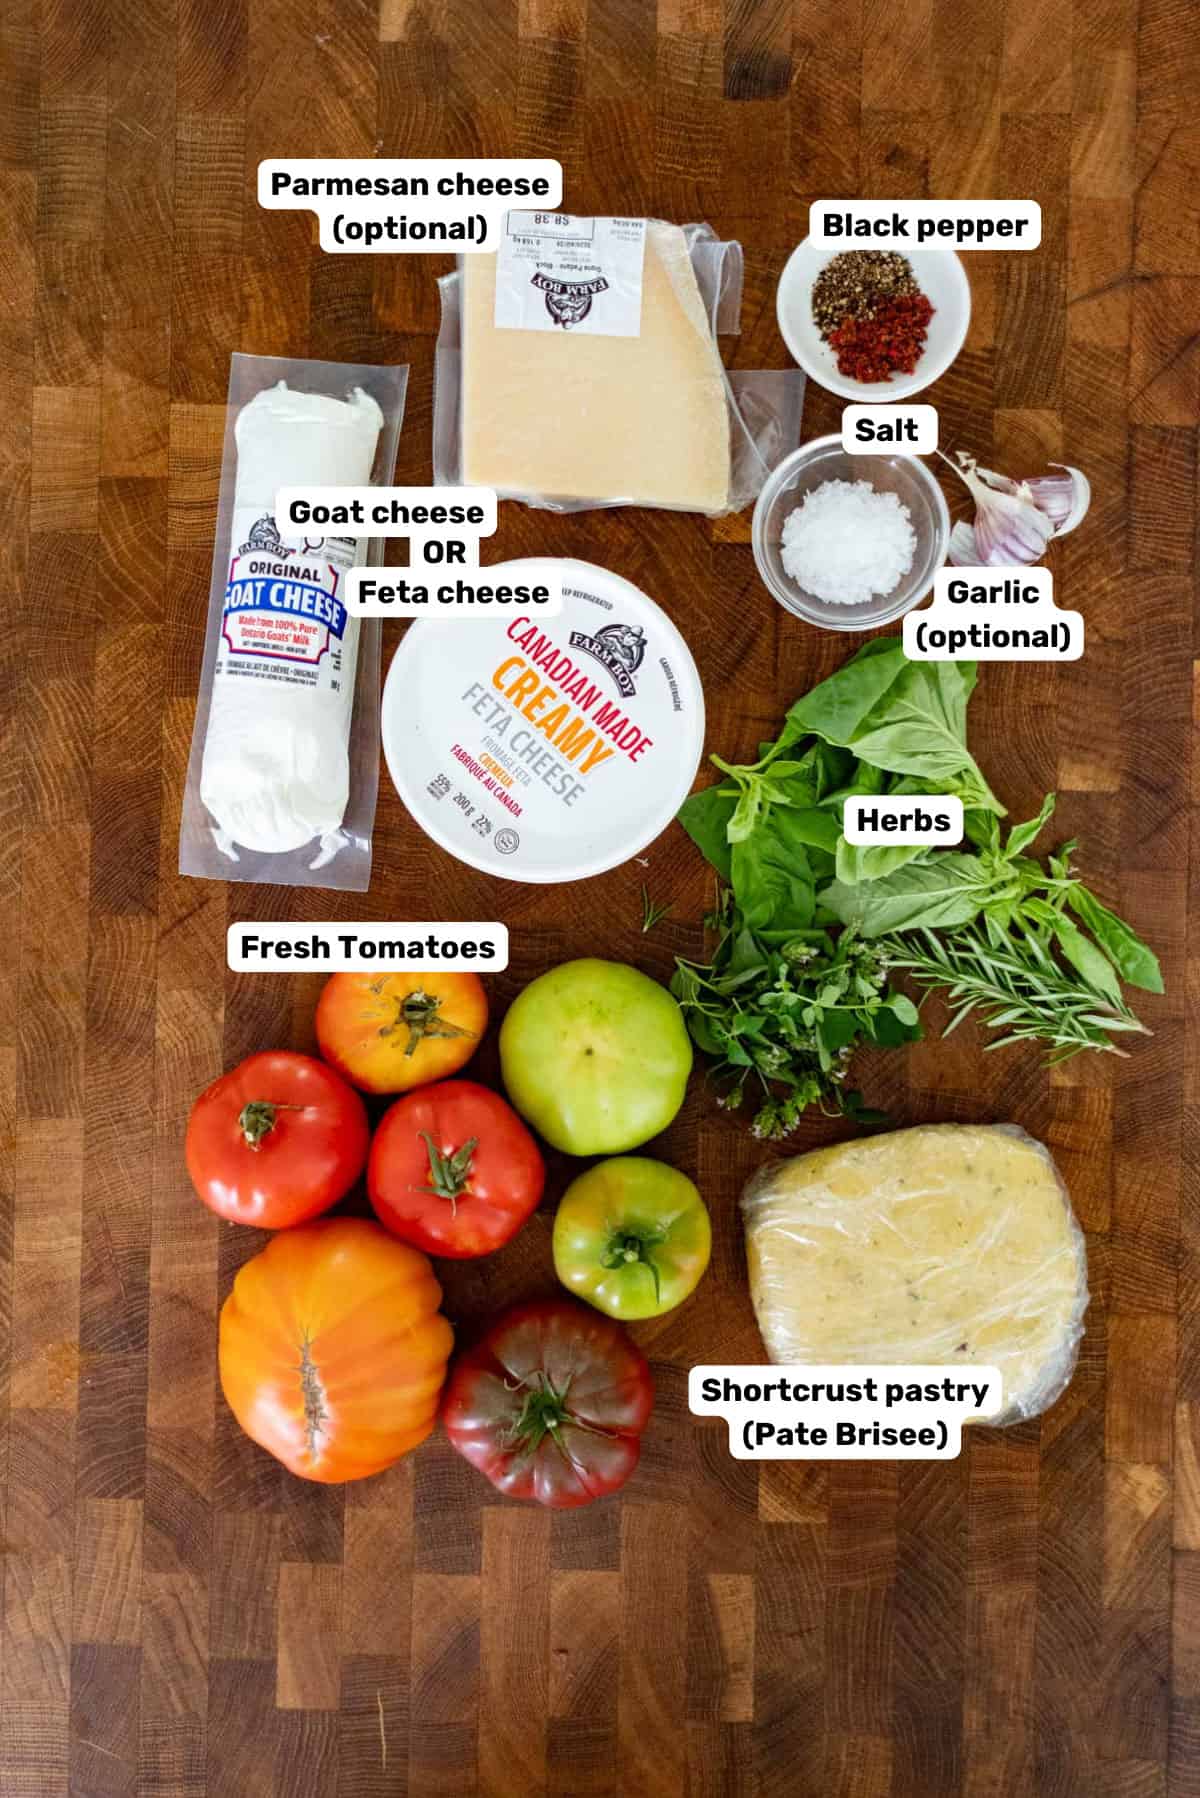
- Tomatoes – Since this tart is all about the tomatoes, make sure they have a lot of flavor! I use a combination of heirloom tomatoes and slicing tomatoes, but you can also use cherry tomatoes in this recipe.
- Mustard – Use a good quality dijon mustard. You can use old fashioned (stone-ground) dijon mustard or a smooth dijon mustard. There are also other types of dijon mustard that are infused with wine or other flavors. You can use these too if you like. Just make sure the mustard has a strong, sharp flavor.
- Salt – Brings out the flavor of the tomatoes.
- Cheese – I’ve used feta cheese on one of the tarts here, and goat cheese on the other tart. The salty-sharpness of both complements the tomato flavor. However, the feta cheese I used was a Canadian creamy feta cheese, which I definitely prefer! The creamy saltiness goes perfectly with the tomatoes.
- Honey – This is optional, but it also helps bring out more tomato flavor!
- Shortcrust pastry (pate brisee) – I make my own pate brisee here, but you can use store-bought shortcrust pastry as well (NOT a sweet pâte sucrée type crust). I actually added chopped oregano to the pastry dough as well to add more flavor to the tart!
Other ingredients to add even more flavor
- Herbs – Herbs are a great way to add more fresh flavor to your tomato tart.
- Basil
- Oregano
- Thyme
- Parsley
- Herbes de provence
- Chili – chopped fresh chili for some heat.
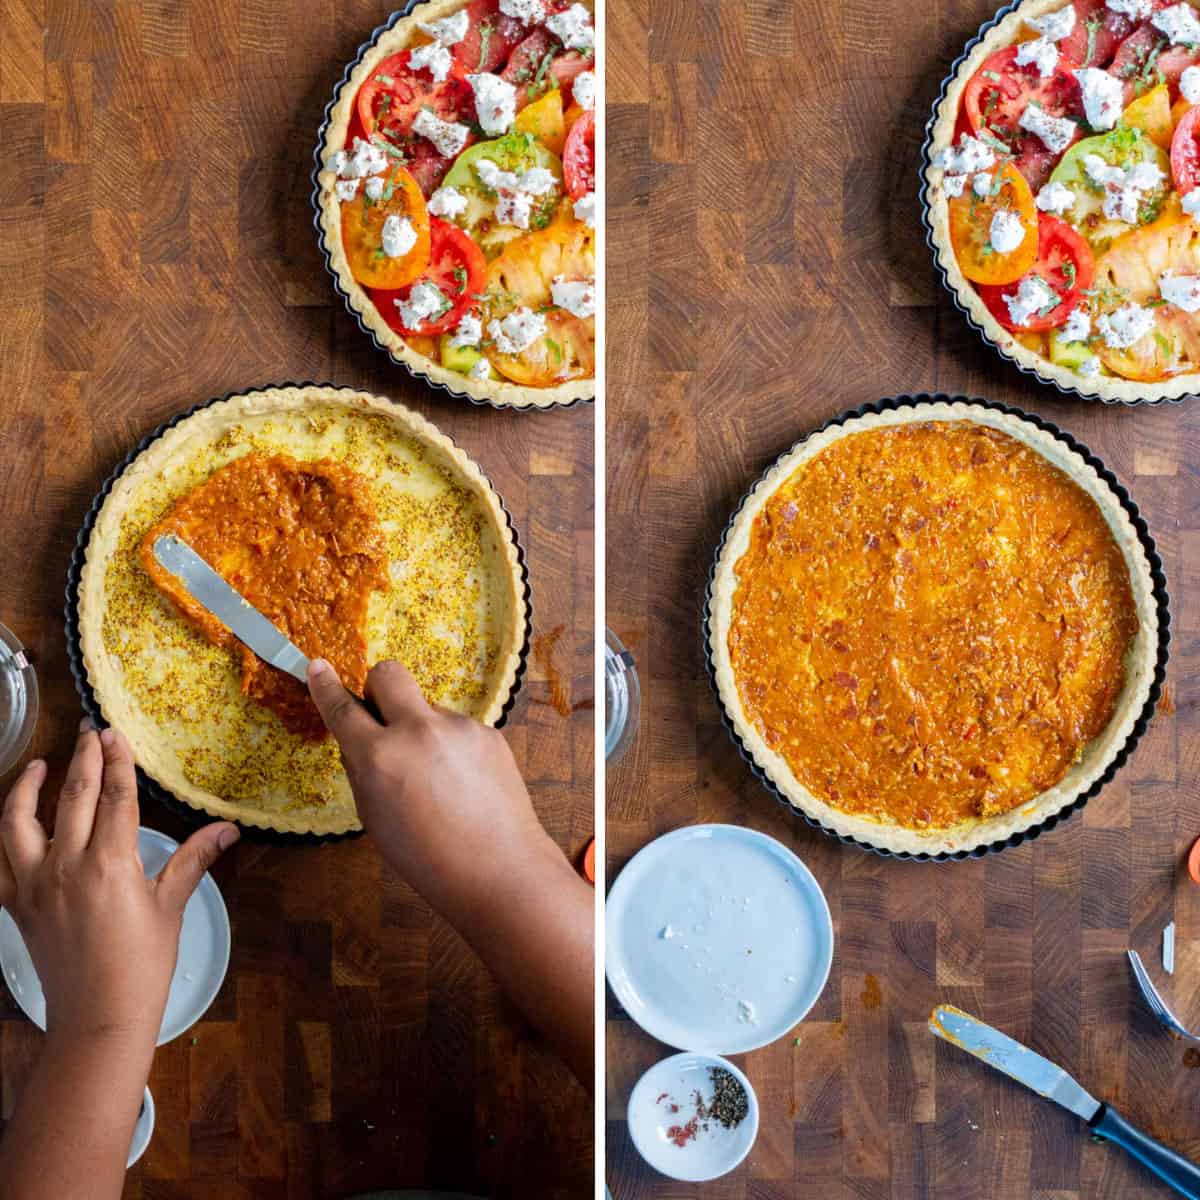
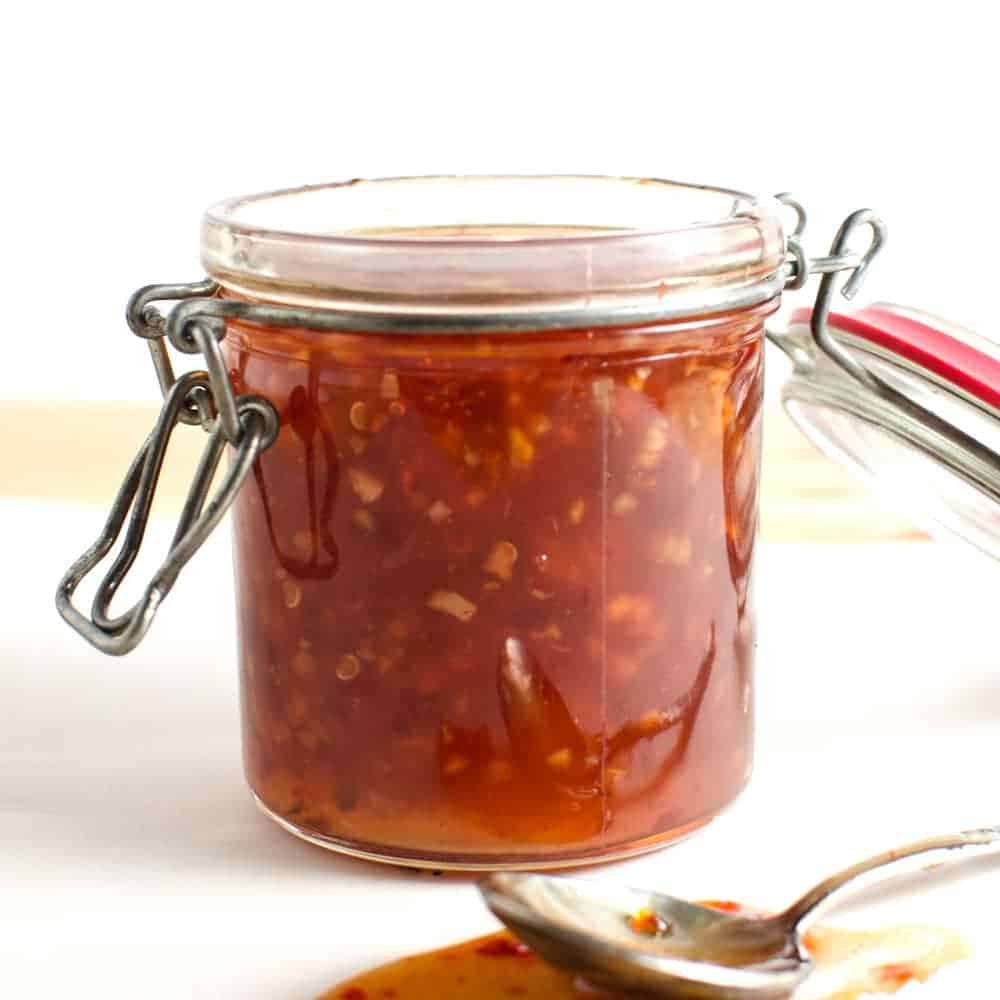
- Pepper jelly or tomato jam – Spread with the mustard on the bottom of the tart. I used my bacon tomato jam here on one of the tarts.
Ingredient notes and substitutions
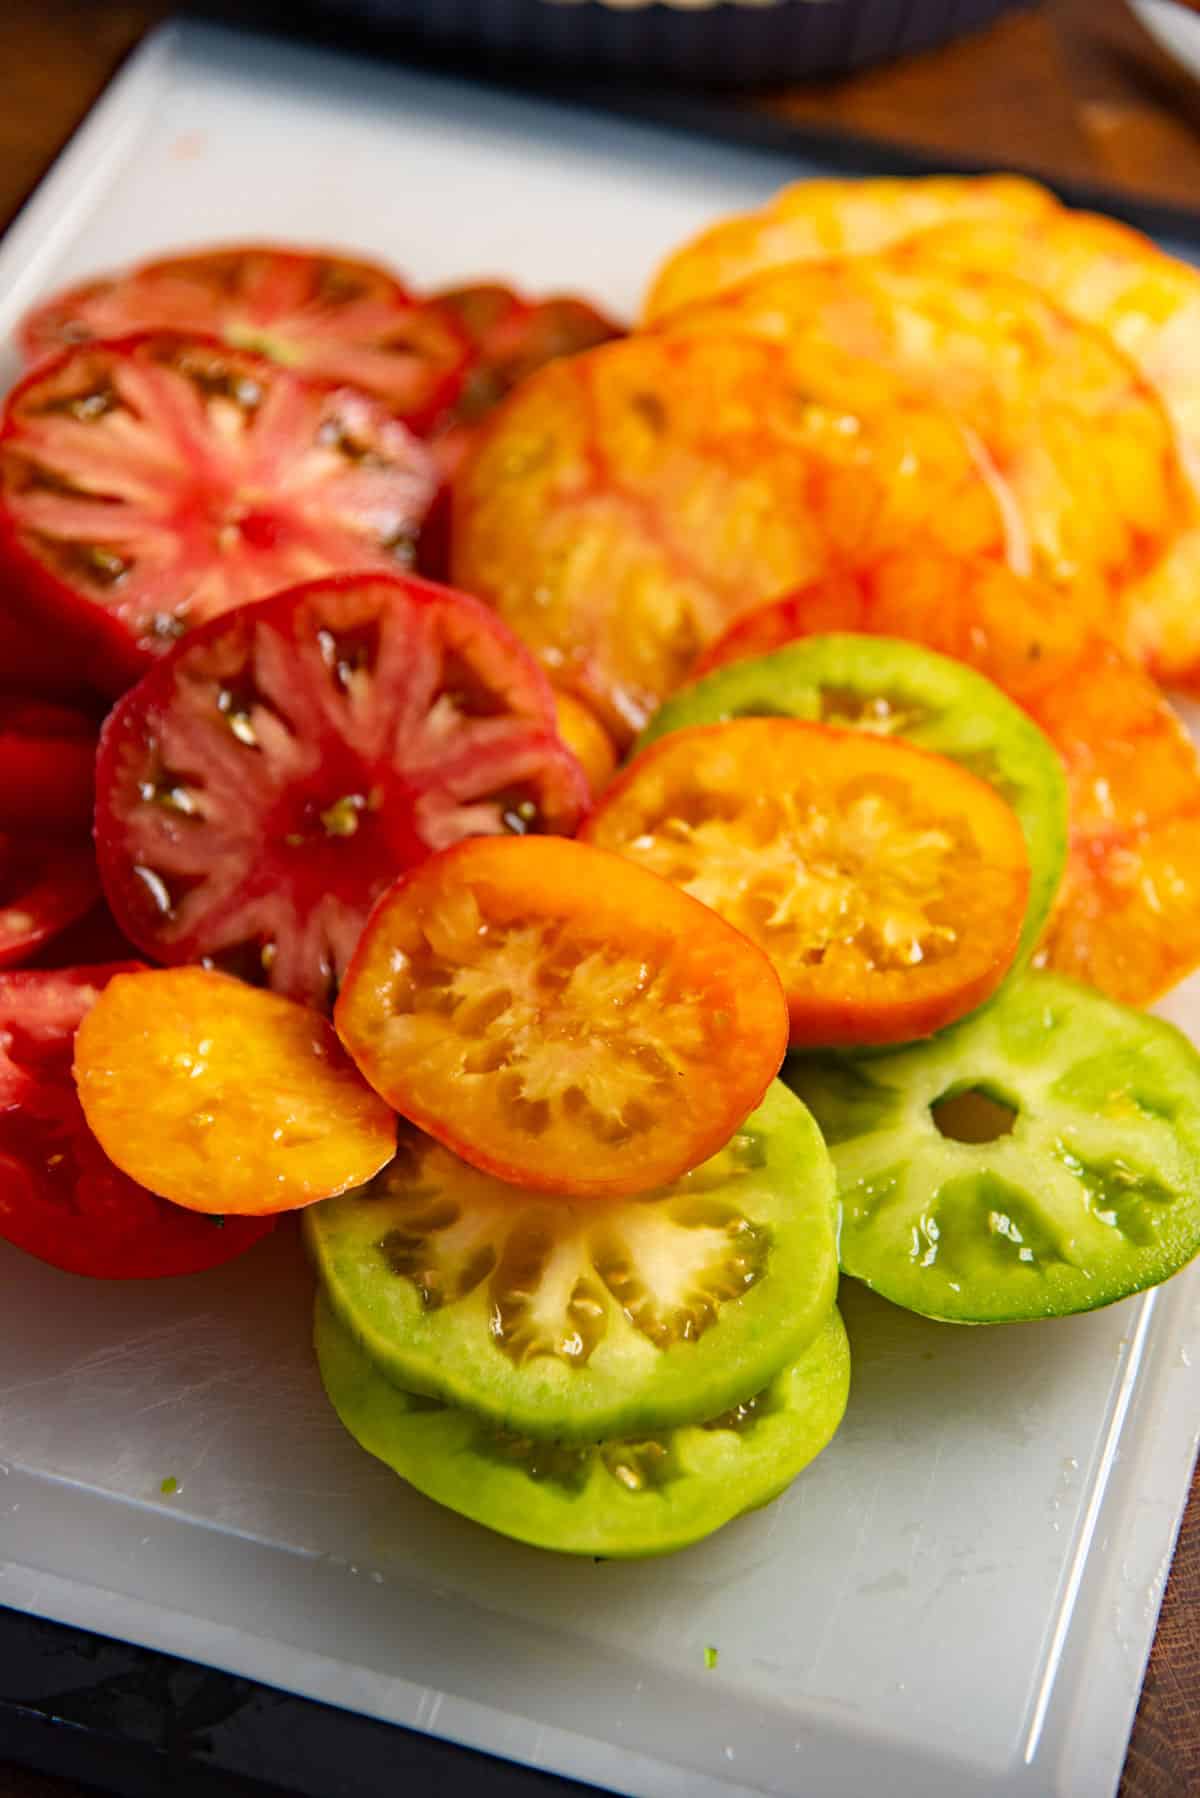
- Tomatoes – It’s the main ingredient of course, and fresh tomatoes are a must. I do not recommend using canned or frozen (and thawed) tomatoes here. Use perfectly ripe, firm tomatoes that have good flavor. Here, I’m using black krim, pineapple tomato, and another slicing tomato that I grew in my yard, as well as an unripened tomato, because I love the sourness of it.
- Cheese – I used a salty and creamy cheese here. The feta was exceptionally creamier than the goat cheese, so it was my favorite pick. However, I’ve also made this tart with cheddar cheese on top, and it’s absolutely delicious! I’ve also added parmesan cheese on the bottom of the tart crust as it was parbaked to add flavor, and to act as a barrier between the crust and the filling.
- Salt and honey – Salt and honey act as seasoning. Honey isn’t required, but I highly recommend it. Instead of honey, you can also use white sugar or brown sugar. Both the salt and sweetness bring out the flavors of the tomato.
- Pate brisee – I make my own tart crust here. It’s a French shortcrust pastry called pâte brisée. It’s a flexible crust that has no sugar or sweetness in it. So, you can use this neutral-flavored crust for savory or sweet applications. For this, I added chopped herbs to complement the tomato flavor, and to add extra savory flavor to the tart. A homemade tart crust certainly amps up the flavor, but you can absolutely take shortcuts, if you prefer.
- Use store-bought shortcrust pastry (not the sweet kind).
- You can also use a non-sweet pie crust dough (like this all butter pie crust).
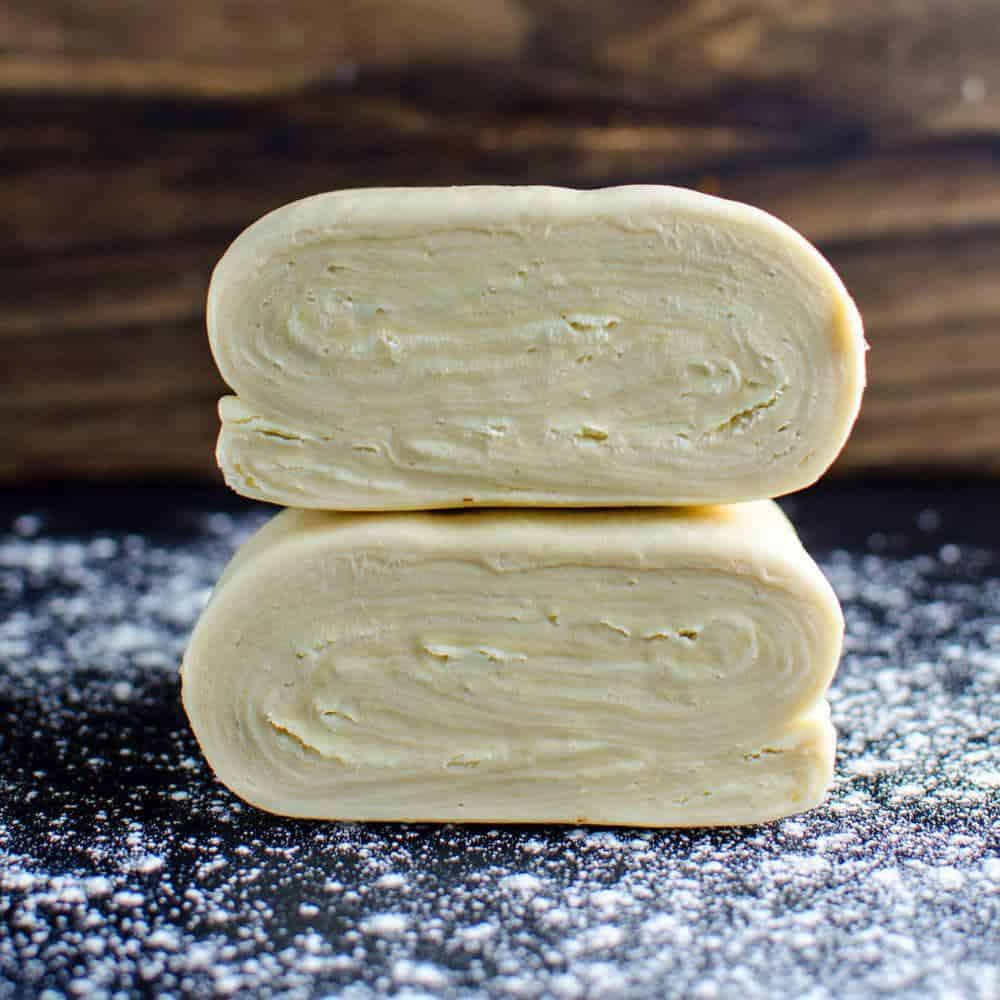
- Puff pastry (homemade rough puff pastry or store-bought)
How to make classic tomato tart
Step 1 – Make and bake the crust
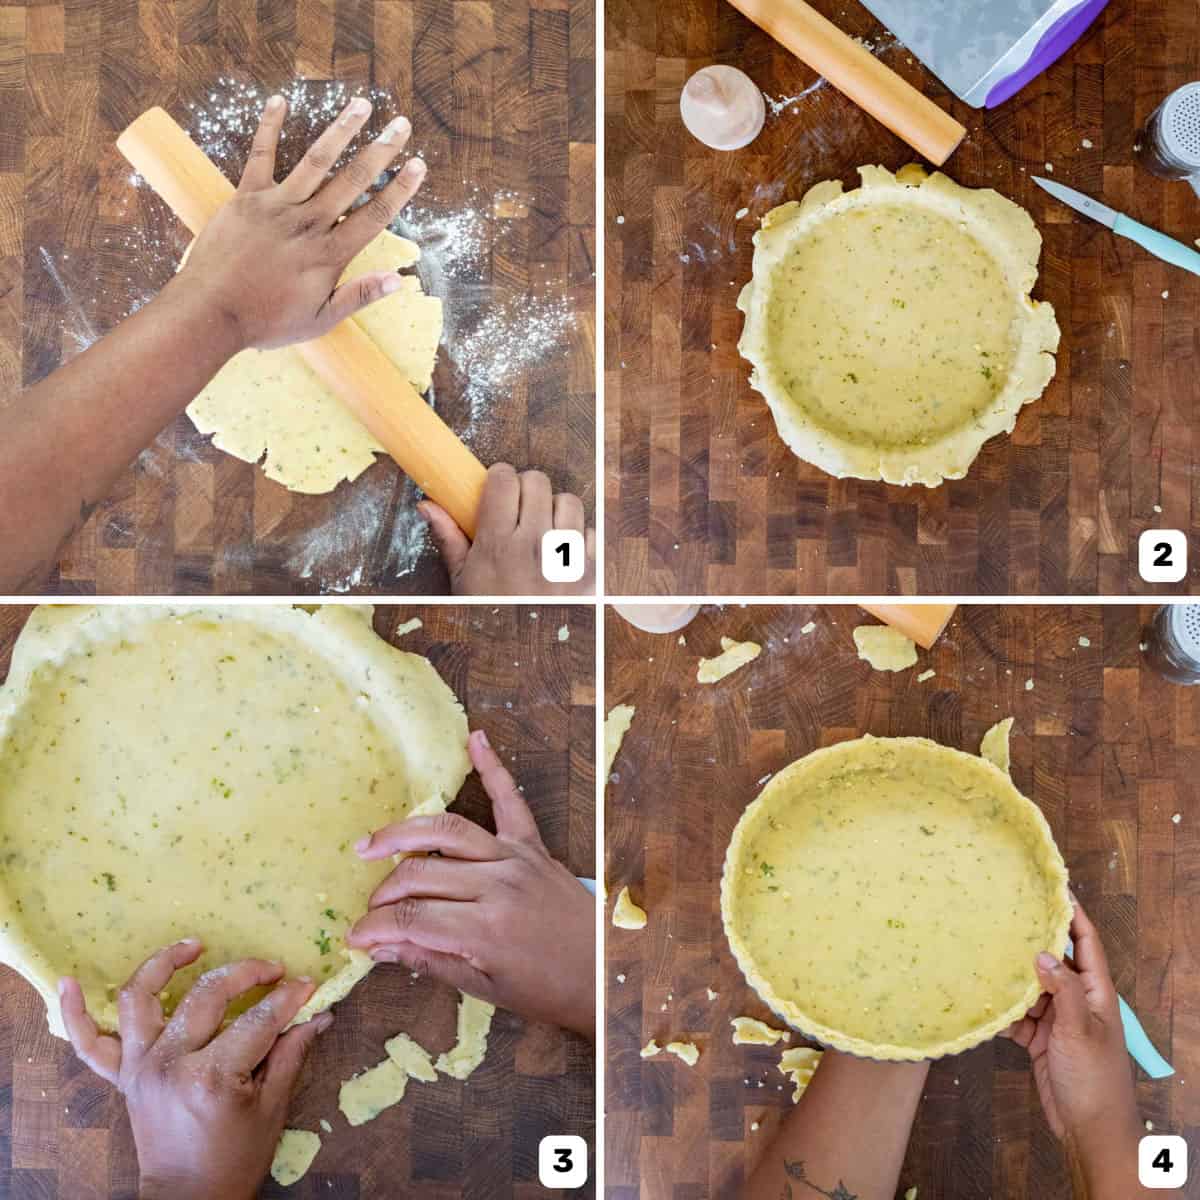
I made this shortcrust pastry from scratch. I used pate brisee as the tart crust. The dough was rolled out (image 1) and lined in a 9 inch tart pan.
After fitting the crust into the pan (image 2), I fold over the edges of the crust (about a 1 cm overhang) to create a thicker border along the sides of the tart pan (images 3 – 4). Then the excess is trimmed off by running a sharp knife along the edge of the tart pan. This creates a neat border.
I also add chopped herbs to the dough to flavor the tart crust even more. Here I added fresh oregano, but you can add parsley as well.
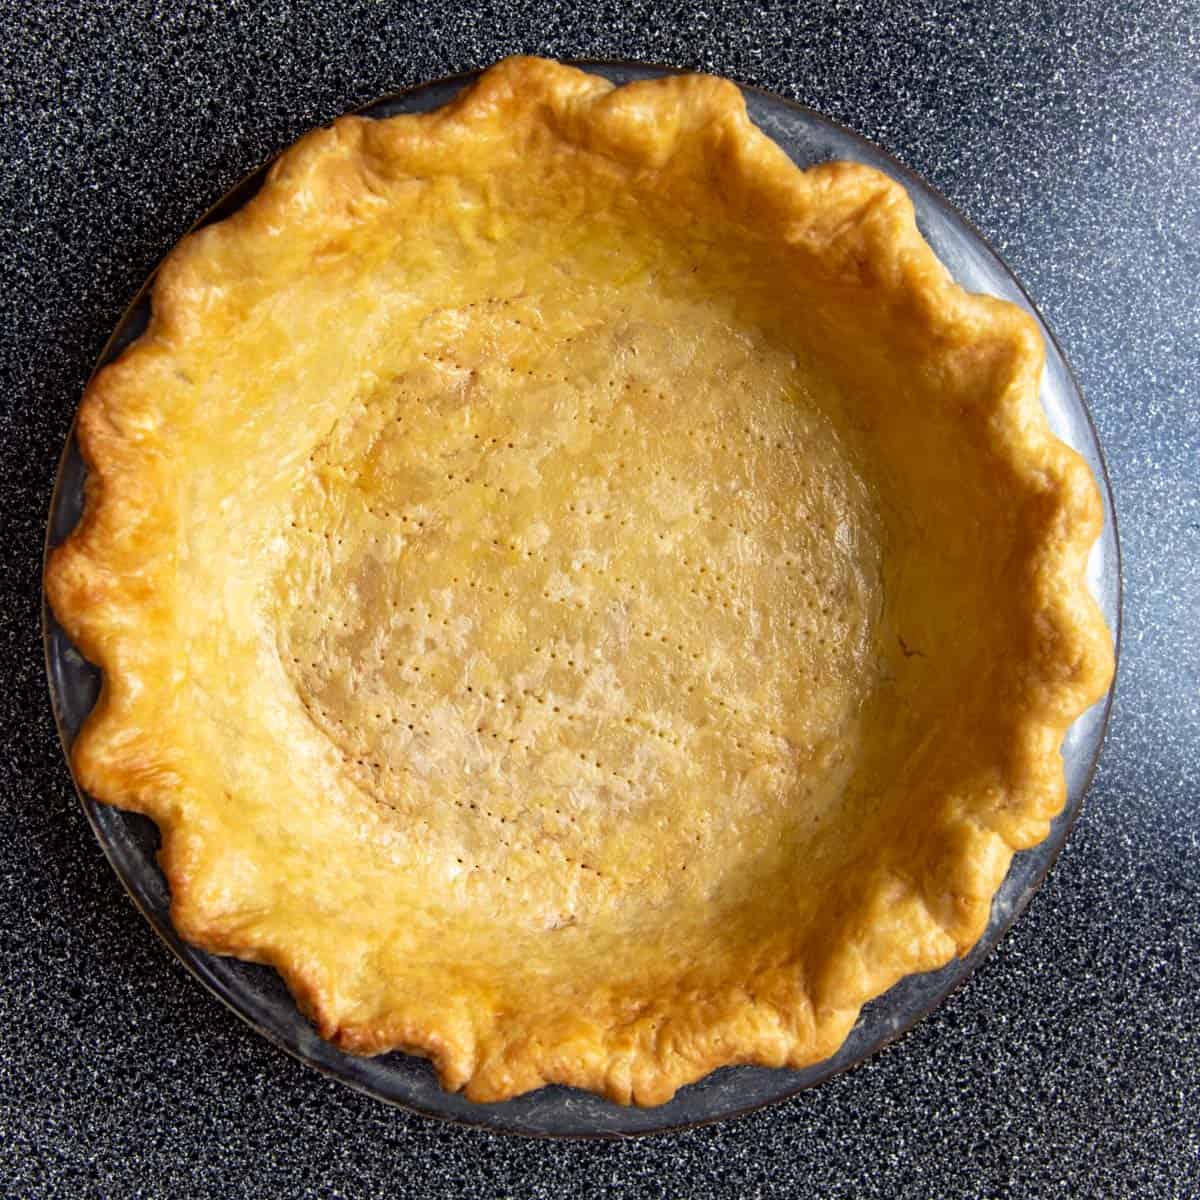
Then, I par-bake the tart crust dough before adding the tomato slices as the filling. If there are any holes in the crust, you can also grate some parmesan or cheddar cheese on top and let it melt in the oven to “seal” any cracks or holes (images 5 – 8).
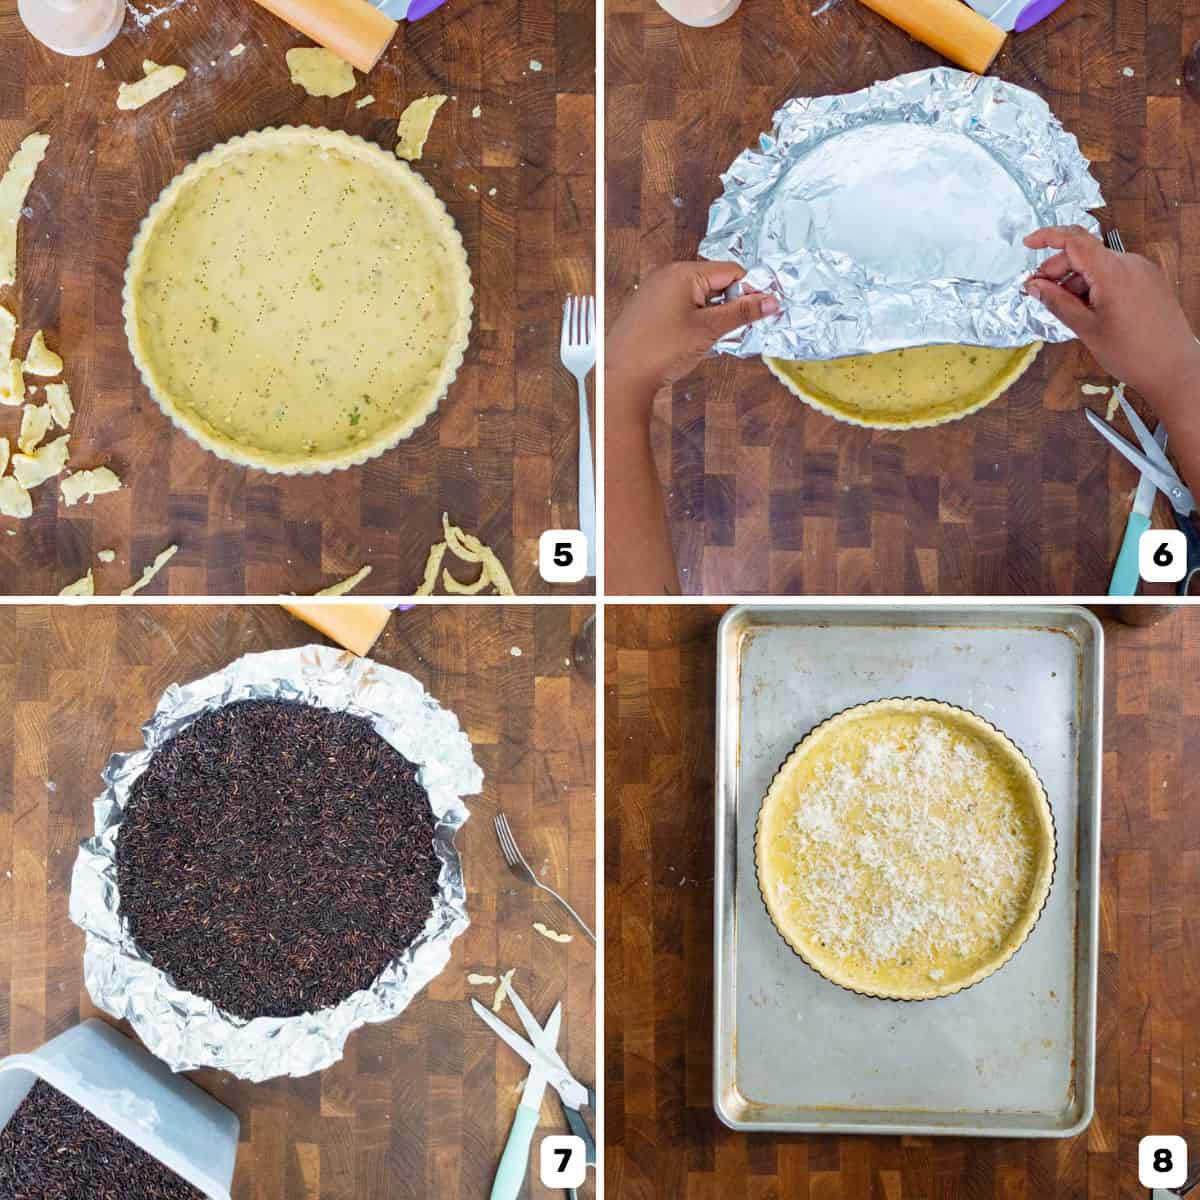

Parbaking – Parbaking is to partially bake a pie crust / tart crust. I go into more detail about this in my how to blind bake pie crust tutorial.
By partially baking the crust, the dough firms up and retains its final shape. Plus, it helps to prevent a soggy crust when it’s baked with the tomato slices.
If you don’t have a tart pan, or prefer to make a rustic galette style tomato tart, you can skip to this section that outlines how to make a rustic tomato tart, without parbaking the dough, and without a tart pan.
Step 2 – Prepare the tomatoes and other ingredients (if using)
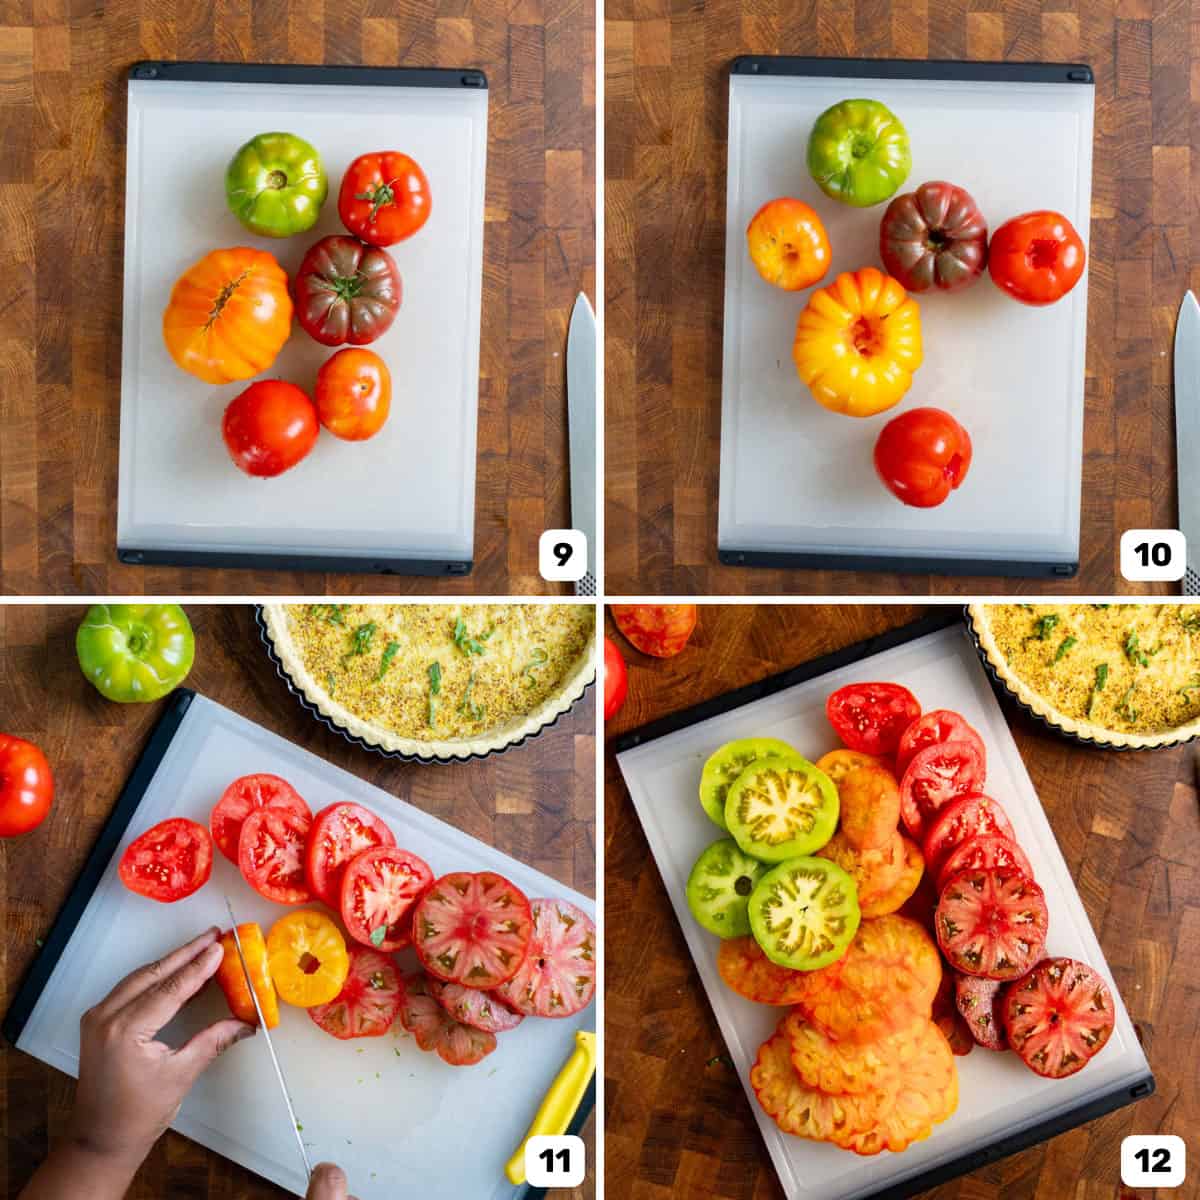
Wash and pat dry the tomatoes (image 9). Use a small paring knife to hull out the small stem area of the tomato (image 10). Then using a very sharp knife, slice the tomatoes horizontally (parallel to the stem), with a thickness of about 3/4 – 1 cm. Not too thick, and definitely not thin (image 11).
Place the tomato slices on a plate or cutting board and sprinkle a little salt on top and leave it aside for about 5 – 10 minutes, while you prepare the other ingredients (image 12).
Chop some herbs and chili (if using).
Step 3 – Prepare the tart
Spread a thin and even layer of mustard over the bottom of the tart crust (images 13 – 14). Optionally, sprinkle some chopped herbs on top as well.
Then lay the tomato slices on top. The tomato slices can overlap slightly, but I prefer not to let them overlap too much in order to keep an even layer of tomatoes. Cut any remaining slices to fill up any gaps in the tart (image 15).
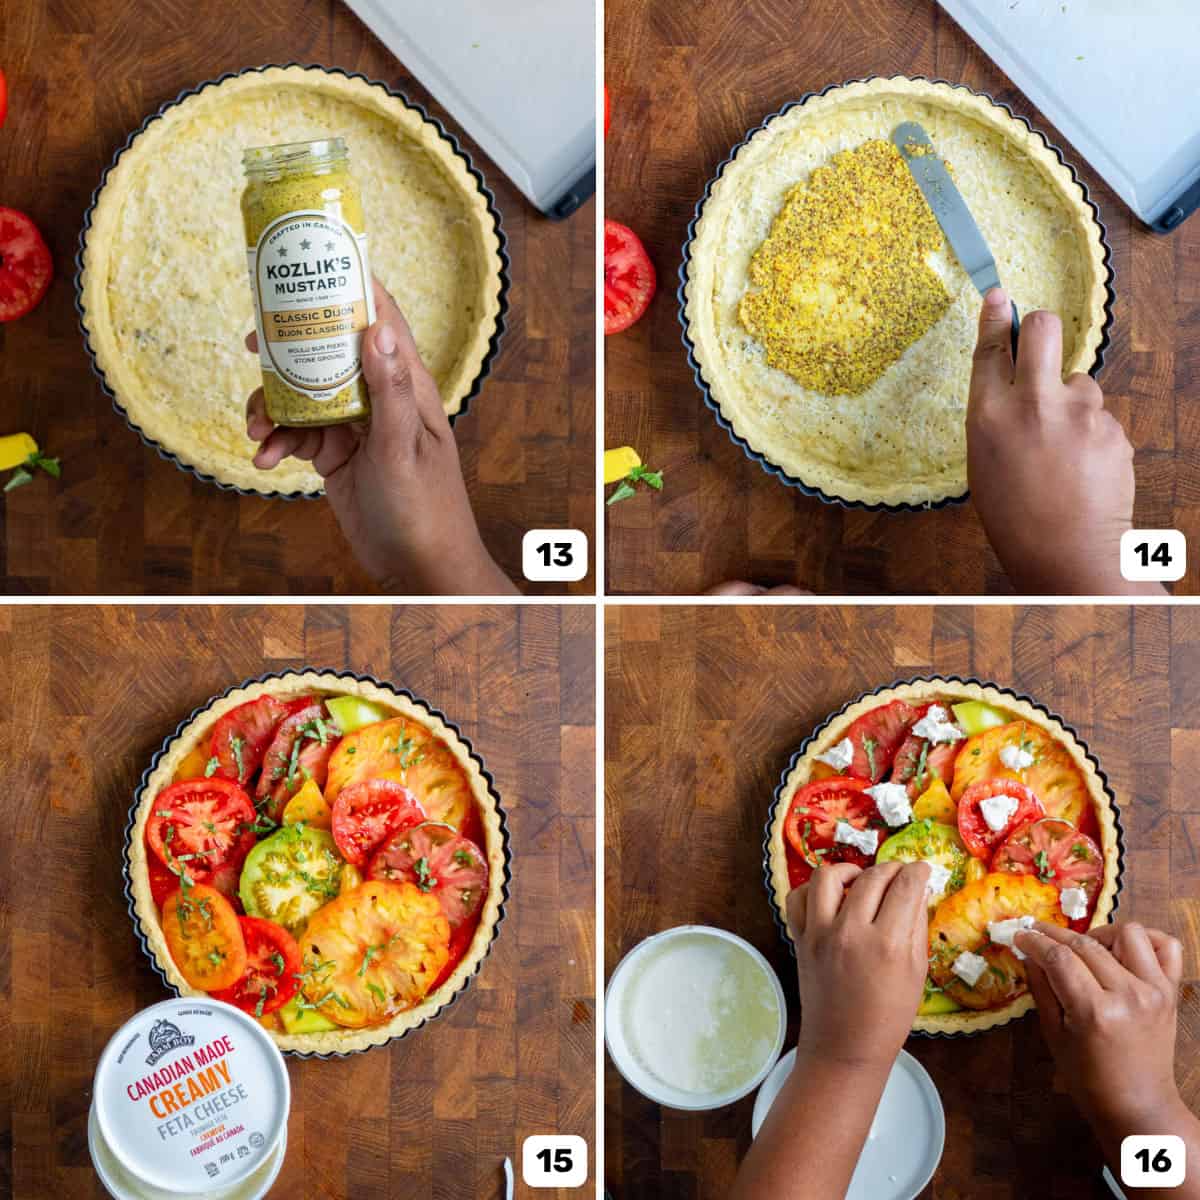
Cut the goat cheese or feta cheese into chunks and place them over the sliced tomatoes. They don’t need to be spread evenly, but dotted over the tart instead (image 16). Sprinkle more herbs on top if you like too!
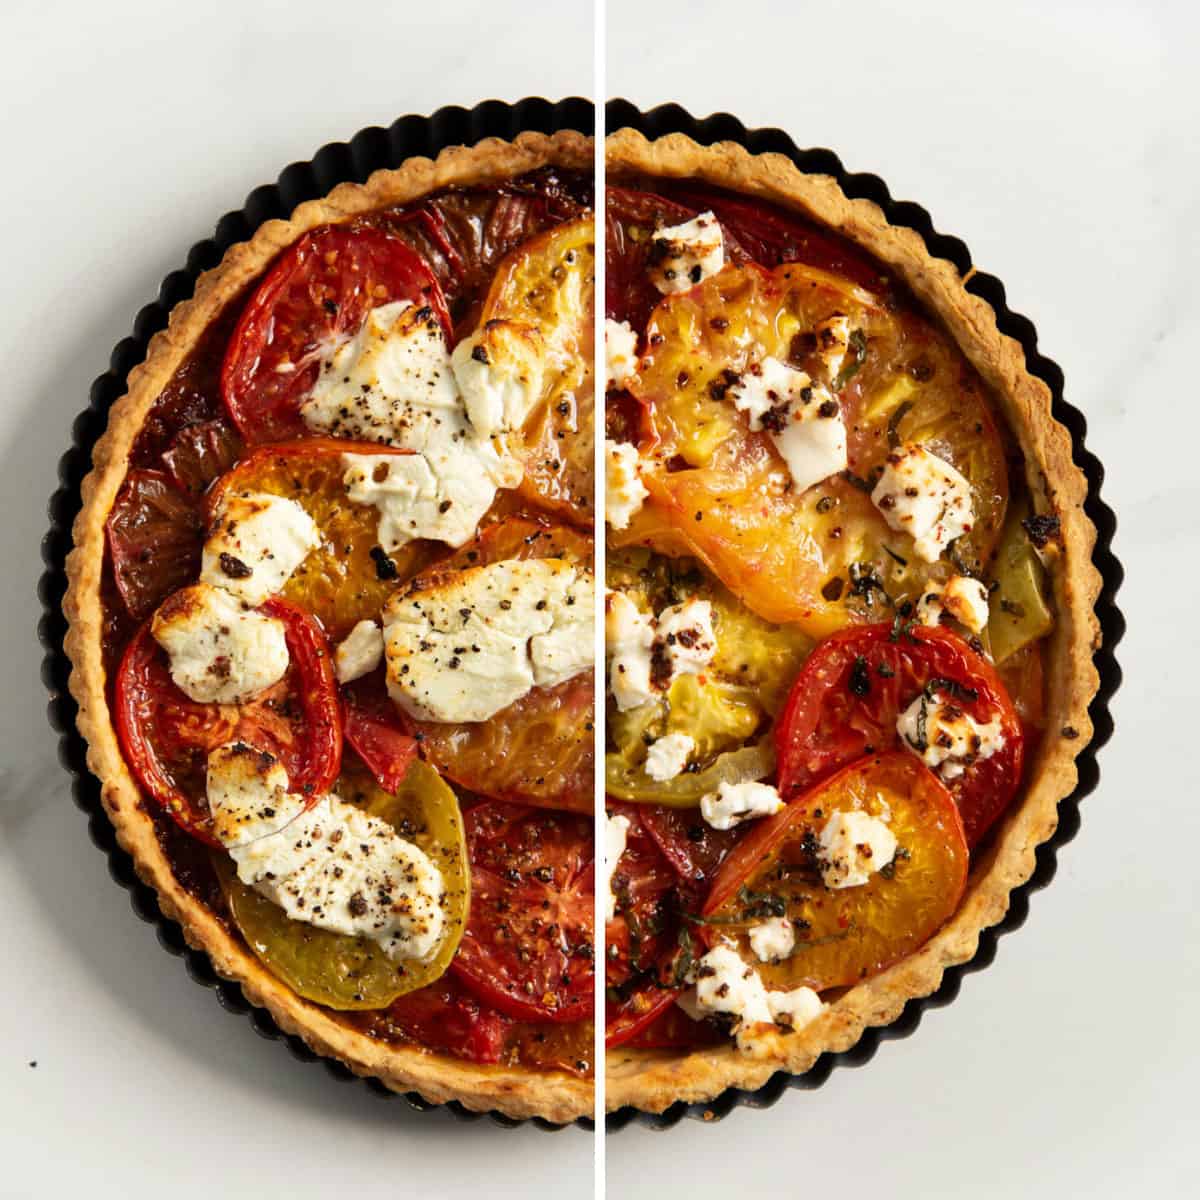
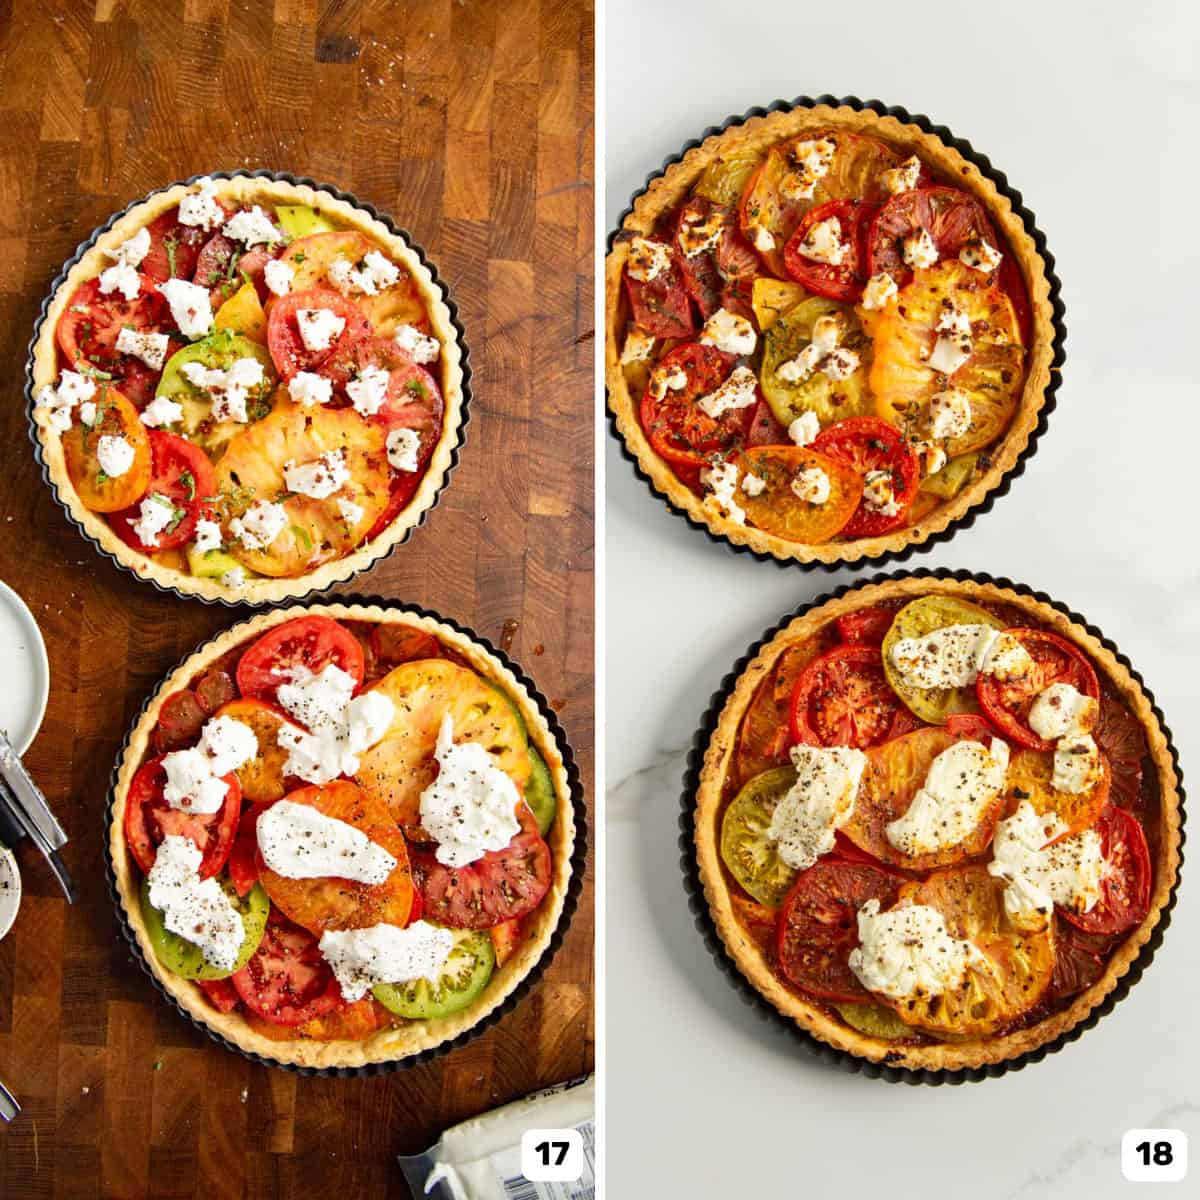
Image 17 shows you the two tarts I made – one with feta cheese and the other with goat cheese.
Step 4 – Bake the tart
Place the tomato tart on a baking sheet and transfer into your oven, in the lower third of the oven.
Bake until the crust starts to take on a golden brown color, and the tomatoes slightly caramelize at the edges, and so does the cheese.
Step 5 – Cool the tart (and final touches)
Once baked, remove the tart from the oven and let it cool down (image 18). If you try to remove the tart from the pan while it’s still piping hot, it’ll be very crumbly as the crust will still be soft.
While the tomato tart is still hot, drizzle some honey (or sprinkle a little bit of sugar) on top, and sprinkle any more herbs or black pepper on top too. A drizzle of olive oil is also great!
You also have the option of drizzling a little balsamic glaze! But make sure to only add the smallest drizzle because you don’t want to overpower the flavor of the tomatoes.
Allow the crust to cool down and become firm, and for the tomatoes to cool down as well.
Step 6 – Serve
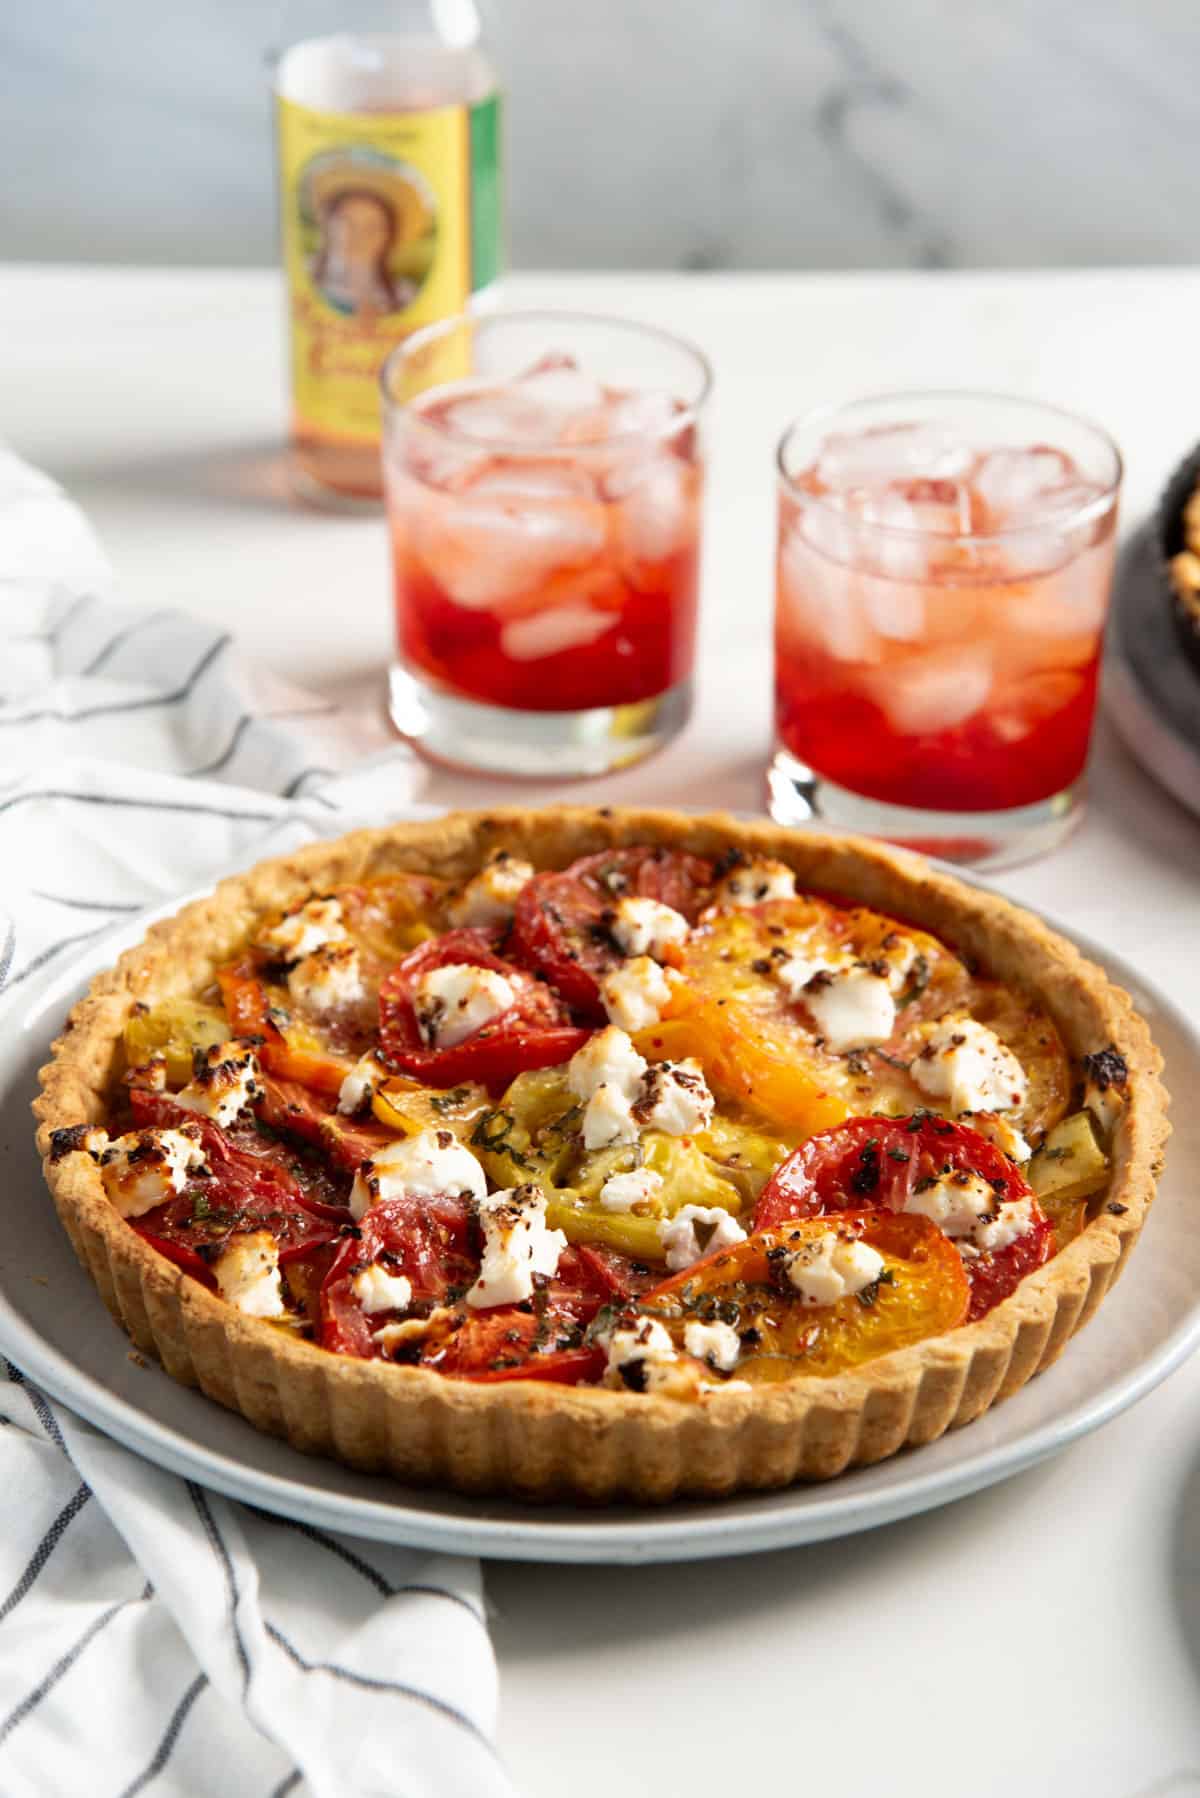
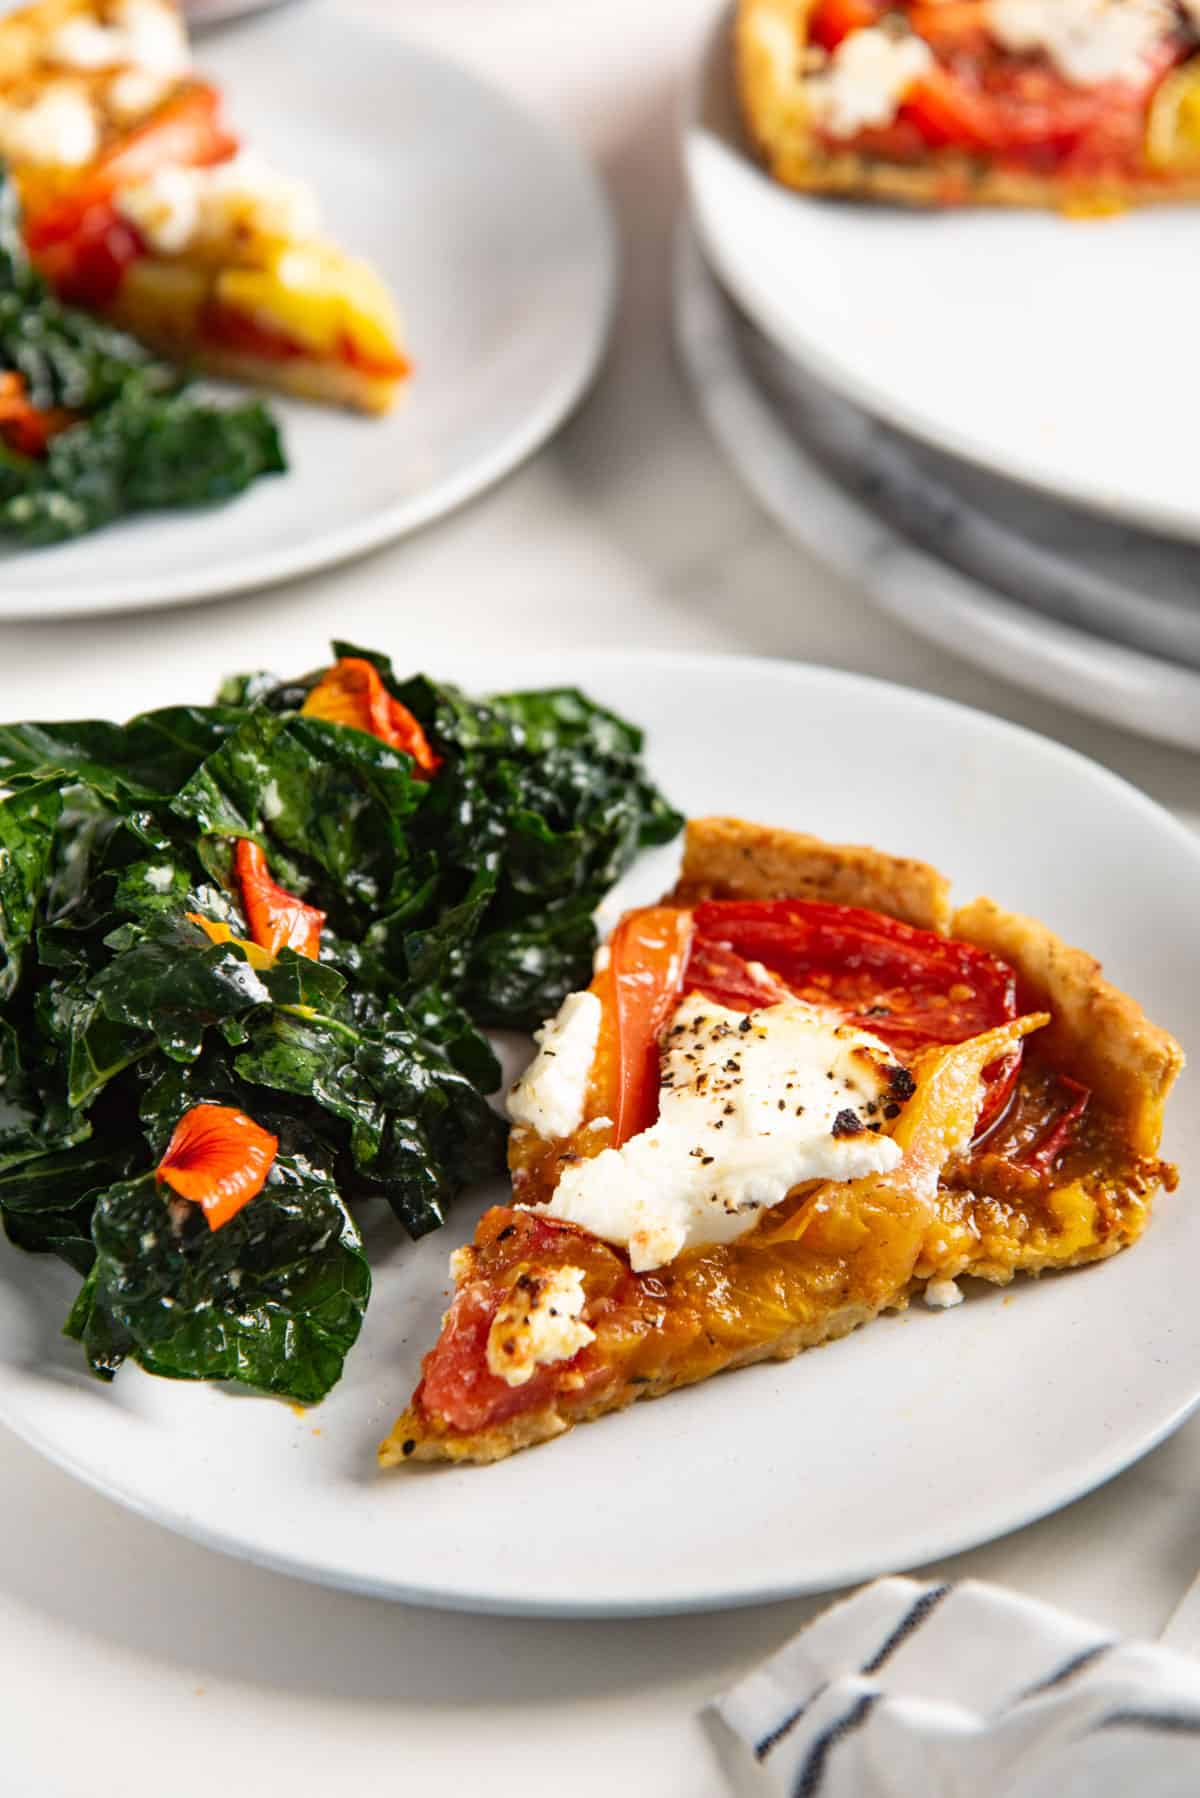
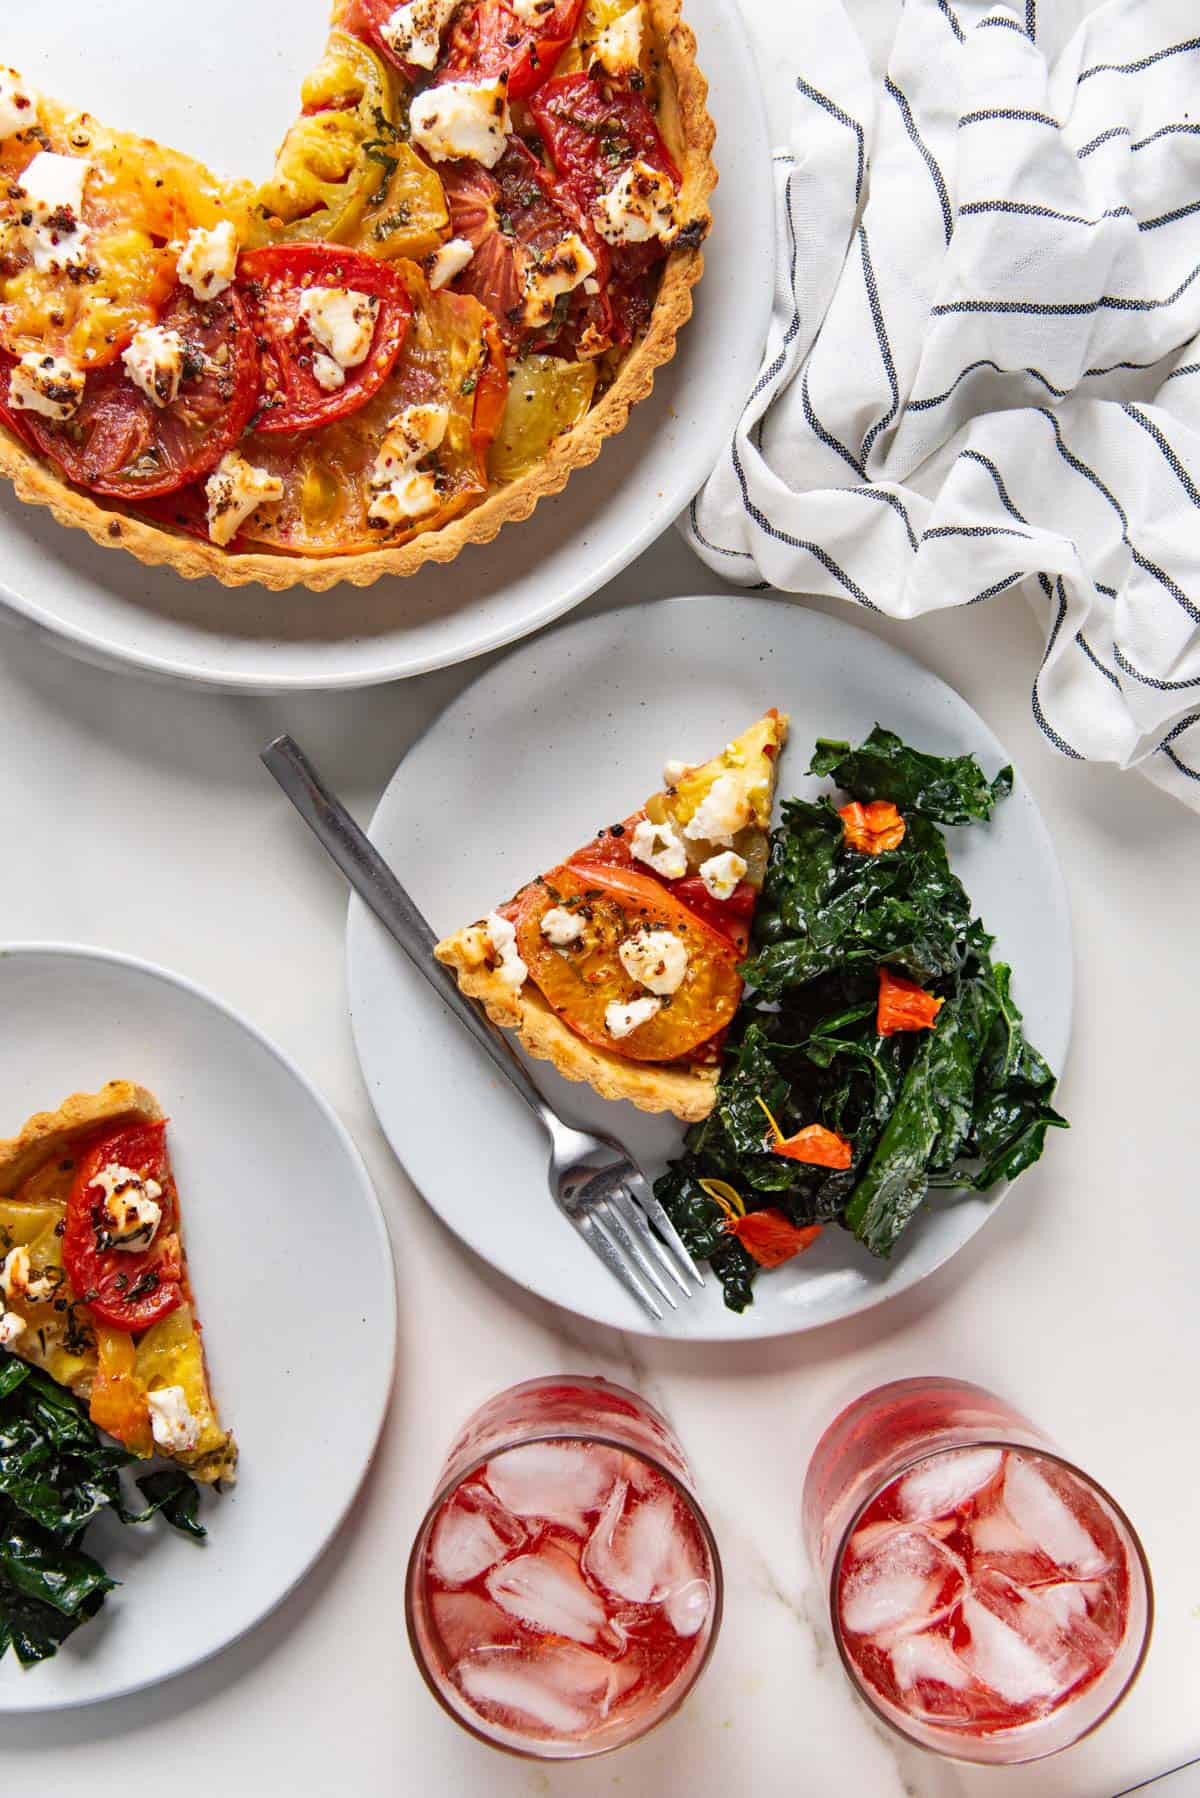
You can serve the tomato tart while still a little warm, or at room temperature. Serve as is, or with a side salad, like a caprese salad! I could never have too much summer tomato!
How to make a rustic tomato tart (without a tart pan)
Preheat the oven to 350 F / 180 C. Place the oven rack in the lower third of the oven with a sheet pan or a pizza stone on it and allow the sheet pan / stone to preheat thoroughly after the oven heats. (Pizza stones can take about 1 hour, and a sheet pan about 30 minutes.)
Roll out the dough into a large circle that’s about 3 mm thick. Place the dough on a parchment paper. The edges don’t have to look neat, but smooth out any jagged edges.
Spread an even and thin layer of dijon mustard on the dough, leaving a 1.5 inch border along the edge. To keep a barrier between the tomatoes and the crust, grate some parmesan cheese or cheddar cheese and thinly spread it on top of the mustard layer. Lay the sliced and salted tomato slices over the cheese layer. Follow with the feta cheese to dollop on top of the tomato slices.
Then fold the pastry border over the tomatoes, for a folded edge of about 1 inch. Optionally, you can brush the pastry edge / crust with an egg wash for a sheen as well.
Carefully transfer the tart with the parchment paper onto the preheated sheet pan. Bake until the crust is golden brown, and keep an eye on it to make sure the bottom isn’t burning.
Then remove the tart from the oven when baked through and let it cool down before serving.

This rustic galette method doesn’t involve par-baking the crust. This is because the crust doesn’t need to hold its shape on the sides like in a tart pan, where gravity can cause the sides to slide down.
Also, since we are baking this galette on a preheated sheet pan, closer to the bottom element of the oven, the galette does bake from the bottom as well to prevent an under-baked crust. The cheese also helps to keep the crust more crisp without getting soggy from the tomatoes.

My best recipe tips
- Use the best summer tomatoes you can get your hands on! This recipe relies solely on the tomatoes. IF your tomatoes don’t tase good, or you use the wrong type of tomato, the tart will be bland in flavor.
- You can use your garden tomatoes for this recipe. If not, tomatoes from local farmers will give you the best results. If neither is possible, you can use good slicing tomatoes or heirloom tomatoes from the grocery store for this recipe too.
- Dijon mustard tastes the best in this tart. But if you only have yellow mustard, you can use that too.
- You can use store-bought shortcrust pastry to make this recipe easier, if you prefer! But, if you do have time, making the crust from scratch makes a HUGE difference in flavor! It’s also not that difficult to make pate brisee!
- You can also use puff pastry for this recipe, but you cannot use puff pastry to line a tart pan. The pastry will puff up significantly as it bakes, and may not hold its shape in the tart pan.
- Parbaking the tart crust will prevent it from getting soggy. Spreading a layer of cheese between the tomatoes and the dough can also help prevent a soggy crust.
- Use a cheese that pairs really well with the acidity of tomatoes, and the crisp butteriness of the crust. My favorite is a creamy feta cheese! But I also love regular feta crumbly cheese, or goat cheese too. At the other end of the spectrum, a crumbly hard cheese like an aged cheddar will work really well if the cheese is melted on top.
Tomato tart variations
- Using different type of tomatoes – Here, I use sliced tomatoes, but you can use cherry tomatoes too! Halved cherry tomatoes or plum tomatoes will work in this recipe. I don’t recommend using paste tomatoes, but the taste will still be OK with them too.
- Adding different flavors on top of the tart – Drizzle the baked tomato tart with chili honey, balsamic syrup, herb oil, or chopped herbs to add more flavor to the tart.
- Different spreads on the bottom of the tart – Instead of the mustard layer (or along with the mustard layer), you can add other flavors with different spreads.
- I made a tomato tart with my bacon tomato jam spread on the bottom of the tart shell, which was spectacular (see image below)! But keep in mind that the jam along with the tomato slices could make the tart heavier for the crust.
- A spread of my bourbon tomato jam on the base of the tart.
- Pepper jelly spread on the bottom for a sweet and spicy flavor combo.
- Spreading pesto on the bottom for a more herby pesto and tomato tart.
- Using pie crust – I have also made this tart with pie crust (the mealy version of my all butter pie crust) which is very similar to pate brisee, but instead of lining a tart pan, I make a rustic galette instead.
- Using puff pastry – I’ve also made tomato tarts and tomato tartlets with puff pastry! But instead of lining tart pans, or making galettes, I place the tomatoes in the center and baked the pastry in the oven. The edges without any filling will puff up more than the center with the tomatoes, and make it look like a tart with “rustic edges”.
Delicious ways to serve this tomato tart
- Make mini versions (tomato tartlets!) of this tomato tart and serve as appetizers for parties and potlucks!
- The tomato tarts can be served along with a salad as part of any meal or snack.
- Serve poached eggs or over-easy fried eggs, or soft boiled eggs with the tarts for breakfast or brunch!
- If you want to add more protein,
- I also love serving this with a side of labneh or thickened Greek yogurt flavored with salt and garlic. It’s such a perfect light meal! The labneh also adds protein.
- A side salad with marinated beans and herbs.
- Refreshing, citrusy chicken salad with the tart.
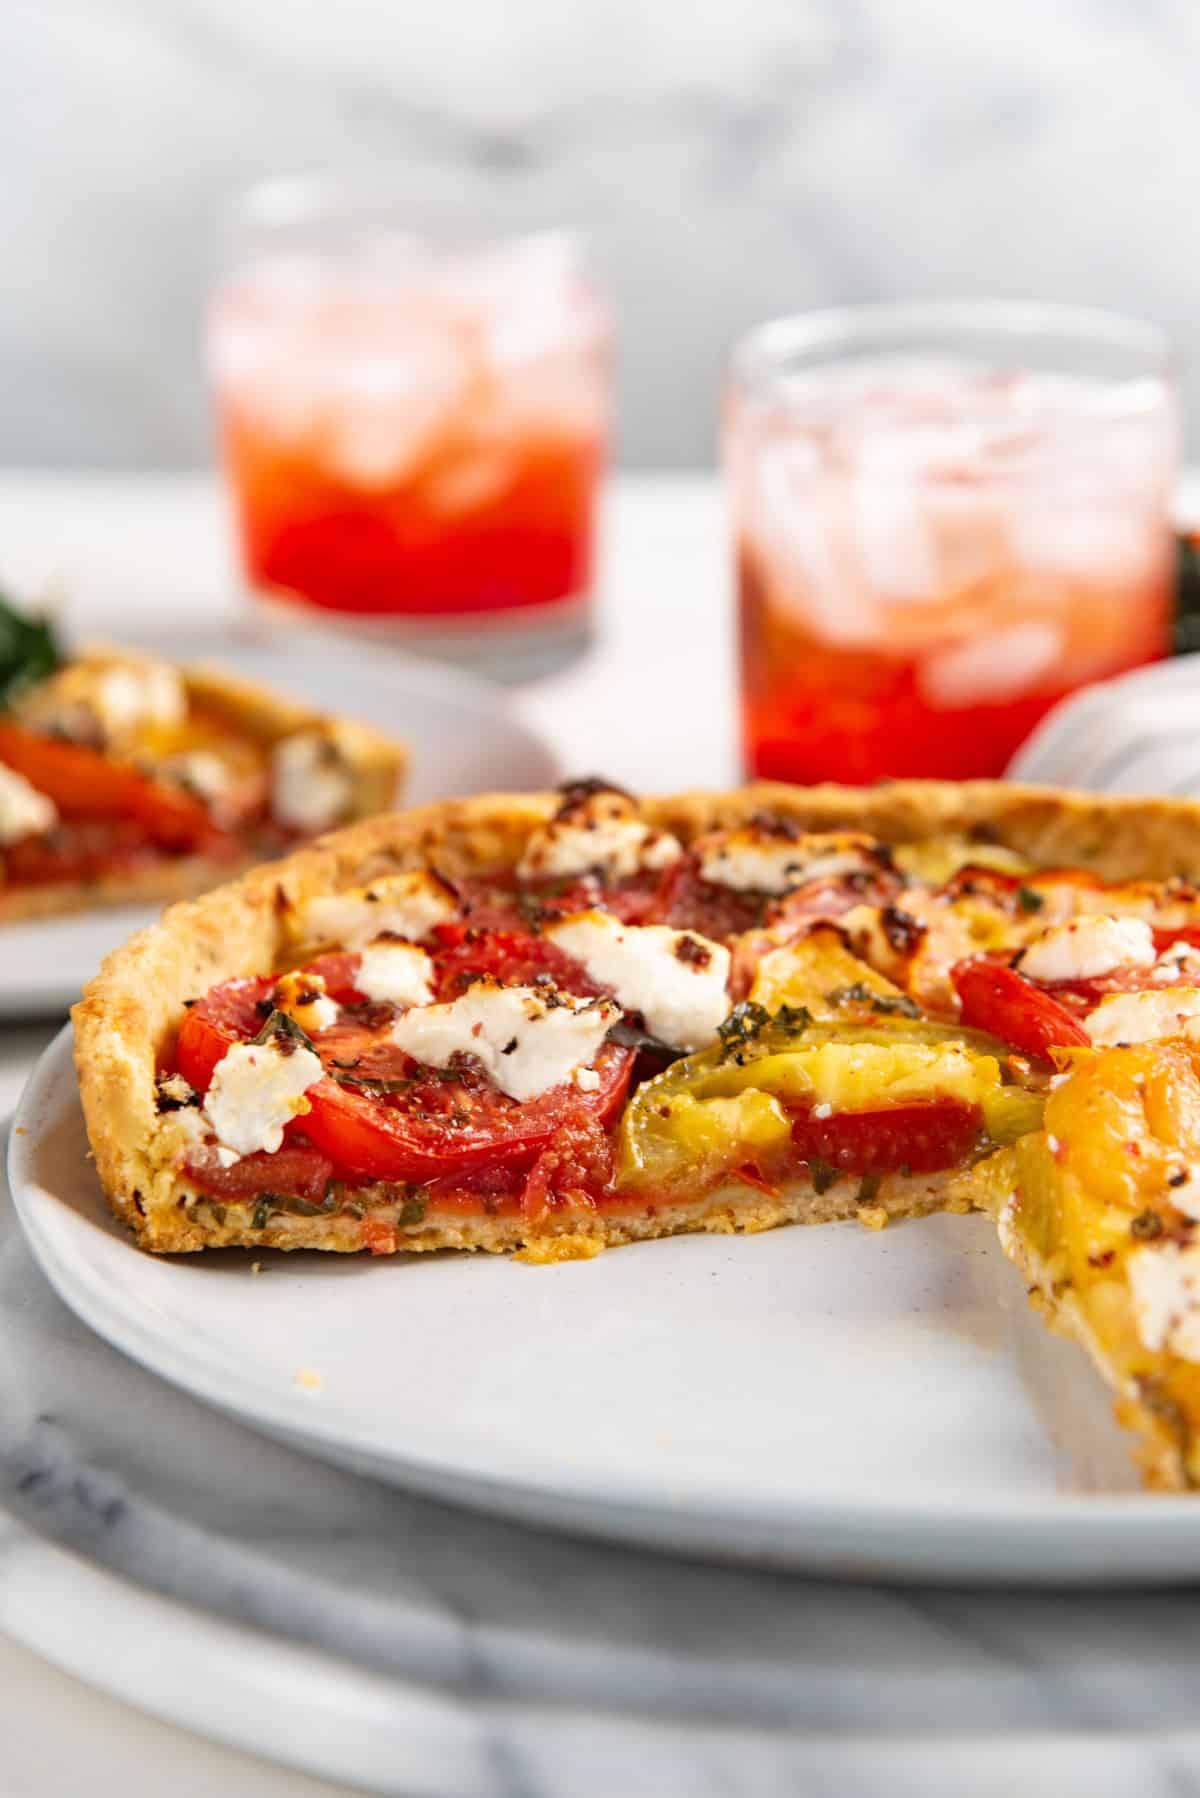
Storage, make ahead, and reheating tips
This tart is best served within 24 hours of making it. However, there are some parts of the recipe that you can make ahead of time.
You can make the tart dough up to 1 month ahead! Just wrap it really well with plastic wrap, and freeze until needed.
Since the tomatoes need to be used at peak ripeness, it’s important to use them before they overripen. While you can store tomatoes in the fridge, the longer they stay in the fridge, the faster they lose some of their flavor.
Once the tart is baked, you can keep leftovers in the fridge for up to 2 days, but it will make the tart dough soggy the longer it’s stored.
If you need to reheat the tart; preheat the oven to 250 F and place the tart in the oven. Let it reheat to the desired warmth, so check on it to make sure. It can take up to 20 minutes for the tart to be piping hot again.
Recipe
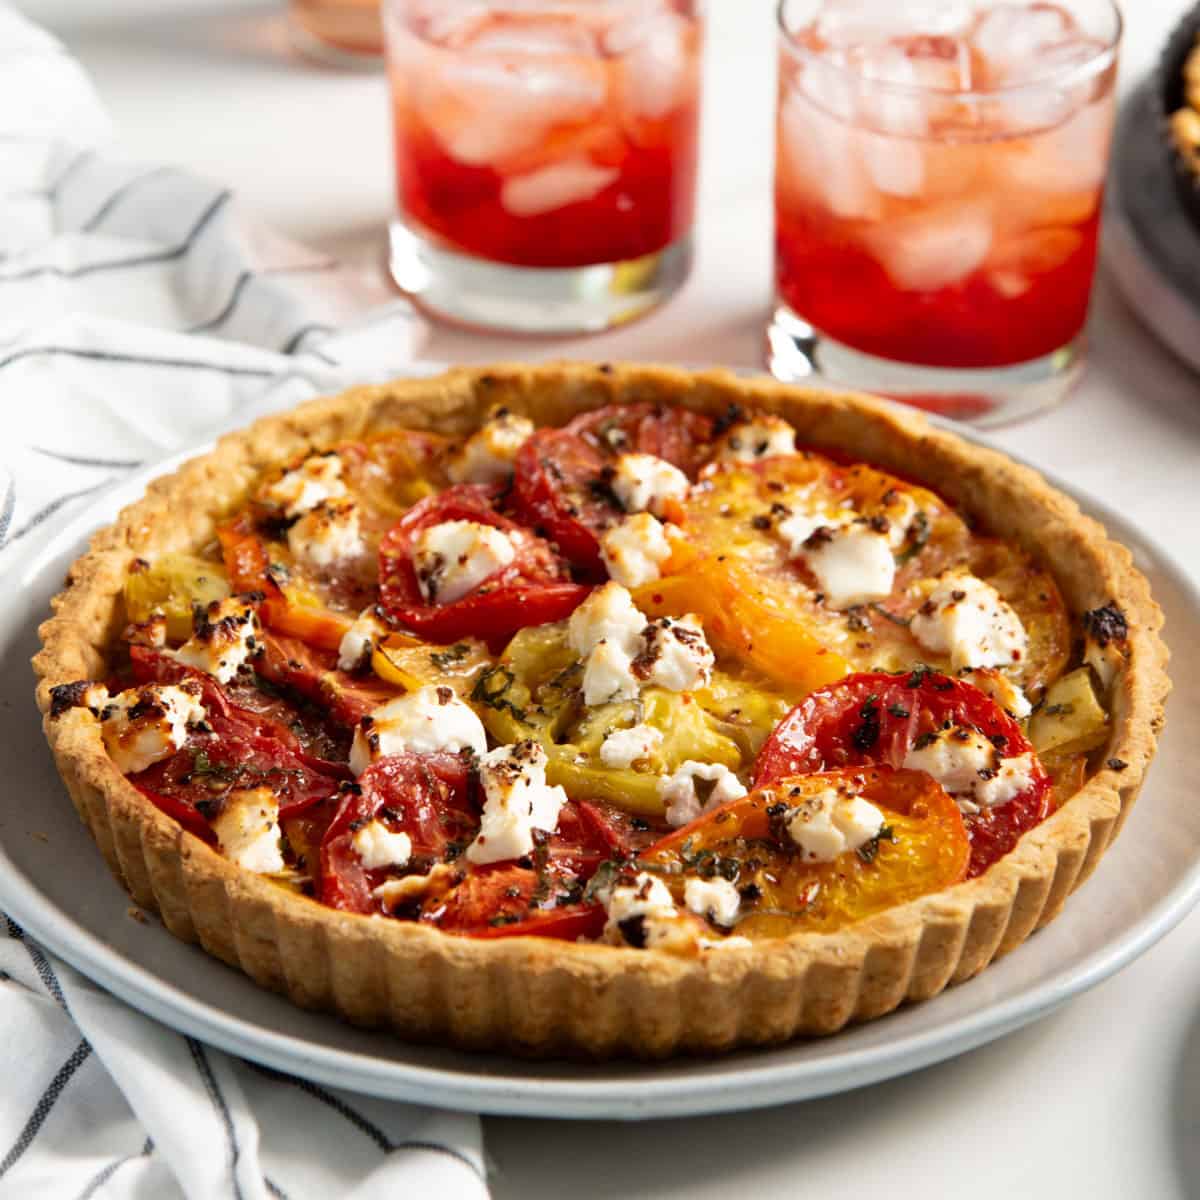
Tomato Tart
US based cup, teaspoon, tablespoon measurements. Weight measurements are recommended for accurate results whenever available.
Common Measurement ConversionsIngredients:
Pâte brisée dough
- 250 g all purpose flour about 2 cups (spooned and leveled)
- 125 g butter about 1 stick + ½ tbsp., softened (either unsalted or salted is fine)
- ½ tsp salt reduce the amount if using salted butter
- 60 g ice water or 1 large egg
- Extra flour if needed
- 2 tbsp chopped oregano or 1 tbsp chopped thyme
- Parmesan cheese optional
For the tart
- 1 lb pate brisee / shortcrust pastry dough recipe above, OR use store-bought
- 2 – 3 large heirloom tomatoes or slicing tomatoes
- Salt
- 2 tbsp dijon mustard
- Chopped herbs I use basil here
- Black pepper I also used pink peppercorn here
- ⅓ cup feta cheese or goat cheese
To top
- Olive oil
- Honey
Instructions:
Pâte brisée (use store-bought if not making from scratch)
- While I highly recommend it, making this from scratch is optional. You can use store-bought shortcrust pastry for convenience.
- In a large bowl, place the butter and salt.125 g butter, ½ tsp salt
- Mix the butter with a spatula to make it creamy, but not airy or fluffy. Make sure there are no lumps, and it looks nice and smooth.
- Whisk the egg (if using) really well, and set it aside.
- Finely chop the oregano, and set it aside.2 tbsp chopped oregano
- Add the flour and chopped herbs to the butter mixture and mix them in until the butter and flour form a crumbly mixture.250 g all purpose flour
- Add the whisked egg or ice water while mixing the flour. It should create flour lumps that form a dough when squeezed together.60 g ice water
- Bring the mixture together and fold over itself to form a smooth dough. But make sure not to mix it or knead it too much, as this will over-work the dough.
- Shape the dough into a disc, wrap it with plastic wrap, and let it rest. You can allow the dough to rest in the fridge for about 1 – 2 hours, or at room temperature for 1 hour.
- Roll out the dough to about a 3 – 4 mm thickness. If the dough is cold, then it can be rolled out on a lightly floured surface. However, if the dough is at room temperature, you will need to roll it out between two parchment paper sheets to prevent the dough from sticking to the surface.Extra flour if needed
Line the tart pan
- Transfer the rolled out dough into a 9 inch tart pan. If the dough tears, you can press or pinch it together to “seal it” again.1 lb pate brisee / shortcrust pastry dough
- Gently lift the dough and press it into the corners of the tart pan to prevent the dough from stretching when you're fitting it into the pan.
- Trim off excess dough, leaving just about a 1 cm overhang. I like to fold this overhang into the tart edge to create a thicker side crust on the tart. Press it in to make the crust edge evenly thick. Then trim off any excess dough on the top of the tart pan using a sharp knife. (See images in the post for reference.)
- Cover the tart with plastic wrap and let it chill in the fridge for about 1 hour.
Par-bake the tart crust
- Preheat your oven to 375°F / 191°C.
- When the oven is preheated, remove the chilled tart crust from the fridge. Use a fork to dock the crust.
- Line it with a piece of foil or parchment paper and fill it with pie weights (you can use ceramic weights or beans or rice or sugar).
- Transfer the tart to a half sheet pan and bake the crust for about 30 minutes.
- Remove the tart from the oven, and carefully remove the pie weights.
- OPTIONAL – Spread some grated parmesan cheese / cheddar cheese on the bottom of the crust.Parmesan cheese
- Return the parbaked tart crust (with or without the cheese) to the oven and let it bake for about 3 – 5 minutes.
- Remove the tart from the oven and set it aside until needed.
Prepare the tomatoes
- Wash the tomatoes and use a sharp knife to hull the top of the tomatoes.2 – 3 large heirloom tomatoes
- Slice the tomatoes horizontally, for slices that are about ¾ cm thick. Sprinkle the tomatoes with a little sea salt and set aside.Salt
Fill the tart
- Spread the bottom of the tart with a thin, even layer of dijon mustard.2 tbsp dijon mustard
- Sprinkle the bottom of the tart with some chopped basil (optional).Chopped herbs
- Layer the tomato slices in the tart shell. The tomatoes can overlap slightly, but don't let them overlap too much. Cut the tomato slices into smaller pieces to fit into the gaps.
- Break the feta or goat cheese into pieces and place it on top of the tomato slices. You can't spread the cheese evenly, but it can be dotted all over the surface.⅓ cup feta cheese
- Sprinkle black pepper on top (if using).Black pepper
Bake the tart
- Bake the tart on a half sheet pan, in the preheated oven (375°F / 191°C), for about 20 – 30 minutes, or until the crust becomes golden brown in color, and the cheese is caramelized on top as well.
- Once baked, remove the tart from the oven. Drizzle some olive oil and honey on top. Then let it cool down before serving.Olive oil, Honey
- Cut the tart into slices and serve at room temperature or slightly warm.
Nutrition Information:
“This website provides approximate nutrition information for convenience and as a courtesy only. Nutrition data is gathered primarily from the USDA Food Composition Database, whenever available, or otherwise other online calculators.”











Leave a Reply