



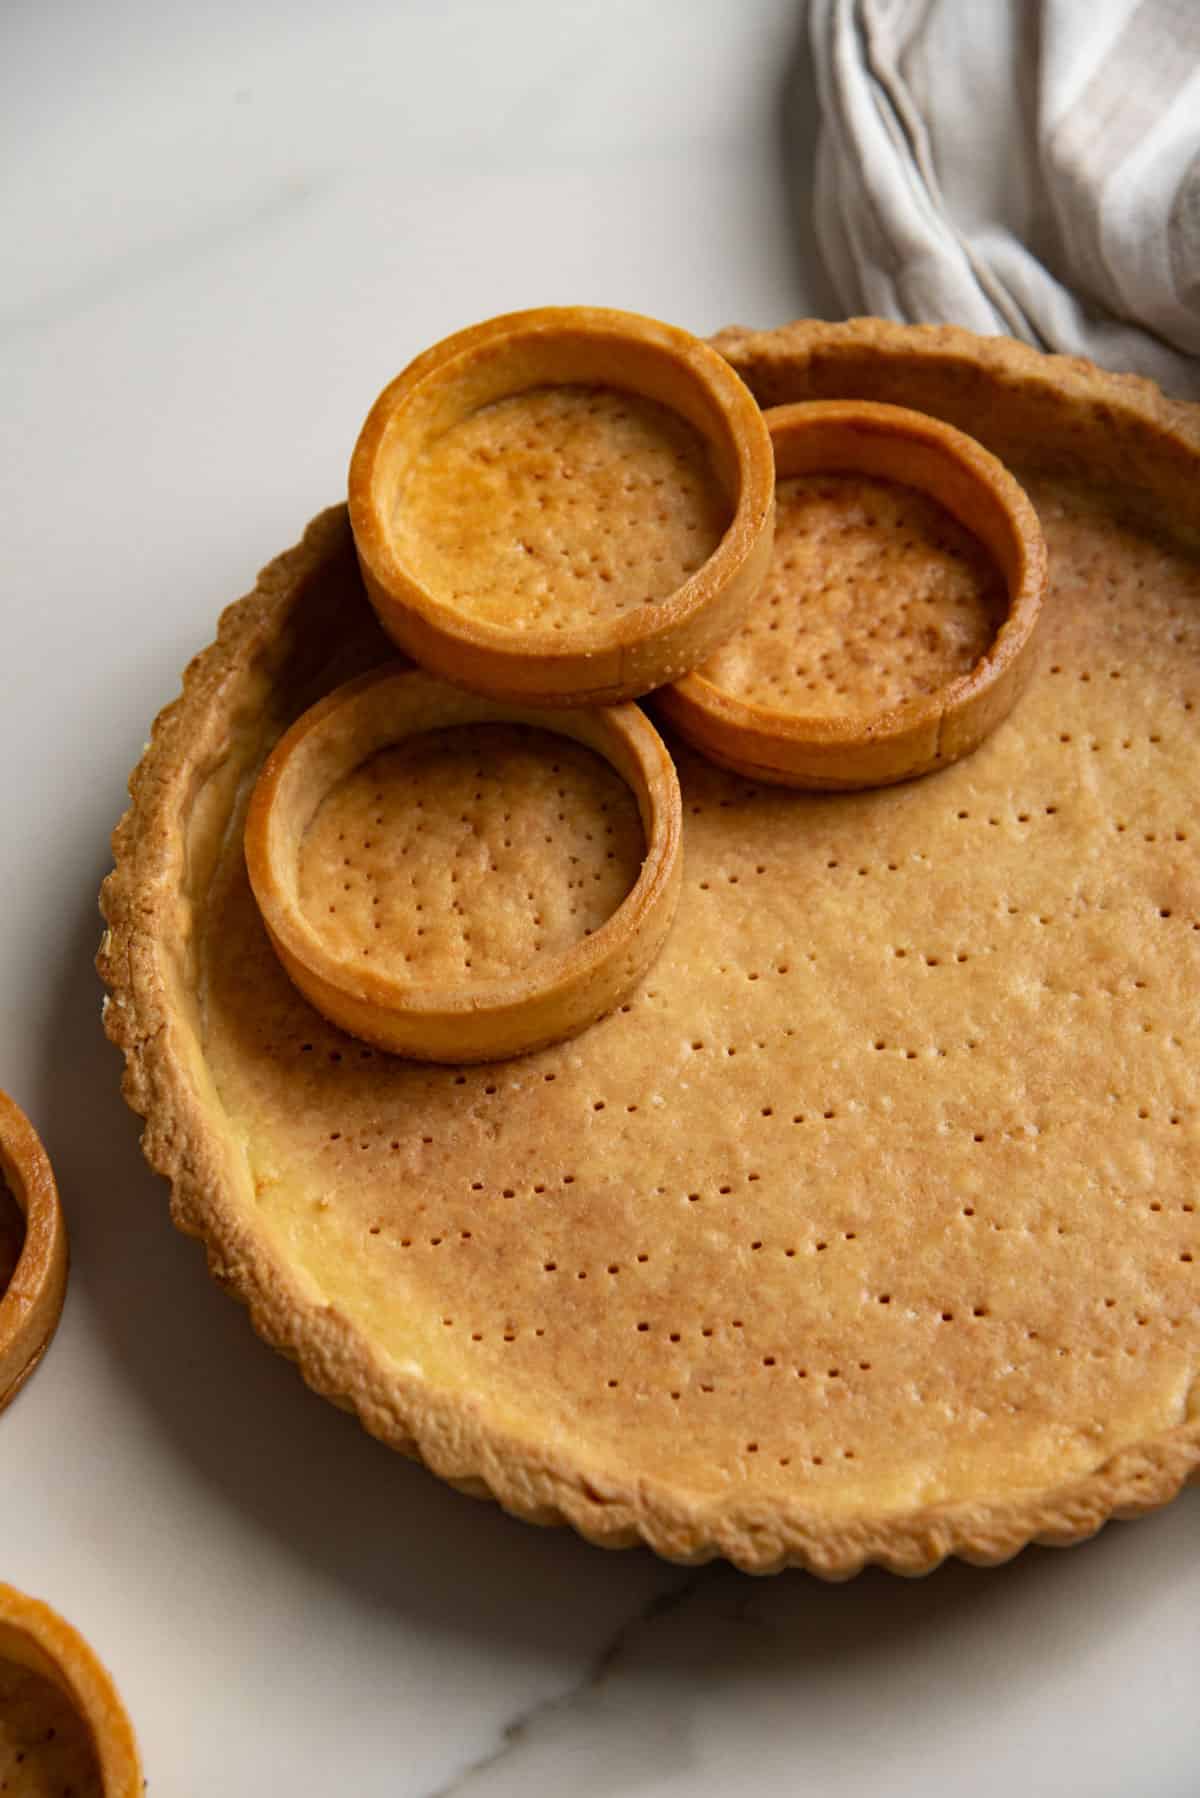
Here’s ALL you need to know about making perfect shortcrust pastry (pâte brisée) with just a handful of pantry-staple ingredients! A buttery, crisp, crumbly, neutral-flavored pastry that’s perfect as a tart crust or even pie crust for both sweet or savory applications.
I share different ways to make shortcrust pastry dough, as well as simple substitutions to enrich the pastry more and make it richer and crumblier too!
- Why this recipe works
- What’s in a name – what is shortcrust pastry?
- French shortcrust pastry dough
- French shortcrust pastry vs pie dough
- Ingredients to make shortcrust pastry
- How to make shortcrust pastry (step by step overview)
- Recipe variations
- All the ways to use this shortcrust pastry
- Storage and make ahead tips
- My best recipe tips
- Recipe FAQs
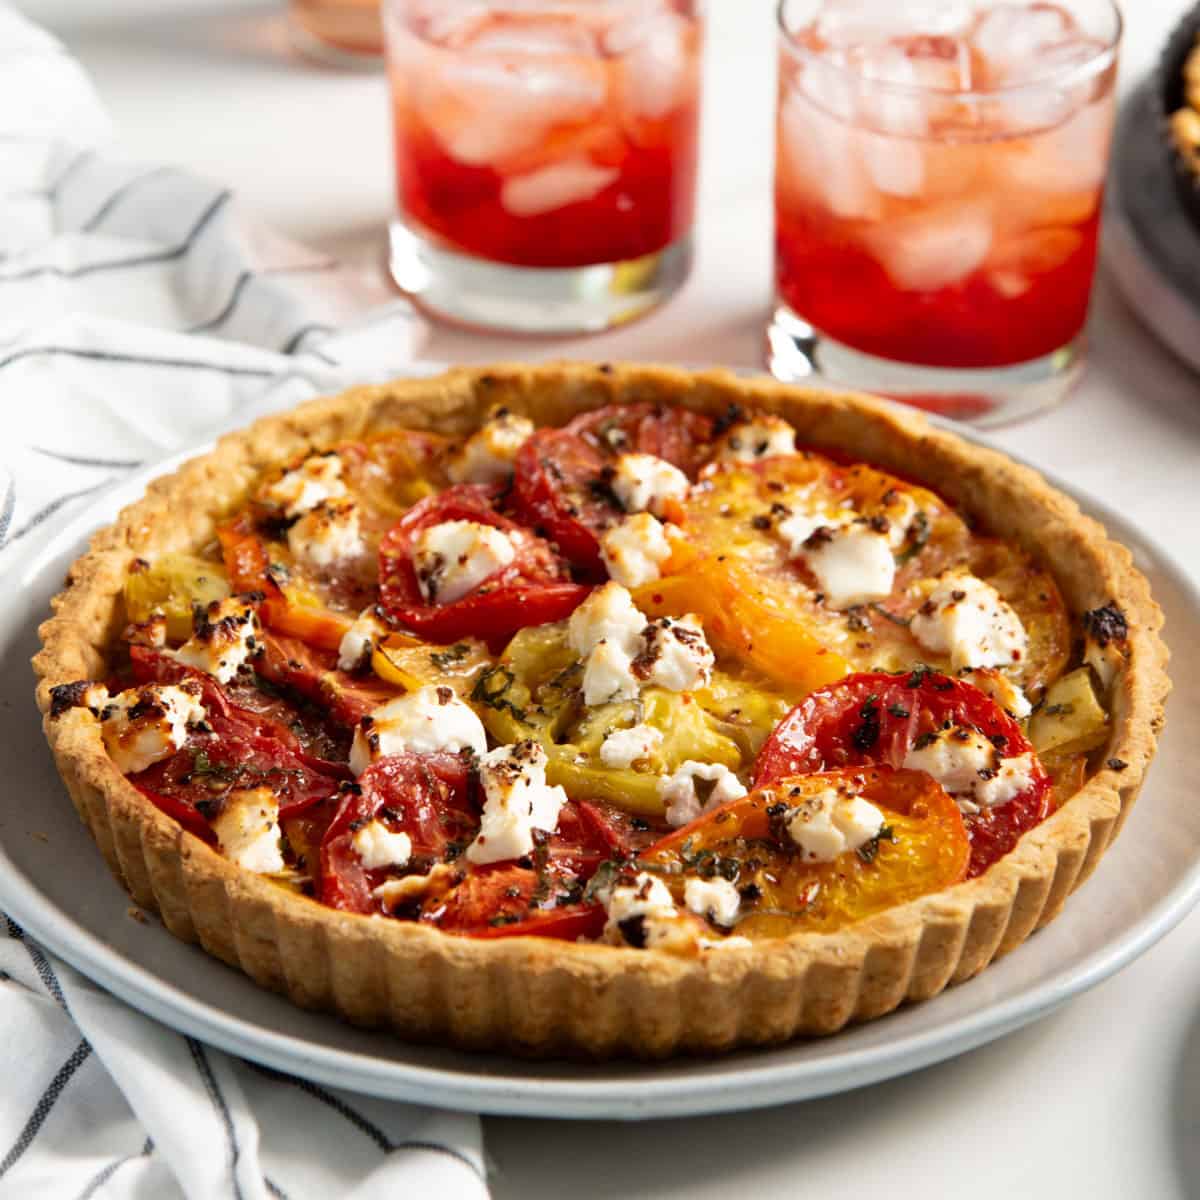
I’ve been making a lot of savory tarts this summer, especially this scrumptious tomato tart, and I realized I hadn’t shared my shortcrust pastry recipe on the blog before.
While I often use my pâte sucrée dough for sweet tarts, this pâte brisée is the perfect neutral-flavored companion for savory tarts.
While you can make this shortcrust pastry the classic way with water, you can also make a richer, more crumbly and delicious version with a few simple additions. So, it’s super versatile!
It’s the perfect tart dough for savory as well as sweet tarts, and you could honestly even eat it on its own. Like a cracker!
Why this recipe works

- Comes together quickly with just a few pantry-staple ingredients that you most likely always have!
- Just like my other French pastry recipes, this foolproof, step by step recipe is super easy to follow even for beginner bakers.
- This is a flexible shortcrust pastry recipe that you can make with water, or enrich it further with eggs. I show you both methods!
- I talk about the differences in the dough when made with a sablage (sandy flour mixture) vs the creaming method (i.e. mixing the butter first).
- I show what makes pate brisee unique, difference between pate brisee and regular pie crust (they are not the same!), and where and how to use different types of shortcrust pastry too.
- Plus, I share different ways to make this shortcrust pastry dough.
What’s in a name – what is shortcrust pastry?
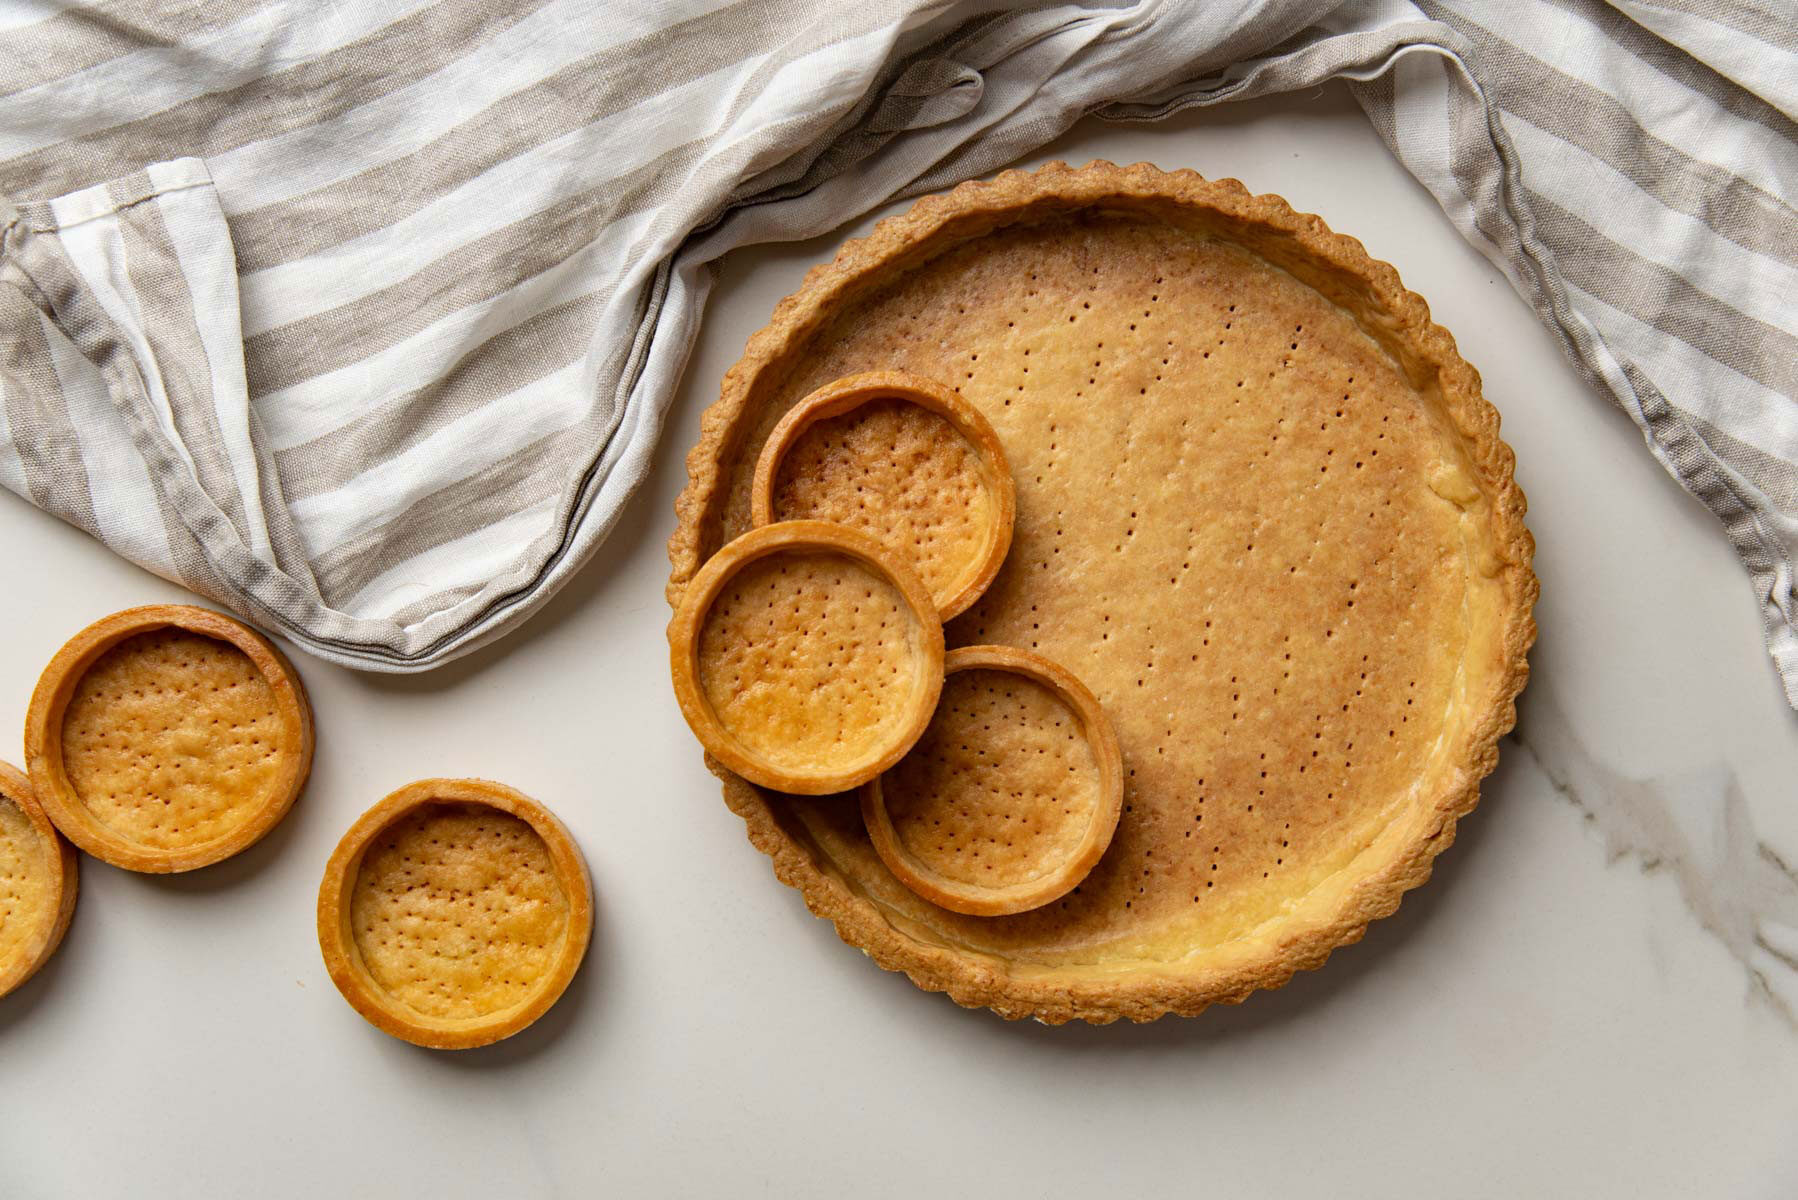
Shortcrust pastry is a popular type of pastry dough. However, there are different types of shortcrust pastry dough in the world of French pastry. These doughs are excellent to make tarts because of the texture and mouthfeel of the crust.
While the strict definitions of these different tart doughs can be a little murky because their features often overlap a fair bit, you can broadly categorize them as follows.
- Pâte brisée – Basic shortcrust pastry. Contains no sugar. A neutral-flavored crust that you can use for sweet or savory tarts.
- Pâte à foncer – Very similar to pate brisee, but can contain sugar. It can also vary in its fat content (butter and eggs), ranging from a drier crust to a richer crust.
- Pâte sucrée – A sweet tart dough. Contains eggs (egg yolks), so it’s richer in flavor, and very tender as well.
- Pâte sablée – A sweet shortbread dough that’s very tender and light. Contains leaveners to make the dough lighter in texture.
Pate brisee directly translates to “broken dough”. The dough is “broken” by the butter pieces that you rub into the flour, making the resulting crust tender and crumbly. Foncer means to line a pan.
The unsweetened version of pate a foncer and pate brisee are similar and some classic cookbooks, and some text books actually use the names interchangeably.
In some recipe books, pate brisee may contains eggs, while pate a foncer will not. But in other text books, it’s the other way around.
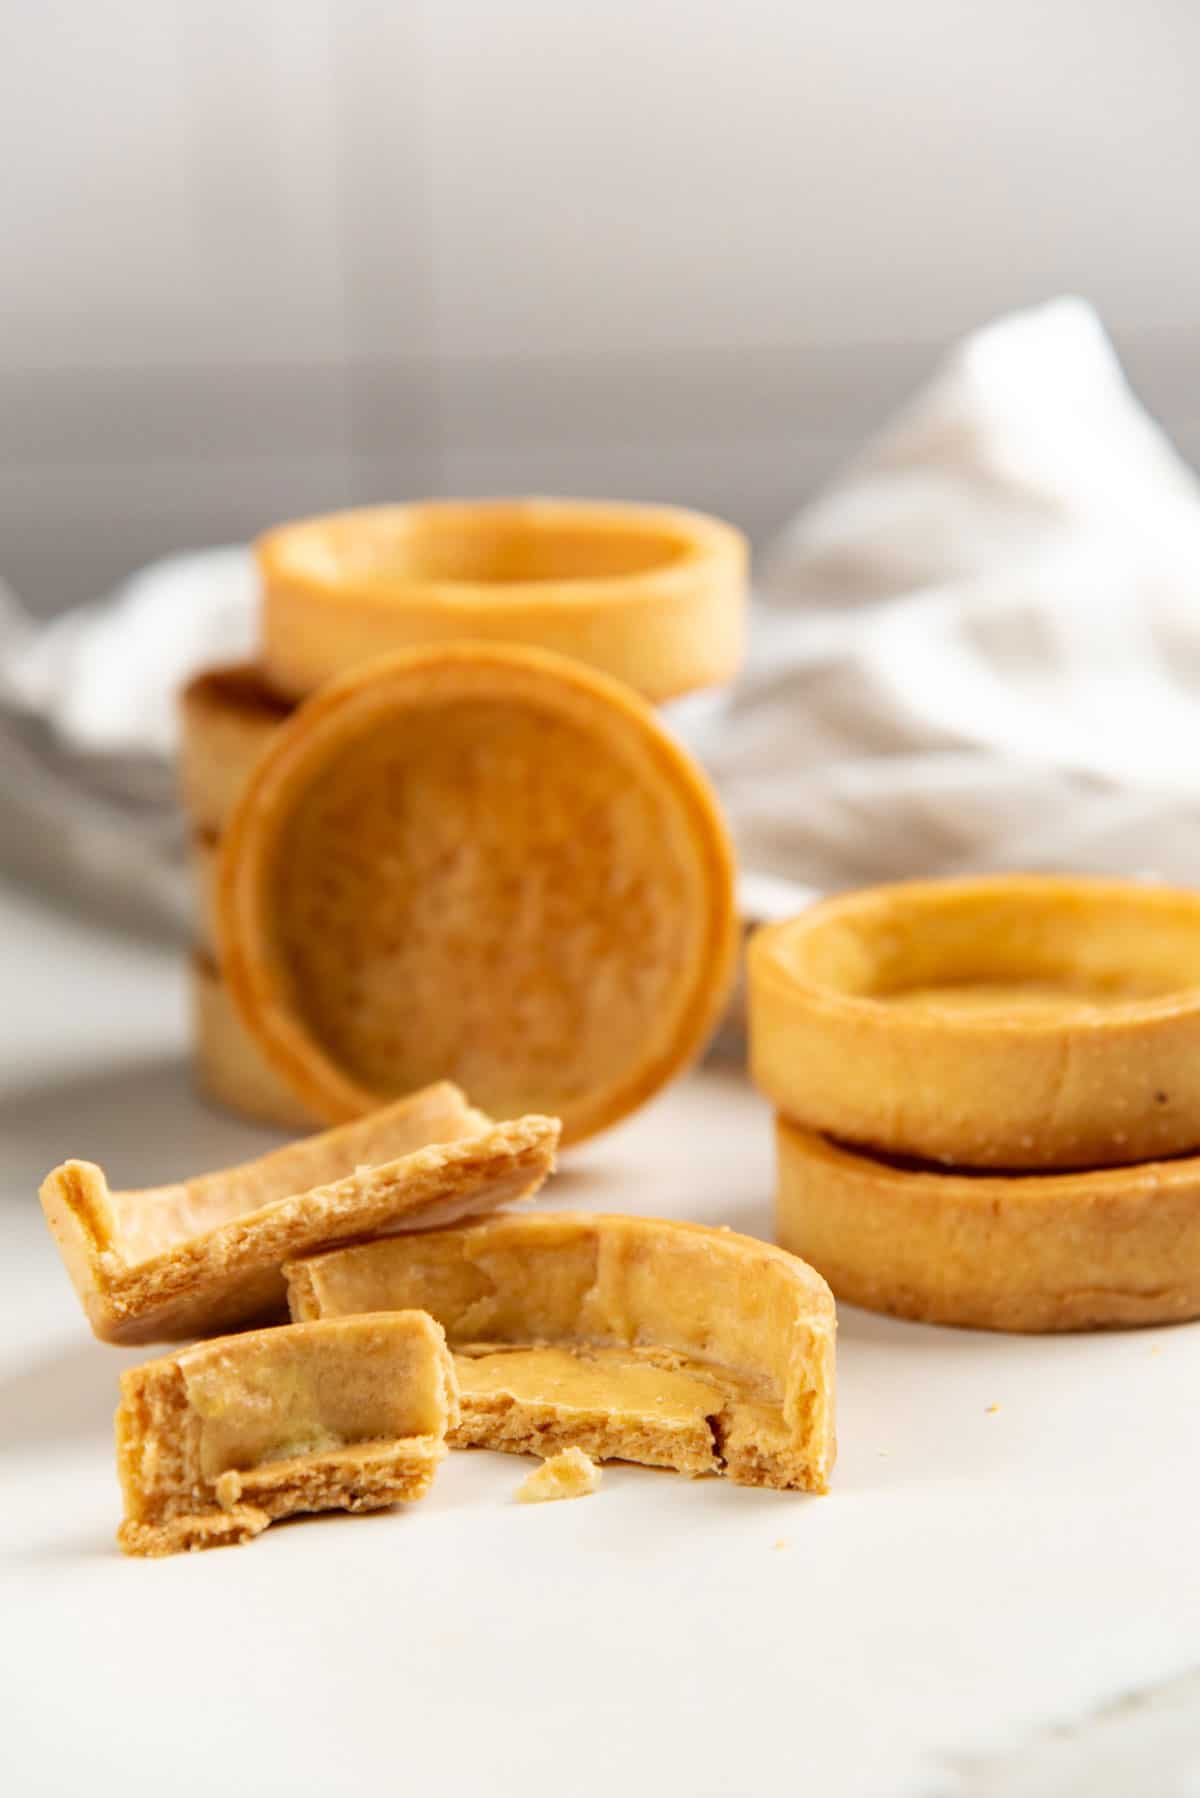
Since the original definitions of pate brisee and pate a foncer are not so rigid, let’s clear it up here.

French shortcrust pastry dough
French shortcrust pastry that’s rich and buttery with a neutral flavor and can be used for sweet or savory applications can be called pâte brisée or pâte à foncer.
These doughs are made with
- Flour
- Salt
- Butter
- Water
When you add a significant amount of sugar to the dough, it becomes a sweet shortcrust pastry – either a sweet pate a foncer, or pate sucree.
This French shortcrust dough can contain eggs too. Adding eggs makes the dough more tender because of the extra enrichment from the yolks.
Both pate brisee and pate a foncer are typically made with the sablage method, where the butter and flour are rubbed together to create a sandy mixture, before adding the liquids to make the dough.
But you can use the creaming method instead if you want a dough that has more strength to hold up to heavier fillings.
They also use softened, malleable butter, as the butter distributes more evenly through the flour that way, as opposed to chilled butter.
French shortcrust pastry vs pie dough
Yes, you can use shortcrust pastry and pie crust dough interchangeably for most purposes. However, they are not the same.
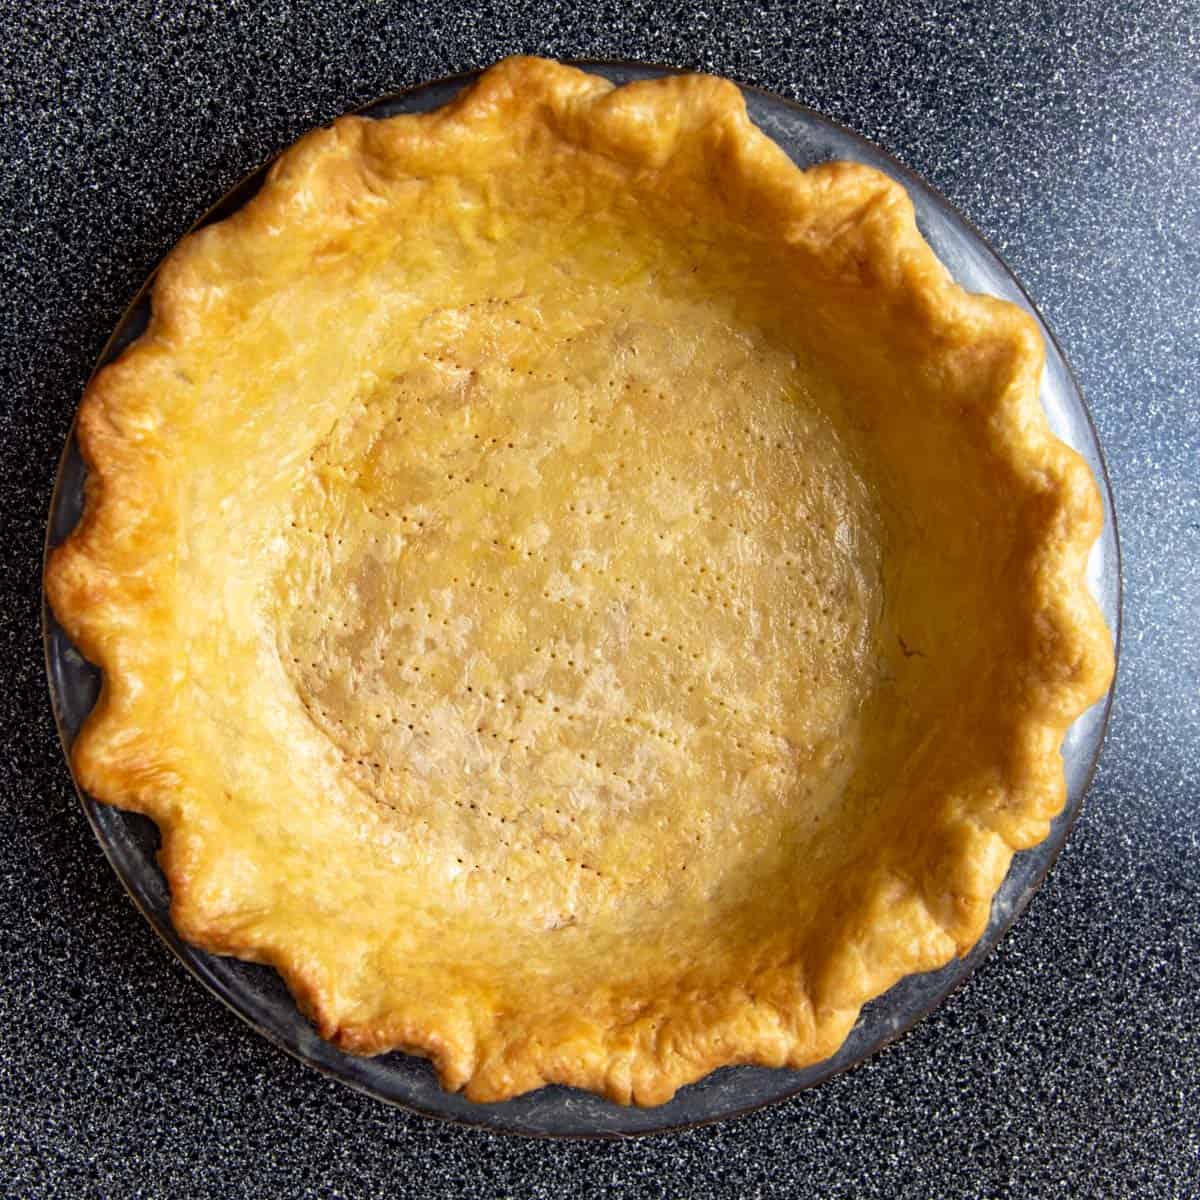
Pie crust dough can be classified as flaky or mealy pie crust. It’s the mealy pie crust that is most similar to shortcrust pastry. Flaky pie crust is NOT suitable as a tart pan liner, as it expands too much. Whereas, shortcrust pastry can be used as pie crust as well as tart crust.
The butter used for pie dough is always very cold. The cold butter is key to creating flakiness in the pie crust. However, French butter tart dough like this shortcrust pastry uses cold, but malleable butter (butter that is slightly softened, but DOES NOT MELT in the dough while mixing).
The softened butter will evenly disperse and coat the flour. This will result in that quintessential sandy, crumbly tart crust that everyone loves in a classic shortcrust recipe.
Ingredients to make shortcrust pastry
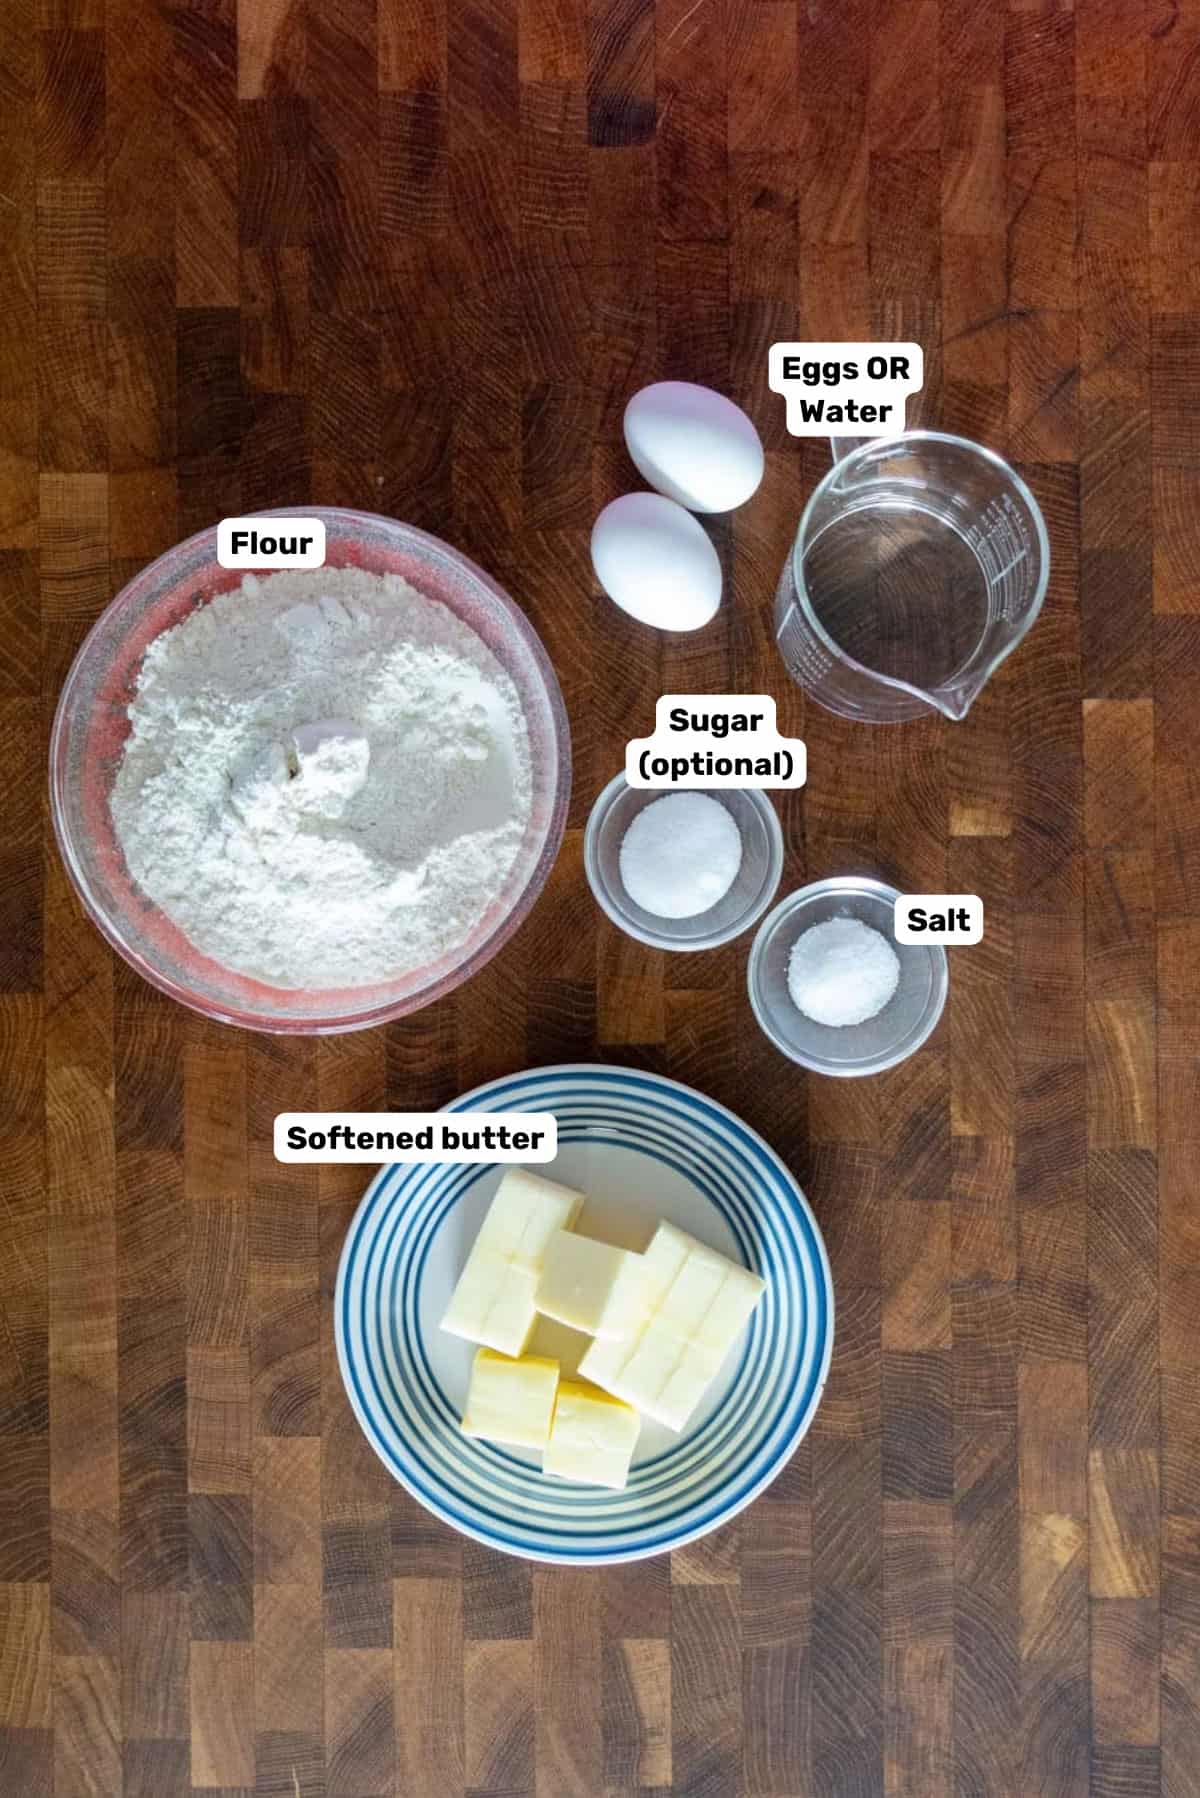
- All purpose flour – I use AP flour here. You can use pastry flour for a more tender crust, or a mix of AP flour and bread flour for a sturdier crust.
- Butter – You can use unsalted or salted butter. Unsalted butter gives you better control over how much salt you add to the crust. I do recommend using good quality butter! You can even use cultured butter here.
- Salt – Adds flavor to the crust. Reduce the amount if using salted butter. Using too little salt can make the crust taste bland.
- Water or eggs – You can add water or eggs to bring the dough together.
- Water – Using just water will result in a more crumbly crust.
- Egg yolks – Makes the crust taste richer, and makes it more tender and delicate.
- Whole eggs – Can make the crust taste richer, and add some strength from the protein in egg whites.
- Sugar – Optional. Only add just a little for depth of flavor – not to make the crust sweet.
How to make shortcrust pastry (step by step overview)
Step 1 – Get the ingredients ready
Make sure the butter is softened, but not melted (61 – 68°F / 16 – 20°C). If you live in a hot climate, or your kitchen is very warm, then I recommend using colder butter so that you can keep the dough fairly cold throughout.
- 20°C in cooler weather
- About 16°C in warmer weather
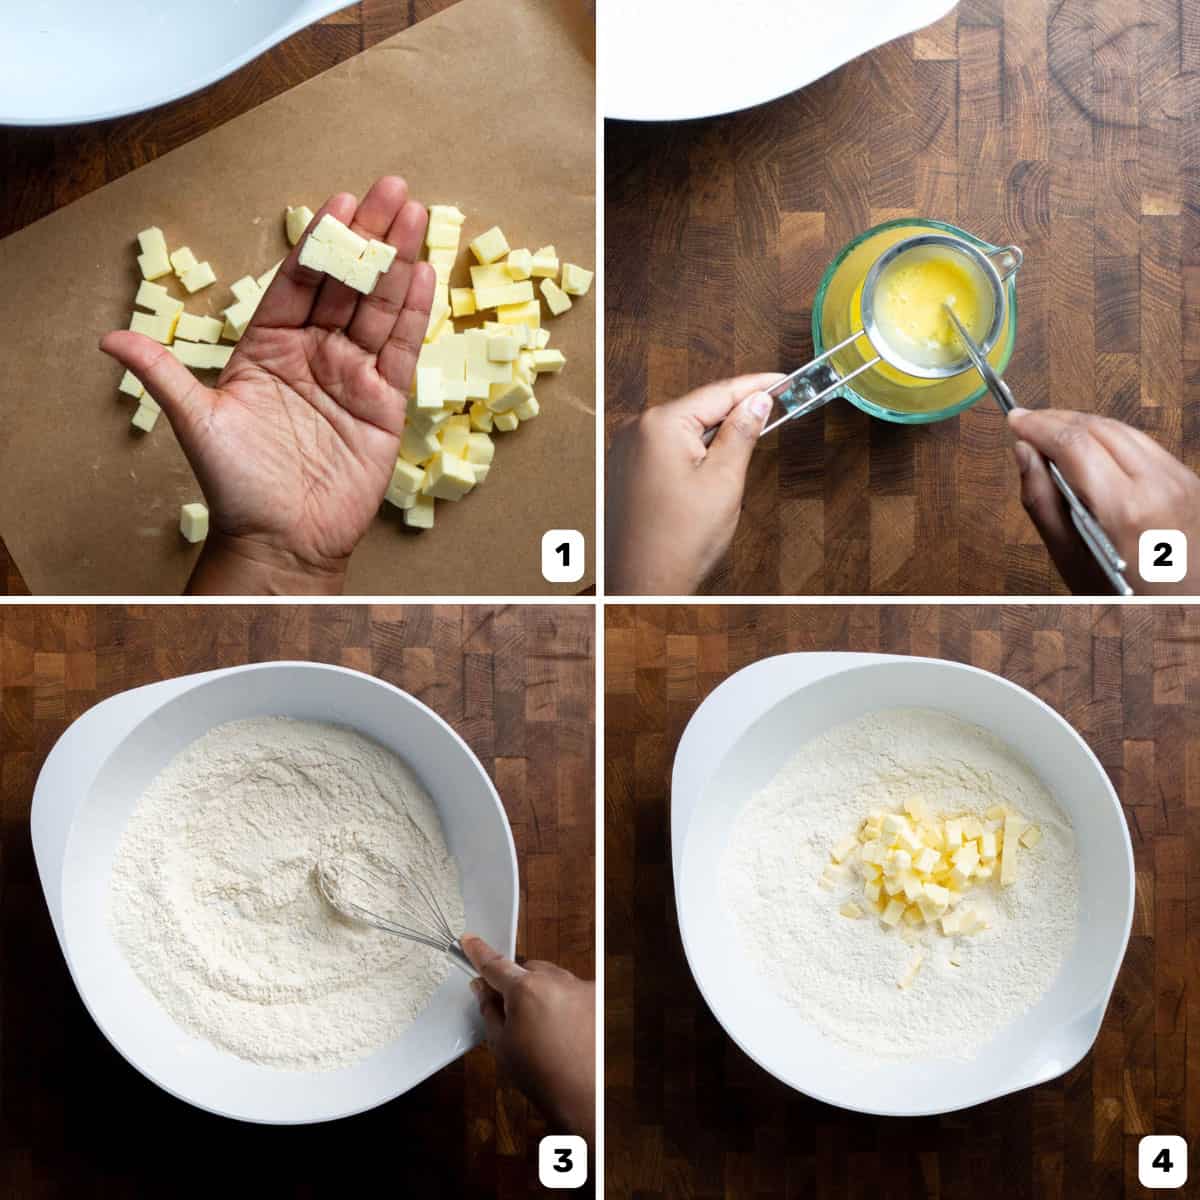
If the butter is chilled, then you can cut it into small cubes, so that it softens faster as well (image 1).
And if you’re using eggs (whole or just egg yolks), make sure to whisk the eggs really well so the mixture is uniform. Bonus points if you pass the egg mixture through a sieve to make it smoother (image 2). This just makes it easier to mix it in with the dough.
Step 2 – Make the sablage
You can make the sablage in a large bowl or on your countertop to make it with your hands. Alternatively, you can use a stand mixer, or even your food processor. Here, I’m using a bowl.
Cut the butter into smaller pieces (about 1/4 tbsp size; approximately 1 x 1 cm) and set aside (image 1). Place the flour in the large bowl. Add the salt and mix it in (image 3). Add the butter into the flour (image 4), and start rubbing the butter into the flour using your fingertips. It’s really important that the butter pieces are very small and mixed in really well with the flour, and the mixture resembles coarse sand.
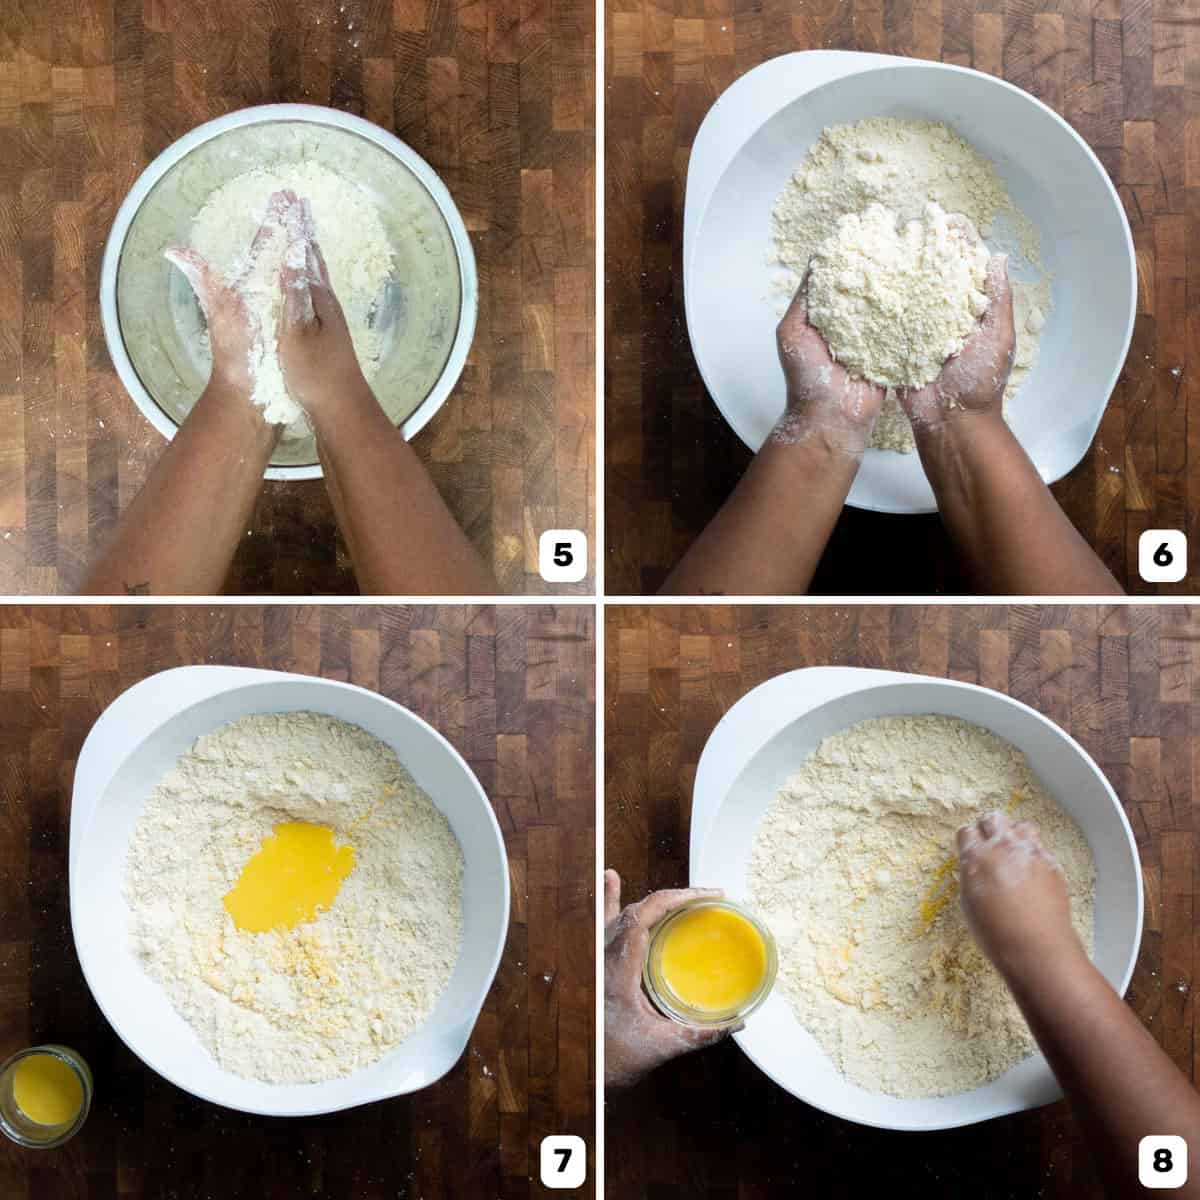
You can also place the flour and butter in the food processor bowl or stand mixer bowl with a paddle attachment, and process until the butter breaks into small pieces and mixes in with the flour to make a sandy dry mixture (image 6).
I like to take the mixture and rub it between my palms to make sure the butter is REALLY broken down and coating the flour well (image 5). Larger pieces of butter (even pea-sized) will result in a flaky crust instead of a shortcrust. BUT it’s also important not to overwork the dough, as this can result in the butter melting, and also developing too much gluten.
If the butter is starting to melt, place the mixture in the freezer to rapidly cool it down.

Sablage – From the word “sable”. Sable means “sandy”, and it involves rubbing the fat (butter in this case), into the flour to resemble coarse, wet sand. The coating of fat around the flour inhibits long gluten matrices from forming easily, and staying “short”. Resulting in a crumblier and tender shortcrust.
Step 3 – Bring the dough together / fraisage
When the sablage is ready, it’s time to add the liquid to bring the dough together. You can also do this step manually (in a bowl, or on your work surface / countertop), or in a stand mixer or food processor. However, I recommend doing this manually for single batches, as it will give you more control over the dough consistency.
Adding too much liquid can result in a dough that’s tough and rubbery, and adding too little will create a crust that crumbles too easily and is hard to handle.
Add the water or the whisked egg into the flour mixture while stirring it (images 7 – 9). Then use your hand to press into the dough and spread it forward, essentially crushing the dough under your palm (image 10). You can also do this with a flexible scraper.
Bring the dough back together (image 11) and repeat this process. The goal is to bring the dough together quickly (image 12), while evenly dispersing the liquid and butter, without overheating the dough.
This technique is called “fraising (or fraisage)”.
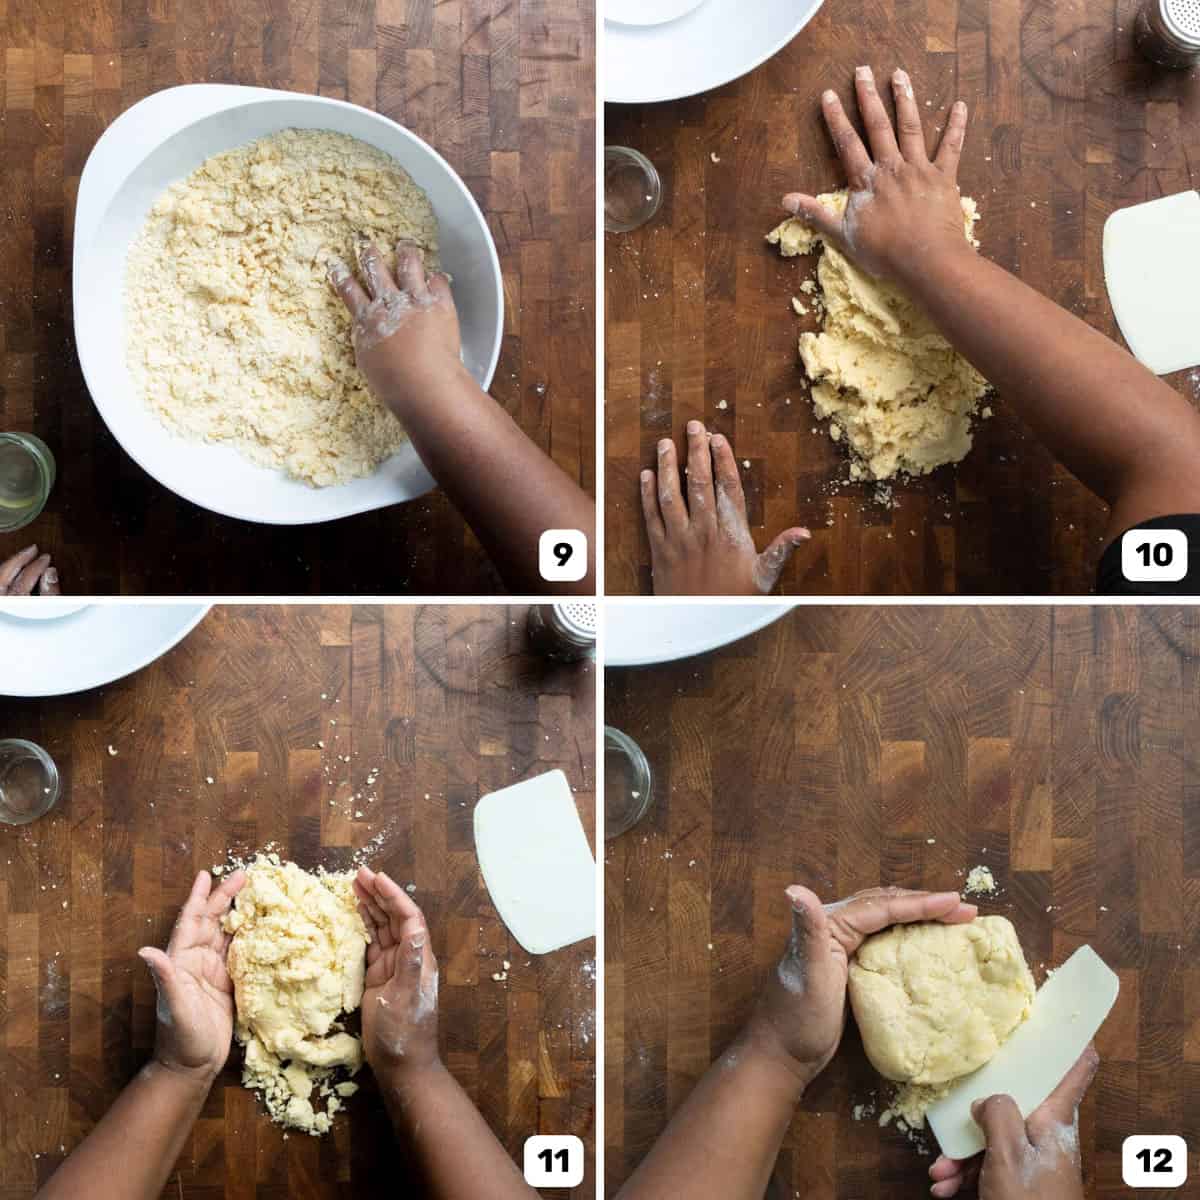
Fraising vs kneading – The goal of fraising pastry dough is to incorporate the ingredients in the dough to bring it together as quickly as possible without overheating or overworking the dough. We do not want to develop excessive gluten that would result in a tough tart dough.
Kneading on the other hand is the active stretching and pulling of the dough, over and over again, to not only bring the dough together, but to also develop gluten, like you would do with bread recipes.
Step 4 – Rest the dough
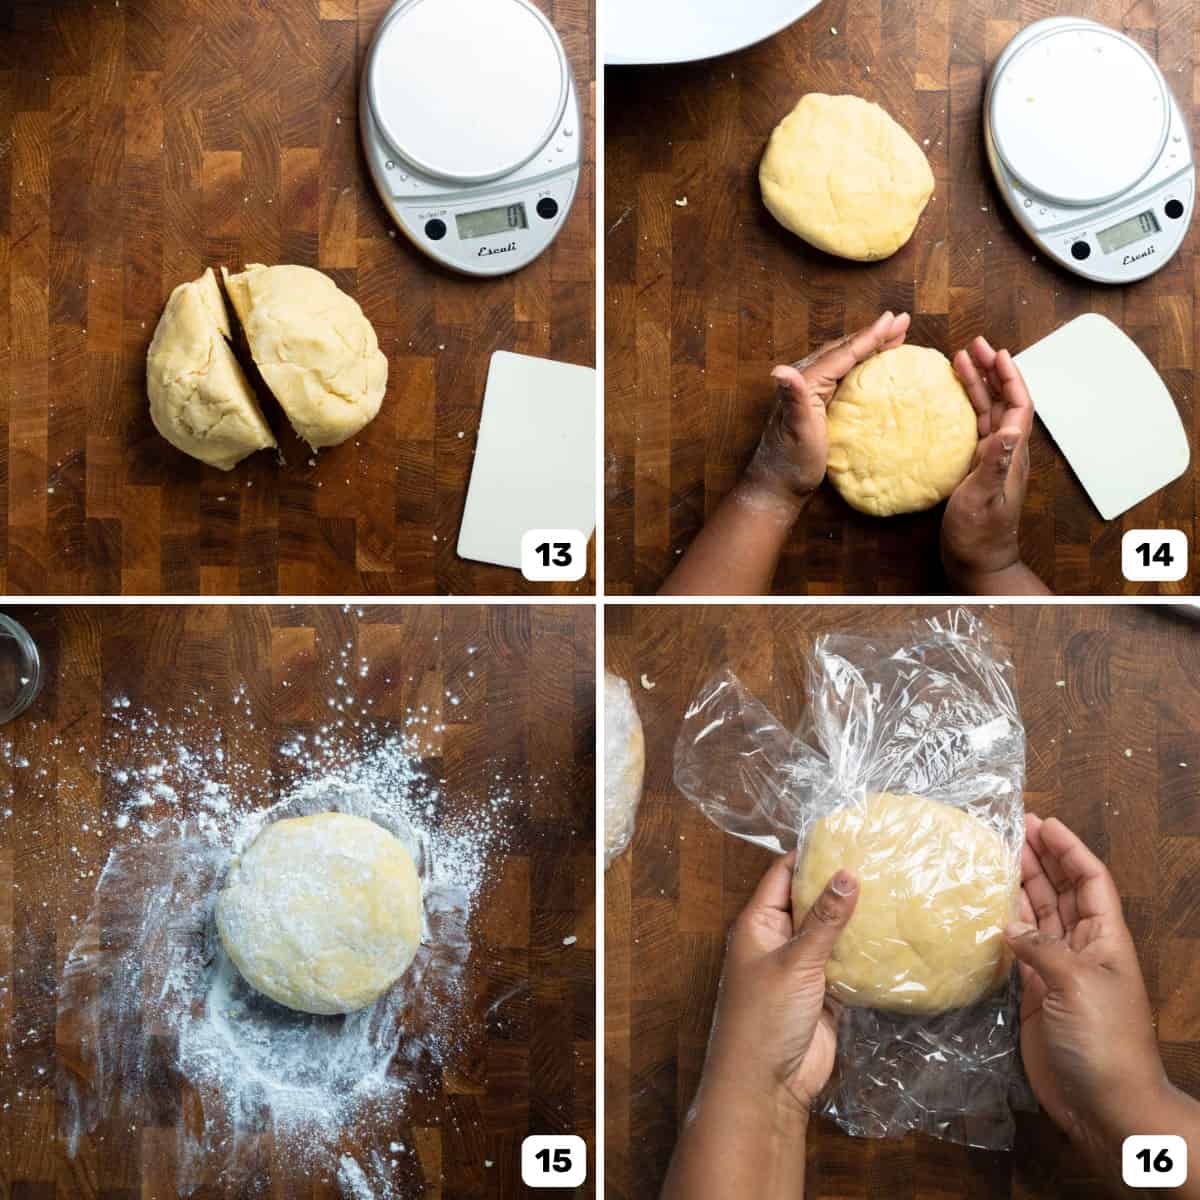
After forming the dough, split it into two portions (image 13). Then shape each portion into a flat disc, and wrap it with plastic wrap and place it in the fridge to rest for at least 1 hour (images 14 – 16).
However, it’s best to make the dough a day ahead, so that the dough has time to rest. Since this recipe is for two tart crusts, divide the dough in half, and shape each portion into a disc to rest in the fridge.
Resting the dough will relax the gluten in it, and evenly distribute the moisture in the dough, plus the risk of shrinking as the dough bakes is less too!

Creaming method
I only use this method to make shortcrust pastry if I’m using sugar and eggs with the butter.
This involves “creaming” softened butter with salt to form a creamy, soft mixture (that’s not melted). Then we add the sugar and / or whisked eggs or egg yolks to the butter and mix it in. It’s important that the butter mixture is creamy and not fluffy, as there should be no air incorporated into the mixture.
Then we add the flour to the creamed butter mixture, and bring the dough together using the “fraising” technique.
Step 5 – Roll out the dough
Shortcrust pastry can be rolled out while cold or while at room temperature. Strike the dough with a rolling pin to make it malleable enough to roll out if needed.
Lightly dust your work surface and both sides of the dough with flour, and roll out the dough into a circle (or any shape you like). If the dough is softer (at room temperature), you can also roll it out between two parchment papers (images 17 – 18), or silicone sheets. This method avoids adding extra flour to the dough.
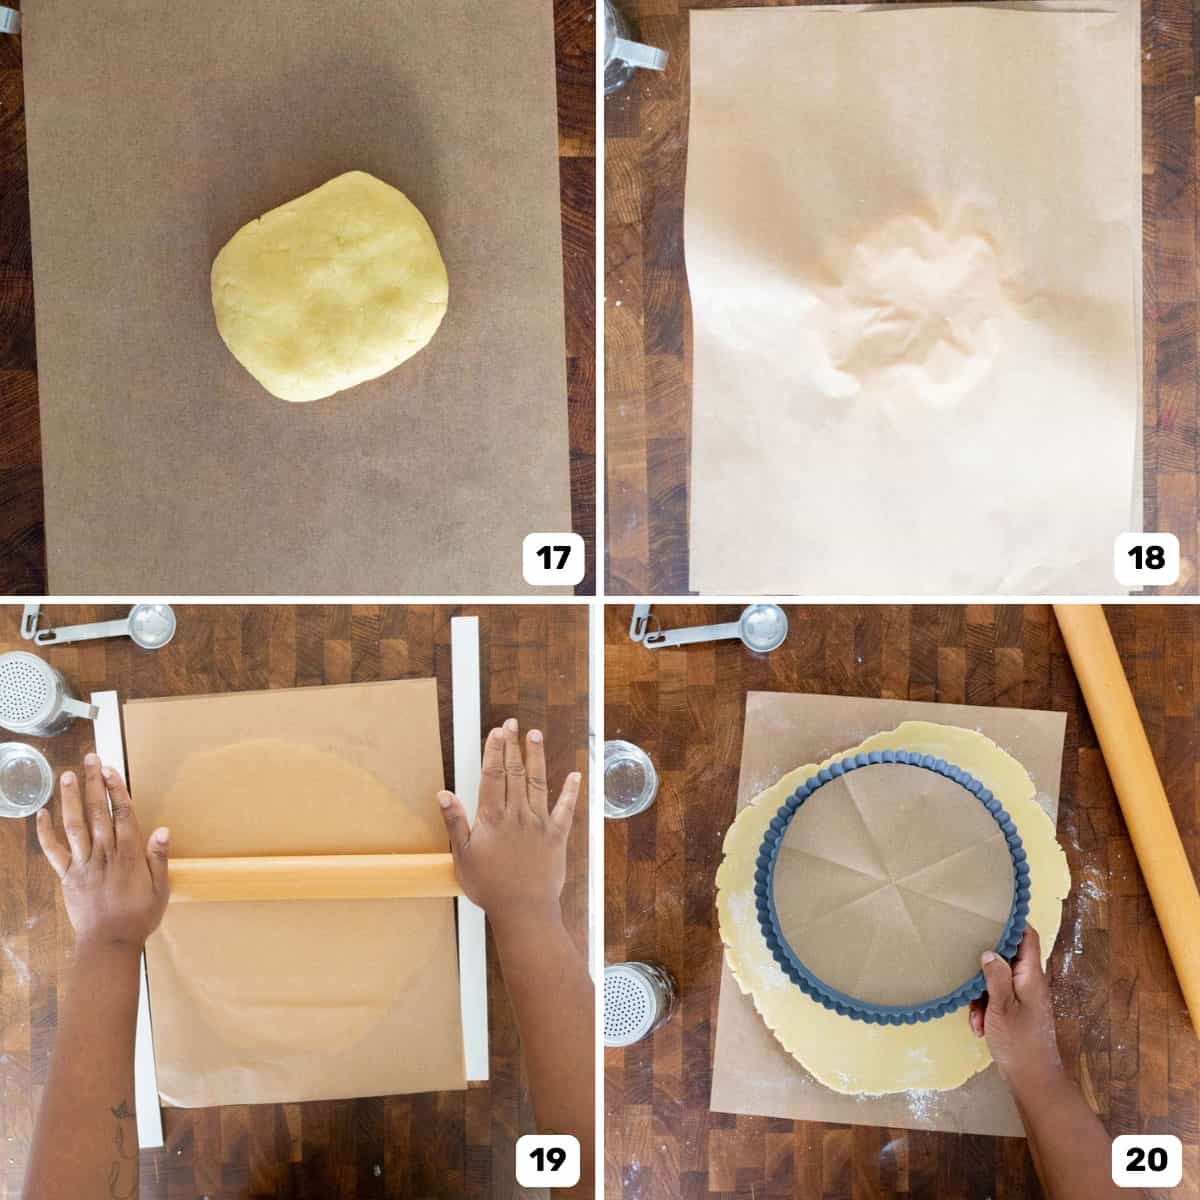
With both methods, make sure that you flip the dough over to roll out on both sides (image 19). Check on the dough to make sure that it’s rolled out to an even thickness, and has no large cracks or holes. You can fix any cracks and holes by pinching the dough together, OR by taking a small piece of dough from the edge and using it to patch up the hole.
Tip to properly roll out the dough
If you need to dust the dough with flour, only use the minimal amount needed. Make sure the dough doesn’t stick to the work surface, or overheats and starts to melt.
Use rolling pin guides like this to ensure your dough maintains an even thickness. The ones I have linked here are made from silicone, but I use wooden ones that I bought EONS ago at a fondant class. I do like the wooden ones more than the silicone ones, but either works well.
If the dough starts to snap back, and is hard to roll out, transfer it to the fridge to rest for at least 30 minutes before trying to roll it out again.
Roll out the dough to about a 3 mm thickness, and make sure it’s large enough to fit your tart pan (image 20). Then it’s ready to be transferred to a tart pan, or be cut into individual mini tarts.
Step 6 – Line tart pans
Due to the butter content in the dough, you will not need to brush the pan with butter. This also makes it easier for the dough to slide down as it bakes. But, I do like to place a parchment paper circle on the bottom of the pan to make it easier to transfer the tart from the pan to a plate.
Transfer the dough carefully into the tart pan. Don’t worry if the dough cracks a little on the sharp edges of the pan, since this can be fixed.
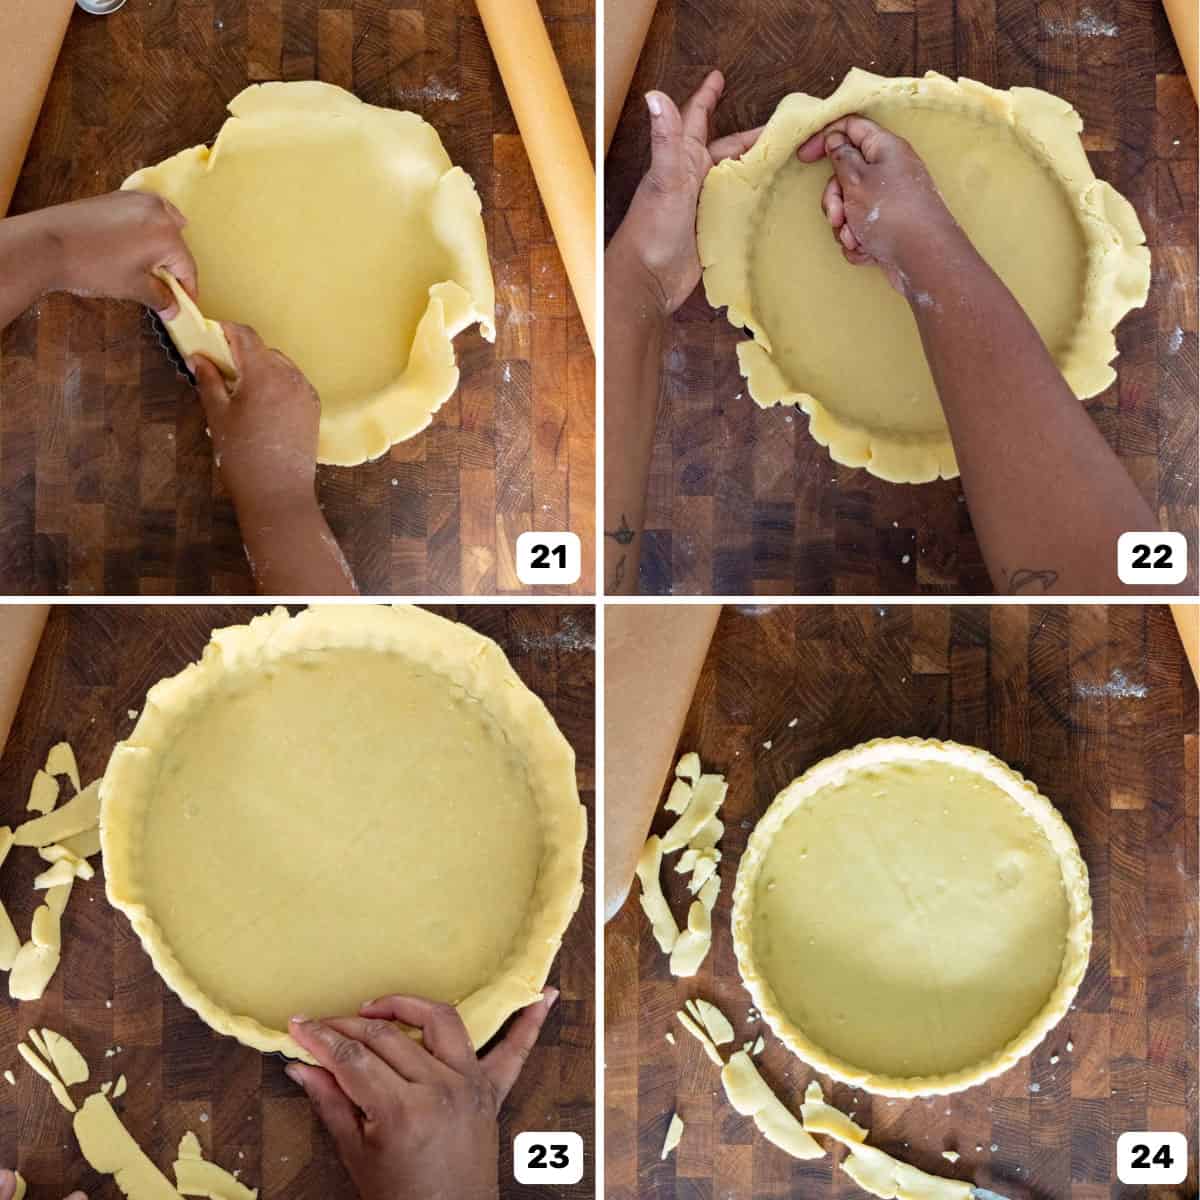
Gently press in the dough to fit the tart pan, without stretching the dough to fit (images 21 – 22).
OPTIONAL – Trim the excess dough while leaving a 1 cm overhang. I like to fold this overhang into the sides of the tart pan to create a thicker crust on the sides (images 23 – 24). Then trim off the excess with a small paring knife, leaving a neat tart dough edge along the edge of the tart pan (images 25 – 26).
Alternatively, you can just use the paring knife to trim off the excess along the edge of the pan, without folding over the sides for a thinner crust edge.
Dock the bottom of the tarts with a fork.
Step 7 – Cut the dough (for mini tarts / tart rings)
If you’re using fluted mini tarts, make sure to cut circles of pastry dough to line the bottom of the pans, as well as the sides.
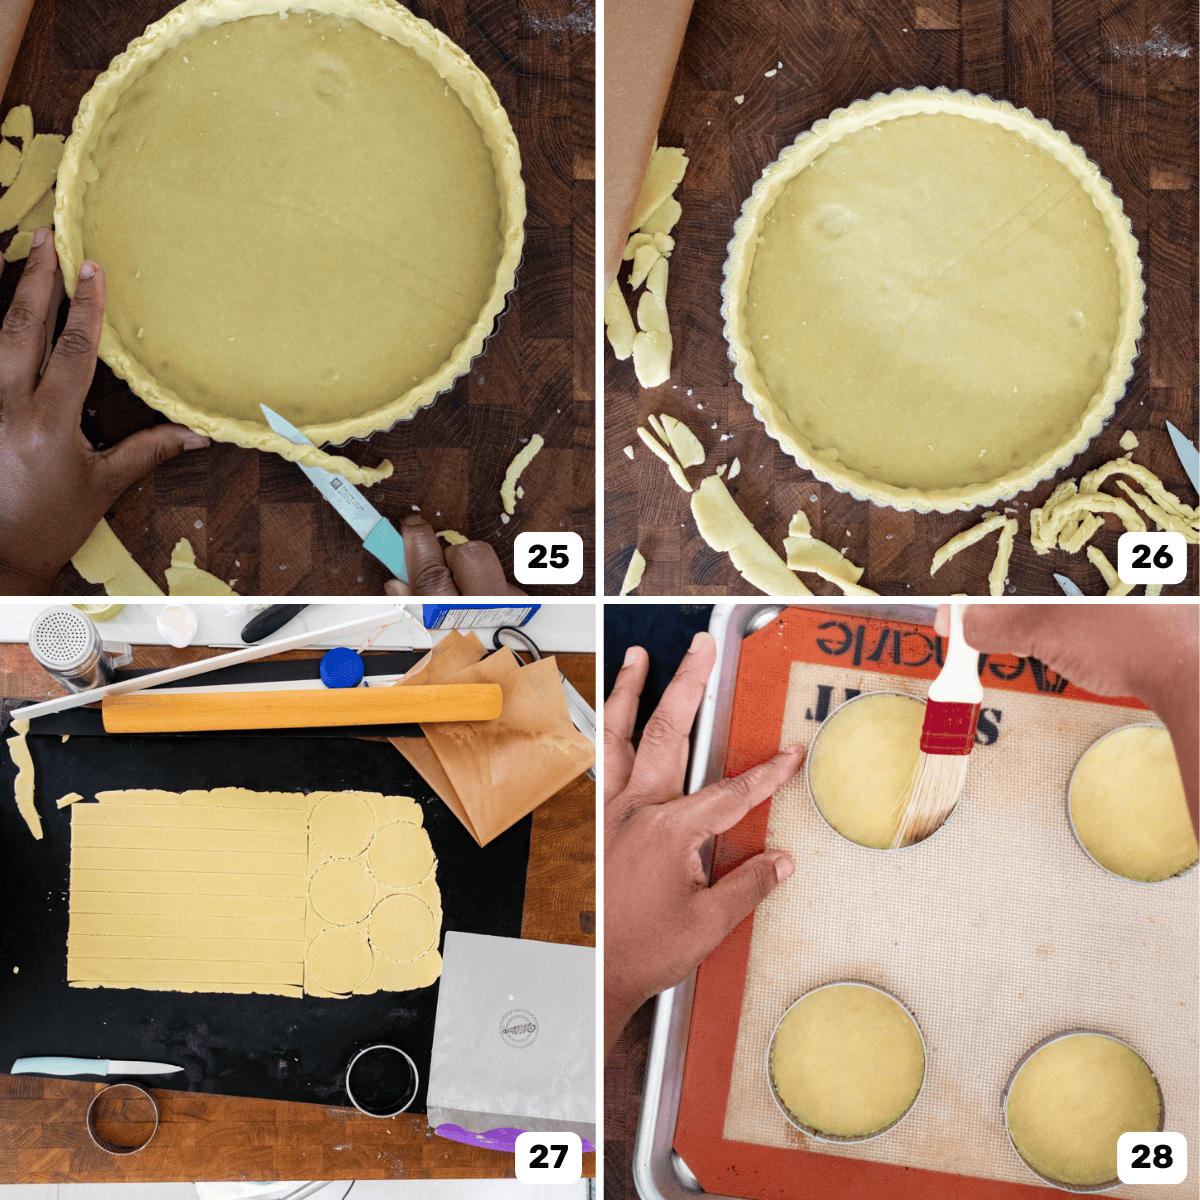
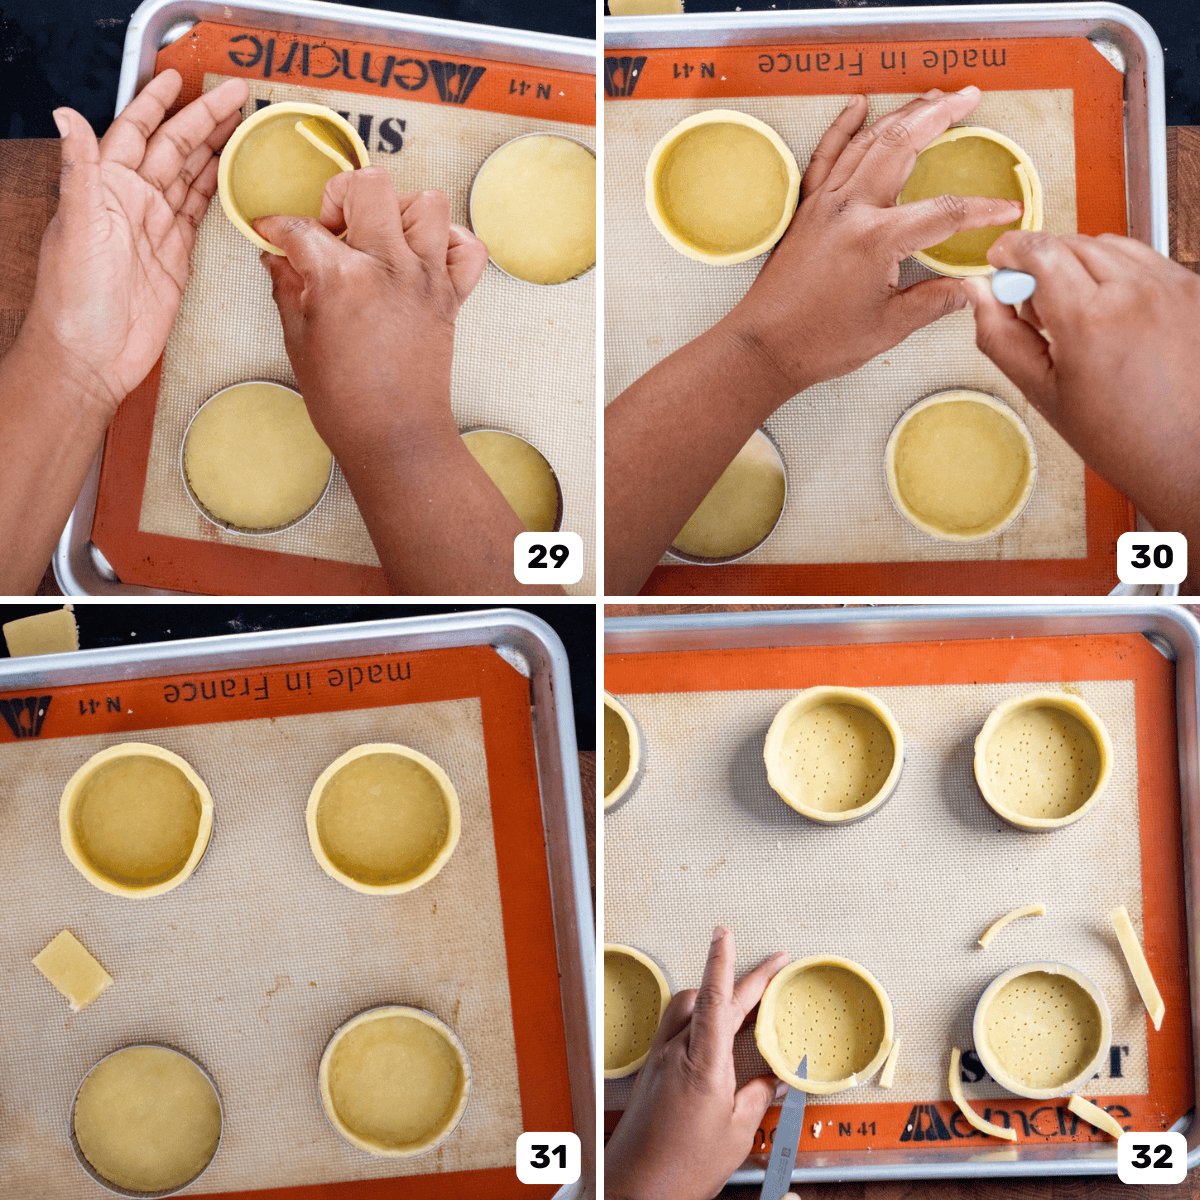
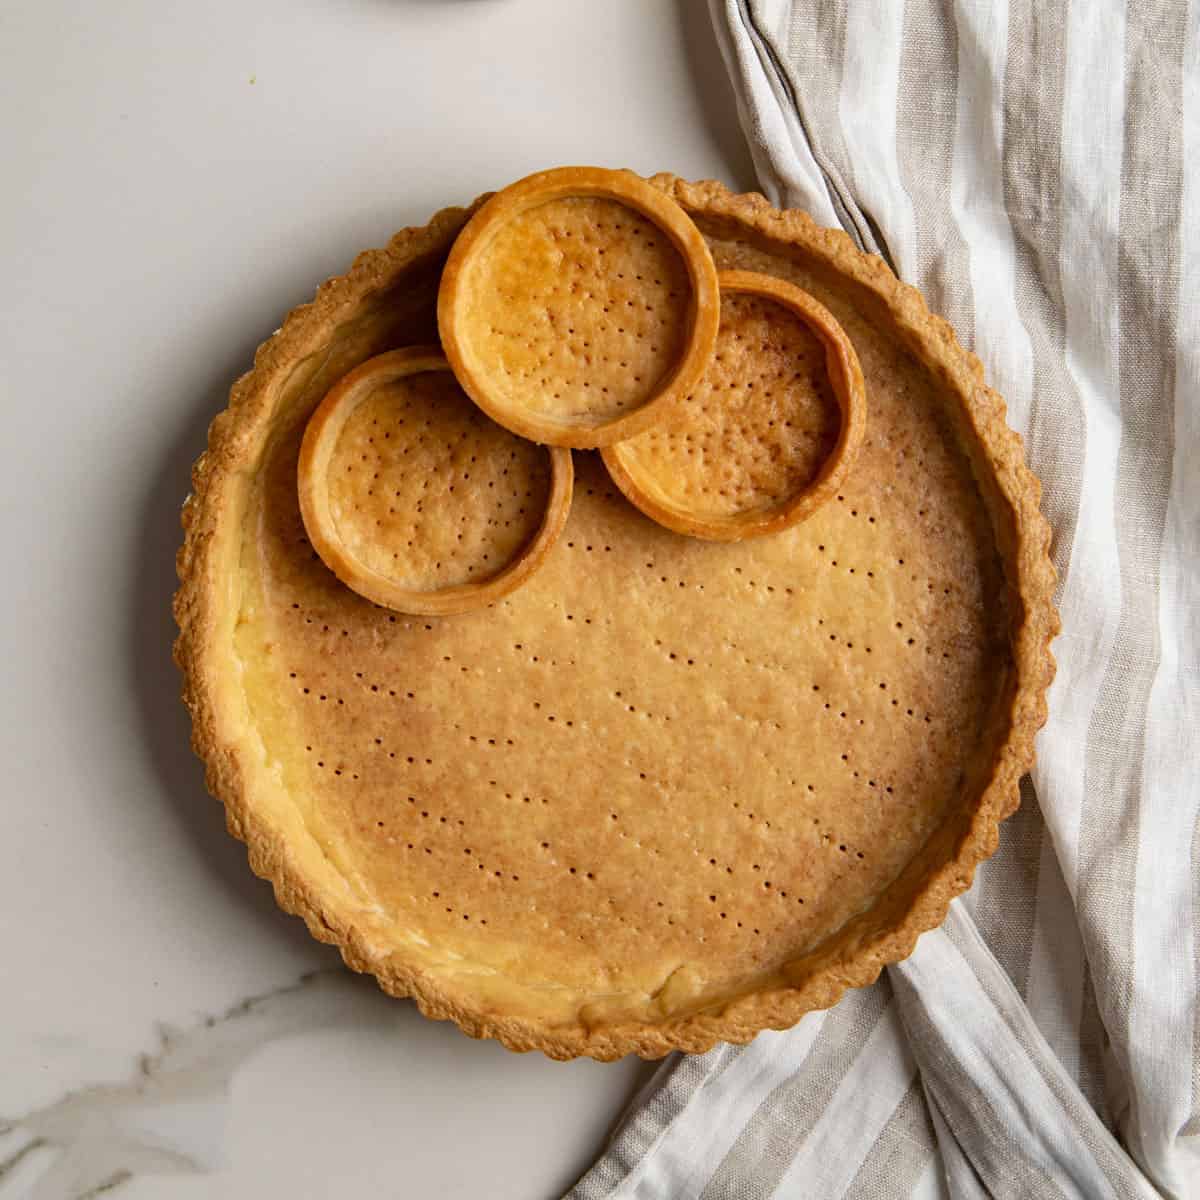
For these fancy perforated pastry rings, use the ring as a guide to cut circles that will comfortably fit inside the ring. Then cut 3/4 – 1 inch strips that are long enough to fit inside the sides of the tart ring (image 27). This method should be used for mini tart rings or even larger ones too. Make sure to place the rings on a silpat or parchment paper-lined baking sheet before lining them.
Then place the dough circle in the middle of the ring and brush the edge with a little water (image 28). Carefully place the dough strip along the inside edge of the tart ring (image 29).
Trim the excess dough from the strip and stick the dough strip together to make a perfect circle (images 30 – 31). Then gently press down so that the dough strip on the side sticks to the dough circle at the base as well. Then trim off any excess dough at the top of the tart rings (image 32).
Dock the bottom of the tarts with a fork.
Step 8 – Rest and preheat the oven
Transfer the tart pans / tart rings into the fridge for about 1 hour to rest before baking (or 30 minutes in the freezer). Preheat the oven to 375°F / 190°C. If you’re filling the tart with a filling and then baking them, make sure the oven rack is in the lower third of the oven.
Step 9 – Parbake or blind bake the tart shells
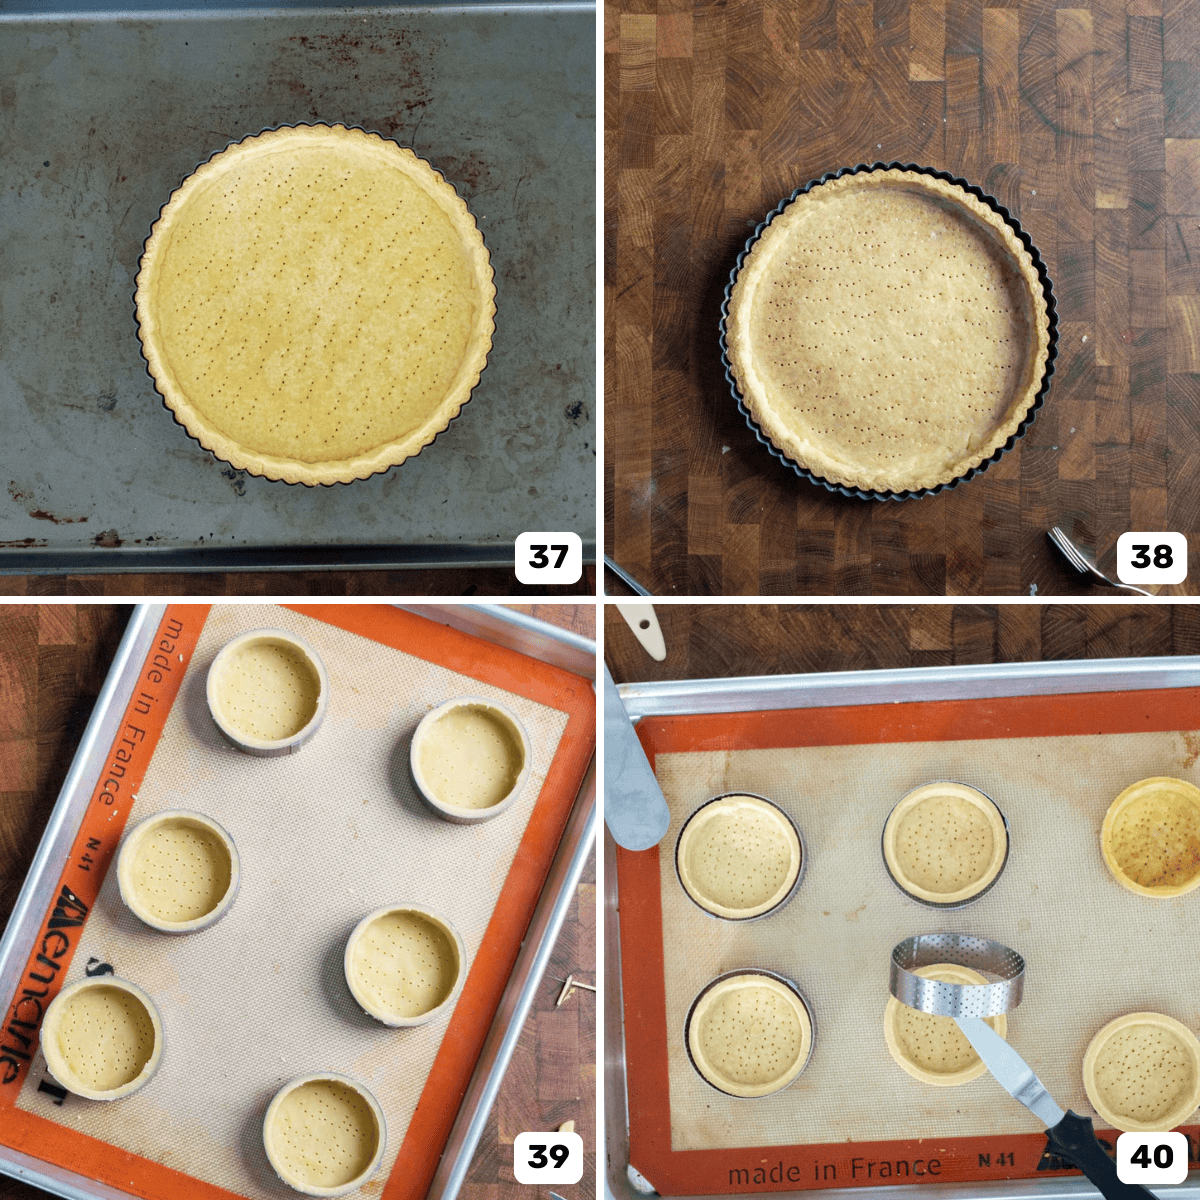
Once the oven is preheated and the tarts have been chilled, they can be baked. Make sure the tart bottoms are docked with a fork (images 33 and 39).
To parbake or blind bake, line the tart pan with parchment paper or foil, and fill it with pie weights (images 34 – 35). I prefer to use smaller weights such as rice or sugar, as these do a better job, especially with mini tarts. (I talk more about this in my comprehensive tutorial on how to blind bake pie crust.)
Transfer the tart pan onto a baking sheet, and bake in a preheated oven for about 20 – 30 minutes. The edges will start to turn blonde in color.
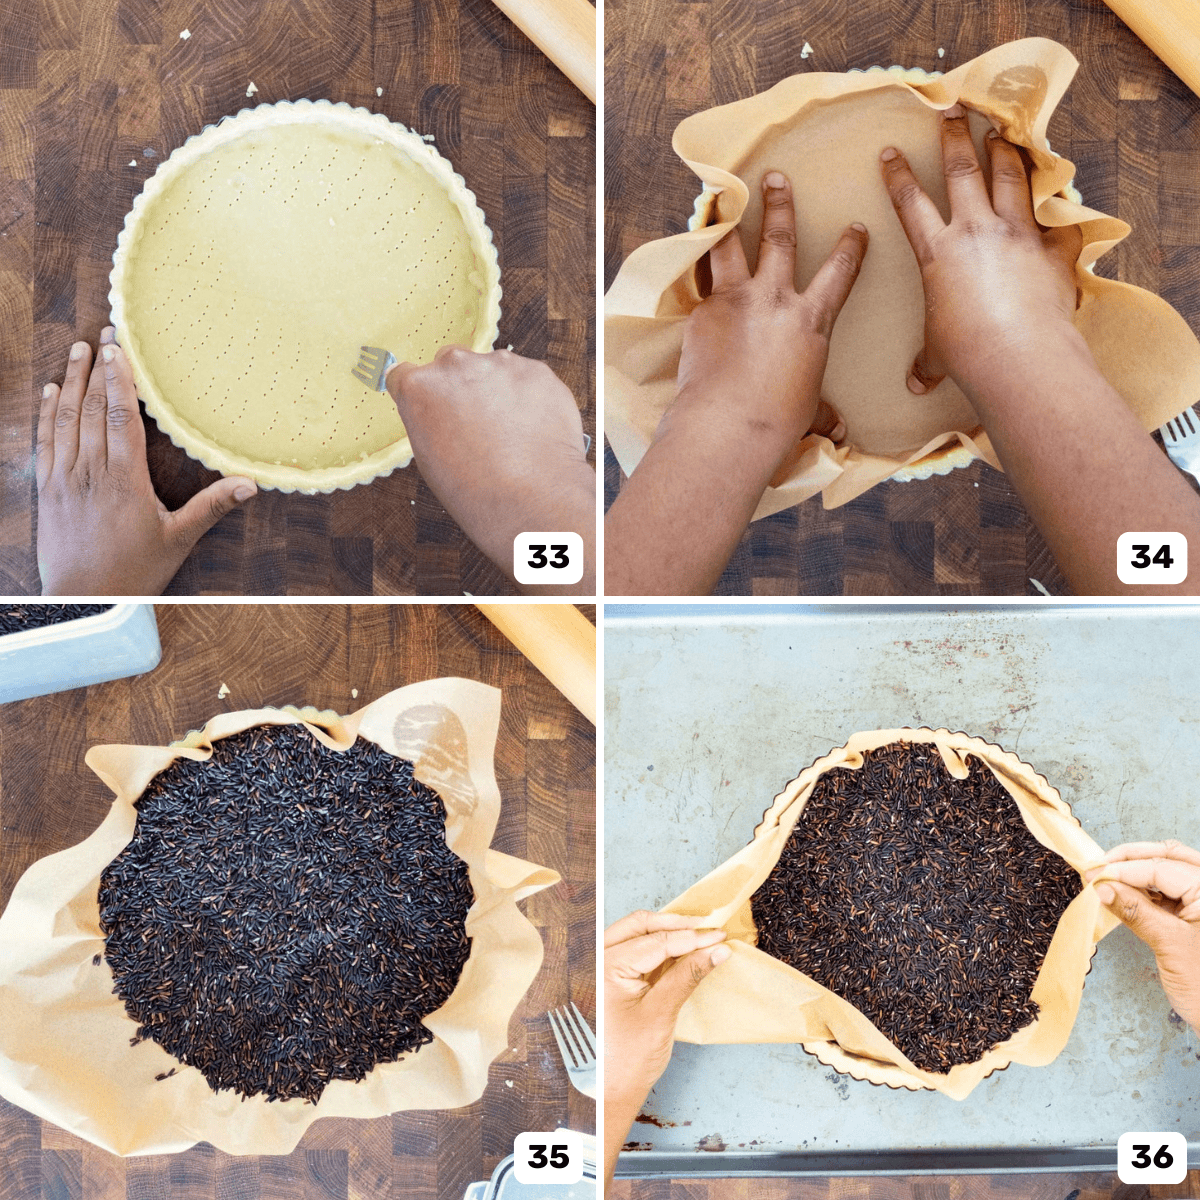
Then remove the baking sheet from the oven, and carefully remove the pie weights along with the foil / parchment paper (image 36). The bottom of the crust will look a little oily, but shouldn’t be raw.
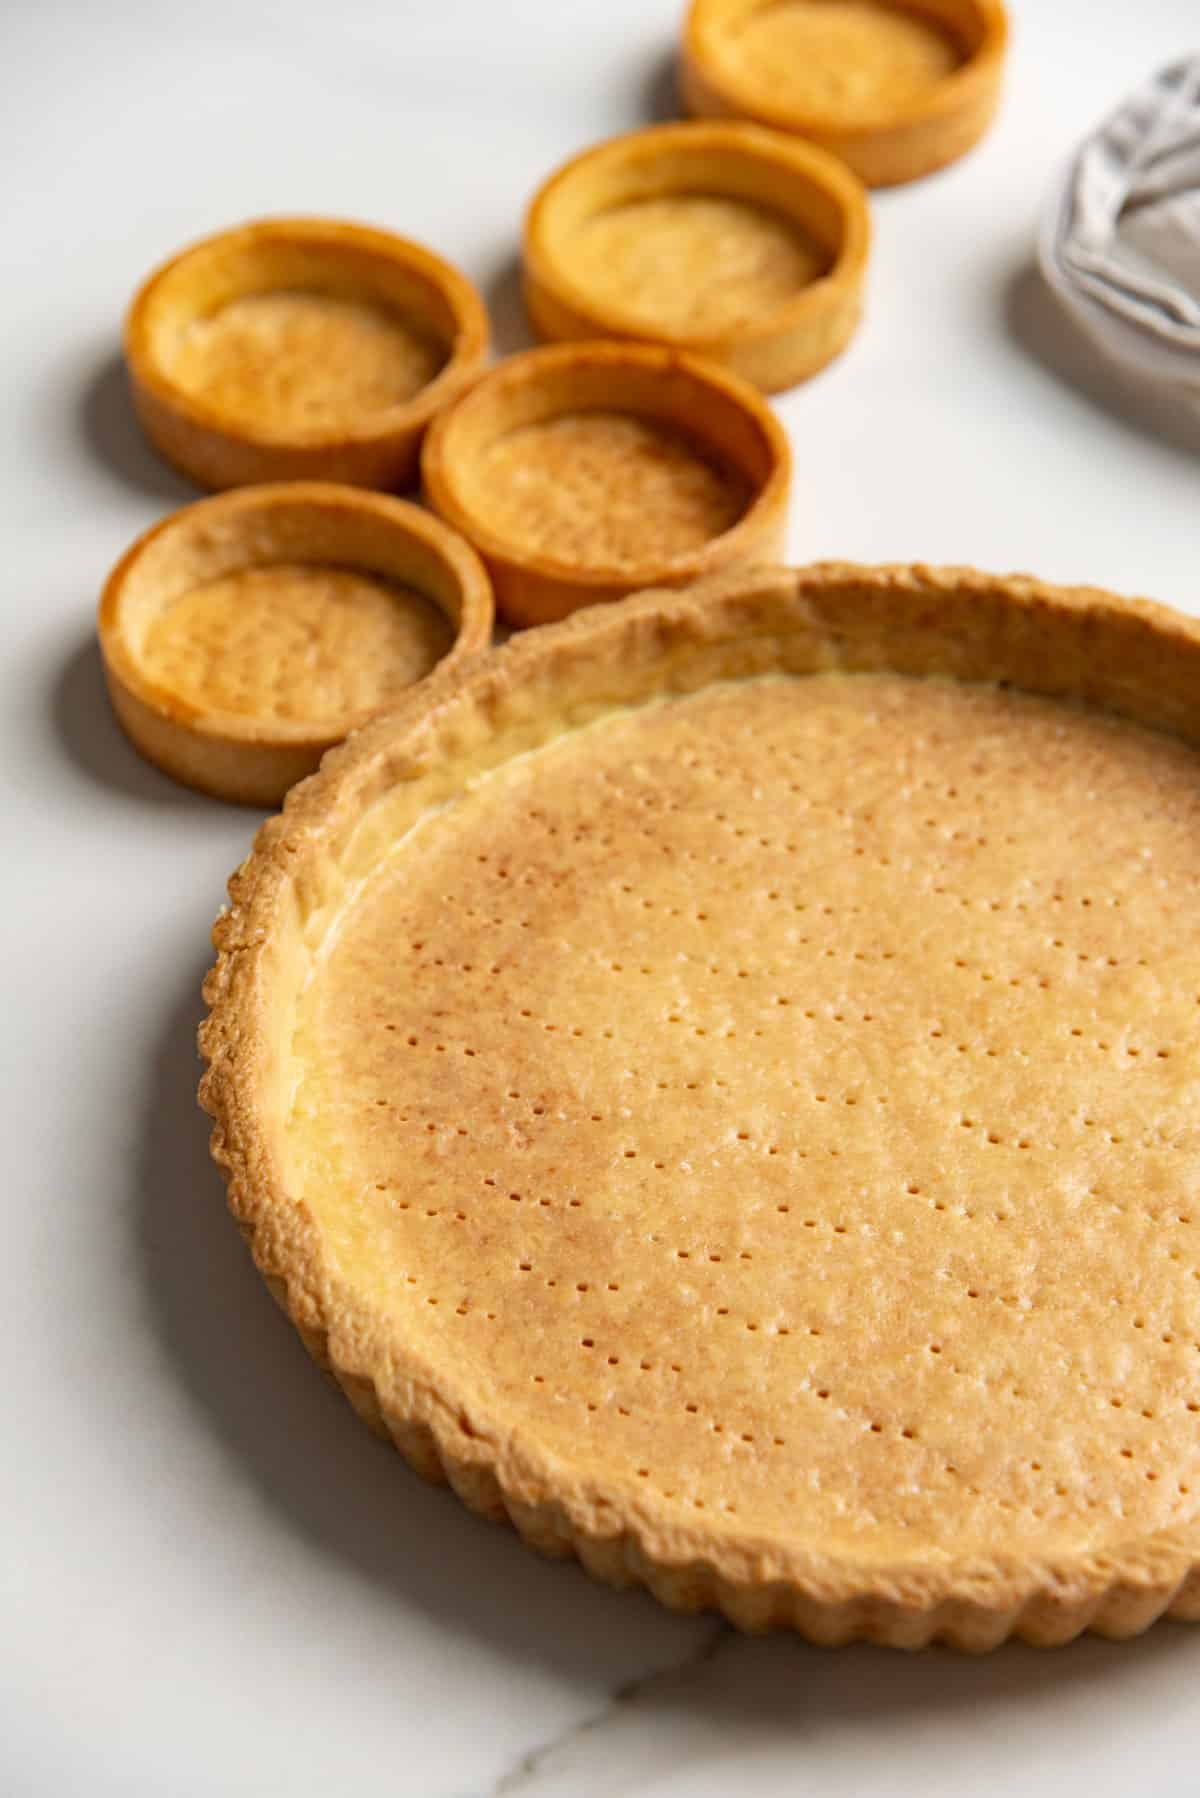
PARBAKING – Dock the bottom of the crust if needed, and return the tart to the oven to bake for a further 5 minutes or so. It’s parbaked when the tart dough goes from shiny to matte (images 37 and 40).
FULLY BLIND BAKING – Dock the crust if needed and return to the oven. Bake for a further 15 – 20 minutes, until the crust is golden in color throughout.
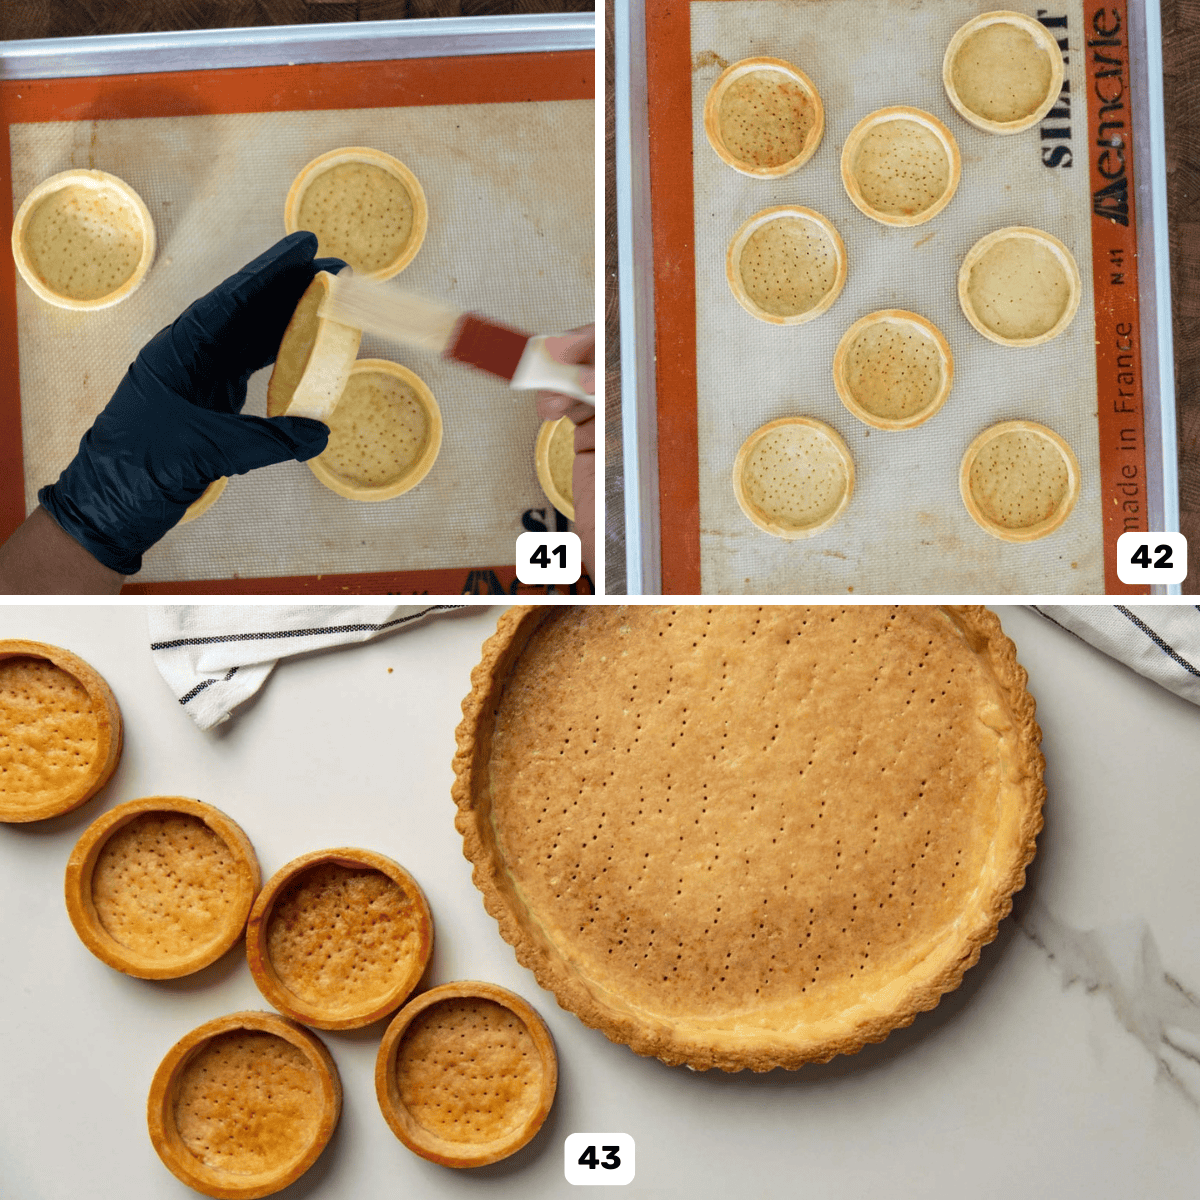
If needed, you can also lower the heat to 350°F for a slower, more even caramelization. To seal the crust, remove the crust from the oven when it’s a light golden color, and brush the surface with an egg wash (images 41 – 42). Then bake it again until the crust has a shiny, golden color (images 38 and 43).
Step 10 – Cool down and fill the tarts
Parbaked tart shells can be filled and baked further with a filling, like my classic French tomato tart.
Fully blind baked tarts can be cooled down to room temperature and filled with cooked fillings and served.
Recipe variations
- Sweet shortcrust pastry – You can add up to 120 g caster sugar (sablage method) or confectioner’s sugar (creaming method) to make a sweet shortcrust pastry. Pâte sucrée is a sweet shortcrust pastry made with the creaming method with added eggs. But you can leave out the eggs and use water instead as well.
- Chocolate shortcrust pastry – Chocolate variation of my sweet shortcrust pastry. This chocolate pâte sucrée is crisp and buttery, with a deep and bittersweet chocolate flavor.
- Vegan shortcrust pastry – Yes, you can make a vegan shortcrust pastry! You can use vegan butter to substitute regular butter, or you can also use an oil such as olive oil. But using oil will make the dough very soft, crumbly, and tender, so it needs to be handled very carefully. You can leave out the eggs entirely.
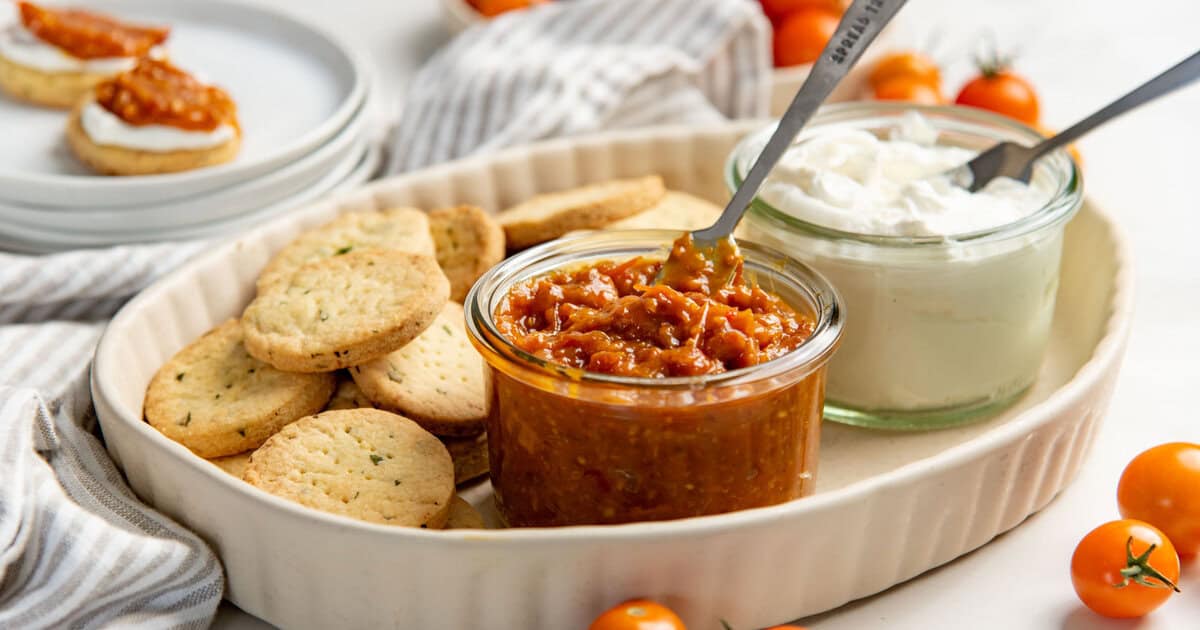
- Savory shortcrust pastry – The beauty of this French shortcrust pastry is that it has a neutral flavor, so you can add a sweet or savory flavor to it, if you prefer! I like to add herbs to the dough to make a savory shortcrust. I add chopped fresh herbs that complement the filling, such as oregano for my classic tomato tart. Or parsley for these shortcrust pastry cookies that I served with my bacon tomato jam. You can add spices to the dough to add more flavor too!
- Cheesy shortcrust pastry – To make the crust even more savory, add finely grated cheese to the dough. A crumbly hard cheese works best here, such as parmesan or cheddar cheese.
All the ways to use this shortcrust pastry
- This crust is not only for savory light tarts, you can also use this as a crust for quiches like this classic quiche lorraine too.
- Instead of puff pastry, use this shortcrust pastry to make my pork sausage rolls, or these easy 3-ingredient sausage rolls.
- You can use this pâte brisée for sweet desserts too. Such as fruit galettes like my strawberry galette or peach galette.
- Use this as a substitute for mealy pie crusts to make custard pies such as classic pumpkin pie. This pate brisee is a richer alternative to standard pie crust.
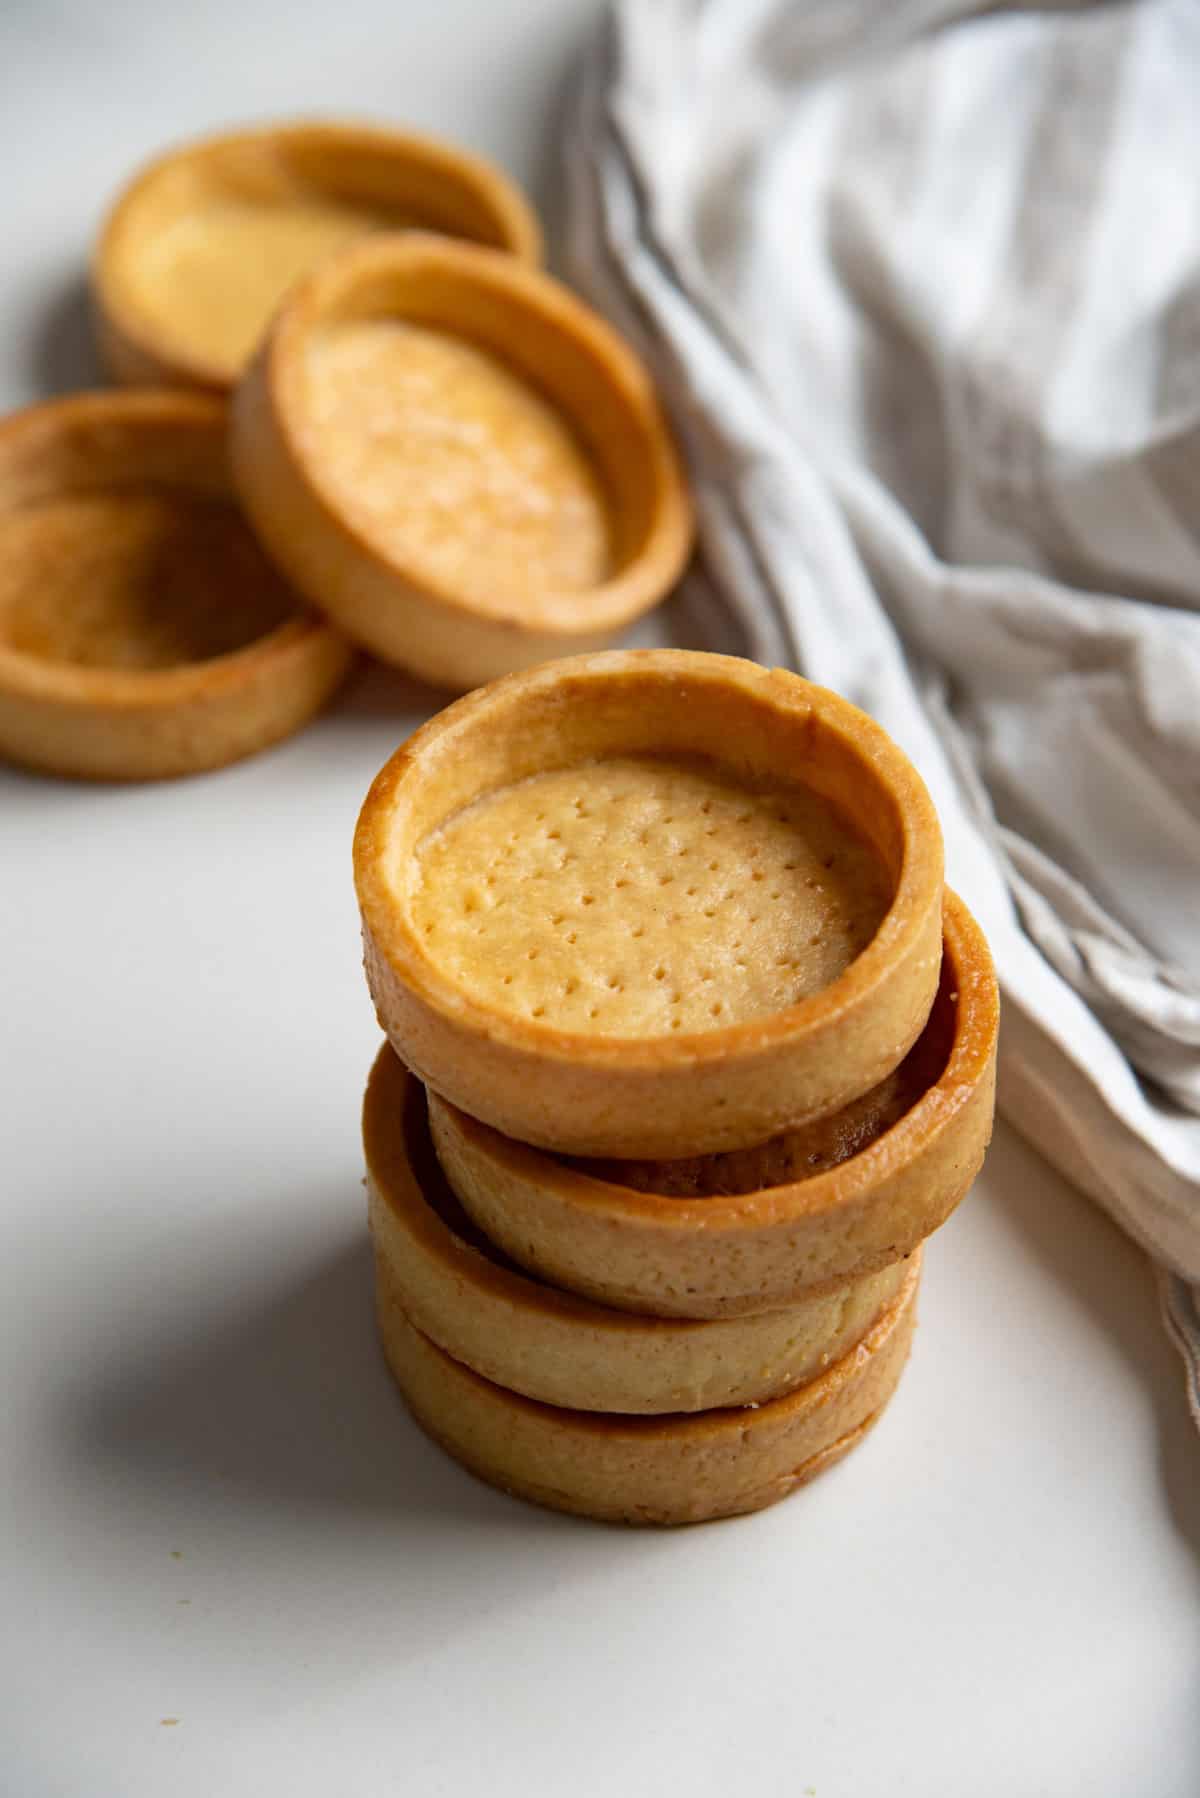
- I also love to make mini tart shells to make individual desserts and snacks! Fill them up with a cream cheese mix and top with fruits, like this strawberry sauce to make a simple dessert that looks and tastes fancy!
- Another way I love to use this shortcrust pastry is to make crackers! They make deliciously versatile crackers that you can serve on a charcuterie board or as canapes!
- You can also re-purpose dough scraps and bake them to make mini chips to serve with a dip!
Storage and make ahead tips
You can make the dough up to 3 months ahead of time, IF you’re going to store it in the freezer. Unfortunately, the dough will only last in the fridge for about 3 – 4 days.
The baked crust should be stored in an airtight container, otherwise it can get stale if it’s out in the open. The baked shortcrust pastry can be stored in the freezer, but make sure the crust is wrapped well and stored in a container.
This is so that the crust doesn’t absorb any freezer smells or doesn’t get crushed.

My best recipe tips
- Keep the butter soft, but not melted! If the butter is melting, transfer the dough into the fridge to quickly chill it for a minute or two. Melting butter will make the dough too sticky AND also form more gluten. More gluten in the dough will make the crust rubbery.
- Don’t overwork the dough. Just work it enough to form the dough and to evenly distribute the butter. Mixing it too much will result in a rubbery texture.
- Let the dough rest after forming it. This will let the moisture distribute throughout the dough more evenly.
- Make sure to evenly roll out the dough, so that it bakes evenly in the oven as well.
- If the dough shrinks at any stage, let it rest in the fridge before rolling it out further. A shrinking dough will shrink further as it bakes.
- To add more flavor, add chopped herbs or spices to the dough. You can even add some cheese.
- Although making the dough with just butter and water is simpler, adding eggs will make the crust more tender.
Recipe FAQs
Why does my pastry crack when I roll it out?
This happens when the dough is too dry because not enough liquid was added to form the dough.
However, you can easily fix this by pressing or pinching the dough together to seal it, or by spraying just a small amount of water to help the dough stick together.
How to prevent a soggy pate brisee crust
The pate brisee can be sealed on top to prevent a soggy crust! You can do this by brushing the crust with an egg wash during the last few minutes of baking for a par-baked or fully blind baked crust.
You can also spread some parmesan cheese on the bottom of the crust and let it melt and harden during the last few minutes of baking to create a layer between the crust and the filling.
Alternatively, the crust can be brushed with cocoa butter or chocolate, if you’re making a sweet tart!
Why is my shortcrust pastry tough or rubbery?
The more you overwork the dough, the more gluten will develop. If the shortcrust dough forms too much gluten, it’ll result in a tough and rubbery crust as it bakes.
Why does my crust shrink as it bakes?
Some shrinkage is normal. However, if the dough is too hydrated or too elastic, it can shrink more as it bakes. This is due to the extra gluten that can form in the presence of too much water.
If the dough was made perfectly, and rolled out perfectly, it can still shrink as it bakes IF you stretch it to fit the tart pan! So, make sure to carefully fit the dough in the baking pan by following my instructions, without stretching it.
Recipe
Shortcrust Pastry (Pâte Brisée)
US based cup, teaspoon, tablespoon measurements. Weight measurements are recommended for accurate results whenever available.
Common Measurement ConversionsIngredients:
- 455 g all purpose flour approximately 3 ¾ cups (spooned and leveled)
- 226 g unsalted butter softened, 1 cup / 2 sticks
- 1 tsp salt
- 100 mL water OR 2 whole large eggs (100 g)
- 1 tbsp sugar optional
- Extra egg for the egg wash (optional)
Instructions:
Shortcrust pastry dough
- If the butter is hard and cold, then cut it into small pieces so that it softens faster. The butter should be malleable, but still cold. See recipe notes below for more details.226 g unsalted butter
- If you'd like to use eggs instead of water, whisk the eggs well in a bowl. Then pass the mixture through a sieve to remove any lumps. This will make the egg mixture smooth, and will mix in with the dough much better.100 mL water
- Place the flour, salt, and sugar (if using) in a large bowl.455 g all purpose flour, 1 tsp salt, 1 tbsp sugar
- Add the butter and start rubbing the butter pieces into the flour using your fingers or a fork or a pastry cutter.226 g unsalted butter
- It's important that the butter doesn’t melt as you do this, but it doesn’t need to be chilled either. If the butter starts to melt, then place the mixture in the fridge to chill it for a little bit.
- I like to quickly rub the butter and flour mixture between my palms to get the butter really mixed in with the flour. There shouldn’t be any large lumps of butter in the flour. The mixture should resemble wet, coarse sand. This is the sablage stage. (You can read the post for more information about this technique, and others.)
- To mix in the wet ingredients, keep the dough in the large shallow bowl, OR place the mixture on a clean work surface. Make a well in the middle.
- Pour half of the egg or water mixture. Use a fork or your fingers to stir the liquid into the flour. Add the remaining amount and keep stirring to incorporate the liquid into the flour. The resulting mixture will have lumps.100 mL water
- Using your palm, quickly push one part of the dough to spread it on your work surface, then bring it back together with well floured hands or a bench scraper. Repeat this process just a few times to evenly mix in the ingredients, and to have a homogenous mixture. (Take care not to overwork the dough, as this can form gluten.)
- Bring the dough together and divide it into two portions.
- Dust the portions with flour and shape each one into a disc, and cover with plastic wrap.
- Let the dough rest for at least 1 hour in the fridge, although I prefer to let it rest for at least 4 hours.
Baking the shortcrust pastry
For larger tarts (about 9 inch)
- You can roll out the dough on your work surface using extra flour to make sure it doesn’t stick to any surface. Or you can roll the dough between two parchment papers as well.
- Remove the rested pate brisee dough from the fridge. Knock the dough a few times on your work surface to soften the butter if needed. You can also roll out the dough while it has softened quite a bit, as long as you use parchment paper to roll it out.
- Roll out the dough to a thickness of about 3 mm.
- Carefully transfer the dough onto a 9 inch tart pan. Gently fit the dough in the pan, making sure not to stretch the dough to fit. Stretching will lead to the dough shrinking as it bakes.
- When the tart pan is lined with the pastry dough, trim off the excess using a sharp paring knife. If you'd like a thicker crust, you can fold over some of the crust at the top to create a thicker border (see pictures in the post for reference). Then trim off the excess dough.
- Place the tart pan in the fridge for about 30 minutes to chill, while your oven preheats.
- Preheat the oven to 350°F / 180°C.
- When your oven is preheated, remove the chilled tart pan from the fridge and dock the base of the tart dough with a fork.
- Line the tart shell with parchment paper or foil and fill it with rice, beans, or sugar (as pie weights).
- Place the tart pan on a baking sheet pan, and transfer it into the oven to bake for about 20 minutes.
- When edges of the dough start to turn a light blonde in color, remove the pan from the oven and carefully lift out the pie weights.
- Return the tart shell to the oven and bake for a further 3 minutes until the bottom looks dry. Now your tart shell is par-baked.
- Bake the tart shell for a further 10 – 15 minutes or so, or until the shell is a golden color for a fully blind baked tart shell.
- OPTIONAL – Brush the inside of the shell with an egg wash to seal the crust and to get a shiny golden sheen – about 5 minutes before the bake time ends, and then continue baking it for that final 5 minutes.Extra egg
- Let it cool, and then use as needed.
For mini tart shells
- Roll out the dough as per the same instructions above for regular 9 inch tarts.
- For fluted mini tart pans, cut out circles of dough that will fit the bottom and sides of the mini tart pans. Then line each pan with the circles.
- For perforated tart rings (or any tart ring), cut circles of dough using the tart ring. Then also measure the circumference of the tart rings and cut out strips that are long enough to fit inside the sides of the tart rings.
- Carefully cut the dough with a sharp cutter to get clean lines for the dough circles AND the dough strips.
- Place the rings on a silpat-lined baking tray. Place the dough circles inside each ring.
- Brush the sides of the tart rings with some water and place the dough strips along the inside edge of the ring. Gently push the strips into the base, so that the dough strips and the dough circle at the base seal together.
- Trim the excess, and make sure the dough is sticking together well.
- Refrigerate the tart shells for about 30 – 60 minutes before baking.
- Before baking, dock the base of the tarts with a fork.
- You can choose to blind bake with pie weights if you like. But with tart rings, if the shell is chilled well, you can blind bake without using any pie weights as well.
- Bake in a preheated oven for about 15 minutes for par baking, and about 20 – 25 minutes for fully blind baked shells.
- Brush the tart shells with egg wash during the last 5 minutes of baking for a shiny, golden sheen, and to seal the shell as well.Extra egg
Recipe Notes
Nutrition Information:
“This website provides approximate nutrition information for convenience and as a courtesy only. Nutrition data is gathered primarily from the USDA Food Composition Database, whenever available, or otherwise other online calculators.”











Leave a Reply