


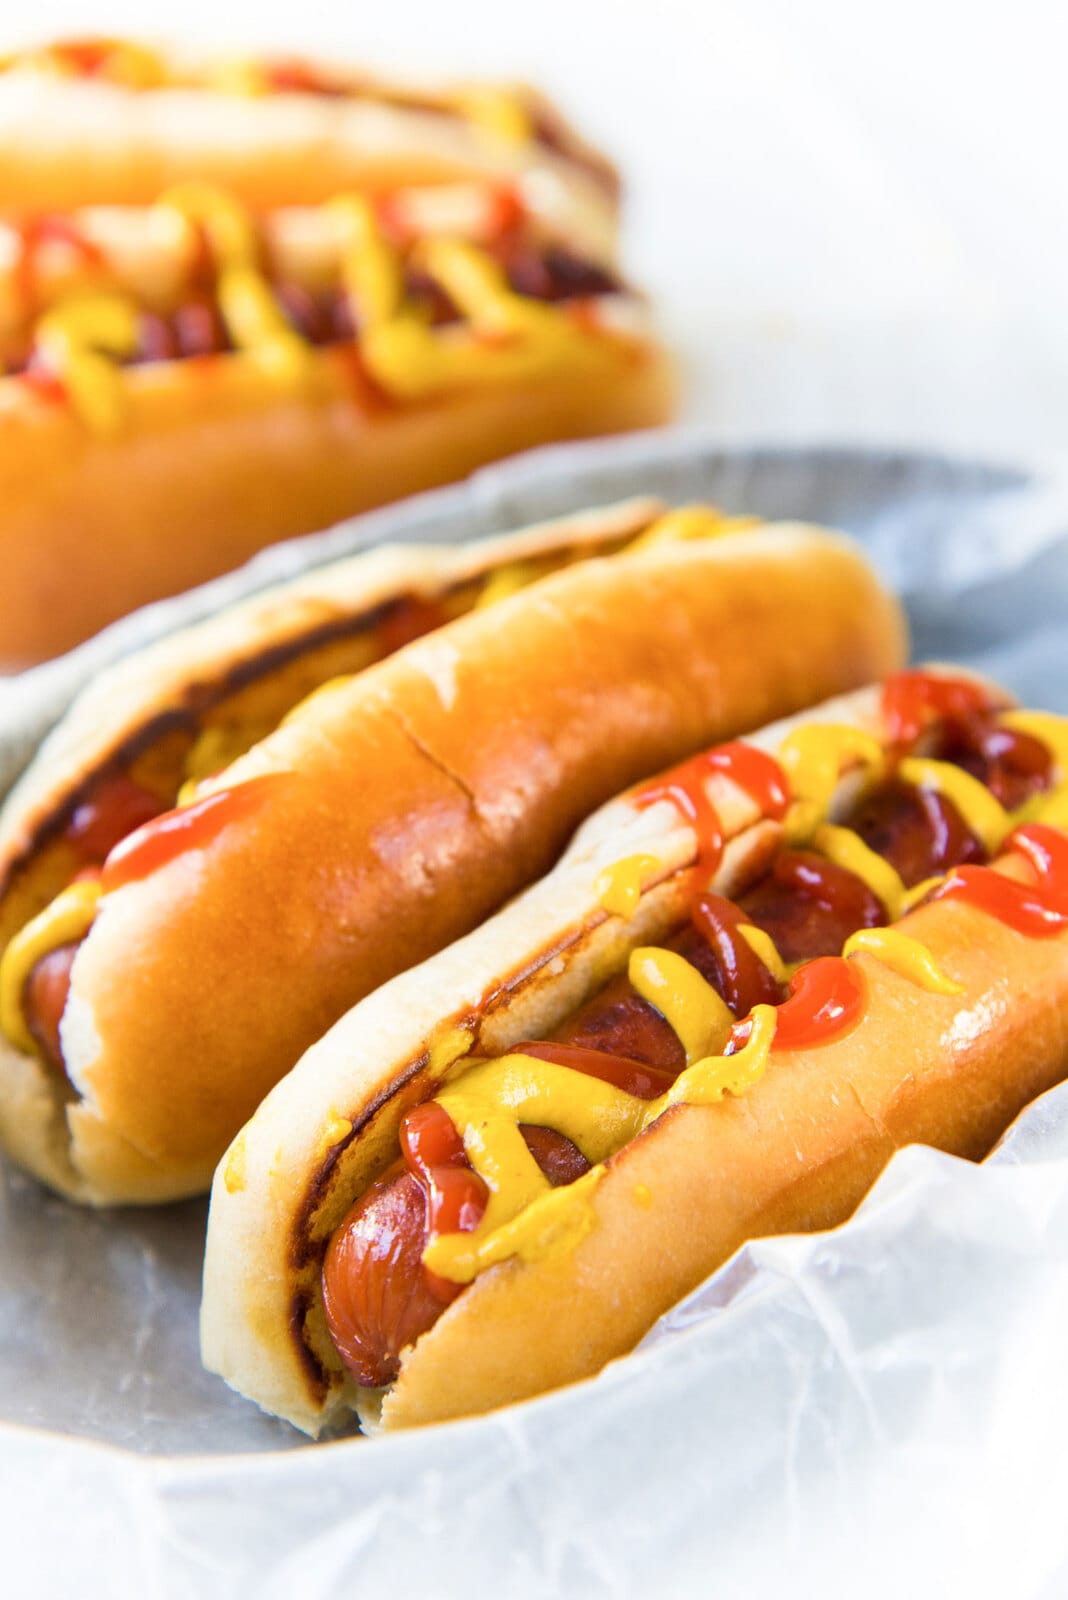
These Easy Homemade Hot Dog Buns are perfectly soft and delicious! The dough is super versatile and can be used to make hot dog buns, subs, or hamburger buns. I provide tips and explain the basics to help you get perfect results every time, with this hot dog bun recipe!
Step by step instructions to make soft, perfect homemade hot dog buns. Now you can also make delightfully soft and milky hot dog bread with this New England hot dog bun recipe, perfect for Maine lobster rolls.
Make a softer, more buttery and milky variation of this with my New England Hot Dog Buns recipe.
There’s a saying that the noblest of all dogs is the hot dog, because it feeds the hand that bites it. It may also be the most popular dog in America this time of year.
Although hot dogs were not on our menu this past fourth of July weekend, we enjoyed quite a few the week before, with these delicious, soft, easy Homemade Hot Dog Buns that I made.
I think that being able to handle and bake dough that’s versatile enough to be hot dogs, subs, or hamburger buns is a basic yet fantastic skill to have. This hot dog bread is easily one of my favorite homemade bread recipes!
So, to all my American readers, how was your fourth?

Store-bought vs homemade hot dog buns
It’s easy to find hot dog buns anywhere, but not all of them taste the same. Supermarket hot dog buns are generally,
- Too hard or dense
- Collapse and disappear in your mouth
- Have too many chemicals to increase shelf-life
- Have an artificial taste
I do love my bread buns to be soft, but no one wants buns that are so flimsy that they simply dissolve in your mouth?
After a particularly disappointing experience with magical, disappearing hot dog buns at a local chili dog establishment, I started making my own hot dog buns at home.
And thanks to my husband’s killer chili, and good sausages, we’ve never been disappointed in chili dogs or hot dogs ever since!
Why these homemade hot dog buns are better than store-bought
These hot dog buns are soft, but not too soft that they just collapse after that first bite. And the best part is you can make the buns as big or as small as you like. Make them small enough for small hot dogs, or big enough for larger and thicker sausages.
This hot dog bun dough is so versatile. You can use it to make buns for subs, New England style hot dog buns, or even hamburger buns!
Homemade hot dog buns are also excellent because YOU made them! So you know exactly what went into the dough and you can be confident that there are no artificial ingredients or chemicals.

You can shape these hot dog buns in TWO different ways
The first is a cutting method – where the dough is shaped into a slab and then cut into hot dog buns.
The second is the shaping method – where you individually shape each hot dog bun into the desired shape.

Hot dog bread dough
Usually with dough, there are two proof cycles. This lets the yeast develop which adds air and flavor, and it also lets the gluten in the dough develop too.
The dough in this homemade hot dog bun recipe does require an overnight rise. I have tried it with and without the overnight rise, and I have to say the overnight rise results in a better taste and also makes the dough easier to handle. Much like my focaccia bread recipe.

Another great advantage of this technique/recipe is that you can cover the dough and keep it in the fridge until you’re ready to bake the bread. You can do this for up to 24 hours (I have kept it for up to 1 ½ days actually).
What is gluten?
Gluten in flour is actually two molecules – Glutenin and Gliadin. These two together form the all important lattice structure of bread.
Glutenin is sort of like a coil that can be stretched out and Gliadin binds to these to create the bonds. More kneading and more protein in the flour, result in a more “organized” gluten structure, which in turn results in the kind of chewy bread we all like.

Proofing also gives the bread dough extra flavor. Who doesn’t love more flavor? It’s because the yeast ferments and multiplies, introducing CO2 (which creates more air pockets) and alcohol (which leads to the beer-like flavor).
By the way, do you know what the process of letting the dough rise slowly in the fridge is called?
It’s called retarding the dough. I know, right?
A colder environment (usually a fridge for us home bakers) means a slower rise due to the slowing down of yeast activity (metabolism). I do this for homemade doughnuts recipe and brioche bread recipe as well, because it really does make it tastier and easier to handle.

And even though the yeast activity slows down in the fridge, bacteria and enzymes keep working to break down proteins to develop more flavor in that colder environment. How neat is that? 😀
What are the TWO ways in which I can prepare these easy homemade hot dog buns?
The first method of shaping the dough is the cutting method.
After the overnight rise, the dough is rolled out to a slab. This slab is cut into 10 – 12 sections, and then each section is placed on the baking tray, proofed for the second time and baked. This method is easier and less time consuming. With this method, the hot dog buns will have rougher edges where they were cut.

This is because the buns need be placed close to each other while baking. This way the buns support each other to rise UPWARD while baking, rather than flattening out. This will also result in the hot dog buns having soft sides as well.

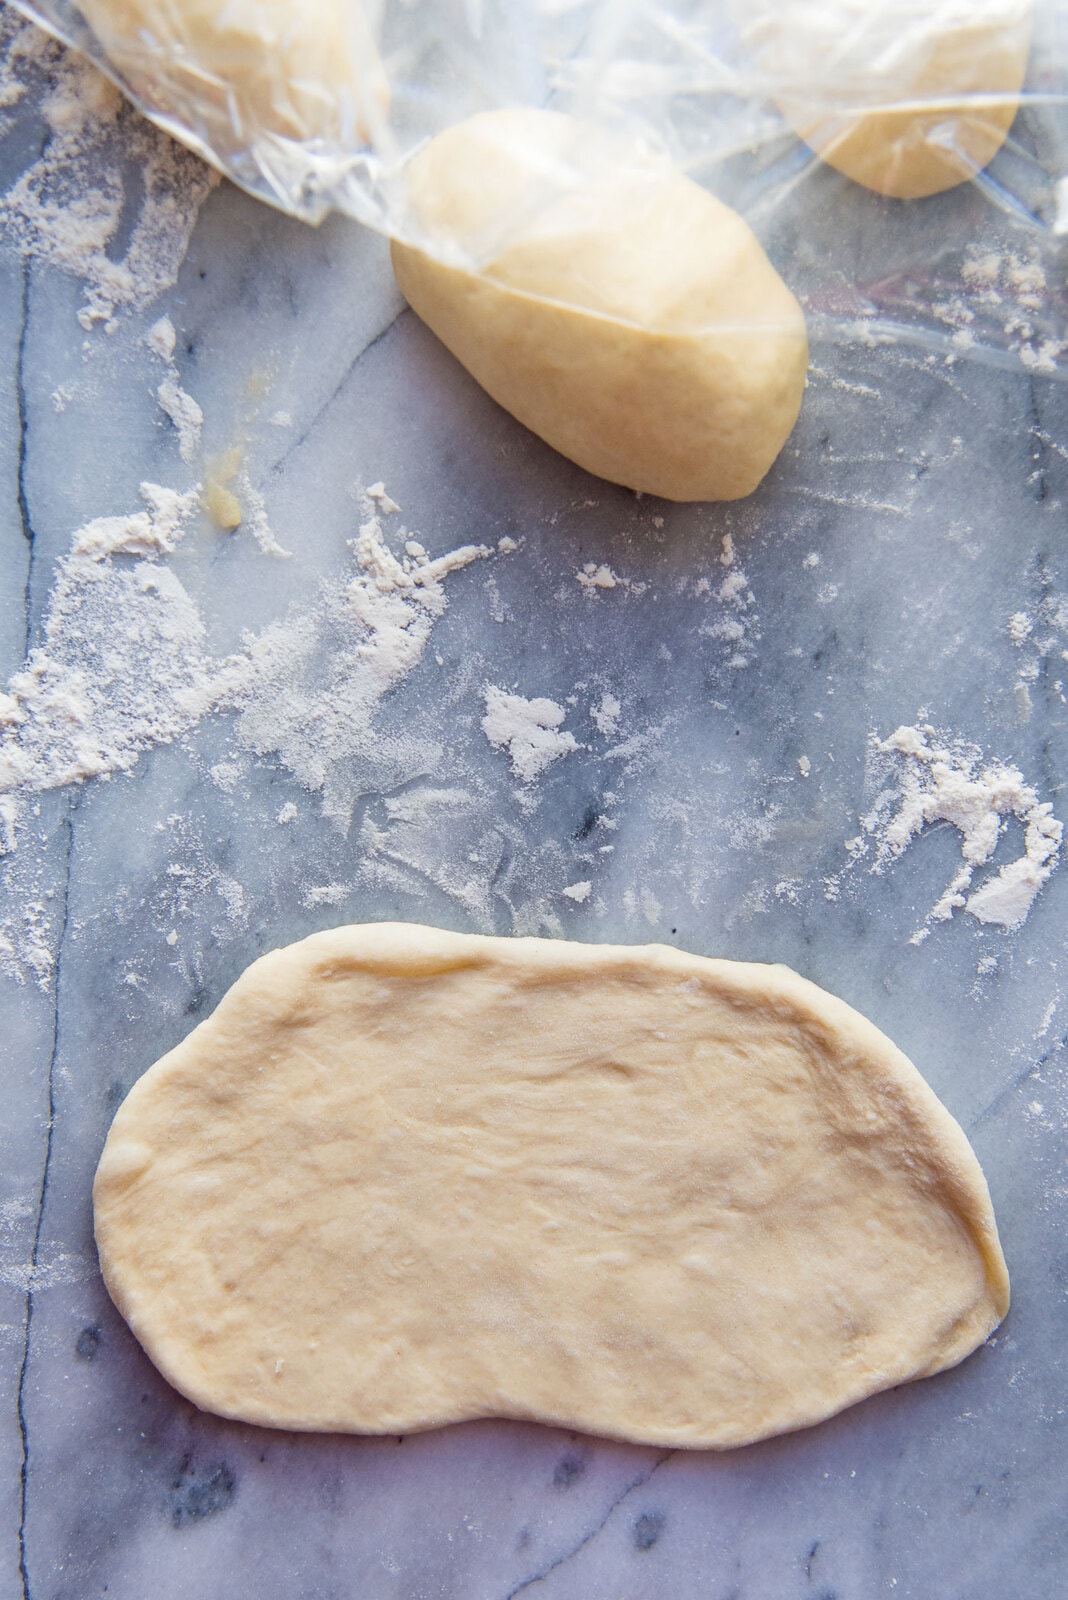
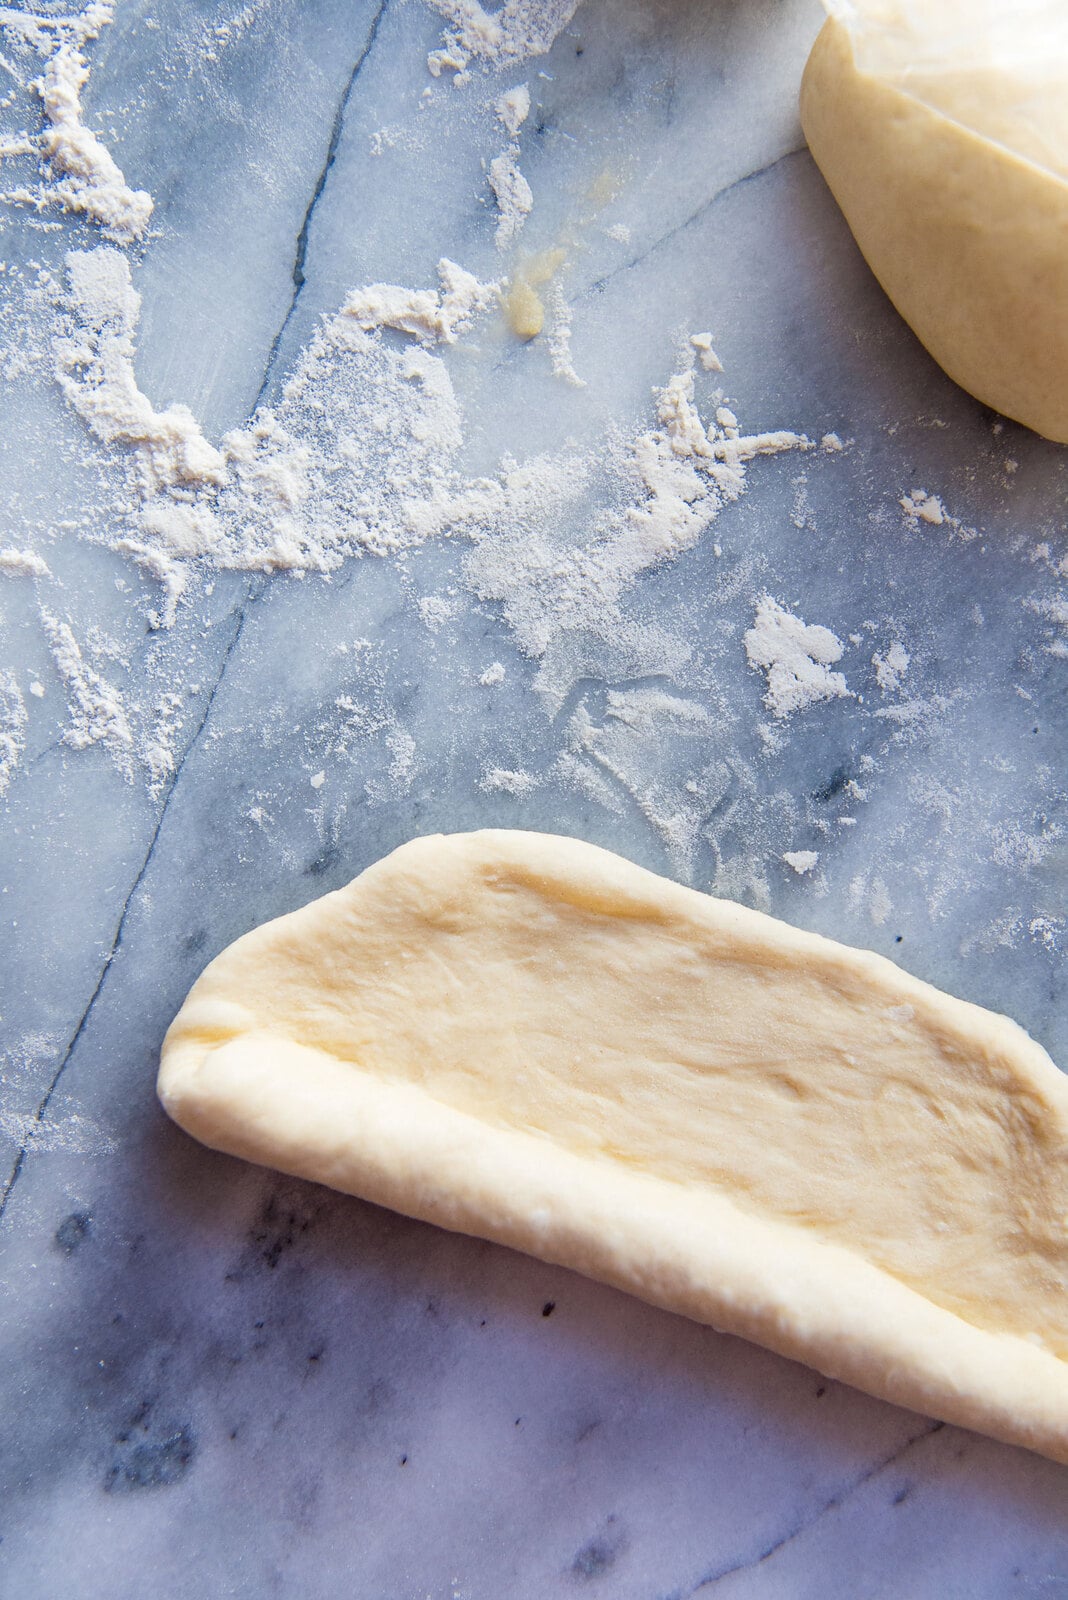
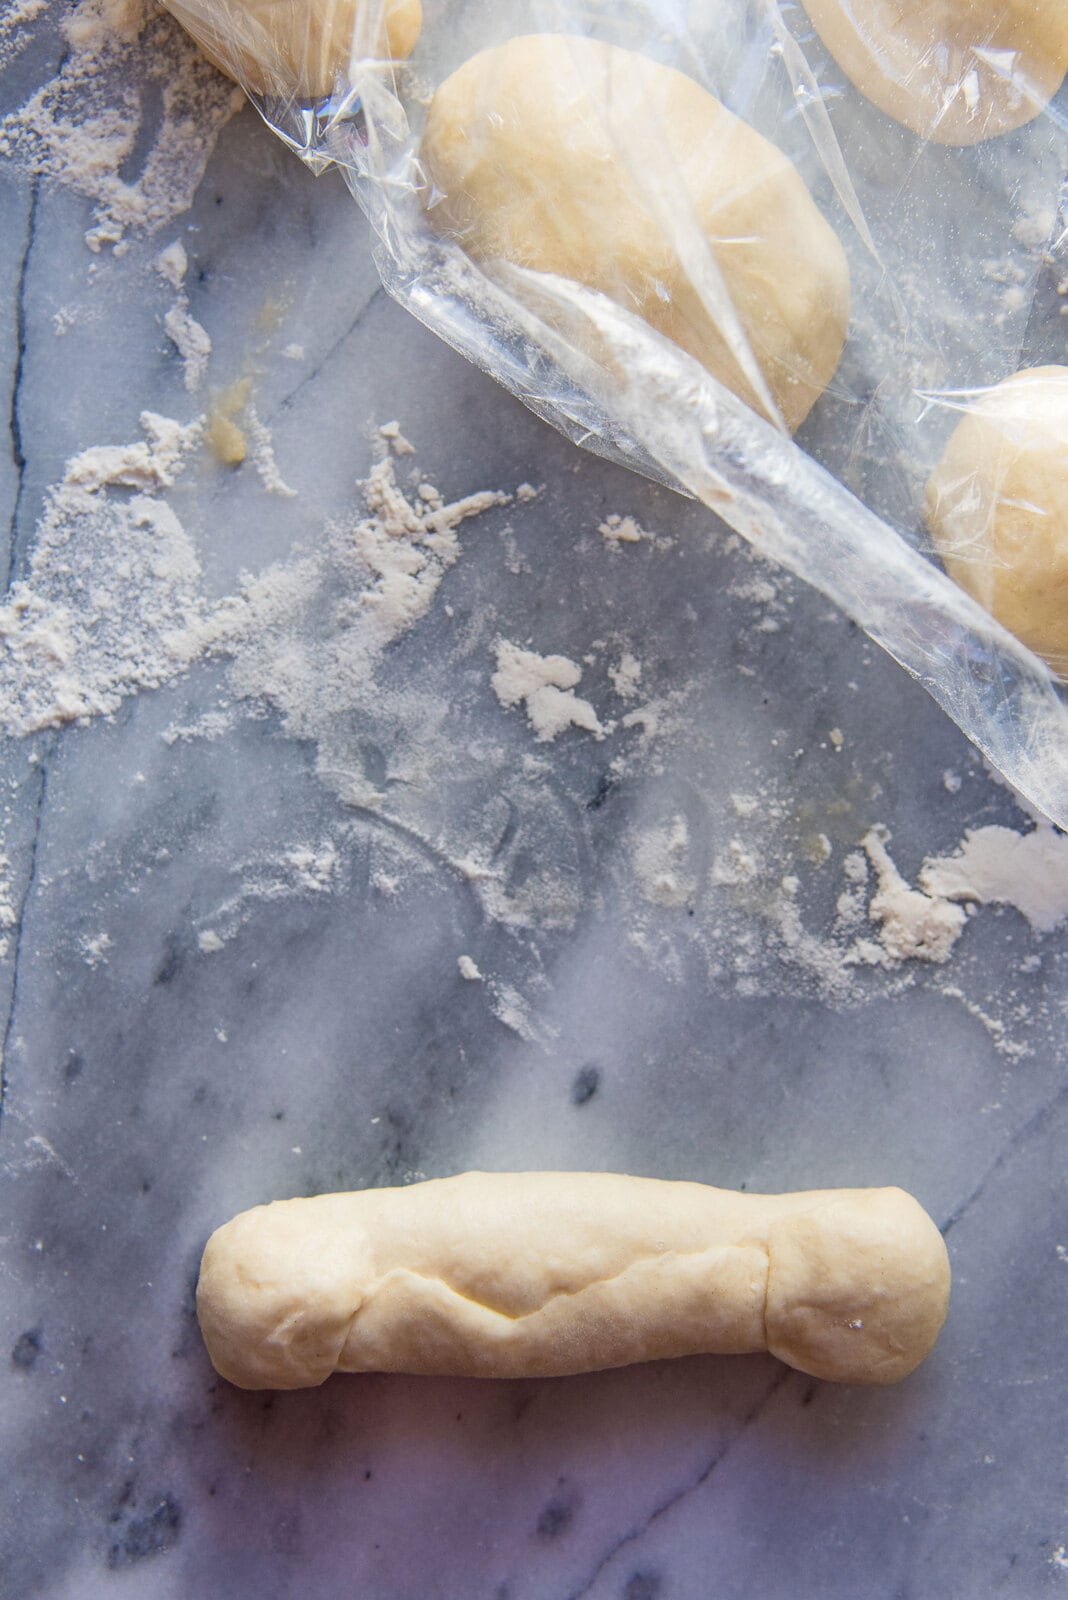
The second method of shaping the dough is to portion the dough, and then shape each portion individually.
For this, the dough that was proofed overnight, is turned out on to a floured working surface and flattened to let out excess air. Then the dough is weighed, and then divided into portions equally (by weight, to ensure all will be similar in size).
For this recipe, I like dividing it into 12 portions (for smaller hot dog buns), or 10 for medium sized hot dog buns, or 8 for large hot dog buns.

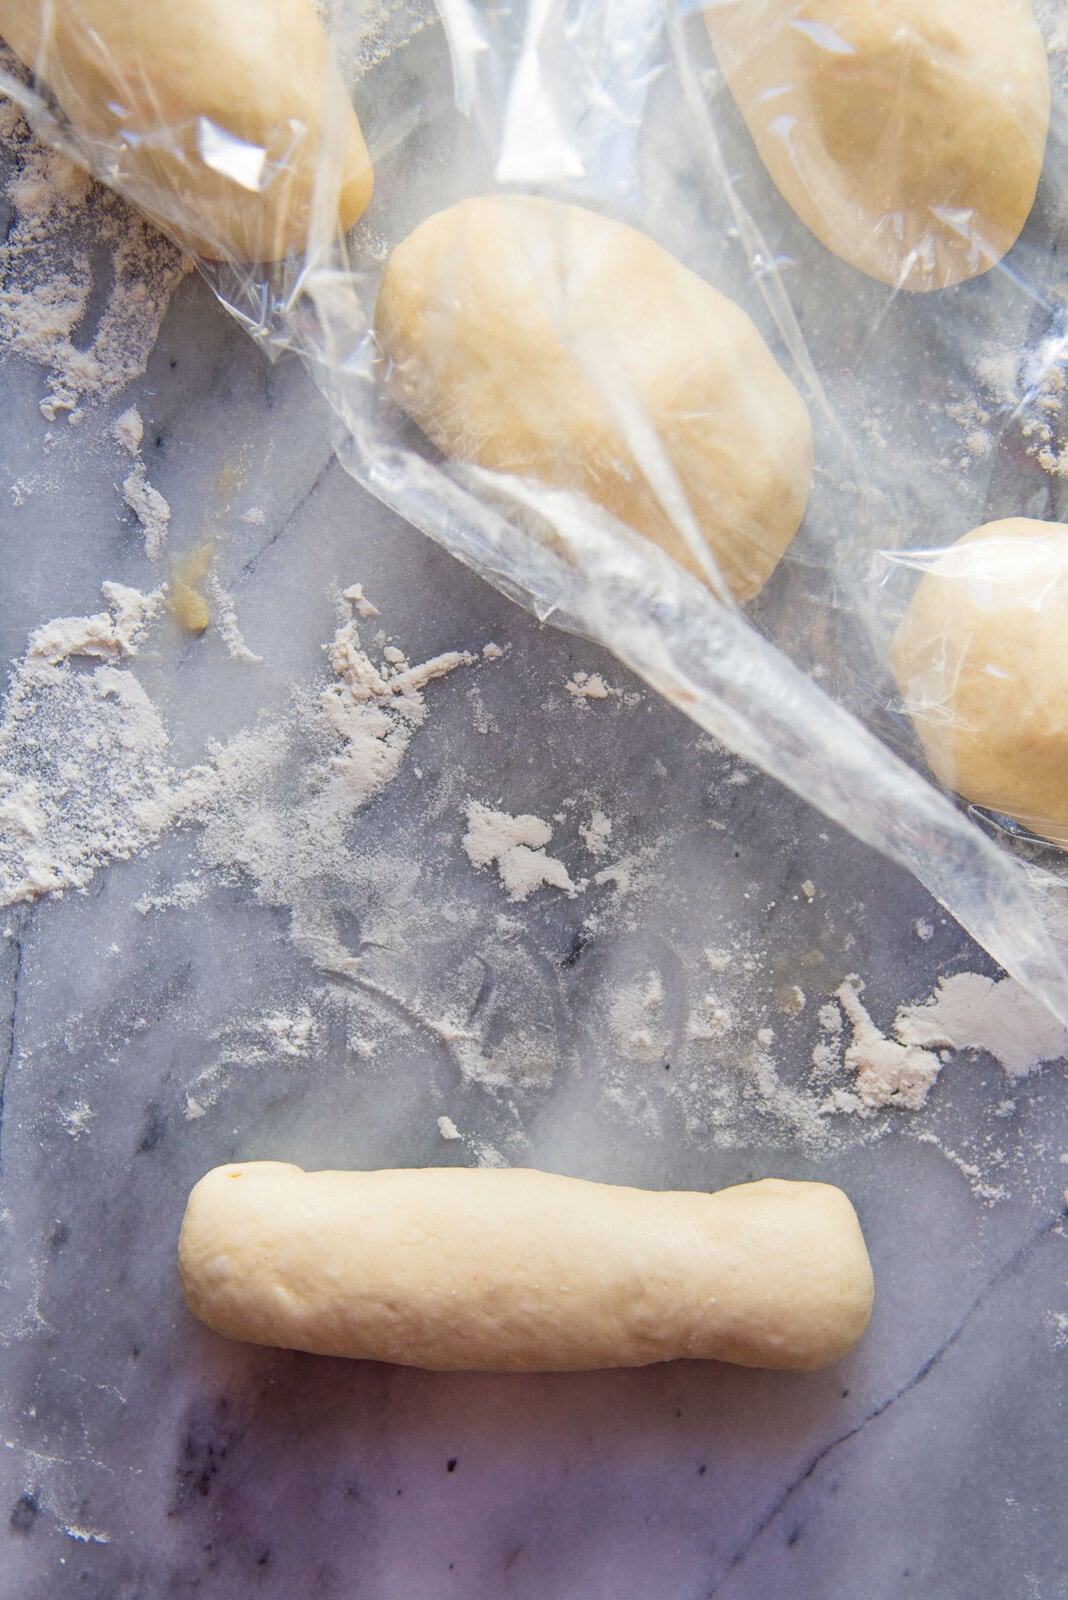
Each portion is then rolled out into a flat piece that’s about 5 – 6 inches long and 4 inches wide. The dough is then TIGHTLY rolled up, and the edges are tucked in and sealed, to form an evenly shaped cylinder that’s about 5 inches long and 1 inch wide.
This method is more time consuming but yields neater results.
Once the dough is shaped, what’s next?
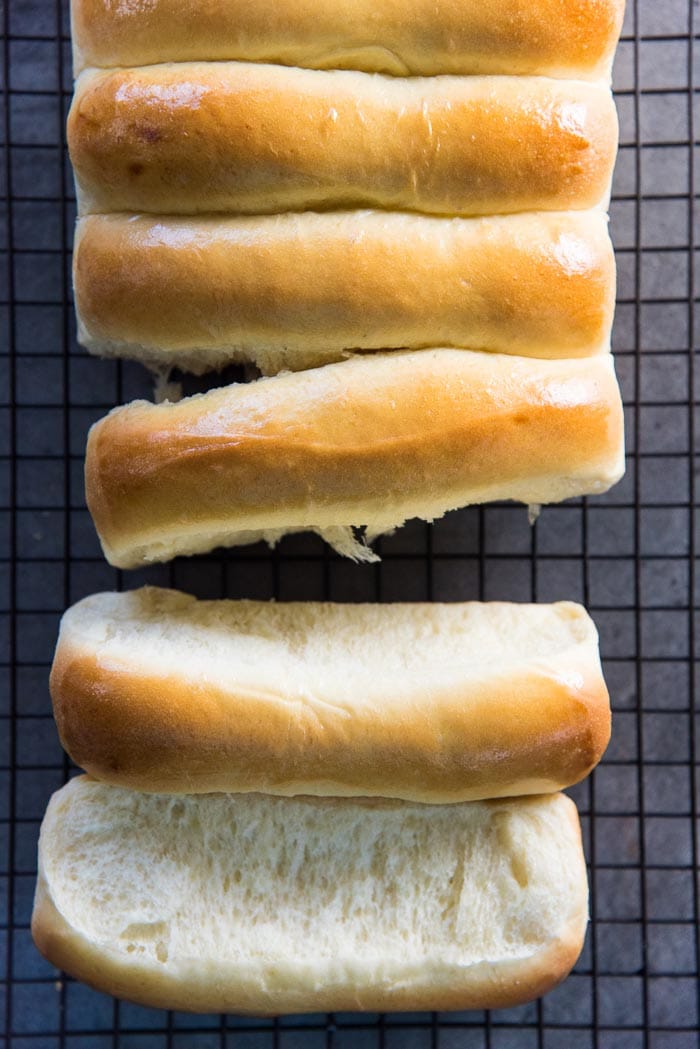
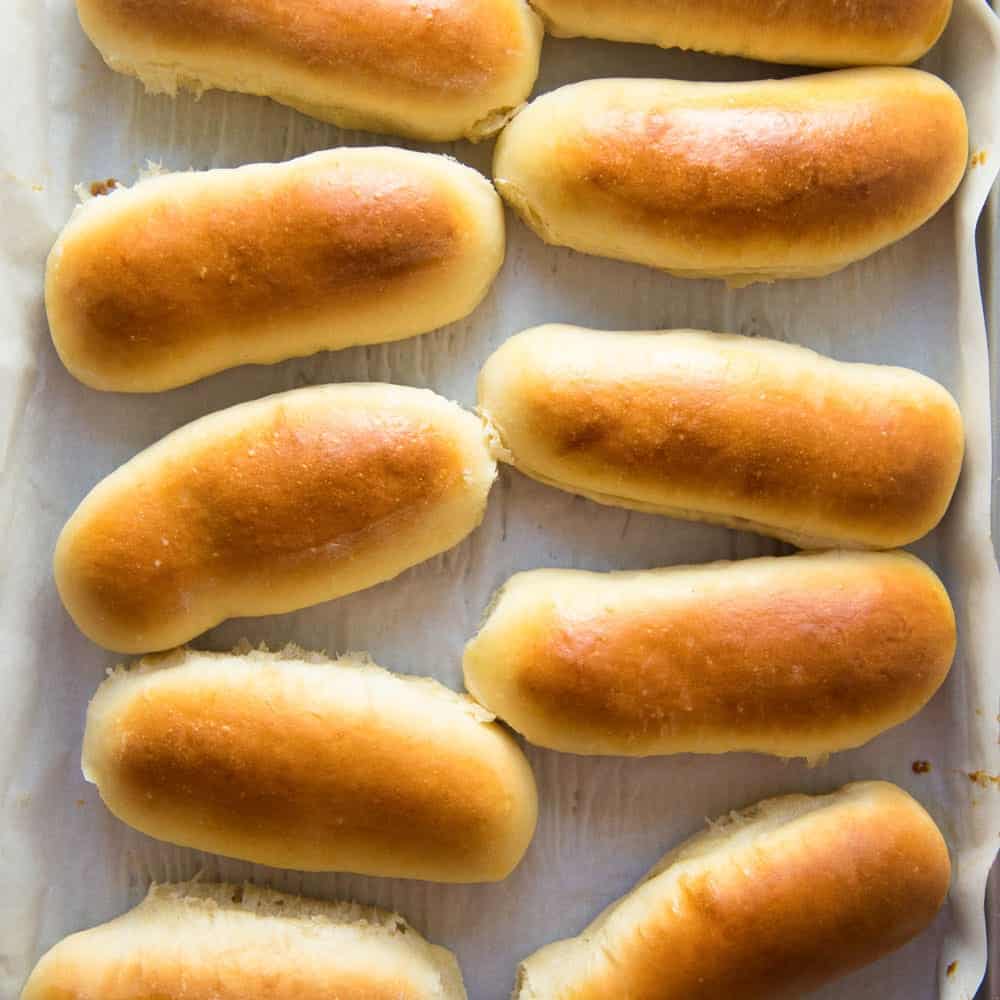
The next step is to let them proof for the second time. You can let these hot dog buns rise with good spacing between each, in order to have smooth sides. OR you can let them rise in close proximity, so that the dough sticks together as they rise and bake. This way you end up with pull-apart hot dog buns.
The other option is to use a New England hot dog bun pan, which will give you soft sides, with pull apart hot dog buns.

Can I freeze unbaked hot dog buns?
After rolling out and cutting/shaping the dough into hot dog buns or burger buns (following the first overnight rise), you can freeze them (on a lined pan). Then you can store these frozen dough rolls in plastic bags in the freezer until you’re ready to bake them.
However, if you do this, the second proofing at room temperature will be longer because now the bread rolls will have to defrost first and then rise.
However, this is not my preferred way to freeze hot dog buns.

What is the best way to freeze hot dog buns?
Baked and cooled hot dog buns. You can easily bake them all the way through, until they are golden brown. Once they are at room temperature, freeze the hot dog buns, and store the frozen buns in air-tight containers.
When needed, simply let them thaw out and use as normal. For an even better tasting buns, split and toast them lightly in the oven.
Par-baking the hot dog buns. You can also bake the hot dog buns, but remove them from the oven about 5 – 10 minutes before they are completely baked (when the tops aren’t completely golden brown). These buns are then frozen and stored in air-tight containers. When needed, pop the frozen buns in the oven and bake them until golden brown.
In the end, you will have perfectly soft, delicious homemade hot dog buns or burger buns that you and your family will LOVE!

Recipe substitutions
I often get asked by my readers about substitutions. You can substitute certain ingredients in this recipe, but please note that it can obviously change the texture and/or taste of these buns.
Can I make these hot dog buns with bread flour?
Yes you can! However, bread flour contains more gluten (than all purpose flour), and the dough may require extra milk/water to get the same consistency.
Can I use whole-wheat flour to make these hot dog buns?
I have used 50% whole-wheat flour and had good results. They are not as soft as the hot dog buns made with 100% AP flour, but they are still delicious!
I’ve also had a reader, who made these buns with half whole spelt and half white spelt flour and was really happy with the results (thank you Devorah!).
How about the other ingredients?
These hot dog buns contain eggs. Specifically 1 egg. The egg adds richness and makes the bread tender and soft. These hot dog buns also contain dairy – milk and butter. Both these ingredients also make the buns soft.
Can I make vegan hot dog buns?
While the eggs and milk can be substituted, they will change the flavor and texture of the final product.
- Milk substitutions – You can absolutely use a non-dairy milk (almond, soy, coconut milk) instead of regular milk. Or in a pinch, use water instead.
- Butter substitutions – For dairy-free or vegan substitutions, just add a vegan butter or oil. You can use vegetable oil so that it doesn’t add flavor to the dough. OR you could be adventurous, and add some olive oil or a flavored oil instead.
- Egg substitutions – You can add extra milk or water to compensate for the liquid that the egg adds to the dough. The extra liquid can be between 3 – 4 tbsp. You could use a flax egg instead as well, which would add a different flavor to the dough. I have not tried this, however.
I LOVE how versatile these hot dog buns are!
You can cut this dough into 8 portions for larger buns or hamburger buns, and into 10 – 12 portions for smaller hot dog buns. I prefer to shape the buns into 10 – 12 portions for hot dog buns, but have my burger buns be slightly larger.

This recipe always gives me ridiculously delicious and soft buns that are perfect for hot dogs, subs and hamburgers. These hot dog buns can also serve as a canvas for bigger, better and tastier creations like this chicken meatball sandwich, fried chicken sandwich, Nashville hot chicken sandwich, crispy tuna burger etc.

Do you prefer New England hot dog buns instead?
You can make New England hot dog buns with this same recipe, OR use my New England hot dog bun recipe for hot dog bread that is more buttery, and with an extra milky flavor!
Other recipes you may like
Frequently asked questions
Why do you not activate the yeast?
If you use active dry yeast that has smaller granules, and is fresh, you don’t need to activate it. But if you’re not sure how fresh / active the yeast is, then you may want to activate the yeast in 1/2 cup of warm liquid first.
I very rarely activate my active dry yeast, because I know my yeast is fresh (I use up yeast pretty quickly).
Can I use instant yeast instead of active dry yeast?
Yes! There’s conflicting information about how much instant yeast to use, ranging from 50% – 100% of the weight.
I have had readers who simply substituted 1:1, and had good results.
Just remember, instant yeast is more fast acting, so proofing times will be shorter.
My hot dog buns are dense
If you use volumetric measurements (cup measurements), chances are that the flour was not measured correctly. If too much flour is packed into the cup, then too much flour is added to the dough, which will result in dry, dense hot dog buns.
The dough should be sticky to work with at the start. If not, then too much flour was added.
As noted in the recipe, PLEASE USE WEIGHT MEASUREMENTS for accurate results.
Equipment and tools I use for this recipe
- Stand Mixer – A stand mixer will make the process of kneading much faster. You could knead the dough by hand but this will take a longer time, and can be tiring.
- Small rolling pin – This is to roll out the dough portions to help shape the buns. Rather than using large rolling pins, I prefer to use smaller fondant rolling pins for small jobs like this.
- Pastry brush – to brush the tops of the buns to get that shiny crust!
- Half Sheet pan – to bake the the hot dog buns
- Cooling rack – To help cool down the buns to avoid soggy bottoms
Recipe
Easy Homemade Hot Dog Buns (or Burger Buns)
US based cup, teaspoon, tablespoon measurements. Weight measurements are recommended for accurate results whenever available.
Common Measurement ConversionsIngredients:
- 500 g all purpose flour 4 US cups, measured by spoon and level method (please see notes).
- 120 mL warm milk ½ cup
- 180 mL warm water ¾ cup
- 7 g dry active yeast 2 tsp
- 1 tsp fine sea salt Use a little extra if using coarse kosher salt
- 1 tbsp sugar
- 1 large egg
- 28 g softened butter / oil 2 tbsp
- Extra oil to lightly oil the bowl
- 1 egg for the egg wash
Instructions:
- In a mixing bowl (of your stand mixer), combine the flour, yeast, sugar and salt.
- In another small bowl, whisk together the water, milk and egg.
- With the paddle attachment in your stand mixer or a dough whisk, mix the dry ingredients and add the water-milk-egg mixture and mix to combine.
- Switch to the dough hook of your stand mixer, and knead the dough to bring it together. The dough needs to be fairly wet and sticky. Knead for about 5 minutes, until you have a smooth ball of dough.
- Add the oil or butter and knead for a further 5-10 minutes (I knead it for about 8 minutes), until the dough is shiny, smooth and tacky to the touch.
- Lightly oil a big bowl and place the dough in it. Make sure the dough is lightly oiled on the surface as well.
- For best results, cover the bowl with plastic wrap and store in the fridge overnight (8 hours) or for up to 24 hours. Alternatively, if you want to bake it on the same day, you can cover the dough with plastic wrap and let it rise for 1 hour in a warm place, until it has doubled in size.
- On the day you bake the bread rolls – turn the chilled dough out on to a lightly floured surface and lightly dust the surface of the dough as well. If the dough wasn’t chilled, you may need extra flour on your hands and on your work surface to prevent the dough from sticking.
FOR THE CUTTING METHOD FOR HOT DOG BUNS
- Roll out the dough into a rectangle that’s about 16 inches in length and 4-5 inches in width. Cut the dough into 10 sections and place them on a parchment paper lined baking tray, with about 1.5 inches of space between each.
FOR THE SHAPING METHOD FOR HOT DOG BUNS
- Cut the dough into 12 (or 10) equal sections. I usually weigh the bread dough so that I know how much each section should weigh.
- Knead each portion for just a few seconds to form a smooth ball. Roll out each portion into a flattened piece of dough that’s about 5 inches long and 4 inches wide. Then TIGHTLY roll up the dough to form a cylinder. Tuck in the sides/edges and pinch these edges and seams to seal. Place each portion on a parchment paper lined baking tray, about 2 inches apart.
FOR BURGER BUNS
- Cut the dough into 8 sections (for larger buns) or 10 sections (for smaller buns) and roll these portions in your hands to form smooth balls. Place them on the parchment paper lined baking tray, about 3 inches apart.
Preparing the dough for the second proofing
- Cover the dough with plastic wrap and let it rise for 45 min in a warm place, until it has just about doubled in size. In winter, this can take a little longer than 45 min, and on very hot summer days, it can take less than 45 minutes.
- Preheat the oven to 180°C / 350°F about 30 minutes prior to baking.
- Brush the hot dog rolls with the egg wash (lightly beaten egg) and bake in the preheated oven until they are golden brown on top and sounds hollow when tapped, which should take about 15-20 mins. (Optional – sprinkle sesame seeds or poppy seeds on the egg wash brushed dough before baking). SEE NOTES FOR FREEZING INSTRUCTIONS.
- Remove from the oven and let the buns cool down enough to be handled comfortably. Best eaten on the same day. Will keep longer in an air-tight container in the fridge.
Recipe Notes
Note on the dough
Please use weight measurements for accurate results. Using cup measurements can result in the addition of more flour than intended, causing the dough to be too dry. This results in a heavy, dense bread roll, instead of the soft, fluffy roll that this recipe guarantees. The dough should be sticky and wet at the start, and with kneading it’ll become glossy, smooth and tacky. Do NOT add more flour than the recipe calls for.Note on activating yeast
If you’re not sure of how fresh / active the active dry yeast is, OR if the yeast granules are larger, THEN ACTIVATE IT FIRST. Sprinkle the yeast over 1/2 cup of the warm liquid (water or milk) from the recipe (plus 1 tsp of sugar), and let it sit for about 15 minutes until it forms a foam on the surface. Then it can be used in the recipe.Freezing
Bake the hot dog buns until they are just starting to turn golden brown – about 10 to 15 minutes. Remove the buns from the oven, and allow them to cool down. FREEZE the hot dog buns at this point, and then place them in an air-tight container (or freezer bag). When you’re ready to bake, allow the buns to thaw out in the fridge first. Preheat oven to 350°F and place the thawed out hot dog buns on the tray and bake for about 10 to 15 minutes until the buns are golden brown on top.Nutrition Information:
“This website provides approximate nutrition information for convenience and as a courtesy only. Nutrition data is gathered primarily from the USDA Food Composition Database, whenever available, or otherwise other online calculators.”


Leave a Reply