


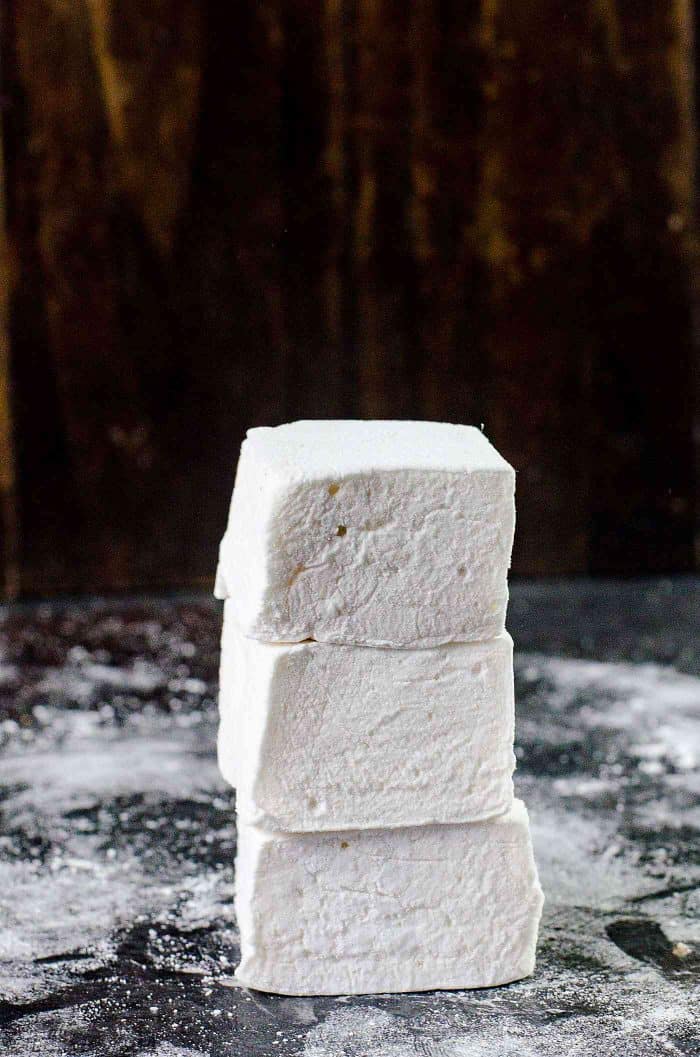
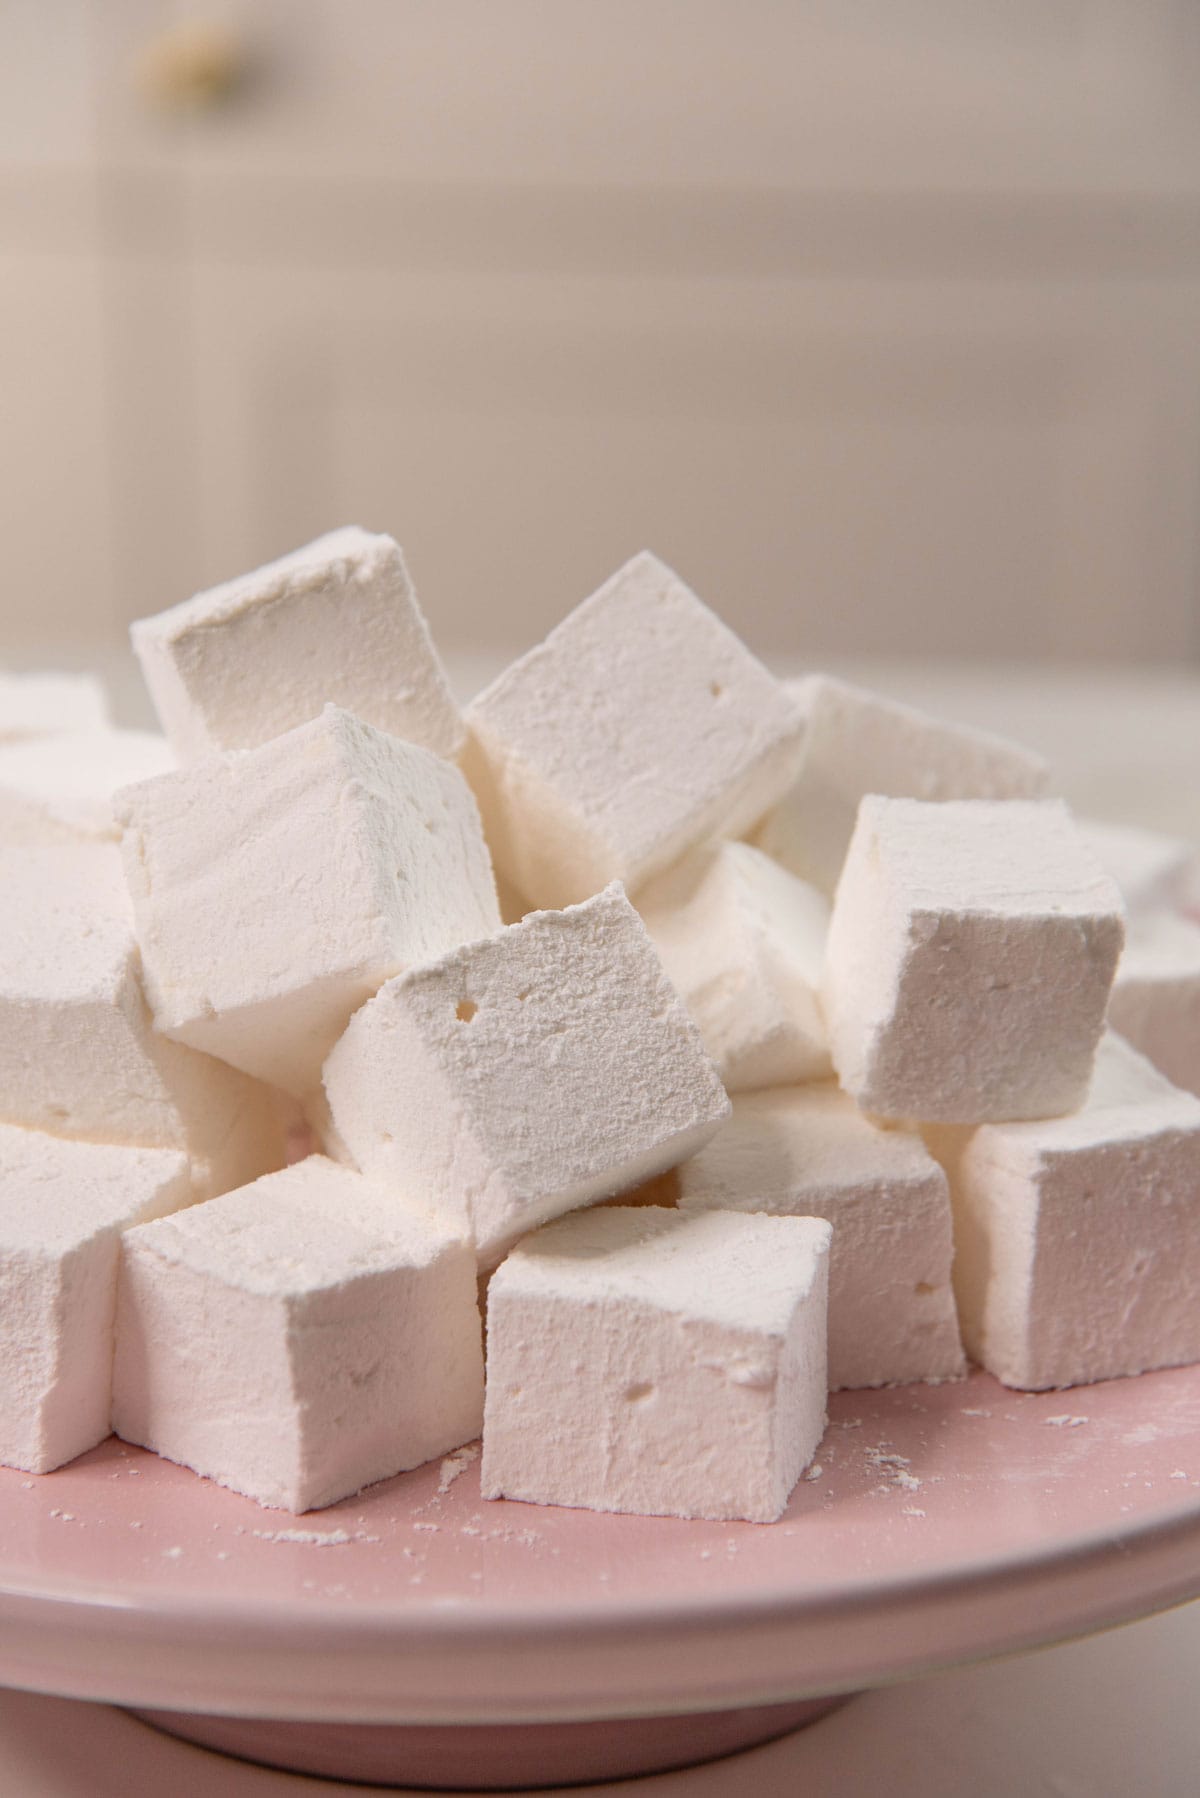
Alright my friends, let’s talk homemade marshmallows. Sweet, soft, springy, fluffy pillows of deliciousness, homemade marshmallows are easy and so much better than store-bought.
This is a long post with LOTS of tips on how to make marshmallows,
- How to troubleshoot and adjust the recipe for perfect results
- With or without corn syrup
- With or without a candy thermometer
- Thorough recipe video that walks you through all the steps
I used to watch my grandmother make marshmallows when I was a wee little girl! I’ve been making marshmallows for decades, and I’ve tested and experimented with this recipe in so many different ways.
So, I’ve really gotten to know how to adapt this recipe to make it easier and absolutely foolproof and failproof.
Now I’m sharing all those tips with you, with a detailed troubleshooting post, to make the fluffiest, most divine marshmallows in the comfort of your home.
- Why make homemade marshmallows?
- Reader favorite, foolproof marshmallow recipe that works
- Ingredients and tools to make marshmallows
- How to make marshmallows (step by step overview)
- How to adjust the recipe for tropical humid environments
- How to adapt the recipe for a very cold and dry climate
- Marshmallow recipe FAQs
- My best recipe tips
- What to make with marshmallows
Why make homemade marshmallows?
- Well, as cliche as this sounds, they really are SO MUCH better than any store-bought marshmallows. Store-bought marshmallows just don’t have that pure, irresistible, marshmallow flavor or the melt-in-your-mouth fluffiness.
- And if you try making s’mores, you’ll find that homemade marshmallows have a really desirable melting quality that store-bought marshmallows don’t have. Since homemade marshmallows have no stabilizers (unlike store-bought), they have a gooey, caramelized flavor when roasted.
- These marshmallows have a REALLY long shelf life when stored in an airtight container as well. And imagine serving a hot mug of creamy French hot chocolate or peanut butter hot chocolate with a big, fluffy homemade marshmallow?
- And you can make all kinds of flavored, colored, gourmet marshmallows, marshmallow peeps, marshmallow ropes or twisted marshmallows (flumps!) etc.
- And if all that wasn’t enough to sway you, how about this? Homemade marshmallows are really simple to make! Like, ridiculously simple and fast.

Reader favorite, foolproof marshmallow recipe that works
- I adapted this recipe from my grandmother’s age-old recipe! So I’ve been making it for years and years, and have adjusted it to make it easier for beginners.
- I show you how to make marshmallows without corn syrup!
- But I also explain the role of corn syrup and substitutes so you can decide what you want to use to make these.
- I first shared this recipe almost a decade ago on the blog, and with 330+ 5-star reviews, and thousands of comments, it’s a reader-favorite that really works!
- Lots of troubleshooting tips, and I’ve recently added more information on how to adapt this recipe for more options.
- I show how to adapt this recipe for hot, humid, tropical climates (wet, sticky marshmallows? I got you!), as well as dry cold climates too. After all, I first made marshmallows in Sri Lanka, and now I’m in Ottawa, Canada. That’s about as diverse as the weather gets!
- You can use this recipe to make piped marshmallows without adding egg whites.
- These marshmallows can be adapted to make so many different flavors, and I’ve shared lots of recipes for variations (with more to come!).
Ingredients and tools to make marshmallows
Tools
- Stand mixer with whisk attachment – You can use a hand-held mixer too, but the whisking times might be longer.
- 9 x 9 inch pan (for 1 inch tall marshmallows) or 9 x 13 pan (for ½ inch tall marshmallows).
- Butter or shortening to lightly coat the pan – any solid fat can be used.
- Spatula
- Offset spatula
- Digital thermometer
- If you don’t have a digital thermometer (candy thermometer), you can do the “water test” to determine the stage of the sugar syrup. For this, you will need ice water and a small bowl.
Ingredients
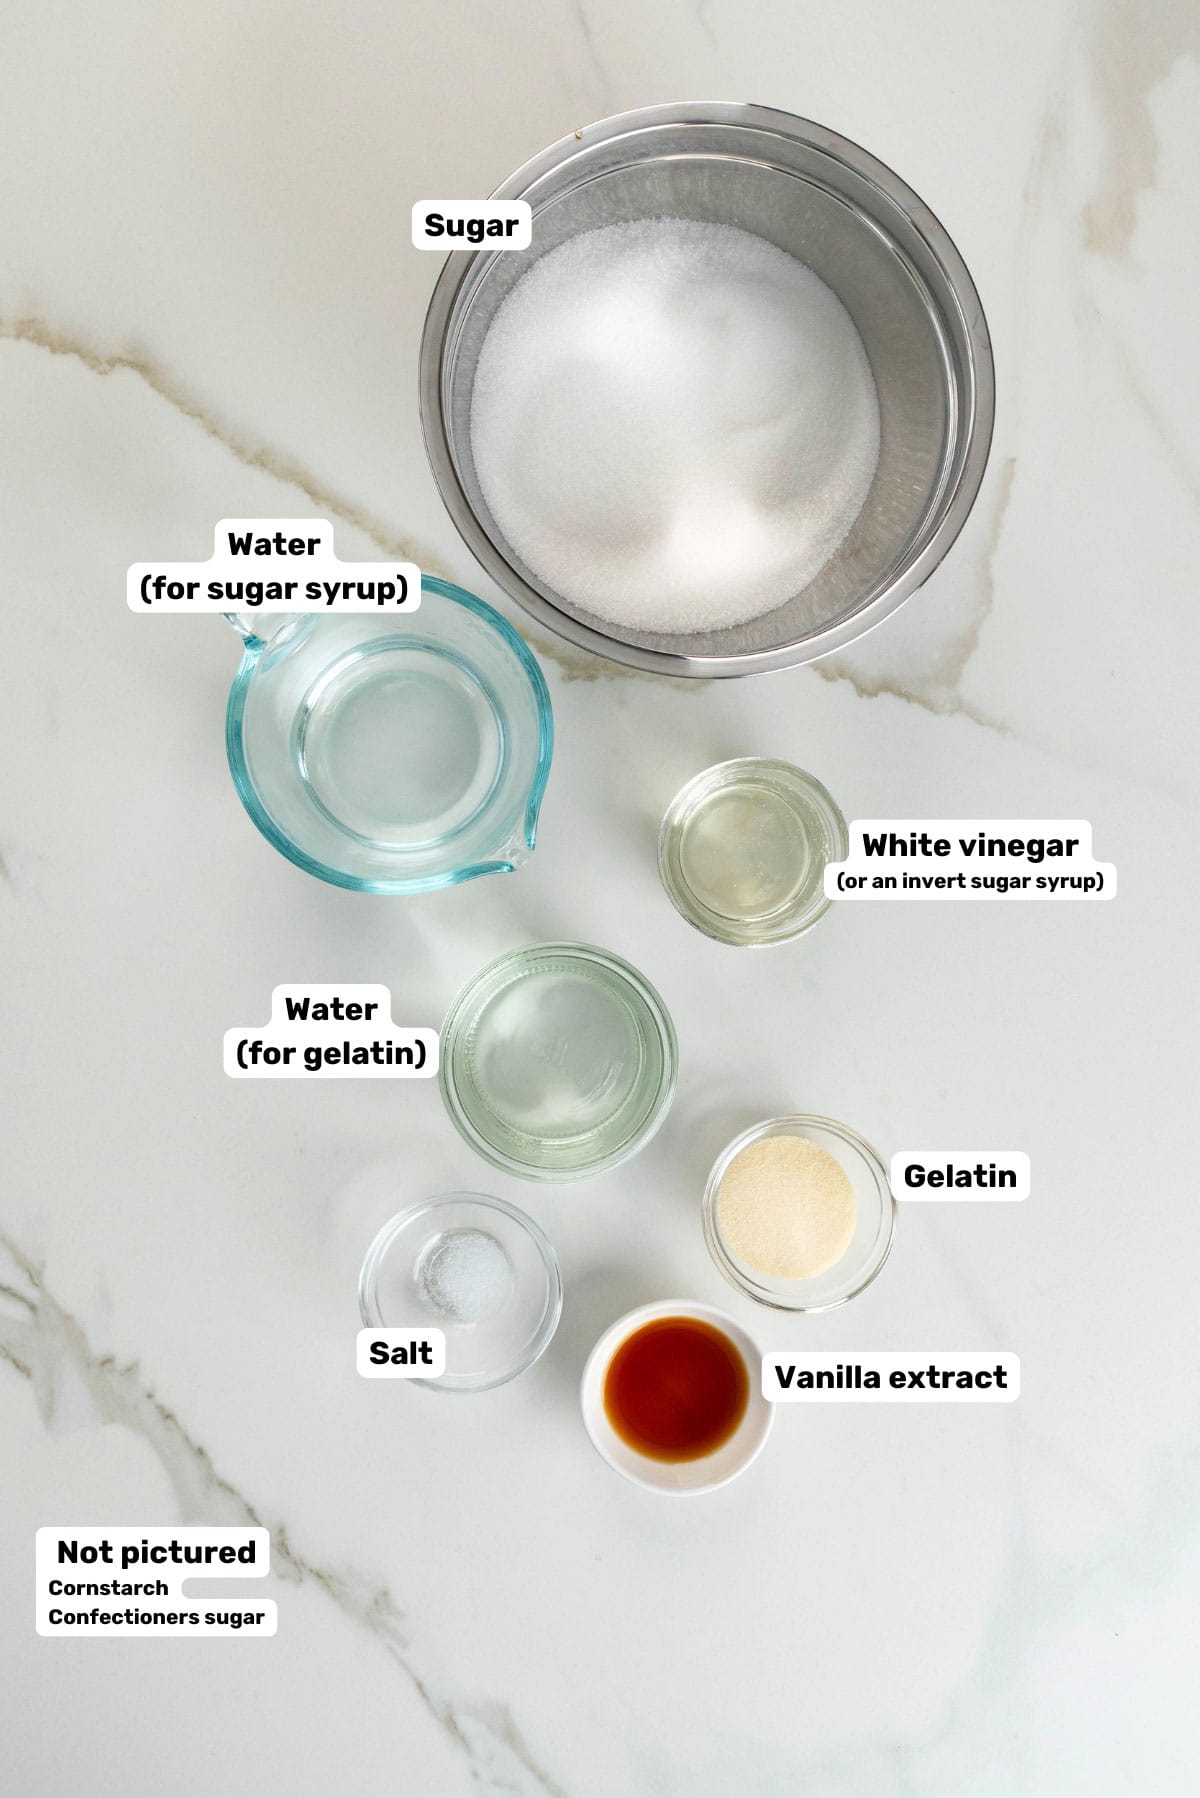
- Sugar – I use white sugar. You can use brown sugar as well but it’ll change the flavor of the marshmallows.
- Water – For the sugar syrup and to bloom the gelatin.
- Gelatin – This recipe uses powdered gelatin. Agar agar cannot be used as a replacement in this recipe.
- Vanilla extract – For flavor.
- Salt – For flavor.
- Cornstarch and confectioner’s sugar – For the dusting powder.
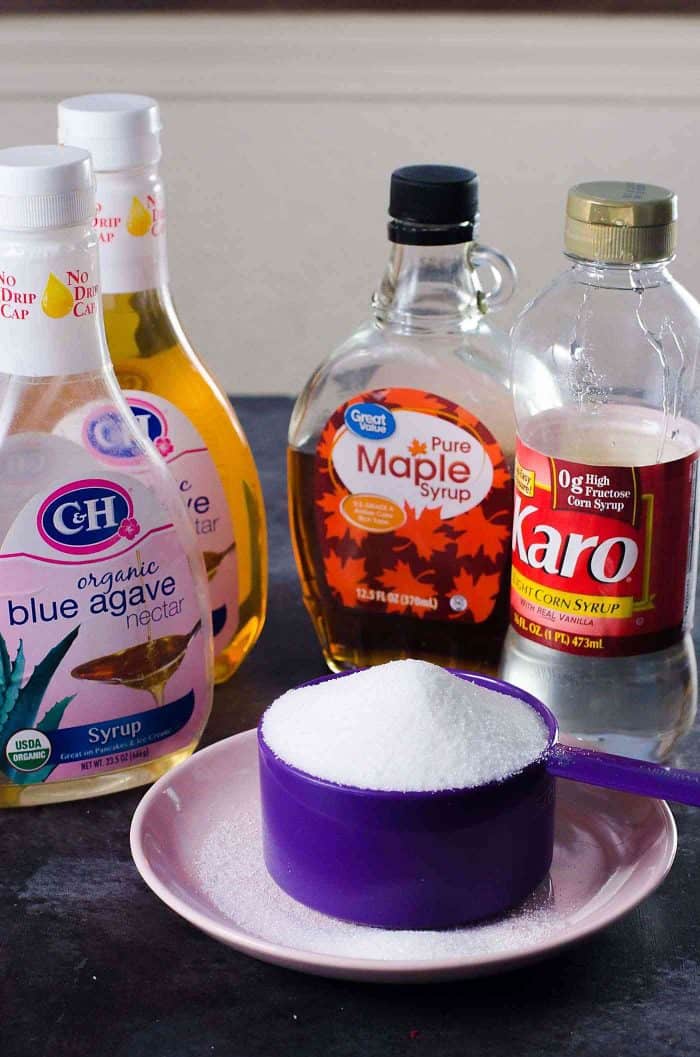
- Agave or honey– Optional. This is an INVERT SUGAR SYRUP to prevent the sugar syrup from crystallizing (turning back into a dry mix). Corn syrup is what’s typically used as an invert sugar in bigger applications. It’s very useful, especially IF you’re a beginner with minimal experience making candy. But we’re using an alternative here, such as agave or honey instead.
- White vinegar – Used in place of invert sugar syrups. This is one of many alternatives to corn syrup.
- Corn syrup substitutes (invert sugar syrup options)
- Honey
- Golden syrup
- Agave
- Maple syrup (to an extent)
Corn Syrup break down + substitutes
Corn syrup break down
This syrup is used in candy making to prevent the sugar syrup from turning back into a dry mixture (crystallizing or seizing) at high temperatures in super saturated syrups. Corn syrup is an invert sugar syrup.
Sugar is usually made of sucrose (glucose + fructose linked together). Sucrose LOVES to link together to form larger molecules and create crystals. Especially when it’s super saturated in water (i.e. a high concentrated sugar syrup).
Invert sugar syrups are mainly made out of glucose and fructose molecules that are not linked together. Since they are already separate, they don’t readily re-connect to make sucrose.
Adding invert sugar when making a super saturated sugar syrup (high concentration of sugar while cooking), will prevent crystallization because the glucose and fructose molecules will interfere with the sucrose molecules trying to bond together.
Resulting in a smoother candy mixture. It’s absolutely crucial to be able to make reliably smooth, delicious candy with consistent results, every time.
I personally don’t think invert sugar syrups are bad, and have no problem with using corn syrup when making candy recipes. But I also understand that each person will want to decide that for themselves.
That’s why I provide substitutions here,
- Glucose syrup – In some countries, glucose syrup is more common than corn syrup.
- Honey – Also contains high amounts of fructose and glucose.
- Golden syrup – Invert sugar syrup that contains fructose and glucose.
- Maple syrup – Contains some fructose and glucose, but less than the other substitutes.
- Agave syrup – Also a great option.
- Acids such as vinegar, citric acid, cream of tartar – The acid helps to break sucrose into fructose and glucose as the syrup is heated.
How to make marshmallows (step by step overview)
Step 1 – Prepare the pan and get the ingredients ready
Grease the pan with a thin layer of butter or shortening (image 2). Any solid fat like solid coconut oil can be used. You can also line the pan with parchment paper (make sure it’s a good non-stick brand).

Make sure to clean your hands and utensils when handling the ingredients. If any fat is introduced into the syrup and/or gelatin, the marshmallow mixture will not aerate properly. Just like with Swiss meringue for example.
Make sure the pots, bowls, and other utensils are clean. Have the ingredients ready to go.

Step 2 – Bloom the gelatin
Place the water in the bowl of the mixer and sprinkle the gelatin into the water (image 1). Stir with a fork to make sure the gelatin is saturated. Set aside for at least 10 minutes while you get the syrup ready.
Step 3 – Make the sugar syrup
In a saucepan, place the sugar and pour the water in. Add any invert sugar syrup option, OR the white vinegar. Gently stir to make sure all the sugar is saturated in water (image 3).
Heat the sugar syrup over medium – medium high heat. Swirl the pan to evenly dissolve the mixture as it heats up and starts to simmer (image 4).
As the sugar syrup heats, it’ll become thicker and concentrated. It’s important to cook the syrup carefully, and not to agitate / stir the syrup to keep it as a liquid.
To prevent the syrup from crystallizing
- When the sugar syrup starts to boil, cover the saucepan with a lid and lower the heat (image 5). Let the syrup simmer for about 2 minutes. The condensation forming on the lid will wash down the sides of the pot and any undissolved sugar on the sides of the saucepan.
- Alternatively, brush the sides of the saucepan with a clean pastry brush that’s dipped in cold water to wash away the sugar on the sides.
- Swirl the saucepan to evenly cook the syrup, rather than stirring it.
Step 4 – Cooking the sugar syrup to the right temperature
Continue to heat the sugar after the sugar has dissolved and the pot has no sugar stuck to the side.

Check the temperature of the syrup with a digital thermometer. Read the temperature in a few spots to make sure there are no hot spots that are cooking faster. The temperature of the sugar syrup impacts the final texture of the marshmallows.
Cook the sugar syrup until the temperature registers between 240 – 245 F (image 6). This is the firm ball stage of sugar syrup, where the sugar concentration is at about 85 – 87%.
If you live in a hot and humid climate, then make sure the sugar syrup heats to 244 – 245 F.
If you live in a cooler, dry climate, then the sugar syrup should ideally only be heated to about 240 F (or even 239 F, for very cold and dry places).
Once the sugar syrup is at the right temperature, remove it from the heat and set it aside for a few seconds to let the bubbles subside, and to set up the mixer.

Water test (if you don’t have a candy thermometer)
Even if you don’t have a candy thermometer, you can still check the sugar syrup stage with a water test as follows.
- Every 5 minutes or so, take a small amount of the sugar syrup and drop it into a small bowl of cold water.
- If the sugar completely dissolves in the water – it’s not ready.
- The sugar forms a cohesive shape in the cold water, but you can completely flatten it between your fingers easily – still not ready (this is the soft-ball stage).
- If the sugar has reached firm-ball stage, then it will form a cohesive shape in the water. You can form a firm and pliable ball with the sugar using your fingers. It will also hold the shape it’s pressed into without dissolving. THIS IS THE CORRECT STAGE.
- But if the sugar forms a cohesive ball that is very firm and is not very pliable, then it’s gone a little too far and the marshmallows may end up hard over time. However, if you live in a tropical climate – you can still make marshmallows with this sugar syrup!
This is how my grandmother used to check the stages of the sugar syrup for marshmallows she made many decades ago! If you’re not sure if your digital thermometer is calibrated, you can double check the sugar syrup with this method too.
Step 5 – Whisking the marshmallow mix
Place the mixer bowl with the bloomed gelatin in the stand mixer with the whisk attachment (image 7). Add the salt to the gelatin and start whisking on low – medium speed to break up the bloomed gelatin (image 8).
While whisking at medium speed, stream in the HOT sugar syrup into the bowl VERY CAREFULLY (image 9). The bloomed gelatin will easily dissolve in the hot syrup.
When pouring the hot syrup, avoid pouring it directly on the whisk to avoid any syrup splashing back. I pour to the side, closer to the wall of the bowl.

Marshmallow mix whisking time
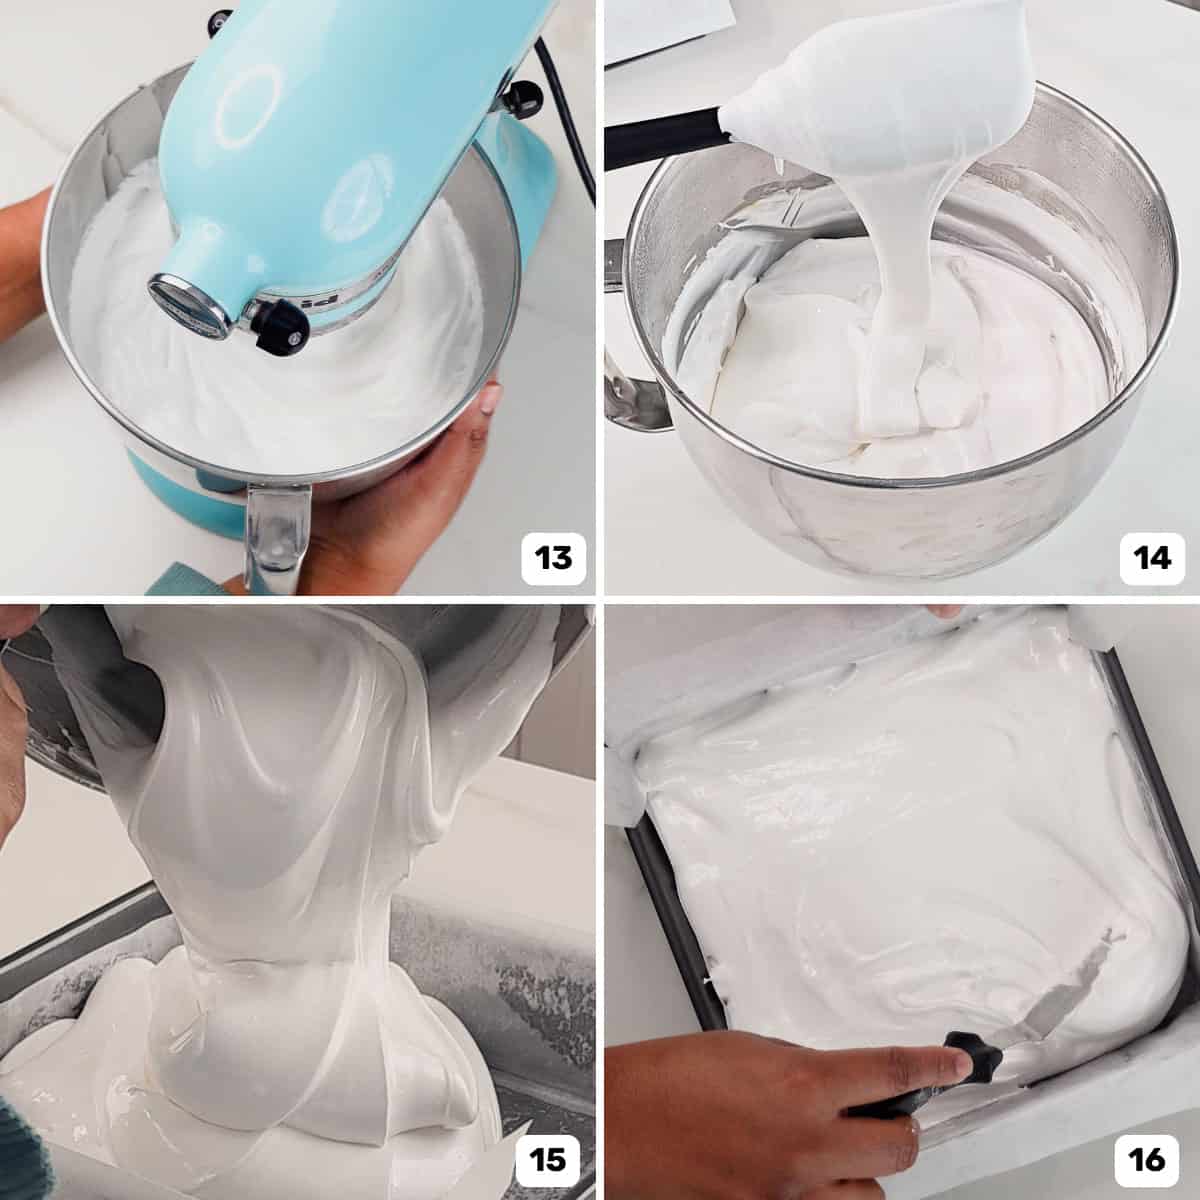
After adding all the sugar syrup (image 10), increase the speed of the mixer to about 9 – 10 (highest speed), and let it whisk until it triples in volume and becomes snowy white, airy, and fluffy (image 11).
This can take between 5 – 7 minutes. This time is more than enough to get maximum volume, and the marshmallow mix should still be warm to the touch. A warm marshmallow mixture is easier to spread as it’s less sticky. It can also be piped if you like!
However, if you live in a high humid, hot climate, you can whisk it longer (up to 10 minutes) to cool down the marshmallow mix further. This will ensure that the marshmallows sets faster, and has a lower chance of absorbing moisture while warm.
Originally, I recommended whisking the mixture until you see “ropes” form on the sides of the bowl as it starts to thicken. These was my grandmother’s instructions, as she made these marshmallows in her very hot, humid, non-AC kitchen in Sri Lanka. So, it makes complete sense!
But after living in New Zealand, Australia, USA, and Canada, I’ve found that I don’t need to whisk the marshmallows that long, as it doesn’t increase the volume further.
Once the marshmallow mix has whisked to maximum volume, add the vanilla or other flavorings and whisk for 1 – 2 minutes until it mixes through (image 12).
Recipe tip
You can absolutely add other flavor extracts, or food coloring at this stage too.
To create a swirled color effect (marble effect), take roughly 1 cup of the marshmallow mixture into a bowl and add food coloring to this portion and quickly mix it through. Then add it back to the mixture and MANUALLY fold it in with a spatula to create a swirl pattern.
Step 6 – Spread the marshmallow mixture
Stop whisking the marshmallow mix while the bowl is still warm to the touch, flows well,(images 13 – 14), AND the mixture has maximum volume. Once the marshmallow mixture is ready, scrape the mixture into the prepared pan (image 15). Spread the mixture evenly in the pan (image 16). Knock the pan on a hard surface just a few times to make sure the mixture settles in evenly.
If the marshmallow mixture is warm, this process will be very easy and you can easily scrape off any excess marshmallow off the spatulas.
However, you can lightly grease the spatula and offset spatula to make them stick less to the marshmallow mixture. This is especially crucial if the mixture is thicker and stickier (because it has cooled down).
Tips for piping marshmallows
It’s important to use the marshmallow mixture while it’s warm, so that it’s not too sticky.
Scrape the marshmallow mixture into large piping bags so it holds a fairly large amount at a time. I prefer to scrape all the mixture into multiple piping bags, while it’s warm.
Step 7 – Dust and set the marshmallows
Dust the surface of the marshmallows generously with the dusting powder (image 17). This will protect the marshmallows from forming a skin while it sets.
Dusting Powder is a mixture of cornstarch and confectioners sugar. I use a ratio of 2 parts cornstarch and 1 part confectioner’s sugar. The cornstarch can be replaced with arrowroot powder as well.

Let the marshmallows cure (set) for at least 6 hours (image 18). In colder weather it can be 4 hours, but I usually always leave it overnight.
- Once the marshmallows have cooled down completely, you can cover the pan with plastic wrap loosely. Or, the condenstation will drip back onto the marshmallows and melt it.
- Do not set the marshmallows in the fridge. They must be set at room temperature.
Step 8 – Cut the marshmallows and store
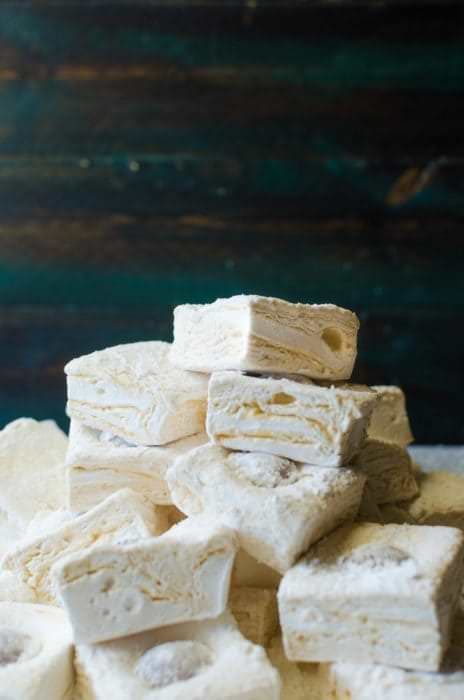
Once the marshmallows have cured, they are ready to be cut.
- If you used parchment paper, you should be able to lift the parchment paper out of the pan, and then carefully loosen and peel off the sides of the marshmallow, before peeling it off the bottom (image 19).
- If you greased the pan directly, with a gentle touch, pull the marshmallow away from the sides of the pan. It should easily pull away. Then turn the pan upside down and gently loosen the marshmallow. It should easily come off the pan.
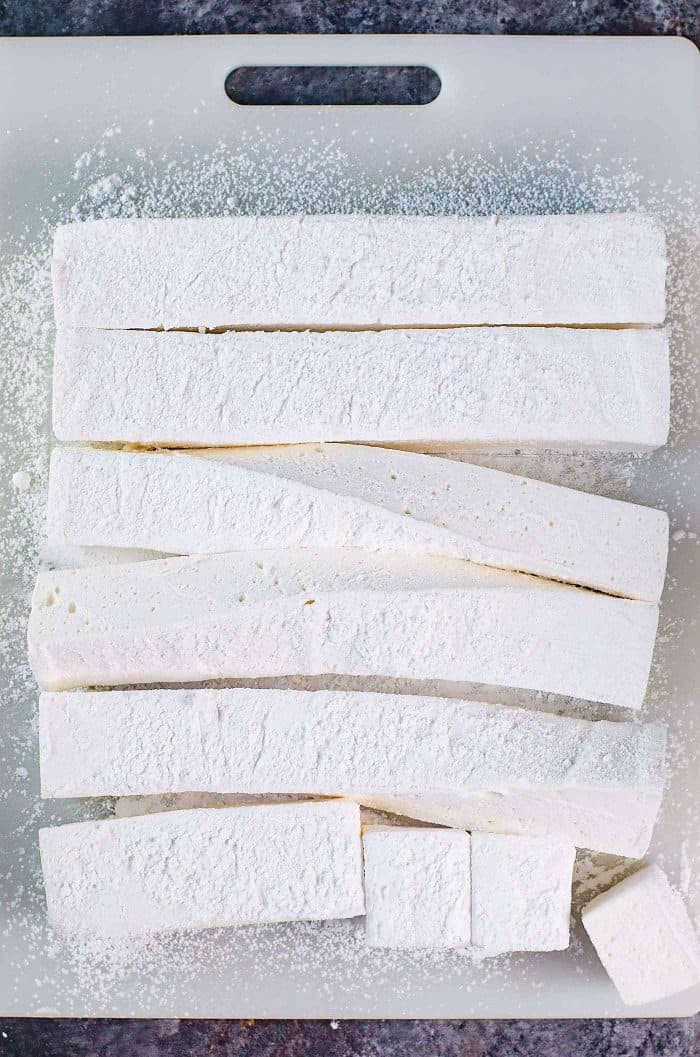
Place the marshmallow block on a cutting board and dust the bottom of the marshmallow block with the dusting powder as well.
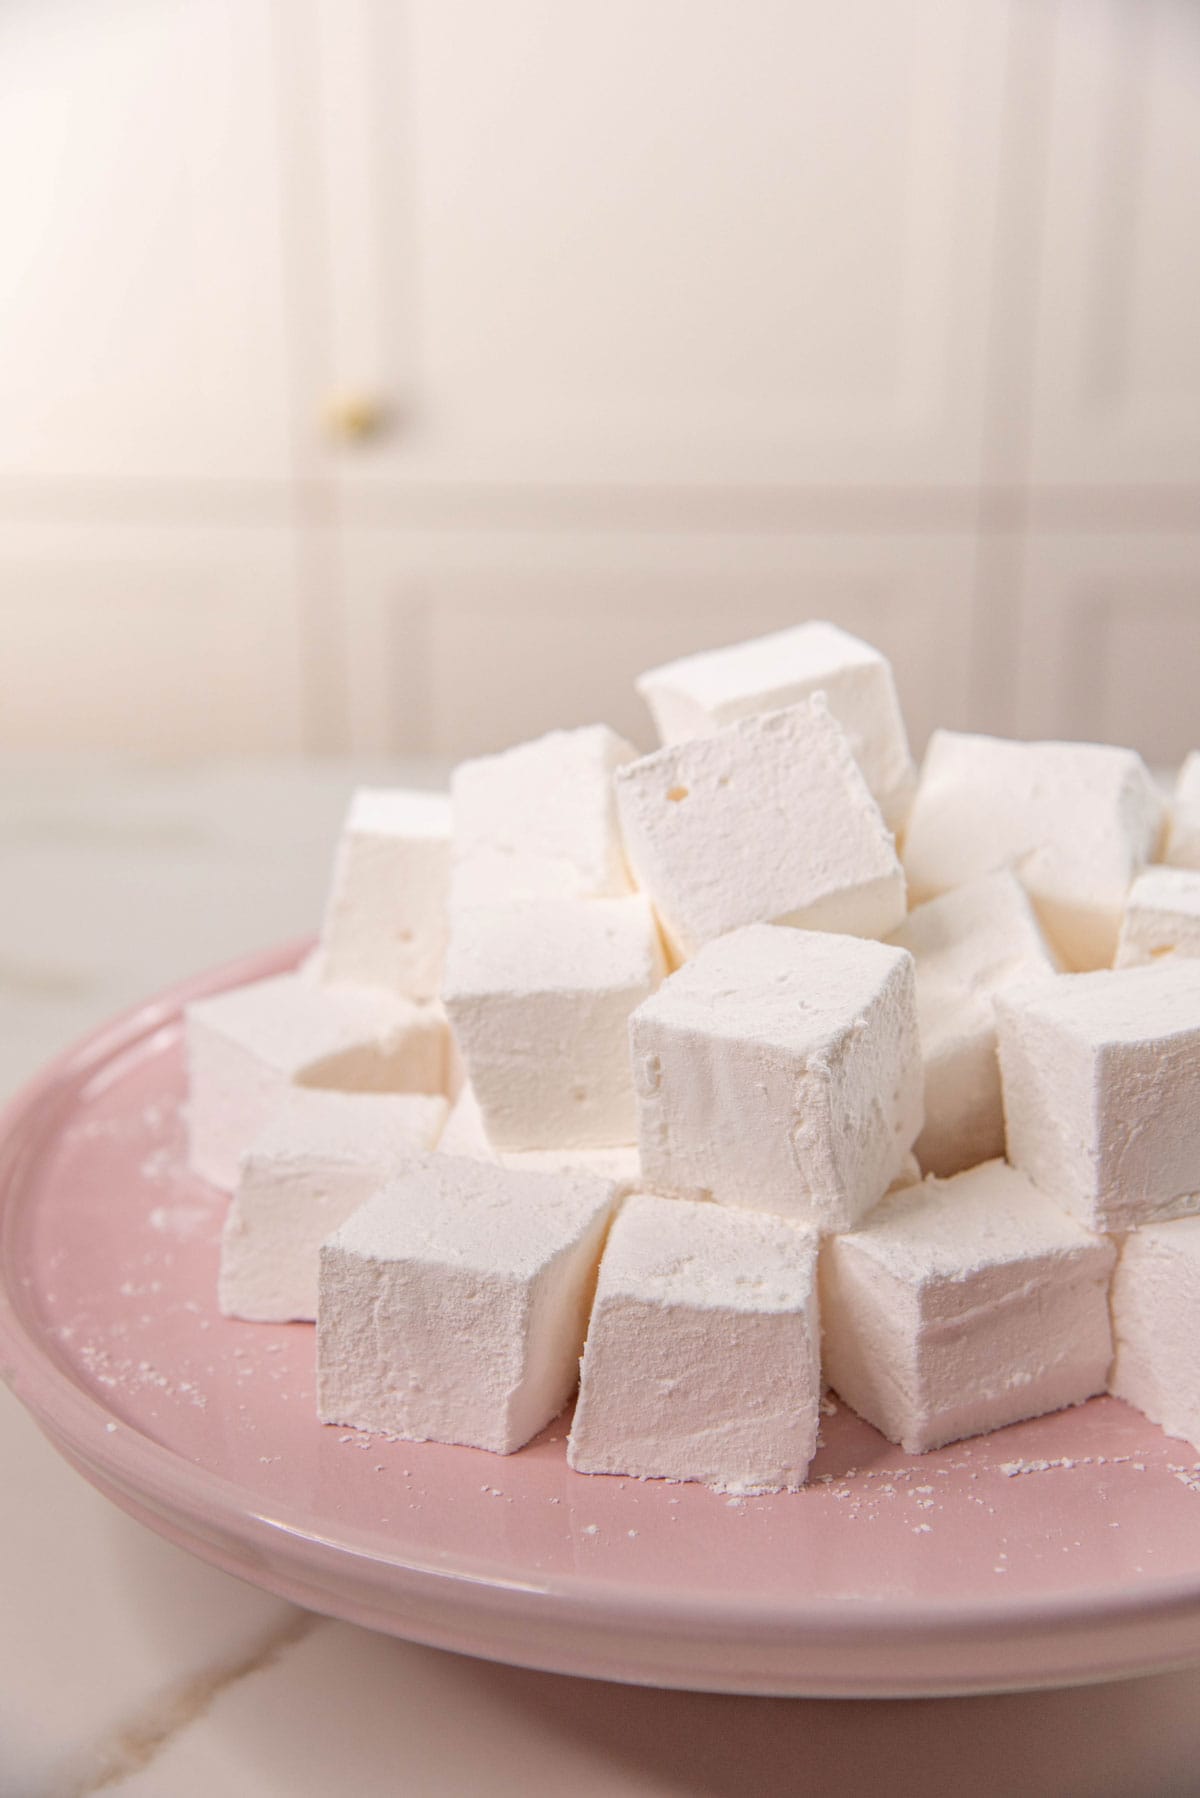
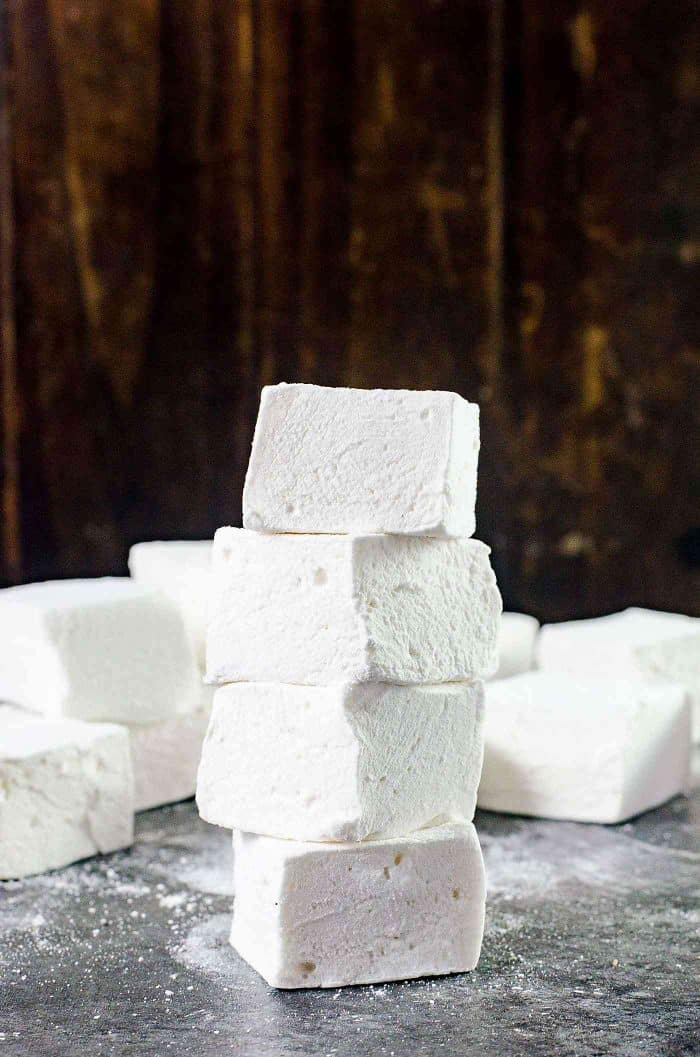
I like cutting small marshmallows that are roughly 1 x 1 inch cubes. I do this by cutting the block of marshmallow into 8 x 8 portions.
Use a sharp, straight blade knife (not serrated) to cut the marshmallows. Coat the blade with butter or shortening (using a paper towel), to get clean cuts (image 20).
Frequently wipe or scrape off any marshmallow residue on the blade and regrease the blade to get clean cuts.
Pull apart the marshmallows and toss them in the dusting powder to make sure they don’t stick to each other (images 21 – 22).
Store the marshmallows in an airtight container, with some of the cornstarch mixture added to it.

How to adjust the recipe for tropical humid environments
The beauty of this marshmallow recipe is that I can share HOW you can adapt the recipe to your climate!
The temperatures given here are great for most climates and environments, but even I change the recipe slightly when I make marshmallows in Canada vs Australia.
This all lies in the sugar syrup and how high the temperature should be. The higher the sugar syrup temperature, the less water it contains (higher concentration of sugar) and vice versa.
Adjusting sugar syrup temperature
- The sugar in the marshmallows is a humectant. It LOVES to draw in moisture in the environment, and that’s why the marshmallows get soggy in humid hot environments.
- To prevent this, cook the sugar syrup to a higher temperature – about 245 – 247 F.
- Add an invert sugar like honey or corn syrup to ensure that the marshmallow won’t crystallize while whisking.
- Less water in the syrup means that the marshmallow will be “drier”, but it can also withstand drawing in some humidity.
- My grandmother would heat the sugar syrup up to about the border of firm ball stage and soft crack stage (about 250 F!!). So, you can increase the temperature up to 250 F, ONLY if the marshmallows are still getting soggy!
How to adapt the recipe for a very cold and dry climate
Adjusting for drier / Cold climates
During Canadian winters, I find that my marshmallows get too firm because the ambient temperature is just too cold. If this happens to you too – these are the tips that I use to get perfectly soft marshmallows that stay that way!
Heat the sugar syrup only up to 240 F, and never beyond! A sugar syrup that registers at between 238 – 240 F is my goal!
The extra water in the syrup helps to keep the marshmallows soft even during dry, cold weather!
Marshmallow recipe FAQs
Can I make vegan marshmallows without gelatin?
You can make vegan marshmallows, but unfortunately you cannot substitute the gelatin with agar agar in this recipe.
Gelatin is the ingredient that helps to create the marshmallow foam, and agar agar doesn’t behave the same way.
You can make vegan marshmallows using the recipe from Serious eats here. But, I’m currently working on a comprehensive vegan marshmallow recipe, with lots of adaptability options (soy free, nut free, legume free options).
Can I make marshmallows without a candy thermometer? (cold water test)
Yes! I have a more detailed article on cooked sugar stages and candy temperature chart that explains the cold water test.
But, I have also included a quick overview in the post above (under “Step 4”).
Why are my marshmallows soggy?
Marshmallows become soggy when they have too much water in them.
If the sugar syrup wasn’t heated to the right temperature, or too low of a temperature, it’ll result in marshmallows that can be too soft.
However, if the marshmallows get soggy when they were initially perfect, humidity and improper storage would be the culprit.
Marshmallows absorb water from the increased heat and humidity in the environment. An airtight container will be crucial for storage.
I talk about how to fix this issue under “How to adjust the recipe for tropical humid environments” in the post above.
Why are my marshmallows too hard or crusty?
This happens because the marshmallows are drying out, usually in a dry climate, or because of improper storage.
Make sure to store them in an airtight container, with minimal air contact to prevent a crust from forming.
But you can also fix this issue by lowering the sugar syrup temperature to make softer marshmallows that contain more moisture.
I talk about how to fix this issue under “Adapting for drier / cold climates” in the post above.
Can I make colored marshmallows?
Yes, you can!
You can either add food coloring after the marshmallows have whisked to the right volume, OR you can also divide the marshmallow mixture after whisking it and add different colors (while it’s still warm) to create multi-colored marshmallows.
You can also create a swirled colored look, like my peppermint marshmallows.
Why is the mixture too thick and sticky for me to spread out?
The marshmallow mixture will thicken and become sticky as it cools down.
You can grease the spatula to make it less sticky as you spread the mixture, but the important thing is to work quickly BEFORE the marshmallow mixture gets too cold.
Next time, spread the marshmallow mixture while it’s a touch warmer so it’ll be easier to spread.
Do marshmallows go bad?
These don’t go bad if they’re properly stored! However, if you add egg whites to your marshmallows, then they will expire within a week.
My best recipe tips
- If you’re a FIRST TIME marshmallow maker, then I recommend that you do use corn syrup or honey, as this will give you increased chances for success!
- Make sure that none of the ingredients or tools used to make the marshmallow mixture is contaminated with any kind of oil / fat. Otherwise, this will prevent the mixture from aerating and properly forming into marshmallows.
- Do not stir the sugar syrup while heating it. This can cause the syrup to re-crystallize and seize.
- You do not have to use corn syrup if you prefer not to, and you’re comfortable with the recipe. The recipe is formulated to work with invert sugar syrups (and substitutes), provided you keep an eye on the syrup.
- When checking the temperature of the syrup, make sure to check multiple spots in the pan, as hot spots can heat faster. Swirl the liquid to evenly heat it.
- Whisk the marshmallow mixture on high to get the right volume. Do not stop whisking before that.
- The marshmallows mixture is easier to spread in the pan, or to pipe, when the mixture is still a little warm. Touch the bowl to check if it’s mildly warm to gauge this.
- If the marshmallow mixture is too thick and sticky, it’s cooling down too quickly. Grease the spatula lightly and spread the mixture fast with it, before it completely sets.
- Dust the surface with the dusting powder to prevent a skin from forming on top. You can use cornstarch or arrowroot powder by itself, OR mixed with a little confectioner’s sugar to make it less starchy.
- Be patient during the curing / setting time. Don’t rush the process, as the marshmallows need to set properly.
- Cut the marshmallows with a sharp knife. Clean the blade and apply a thin layer of fat regularly to keep the cuts clean and neat.
- Dust the cut marshmallows with the dusting powder to make sure that the sides aren’t sticky.

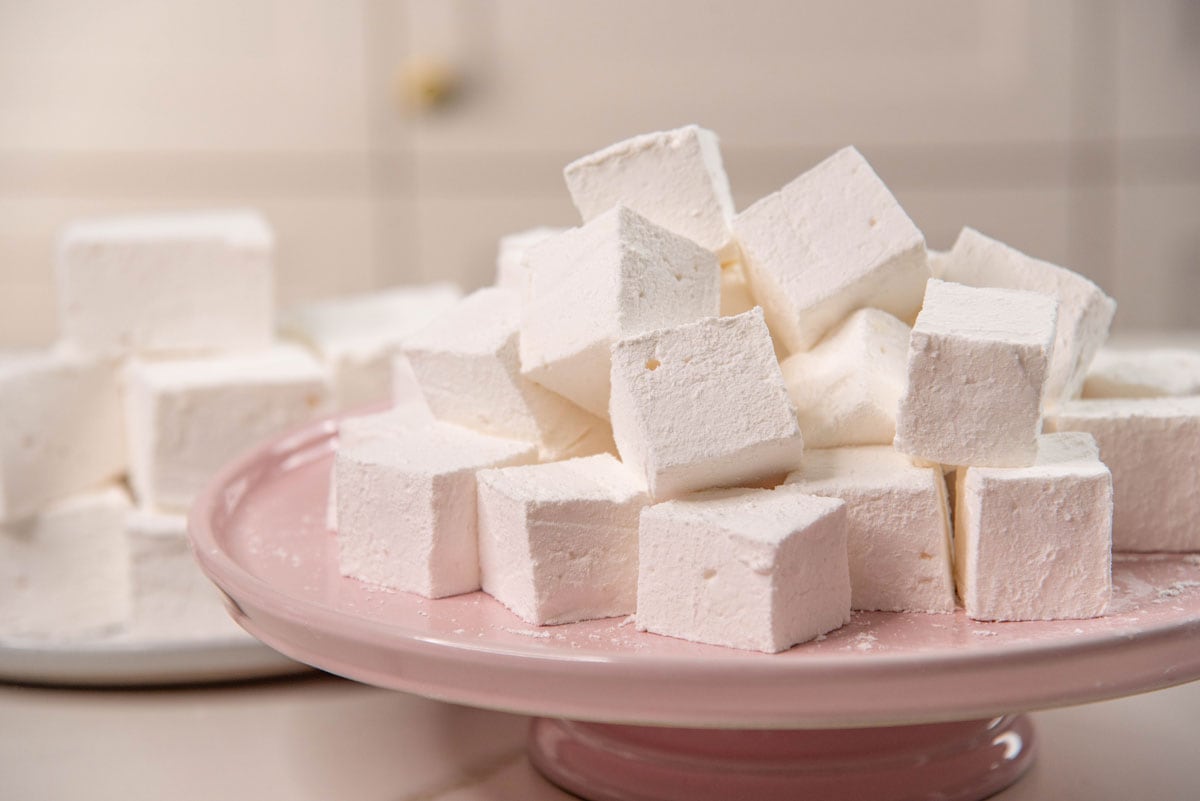
What to make with marshmallows
S’mores
These marshmallows make amazing s’mores (and s’mores cookies and s’mores brownie pie!). However, since these do not contain any stabilizers, they melt faster and are more gooey and liquidy!
My tip for roasting marshmallows is to hold them a little further out from the fire so they can roast more slowly.
Rice krispie treats
You can also make rice krispie treats with these marshmallows! The mixture can be set first, or used as soon as it’s whipped.
However, these marshmallows do result in rice krispie treats that look a little different and have a softer texture. But they taste AMAZING, like these brown butter rice krispie treats.
Mini marshmallows
You can make mini marshmallows using two different methods. By piping the marshmallows and cutting them into small pieces, as shown in my mini marshmallows recipe. OR you can also use a mold with multiple small cavities.
Flavored marshmallows
- Chocolate marshmallow or chocolate covered marshmallows
- Mini marshmallows (and how to pipe marshmallows). I also make fruit flavored marshmallows here using strawberry and lemon extract.
- Fruit flavored marshmallows – by adding freeze dried fruit powders.
- Butterscotch swirl marshmallows – these taste like part marshmallow and part toffee!

Recipe

Perfect Homemade Marshmallows
US based cup, teaspoon, tablespoon measurements. Weight measurements are recommended for accurate results whenever available.
Common Measurement ConversionsVideo
Ingredients:
Marshmallow mixture
- 400 g white sugar 2 cups (increase to 500 g / 2½ cups if you're not using agave or honey or corn syrup)
- ½ tsp white vinegar
- 100 g agave or honey or corn syrup about ⅓ cup (check recipe notes below for more 1:1 invert sugar substitution options)
- 120 mL water ½ cup, for the sugar syrup (increase water to ⅔ cup / 160 mL if you’re not using agave or honey or corn syrup)
- 120 mL water ½ cup, to bloom the gelatin
- 18 g gelatin powder 6 tsp / about 2.5 packets of Knox gelatin
- 1 pinch kosher salt / sea salt (I prefer to use about ¼ tsp to balance the sweetness)
- 2 tsp pure vanilla extract
Dusting powder (see recipe notes)
- 120 g cornstarch sifted, about ½ cup
- 60 g confectioner’s sugar sifted, about ½ cup
Instructions:
Marshmallow mix
Blooming the gelatin
- Place the water in the mixer bowl. Sprinkle the gelatin over the water and stir to saturate the gelatin in the water. Set it aside for at least 10 minutes while you get the syrup and the pan ready.120 mL water , 18 g gelatin powder
Prepping the pan
- Using butter or shortening, grease a 9 x 9 inch pan with a thin layer. This is my preferred method.
- You can also use solid coconut oil. Do not use liquid oil (like vegetable oil), as it wouldn’t spread on the surface evenly. You can also line the pan with good quality parchment paper, but be careful when you peel it off at the end. Another option is to dust the pan with the cornstarch dusting powder, but this can result in some sticky spots.
Making the sugar syrup
- Place the sugar and water in a pot. Add the vinegar and agave or honey (or substitute). Stir very gently until the sugar is moistened and mixed with the water.400 g white sugar, ½ tsp white vinegar, 120 mL water, 100 g agave or honey or corn syrup
- Heat over medium / medium high heat until the sugar syrup starts to simmer. Gently swirl the pan to evenly distribute the heat, and to help dissolve the sugar.
- When the syrup comes to a boil, cover the saucepan with a lid and lower the heat to medium / medium low to simmer the syrup. Let the syrup simmer for about 2 minutes, without lifting the lid off the saucepan.
- After 2 minutes, remove the lid and check to make sure there are no sugar crystals on the side of the saucepan. If there are still crystals on the sides, then cover the saucepan for a further minute to allow the condensation to wash down the sugar crystals into the syrup.
- Clip the sugar thermometer to the side of the saucepan to monitor the temperature, or if you have an instant read thermometer, check the sugar syrup temperature every few minutes.
- Continue to cook the sugar syrup on medium / medium high heat until it reaches the correct temperature. Gently and frequently swirl the pan to ensure the syrup is cooking evenly.
Heating syrup to the right temperature
- The sugar syrup must be heated to between 240 – 245°F.
- For most climates, around 242 – 243°F works great. If you live in a cold, dry climate, heat the syrup to 240°F. If you live in a hot, humid climate, heat the sugar syrup to 245°F. Check recipe notes for more information.
- If you don't have a sugar thermometer, please check the sugar stage every 5 minutes with the cold water test until it reaches the firm-ball stage. (Please read the notes in the post to learn how to do this.)
- When the sugar syrup reaches the right temperature, remove it from the heat and let the bubbles subside for a few seconds.
Making the marshmallow mix
- Place the bowl with the bloomed gelatin in the mixer with a whisk attachment. Whisk the gelatin on medium speed for a few seconds to break it up. Add the salt to the gelatin as well.1 pinch kosher salt / sea salt
- While the mixer is running on medium / medium low speed, carefully stream in the sugar syrup. Do not dump it all at once.
- Do not pour the syrup directly on the whisk to avoid splash back, and instead pour it along the wall of the bowl. Pour in all of the sugar syrup and the heat should dissolve all of the gelatin.
- Increase the speed to high (9 or 10), and whisk the mixture for at least 5 – 6 minutes. The base should increase about 3 times in size and become white, fluffy, and smooth. It should look like a very fine, glossy, thick meringue.
- Add the vanilla and whisk for a further 1 – 2 minutes until the vanilla mixes through the entire mixture.2 tsp pure vanilla extract
- The total whisking time can be between 5 – 8 minutes.
- Since it’s easier to spread the marshmallow mixture while it’s warm, stop whisking the marshmallow mix while the bowl is still warm to the touch.
- Using a clean spatula, fold the mixture if there’s any vanilla stuck to the sides.
Spread and set the marshmallow
- Scrape all of the mixture into the 9 x 9 inch pan, and spread it evenly inside the pan using an offset spatula. Scrape in any mixture that is stuck to the spatula and bowl before it sets.
- The marshmallow mixture will thicken and get sticky as it cools down. Cover the spatula with a thin layer of butter / shortening to make it easier to spread the sticky marshmallow if needed.
- Sift the dusting powder (confectioner’s sugar + cornstarch mix) over the top of the marshmallow liberally to completely cover the surface.
- Set the marshmallow aside to let it set / cure for at least 6 hours at room temperature. Do not put the marshmallow mix in the fridge. Once the marshmallow mixture has cooled to room temperature, you can loosely cover it with plastic wrap as well.
Cut the marshmallows
- Turn the set marshmallow block out onto a work and cutting surface that’s dusted with dusting powder. The marshmallow block should easily release from the pan when it’s gently pulled away from the pan with your fingers.
- Cut the block into 8 x 8 small squares. You can cut the marshmallows into any shape or sixe you like, but I like cutting them into smaller 1 x 1 inch portions.
- To get clean, neat cuts, lightly grease the blade of your straight blade knife or even scissors. Scrape off any marshmallow residue that sticks to the blade frequently and re-apply the grease to keep it from sticking to the marshmallow.
- Toss the cut marshmallows in the dusting powder and store in an air-tight container with some extra dusting powder.
Dusting powder
- Mix the confectioner’s sugar and cornstarch together until well combined. Set aside until needed. You can also use only cornstarch, if you don’t want to add sugar.120 g cornstarch, 60 g confectioner’s sugar
Recipe Notes
Invert sugar options
Corn syrup, honey, golden syrup, agave, or maple syrup.Dusting powder
I used to add more confectioner’s sugar than cornstarch, but I flipped the ratio to have more cornstarch instead. You can also leave out the sugar completely and only use cornstarch if you don’t mind the starchiness. My readers have let me know that they’ve also used arrowroot powder instead of cornstarch and love that substitution.Notes on how to adapt the recipe
For hot humid climates, or if your marshmallows are getting too soggy during storage. Adapting for very dry and cold environments, or when your marshmallows are forming thick crusts or hardening.Storage instructions
Place the cut marshmallows in an airtight container. Ideally, the marshmallows should have as little contact with air as possible. They will keep indefinitely if they are stored this way.Recipe updates
I’ve made minor changes to the recipe (in November 2025) to make it more accessible to my readers living in different climates. After ongoing recipe quality tests and experimentation, and making it in different environments, I’ve learned how to adapt the recipe. The new information included will be especially helpful for making marshmallows in humid, hot, tropical environments.Why I no longer use egg whites in my marshmallows
The previous recipe also called for 2 egg whites to be whipped and added along with the vanilla, if you want to pipe the marshmallows. However, after further testing, egg whites are NOT needed to make this pipeable as the mixture can be piped while it’s warm. However, if you do wish to still add egg whites, you absolutely can. The egg whites do make the marshmallows lighter and softer, but also lowers the shelf life to 1 week only.More helpful information
Step by step photos for making the marshmallows The role of invert sugar syrup in making marshmallows or other candy Water test for checking syrup stage (if you don’t have a candy thermometer) Marshmallow flavor variations and what you can make with marshmallows How to make rice krispie treats with these homemade marshmallowsMarshmallow flavor variations
- Chocolate marshmallows
- Coffee marshmallows
- Ube marshmallows
- Toasted coconut marshmallows
- Mini marshmallows (and how to pipe marshmallows)
- Lemon marshmallows – add lemon zest to the sugar syrup. Substitute 1/4 cup of the water used to make the sugar syrup with strained lemon juice. Then proceed as normal with the rest of the recipe.
- Peppermint marshmallows
- Butterscotch marshmallows
- Tahini marshmallows
- Chocolate chip mint marshmallows – add 1/2 cup of grated milk chocolate (or finely chopped chocolate) and 2 tsp of pepper mint extract to the marshmallow base and mix to combine.
- Unicorn marshmallows – you will need to work quickly for these. Divide the marshmallows into 3 portions. Color each portion with pink, blue, and purple. Swirl the colors together and spread them in the prepared pan.
- Orange blossom marshmallows with pistachios
- Butterscotch swirled marshmallows
Nutrition Information:
“This website provides approximate nutrition information for convenience and as a courtesy only. Nutrition data is gathered primarily from the USDA Food Composition Database, whenever available, or otherwise other online calculators.”


Leave a Reply