

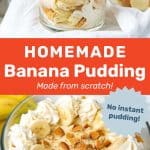
This is the Best Homemade Banana Pudding ever! Even better than the legendary Magnolia Bakery Banana Pudding! More banana flavor, more creamy yet light at the same time, and made from scratch without instant pudding mix!
Delicious homemade banana pudding that’s made from scratch, and full of creamy banana flavor! And it makes the BEST banana pudding cake along with my banana sheet cake recipe.

Better than Magnolia bakery banana pudding
My first taste of Magnolia Bakery Banana Pudding when visiting New York City several years ago was an absolute revelation. No exaggeration. I had it not once, not twice, but three times. And then more to go.
But of course you can’t find that banana pudding here in Ottawa. So I decided to make my own. Thankfully, they share their recipe online and in their cookbook. I’ve tried that version several times and enjoyed it. But I knew I could do better than that. I wanted to improve on the Magnolia bakery banana pudding. More banana flavor, more creamy, and without instant pudding mix.
So here’s my absolute favorite homemade banana pudding recipe, made from scratch, WITHOUT instant pudding mix! So you can make this even if you can’t find pudding mix, no matter where you live in the world.
Why this is truly the best homemade banana pudding
- This recipe makes the pastry cream from scratch, without using an instant vanilla pudding mix. This means that my readers who are from outside the US can also easily make this at home.
- The Magnolia Bakery recipe relies only on banana slices for banana flavor, and it’s too sweet for my liking (because it uses instant pudding mix that is incredibly sweet). But NOT this recipe.
- My homemade version has perfect sweetness that you can adjust, and it’s packed with delicious banana flavor!
- Since the banana pudding base (diplomat cream) is already infused with banana, you can actually just eat the banana diplomat cream on its own. And it tastes freaking incredible!
So if you’re looking for the best banana pudding recipe, that is made from scratch, then look no further. I got you covered! This is easily one of my favorite no bake desserts to make for guests too.

Banana pudding ingredients and components
Banana pastry cream
The base of this homemade banana pudding is a banana flavored custard / pastry cream. The Magnolia Bakery recipe uses vanilla pudding as the base. However, I use a banana flavor infused banana custard (just like I do for my banana cream pie recipe and banana pudding layer cake). This is essentially a thicker banana flavored pudding. This makes the pudding that much more banana flavored and creamier.
To make this you will need,
- Milk
- Banana
- Sugar
- Cornstarch
- Eggs

Banana pudding base (banana flavored diplomat cream)
To turn the banana custard into a banana pudding, I fold in stabilized whipped cream. I make stabilized whipped cream by whisking heavy cream with melted gelatin. This keeps the banana pudding stable without deflating. You can skip this step if you like, but I prefer to add the gelatin. This base is essentially a banana flavored diplomat cream.
Folding in whipped cream will make the banana pastry cream more light and airy as well! But the cream will also make it feel richer. Creamy and light – the best of both worlds.
For stabilized whipped cream, you will need,
- Heavy cream (35% fat at least)
- Gelatin and water (optional)
To layer the Banana Pudding,
- Nilla wafers
- Bananas
- Whipped cream (optional)

Nilla wafers
These vanilla wafers are a key ingredient in this homemade banana pudding from scratch. They become almost cake-like when soaked in the pudding base. Nilla wafers are vanilla wafers that can be found very easily in the US. They are not as common in Canada however, so I had to order it online.
So if you can’t find Nilla wafers where you live, you can substitute it with ladyfingers (Savoiardi biscuits).
Bananas
Can’t make banana pudding without bananas of course. You’ll need bananas in this recipe for both the custard, and for layering the dessert. Use bananas that are just ripe and still a little firm. If you use overripe bananas, they can get mushy in the banana pudding. You could use those to make banana cake or banana bread instead.
How to make banana pudding (step by step overview)
My homemade banana pudding recipe is certainly more involved than the Magnolia banana pudding. There are no shortcuts. But it’s absolutely worth your while, at least in my opinion. And maybe you will agree too! 🙂
Step one – Make the banana pastry cream
The first step is to infuse the milk with the flavor of banana. Slice the bananas and add them to the milk. Heat the milk mixture until it just starts to boil or simmer. Remove from the pan and let the milk cool down in the fridge. Let the bananas infuse the milk for about 4 hours, or up to 12 hours.
Next, strain the milk mixture without squeezing the bananas through the sieve. Now you’ve got banana infused milk! This is what you will be using to make a pastry cream / custard. The pastry cream will be very thick because of the addition of extra cornstarch. This is so that the final banana pudding will have the right spreadable consistency after adding whipped cream.
The pastry cream is then chilled in the fridge for a few hours.


Step two – Make the banana diplomat cream
This step involves whisking heavy cream until you have stiff peaks and then folding it in with the chilled banana pastry cream. Add gelatin to make this more stable, but this is an optional step.
The banana pudding base should be used immediately.


Step three – Prepare the bananas for layering
When the banana pudding base is ready, you can start layering the pudding.
I do not advice that you cut the bananas in advance, since they will brown when exposed to air. So cut the bananas only when you need them for layering this dessert.


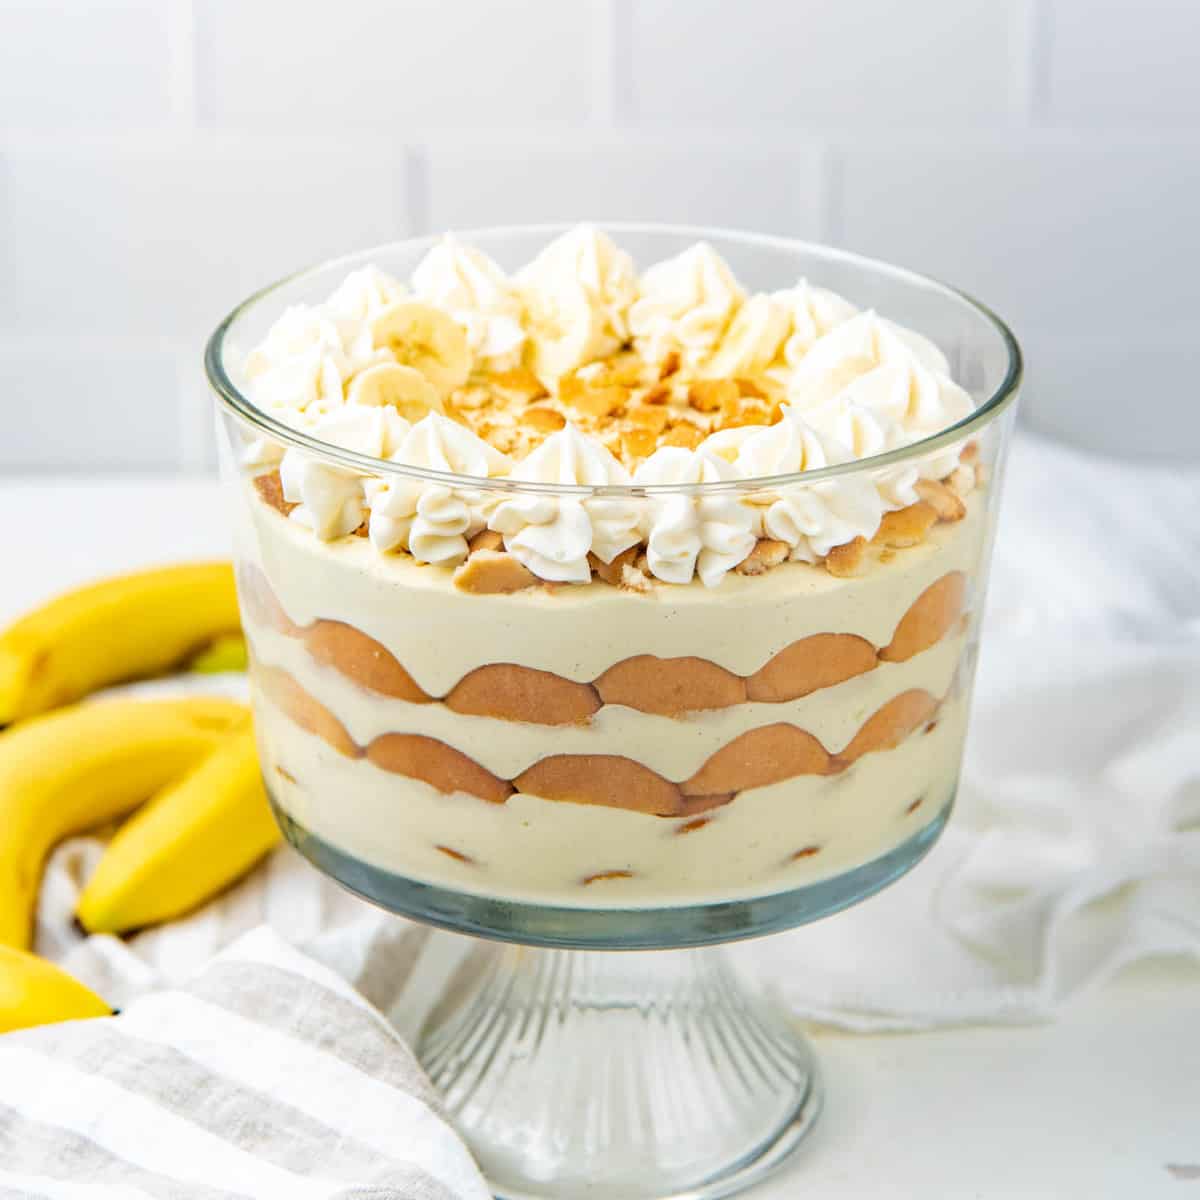
Step four – Layer the banana pudding
I made my banana pudding in a trifle bowl here. However you can make this in individual bowls or in a shallow baking dish as well (9 x 13 or less).
Spread a layer of the banana pudding base at the bottom of your serving dish. Place the Nilla wafer cookies in a layer on top. I like to make sure that the cookies overlap a little so that there are no gaps.
Follow this with sliced bananas. I personally do not like the banana slices to be visible from outside the bowl. While I do add a generous layer of sliced bananas, I make sure that they are not too close to the side of the bowl. But that’s just a personal preference.
I also break some of the Nilla wafers in half and place them upright against the wall of the trifle bowl – purely for decoration.
Next I follow with another layer of banana pudding base, and repeat with the Nilla wafers, and banana slices, and the wafers against the wall of the trifle bowl. Repeat until you have used up all of your banana pudding, but make sure the final layer is also the banana pudding.
The thinner the layer of banana pudding, the more layers you can get. With this recipe, I get 3 layers in my trifle bowl, with one final layer of pudding on top.
Cover your trifle bowl / baking dish and refrigerate the pudding for at least 1 hour, up to 8 hours.
Step five – Decorate
Just before serving, decorate the dish as you prefer. Add crushed Nilla wafers and whipped cream on top. I only garnish the dessert with fresh banana IF I’m serving the banana pudding right away. This is because the bananas will discolor quickly.


How do I prevent bananas from discoloring?
Much like apples, bananas discolor once cut and exposed to air.
You can toss them with a little bit of lemon juice if you like to stop them from discoloring (like I do with apples when I make this butterscotch apple pie). But I don’t like the addition of lemon flavor into this pudding. But if you don’t mind that, then go ahead and use lemon!
I just prefer to cut the bananas just before I use them. I also make sure that the bananas are not exposed to air, and are completely covered by the banana pudding base. This is why I don’t line the side of the bowl with sliced bananas.
As long as you make sure the bananas are completely covered by the banana pudding base, and not exposed – the bananas will retain their color for quite a while in this dessert.

Storage tips
You can refrigerate the banana pudding for up to 3 days after assembling it. This is not counting the day to make the pastry cream, and then chilling the assembled pudding.
The pastry cream itself will last about 5 days. However, this is only IF the pudding is kept whole and intact (without cutting into it).
Just be mindful that the bananas will discolor if they are exposed. The pudding will still be good to eat even if the bananas discolor, but it may not look appetizing.
So, if you’re storing leftovers, make sure to cover the leftovers with plastic wrap to prevent the pudding (bananas) from being exposed to air.
Personally, I keep any leftovers only for an extra day. After that the bananas do tend to discolor and get mushy.

Recipe
Homemade Banana Pudding from scratch
US based cup, teaspoon, tablespoon measurements. Weight measurements are recommended for accurate results whenever available.
Common Measurement ConversionsIngredients:
Banana Milk
- 720 mL milk 3 cups, full fat milk preferably
- 300 – 400 g bananas about 3 – 4 bananas, see recipe notes
Banana pastry cream
- 600 mL banana milk 2 ½ cups, see above
- 3 egg yolks from large eggs
- 1 large egg
- 60 g cornstarch about 6 – 7 US tablespoons
- 150 g white sugar ¾ cup, see recipe notes
- ½ tsp fine sea salt
- 15 mL vanilla extract 1 tbsp
- 57 g butter ½ stick / ¼ cup
Stabilized whipped cream (to make diplomat cream)
- 360 mL heavy cream 1 ½ cups
- 1 tsp gelatin
- 1 tbsp water room temperature,
- 2 tbsp instant vanilla pudding instead of the gelatin
To assemble
- 340 g Nilla wafers about 12 oz, see recipe notes
- 3 – 4 ripe bananas just ripe and firm bananas are best
To decorate
- Extra whipped cream
- Nilla wafers
- Sliced bananas
Instructions:
Banana milk
- Place the milk in a saucepan. Slice the bananas into the milk.720 mL milk, 300 – 400 g bananas
- Heat the milk and banana mix over medium heat, stirring occasionally to prevent the milk from burning.
- Heat until the milk starts to steam or simmer. Do not let it come to a full boil.
- Remove the milk from the heat and let it cool down slightly.
- Transfer to the fridge and let the bananas infuse the milk for at least 4 hours, or up to 12 hours.
- Strain the banana milk mixture, without pressing the banana pieces through the sieve. You only want the milk portion. To make sure you get all the milk, allow the strainer to sit over the milk for awhile to drain all of the milk. You should get 2 ½ cups of milk. If not, just top it with some milk to get 2 ½ cups.
Banana pastry cream
- Place the 2 ½ cups banana milk in a saucepan. Heat until the milk mixture is steaming.600 mL banana milk
- While the milk is heating, place the eggs, egg yolks, sugar, salt, cornstarch, and vanilla in a bowl. Whisk until you have a smooth mixture.3 egg yolks, 1 large egg, 60 g cornstarch, 150 g white sugar, ½ tsp fine sea salt, 15 mL vanilla extract
- When the milk is heated, pour about 1 cup of the hot milk in a thin stream into the egg mixture, while constantly whisking the egg mixture. This is to temper the eggs.
- The tempered egg mixture should now be at least warm. Gently pour it back into the remaining hot milk mixture in the saucepan while whisking the milk mixture constantly.
- Return the banana milk custard mix back to the stove, and cook over medium or medium-low heat until thickened. Make sure to whisk frequently to prevent curdling, but also check if the mixture is coming to a boil.
- When the mixture comes to a boil (bubbles break the surface), lower the heat of the stove and whisk for a further minute.
- Remove the custard base from the heat and add the butter. Whisk it in until the butter is emulsified.57 g butter
- Place the custard in a bowl (or shallow dish) and cover the custard with plastic wrap. Make sure to press the plastic wrap onto the surface of the custard and cover the whole surface to prevent a skin from forming on top.
- Allow the custard to chill in the fridge. A large, shallow dish will chill the pastry cream faster. This can take 4 hours (depending on the dish), or up to 8 hours.
- Once the custard is chilled, remove it from the fridge and whisk it until smooth. Now the custard is ready to be mixed with the whipped cream.
Banana diplomat cream (pudding base)
- When the custard is chilled, make the stabilized whipped cream.
- Place the chilled whipping cream (heavy cream) in a chilled metal bowl (of your mixer).360 mL heavy cream
- Place the water in a small microwaveable bowl. Sprinkle the gelatin and stir it in. Allow the gelatin to bloom in the water for about 10 minutes.1 tsp gelatin, 1 tbsp water
- Microwave the bloomed gelatin for about 10 – 20 seconds to dissolve the gelatin. But DO NOT let it boil.
- Stir in about 1 tbsp of the chilled heavy cream to temper the gelatin mixture.
- Start whisking the heavy cream and pour in the gelatin mixture. Make sure the gelatin isn’t poured directly onto the whisks, since this will cause the gelatin to set and forms clumps.
- Whisk the heavy cream on high for a few seconds to incorporate the gelatin.
- Once the gelatin is incorporated, lower the speed to medium high, and whisk the cream until it's just starting to form stiff peaks. Make sure to NOT let the heavy cream curdle / become grainy.
- ALTERNATIVELY, Whisk in about ¼ cup of heavy cream with the vanilla pudding powder until mixed well into a smooth paste. Add this paste to the rest of the whipped cream and whisk to combine well. Then start whisking the heavy cream on medium high until the heavy cream just starts to form stiff peaks.2 tbsp instant vanilla pudding
- Fold in about ⅓ of the whipped cream into the banana flavored custard. Once mixed well, either fold the rest of the whipped cream into the custard, or fold the custard into the remaining whipped cream in the mixer bowl. Either way is fine. Now the pudding base is ready.
To assemble the banana pudding
- Choose the dish you'll be serving the banana pudding in. I used an 8 – 9 inch trifle bowl here, but a large casserole dish (about 9 x 9 inch square or slightly rectangular) will work as well.
- You can create as many layers as you like, depending on how thinly you spread the pudding base layer. Start with the pudding base, and have enough to top the dessert as the final layer.
- Spread a layer of the banana pudding base at the bottom of your dish. Top it with a layer of Nilla wafers, followed by sliced bananas (about ½ cm thick). I like to slice the bananas only as I layer them, and not ahead of time (to prevent browning).340 g Nilla wafers, 3 – 4 ripe bananas
- Break some Nilla wafers in half and layer them against the wall of the dish (IF you’re serving this in a glass container). This is optional and purely for aesthetics.
- Spread a layer of the banana pudding base on top of the bananas. Make sure the bananas are completely covered with the pudding. Banana slices that are exposed to air will brown quickly.
- Repeat the layers until you have used up all of the banana pudding base, while making sure the final layer on top is also the pudding.
- Cover the dish with plastic wrap and refrigerate for at least 1 hour.
To decorate
- Top the pudding with whipped cream (optional). You can either pipe it along the edge or spread a layer of whipped cream on top.Extra whipped cream
- Decorate with whole or crushed Nilla wafers.Nilla wafers
- You can also decorate with more banana slices, but make sure to do this just before serving (to prevent browning).Sliced bananas
Recipe Notes
Note about bananas
You’ll need 300 – 400 g of bananas. If you’re infusing the milk for a longer time, you can use 300 g bananas (about 3 bananas). If you’re infusing the milk for a shorter amount of time, then I recommend using 400 g (about 4 bananas).Note about sugar
This recipe is less sweet than the classic Magnolia Bakery banana pudding. If you want this to be sweeter, then I recommend using 200 – 225 g sugar (1 – 1 ¼ cups).Note about Nilla wafers
You will need about 340 g / 12 oz. You may not use all of it, depending on the size of the serving dish and number of layers in your pudding. If you cannot find Nilla wafers, use savoiardi / ladyfinger biscuits (cookies).To chill the pastry cream faster
Place the banana pastry cream in a large, shallow dish – I like to use a quarter sheet pan. Spread it evenly in the dish and cover it with plastic wrap. Then place it in the freezer for about 3 – 4 hours to cool it down faster. DO NOT let it freeze overnight, so check on it every hour to make sure it’s not freezing.Nutrition Information:
“This website provides approximate nutrition information for convenience and as a courtesy only. Nutrition data is gathered primarily from the USDA Food Composition Database, whenever available, or otherwise other online calculators.”


Leave a Reply