

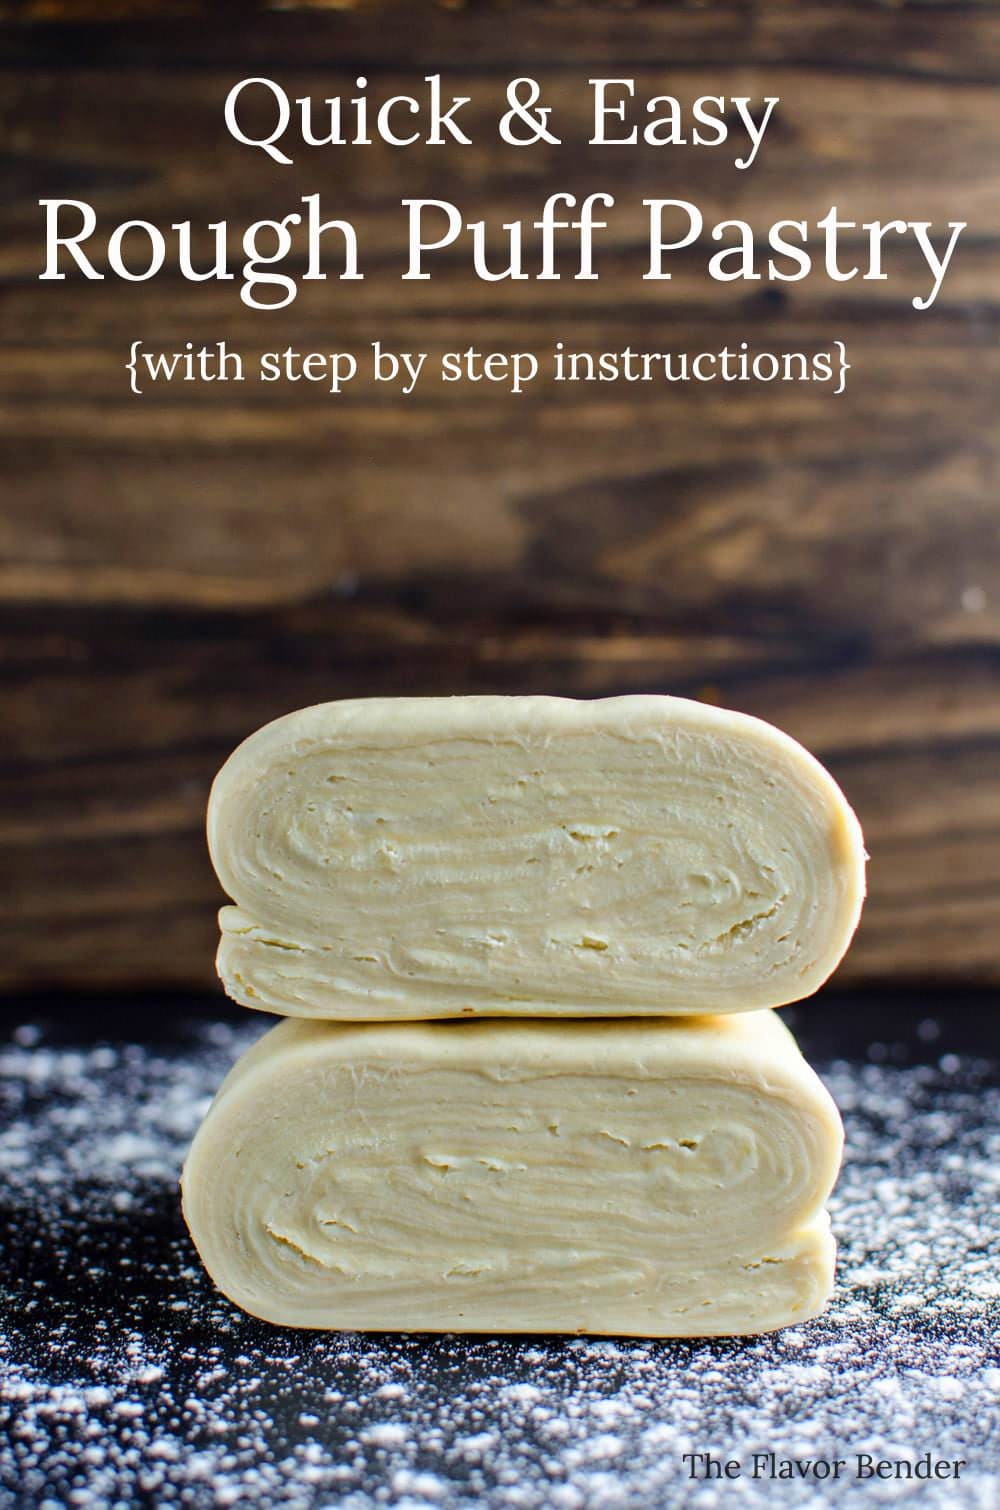
This homemade quick and easy rough puff pastry is beautifully flaky and buttery. Delicious puff pastry made from scratch that tastes infinitely better than frozen, store-bought puff pastry and it only takes 30 minutes of your time? Almost too good to be true!
Flaky, buttery, homemade rough puff pastry is PERFECT for a variety of starter recipes and easy pastry recipes!
What is puff pastry?
Originating from France, classic puff pastry is made using a dough called détrempe (pronounced day-trahmp, a basic dough made with flour, water and butter) to which you add more butter, roll it out, fold it, turn it, roll it out, fold it, turn it and on and on till you have made several such turns.
This process is called “turning the dough” or “laminating the dough” and the idea is to distribute the butter evenly in layers throughout the dough (laminating the dough layers, with butter layers).
What creates flaky pastry layers?
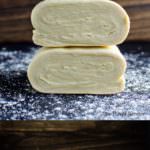
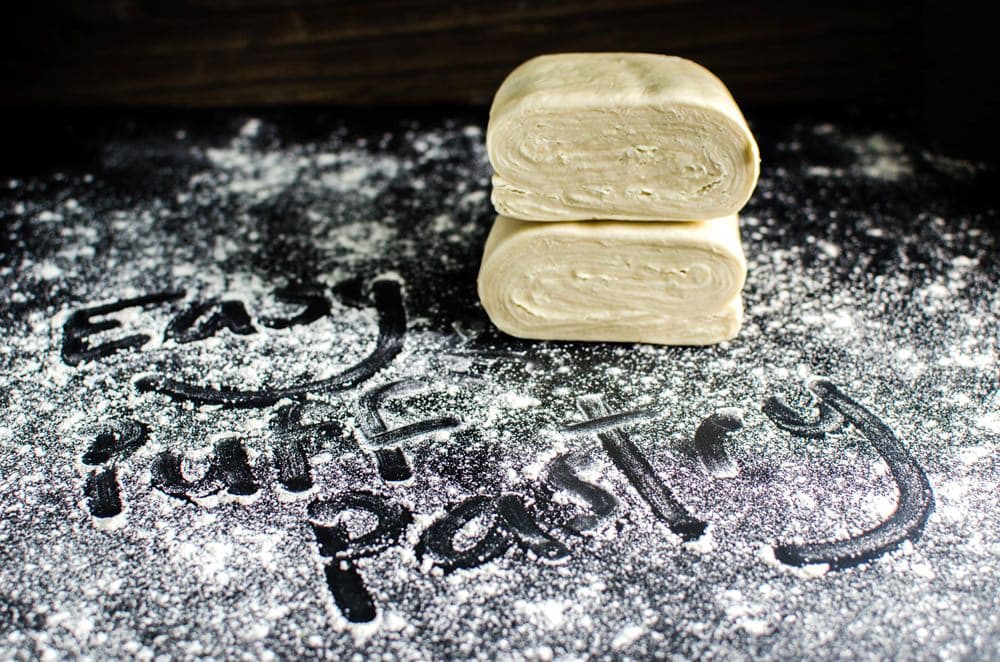
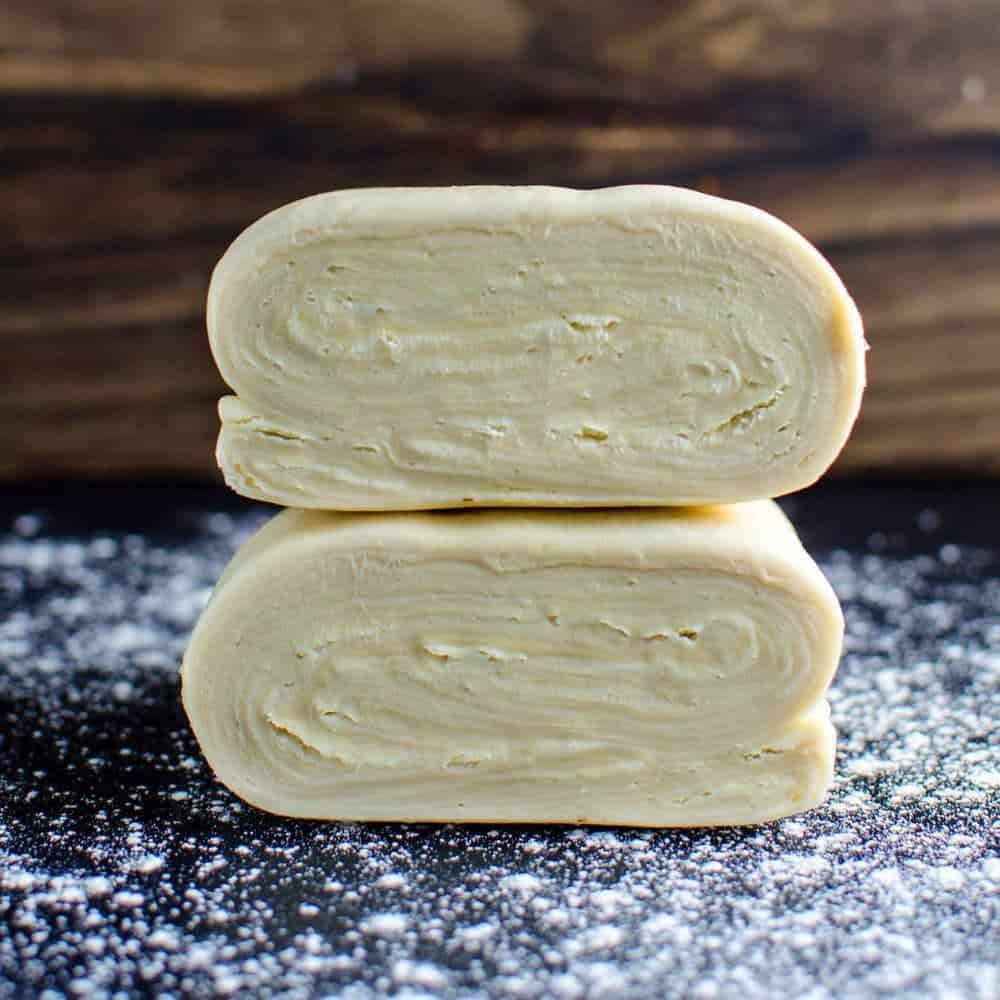
The sign of a good puff pastry dough (classic puff pastry or rough puff pastry) is the lamination layers. To laminate a dough you need to incorporate layers of butter (fat) into the dough by repeatedly rolling out and folding the dough and butter together which results in beautiful, paper-thin layers as you can see in the pictures of this rough puff pastry.
Similar to what you would do with French croissants and chocolate croissants, or with scallion pancakes (using oil instead of butter).
When this dough bakes, the moisture in the butter and dough turns to steam and lifts the layers in the dough (which is what puts the “puff” in puff pastry) resulting in thin, crispy, buttery layers of delicious pastry!
Why is homemade puff pastry better?
The simple fact is homemade puff pastry is infinitely better than store-bought, and I’m not just saying that to sell you this recipe. This really is an observable fact.
Mass-produced puff pastry available at the store, often uses sub-standard ingredients and the difference between that and the stuff you make yourself at home with love and care is pretty easy to tell.
But the thing is, classic puff pastry is an absolute pain to make. So if someone has already done it for you and it’s frozen and it’s available at the store, then there’s no reason to boycott them altogether.
I do still use store-bought puff pastry for emergencies, because life ain’t always planned, you know. But what if I told you that there’s a cheat’s version of puff pastry out there? Also known as “Rough Puff Pastry”?
What is rough puff pastry?
Rough puff pastry is a cheat’s way of making puff pastry, a QUICK AND EASY Puff Pastry, if you will. This only takes 30-45 minutes of your time (30 on a cold day and 45 on a hot summer day), and is just as good as classic puff pastry and tastes downright phenomenal!
This method of making puff pastry takes short cuts, cutting down on the time it takes to make puff pastry – thus giving you a “rough” puff pastry.
There are two ways to make rough puff pastry
- Grating the butter, and incorporating the butter in TWO folds. This will increase the lamination layer with fewer folds. You still have to make sure the butter doesn’t melt, and the ingredients are super cold to maintain the dough and butter layers, but it is easier to fold and roll out because the butter is grated (and not in a block). Since you do maintain the laminated layers, you still get flaky, puffed layers as it bakes.
- Shortcrust style puff pastry – The butter is mixed into the dough in chunks, using the food processor. The dough is folded and rolled to create layers, while there are still chunks of butter in the dough. You don’t create dough-butter laminated layers with this method, and alternatively rely on chunks of butter IN the dough to make the dough flaky. This method is faster, but the result looks more like extra flaky pie dough (instead of beautiful layers of flaky puff pastry).
The recipe I’m sharing here is for the first method. I prefer this over the shortcrust method too. This is because the grated butter method mimics the puff pastry much better than the shortcrust method, which is more like an extra flaky pie crust.
What can I make with this puff pastry recipe?
You can use this rough puff pastry for any recipe that calls for puff pastry! From sausage rolls to pies, to tarts, to desserts! Anything you can think of that calls for puff pastry.
What’s the difference between the classic and shortcut version
Classic puff pastry takes several hours to make with lengthy resting steps in the middle, but this Quick and Easy rough puff pastry recipe cuts it down to about 30-45 minutes (not counting the non-active prep time to freeze the ingredients). Yet, the pastry still comes out unbelievably well.
Those beautiful flaky layers puff up as they bake (not to the same extent as classic puff pastry, but this difference is quite negligible to me). And the recipe is quite flexible too. You can use a little less butter if you prefer, and you will still get deliciously puffy, flaky pastry.
How to make rough puff pastry (step by step overview)
The basic dough (détrempe)
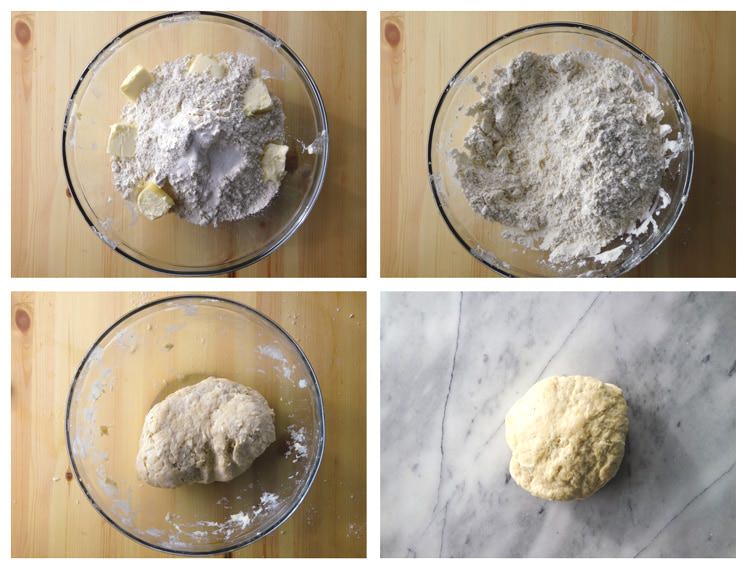
First step is to make the basic dough. This is easy and only requires AP flour, water, salt, butter and a little vinegar.
The butter can be incorporated into the dough in anyway you like. You can rub the butter into the four, or grate the butter and add it to the dough. Melting the butter isn’t a good idea though because you want to keep the dough as cold as possible.
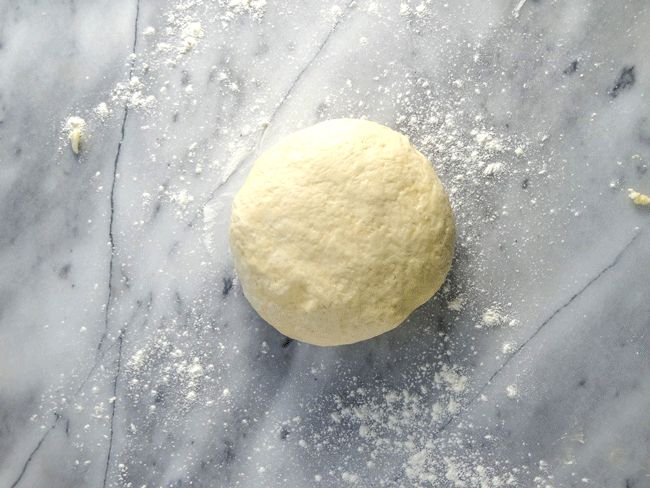
Make sure the flour, butter, and water are chilled before making the dough. Don’t forget to add the vinegar as well. You can add lemon/lime juice, or white wine vinegar or white vinegar or even citric acid powder as the vinegar. Once the dough is made, let it chill in the fridge so that the gluten is allowed to rest more.
Why is vinegar (or an acid) important?
The reason why an acid (typically in the form of vinegar) is important for the dough is that the acid helps relax the gluten in the flour. This makes it easier to roll out. You can use any of the following as an acid.
- Lemon or lime juice – this can add some flavor to the dough as well.
- White vinegar and white wine vinegar has less of an after-taste.
- Citric acid adds the least after-taste of all these options.
Incorporate the butter layers
There is a total of FIVE lamination steps in this rough puff pastry recipe. The first two lamination steps are to incorporate the butter into the dough. This will increase the buttery lamination layers in fewer folds (basically that means better results with less effort).
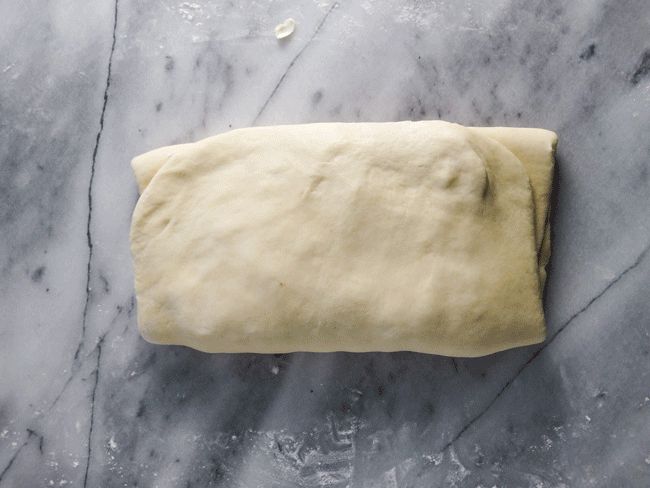
The first fold
Roll out the chilled dough into a long rectangle. The length and width don’t really matter, but I usually go for at least 6 – 7 inches in width, and 15 – 16 inches in length.
Place the half of the butter on 2/3 of the rolled out dough, and then fold over the 1/3 of the dough with no butter, over the middle 1/3 of the dough with butter. Then fold over final 1/3 of the dough with butter, over the top.
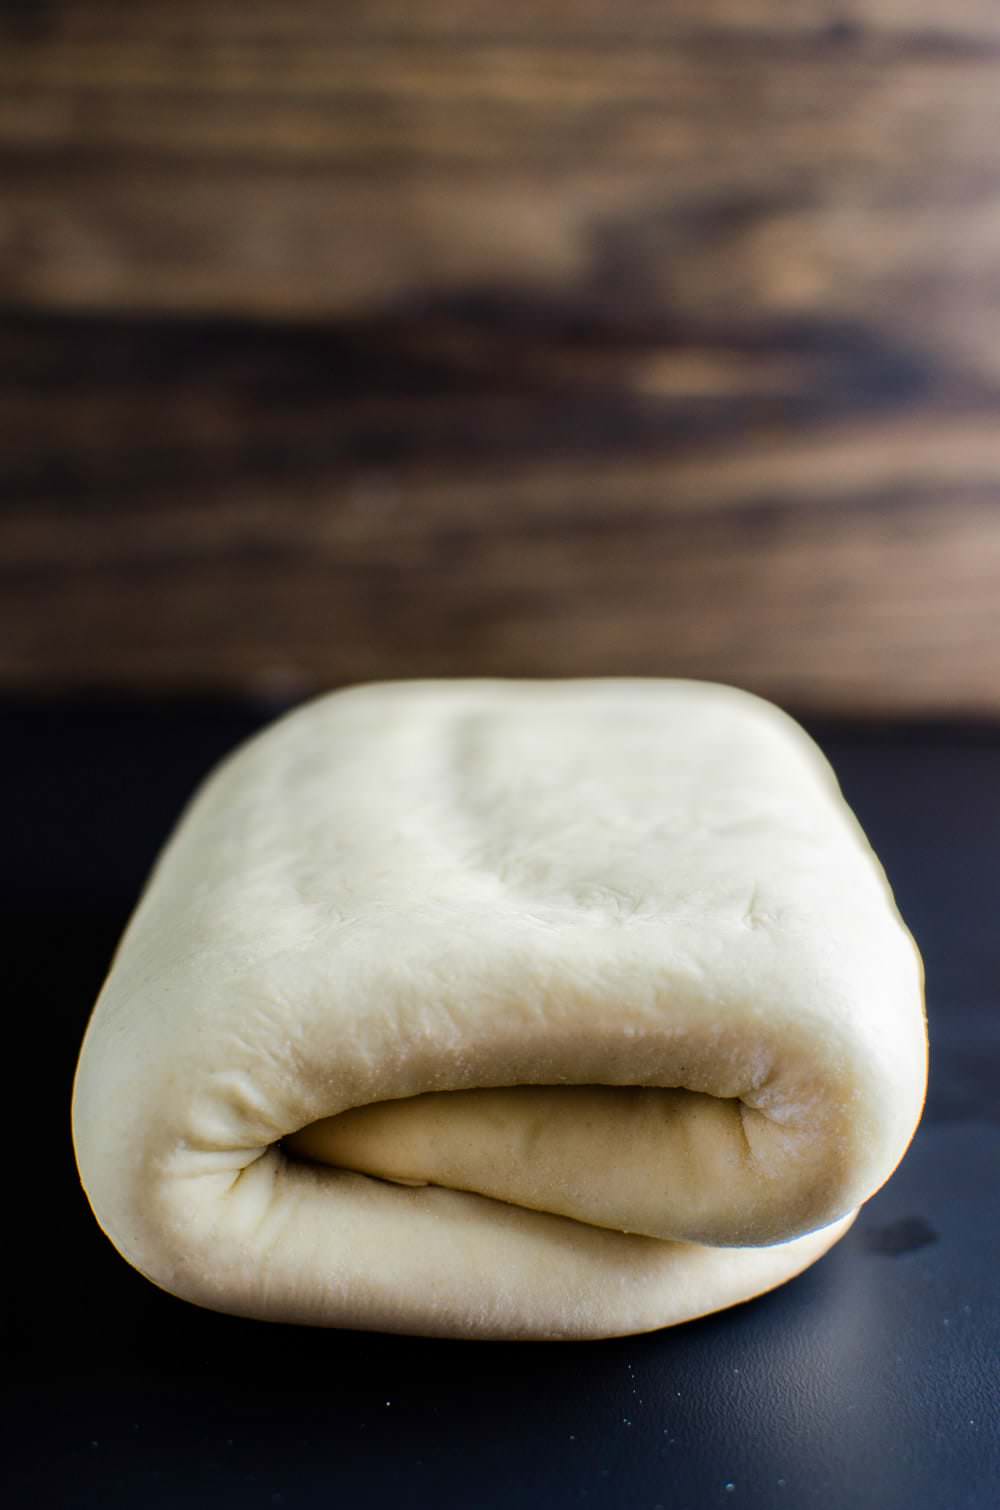
Second fold
Turn the dough 90 degrees and roll it out again, into a rectangle (5 – 6 inches x 15 – 16 inches).
Repeat the same process with the remaining butter.
Work quickly through this process so that the dough will remain nice and cold and the butter won’t melt.
If it’s summer or a particularly hot day where you live, the dough and butter might warm up and soften. Don’t worry if this happens, just quickly put it in the fridge or freezer for a few minutes to firm up the butter again. You don’t want the butter to soften, as it can melt and incorporate into the dough while folding and rolling, and then you will lose the lamination layers.
Creating more butter dough layers (increasing lamination)
After the butter has been incorporated, it’s time to repeat the folds THREE MORE TIMES.
The remaining folds
Turn the dough another quarter turn and roll it out to a similar sized rectangle as before. Fold it into thirds (just like before, but without the butter).
Rotate the dough another quarter turn, and repeat two more times.
In total, this recipe for rough puff pastry will create a whopping 171 layers of butter within the dough, with just five folds!

Once the folds have been completed, tightly wrap the dough in plastic wrap, and refrigerate until needed. I personally prefer to cut the dough in half and wrap each portion separately (so that I can freeze the portion I don’t need for later).
Store the wrapped dough in the fridge for at least 30 minutes (longer is even better), to rest the gluten in the dough. It will be much easier to roll out the dough the more you rest it at this stage.
Do you find that your rough puff pastry dough isn’t rolling out easily, or rolling out nice and thin?
Or do you find that the puff pastry dough shrinks as you roll it out, or as you bake it?
This is because you didn’t let the dough rest properly after making the puff pastry. Wrap it again, and let it rest in the fridge for longer. The amount of time you need to rest the dough can vary, so keep that in mind.
Why make rough puff pastry at home
- It’s cheaper to make your own puff pastry at home.
- Tastes better. Seriously, it’s not even close. I cannot stress this enough.
- Since it’s rough puff pastry, it’s much faster than making classic puff pastry.
- Since all the ingredients are ice cold and the butter is grated and frozen before use, it makes it easier to handle the dough – to roll it out and fold the dough.
Take a look at that lamination in the photo right at the top of the post, if you don’t believe me. Doesn’t that look beautiful? Perfect homemade quick and easy rough puff pastry achieved in 30 minutes (might be about 45 on a hot day)!
How to store this cheat’s puff pastry
Make sure the dough is wrapped tightly with plastic wrap. Even two layers to make sure it’s not in contact with air so that it doesn’t dry out. You can wrap this again in foil, or put it in an air-tight container as well.
I have stored this rough puff pastry in the fridge for up to 5 days. And YES, this rough puff pastry dough can be frozen too, for up to one month. After using the dough, the remaining scraps could maybe re-rolled once. However if you knead or handle it too much, the lamination layers will be lost.
What can rough puff pastry be used for?
This recipe is an absolute godsend if you’re entertaining guests or hosting a party or family festivities. Good quality puff pastry is the perfect base for tasty appetizers and party food.
You can make so many great recipes with puff pastry. Like delicious puff pastry appetizers and snacks, desserts and even meals using this rough puff pastry like,
Sausage rolls
Mini hand pies
Mini tarts
More appetizers
Great brunch or lunch or dinners
So save, share and pin this tutorial and make your own puff pastry right at home and then even save a batch in your fridge. This rough puff pastry has been a lifesaver for me on many occasions! How do you like your puff pastry? Savory or sweet?
Equipment and tools I use for this recipe
- Grater – to grate the frozen butter
- Flat mixing bowls – I like these wide flat bowls if I’m kneading dough by hand. It’s easier to access the dough and knead it.
- Rolling pin – A heavy rolling pin to roll out the dough to create laminated layers
Recipe
Easy Rough Puff Pastry
US based cup, teaspoon, tablespoon measurements. Weight measurements are recommended for accurate results whenever available.
Common Measurement ConversionsIngredients:
- 60 g unsalted butter 2.1 oz. grated and frozen
- 200 g unsalted butter 7 oz. grated and frozen (weigh the butter after grating it)
- 350 g AP flour 12.3 oz. Flour chilled in the freezer for about 1 hour is preferable.
- 120 – 150 mL ice cold water 8–10 tbsp. The amount varies depending on the flour and humidity in enviroment.
- 1 tsp salt
- ½ tsp lemon / lime juice (or white vinegar)
Instructions:
- In a bowl, combine the flour, salt and the 60 g / 2.1 oz of butter. With your fingers quickly rub the butter into the flour.
- Add the lemon and water, a tablespoon at a time, while mixing with a wooden spoon or your finger tips to bring the dough together.
- Add enough water to form a firm dough (that is not tacky or too wet).
- Knead the dough on a floured surface for about a minute, and leave it to rest for about 5 minutes (in the fridge).
- Roll the dough out into a long rectangle (about 6 – 7 inches wide, and 15 – 16 inches long).
- Sprinkle 100 g / 3.5 oz of grated butter on 2/3rds of the area of this rectangle.
- Fold over the portion without butter, towards the middle.
- Then fold over the other end, over the first fold. You completed one fold (while laminating butter).
- Turn the dough 90 degrees and roll it out to form another long rectangle (about 5 – 6 inches wide, and 15 – 16 inches long).
- Repeat with the rest of the butter and fold over, (completed 2nd fold with second lamination) and turn 90 degrees. Now you have incorporated all the butter in two folds.
- Complete 3 more folds so you have folded the dough about 5 times. You shouldn’t need to refrigerate between folds, if you work quickly, HOWEVER if it’s a hot day and the butter starts to seep through, keep the dough in the freezer for about 10 minutes to harden the butter and continue.
- After the fifth and final folding, wrap the dough in plastic wrap and store it in the fridge until needed.
- Let it rest for at least 2 hours before using. (I prefer to leave it longer, even overnight for best results.)
- If you’re not using it right away, cut the dough in half, wrap individual pieces in plastic wrap and store in the freezer.
Recipe Notes
Nutrition Information:
“This website provides approximate nutrition information for convenience and as a courtesy only. Nutrition data is gathered primarily from the USDA Food Composition Database, whenever available, or otherwise other online calculators.”


Leave a Reply