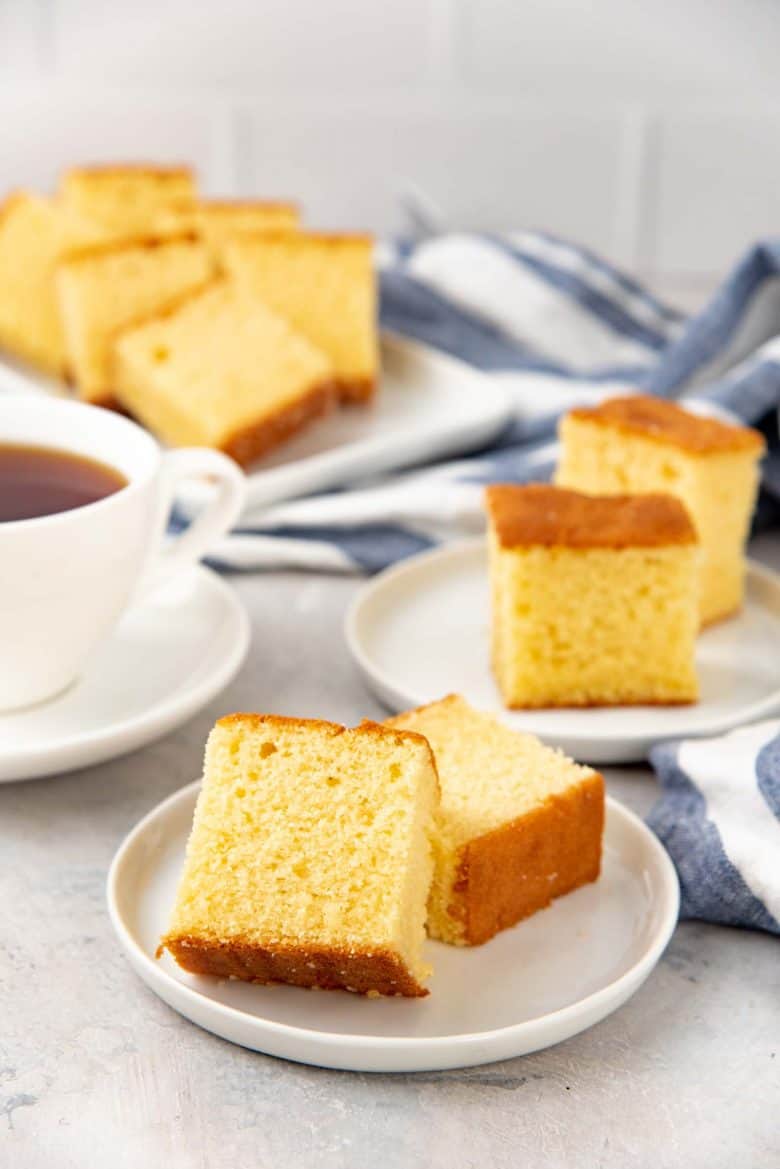
About
My Cookbooks
Work With Me
Contact
  • Facebook
  • Instagram
  • Pinterest
  • X
  • YouTube
The Flavor Bender

Master the Science of Delicious

  • Recipe Index
    • All Recipes
    • Desserts
      • Cakes & Cupcakes
      • Candy & Bite Sizes
      • Chocolate
      • Cookies, Brownies & Bars
      • Frozen Desserts
      • Fruit Desserts
      • Puddings & Custards
      • Dessert drinks
      • No Bake
      • Pastries & Breads
      • Sweet Syrups & Spreads
      • Tarts & Pies
      • Cheesecakes
      • Healthy sweets
    • Breakfasts
      • Tarts, Quiches, & Pies
      • Waffles, Pancakes & Crepes
      • Quick Breads, Scones & Muffins
      • Breakfast Sandwiches
      • Breakfast Pastries
      • Eggs
      • Breakfast & Brunch Drinks
      • Make Ahead Breakfasts
      • Healthy Breakfasts
      • Coffee and Tea drinks
      • Breakfast Smoothies & Juices
      • Breakfast Sides
      • Casseroles
      • Jams & Spreads
    • Courses
      • Main Meals
        • Bread, Sandwiches & Burgers
        • Curries
        • Salads
        • Roasts & BBQ
        • Soups & Stews
        • Casseroles
      • Bread
      • Lunch
      • Beverages
      • Appetizers & Tapas
      • Sides
      • Dips & Condiments
      • Tea Time & Snacks
      • Desserts
      • Meal Prep
      • Cocktails
      • Pet Friendly Recipes
    • Cuisines
      • American
      • European
      • Australasian
      • Sri Lankan
      • East Asian
      • Mexican
      • Middle Eastern
      • South Asian
    • Sri Lankan
      • Main Meals
      • Drinks
      • Desserts
      • Breakfasts
      • Snacks
    • Skill Level
      • Easy
        • Easy Desserts
        • Easy Cooking
        • Easy Breads
        • Easy Breakfasts
        • Easy Dinners
      • Intermediate
        • Intermediate Desserts
        • Intermediate Cooking
        • Intermediate Breads
        • Intermediate Breakfasts
        • Intermediate Dinners
      • Advanced
        • Advanced Desserts
        • Advanced Cooking
    • Recipes by Season
      • Christmas
      • Fall & Winter
      • Halloween
      • Spring & Summer
      • Thanksgiving
      • Valentines Day
    • Recipes by Diet
      • Dairy Free
      • Eggless
      • Gluten Free
      • Paleo
      • Vegan & Vegetarian
    • Recipe Basics
      • Baking Basics
      • Cooking Basics
      • Baking & Cooking 101
  • New? Start Here
  • Measurement Conversions
  • How-To Posts
  • About
  • My Cookbooks
  • Work With Me
  • Contact
The Flavor Bender   ›   Recipes   ›   Delicious Desserts   ›   Cakes and Cupcakes   ›   Sri Lankan Butter Cake (Authentic Recipe)

Sri Lankan Butter Cake (Authentic Recipe)

Author:

Dini Kodippili


Jump to Recipe


Posted: 8/11/2020
Total Time1 hour hr
Quick and Easy Recipes
Cakes and Cupcakes

Authentic Sri Lankan Butter Cake is easy to make. And easy to love! It’s essentially a pound cake, but even more deliciously moist, light and buttery. And perfectly sweet, with a gorgeous crumb. Often accompanied with a cup of tea, and absolutely no frosting. And it’s very popular as a birthday cake too!

Classic Sri Lankan Butter Cake recipe with step by step instructions!

A close up of two pieces of butter cake on a small serving plate

This is the first cake I learned to make as a kid. That’s no surprise because it’s perhaps the most popular type of cake in Sri Lanka. If a little me can bake this cake with little hassle, then you can nail this recipe too.

What is a Sri Lankan Butter Cake?

This is essentially a pound cake. This butter cake is made with butter (duh), and flavored with vanilla. It’s served in every bakery in Sri Lanka (no really, every single one of them without fail), because it’s a simple cake that can be served during special occasions as well as mundane occasions. Due to its simplicity and relative inexpensiveness, it’s widely popular!

Although it is made with butter and vanilla, butter can be expensive in Sri Lanka. So most people substitute the butter with margarine. Butter has more flavor in my opinion, but margarine does yield a softer cake. So you can use half butter and half margarine if you like.

A close up of the butter cake crumb

I also prefer using vanilla extract. Some people use almond extract as well. Some families use a little lime rind or lemon rind, because vanilla extract used to be hard to find when I was growing up. The primary purpose of this flavoring is to shield any “eggy” smell. But good quality vanilla extract does add a flavor that is hard to beat.

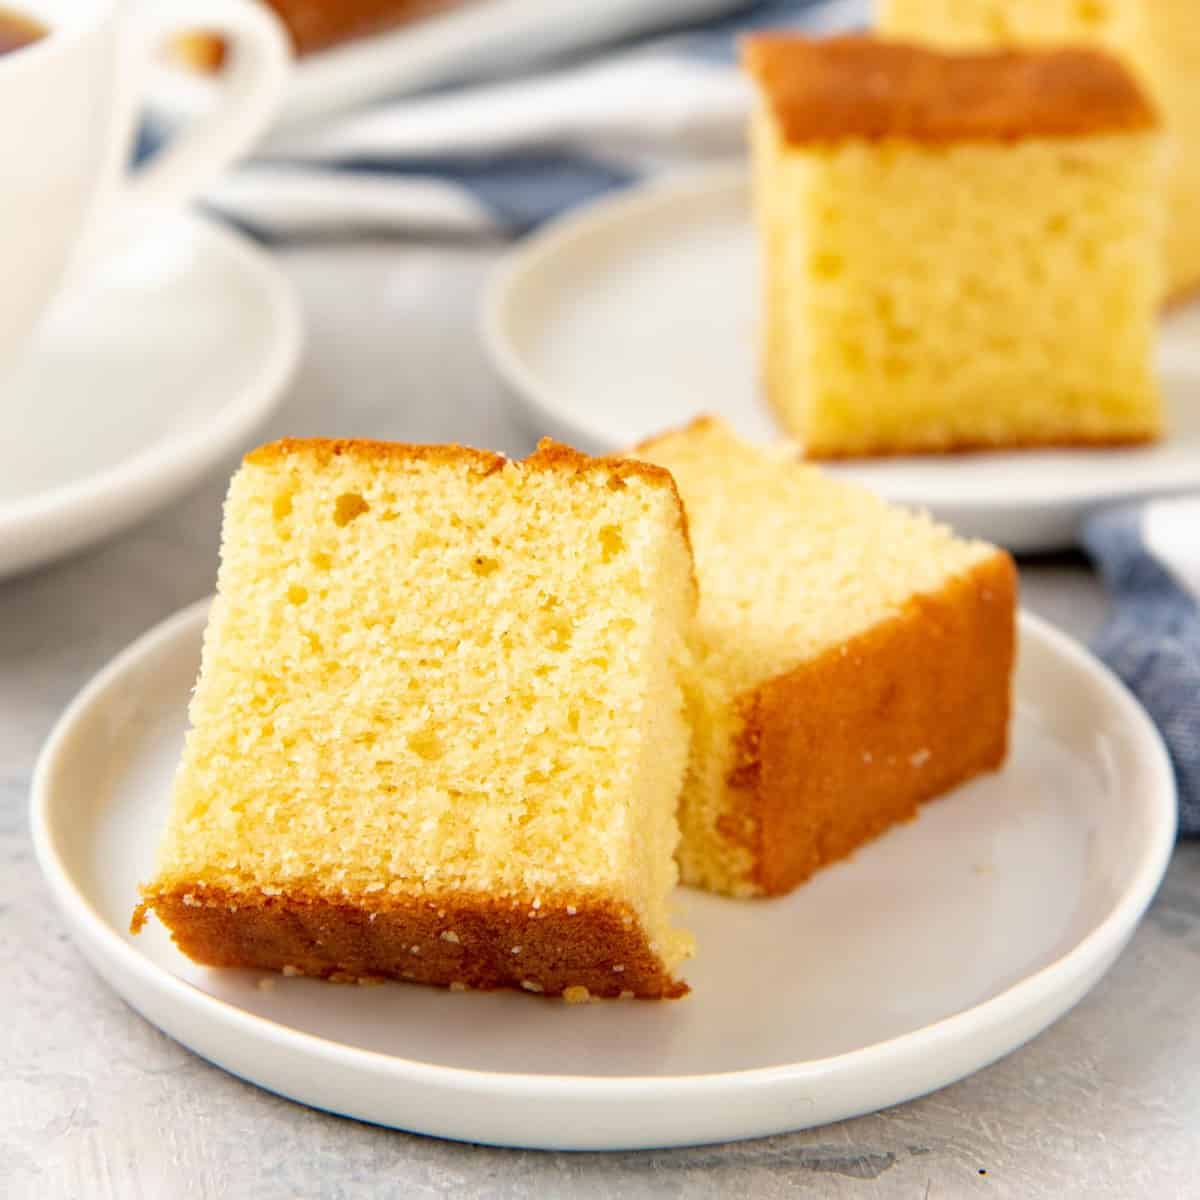
This cake doesn’t have any frosting, or any toppings. Just like regular pound cake. The flavor and texture of this butter cake are bold and beautiful enough on their own!

Is this similar to an American butter cake?

Similar, but not the same.

American butter cake usually has more sugar compared to this Sri Lankan butter cake. This butter cake recipe has more in common with an American pound cake recipe (because of the added milk).

However, all of these cakes derive from a common ancestor – the classic British pound cake.

Is butter cake hard to make?

This is a common question I get. The answer is not at all.

Yes, baking is a science of sorts. But if you have a weighing scale, an oven, a bowl and a mixer – this cake is indeed a piece of cake.

It’s important to get the consistency right at each step, so make sure to read the whole recipe properly once or twice before you start, and check out the photos in the post to know what to expect.

There are two ways people choose to make Sri Lankan butter cake. You could do it either way, but let me explain each method first.

Sri Lankan butter cake on a cooling wire rack

Two ways to make butter cake

The classic method – This is the method that I’ll be sharing in this post. The butter and sugar are creamed together and then WHOLE EGGS are added to the batter, followed by milk and dry ingredients.

The sponge method – This method will use the same ingredients as the classic method, but usually without the baking powder. However the eggs are separated, and only the egg yolks are added to the butter and sugar mixture. The egg whites are whisked separately and folded into the batter at the end.

Which method do I prefer?

Classic method. This method is easier, and the results are amazing. The texture here is more like that of a classic cake as well. This way you don’t have to whisk the egg whites separately and you still get an amazingly light texture. If it ain’t broke, don’t fix it, right?

With the sponge method, the cake relies on the egg whites for “lift”. The final cake has a more sponge cake-like texture as well.

Pieces of butter cake, standing upright on a serving plate

Can I make butter cake without a mixer?

Yes, you can! It takes a little longer, and it’ll be a good arm workout too.

The hardest part is creaming the butter and sugar until really light and fluffy. Once that step is done, the rest will be a breeze to do by hand.

How to make the perfect Sri Lankan Butter Cake

Ingredients

You will need equal amounts of butter, sugar, all purpose flour and eggs. To make sure you have equal amounts of each of these ingredients, you MUST weigh them, including the eggs.

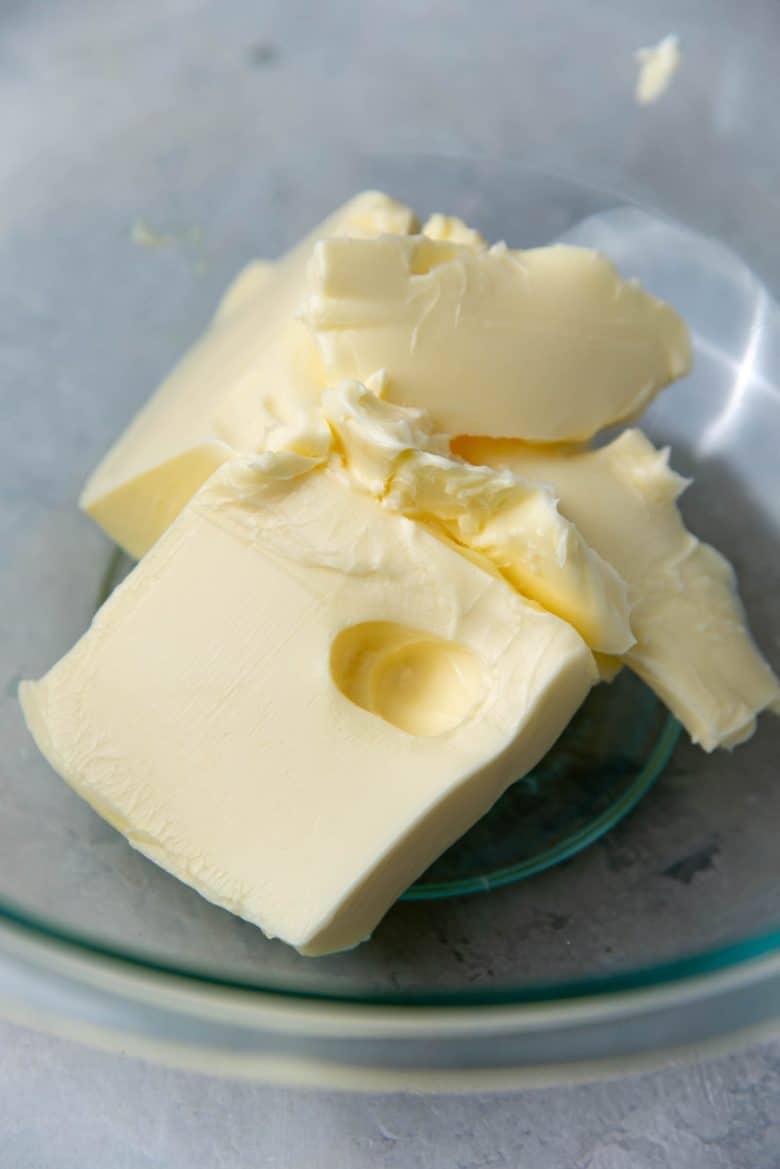
It’s also very important that ALL the ingredients are at room temperature. If it’s a cold day, then make sure the butter is at about 73 F / 23 C. It’s important that the butter is softened, but NOT melted.

Softened butter, with a dent in it to show how soft it is

Apart from these core ingredients, you will also need;

  • Baking powder – the chemical leavener to “lift” the cake and make it lighter.
  • Vanilla – flavoring to make the cake taste better, and enhance the buttery flavor and sweetness.
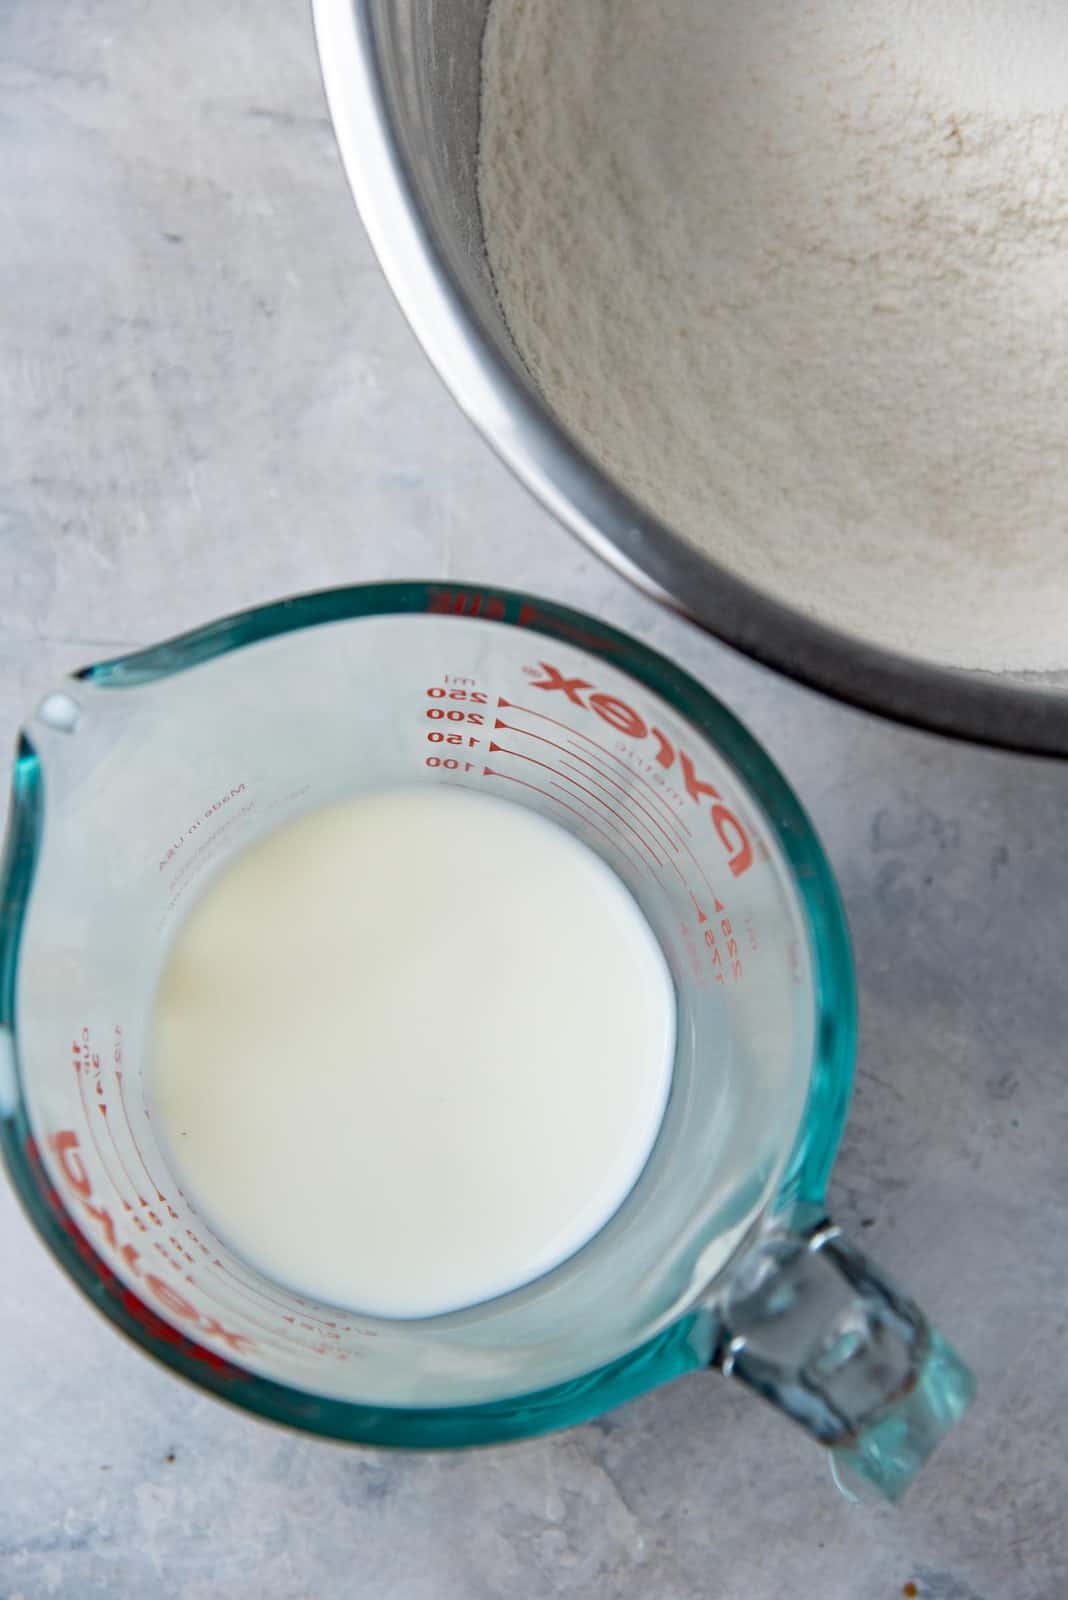
  • Milk (at room temperature) – unlike classic pound cake, milk is added to the cake batter here. The extra liquid makes the cake batter light, and yields a cake with a beautiful, light crumb. Pound cake on the other hand has a more dense crumb.

Make sure you have the right tools to make the cake first.

  • Stand mixer (preferable), or hand mixer
  • An 8 inch or 9 inch square pan
  • Parchment paper
  • Spatula

The process of making butter cake

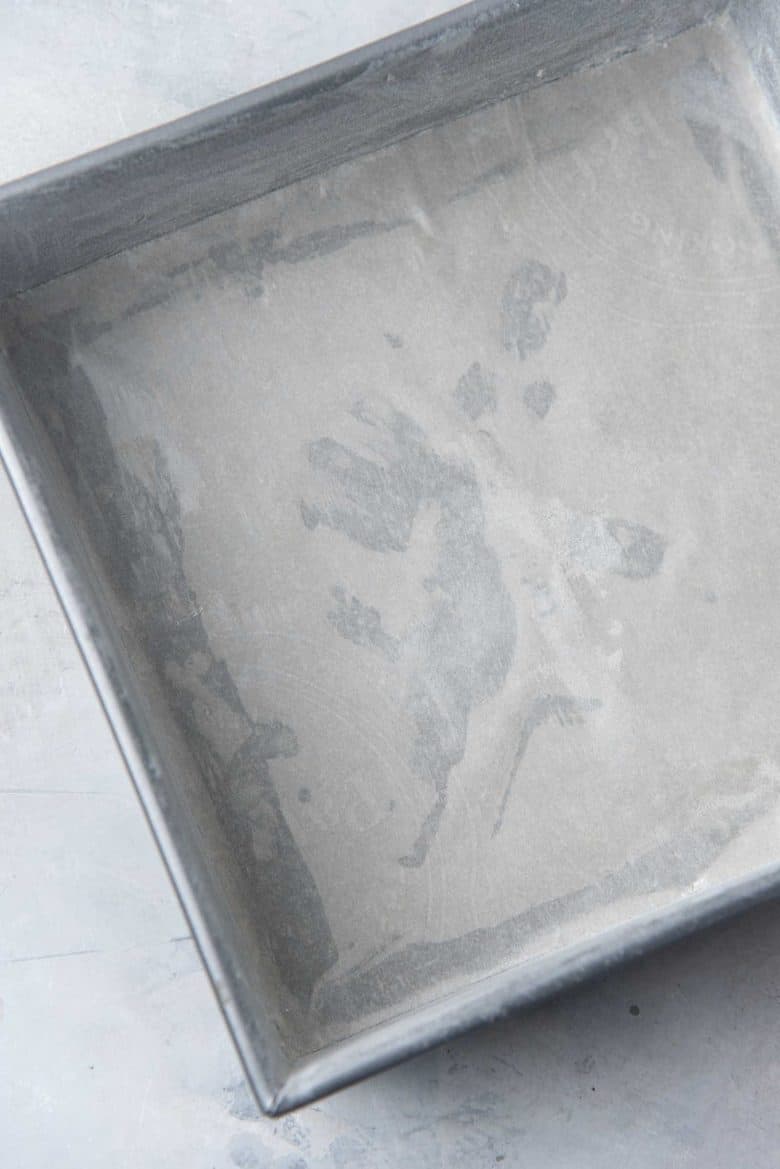
Line your baking pan (8 or 9 inch square pan) with parchment paper. I usually only line the bottom of the pan, and then butter and flour the sides. But you can leave a generous overhang of parchment paper over the sides, so that it’s easier to remove the cake from the pan.

A parchment lined square pan to bake butter cake

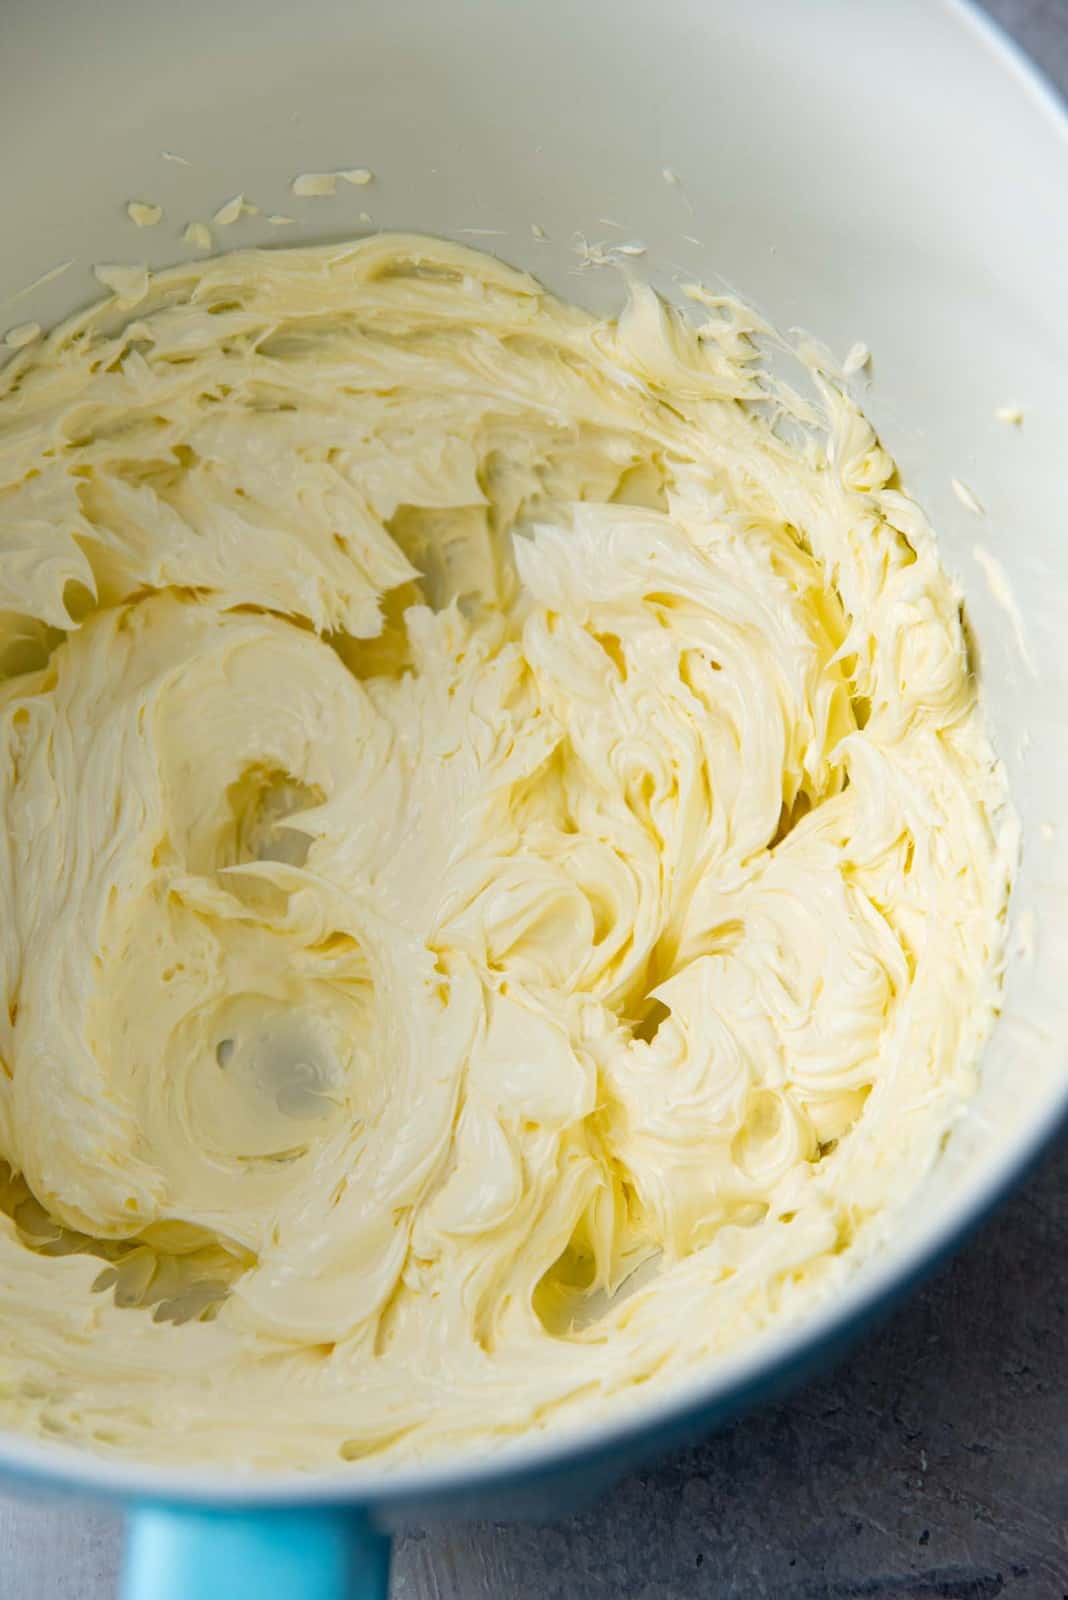
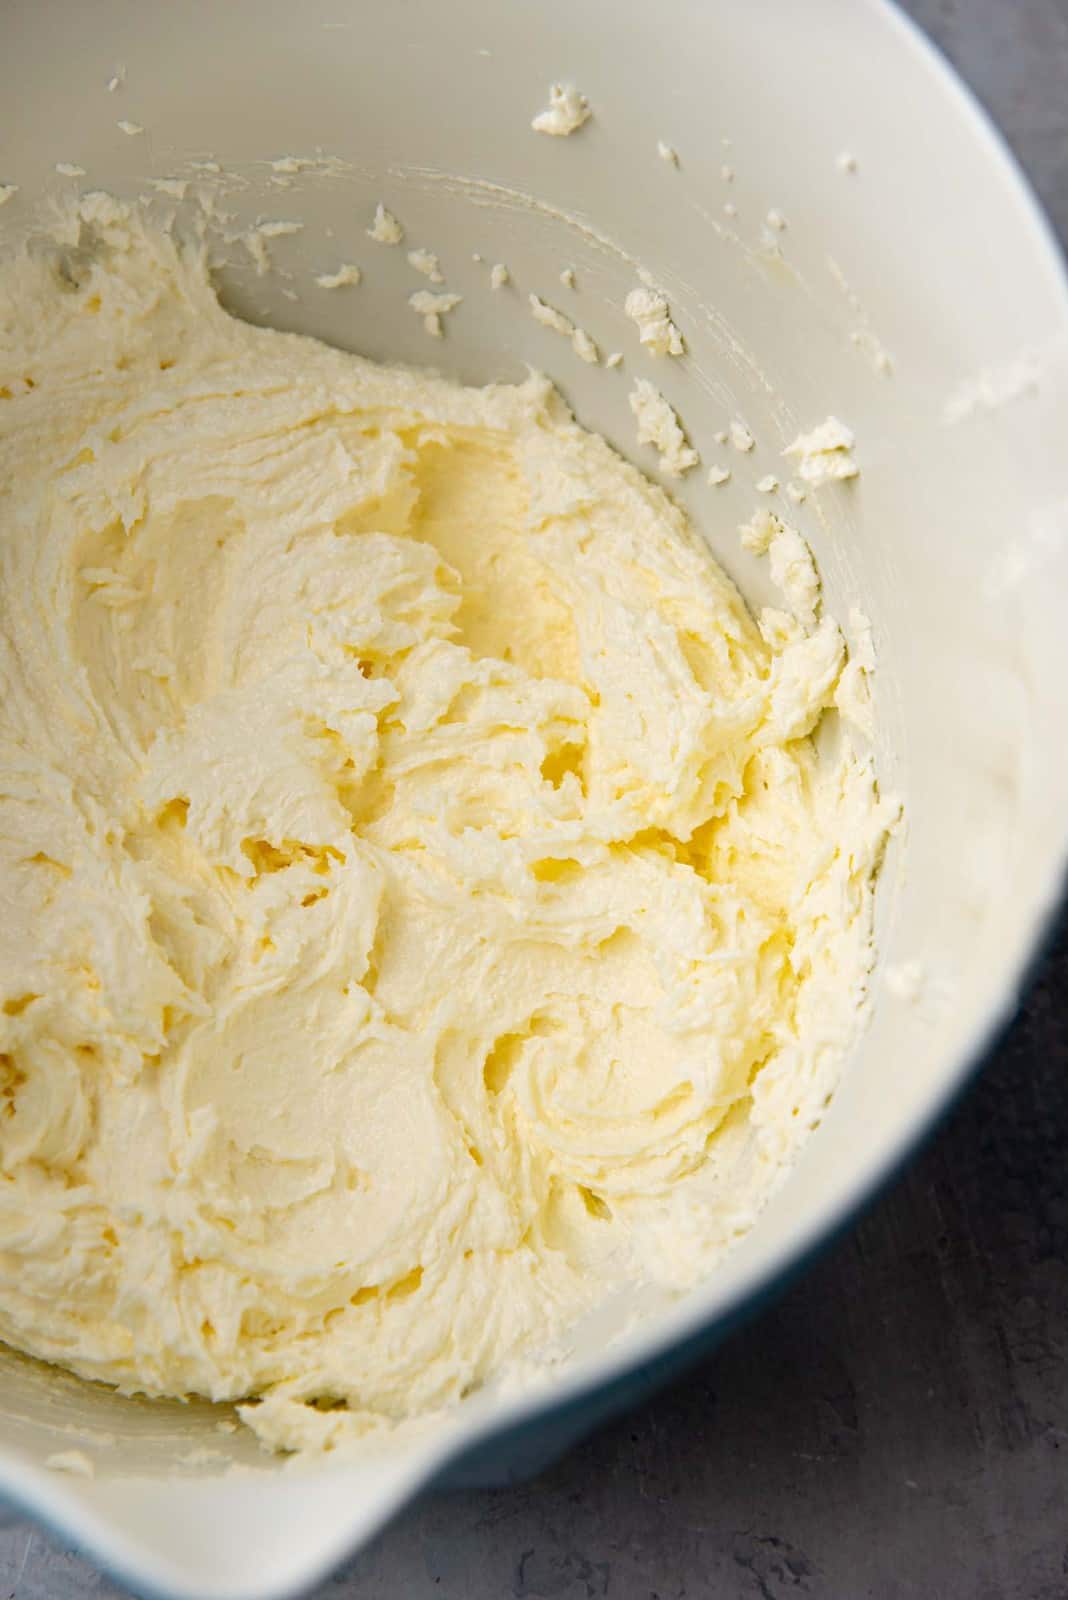
The first step is to place the softened butter and salt in your mixer bowl. Using the paddle attachment in your mixer, beat the butter until light and creamy.

Fluffy, creamy butter in a mixer bowl after being mixed with a hand mixer
Mixing the butter until creamy
Adding sugar to the creamed butter
Add the sugar to the creamed butter

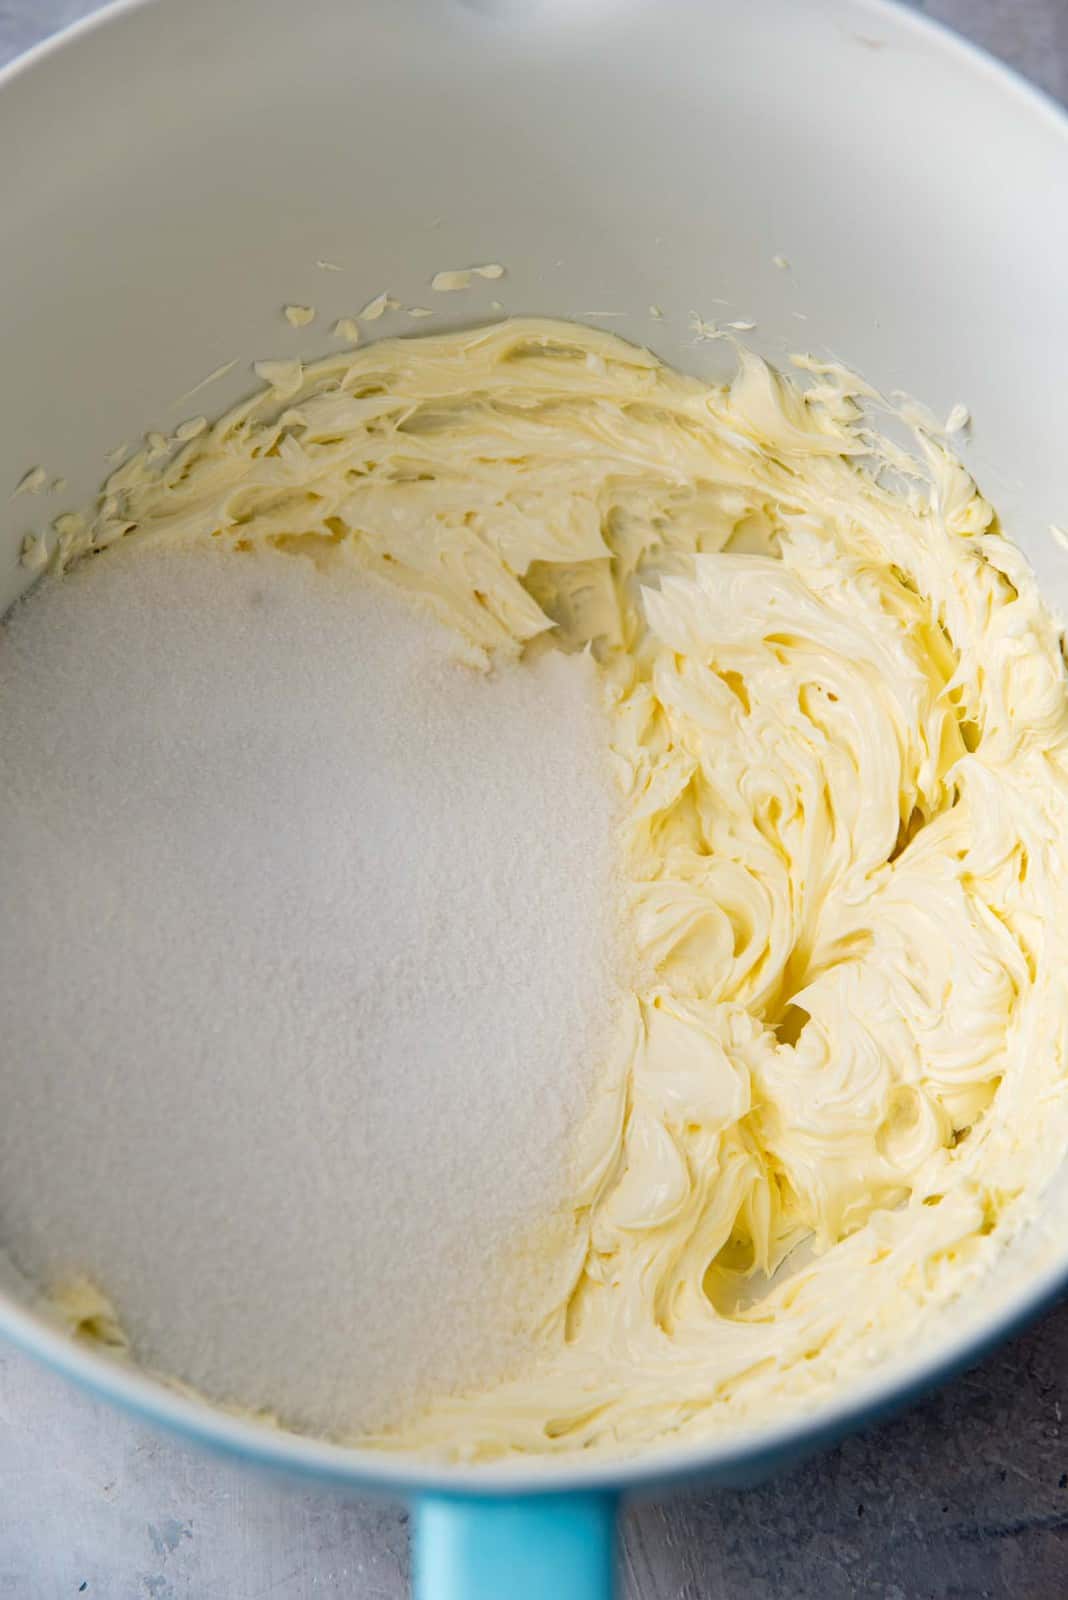
Add the sugar, and cream the butter and sugar together until you have a very light and fluffy butter-sugar mix. Half way through creaming these ingredients, scrape the sides and bottom of the bowl to make sure everything is mixing evenly. DO NOT SKIP THE STEP. It’s crucial for how fluffy and soft the cake will be at the end. Take your time and make sure you get this step right. There’ll be plenty of time to enjoy your fruits (cakes?) of labor later.

An image showing the texture of the creamed butter and sugar at the start of the process of making butter cake
This is what the batter looks like as soon as the sugar is mixed into it
Creamier, fluffier butter and sugar mixture after mixing for a few minutes
After a few minutes of creaming the butter and sugar mixture

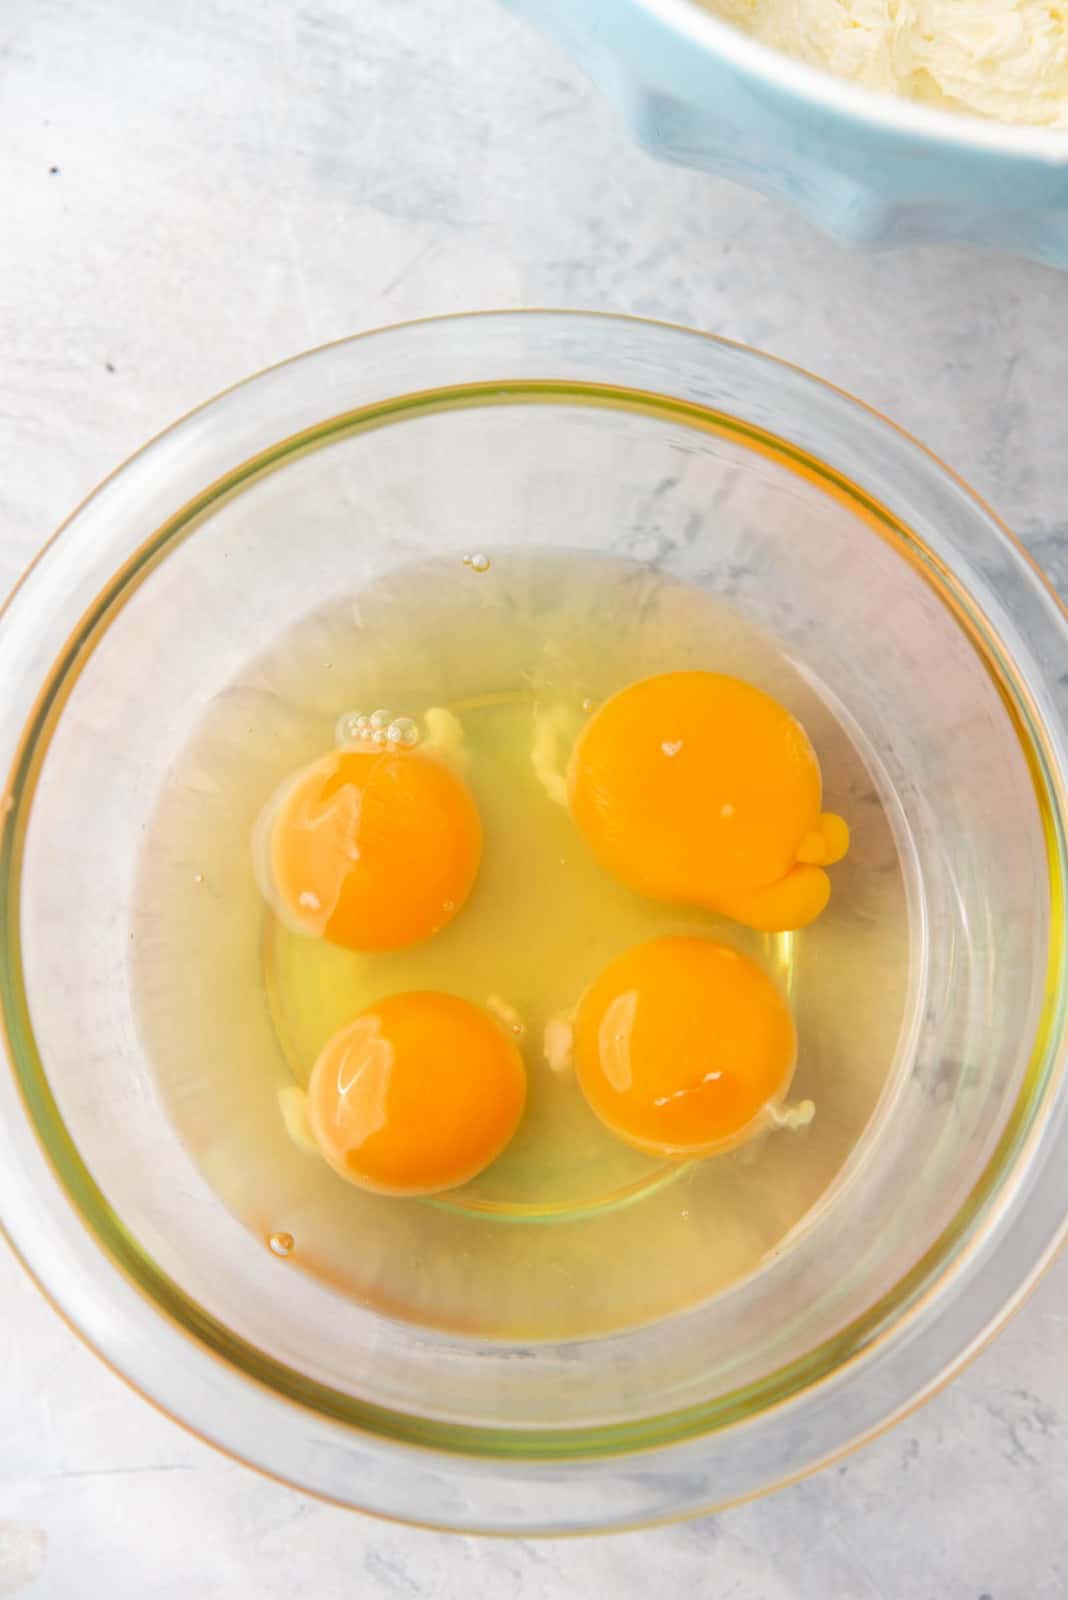
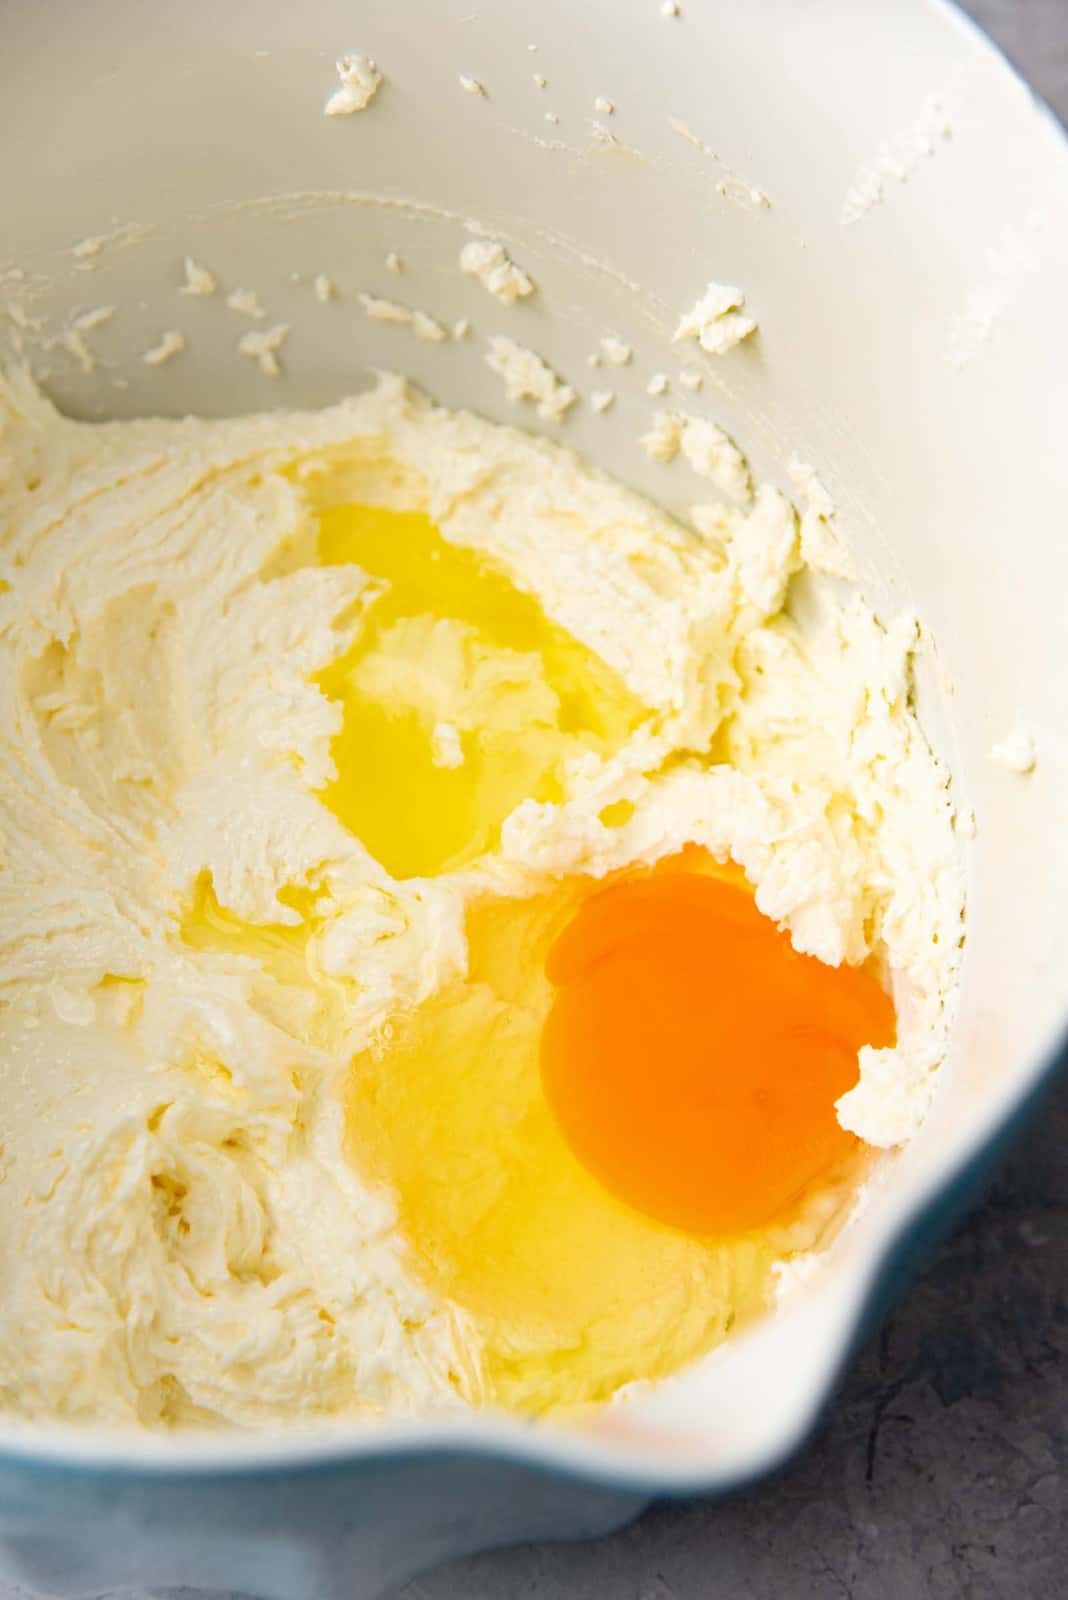
Next, add the eggs. For 250 g of butter, you may need 4 – 5 eggs (weighed with the shells). Mix one at a time, and add the next one only after the previous egg has been mixed in. It’s also important not to over-beat the batter once you add the eggs.

4 eggs in a bowl
One egg added to the creamed butter sugar mixture

Over-beating the eggs will incorporate more air that could deflate during and after the baking process. The result would be a sunken cake.

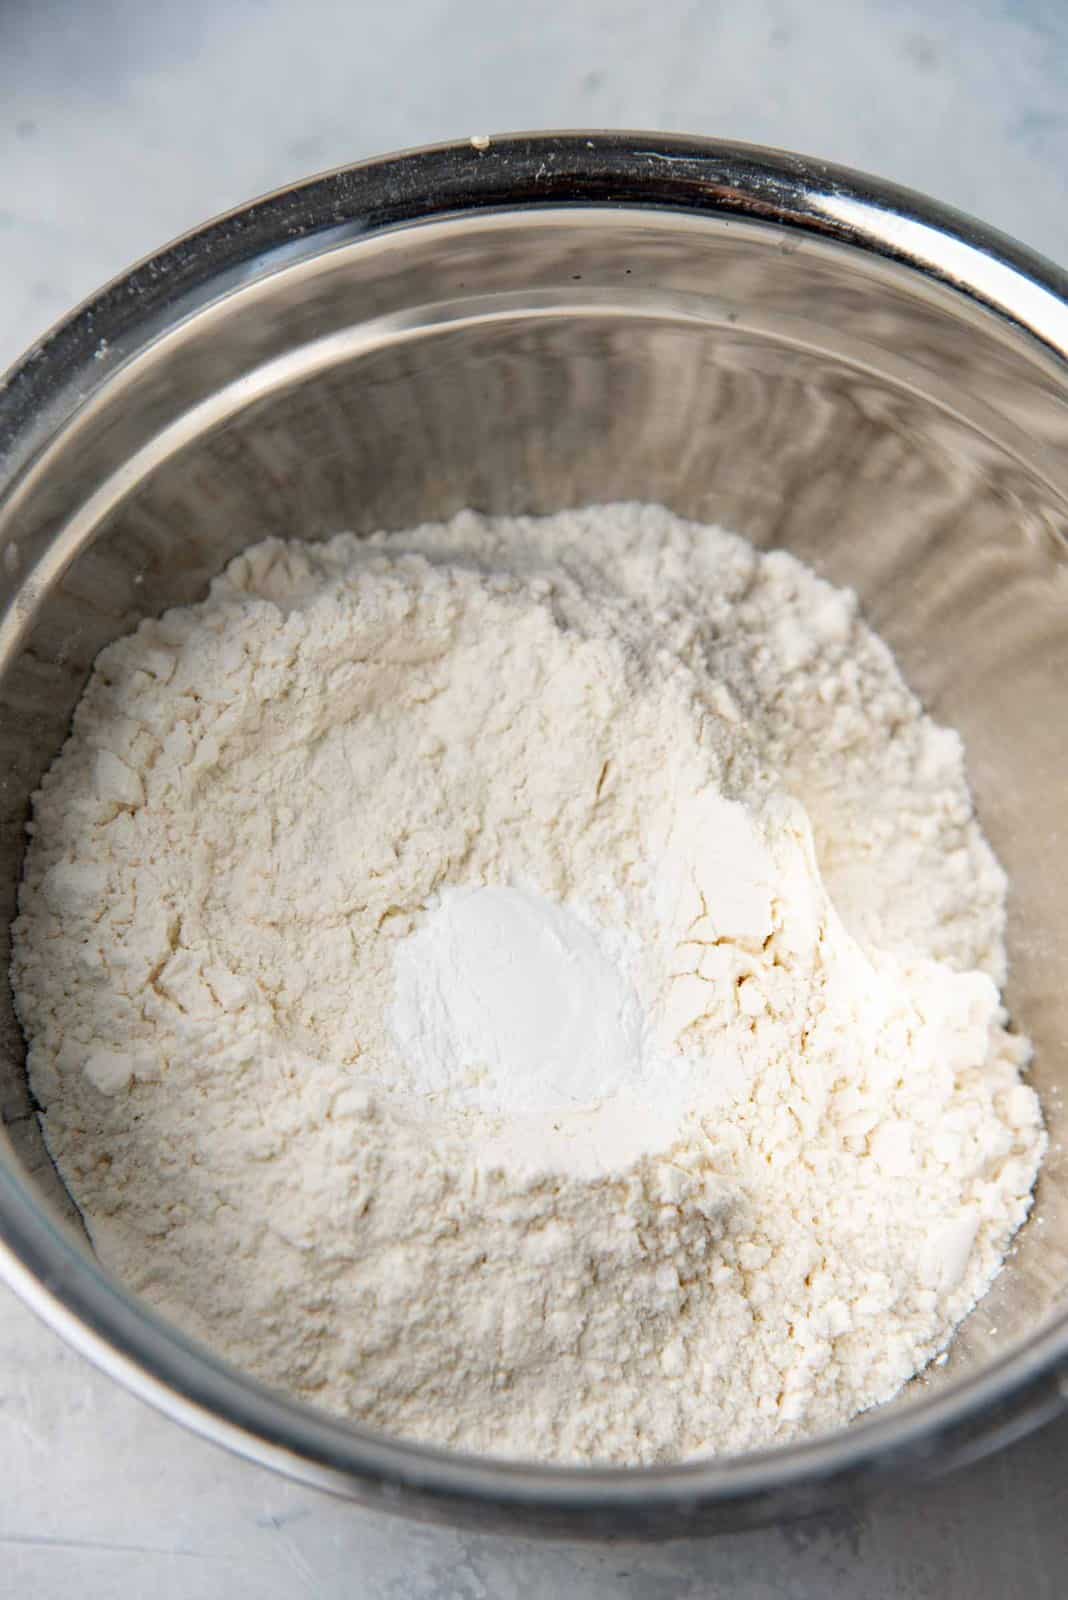
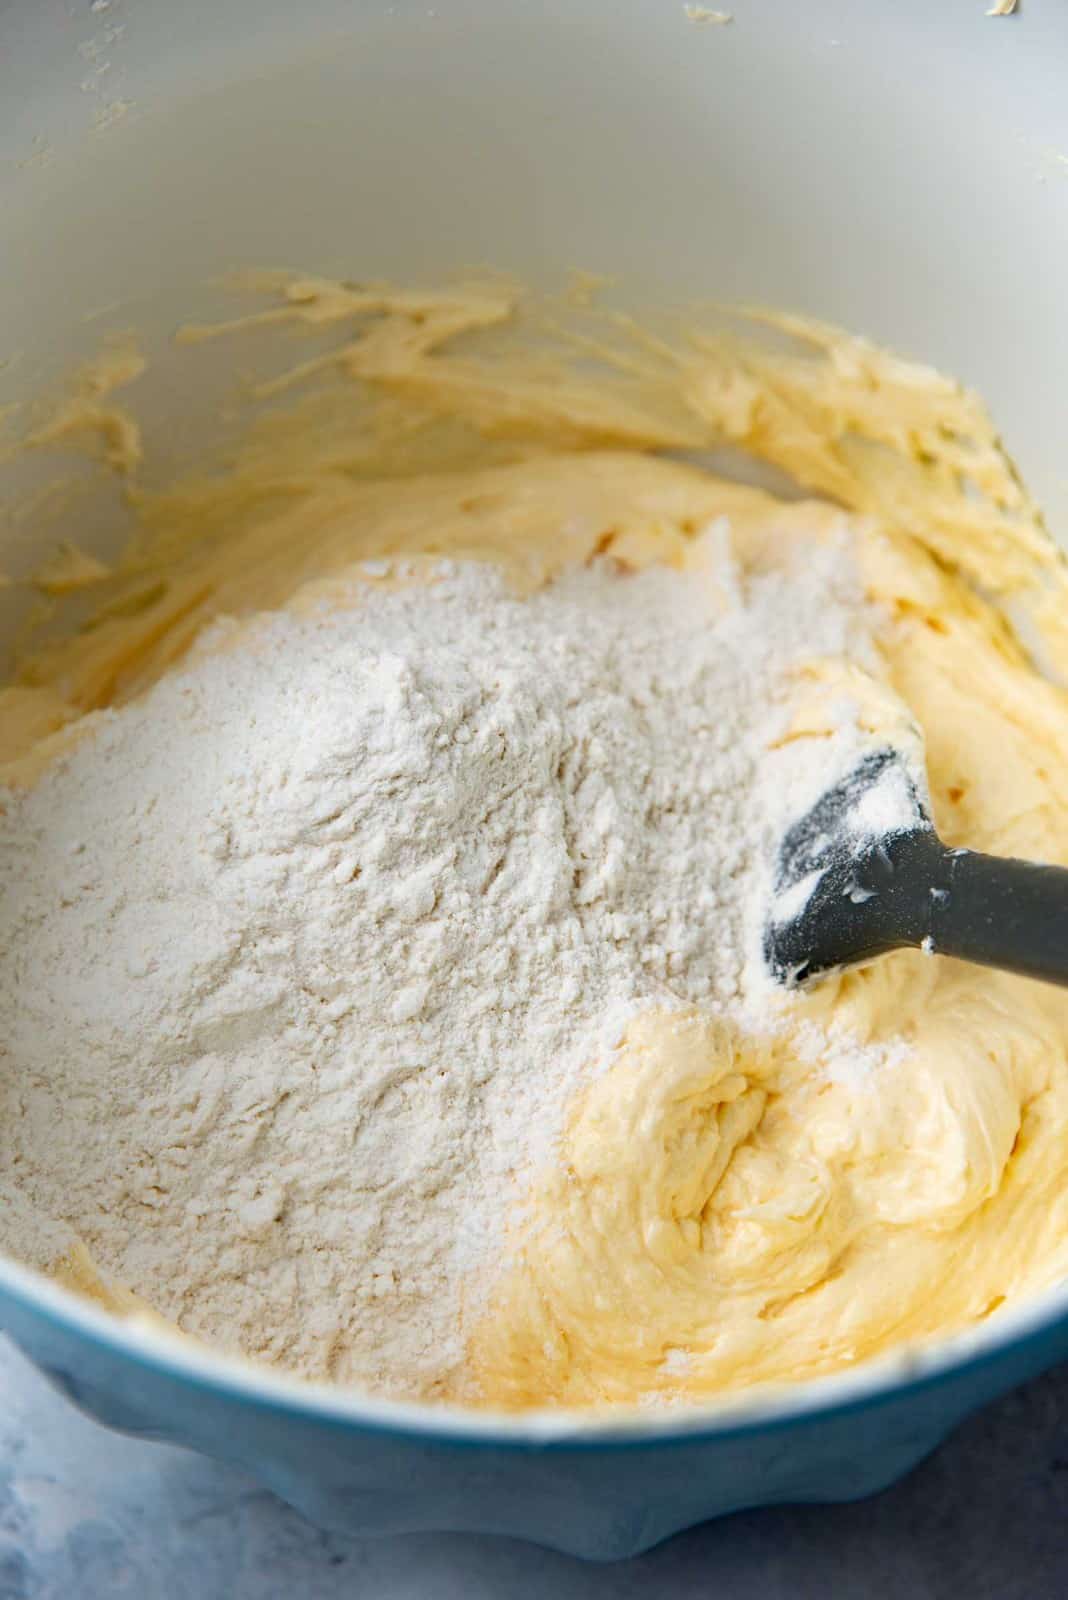
Sift the flour and baking powder together. You will be adding the dry ingredients into the cake batter alternately with the milk. Make sure to end with the flour.

Preventing overmixing of the batter

Very important that you do not overmix the batter while folding in the flour. Fold in the flour gently with a spatula to avoid overworking the gluten in the dough. If you end up with a rubbery, dry cake with a dense crumb with tunnel-like holes – this is usually the culprit.

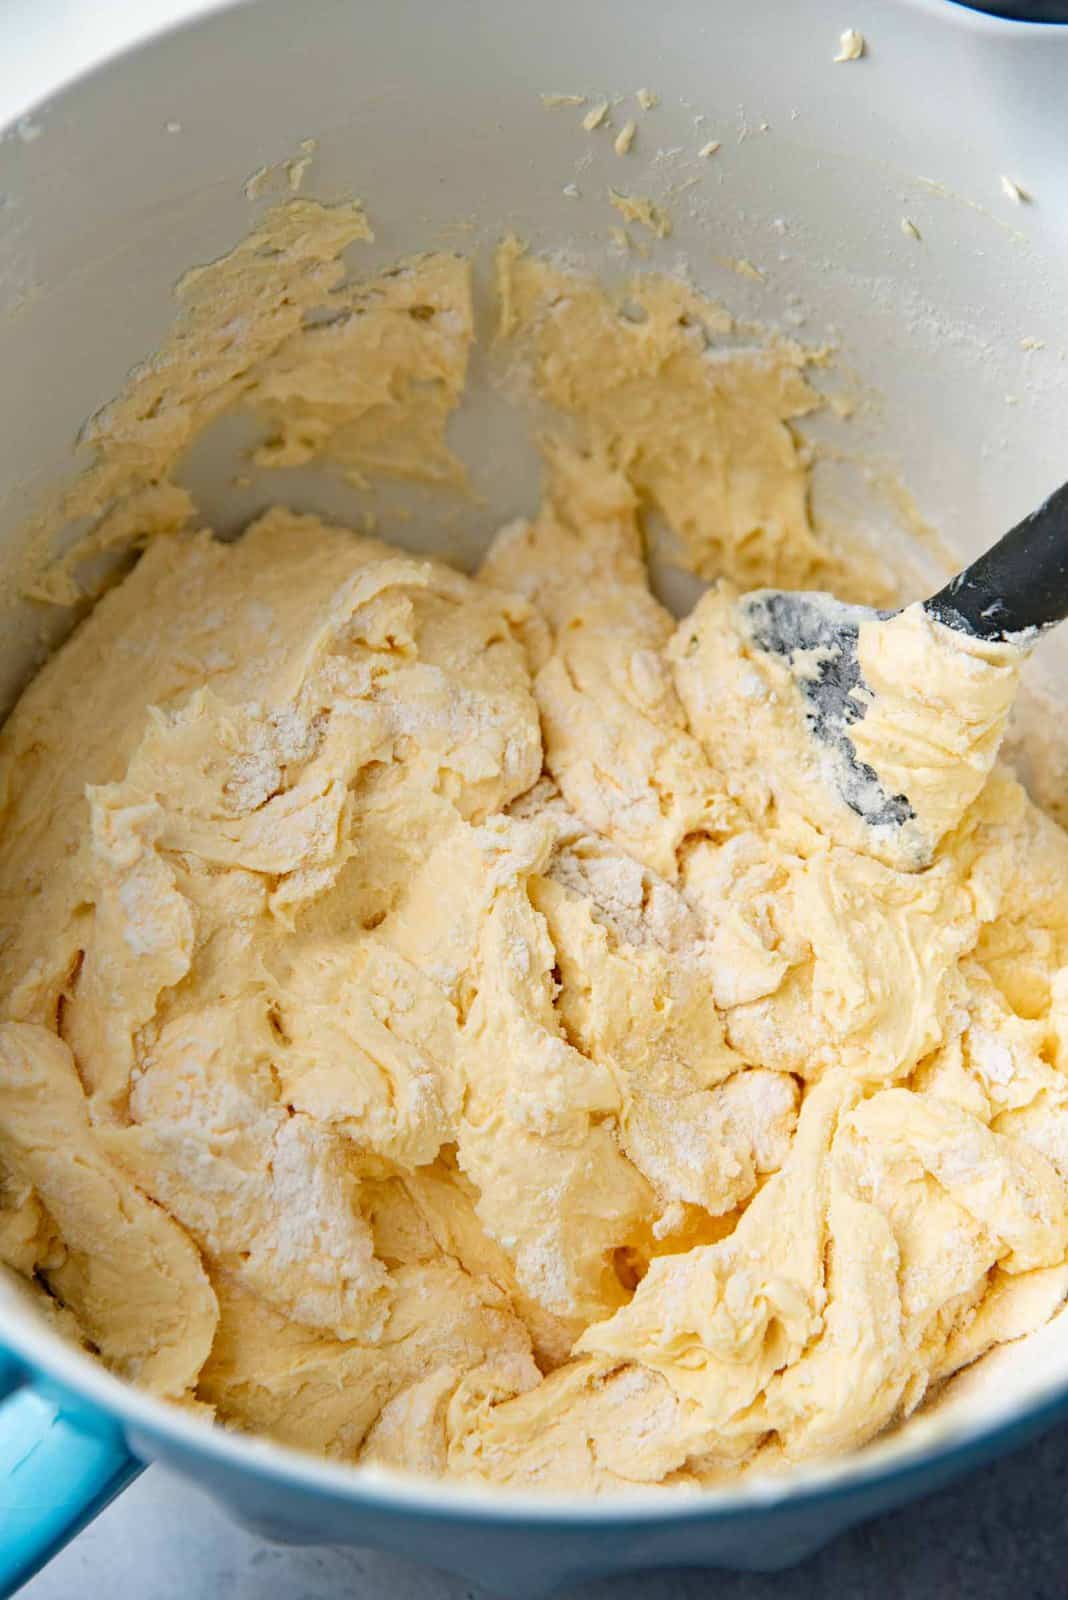
Fold the flour in using a big, flat spatula. Do this by sweeping the spatula THROUGH the middle of the batter, and then go along the wall of the bowl from the bottom to the top, and then fold it over. Rotate the bowl and repeat to evenly mix in the flour. DO NOT stir or mix the batter vigorously.

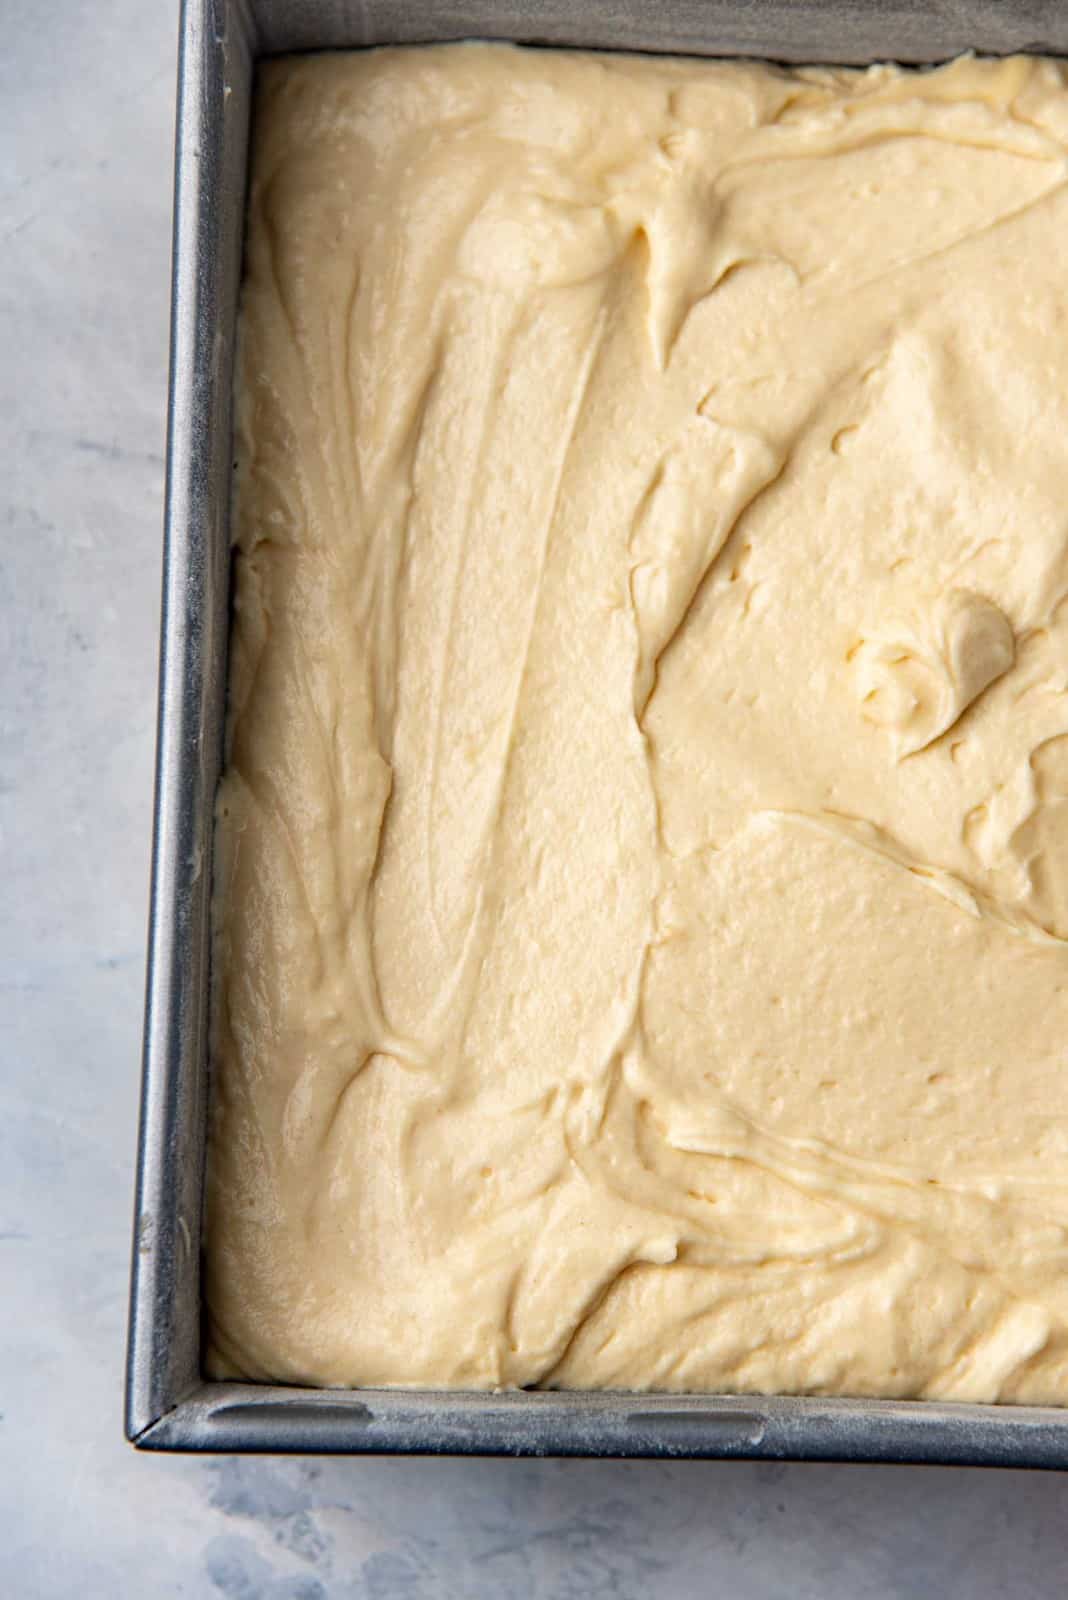
Once the flour and milk are folded in, the batter is ready to be baked. The batter should be smooth and light yellow in color. It should not look grainy or be too liquid.

Dry ingredients - flour and baking powder in a bowl
room temperature milk in a jug next to the bowl of dry ingredients
Cake batter in a bowl, with dry ingredients added on top
An image to show mid way through the folding process of the flour into the cake batter

How to bake the butter cake, and tell when it’s done.

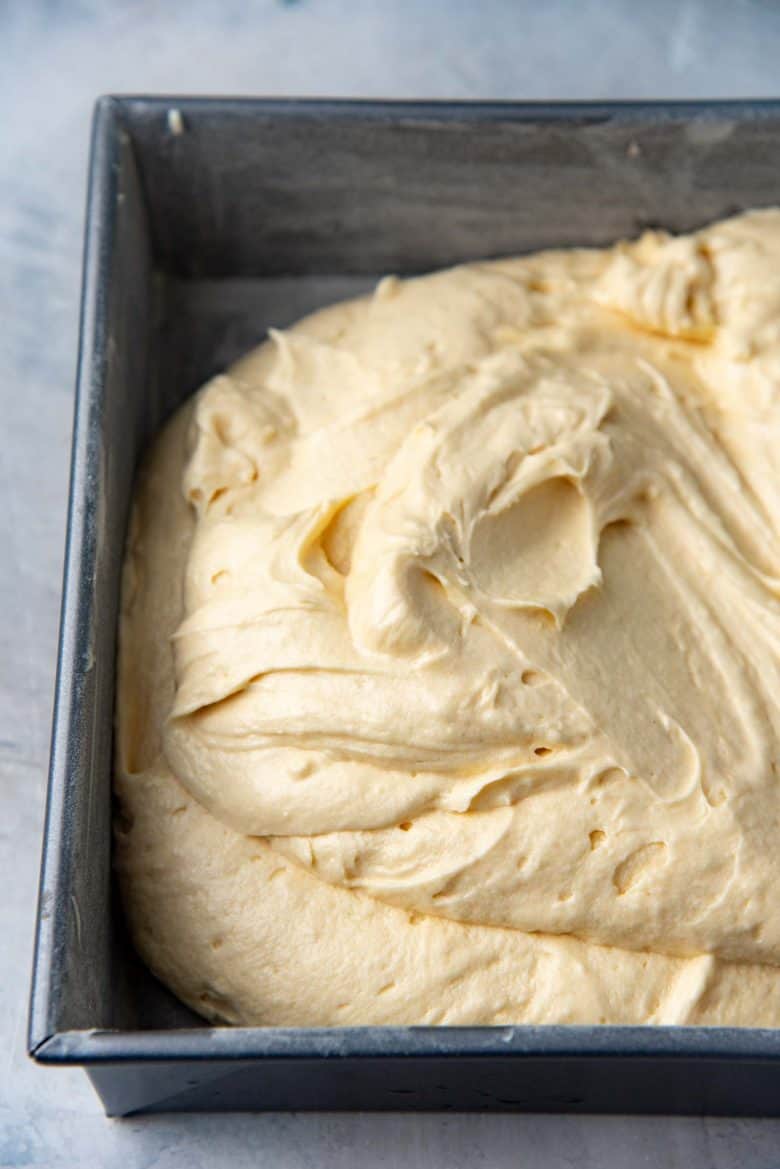
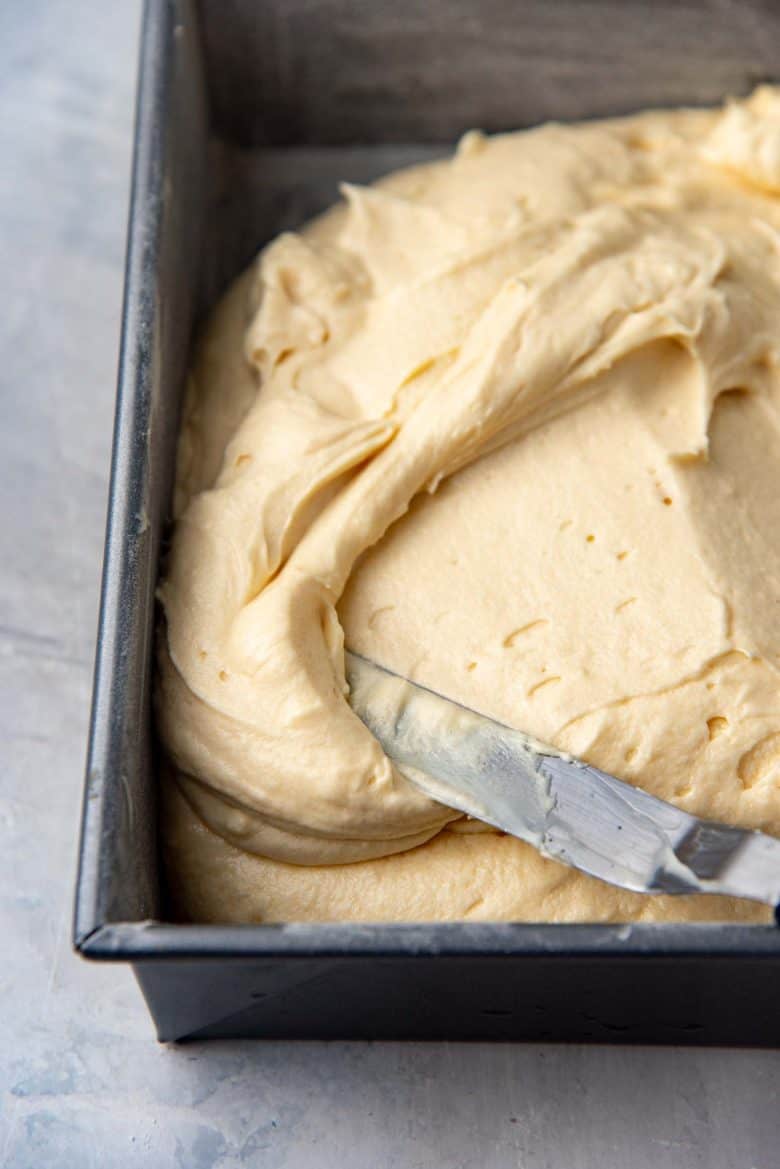
Scrape the batter into the prepared baking pan. The longer you let your batter sit on your counter, the less active the baking powder is going to be. This is why we prepared the baking pan first! Once the batter is in the pan, use an offset spatula to evenly spread it.

Cake batter that has been made and poured into a prepared cake pan.

To make sure there are no big air holes trapped in the batter – knock the pan on your kitchen counter about 2 – 3 times. This not only knocks out air pockets from the batter, but also makes the batter spread evenly in the pan.

I bake my Sri Lankan butter cake in a oven preheated to 325 F. Since the cake is a square, and the heat doesn’t distribute as evenly as in a round pan, I like to bake the cake at a slightly lower temperature. This way the cake bakes a little slowly, but also evenly.

Using a spatula to spread the smooth butter cake batter evenly in the pan

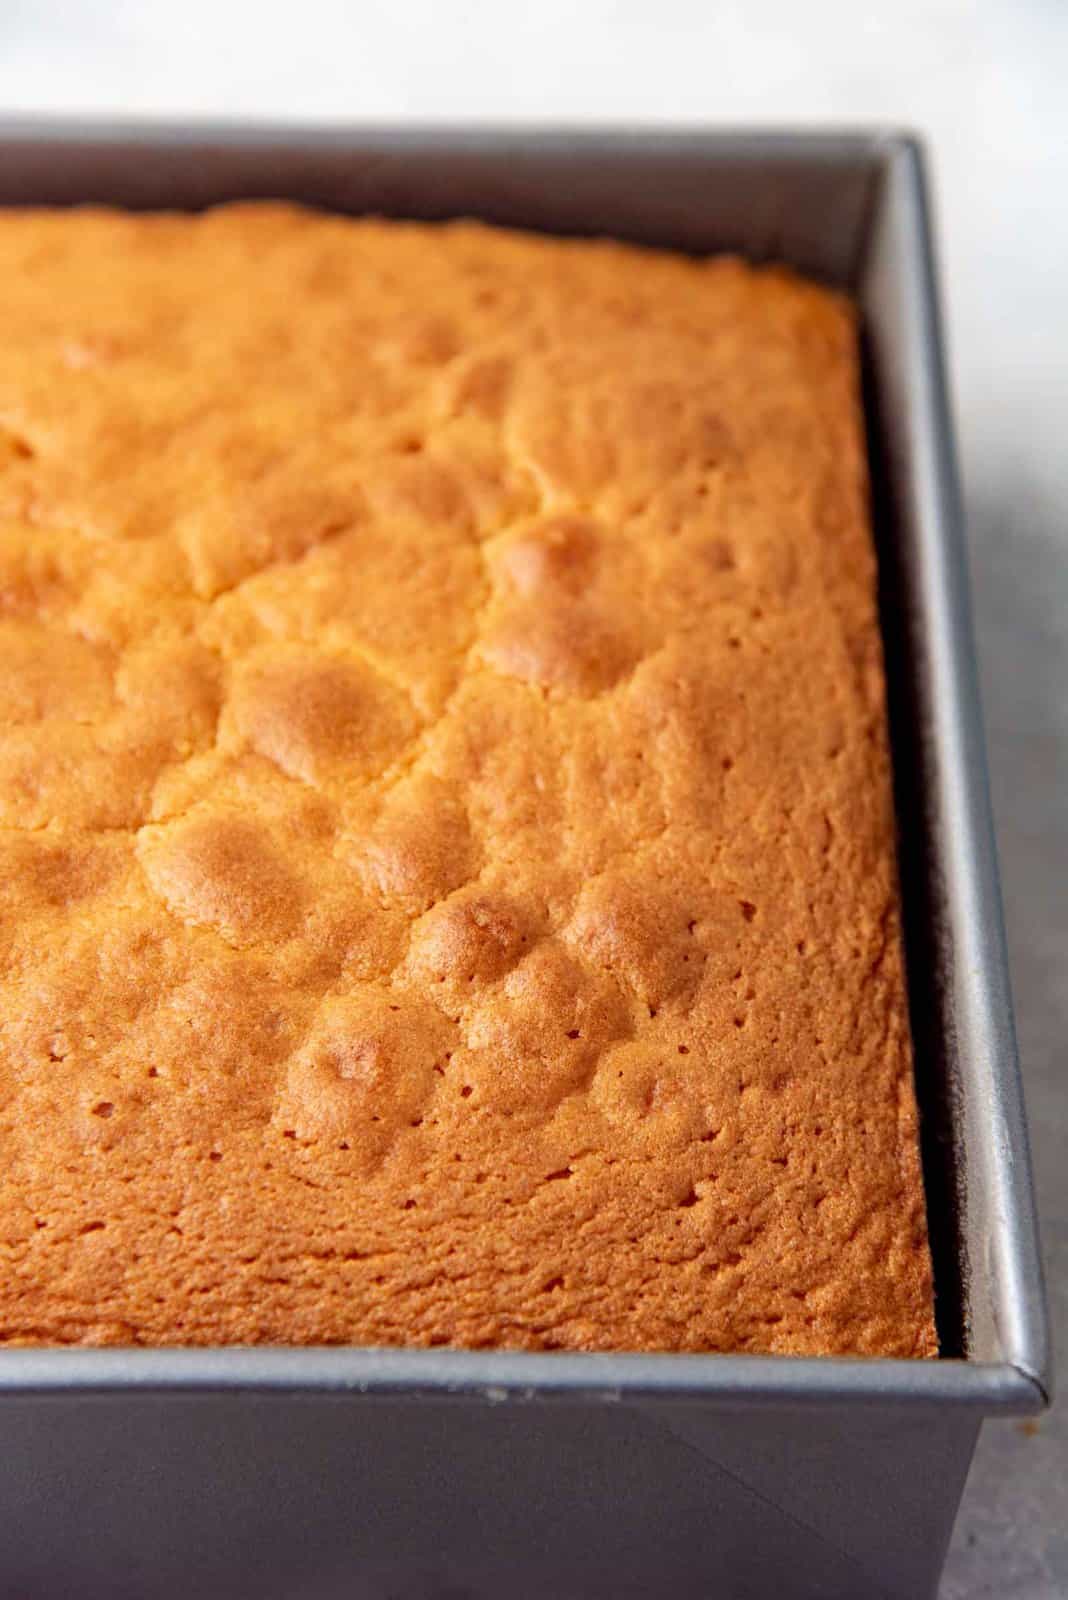
Bake the cake in your preheated oven until the cake is done. This can vary slightly depending on whether you used an 8 or 9 inch pan, or your oven. But you will know it’s done when you insert a toothpick in the center of the cake, and it comes out clean. The cake surface will also spring back slightly when gently pressed with a finger.

The butter cake batter in the cake pan, ready to be baked
A freshly baked sri lankan butter cake, still in the cake pan

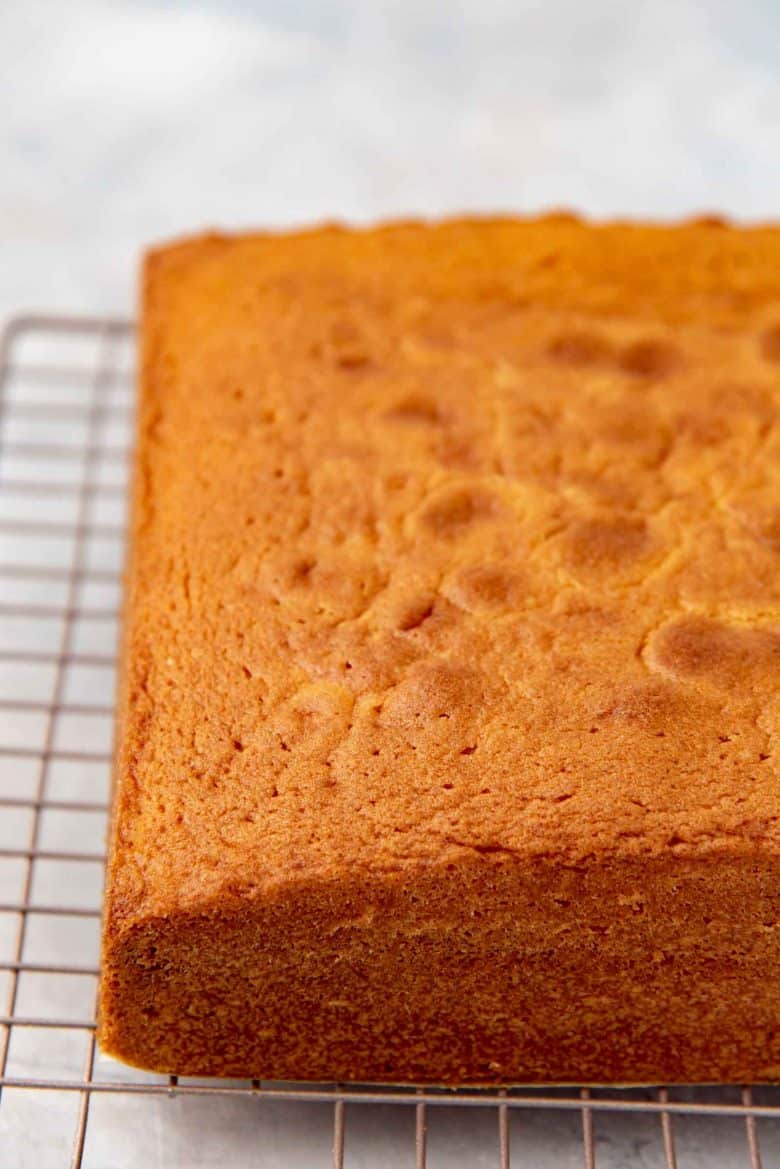
Why is my butter cake domed? Can I have a flat surface?

A little doming is natural. And it’s not a bad thing. It you want a flat surface on your butter cake, then you can either bake the cake in a water bath, or wrap the baking pan with these even bake oven strips. Both of these methods slow down the baking process and help distribute the heat evenly, which will largely prevent any doming.

You can also make the cake by separating the egg whites, and whisking them into a meringue and then adding this to the cake batter. This will substitute the baking powder. This can also help make the surface flat.

Two cakes on two wire racks, to show the different in height between 8 and 9 inch cake pans
The difference in height between a 9 inch (L) and 8 inch (R) square cake pan

Personally, I prefer it with a slightly domed surface. It’s the natural end result, and there’s just no reason to mess with that.

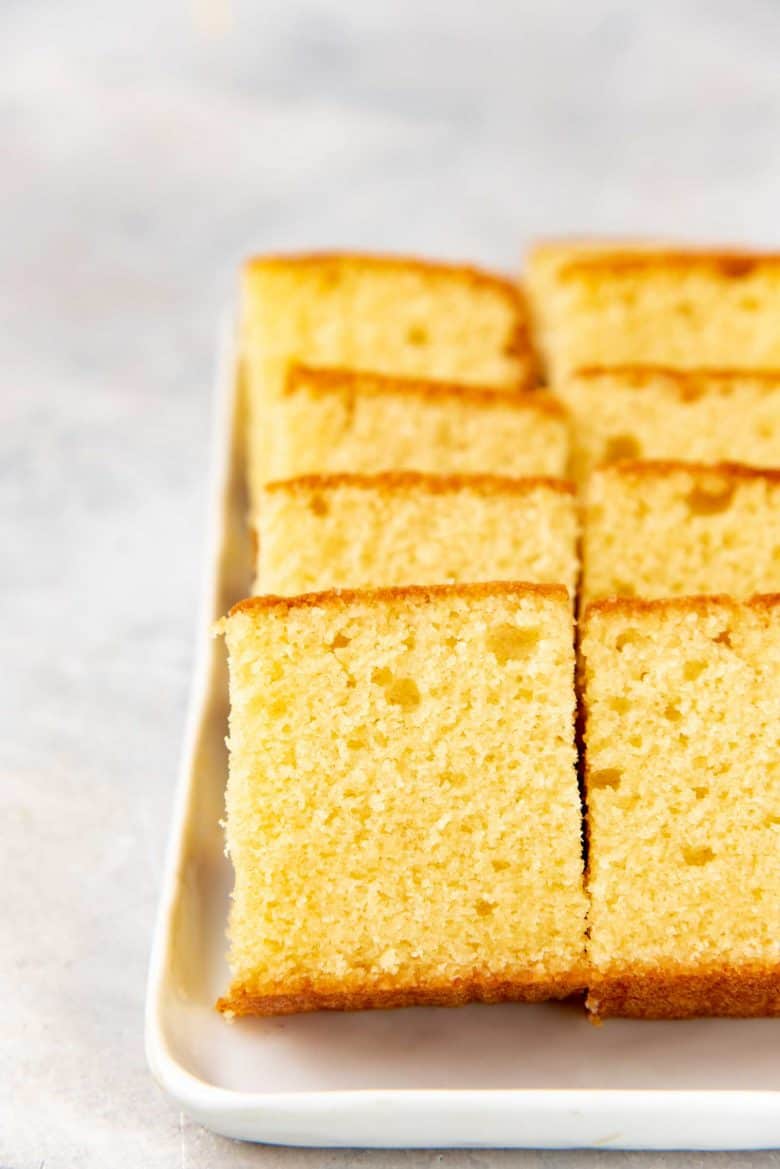
A properly baked butter cake should have a nice brown top with absolutely NO spots. Usually cakes have spots on the crust when the sugar and butter weren’t mixed properly, and/or the sugar didn’t dissolve. It can also happen if you accidentally added too much sugar to your cake batter.

Serving suggestions

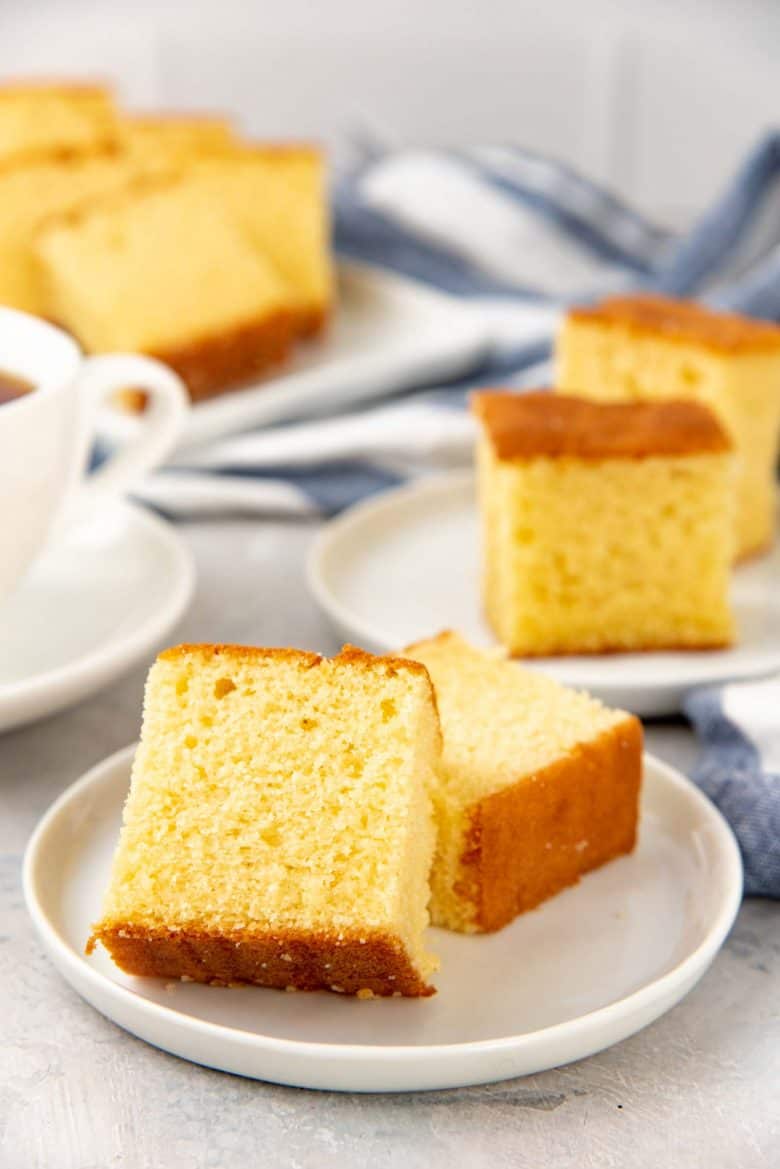
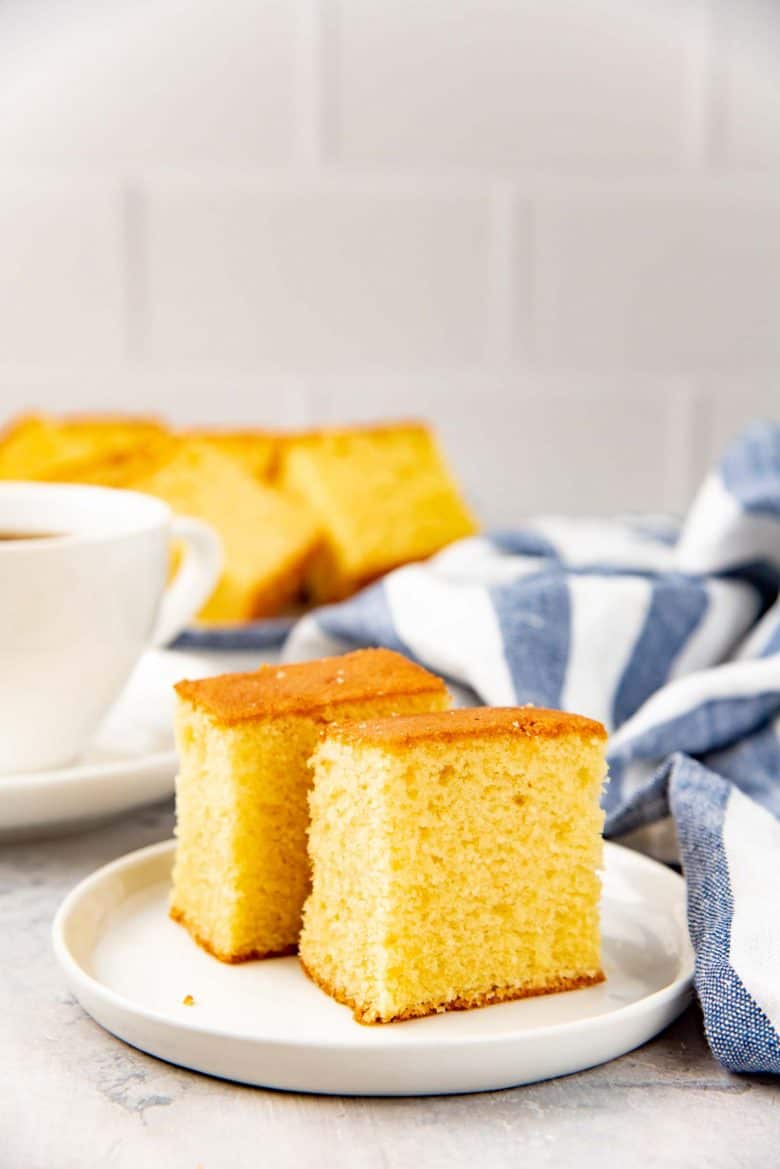
What else does this Sri Lankan butter cake need to make it extra special and extra delicious? NOTHING, absolutely NOTHING! It’s a delightfully light, moist, buttery cake with a gorgeous crumb and perfect sweetness, with a hint of vanilla flavor. And it’s the simplicity of this butter cake that helps those flavors and textures shine through as well. It’s a snack cake that is usually served with tea or coffee, so it’s not meant to be too sweet or indulgent.

BUT if your renegade self is so inclined, you can dust some confectioner’s sugar on top.

My sister used to eat this cake with a drizzle of condensed milk and melted chocolate. I know! She got me hooked on it too for awhile, until we both outgrew that sickeningly sweet tooth. Or maybe the sweet tooth outgrew us.

You could also serve it with some berries and a little whipped cream. A dark chocolate sauce is also a great choice.

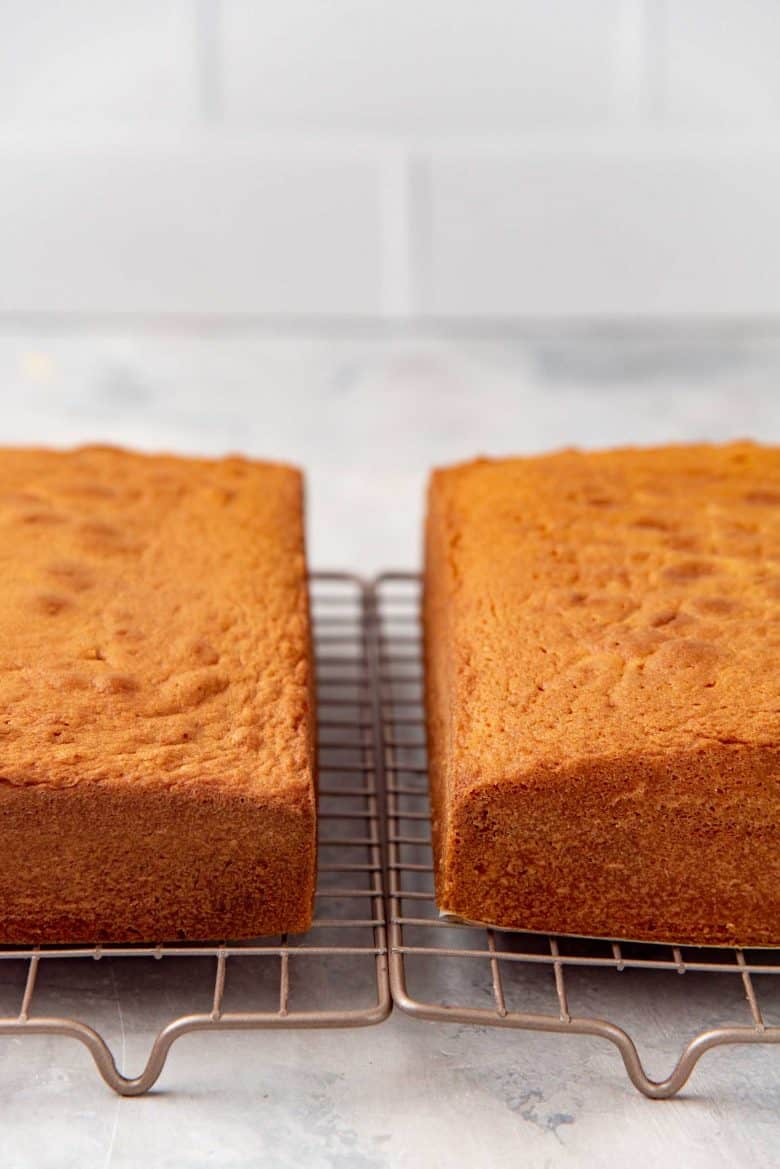
If you’d like to make a birthday cake out of this butter cake, then you can simply make two layers, and sandwich the two layers with my classic vanilla buttercream!

You can even color the batter to make a classic Sri Lankan ribbon cake like this!

Two pieces of Sri Lankan butter cake served on a plate, with more pieces in the background and a cup of tea


Recipe

5 from 48 votes

Sri Lankan Butter Cake

Author: Dini Kodippili
Yield: 28 – 32 pieces (approximately 1″ x 2″ pieces)
Cuisine: European, Sri Lankan

 Difficulty: 

Easy
Authentic Sri Lankan Butter Cake that's light, buttery and moist, with a beautiful crumb, perfect sweetness, and a hint of vanilla flavor! Follow this step by step recipe for perfect results!
EASY – This recipe is easy to make even for beginners. A great basic cake recipe that can be served as a birthday cake as well.
US based cup, teaspoon, tablespoon measurements. Common Measurement Conversions. Weight measurements are recommended for accurate results.

US based cup, teaspoon, tablespoon measurements. Weight‌ ‌measurements‌ ‌are‌ ‌recommended‌ ‌for‌ ‌accurate‌ ‌results whenever available.

Common Measurement Conversions
Prep: 30 minutes mins
Cook: 30 minutes mins
Cooling time: 1 hour hr
Total Time: 1 hour hr
Print Recipe Rate SaveSaved!
Makes: 28 pieces

Ingredients:
 

  • 250 g unsalted butter (1 ⅛ cup) softened to 73°F
  • ¼ tsp sea salt use a generous ¼ tsp
  • 250 g white sugar (1¼ cup) caster sugar is better, but not required
  • 250 g eggs 4 – 5 eggs, weighed with the shell, at room temperature
  • 2 tsp vanilla extract use less if using vanilla essence
  • 250 g all purpose flour 2 cups, measured by spoon and level method
  • 2 tsp baking powder
  • 79 mL milk (⅓ cup) at room temperature

Instructions:
 

  • Butter and line the bottom of a 8 or 9 inch square pan with parchment paper. You could also line the sides of the pan with parchment paper, or simply butter and flour the sides. Set aside.
  • Preheat oven to 325°F / 165°C.
  • Place the butter and salt in a large bowl. With a hand mixer, or the paddle attachment on your stand mixer, beat the butter until light and creamy.
    250 g unsalted butter, ¼ tsp sea salt
  • Then add the sugar, and cream the butter and sugar mixture for about 5 – 7 minutes on medium high speed. Scrape the sides and bottom of the bowl to make sure all the butter and sugar are well-mixed.
    250 g white sugar
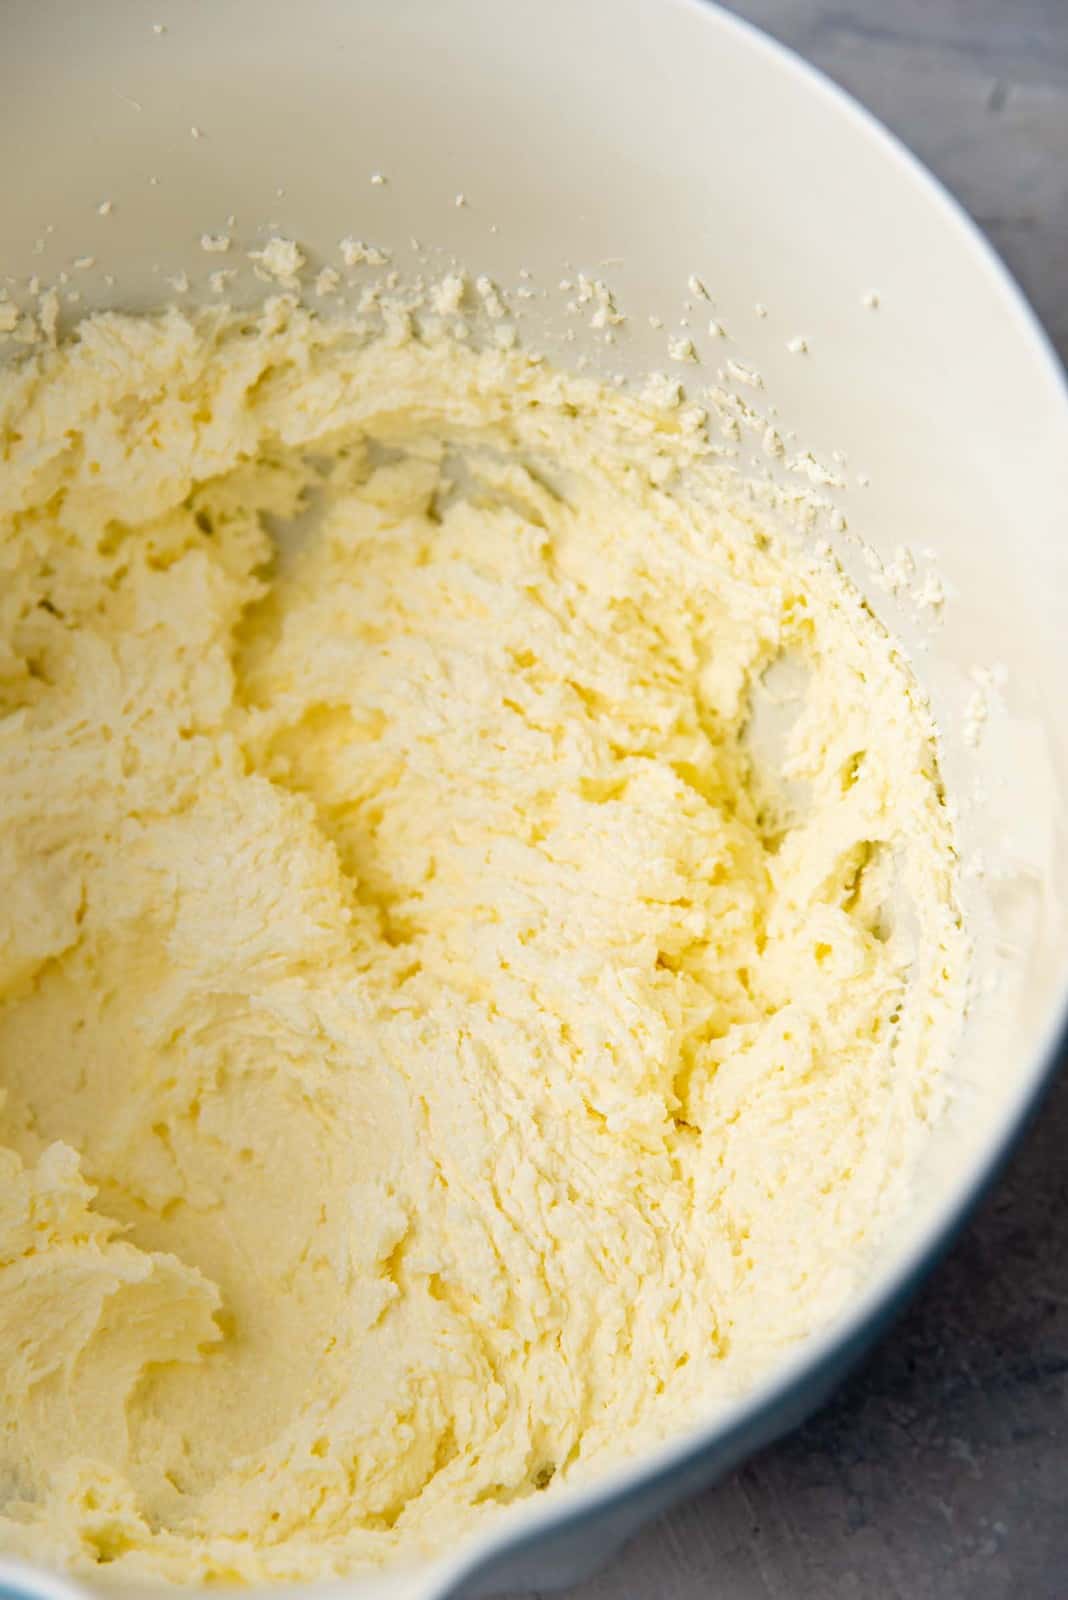
  • The mixture should be pale in color, light and very fluffy. This step is important, so make sure it has the right texture. Add the vanilla and continue to mix.
    2 tsp vanilla extract
  • While you cream the butter and sugar mixture, prepare the eggs. Break the eggs open into a bowl (make sure there are no shells).
  • Add the eggs, one at a time, into the creamed butter-sugar mix. Make sure each egg addition is mixed in well before adding the next one. Scrape the sides and bottom of the bowl in between additions so that the eggs are mixed in well.
    250 g eggs
  • Once the eggs are mixed through, the batter is ready for the dry ingredients.
  • Sift the flour and baking powder together. Place the room temperature milk in a small jug/container.
    250 g all purpose flour, 2 tsp baking powder, 79 mL milk
  • Add the sifted dry ingredients in 3 – 4 additions, alternating with the milk, and ending with the dry ingredients. (Once you add the first portion of dry ingredients, FOLD it in with a spatula. Then add half of the milk and fold that into the mixture as well. Repeat with another portion of dry ingredients and the rest of the milk, then end with the final portion of dry ingredients.)
  • Make sure there are no flour lumps in the mixture at this point, but also be careful not to overmix the flour in the batter.
  • Scrape the batter into the prepared baking pan. Using an offset spatula, spread the batter evenly in the pan. Knock the pan against your kitchen counter 2 – 3 times to remove any trapped air bubbles and to evenly spread the batter in the pan.
  • Place the baking pan in the preheated oven, and bake for 35 – 40 minutes, until the cake is baked through. Rotate the pan once (carefully) halfway through the baking time. The cake is done when a toothpick inserted into the middle of the cake comes out clean, and the surface of the cake is slightly springy to the touch.
  • Remove the pan from the oven and let it cool down for 5 – 10 minutes. Carefully flip the cake out onto a cooling wire rack. Peel off the parchment paper, and then flip the cake over again (so that it's right side up). Use a cake lifter or a cutting board to help with this, because the cake is soft at this point and could break.
  • Let the cake cool completely. Store the cake in an air-tight container for up to 3 days, or in the fridge for up to 5 days. This cake (wrapped and stored in a container) will freeze very well, and can be stored in the freezer for up to 3 months.
  • Slice the cake into any size pieces. I have sliced them into 1” x 2” sized pieces in these photos (28 – 32 pieces). Serve immediately.

Recipe Notes

Storage

The cake can be stored in an air tight container and stored at room temperature for about 2 days. But I prefer to store it in the fridge. 
The cake will last in the fridge for about a week, but it is best eaten within 4 – 5 days. 
To make the cake last longer, cut the cake into pieces and then store it in an air tight container that is freezer safe. The cake will last in the freezer for up to 3 months. 
Place wax paper / parchment paper in between the cake pieces, so they would not stick together, and you can take out the pieces you want and let it thaw out to eat. 

More popular Sri Lankan desserts

  • Breudher cake
  • Falooda recipe
  • Ribbon cake
  • Watalappan
  • Watalappan ice cream 
  • Chocolate biscuit pudding
  • Pani pol
 

Nutrition Information:

Serving: 1piece Calories: 143kcal (7%) Carbohydrates: 16g (5%) Protein: 2g (4%) Fat: 8g (12%) Saturated Fat: 5g (31%) Cholesterol: 43mg (14%) Sodium: 33mg (1%) Potassium: 60mg (2%) Fiber: 1g (4%) Sugar: 9g (10%) Vitamin A: 262IU (5%) Calcium: 26mg (3%) Iron: 1mg (6%)

“This website provides approximate nutrition information for convenience and as a courtesy only. Nutrition data is gathered primarily from the USDA Food Composition Database, whenever available, or otherwise other online calculators.”

Tag me on Instagram!I love seeing what you’ve made! Tag me on Instagram at @TheFlavorBender or leave me a comment & rating below.
Dini Kodippili Avatar

About

Dini Kodippili

Dini Kodippili is a professional food writer, recipe developer, food photographer, cookbook author, and baker. Dini has been featured on HuffPost, Cosmopolitan, Forbes, Delish, Food & Wine and more. Learn More

I love hearing from you! Submit your question or recipe review here.

5 from 48 votes (7 ratings without comment)

Leave a Reply Cancel reply

Your email address will not be published. Required fields are marked *

Made this? Rate this recipe:


This site uses Akismet to reduce spam. Learn how your comment data is processed.

108 responses

  1. Renee
    March 20, 2026

    5 stars
    Thank you for sharing this recipe. The cake turned out perfectly. Will definitely be making this butter cake again.

    Reply
  2. Suba Jenaarthanan
    March 2, 2026

    some people makes butter cake without egg smell and tastier, when i make it always felt the egg smell.. why is that? am i missing something

    Reply
    1. Dini Kodippili
      March 2, 2026

      Hi Suba
      I find that I don’t get an egg smell when I use fresh eggs. Older eggs can emit the sulfur compound more than fresh ones. A good quality vanilla extract (not vanilla essence) also helps.
      Also there are some people that have said, adding a little alcohol will help with the egg smell, but I’ve never needed to.
      I hope that helps!

      Reply
  3. Deepali
    November 5, 2025

    5 stars
    Thankyou for the most beautiful recipe!
    Made this & it turned out fabulous! 💕

    Reply
  4. Nisa
    September 26, 2025

    5 stars
    Thanks for the recipe, cake was lovely and tasted really good. I do have one question tho, how do I get rid of the egg smell coming after baking? What I could do differently ?
    Thanks in advance.

    Reply
    1. Dini Kodippili
      September 26, 2025

      Hi Nisa
      I’m so glad that you enjoyed the cake!
      Unfortunately the cause of the eggy smell in baked goods is not 100% known (other than it being caused by the eggs), and you cannot get rid of it once a cake is baked. Frosting and syrups can mask it, but this will change the flavor of the cake too.

      Some sources say to use farm fresh eggs, while others recommend using supermarket eggs. There is also an old wives tale of removing the egg white strand, but this doesn’t cause the smell either. Sometimes it can be caused by overcooking eggs, but this is less of a concern in baked goods, unless you REALLY overbaked the cake and it’s dry!
      I personally don’t come across the smell of eggs in butter cake, so I can’t 100% know why it occurs. But I do know that good quality vanilla extract tends to help with this a lot, as I always use it with egg based desserts. Imitation vanilla isn’t as good with masking the smell. Another trick I’ve seen is to add 1 – 2 tsp of white vinegar to the batter. I believe this could work because adding lemon zest to cakes also help to minimize the “eggy smell”.

      I hope this helps for next time!

      Reply
      1. Nisa
        September 27, 2025

        Thanks for these tips. Will try next time. Thanks for posting these recipes again. I also LOVED your chocolate cake.

        Reply
      2. madhwie
        February 9, 2026

        maybe use a little bit of alcohol. totally reduces the egg smell

        Reply
  5. Sasha
    August 4, 2025

    Hi could you recommend a good Canadian butter brand to use for this recipe ? I would like to try out this recipe Thank you

    Reply
    1. Dini
      August 4, 2025

      Hi Sasha
      You can use any kind of butter. I usually use gay lea or great value butter as its the easiest and cheapest to buy.
      But my mother also used margarine to make this too. With margarine the batter will be more liquidy.

      I hope that helps

      Reply
  6. Sasha
    August 2, 2025

    Hi can I know which brand of butter would be most suitable for this recipe? I m from Canada and if you could recommend a good Canadian brand for butter really appreciate it or if there’s any specific thing I should look into when choosing a butter ? To avoid the cake being too oily ? Thanks in advance

    Reply
  7. Gaia
    February 28, 2025

    5 stars
    Loved this recipe! Cake turned out amazing ❤️

    Reply
  8. Roopa Sharma
    October 6, 2024

    5 stars
    Best buttercake recipe . very yummy everyone loved it thanks

    Reply
  9. Thia
    October 2, 2024

    Hi dear, can I know what should I substitute for egg. I want to do egglesss version

    Reply
    1. Dini
      October 3, 2024

      Hi Thia
      Unfortunately I do not have an eggless version for this recipe. The eggs are crucial for the texture and structure of this cake.
      I would recommend following a recipe that has been created and tested to be egg free. This will ensure you will get better results as well!
      I hope that helps

      Reply
  10. Jennifer
    July 6, 2024

    5 stars
    Hi Dini!

    My family absolutely loved this cake. It was all gone within one day!

    I was just wondering how to adjust the bake time and temperature (both conventional and fan-forced) for a 20cm/8 inch round cake pan? My cake may have come out a bit coarse as I didn’t know how to adjust for the pan size.

    Thank you so much for a wonderful recipe.

    Reply
    1. Dini
      July 7, 2024

      Hi Jennifer
      I’m so glad that you enjoyed this recipe 🙂
      As for adjusting time and temperature for different sized cake pans, I do have a cake pan conversion chart here! It allows you to understand how to calculate or adjust a recipe to fit different cake pans.
      An 8 x 8 square pan has an area of 64 and a round pan has an area of 50. To keep the bake time and temperature the same you have to adjust the recipe by factor of about 0.78. Or only add about 75% – 80% of the batter into the cake pan.
      It’s hard to know how much to adjust / increase the bake time if you bake a thicker / taller cake. But you can reduce the temperature of the oven by about 15 – 20 degrees, and bake it until a toothpick comes out clean (or with just a few cake crumbs attached).
      I hope that helps!

      Reply
  11. A. Davidson
    May 27, 2024

    5 stars
    It’s become my favorite cake to make.

    Reply
  12. Lorraine
    May 17, 2024

    5 stars
    Very good recipe. I used brown sugar & reduced the quantity a little bit. My grandkids & the adults loved it.

    Reply
  13. Gigi Hale
    April 19, 2024

    5 stars
    Made this cake yesterday and it was so easy. My egg yolks were bright orange so the colour of my cake is a little darker than the photos here but the flavour is lovely. It’s not overly sweet, has a great crumb and a nice bouncey-ness. I’m going to try making it with margarine next time to emulate the softer texture of the butter cake I get in Sri Lanka. Until then, I’ll just be eating cake for breakfast, lunch and dinner!

    Reply
  14. Azeez
    April 17, 2024

    5 stars
    I baked the cake. Easy recipe. Tasty.

    Reply
  15. Jessica Kariyawasam
    March 27, 2024

    5 stars
    This is my go-to and everyone raves about it!! BUT can you help me with hints on what to do to make it a bit bigger please?? I know it’ll be ingredients and cooking time that needs changing!!

    Reply
    1. Dini
      March 27, 2024

      Hi Jessica
      You can make this larger to an extent. It depends on the size of the cake pan that you want to use.
      My cake pan conversion article and chart can be used to determine the difference between the current pan you’re using and the one you would like to. Then the ingredients can also be multiplied by the same ratio to get the new amounts.
      The baking time will also change depending on the size of the cake pan and how thick / tall the cake layer will be.
      I hope that helps!

      Reply
  16. Chacha
    March 23, 2024

    5 stars
    Tried this a million times and perfect each time 🙂

    Reply
    1. Dini
      March 23, 2024

      Yay, I’m so glad to hear! 🙂

      Reply
  17. Jennifer Cresswell
    January 29, 2024

    5 stars
    I love this recipe. It is so perfect. Tried to bake a butter cake several times without success years ago. Today I googled and found your recipe. Haven’t baked in ages and just followed the instructions and baked a lovely butter cake. Thank you so much:)

    Reply
    1. Dini
      February 1, 2024

      So glad you enjoyed the recipe Jennifer, thank you for letting me know! 🙂

      Reply
    2. Linta
      February 11, 2024

      Hi , I found this recipe online . Just a bit confused about the measurements. So we use 2 cups of flour that’s is 250? Or use a cup measure of 250 but use 2 cups. Thank you for the clarification in advance .

      Reply
      1. Dini
        February 11, 2024

        Hi Linta
        I highly recommend following the weight measurements in the recipe. Which states 250 g of flour. The cups included is just the cup conversions for the ingredients.
        I hope that helps!

        Reply
  18. NIHAL SILVA
    January 5, 2024

    5 stars
    Easy to follow steps and well explained in plain English. Every time I bake, it comes out pretty well.

    Reply
  19. Mary
    December 23, 2023

    5 stars
    Well explained in detail. Learned a lot more by going through this.

    Reply
  20. MONIKA
    December 19, 2023

    5 stars
    Hi,
    What should I do prevent curdling when adding eggs to the batter?

    Reply
    1. Dini
      December 19, 2023

      Hi Monika
      This happens because the butter and the eggs are at different temperatures when mixed together. Even when they are slightly off in temperature, this can happen.
      However, it is not a big deal. Once the flour is added the batter will come together really smoothly, so it’s ok if the batter looks curdled once the eggs are added.
      I hope that helps

      Reply
←Older Comments
1 2 3 4
Newer Comments→

Hey There!

Hi! I’m Dini, a third culture kid by upbringing and a food-geek by nature. I was born in Sri Lanka, grew up in New Zealand and lived in Australia, and then the US, before moving to and settling down in Canada. My food is a reflection of those amazing experiences!

Read More
Front cover of the Secret Layer Cakes cookbook by Dini Kodippili.

The Flavor Bender

Cookbook

Buy now on Amazon!

Recipe Basics

  • How To Make Perfect Choux Pastry

    How To Make Perfect Choux Pastry

  • Flaky All Butter Pie Crust Recipe

    Flaky All Butter Pie Crust Recipe

  • How To Make Homemade Marshmallows (Foolproof Guide)

    How To Make Homemade Marshmallows (Foolproof Guide)

  • The Best Homemade Bread (White Bread Recipe)

    The Best Homemade Bread (White Bread Recipe)

  • Homemade French Croissants (Step By Step Recipe)

    Homemade French Croissants (Step By Step Recipe)

  • The BEST Pavlova Recipe (Step by step recipe and video)

    The BEST Pavlova Recipe (Step by step recipe and video)

Featured On

Master the science of baking!

Get my FREE Printable Cake Pan Conversion Chart!

So you’ll know how to substitute cake pans of different shapes, sizes & volumes in a pinch!

A must have resource for all pro bakers, novice bakers, and aspiring bakers alike!

Download now!

Reader Faves

  • How to make the Best Instant Pot Short Ribs

    How to make the Best Instant Pot Short Ribs

  • Perfect Quick and Easy Rough Puff Pastry

    Perfect Quick and Easy Rough Puff Pastry

  • The Best Spicy Sweet Chili Sauce (Easy Recipe!)

    The Best Spicy Sweet Chili Sauce (Easy Recipe!)

  • The Best Homemade Bread (White Bread Recipe)

    The Best Homemade Bread (White Bread Recipe)

The Flavor Bender

I love baking, cooking, experimenting with flavors and ingredients, and passing on all my tips and tricks to you!

Read More

About

Meet Dini
My Book
Work With Me
Contact

Browse

Recipes
Measurement Guide
Baking How-To’s
Shop My Faves
Privacy
Disclosure
Terms

Branding by MRD

Theme by OC

Back to Top
  • Facebook
  • Instagram
  • Pinterest
  • X
  • YouTube
2033 shares

Rate This Recipe

Your vote:


A rating is required
A name is required
An email is required

Recipe Ratings without Comment

Something went wrong. Please try again.