


These Strawberry Custard Brioche Tarts are a fantastic way to use up summer strawberries! Cardamom spiced strawberries, roasted with a deliciously creamy vanilla pastry cream, all atop a buttery, rich, and slightly sweet brioche bun. Perfect for breakfast, dessert, or as tea time snacks!
Another decadent way to use my popular brioche dough recipe – beautiful custard brioche tarts, topped with fruit!

My authentic brioche bread recipe is very popular, for a reason! So many of my readers have thoroughly enjoyed making rich, soft, delicious loaves of brioche bread with that foolproof recipe. But did you know you could make plenty of other amazing treats with the same brioche dough?
- And of course, these custard brioche tarts!

Strawberry custard brioche tarts
These brioche tarts have three main components,
- Brioche dough base
- Vanilla custard filling
- Strawberry topping
- Optional – pearl sugar and jam glaze

The brioche dough
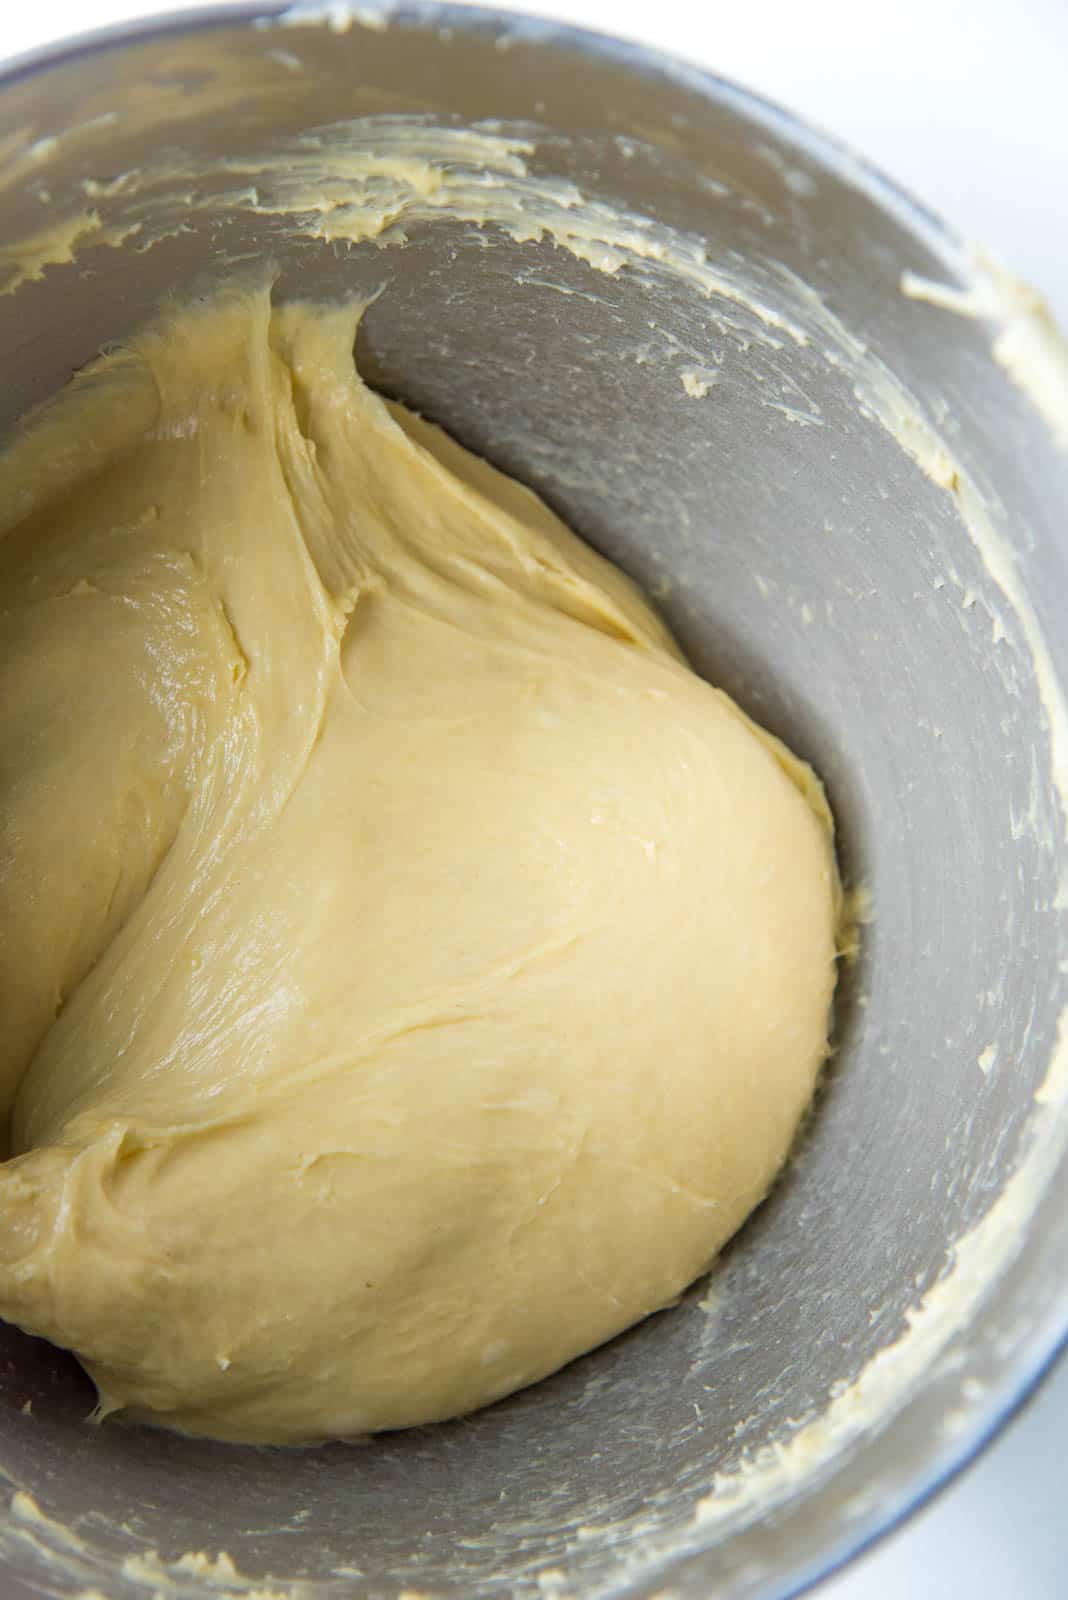
This is the main component of the recipe. If this is your first time making brioche dough, then I HIGHLY recommend reading my very detailed post on brioche dough. Brioche is a cross between bread and cake, so it’s particularly rich. The dough is very soft, and looks and feels (sort of) like a water filled balloon!
So please make sure to read my post and the FAQ section for brioche when making this dough for the first time.
Here are a few tips,
- This is a very wet dough. But it’ll become smooth as you knead it.
- Even after kneading, it’ll pool on your work surface because of the high hydration and enrichment of the dough.
- The dough will have been kneaded enough when you can lift the whole dough from the mixing bowl using the kneading hook, OR when you can form a gluten window (windowpane test) with the dough.
- Do not add extra flour during the kneading process.
- If the dough gets soft while shaping, transfer it to the fridge or freezer to make it firm again.
This brioche dough is the base for these strawberry custard brioche tarts.

Vanilla custard
For the custard, I used my pastry cream recipe, yet another popular post on the blog. It’s just the most all-around perfect pastry cream, with a lovely vanilla flavor and smooth creaminess.
The custard will be the filling in this strawberry custard brioche tart, and will be baked along with the brioche base. You can also add other flavorings to the custard, such as,
- Spiced custard – Instead of adding cardamom to the strawberries, you can add it to the custard.
- Cinnamon custard – Add about 1 tsp of cinnamon to the milk.
- Chocolate custard – You can follow my recipe here to make chocolate custard.
- Tea flavored custard – Steep your choice of tea in the milk, and make the pastry cream with that tea infused milk.
Tips for making perfect pastry cream / custard
- Do not leave the custard unattended. If the custard is heated too fast, and unevenly, the milk and egg will curdle and form a grainy or lumpy pastry cream.
- You do not have to scald the milk, but heating the milk before adding the eggs helps to cook the custard faster.
- Make sure the custard comes to a boil, with frequent stirring. It’s the boiling that activates the cornstarch to thicken it.
- Pass the cooked custard through a sieve to remove any small lumps that may still be present in the custard.
- Make sure to let the custard cool with plastic wrap, covering the whole surface of the custard (touching the custard). This will prevent a skin from forming on top.


Spiced strawberry topping
The fruit topping is super easy and very flexible. I use strawberries, but you can also use raspberries, black berries, peaches, or even apples. Any pie filling would work in these tarts, so these are a great way to use up seasonal fruits.
I just slice the strawberries, and mix them with some ground cardamom powder, and top the custard filled brioche tarts with a generous amount of the cardamom spiced sliced strawberries.
You can also choose to roast the strawberries BEFORE using them as a topping to reduce the amount of liquid from the fruit. This isn’t necessary, but it’ll reduce the amount of liquid that forms while they are being baked.

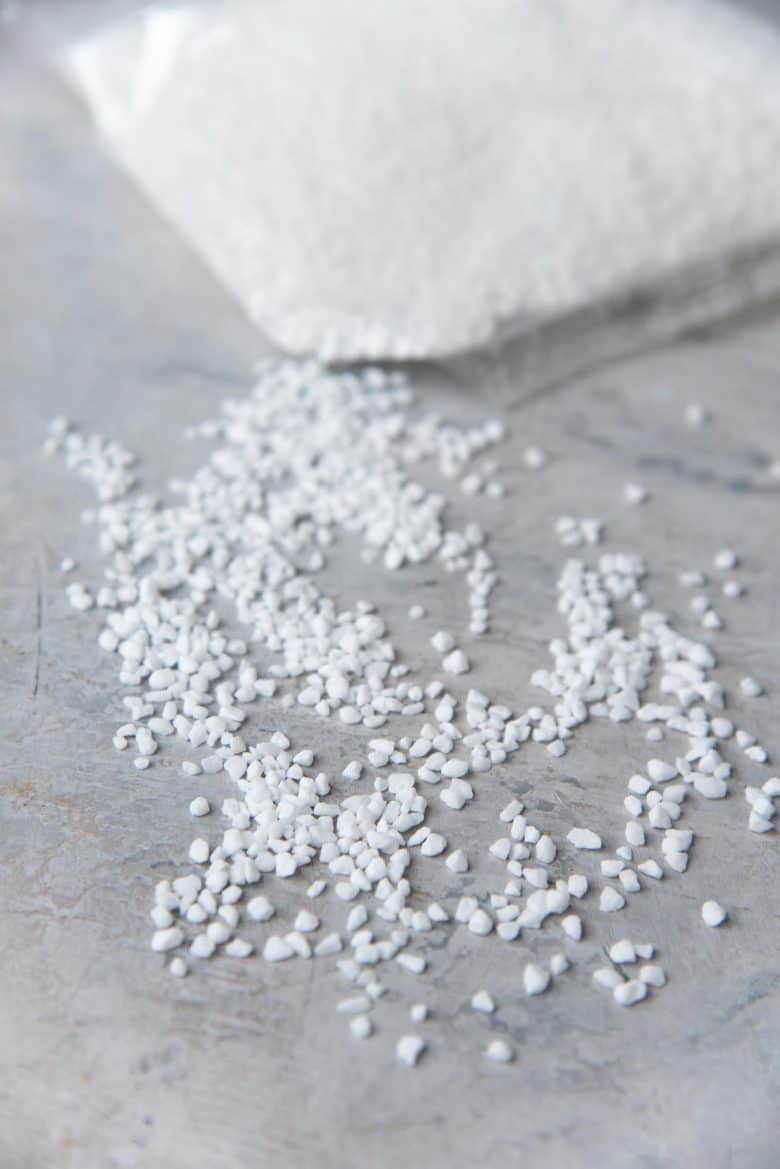
Pearl sugar and jam
This is an optional step. But you can also sprinkle some pearl sugar along the edges of the tart. This adds a lovely sweet crunch to the custard brioche tarts.
You also have the option of brushing the top of the tarts with jam once they are baked. This adds a lovely sheen to the fruit filling. But this is also not necessary. A nice dusting of confectioner’s sugar will be just as fun.
How many tarts can I make with this recipe?
I divided the dough into 12 portions that are about 70 – 75 g each, and I also made 1 large portion that was about 280 – 300 g. The smaller portions were made into mini tarts, while the large portion was made into 1 large 8 inch tart.
With this recipe, each mini tart (using 4 – 4.5 inch mini tart pans), will use about 70 g of brioche dough. Which will result in a total of 16 – 17 mini tarts with the whole recipe.
If you want to make larger tarts, you could also divide the dough into 4 and make four 8 or 9 inch tarts as well.
How to make custard brioche tarts
Shaping the dough
Before portioning the dough, it’s important to first prep the tart pans. Butter the tart pans and line the bottom with parchment paper. If you don’t have tart pans, you could also make “free-form” tarts as well.
After the dough has chilled in the fridge overnight, and the tart pans are ready, it’s time to portion the dough. You will get the best (and most even) results if you divide the dough accurately by weight.
Form smooth balls with each portion, and flatten each ball slightly. They may spring back because of the gluten, and that’s OK. Cover and let them rest for about 15 – 20 minutes in a cool place. The resting time will allow the gluten in the dough to relax, so that the next step is easier.
Flatten the dough and roll them out into a circle that is slightly larger than the base of the tart. Transfer the dough into the prepared tart pans, and press the dough into the edges of the tart pan. Cover the tart pans with plastic wrap and let them rise for 1 – 2 hours, until the dough is about 1.5 times proofed, OR looks puffy in the tart pans.


Preparing the custard and strawberries
Whisk the chilled custard until smooth. Set aside.
Slice the strawberries, add some ground cardamom and sugar, and mix to combine.
Assembling and baking the Strawberry Custard Brioche Tarts
First, using the back of a small spoon, press the center of the dough in the tarts to create a slight depression (for the custard filling). Don’t press too hard, just slightly.
Spoon the custard into the center of the proofed tart base. Spread the custard, leaving a 3/4 inch border. Brush the exposed edge with egg wash, and place a generous amount of the cardamom spiced strawberries over the custard. You can sprinkle some pearl sugar along the exposed edge of the dough as well.


Bake in the preheated oven until baked through. I like to bake these custard brioche tarts until they’re just slightly darker than golden brown.
Remove from the oven and let them cool. While slightly warm, remove the tarts from the tart pans, and serve.
These can be served slightly warm, at room temperature, or even chilled.

Other variations
There are so many ways you could vary the flavor of these custard brioche tarts!
- Serve them plain with no fruits, for a plain custard brioche tart.
- Change the flavor of the custard with infusions and spices.
- Add flavor to the brioche dough – for example cinnamon, lemon etc.
- Change the fruits to make different fruit tarts.

How to store these tarts
Unlike classic brioche bread, these strawberry custard brioche tarts cannot be stored at room temperature. That’s because of the custard and fruits.
I have successfully stored these in an air-tight container and in the fridge for 3 days (that’s how quickly they are usually gobbled up at home). You could also store them in the freezer, but please note that I haven’t personally done this yet.

Why I love this recipe!
My brioche dough is one of my favorite things to whip up in the kitchen. I’ve made so many incredible desserts using this one dough, and these custard brioche tarts are another addition to that repertoire.
Not only are they addictively delicious, they are gorgeous too! I LOVE the custard center, combined with the tart and sweet fruity topping.
The brioche dough may seem more challenging to make than regular bread dough – but it’s truly worth that little bit of extra effort! This buttery, rich, cake-like bread is the perfect base for these tarts. And once you’ve tried it, it’s hard to wean yourself off of homemade brioche dough! 😀 It’s freaking irresistible. Just like these strawberry custard brioche tarts!
These tarts are perfect for breakfast, dessert, or as a tea time treat with a cup of tea or coffee!

Recipe

Strawberry Custard Brioche Tarts
US based cup, teaspoon, tablespoon measurements. Weight measurements are recommended for accurate results whenever available.
Common Measurement ConversionsIngredients:
Brioche dough
- 120 ml warm milk, at about 110°F / 43°C ½ cup
- 9 g active dry yeast 2 ½ tsp
- 10 ml honey 2 tsp
- 4 large eggs
- 2 yolks from large eggs
- 10 ml vanilla 2 tsp
- 60 g granulated white sugar 5 tbsp
- 500 g AP flour 4 ⅛ cups measured by spoon and level method
- 10 g sea salt fine grind 1 ½ tsp
- 250 g unsalted butter very soft, roughly divided into four portions (1⅛ cups)
Vanilla custard (pastry cream)
- 480 ml milk 2 cups
- 75 g sugar 6 tbsp
- Pinch of salt
- 30 g cornstarch cornflour (3 tbsp)
- 3 tsp vanilla bean paste or extract OR 1 vanilla bean pod
- 3 large egg yolks
- 43 g unsalted butter softened
Strawberry topping
- 450 g strawberries hulled and sliced
- 2 tbsp sugar or confectioner's sugar
- 1 tsp vanilla
- ½ tsp ground cardamom
Assembly
- 1 egg for egg wash
- Pearl sugar optional
Instructions:
Brioche
- Measure all the ingredients.
- Add the milk, yeast and honey into the mixing bowl and whisk gently to combine. Set aside for 10 minutes to allow the yeast to activate.120 ml warm milk, at about 110°F / 43°C, 9 g active dry yeast, 10 ml honey
- Add the eggs and yolks, vanilla, and sugar, and whisk gently to break the egg yolks.4 large eggs, 2 yolks from large eggs, 10 ml vanilla, 60 g granulated white sugar
- Add the flour and sea salt, and mix with a spatula or dough whisk to form a scraggly dough.500 g AP flour, 10 g sea salt fine grind
- With the dough hook attachment, knead the dough on speed 2 or 3 for about 3 – 5 minutes.
- Add the first portion of butter, in increments, after the first minute of kneading. Allow the butter to be mixed well into the dough. This should take about 1 – 2 minutes.250 g unsalted butter
- Repeat with the other 3 portions of butter, kneading the dough for about 2 minutes after each addition.
- Make sure to stop the mixer to scrape down the sides of the bowl (and the bottom) between adding butter and kneading. You will have incorporated all the butter in about 9 – 10 minutes of kneading time.
- Once all the butter is incorporated, scrape down the sides and bottom of the bowl, and knead the dough for a further 5 – 15 minutes on speed 5 or 6.
- The dough will have been kneaded enough when it can be lifted fairly cleanly off the bottom of the bowl when picked up with the dough hook. It will be very soft and tacky to the touch, but shouldn’t stick to your fingertips. Rather than strictly going by time, knead the dough until you have reached this consistency.
- Flour your work surface, and turn the dough out onto the floured surface. Lightly flour your hands and the surface of the dough to prevent the dough from sticking to your palms. Then flatten the dough with your hands to deflate.
- Fold in the edges of the dough towards the middle and gently press them into the dough (see pictures in my brioche bread loaf post for more information). Carefully flip the dough over, and then with the heel of your palms, shape the dough to form a tight ball.
- Carefully pick up the dough ball and place it back in the mixer bowl (or another large bowl).
- Let it rise until it has doubled in size, in a warm place (72°F), for about 1 hour.
- Turn the proofed dough out onto a lightly floured surface, and fold in the edges again as before towards the middle and press them in. Carefully flip the dough over (seam side down now). Tighten the dough into a ball with a smooth, taut surface (using the edges of your palms). Transfer the dough into the mixer bowl again.
- Cover and let it chill in the fridge for at least 8 hours, or up to 24 hours.
Next day
- Butter 16 mini tart pans (about 12 cm in total diameter – the ones I've used here have a base of 10 cm, and 12 cm diameter on top). You can also make the tarts in an 8 or 9 inch tart pan. Place a parchment paper on the bottom of the tart pans and flour the sides. Set aside until needed.
- After the dough has chilled overnight, remove the dough from the bowl and gently flatten it to de-gas the dough. Weigh the dough and divide it into 16 small portions (about 70 – 72 g per portion). You can also divide the dough into 4 for larger tarts (8 – 9 inch). Make sure to keep all the dough portions covered with plastic wrap / cloth to prevent them from drying out.
- Roll each portion into a ball. Let the dough rest for about 15 – 20 minutes.
- Using a small rolling pin (or something similar), roll the dough out into a flat circle that is slightly larger than the base of your tart pans. My mini tart pans are 10 cm at the base, so I rolled them out to 11 – 12 cm.
- Place each dough in the prepared pans, and press the dough into the edges. Cover and let the dough proof until they look puffy (about 1.5 – 2 times the original size). The proofing time will depend on the ambient temperature (so it could take anywhere between 45 mins – 1.5 hours).
- Once the dough is proofed in the tart pans, they are ready to be assembled.
Vanilla custard (pastry cream)
- Make the pastry cream according to this recipe here. Make this on Day 1, and let it chill in the fridge overnight.480 ml milk, 75 g sugar, Pinch of salt, 30 g cornstarch, 3 tsp vanilla bean paste or extract , 3 large egg yolks, 43 g unsalted butter
- Once chilled, whisk the set pastry cream until it’s smooth and creamy again. Then keep it in the fridge until needed.
Strawberry topping
- Prepare the strawberry topping just before you assemble the tarts.
- Slice the strawberries and place them in a bowl.450 g strawberries
- Mix in the sugar, vanilla, and cardamom. Use immediately.2 tbsp sugar or confectioner's sugar, 1 tsp vanilla, ½ tsp ground cardamom
Assembly
- Preheat the oven to 350°F / 180°C.
- Using the back of a spoon that is dipped in a little flour, lightly press down the center of the proofed dough. Do not press too hard, just enough to make a slight depression in the center. Lightly flour the spoon each time you do this, to prevent the dough from sticking to the spoon.
- Do the same for larger tarts, gently pressing the dough in the center (leaving a 3 inch border along the edge).
- Add 2 – 3 tbsp of pastry cream into the center of each mini tart and spread it, leaving a border along the edge.
- Do the same for your larger tarts, spreading a layer of pastry cream in the center (about ¾ cm thick). Make sure to leave a 1.5 inch border along the edge.
- Place a generous amount of sliced strawberries on top of the custard.
- Whisk the egg for the egg wash, and brush the exposed border of the tarts with the egg wash. Sprinkle pearl sugar on the exposed border (optional).1 egg, Pearl sugar
- Bake the tarts in the preheated oven until the dough is a darker golden brown in color. This can take about 20 minutes for small tarts, and longer for the large tarts.
- Remove from the oven and let the tarts cool down slightly. Then carefully remove the tarts from the tart pans, and let them cool further on a wire rack. These strawberry custard tarts taste best when slightly warm.
Recipe Notes
Nutrition Information:
“This website provides approximate nutrition information for convenience and as a courtesy only. Nutrition data is gathered primarily from the USDA Food Composition Database, whenever available, or otherwise other online calculators.”


Leave a Reply