




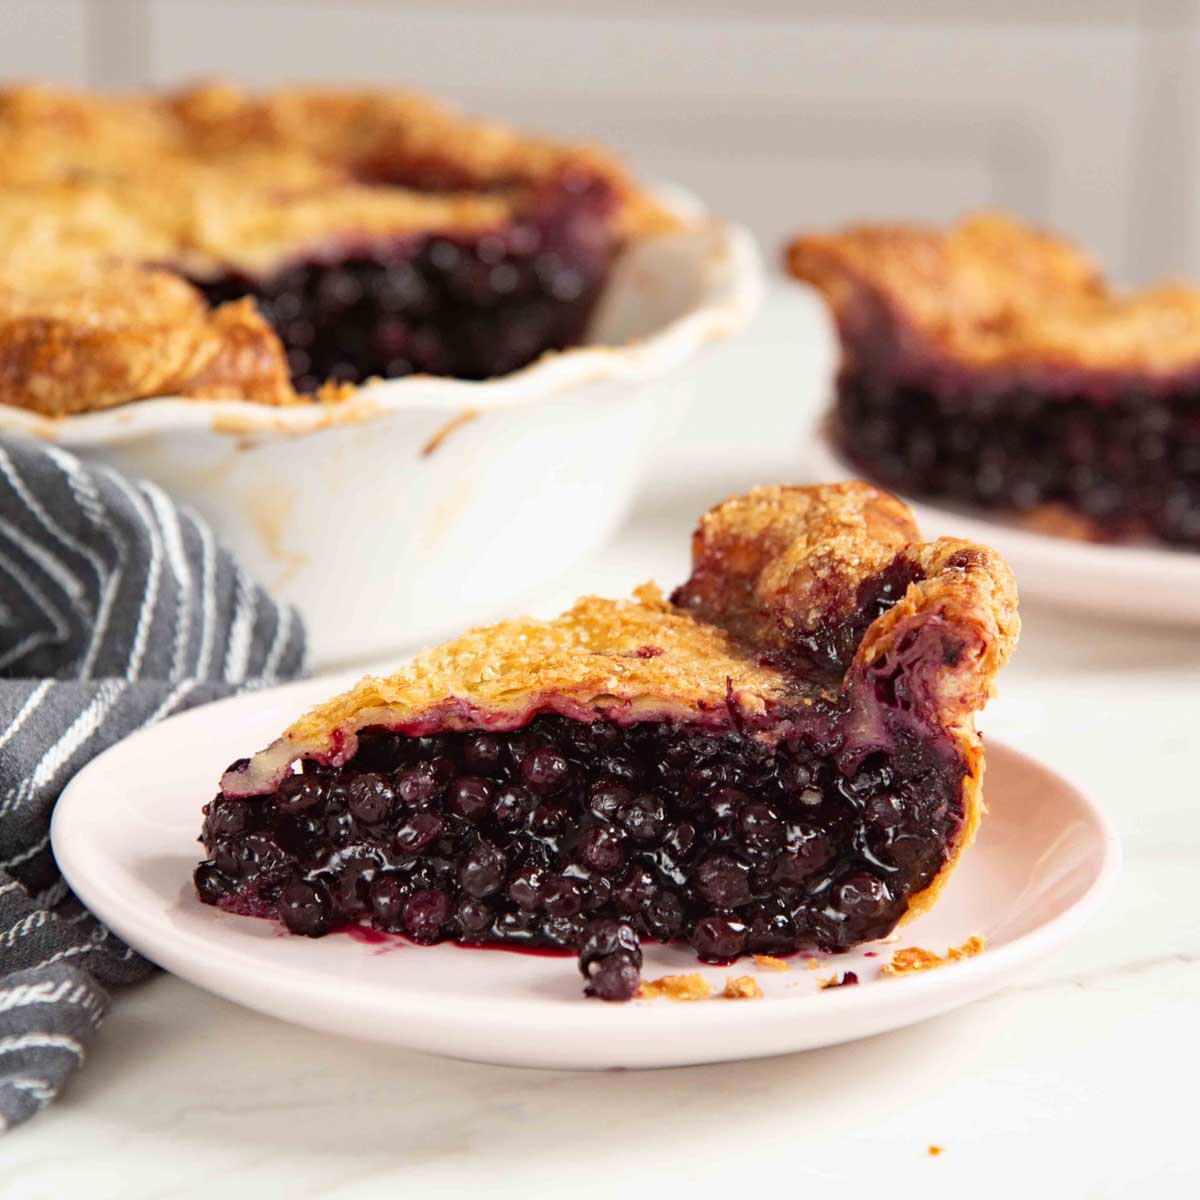
Blueberry pies can often be bland in flavor, but not this wild blueberry pie! Made with more readily accessible frozen wild blueberries, I share all my tips to make the best blueberry pie from the flaky, buttery pie crust to the thick, juicy blueberry filling!
However, you can make this with fresh or frozen regular (or cultivated) blueberries too. No soggy or shrinking crust, just perfectly baked, tender, buttery, fruity pie perfection!
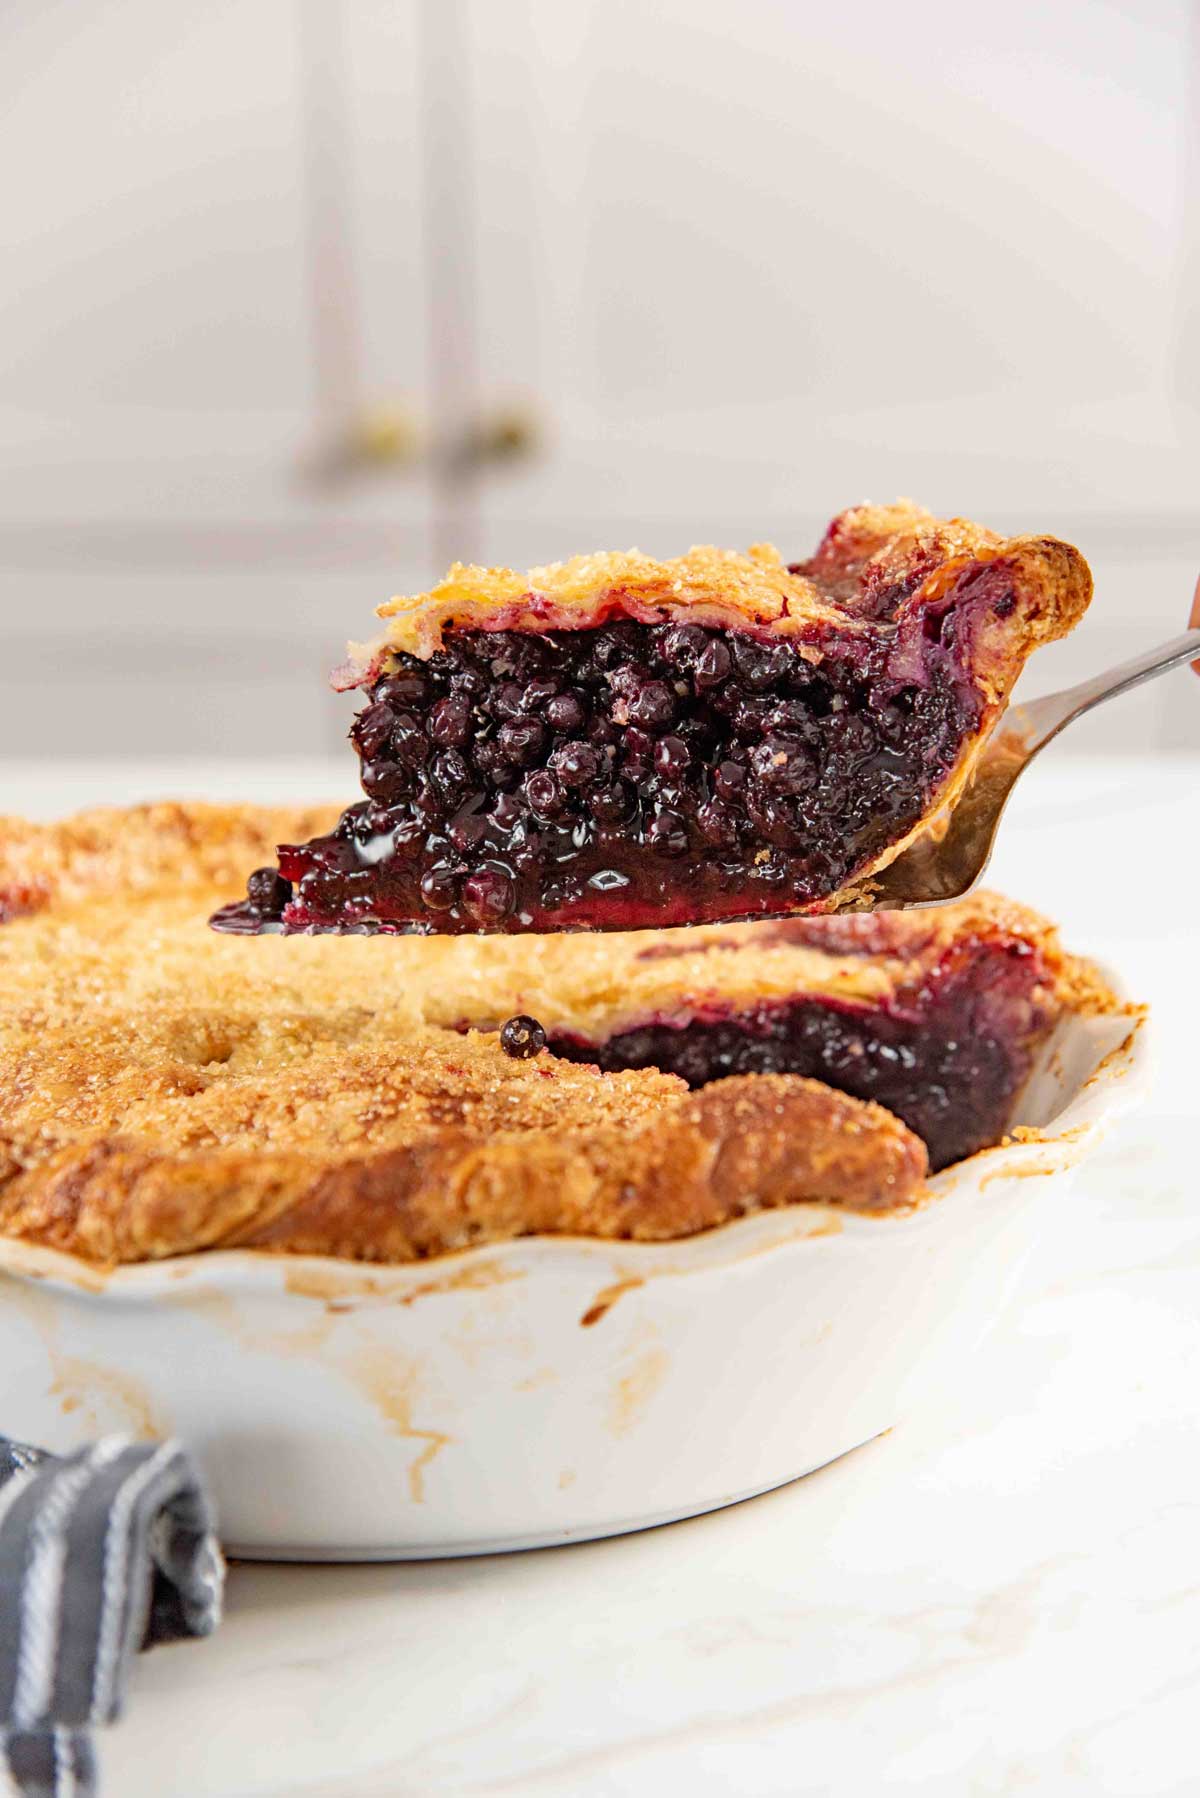
I’ve had blueberry pies in many different shapes and forms over the years, but never with wild blueberries until I moved to Canada! Now, I can’t imagine making or eating blueberry pie any other way. So much so that I’m growing my own wild blueberries in my backyard now.
Unfortunately, fresh wild blueberries aren’t always available all year long, but you CAN easily find frozen wild blueberries any time of year!
You can of course use regular or cultivated blueberries for this recipe, but I personally prefer wild blueberries. Let me show you why.
Here’s why this recipe works

- Works with regular or cultivated blueberries and with fresh or frozen wild blueberries. So, you can make it any time of the year with accessible produce.
- I share tips on how to get the best flavor from your blueberries, as well as ways to amp up the berry flavor even more!
- Made with my tender, flaky all butter pie crust that makes the most flavorful, foolproof crust!
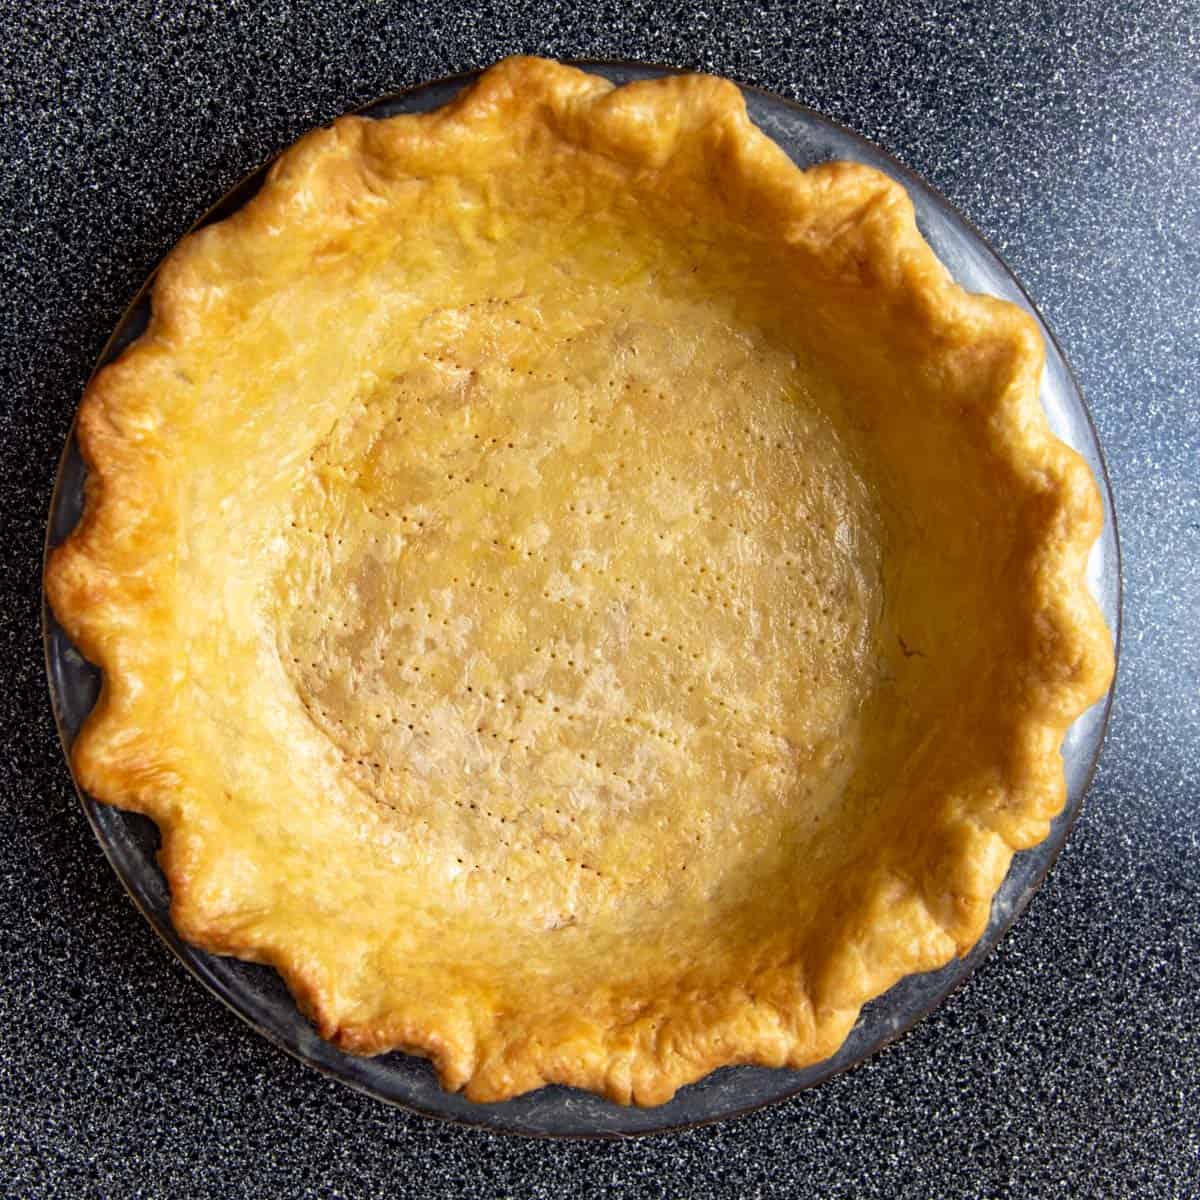
- NEVER worry about a soggy bottom crust, because I share how to bake double crust pies PERFECTLY without par-baking!
Key ingredients
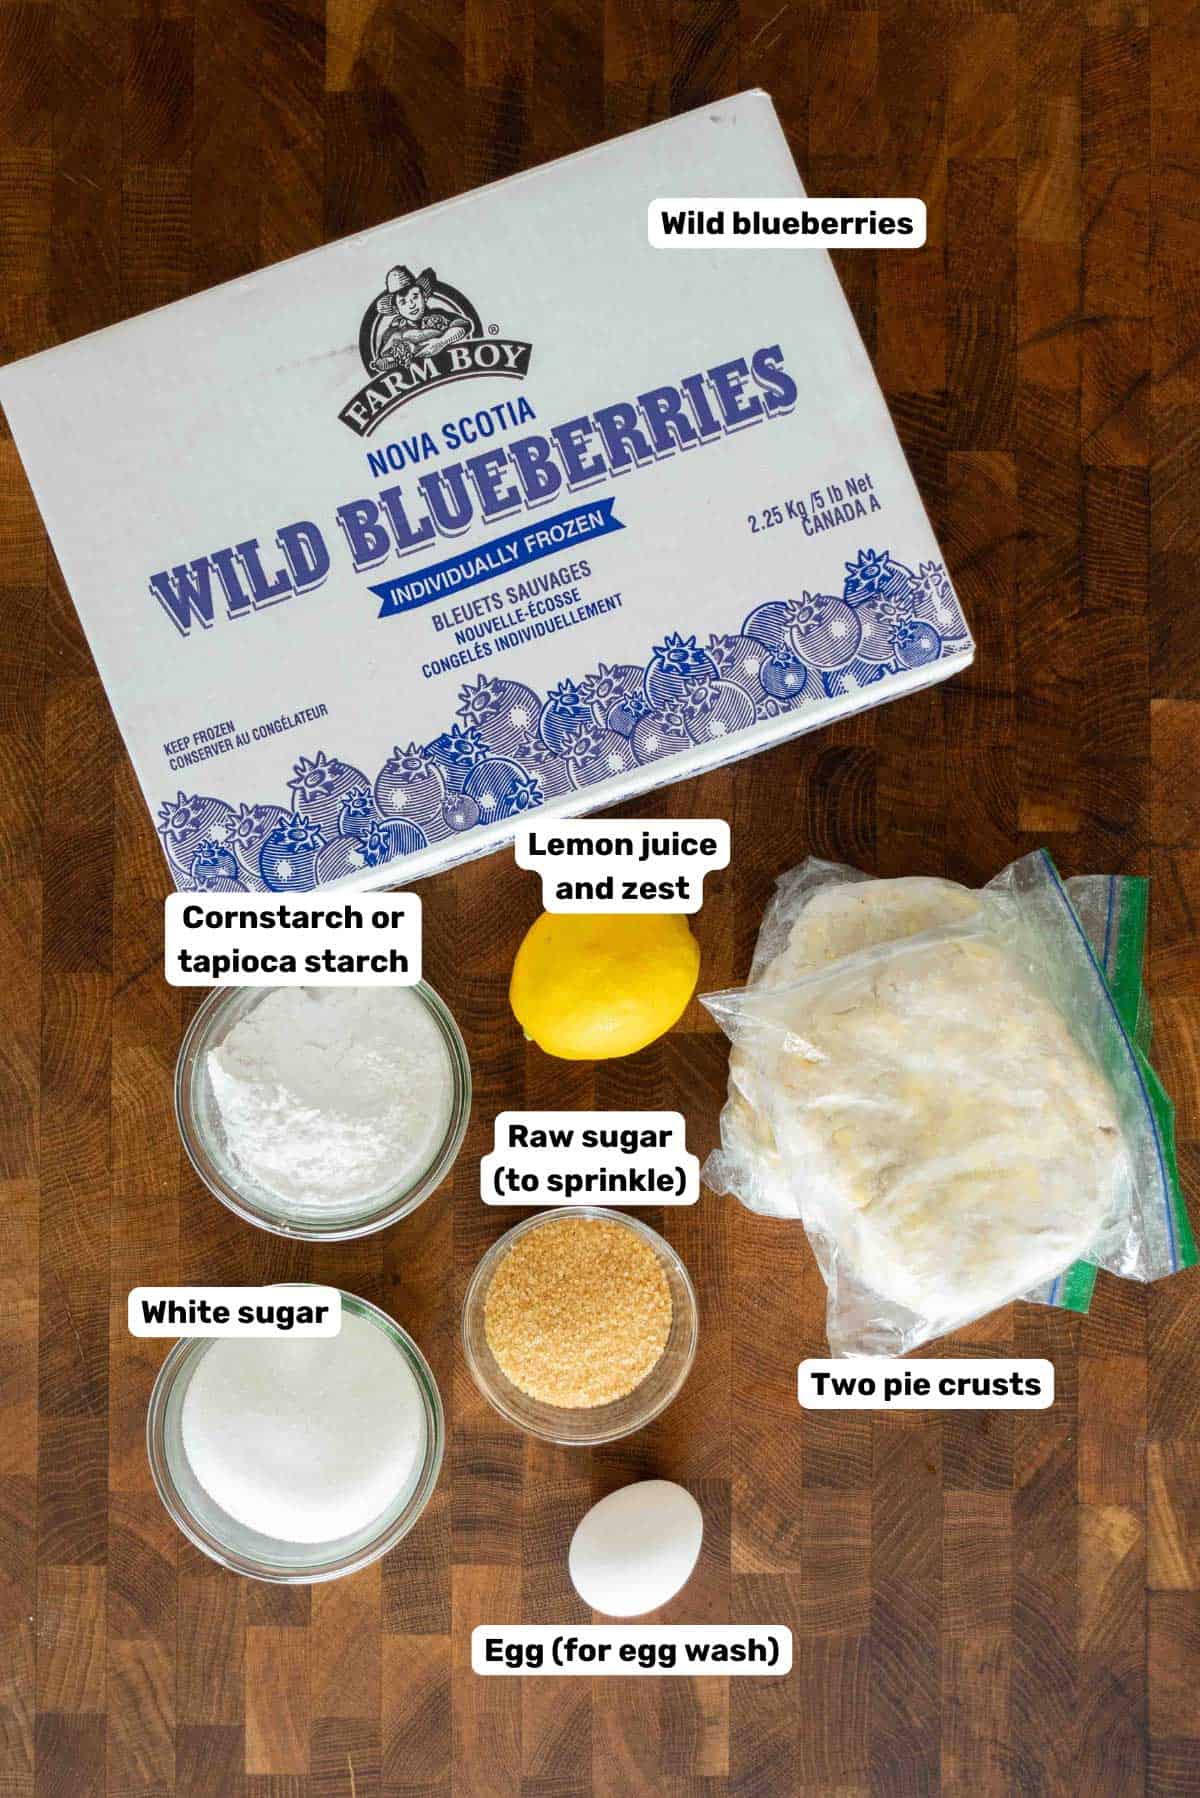
- Wild blueberries – You can use cultivated blueberries as well for this recipe.
- Sugar – I use white sugar which has a neutral flavor that doesn’t interfere with the flavor of blueberries.
- Lemon – Lemon juice and lemon zest to coax out more fruity flavor from the blueberries.
- Cornstarch OR tapioca starch – Either of these will work as a thickener for the wild blueberry pie filling. Tapioca starch gives the filling a glossier finish and freezes better than cornstarch, but you need less cornstarch to get the same jammy, thick filling.
- Pie crust – You’ll need a bottom crust and top crust. I’m using my own butter pie crust, but you can use store-bought as well.
Optional ingredients
These ingredients are optional, but can really elevate the flavor of this pie, so I highly recommend them!
- Ginger
- Cardamom
Wild blueberries vs regular (cultivated blueberries)
Blueberries are native to North America. You can find wild blueberries growing on lowbush blueberry shrubs. They are smaller compared to cultivated blueberries, and as a result, more concentrated in flavor! Cultivated blueberries are larger with a milder flavor.
Wild blueberries also contain more antioxidants and beneficial bioactive compounds, particularly concentrated in the anthocyanins of the blueberry skin. And wild blueberries have a much higher skin to fruit ratio because of their smaller size.
How to make blueberry pie (step by step overview)
Step 1 – Make the pie crust
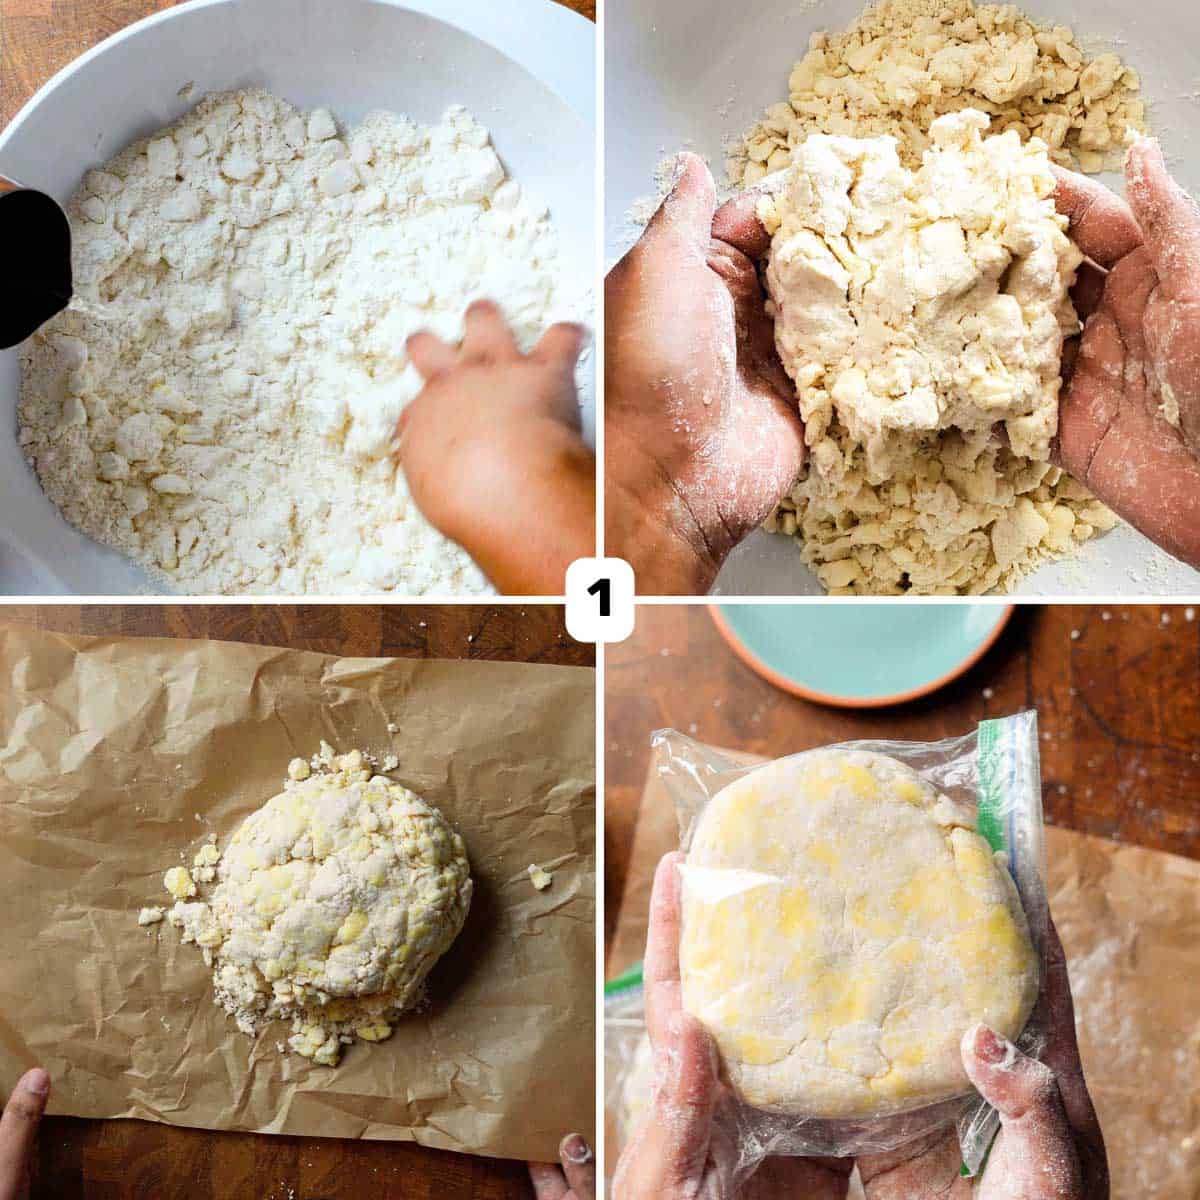
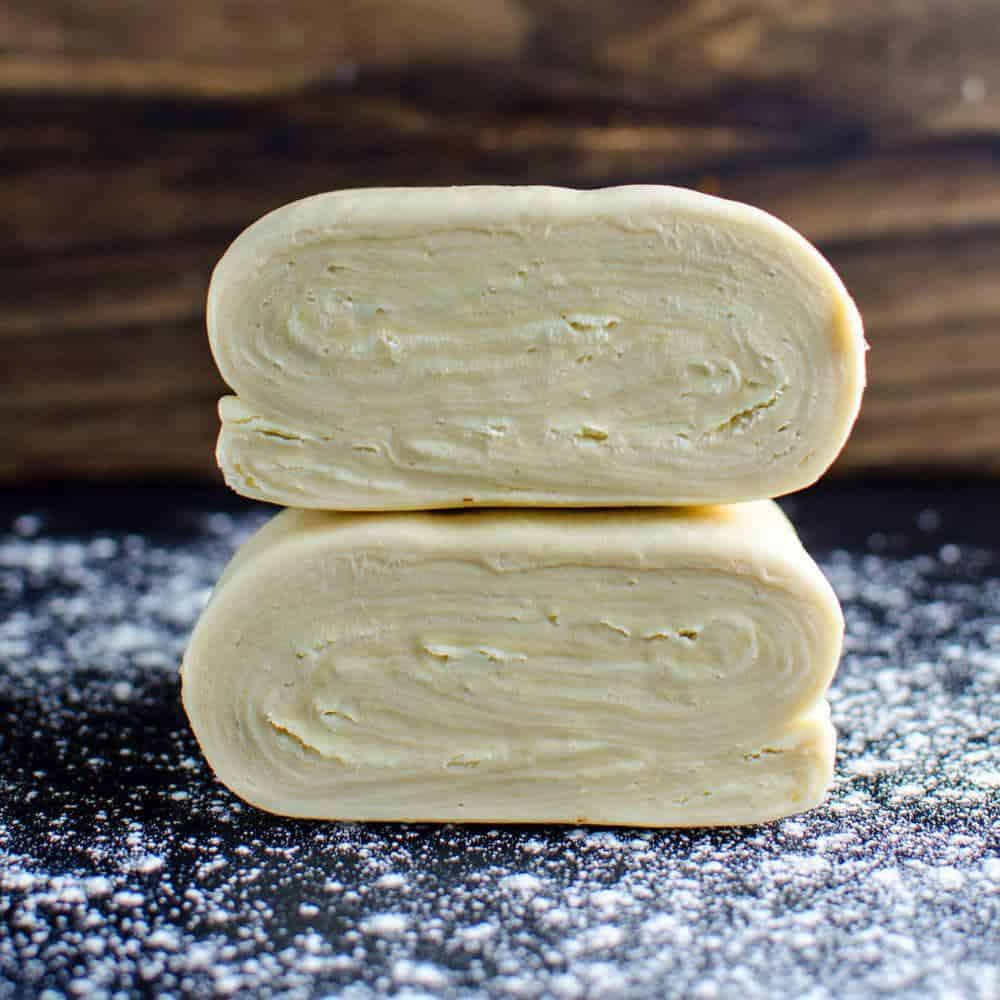
I use my homemade pie crust recipe for this wild blueberry pie (image 1). It’s super flaky and buttery, and will never let you down! No shrinking, no slipping, no collapsing. This recipe makes enough for a double pie crust, or to make a double crust with a lattice top.
You can use store-bought pie crust too.
If you’re making homemade pie crust, make it the night before, so the crust has at least 4 hours to rest in the fridge before rolling it out.
Step 2 – Thaw some blueberries
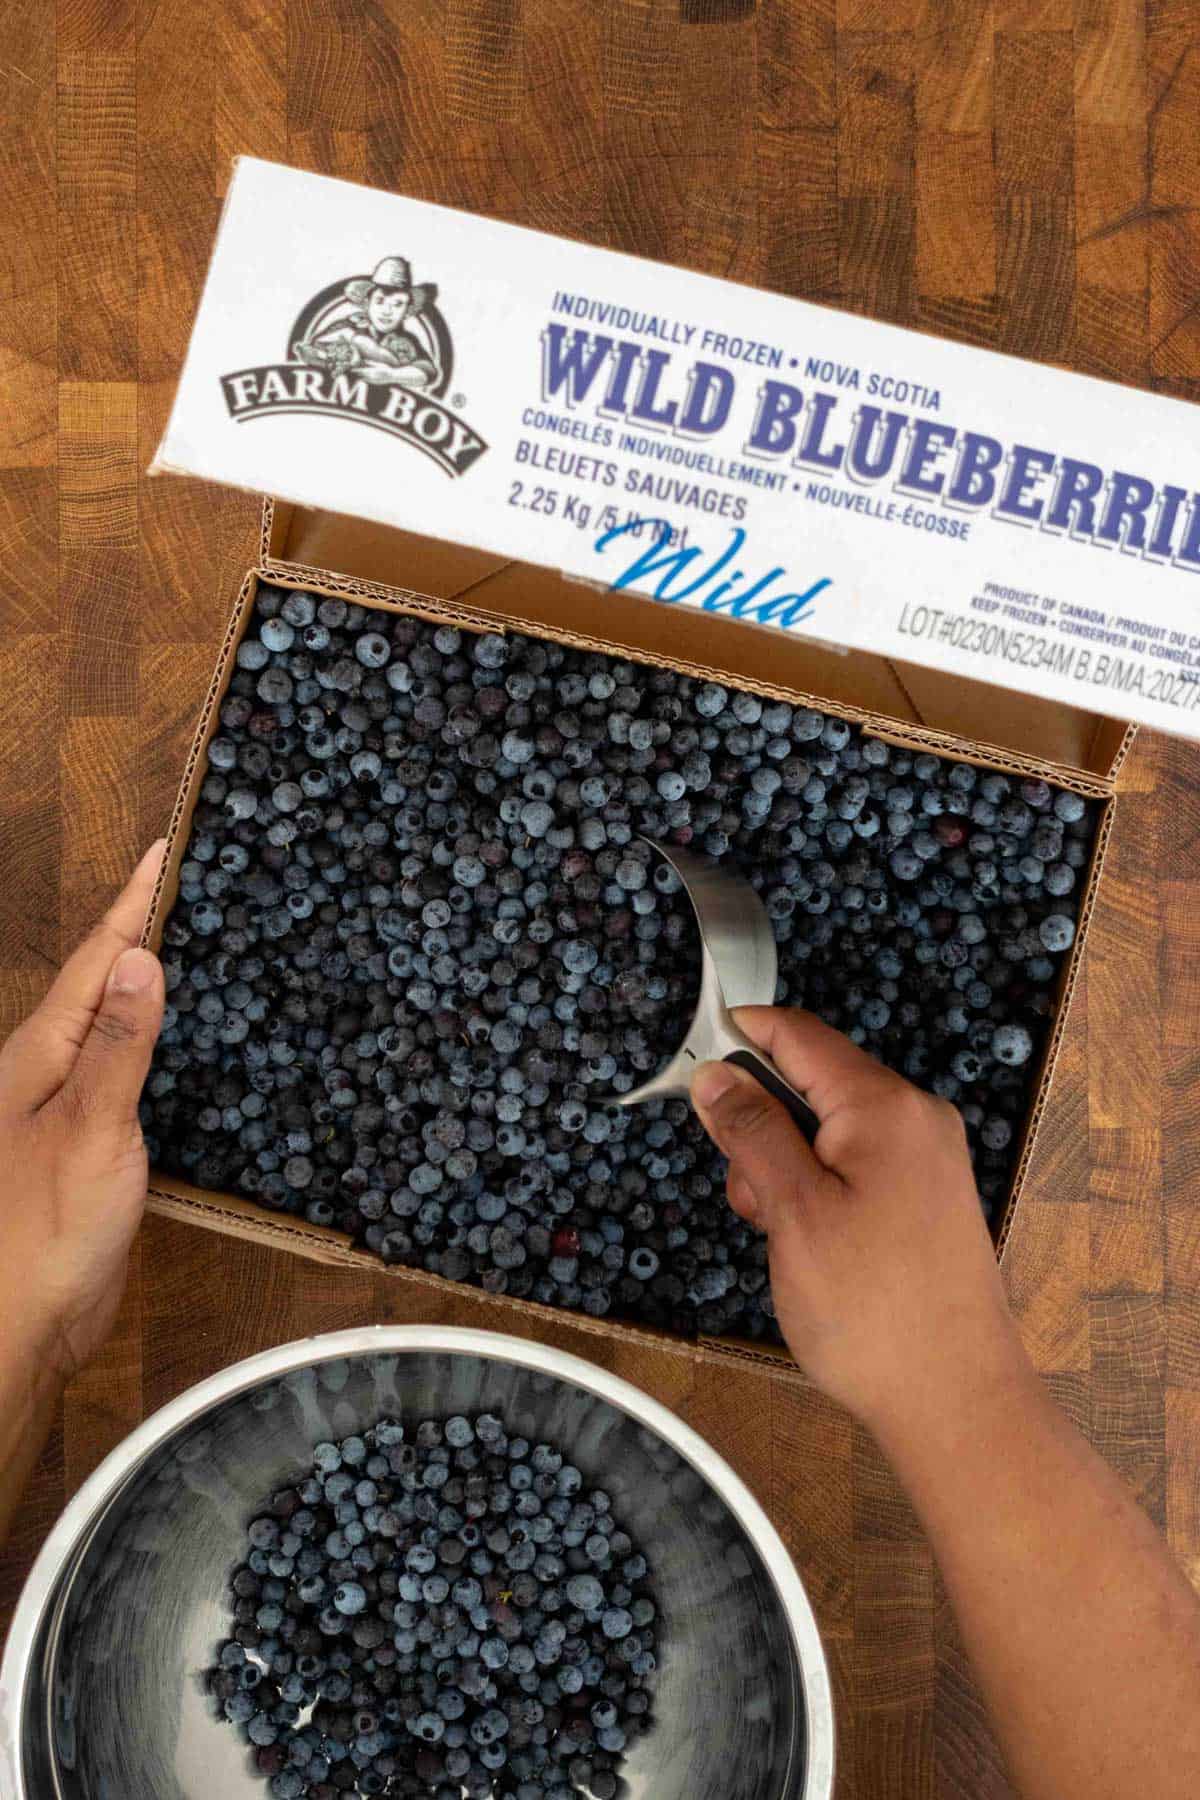
If you’re using frozen blueberries, thaw out about ⅓ of the blueberries in a bowl. These thawed blueberries will be crushed in the filling.
This is optional but highly recommended, and it creates a jammy filling to bind all the blueberries together in this frozen blueberry pie.
Step 3 – Roll out pie dough
I’m using a 9 inch deep pie pan for this blueberry pie. The pie crust recipe makes two crusts to fit on the bottom and top of this pie pan.
I have a full tutorial on the important tips to follow when making a double crusted pie, but here’s a summary of the most important points.

- Keep the dough cold to prevent the butter from softening. Cold butter helps to make the pie crust flaky AND prevents the dough from shrinking.
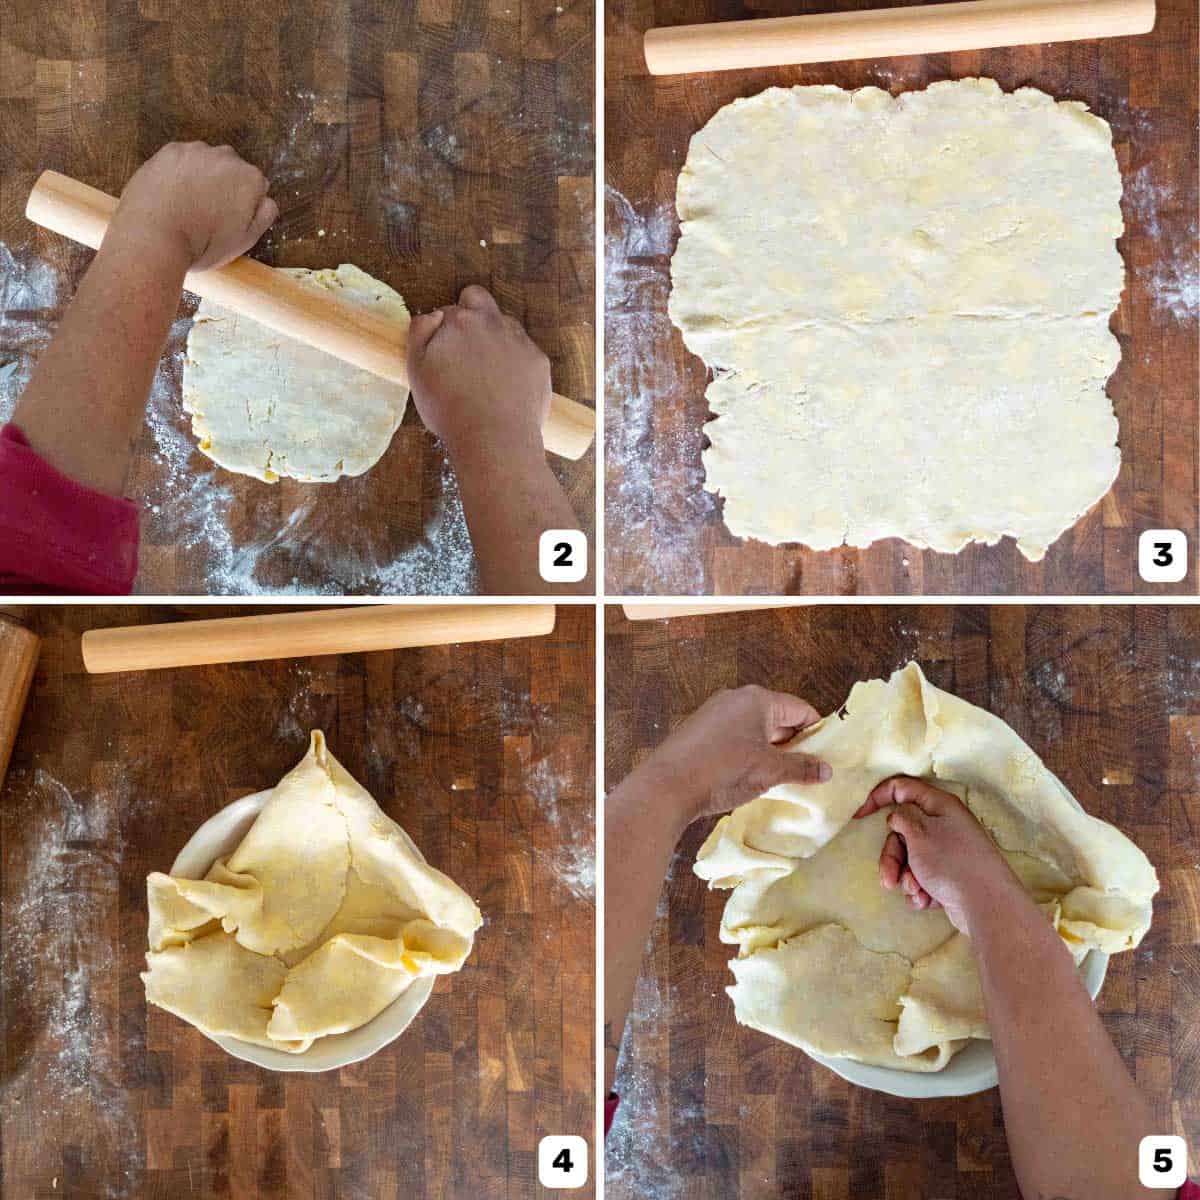
- When rolling out the dough, maintain a round shape as much as possible, so that it fits your pie pan better (images 2 – 3).
- If the dough is shrinking, or is hard to roll out at any point, wrap the dough and put it back in the fridge for about 30 minutes to let it rest.
- The bottom crust must be rolled out to about a 2 – 3 mm thickness. A thinner crust will bake better at the bottom and prevent a soggy crust too.
- The top crust can be rolled out slightly thicker if you like a super flaky crust – about 3 – 5 mm thick. The top crust can be roughly folded into quarters and covered with plastic wrap so you can keep it in the fridge until needed.
Step 4 – Line the pie pan with the bottom crust
Place the pie crust in the pie pan (image 4). Make sure not to stretch the dough to fit in the pan, as this can cause the crust to shrink as it bakes.
Gently lift the dough and lay it down so that it fits the bottom of the pan, without needing to stretch the dough (image 5).
Make sure the folds are smoothed out on the sides of the pan as well, with an overhang along the edge of the pie pan (image 6).
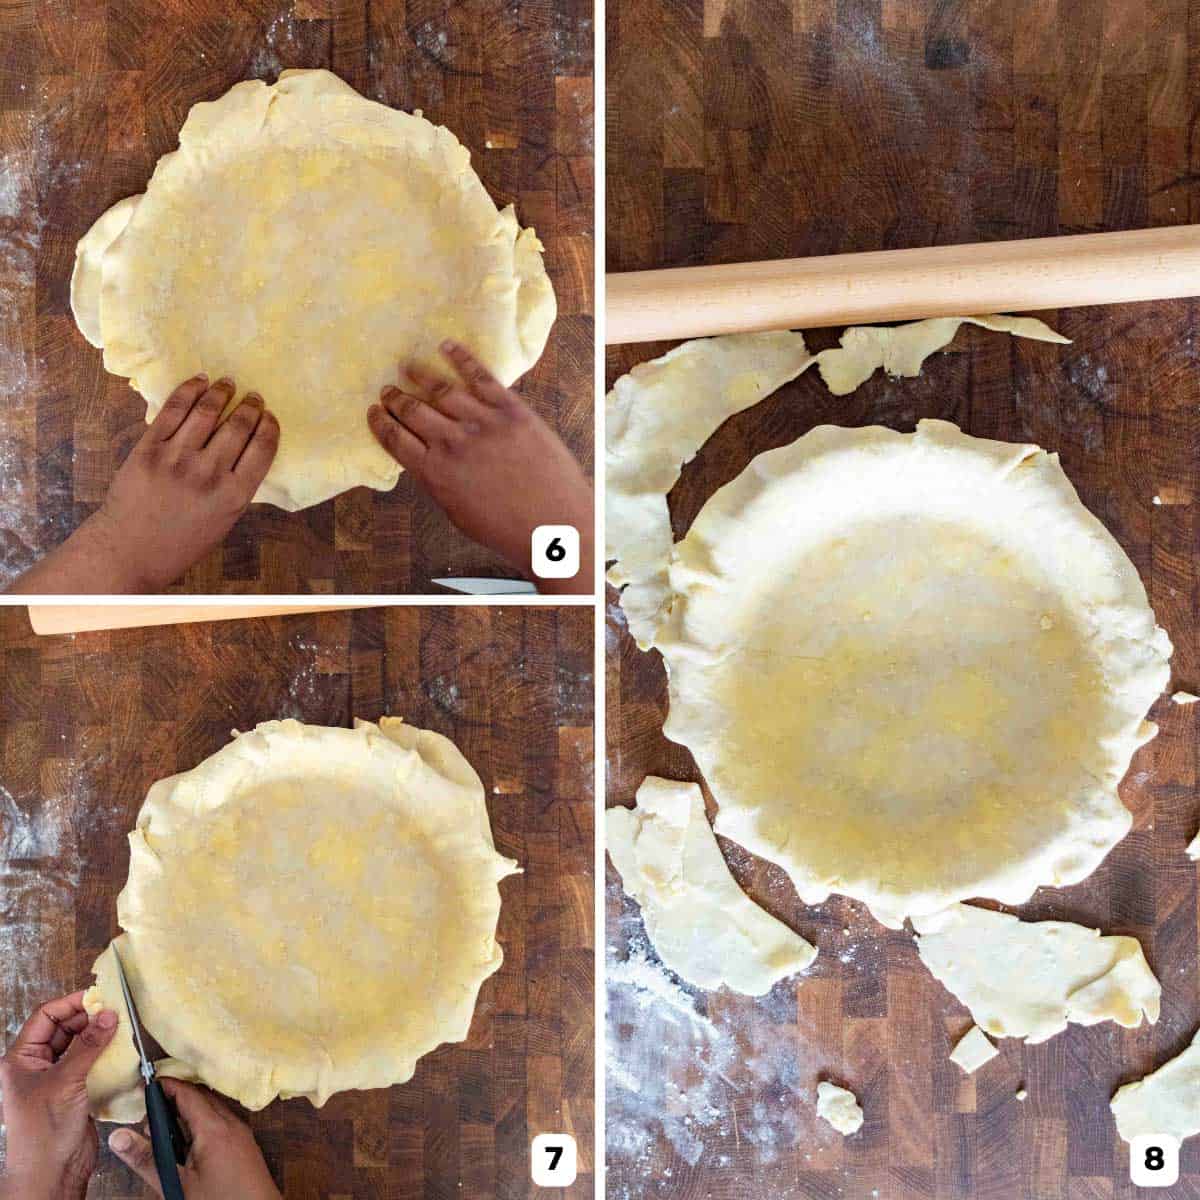
Mark a ½ inch border from the edge of the pie pan and trim the excess, only leaving that ½ inch overhang (images 7 – 8).
The pie pan is now ready for the filling, and you can leave it in the fridge until needed.
Step 5 – Prepare the no cook blueberry filling
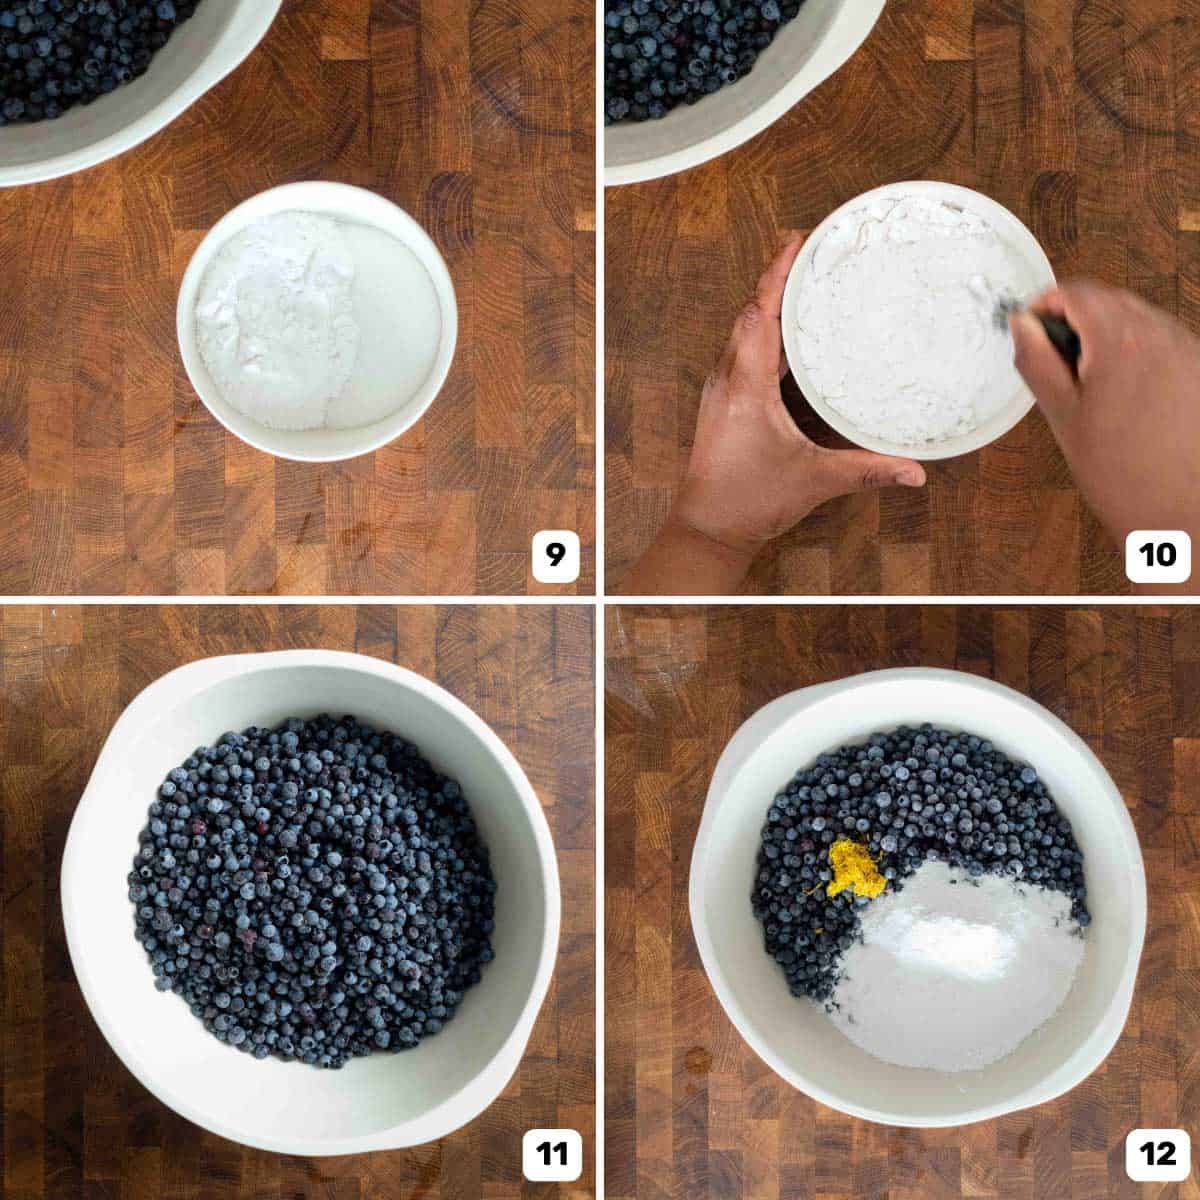
In a large bowl, place about ⅓ of the wild blueberries (fresh or thawed blueberries). Then crush these with a masher or a fork.
Mix together the starch and sugar so that it will mix in more evenly with the blueberries. I use tapioca starch here, but you can use cornstarch too (images 9 – 10).
Then add the remaining whole wild blueberries (frozen or thawed or fresh) to the crushed blueberries (image 11). Then add the lemon juice and zest, along with the sugar and starch mix (image 12).
I like to add a little ginger or cardamom (or both) to the filling too! That little warmth and spice really complement the blueberries. We’re only adding enough to give the filling some oomph, not to overpower the flavor of blueberries.
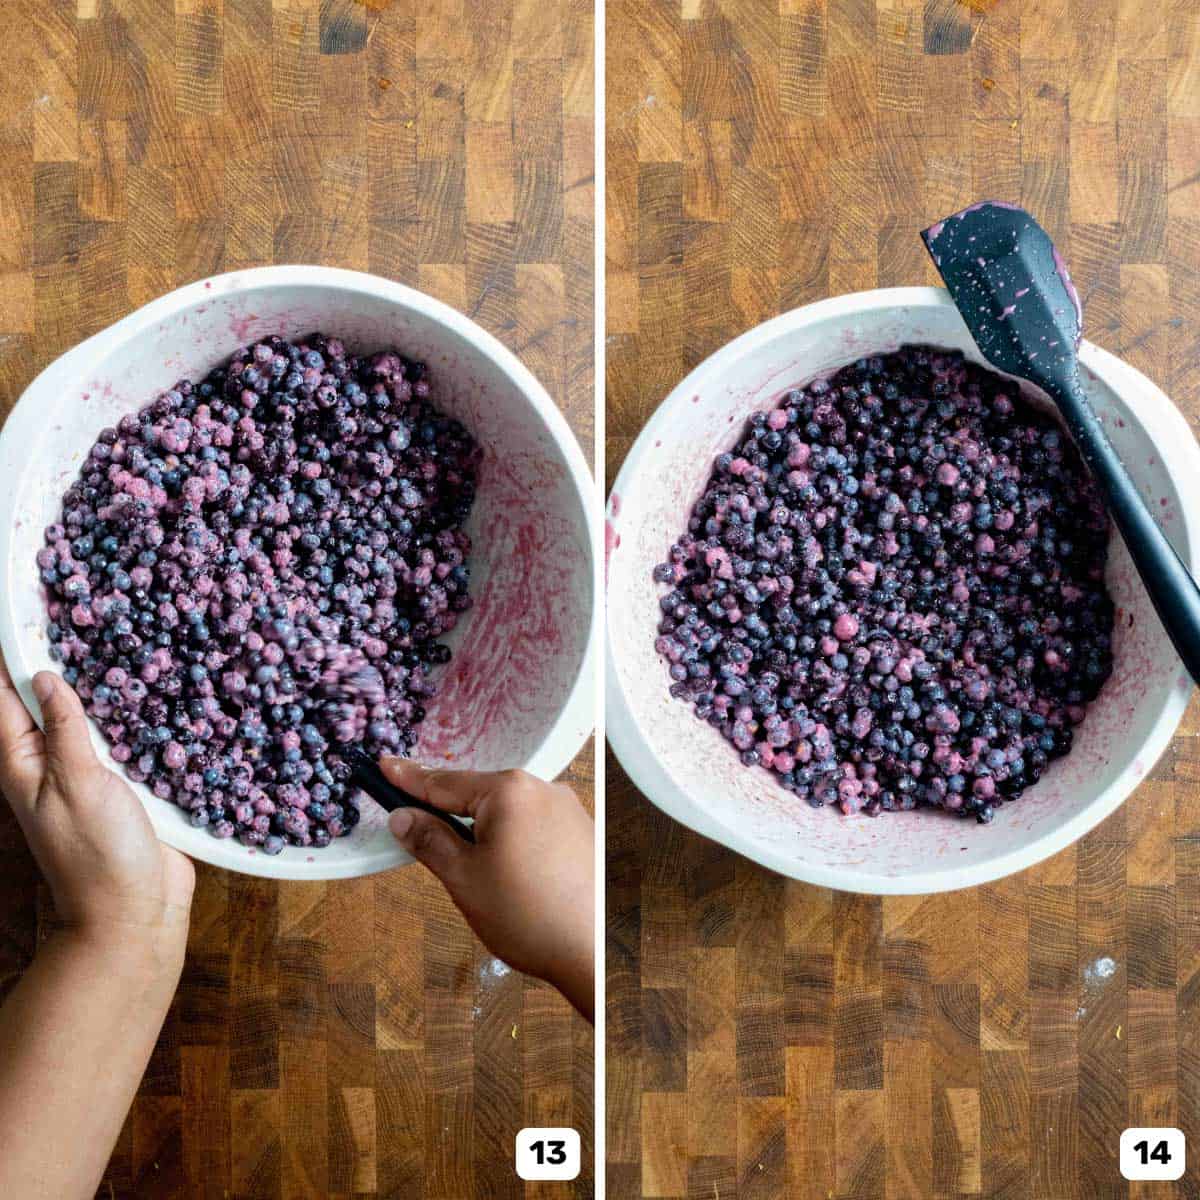
Mix all of it together, and the filling is now ready (images 13 – 14).
Step 6 – Fill the pie and seal with top crust
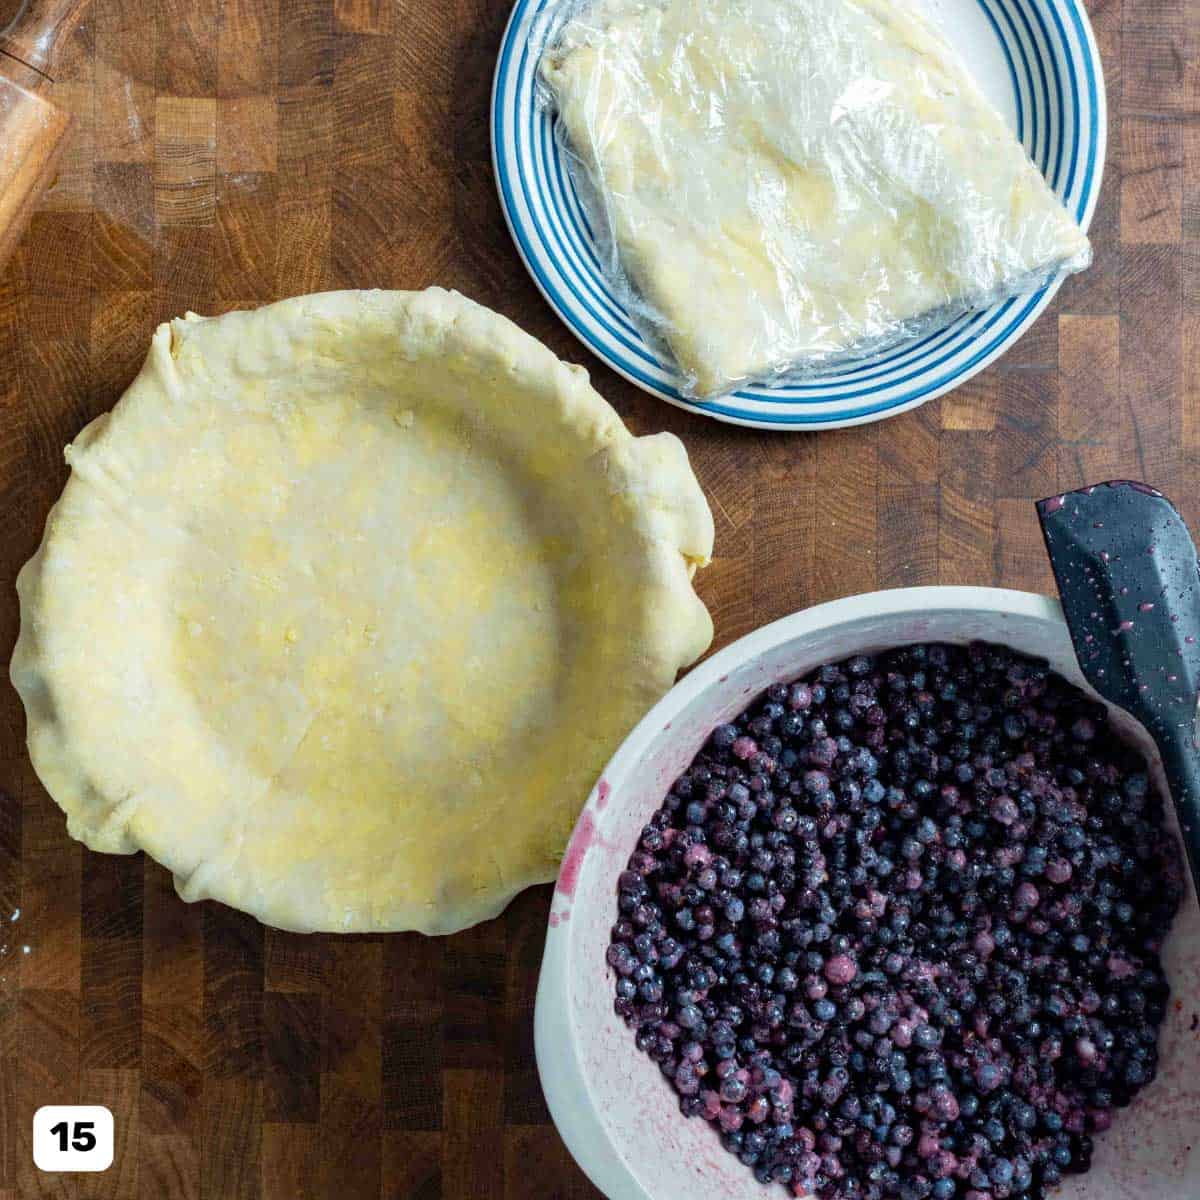
Now you should have your blueberry filling, the lined pie plate, and the rolled out top crust ready to go (image 15).
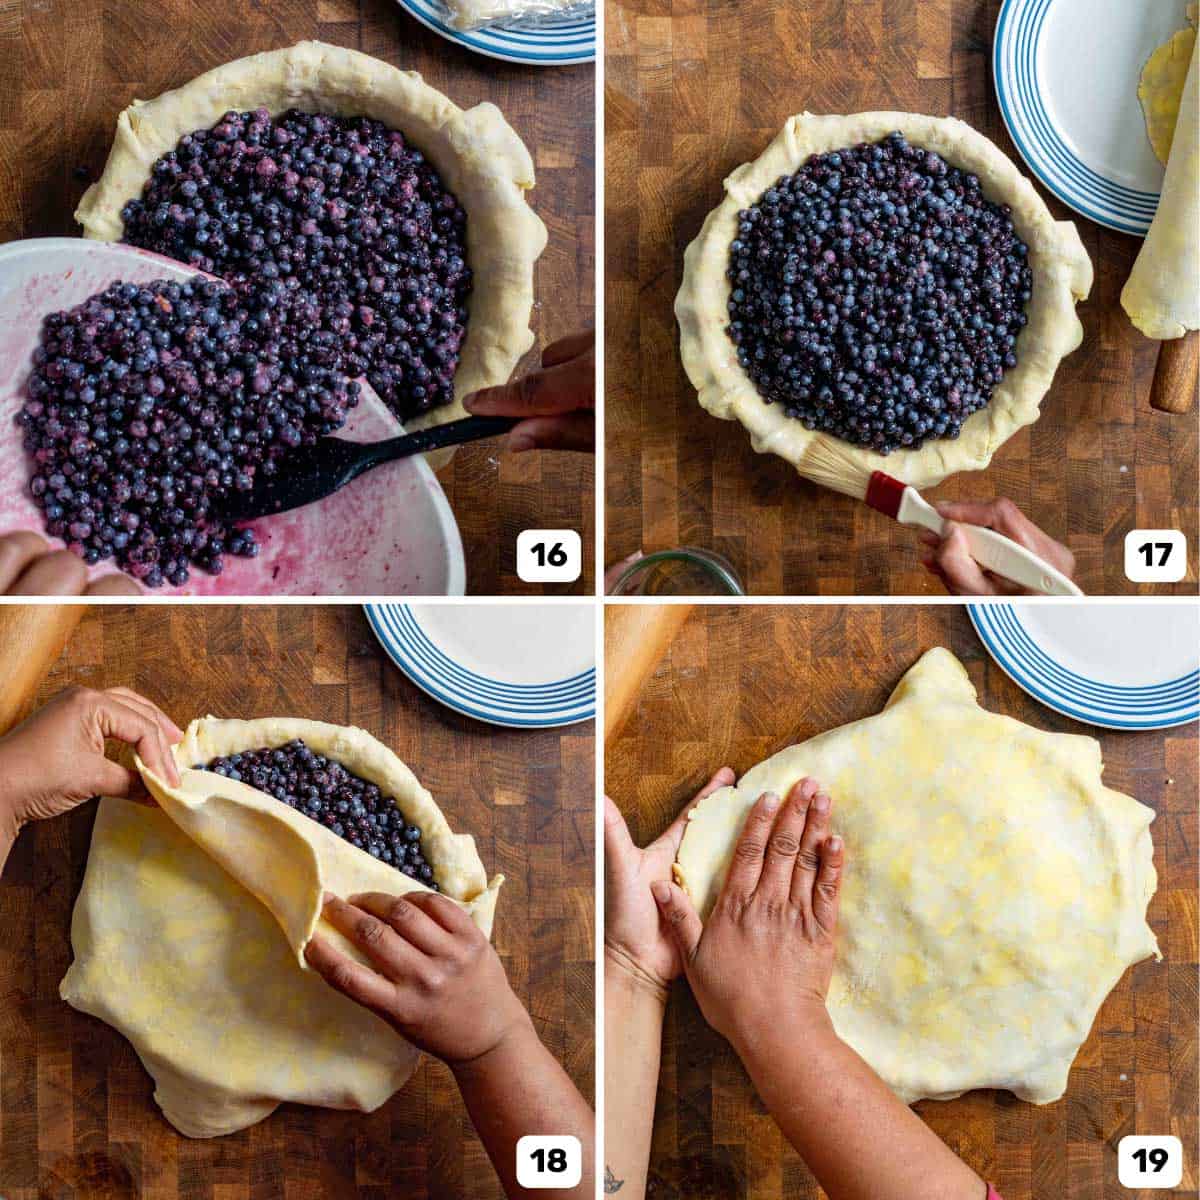
Scrape the pie filling into the lined pie pan (image 16). Then brush the edge of the pie crust with water (image 17) and place the top crust over the top of the pie (image 18), and press the two crusts together to help them stick (image 19).
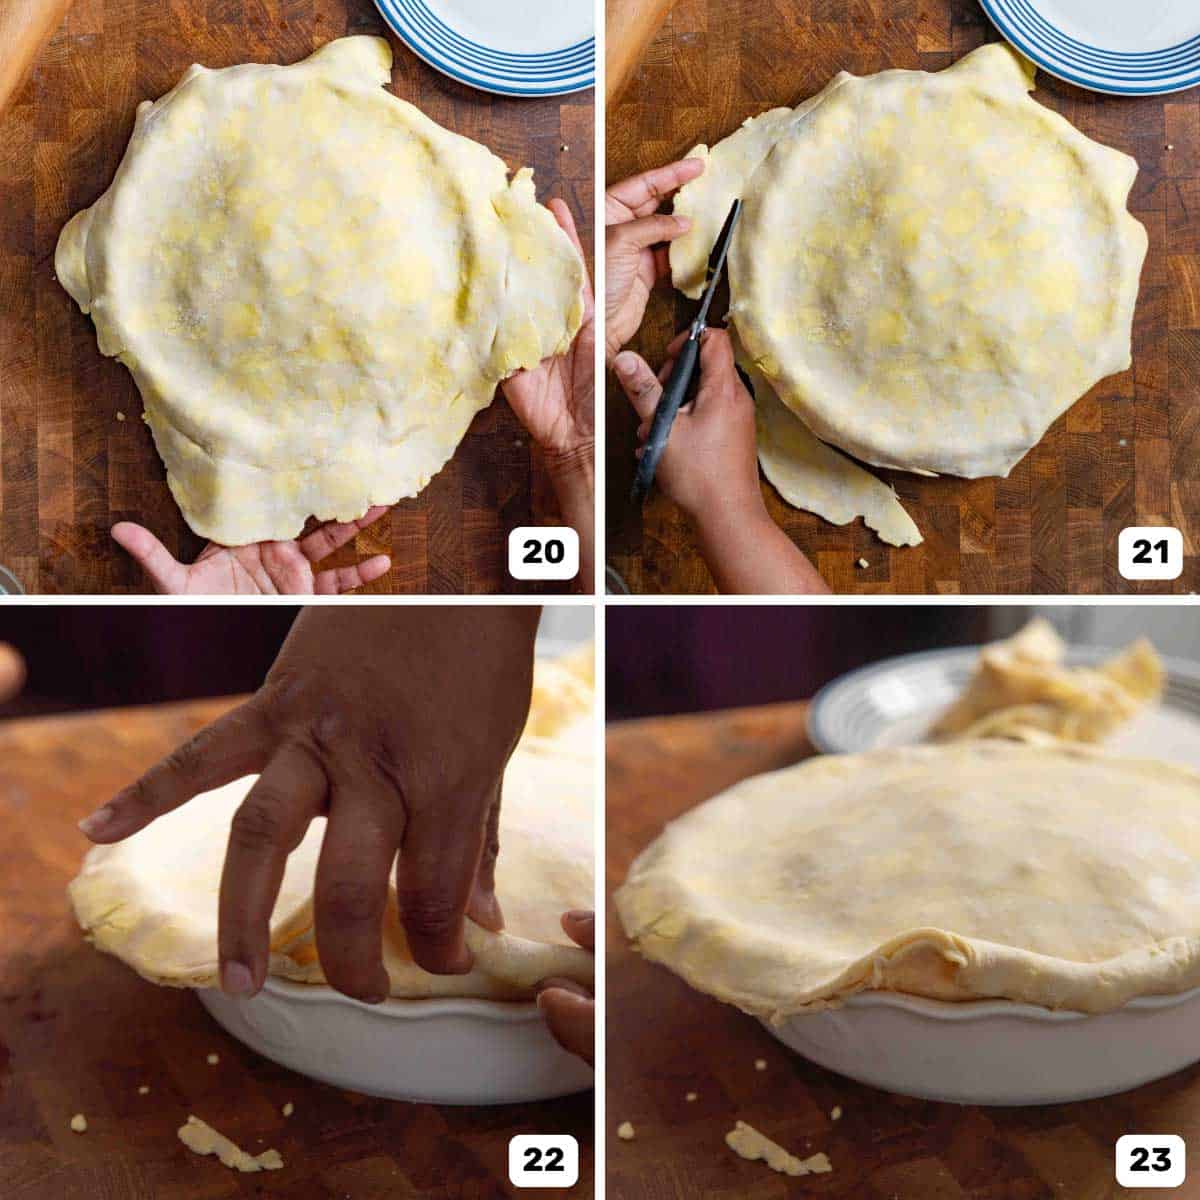
Trim the excess crust on the top crust to match the bottom crust (images 20 – 21). Then roll the overhang under the pie crust edge (images 22 – 23) to create an evenly thick pie crust border.
Crimp or flute the pie crust edge as well (images 24 – 25). Let the crust chill in the fridge for about 45 – 60 minutes.
Step 7 – Preheat oven
Place the oven rack in the lower third of the oven. This is either the bottom rack or one above the bottom rack.
Place a half sheet pan on the rack as well. Then preheat the oven to 425 F with the sheet pan in the oven. It’s important that the sheet pan is properly preheated, as it will help the pie bake from the bottom as well.
Step 8 – Bake the pie
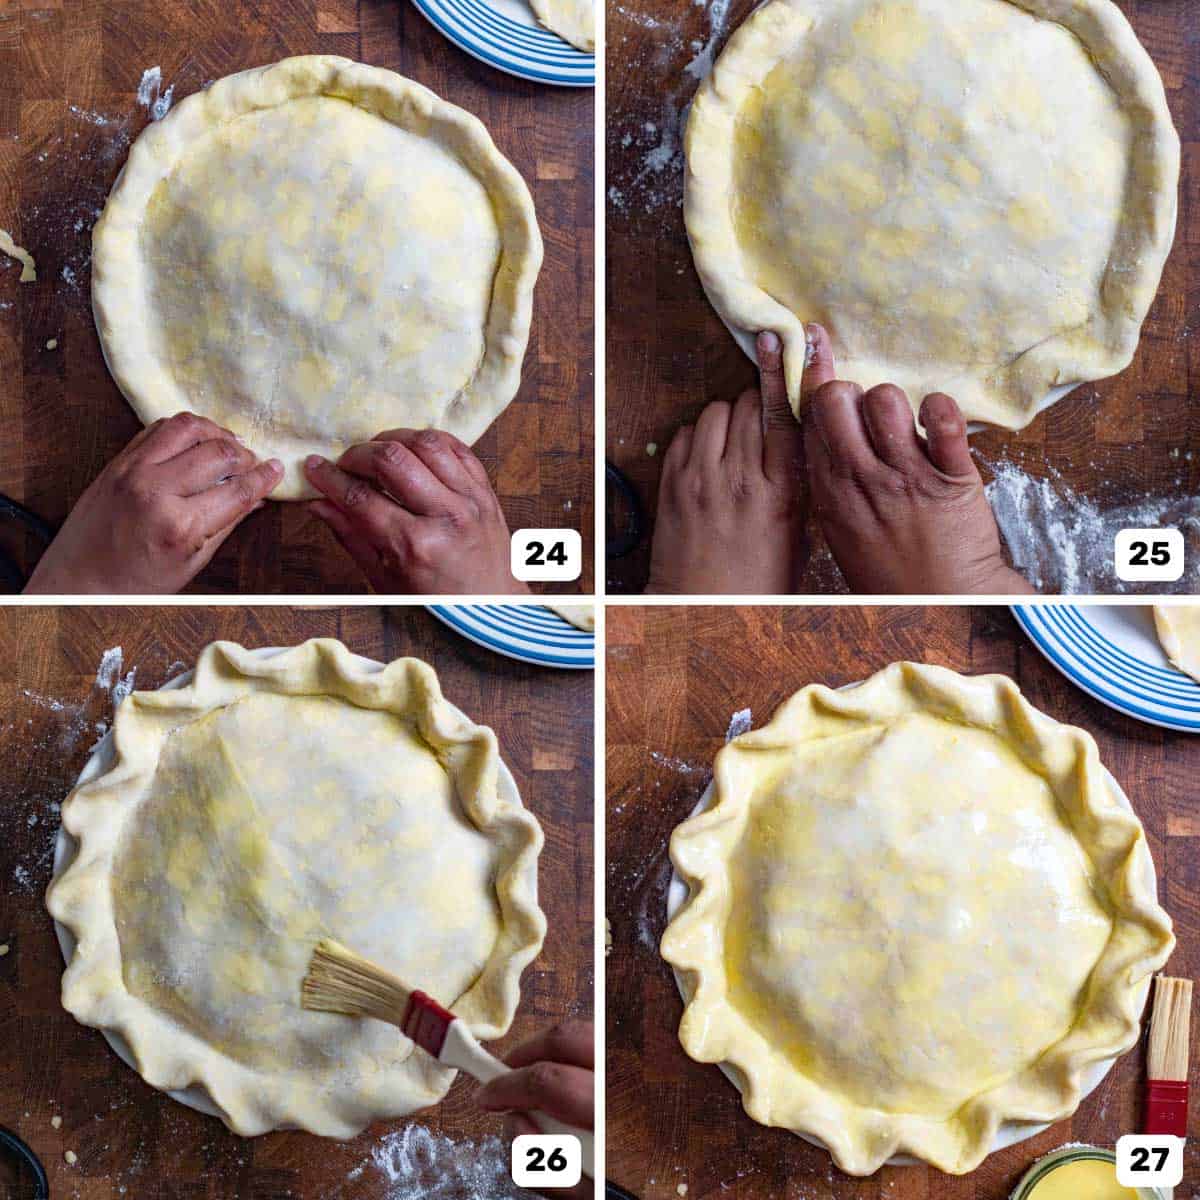
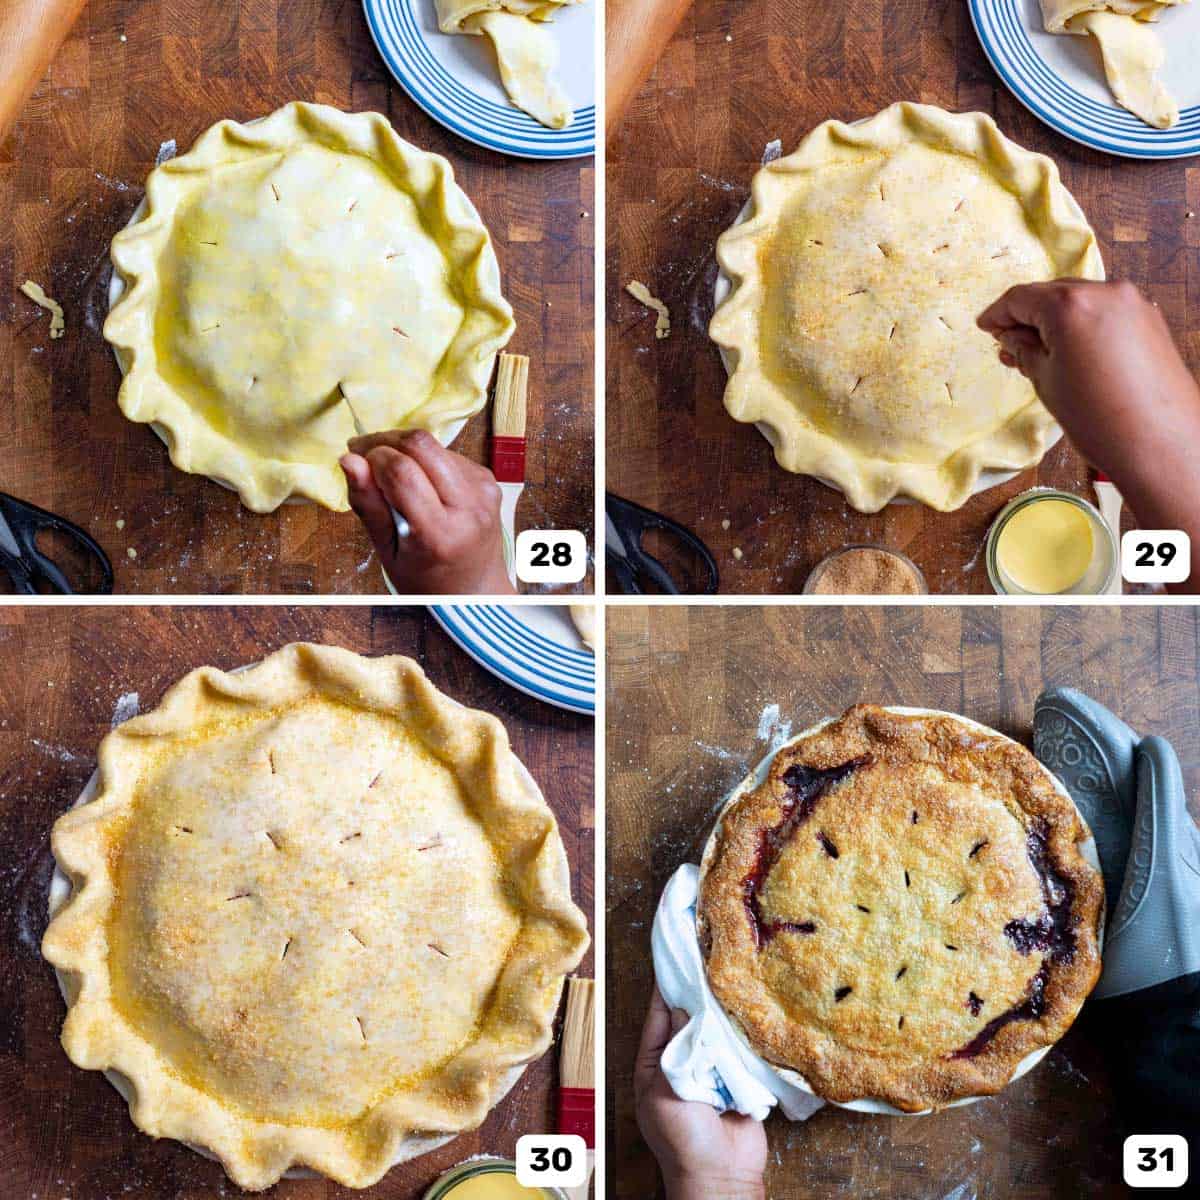
Remove the pie from the fridge and brush the top with an egg wash to get that shiny crust on top (images 26 – 27).
Use a small knife or scissors to cut some venting holes on the top crust (image 28). To create a crunchy top, sprinkle the top with some raw sugar (images 29 – 30). This is optional, but I love doing this!
Once the oven and half sheet pan are preheated, place the pie on the sheet pan to bake.
Let the pie bake at 425 F for about 10 minutes, then lower the heat to 350 F to bake for a further 45 – 50 minutes.
If the crust is browning too fast, use a silicone pie crust shield OR a piece of foil to shield the crust.
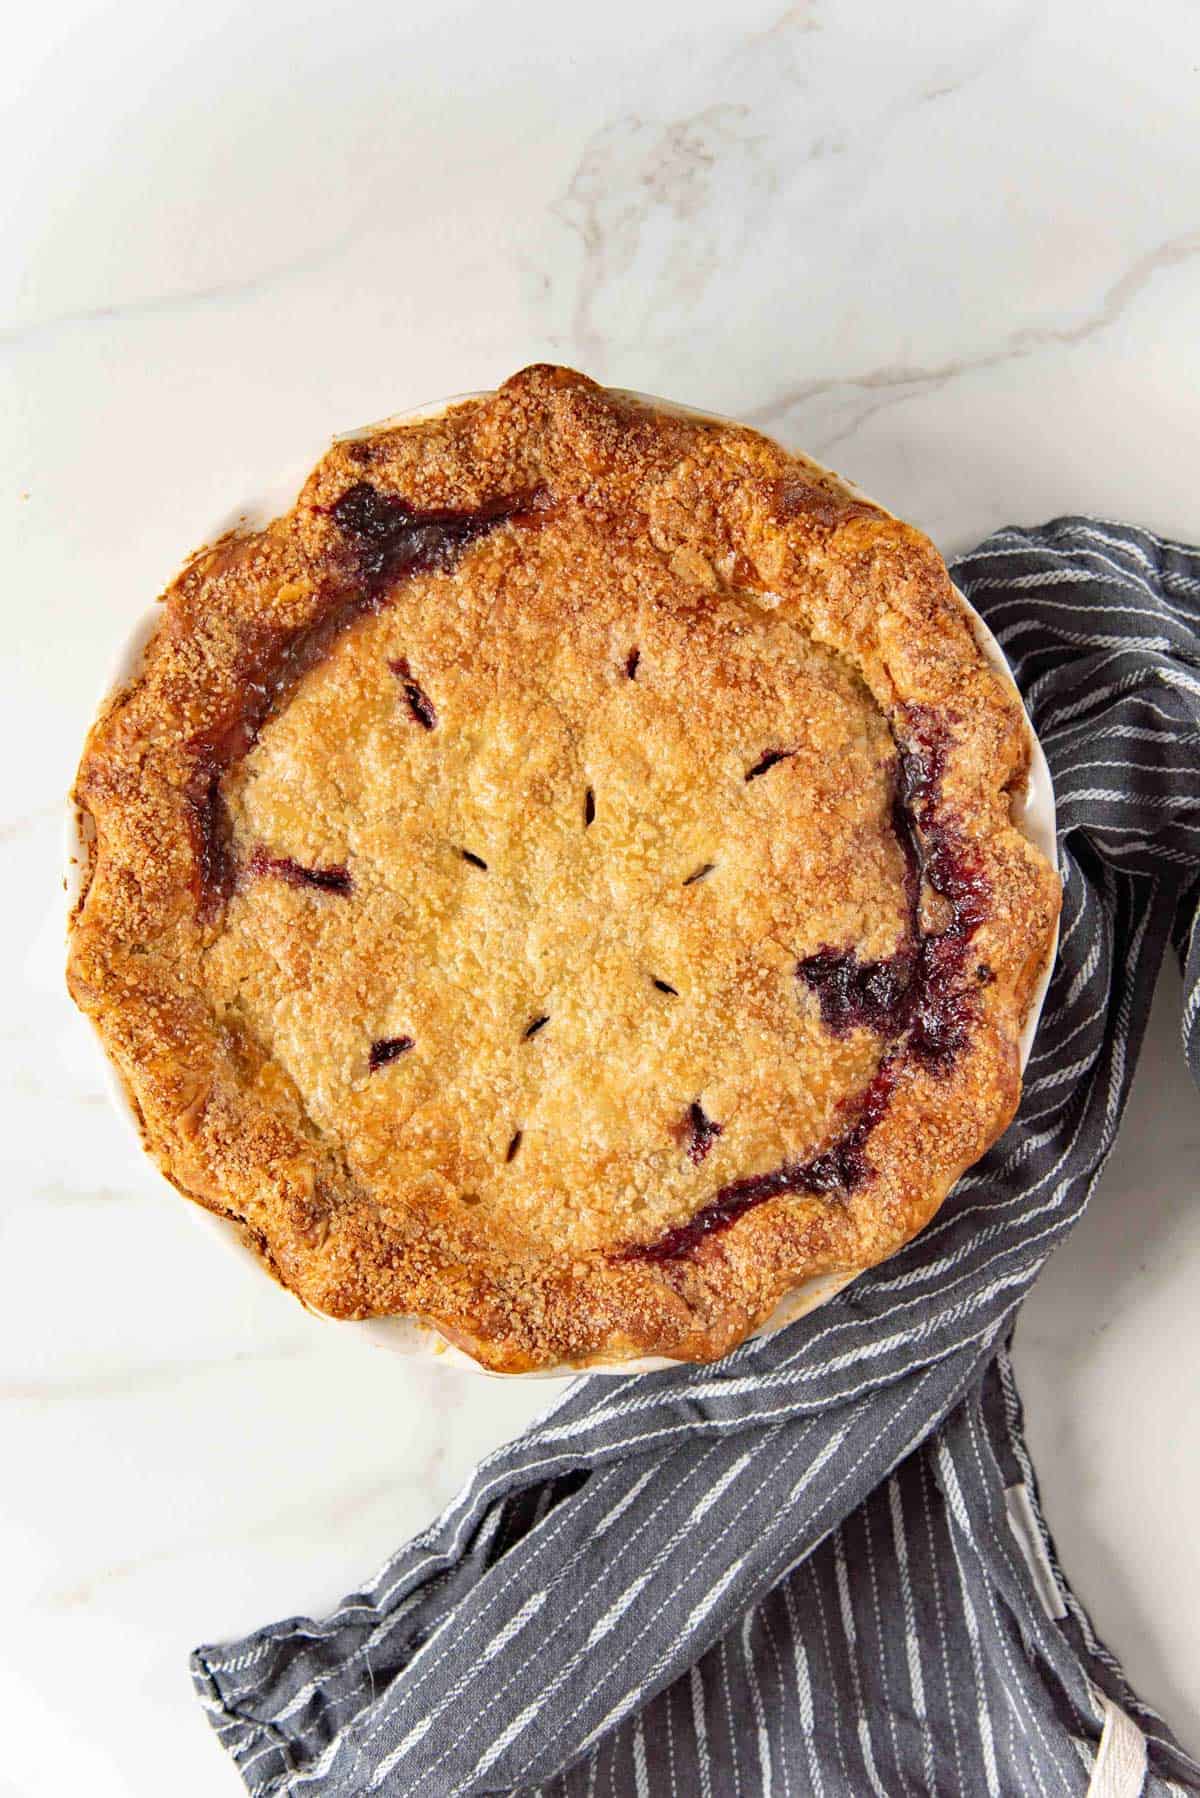
The top crust should be evenly golden brown, and the filling should be bubbling when the pie is done baking.
Step 9 – Let the pie cool, and serve
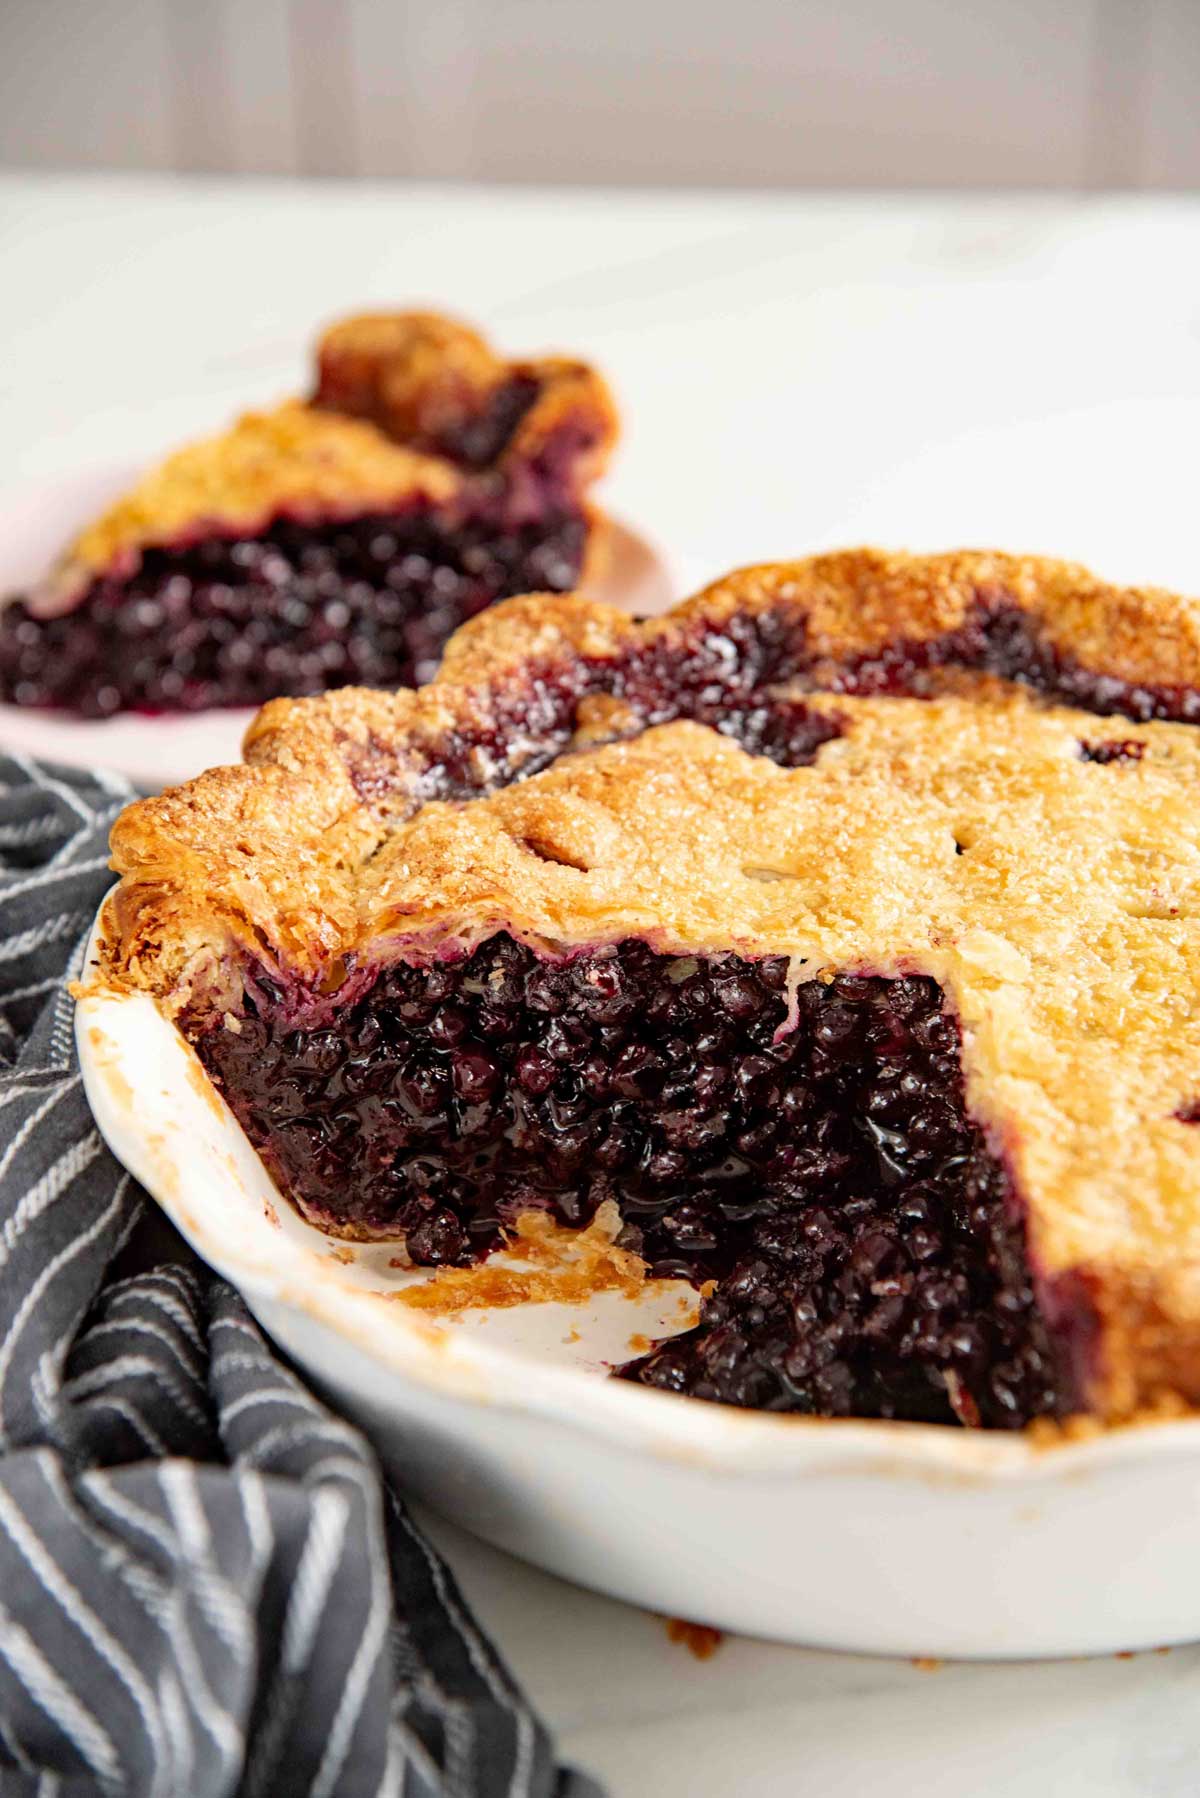
Remove the pie from the oven and let it cool (image 31). It’s really important to let the pie cool before cutting into it, as this allows all the juices and filling to properly set.
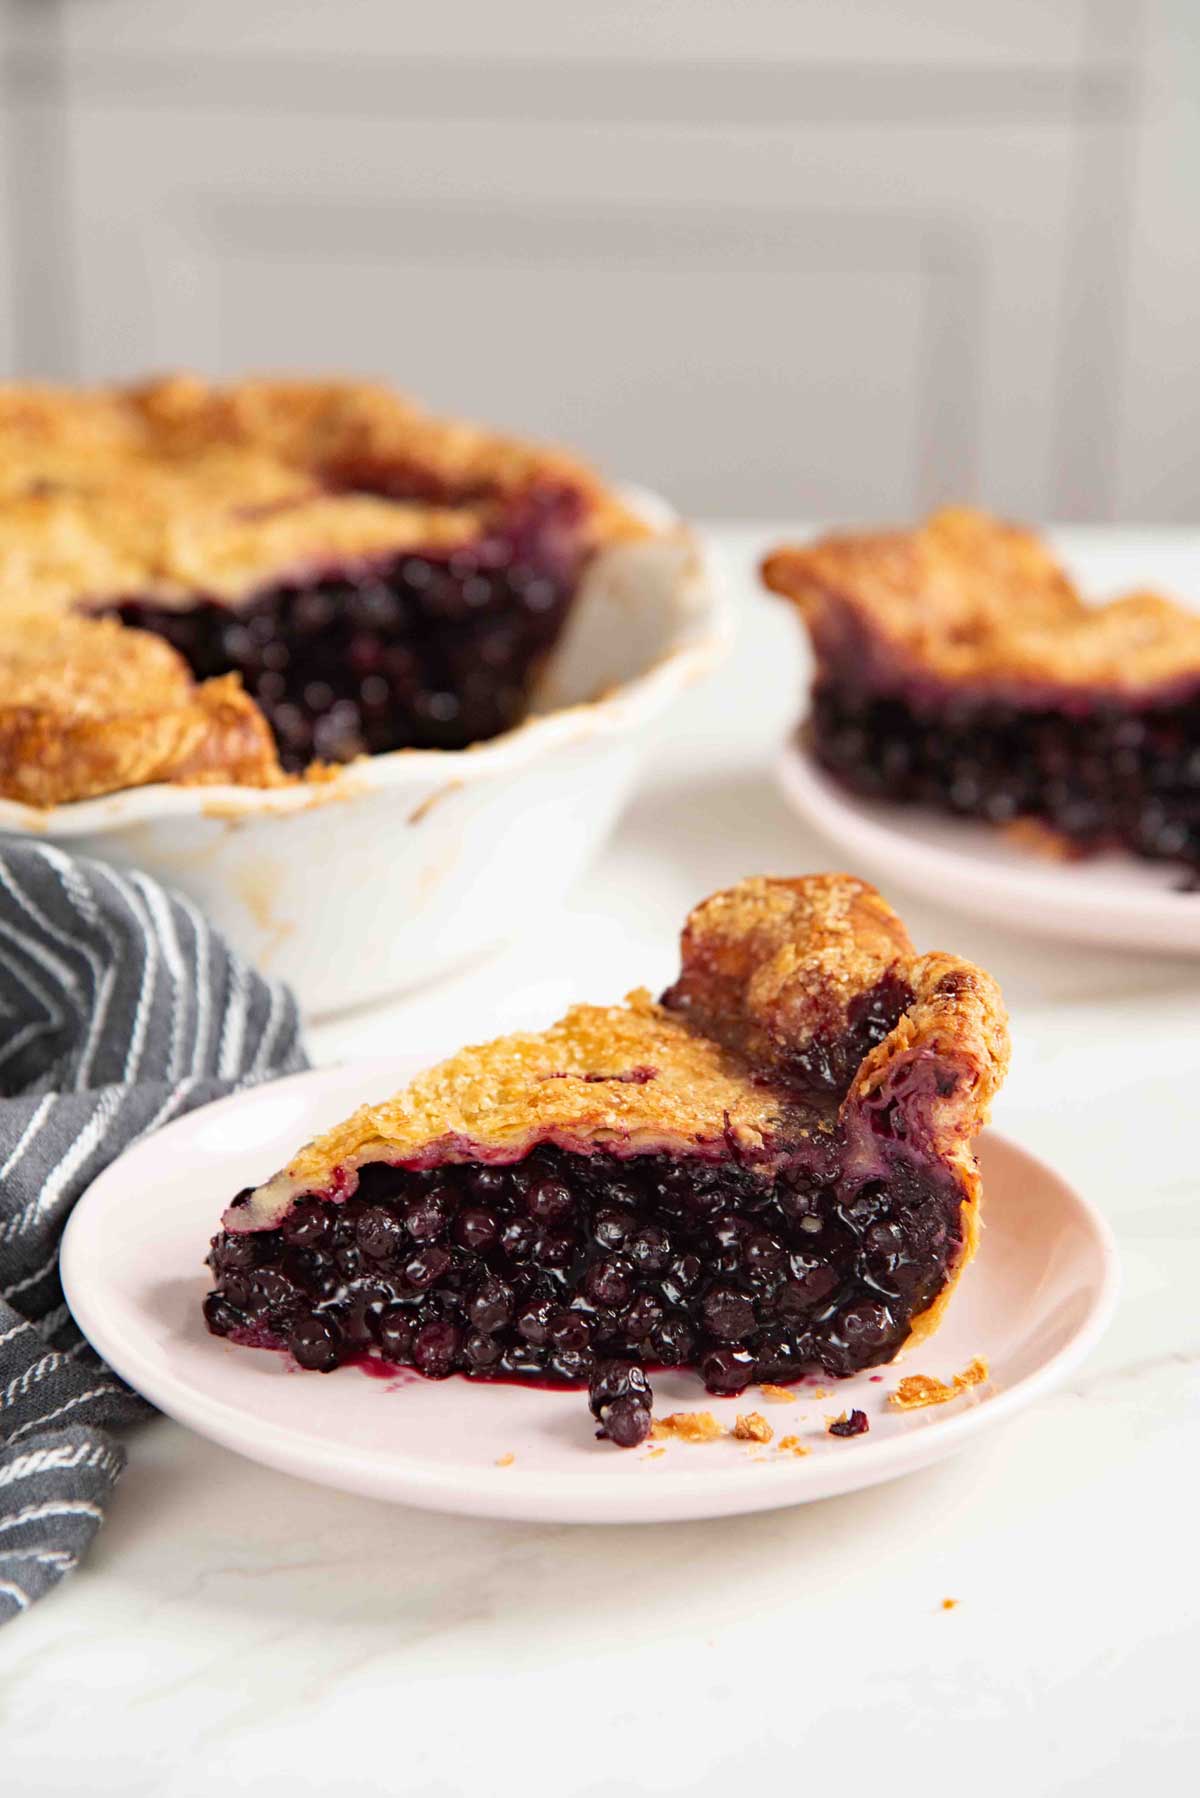
While the pie will hold its shape better if it’s cut at room temperature, I personally have no issues cutting into the pie while it’s still a little warm, and enjoying it with some ice cream or whipped cream!!
Just know that a warm pie filling will be less thick, and will flow out more readily.
Pie crust variations
- I made this wild blueberry pie with a flaky pie crust, but you can also make a mealy (crumbly) pie crust with smaller butter pieces as I explain in my homemade pie crust post.
- You can even use my pate sucree crust recipe for a sweet, buttery, flaky shortcrust pastry variation.
- You can also cover the pie with a lattice crust on top, instead of a solid top crust.
- Or how about topping this wild blueberry pie with a crumble topping instead, like I do with these rhubarb crumble bars or peach crumble bars?
- And if you love graham crackers, then this graham cracker butter pie crust that combines the best of flaky butter pie crust with graham cracker flavor would be such a great substitute!

More baking science and tips for pie success
- When you crush some of the blueberries, the juices will thicken into a jammy filling that binds all the blueberries together. I recommend crushing at least 1/3, and up to 1/2 of the filling for a jammier filling!
- Wild blueberries have a stronger flavor than regular, large blueberries, but adding lemon juice will really enhance that blueberry flavor even more!
- If you’re using frozen blueberries, you will get best results if they were individually frozen. If the blueberries are frozen in one big chunk, then I recommended thawing it overnight. This allows the tapioca starch, lemon, and sugar distribute evenly throughout the filling.
- You can use cornstarch or tapioca starch to thicken the filling. To substitute tapioca starch for cornstarch, use double the amount by weight or volume (i.e. 2 tbsp tapioca starch per 1 tbsp cornstarch, OR 20 g tapioca starch per 10 g cornstarch).
- If you’re planning on freezing the pie after baking it, then I recommend using tapioca starch. The matrix formed with cornstarch starts to break down once frozen. So, the mixture may weep excess moisture and also change the consistency of the filling. This doesn’t happen with tapioca starch.
- Keep the dough fairly cold. The butter should stay firm in the dough. If the butter softens or starts to melt, the dough will get too sticky and wet. This will lead to the crust being more rubbery and harder to roll out. Plus, the crust will be less flaky.
- To make sure you don’t have any raw dough in the bottom crust, roll out the bottom crust thinner than the top crust.
- The pie crust will hold its shape better if the pie is chilled for at least 30 minutes before baking. The pie dough should be firm, and not soft.
- Bake the pie on top of a preheated baking tray. The heat from the baking tray can directly heat the bottom crust helping with even baking.
How to store and freeze this pie
You can freeze this blueberry pie, baked or unbaked!
- Storing unbaked wild blueberry pie – Wrap the pie with plastic wrap and freeze. While you can bake the pie from frozen, be careful placing it on the preheated half sheet pan. Let the pie thaw overnight in the fridge, so that the thermal shock will be less.
- Storing baked wild blueberry pie – A fully baked blueberry pie can be frozen too. Wrap the baked and cooled pie with plastic wrap or foil and store it in the freezer. Let the pie thaw in the fridge overnight (or over 24 hours). I like to warm up the pie a little to make the crust more flaky in a 300 F preheated oven.
The baked wild blueberry pie can be stored in the fridge for up to 5 days. Make sure to store the pie in an airtight container.
Serving ideas
You don’t ever need to pair this pie with anything, but isn’t it fun when you have options?
Here are a few of my favorite options!
- Sweetened whipped cream (or stabilized whipped cream) is always a favorite.
- Whipped feta or goat cheese
Recipe FAQs and troubleshooting
Why is my blueberry pie runny?
Usually blueberry pies are runny when there’s not enough thickener for the amount of liquid in the fruit filling, OR the pie was cut into while it was still warm (i.e. not giving enough time for the thickeners to set).
I don’t have this issue with this recipe since I’ve thoroughly tested this recipe with cornstarch and tapioca starch.
But blueberries break down less than other fruits, and they like to stay whole and don’t always create a cohesive filling. That’s why I like to crush some of the blueberries to create a jammy texture, along with the thickener that can also help to hold the blueberries together.
How to make blueberry pie filling thicker?
Any fruit pie filling, including this blueberry pie filling, can be made thicker in a few different ways.
The first way is to add extra thickener such as cornstarch or tapioca starch. However, adding too much will make the filling too thick and dry.
The second method is to let the fruits macerate for a few hours or overnight with sugar to release some of the juices. Then the juices can be cooked down to remove excess moisture.
The third method is to cook down a portion of the fruits to a jammy filling with the sugar, and then mix it back in with the rest of the fruits. This also removes some of the liquid. This is what I often prefer to do, like with my cherry pie, fresh strawberry pie, and strawberry rhubarb pie.
The final method is to add freeze dried fruit powder. This can also intensify the fruit flavor AND the fruit powder will absorb some of the moisture in the fresh fruits too.
Why is my bottom crust soggy, and how do I prevent it?
Another issue you’ll never encounter with my dessert pie recipes! This happens when the bottom crust is too thick, or because the bottom crust did not bake evenly.
Many recipes suggest parbaking the bottom crust separately before adding the filling. But it’s harder to place the top crust then.
My method is to place a baking sheet or pizza stone in the bottom third of the oven and preheating it first. The direct heat from the baking tray, and being closer to the bottom element allows the bottom crust to bake evenly and fully.
How can I add more flavor to my blueberry pie?
I love my blueberry pie to be a little more tangy, so I like to add more lemon juice than the recipe calls for to add some fresh tartness.
Another great way to intensify the blueberry flavor is to add freeze dried blueberry powder to the filling!
Adding flavors that complement blueberry flavor is another great way. My favorite spices to add to blueberry pie are fresh ginger and green cardamom powder. You can also add cinnamon, or herbs such as basil or thyme.
Can I make this pie ahead of time?
Yes! I personally prefer to make the pie the day before, or the morning of, so that the pie has time to cool down.
However, you can also store the pie in the fridge for a couple days, or freeze it for a couple of months too!
Recipe
Wild Blueberry Pie
US based cup, teaspoon, tablespoon measurements. Weight measurements are recommended for accurate results whenever available.
Common Measurement ConversionsIngredients:
Pie dough (all butter pie dough)
- 300 g unsalted butter preferably chilled
- 120 mL iced water
- 30 mL chilled vodka or use the same amount of iced water
- 400 g all purpose flour spooned and leveled when using cup measurements
- 30 g sugar
- ¾ tsp fine sea salt
Wild blueberry filling
- 1600 g wild blueberries frozen or fresh
- 150 g white sugar
- 45 g cornstarch or 90 g tapioca starch
- 1 tbsp lemon zest from 1 – 2 lemons
- 3 tbsp lemon juice
- 2 tsp grated ginger optional
To finish
- 1 large egg for the egg wash
- raw sugar to sprinkle on top
Instructions:
Making the dough
- Make the pie crust dough according to the instructions in my all butter pie crust recipe here. Make sure the dough is well-rested for a few hours before rolling it out. We'll be using both dough portions for this double pie crust recipe.300 g unsalted butter, 120 mL iced water, 30 mL chilled vodka, 400 g all purpose flour, 30 g sugar, ¾ tsp fine sea salt
Wild blueberry filling
- I like to crush some of the blueberries in the filling to create a jammy texture. If you're using frozen wild blueberries, you will need to thaw about ⅓ of the berries (about 500 g) in a bowl overnight.500 g Wild blueberries
- You have the option of thawing out all the frozen blueberries or just ⅓ of it. If your blueberries are frozen into 1 big clump, then it's best to thaw out all of it in a bowl.
- Once the pie dough is in the pan, and the second portion is also rolled out, make the blueberry filling.
- After the blueberries are thawed, crush the ⅓ portion / 500 g of blueberries with a fork. Set aside.
- In a small bowl, whisk together the cornstarch (or tapioca starch) and sugar.150 g white sugar, 45 g cornstarch
- Place the crushed blueberries in a large bowl, followed by the remaining blueberries (fresh, thawed, or frozen). Add the starch and sugar mixture, along with the lemon zest and lemon juice. The grated ginger can also be added if you're using it.1,100 g Wild blueberries, 1 tbsp lemon zest, 3 tbsp lemon juice, 2 tsp grated ginger
- Mix everything together really well. Set aside until needed.
Rolling out the dough
- Take one portion of pie dough and unwrap the plastic wrap and place it on a floured surface.
- Since the butter will be very firm, it'll be hard to roll out the dough right away. Strike the dough disc a few times with a rolling pin, on both sides, to make it more pliable and easy to roll out.
- Roll out the dough while maintaining the shape of a circle as best you can. Squeeze any cracked dough together to seal. Turn the dough a quarter turn after each roll, to ensure that the dough maintains the shape of a circle and also does not stick to your work surface. Use a light dusting of flour as needed, and also remember to flip the dough so that you roll it on both sides.
- Roll the dough until it’s about 3 mm in thickness. The diameter may vary, but it should definitely fit a 9.5 inch diameter, deep pie dish.
- If the dough starts to shrink as you roll it, lightly flour the dough surface and either fold it into quarters OR roll it onto a rolling pin, and then cover it with plastic wrap. Let the dough rest in the fridge for at least 20 minutes, and then proceed with rolling it out again.
- Now transfer the dough onto the pie dish. You can do this by rolling up the dough on a rolling pin and then carefully unrolling it over a pie dish, or folding the dough into quarters and unfolding it in the pie dish.
- Once you've lined the bottom crust in the pie plate, repeat the process to roll out the second portion of pie dough for the top crust. Fold the top crust into quarters and wrap it in plastic wrap. Keep it in the fridge until you need it.
Lining the pie plate with the bottom crust
- Do NOT stretch the dough to fit it inside the pie dish. This is crucial and a common beginner's mistake. Instead, carefully lift the pie crust and let it gently fall onto the pie dish. Use the back of your fingers to gently press the dough into the bottom of the pie dish, so that it neatly fits in the dish.
- Make sure the dough lines the sides of the pie dish in one smooth layer as well, with no folds or wrinkles.
- There should be an overhang over the pie dish rim. Using scissors or a sharp knife, cut the excess pie crust, leaving at least a 0.5 – 1 inch overhang. Measure the overhang from the inner rim of the pie dish.
- Loosely cover the pie crust with plastic wrap and let it rest in the fridge while you get the filling ready. If the butter softens at any stage, refrigerate the crust.
Assembling the pie
- Fill the pie plate with the blueberry pie filling. If you used a deep pie pan, the filling will completely fill the pan. Make sure the filling is evenly spread in the pie pan.
- However, if you're using a shallow pie pan, the filling will overfill the pan. Mound the extra blueberries in the middle of the pie.
- Take the second rolled out dough portion. You can keep the crust whole, or create a pattern on the top crust. It'll be easier to cut out the design before placing it on the pie. Instead of cutting slits to create vents, you can cut small decorative holes or shapes as well.
- Next, brush the bottom border of the pie crust with a little water. Place the top crust over it, fairly taut. Then press down the top crust so that it sticks well to the water brushed edge of the bottom crust.
- Cut the excess dough from the top crust while leaving the same 0.5 – 1 inch overhang. Roll this overhang under the pie crust edge to form a pie crust border and crimp it with a fork OR create a fluted edge.
- Refrigerate the pie for at least 30 minutes before baking, while you preheat the oven.
- Before baking the pie, brush the top crust with an egg wash and cut some holes / slits for venting.1 large egg
- Sprinkle raw sugar on top (optional).raw sugar
Baking the blueberry pie
- Preheat the oven to 425℉ / 218℃ (conventional oven). Place the oven rack in the lower third of the oven, and then place a baking sheet on the rack. Allow this to preheat with the oven. Make sure it's properly preheated before placing the pie on top of it (this is crucial for a perfectly baked bottom crust).
- Place the egg washed pie on the preheated baking pan / pizza stone. Bake at this temperature for about 5 minutes.
- Then lower the heat to 350°F / 180°C (conventional oven). Bake the pie for a further 55 – 60 minutes. If the pie crust edge is browning too fast, cover the edge with a silicone pie crust shield, or with a piece of aluminum foil shaped into something similar.
- Once the pie is baked, and the top crust is golden brown on the surface, and the filling is bubbling, remove the pie from the oven.
- Allow the pie to cool down before cutting into it. The hotter the pie, the more runny the filling will be. For neat pie slices, wait until the pie is completely cooled down to room temperature.
- Serve with whipped cream or vanilla ice cream (optional).
Recipe Notes
All butter pie crust dough
Step by step instructions and tips for my all butter pie crust recipe.Double pie crust
Step by step instructions and tips on making double pie crust.Nutrition Information:
“This website provides approximate nutrition information for convenience and as a courtesy only. Nutrition data is gathered primarily from the USDA Food Composition Database, whenever available, or otherwise other online calculators.”














Leave a Reply