

The only guide you’ll ever need to make delicious, moist, perfect pound cake! A comprehensive step by step pound cake recipe with all the troubleshooting tips to ensure success!
The perfect pound cake is dense but soft, rich, buttery, and moist, and is easy to make. This extensively tested, foolproof pound cake recipe will guide you to make the best pound cakes that you’ve ever made!
What is a pound cake?
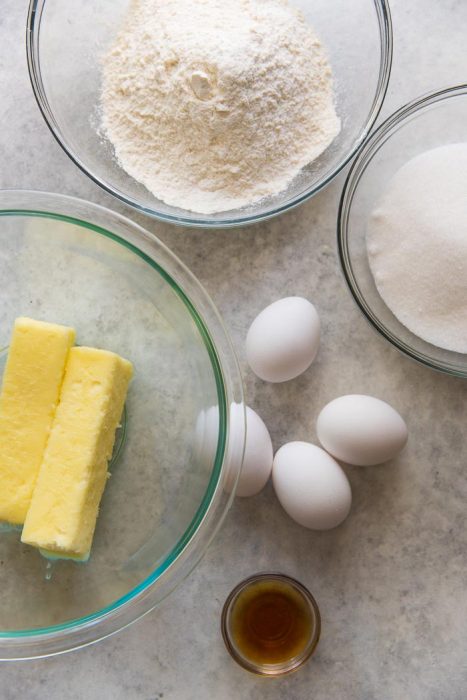
Pound cakes first originated in Europe. They’ve been around since as early as the 1700s, and the term traditionally referred to a cake that weighed four pounds. That’s because a classic pound cake consisted of 1 pound of each of the following FOUR ingredients,
- Butter
- Sugar
- Eggs
- Flour
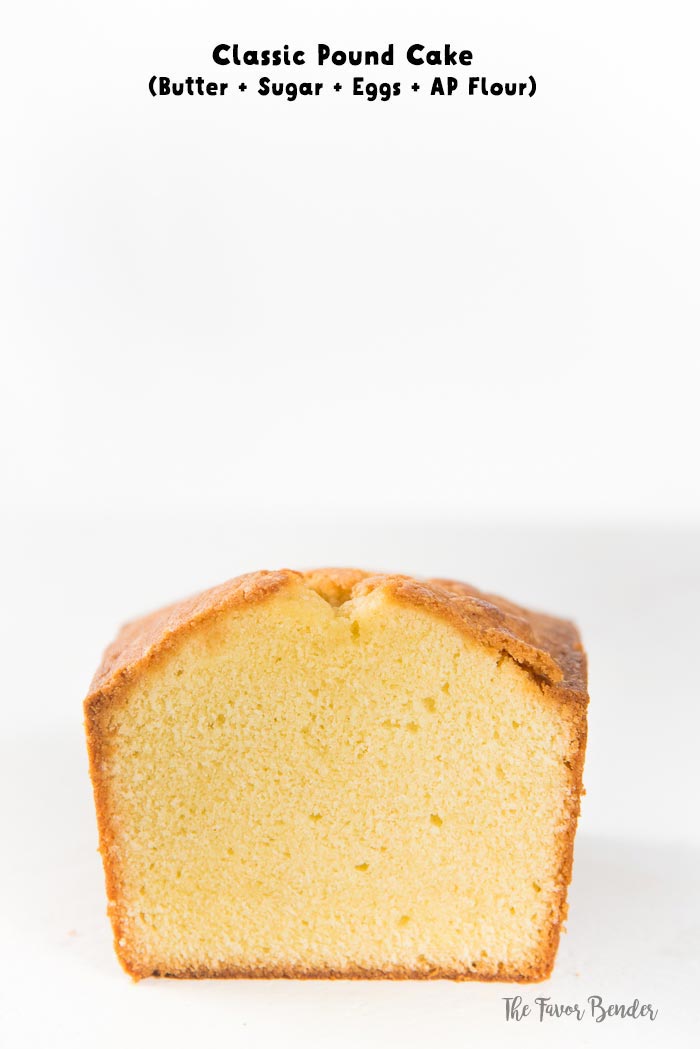
A classic pound cake doesn’t rely on any leavening agents (such as baking powder or baking soda) to give the cake any lift, or any extra liquid to make the cake moist. The result is a dense cake, that is also somewhat dry (especially when over-baked).
As pound cakes have become more popular throughout different parts of the world, different variations of the vanilla pound cake have emerged, that are lighter and more moist.
Each region (or country) has their own version of a pound cake, incorporating different ratios of the main ingredients, and sometimes including extra liquid and baking powder too.
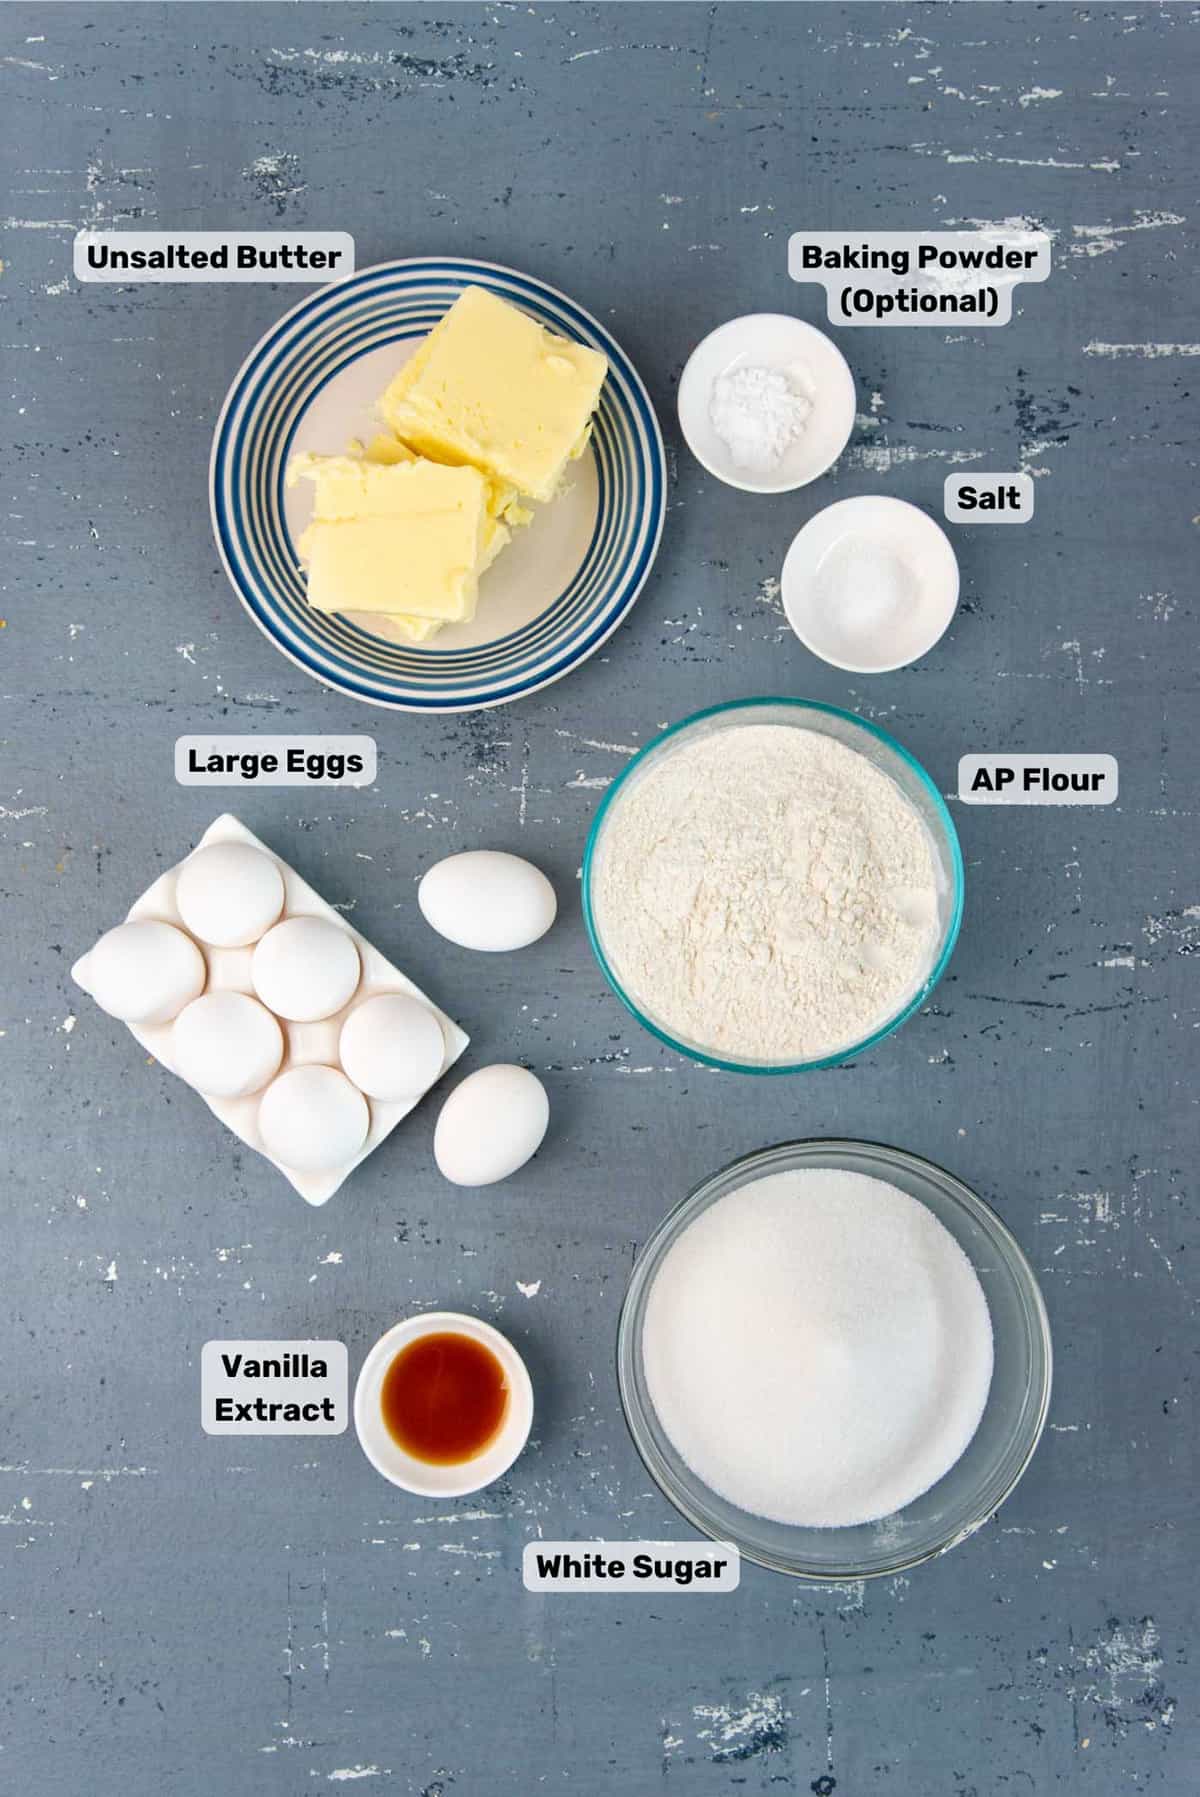
Ingredients for this recipe
Start with good ingredients. Well, that’s a given, but it’s especially true with pound cakes. Rather than using generic ingredients, try and use brand name ingredients when possible.
Sugar
Make sure to get cane sugar because it has a finer grain than other white sugars (if it doesn’t say cane sugar, then it’s probably beet sugar). If you can get your hands on pure cane caster sugar (superfine sugar) that’s even better!
Butter
Use GOOD quality butter to ensure a good butter pound cake. Not margarine, not spreadable butter, but classic butter. I prefer to use unsalted butter, but you can use salted butter as well. However, due to the higher water content in salted butter, there’s a higher chance for inconsistent results when using salted butter.
Eggs
Use organic, free-range eggs whenever possible. However, avoid using really fresh eggs. Shocker right?
I prefer to use eggs that are about 1 week old and here’s why. The egg whites in fresh eggs are tighter and thicker whereas in older eggs, the egg whites are thinner and looser. These older eggs mix into the cake batter more easily and readily, resulting in a pound cake that’s lighter in mouthfeel and crumb texture.
Another reason is that fresh eggs are heavier than older eggs – so 8 fresh large eggs would be way heavier than 1 lb, while 8 older large eggs would be closer to 1 lb.
Flour
I prefer to use unbleached all purpose flour (AP flour) for my pound cake recipe. Mainly because it’s more widely available.
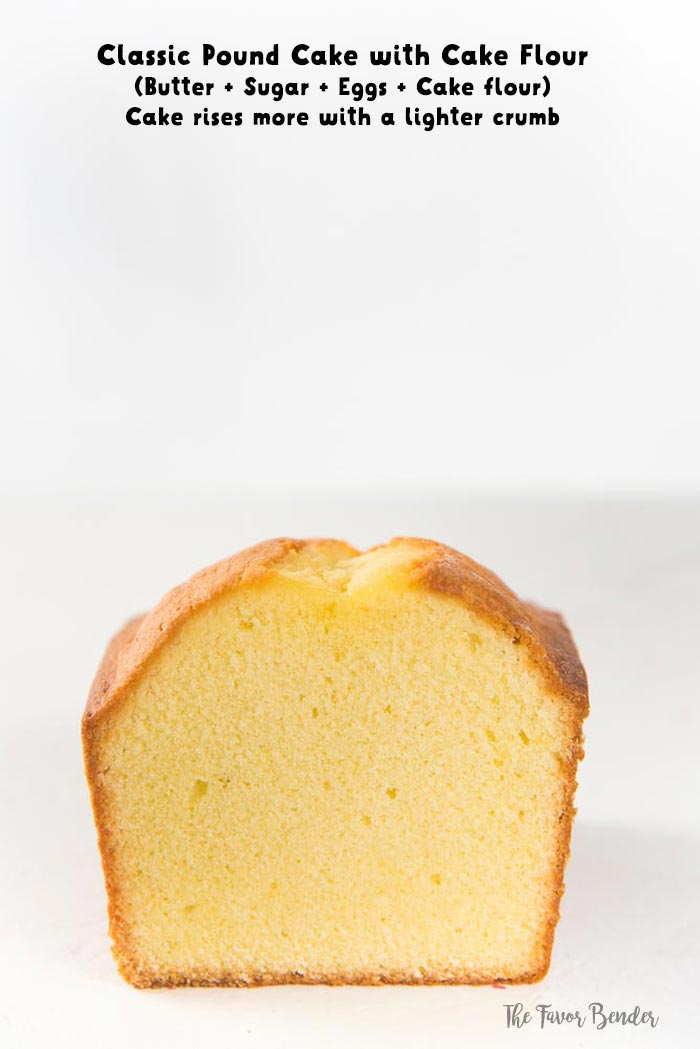
But you can also use cake flour instead. This is lighter, and has less gluten than AP flour. Resulting in pound cake that rises a little more, and has a tender crumb.
If you choose to go with pastry flour, you can substitute cake flour for AP flour at a 1:1 ratio – BY WEIGHT (not volume).
Salt
We add salt to balance the sweetness of the pound cake. Without salt, the cake can either taste too sweet or a little bland. A little salt goes a long way to improve the flavor of the cake.
Vanilla extract
Vanilla also adds flavor to your pound cake. A vanilla pound cake has more depth to its sweetness.
Baking powder (optional)
Baking powder is a chemical leavener (read more about it in my baking powder vs baking soda article). The acid and base react in the presence of liquid and create CO2, which helps to expand the batter and rise. However, unlike other cakes, pound cakes rely on air and eggs to rise. So it’s inherently a dense cake with a close crumb.
But baking powder can be added to make the cake rise a little more – especially if you’re not fully sure that you mixed the ingredients well. This is why baking powder is an optional ingredient.
Pro tip about ingredient measurements
Always WEIGH your ingredients, rather than relying on cup measurements.
I am a HUGE advocate for using an inexpensive kitchen scale for all your baking needs as I’ve discussed at length in my measurement conversions page. Baking needs some precision and a cheap weighing scale will ensure consistent baking results every time, which in turn will save you so much more time and money in the long run from failed recipes and wasted ingredients.
If you do use cups however, it’s important to fluff up the flour and sugar in the container, and then scoop the flour and sugar into the measuring cup to the point of overflowing. Then, using a flat knife, level off the excess flour/sugar. It would still be difficult to guarantee consistent results this way, however.
If you’re in the US, then 1 stick of butter = 4 oz / 115 g / or 0.5 cups. But for anywhere else in the world, the best thing would be to also measure the butter using a measuring scale.
Pro tip about ingredient temperature
It’s absolutely crucial that all the ingredients are at room temperature (70-75°F or 20 – 23°C).
Butter temperature
Butter should be softened, but not too softened. Here’s a crude way of checking if your butter is at the right consistency – make an indentation in the butter with your finger. If the butter is too hard to make an indentation, then well, the butter is too hard.
But if the butter does make an indentation, but it doesn’t keep its shape, and the butter around the indentation loses shape, then the butter is too soft (the butter can also be too oily when it’s this soft).
If it’s easy to make an indentation but it also keeps its shape without distorting any of the butter in the surrounding area, then it’s at the correct consistency!
In the winter, I remove the butter from the fridge and keep it outside overnight. But in the summer, this could make the butter too soft. So instead, in the summer, I prefer to cut the butter into tablespoon-sized pieces and then leave them out to soften for about 30 minutes or so. If the butter gets too soft, then you can simply stick it back in the fridge for about 10-15 minutes to let them chill just a little bit.
Room temperature butter creams and whips easily. This is important because the butter will incorporate air during creaming/whipping which is essential for a light pound cake. If it’s too cold/hard, or too soft/melted, then it cannot hold air while being whipped.
Egg temperature
Eggs should also be kept outside overnight, so that they are all at room temperature. This will help the eggs retain air as well, while being mixed.
Flour and sugar temperature
These should also be at room temperature. I usually store flour and sugar at room temperature anyway, but if you store flour in the fridge, remember to remove it from the fridge the night before.
How to make pound cake
There are only FOUR STEPS for this easy pound cake recipe.
- Creaming butter
- Adding sugar
- Adding eggs
- Incorporating flour
Each step is equally important. Make sure EACH INGREDIENT has been weighed and prepared (and sifted), BEFORE you start to make the pound cake.
Since a classic pound cake does not rely on baking powder or baking soda for the cake to rise, the process of mixing the ingredients is crucial. That’s because this classic pound cake relies heavily on the air that is being incorporated during the mixing of butter and sugar, which further gets trapped by the gluten and eggs during baking.
Stand mixer vs hand mixer
I prefer to use a stand mixer over a hand mixer for convenience. You need to cream the butter and sugar together for a few minutes to incorporate the air, and trust me, your hands will thank you if you use a stand mixer instead of a hand mixer.
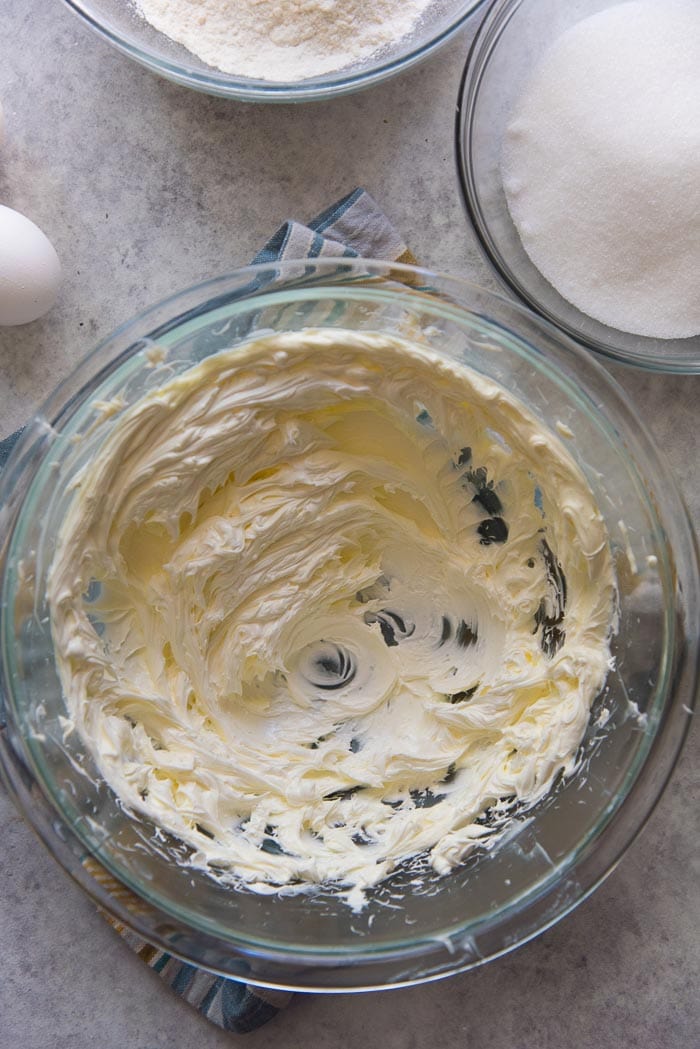
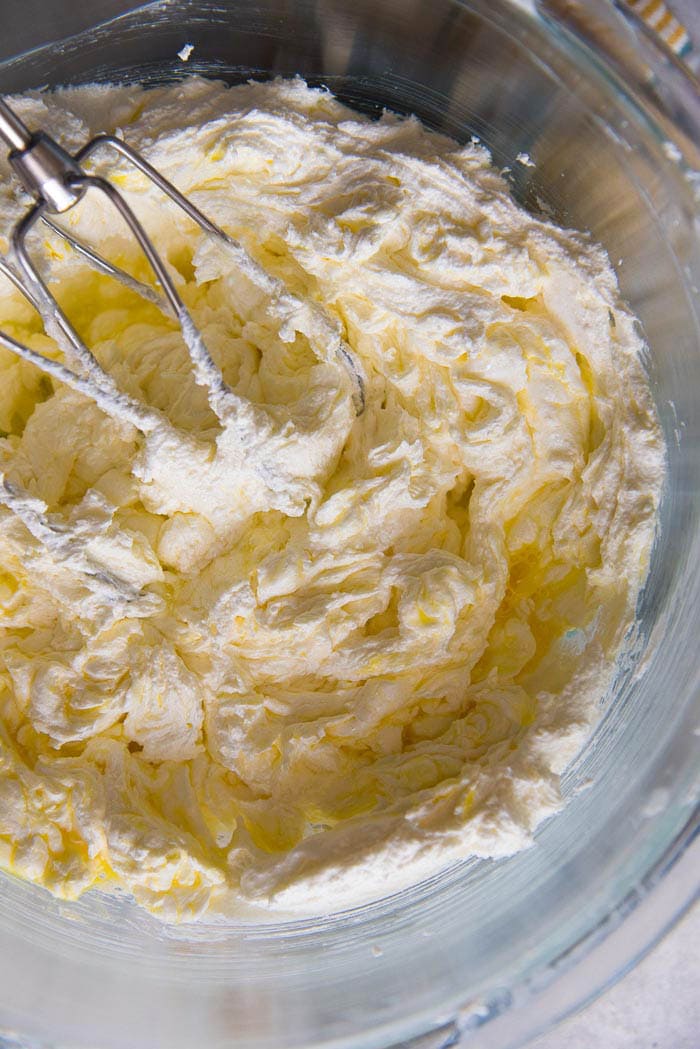
Creaming butter
The butter needs to be mixed for a few minutes (about 3 – 7 minutes, depending on the room temp. and the butter temp.) by itself first.
Use the standard mixer attachment in your mixer to do this (not the whip or the dough hook), and this will ensure the incorporation of air in the butter, making it light, fluffy and creamy.
Another mistake to avoid is running the stand mixer at high speed to speed up the process. DO NOT DO THIS! The high speed can knock the air out really fast. So run the mixer at medium speed to let the air in slowly but surely!
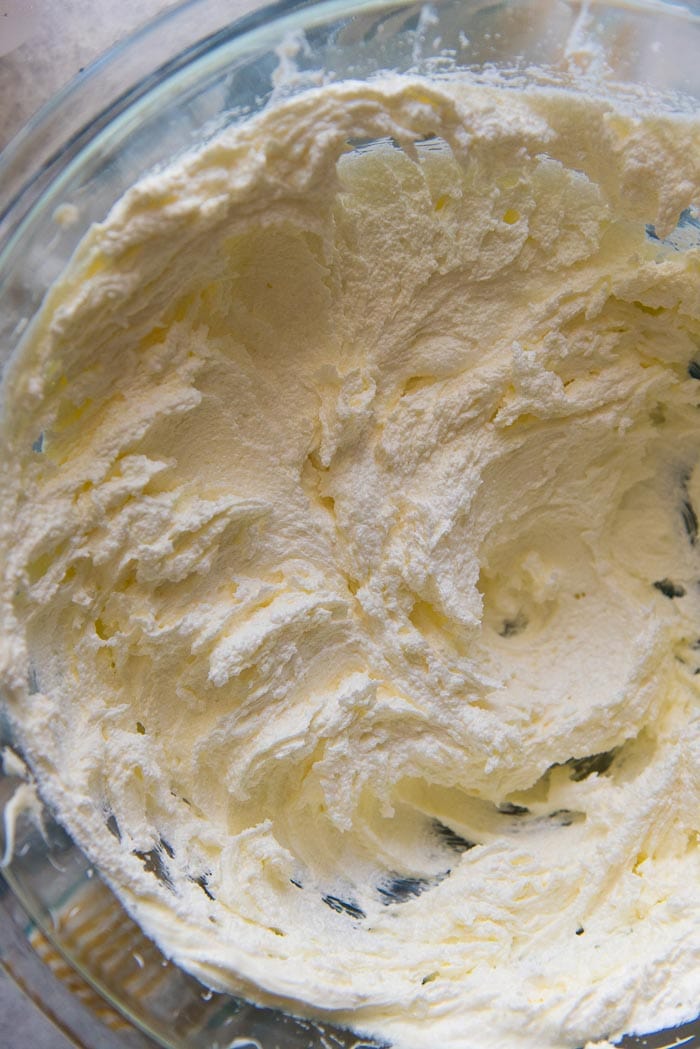
Adding sugar
When the butter is fluffy, then you add the sugar. Make sure not to dump all the sugar in at once. The weight of the sugar can cause the butter to deflate, which is NOT good.
So add the sugar in a thin, steady stream, while the stand mixer is running. This will help cream the butter and sugar together, evenly, adding more air, rather than knocking out the air.
The butter and sugar are creamed together for a few minutes as well. This is for two reasons – one, to incorporate more air and two, to dissolve the sugar. This is why I prefer to use caster sugar which dissolves much faster.
The sugar may not need to be completely dissolved before the addition of the eggs, but they definitely should be completely dissolved after you add the eggs. If you’re using regular cane sugar, you can whiz the sugar separately in a food processor for a few seconds to make it finer, if you like.
Adding eggs
The next important step is the addition of eggs. The same principle as earlier of not weighing down the batter by adding all the eggs in at once, applies here too. There are TWO ways to achieve this,
- Lightly whisk all the eggs in a jug, and then add the eggs slowly in a stream, with a few breaks in between.
- Add the eggs one at a time, mixing each one well before adding the next.
Both techniques work, but for convenience, I usually go with the second method. I always crack an egg into a small bowl first, and add it while the stand mixer is running. I mix in the eggs for about 20 – 30 seconds, until the yolk has disappeared, and then I add the next egg.
It’s important to not let the eggs overbeat in the batter as well. If you overbeat the eggs, the cake WILL COLLAPSE AFTER BAKING!
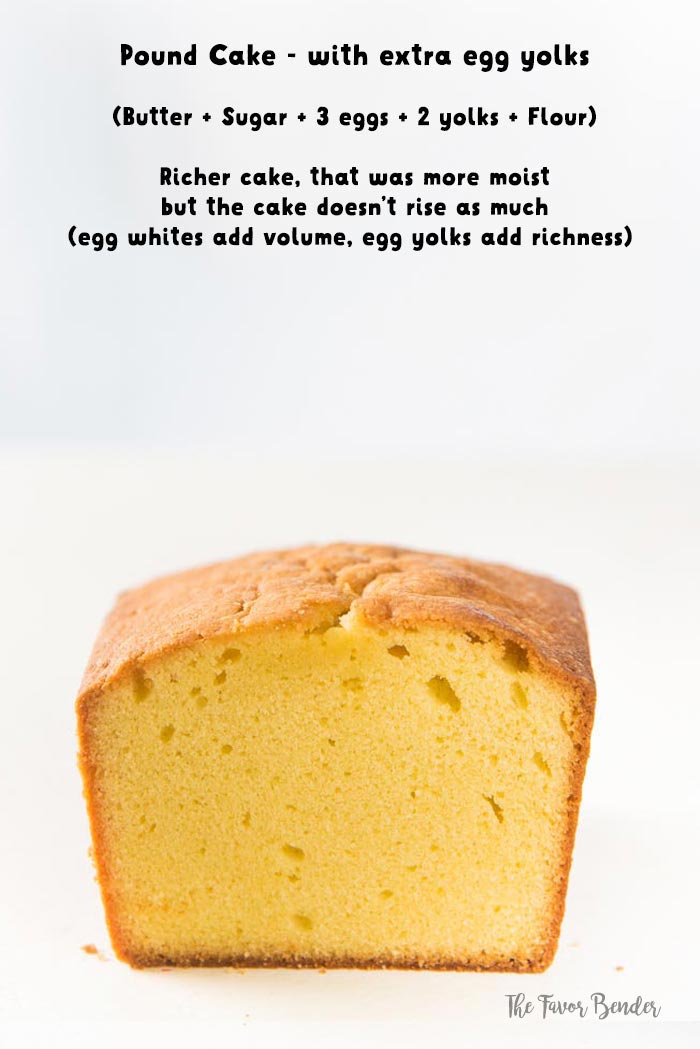
Some recipes call for more egg yolks, instead of using whole eggs only. YOU CAN SUBSTITUTE TWO WHOLE EGGS, with FOUR YOLKS IF YOU PREFER. This will result in a cake that is richer in taste and more moist. The cake will have a richer yellow color as well.
But remember that egg whites add lift to the cake, while egg yolks add richness. The reason why some prefer to add egg yolks is because egg whites, while adding volume and lift to the cake, can also dry out the cake.
CHEAT NOTE 1 – Instead of two of the whole eggs in the recipe, add four egg yolks for a more moist pound cake recipe that tastes richer.
CHEAT NOTE 2 – I would also add 1 tsp of baking powder IF I substitute 2 eggs with four egg yolks. This is to compensate for the lack of egg whites.

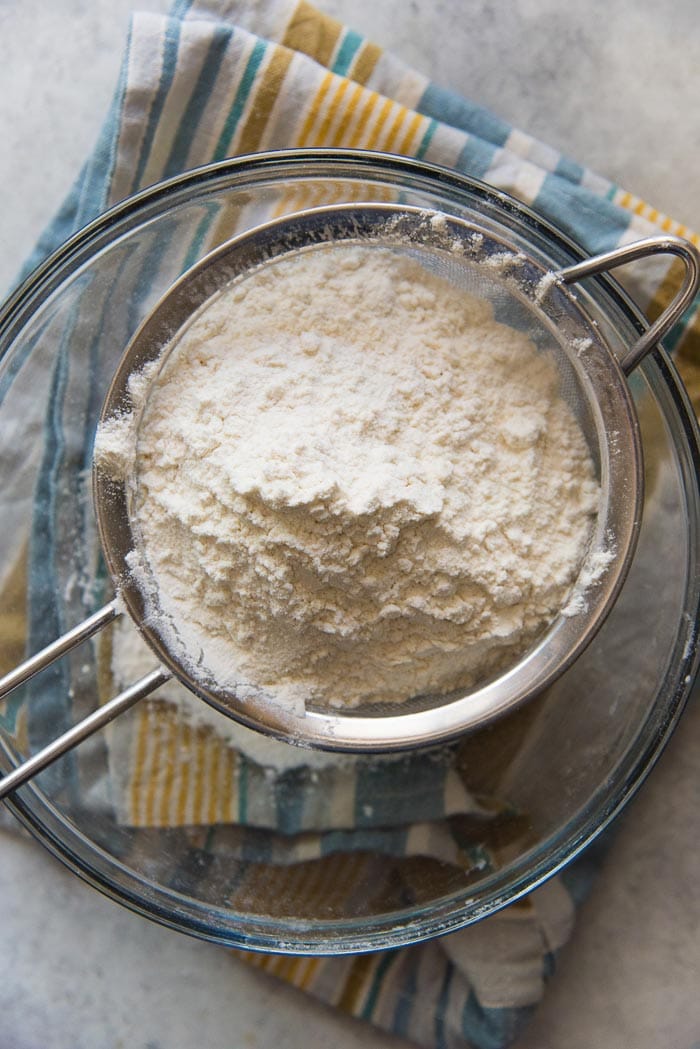
Incorporating flour
Make sure the flour is sifted before you add it to the cake. It’s even better if you can sift it AGAIN when you’re adding it to the cake, but that’s not necessary. This is to reduce the likelihood of flour lumps forming when mixing the flour.
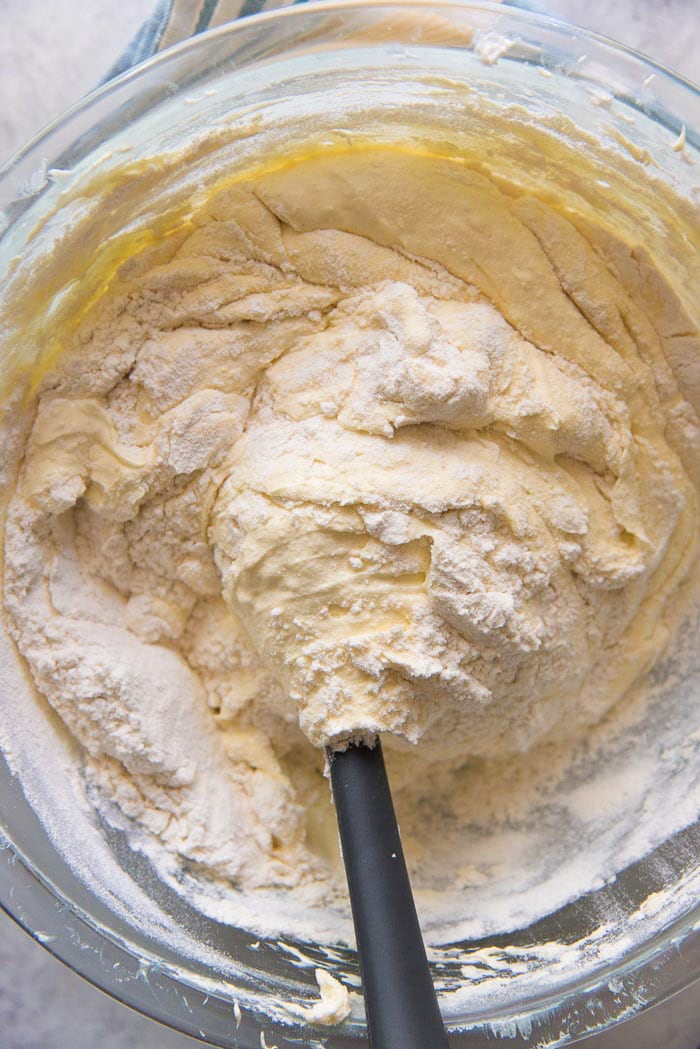
If you’re able to incorporate the flour with a baking spatula – DO IT! Folding in the flour by hand (spoon), will make sure that you don’t overwork the gluten in the flour.
If you do use your stand mixer, use the lowest speed on the stand mixer, and use it for the smallest amount of time.
If the gluten is overworked, you will end up with a tougher and dense pound cake – NOT good. Another way to avoid this is to use cake flour instead of AP flour.
CHEAT NOTE 1 – CAKE FLOUR can be substituted for AP flour because it’ll give a lighter texture to your pound cake. This will make your cake rise more in the oven too.
CHEAT NOTE 2 – If you’re worried that your cake wasn’t beaten enough, you CAN add just the smallest amount of baking powder to make sure your pound cake rises properly. I ONLY do this if I use a hand mixer to mix my pound cake batter, because I know that then there’s a chance that I may not have incorporated enough air.
Baking the cake
ACCURATE oven temperature is important. It’ll be great if you know that your oven is properly calibrated. You can do this by placing an oven temp. reader in your oven, and then comparing the temp. displayed on your oven with that of the reader. If by chance your oven is not calibrated, you can adjust the baking temp. based on how your pound cake turns out on the first attempt.
If the cake is too dry, then the oven is too hot, and you may need to lower the temp. OR remove the cake from the oven earlier. If the cake is not done by 70 minutes, then the oven temp. needs to be increased, or the cake needs to bake longer.
Also make sure to PREHEAT THE OVEN for a good 10 – 15 minutes before putting your cake in. This way a stable oven temp. is guaranteed.
Your baking pans can have an effect on the baking times as well. If you use glass cake pans or dark metal pans, the baking time will shorten. If you’re using a light baking pan, then this recipe will be accurate, because I use a light baking pan as well.
I use two 8.5 x 4.5 inch loaf pans for this classic pound cake recipe. You can adapt this to make the cake in two 9.5 x 5.5 inch loaf pans, but be mindful to check on the cake earlier, as it will bake faster.
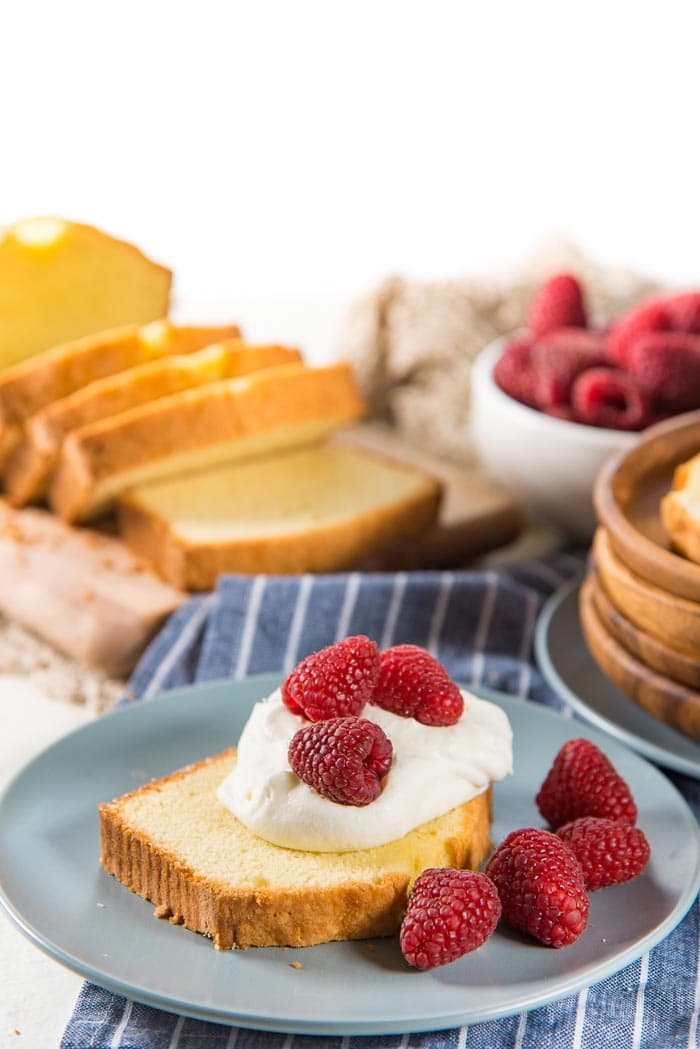
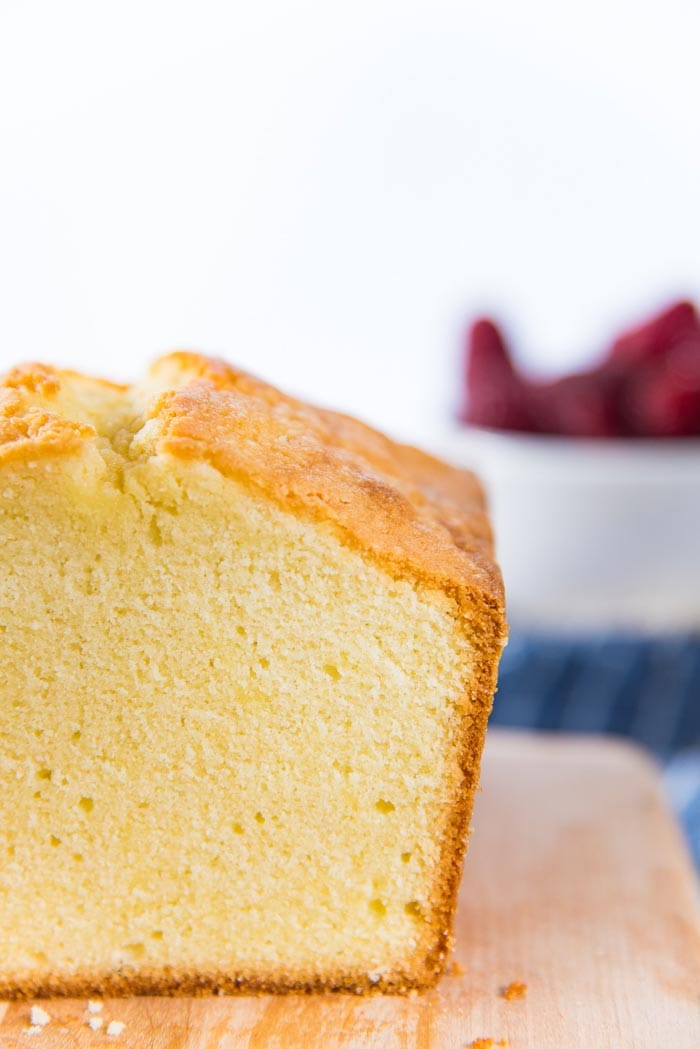
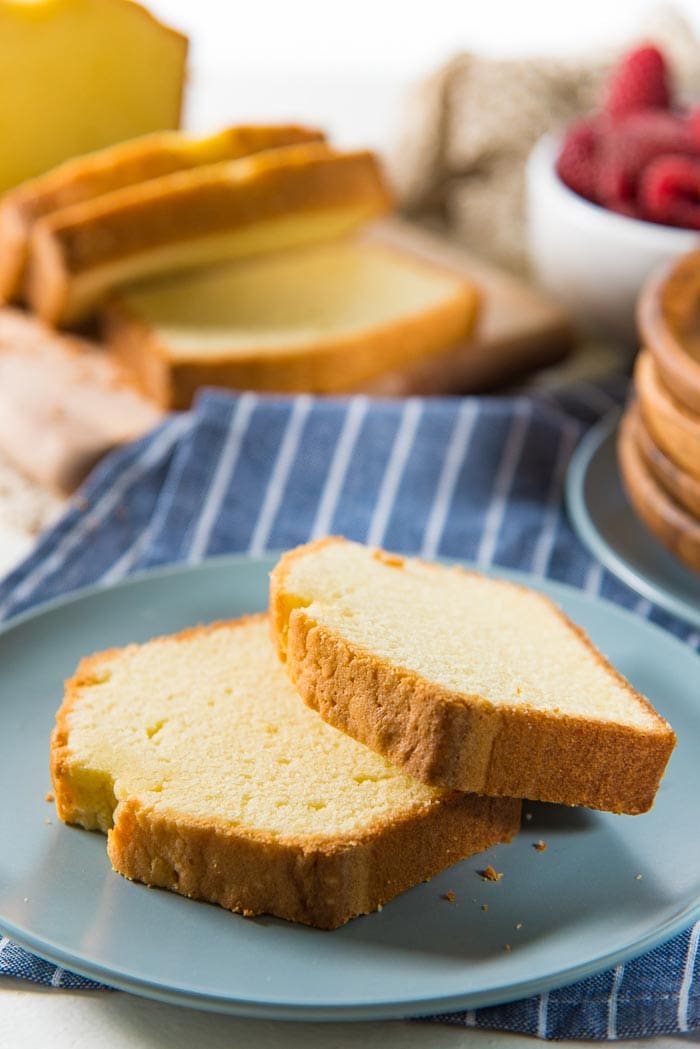
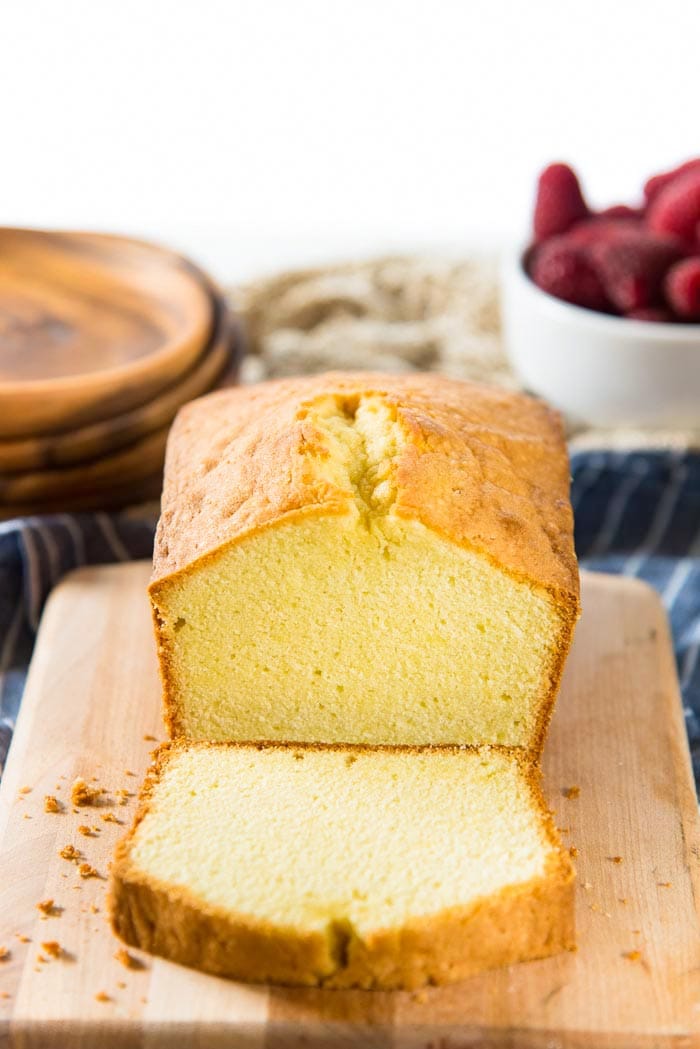
The final result is an incredibly buttery, soft, classic pound cake! The crumb is tight and together, but not dense or gummy – it’s buttery and soft and just so addictively delicious!
Serving suggestions
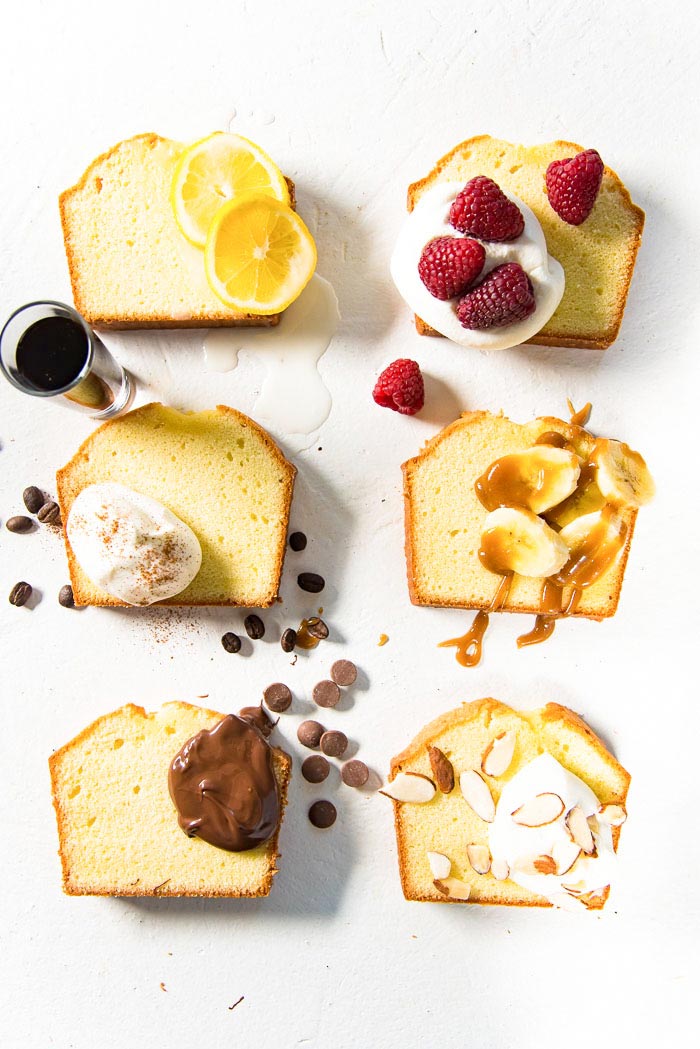
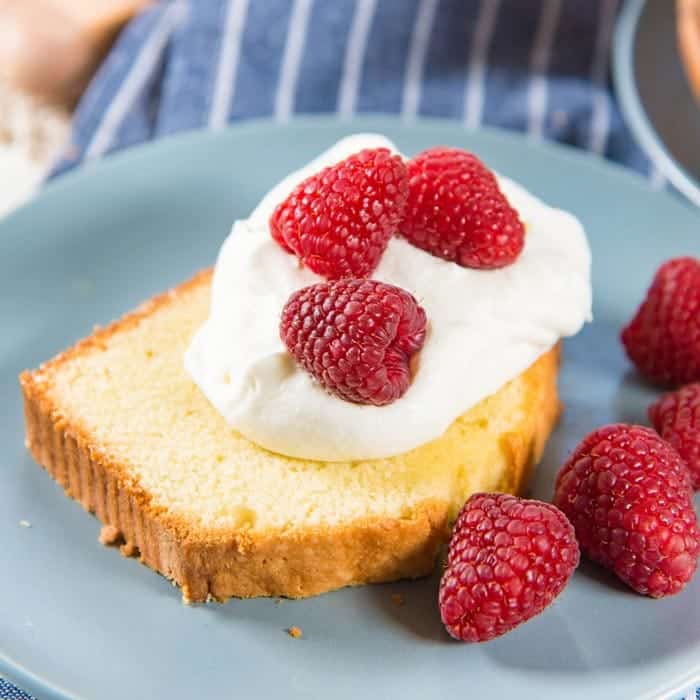
You can enjoy this classic pound cake in SO MANY different ways! Serve it as is, or top it with various additions to make simple but delicious desserts. Check out these creative ways to serve this moist pound cake recipe.
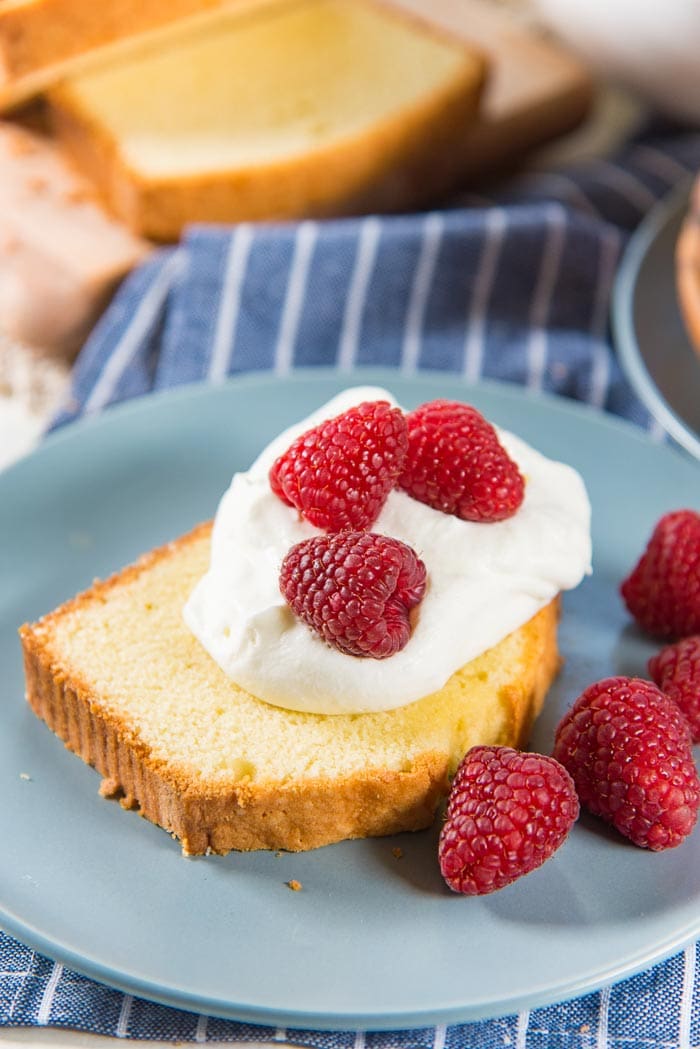
- Berries and cream (pound cake with strawberries is always popular! You can also use raspberries, blueberries or any other type of berry).
- Banana and butterscotch sauce – this would taste like bananas foster, but with cake.
- Chocolate sauce or hazelnut chocolate spread. Who doesn’t love cake and chocolate (or Nutella) together?
- Whipped cream and nuts or praline or praline paste – to enhance the nutty flavor even more, you can flavor your cake with nut flavoring as well (almond, toasted coconut, pistachios, or peanuts).
- Lemon glaze or lemon curd – a refreshing and tangy twist to your butter pound cake! Either cover the pound cake with lemon glaze or pour it over cake slices. Alternatively, you can serve it with lemon curd or any kind of citrus curd (such as passion fruit curd, pineapple curd, or lime curd).
- Whipped cream and Kahlua – this is my favorite! It tastes like tiramisu. A shot of kahlua (or any other sweet liqueur that you like) poured over a cake slice, and then topped with whipped cream or ice cream. An irresistible option for the adults.
Other options not pictured here,
- Grill the pound cake slices (especially if you have stale pound cake), and serve them warm with grilled fruits and ice cream.
- Cut the cake into cubes and add them in trifles (like I do in this chocolate brownie trifle).
- Cut into cubes, then lightly toast them, and add them into fruit salads – they’ll be like dessert croutons!
Storage instructions
When the cake is at room temperature, it can be wrapped well with plastic wrap, and stored in an airtight container, and be consumed within a week. If the cake isn’t wrapped properly, it can become stale, BUT stale pound cake will taste even better when toasted or grilled.
OR you can wrap the cake in plastic wrap, and foil, and then stored in the freezer for up to 3 months.
Ingredient variations and comparisons

Pound cake recipe variations
- Lemon pound cake – To make lemon pound cake, add the zest of two lemons, and about 1/4 cup of lemon juice to the recipe (for two loaves). To make the cake taste even more lemony, mix 1/2 cup of lemon juice and 1/4 cup of sugar over low heat. Once the sugar has dissolved, pour it over the pound cake while it’s warm and still in the loaf pan. The cake will then absorb the lemon syrup.
- Orange pound cake – To make an orange pound cake, add the zest of two oranges into the batter. Make an orange syrup by reducing 1 cup of orange juice to 1/2 a cup. Add 1/4 cup of sugar and stir to dissolve. Pour over the cakes while they are still warm and inside the loaf pans.
- Almond pound cake – In addition to the vanilla extract, add about 1 – 2 tsp of almond extract. Make sure it’s a good, all-natural almond extract, because some almond extracts can taste medicinal and bitter when too much is added. Reduce the flour to 300 g, and add 100 g of almond flour to the batter.
- Eggnog pound cake – I’ve shared my recipe for eggnog pound cake with an eggnog glaze. You can follow that recipe to make a delicious and nutmeg spiced pound cake, perfect for the holidays!
More expert tips and recipe troubleshooting
Why is my cake so dense and heavy?
Reason #1 – Chances are not enough air was incorporated into the butter and sugar. This could be because the creaming time wasn’t long enough, or because the sugar, eggs or flour were incorporated too quickly.
Solution – cream the butter until fluffy, and then incorporate the sugar in a thin stream. Add the eggs one by one, or in a stream. Add the flour in batches.
Reason #2 – The gluten in the flour was overworked, causing the gluten to make the cake too heavy and too dense. Use minimal force to incorporate the flour.
Solution – Preferably, fold in the flour in batches using a spatula, or use the absolute shortest time with your stand mixer to mix in the flour on the lowest speed.
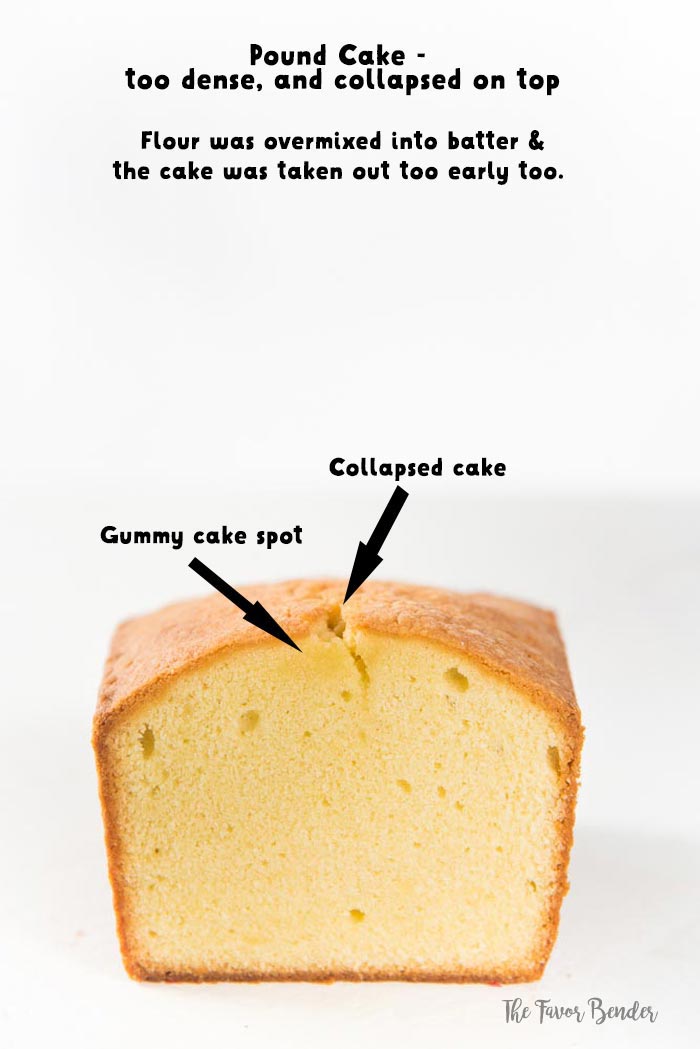
Make sure the flour is fully incorporated too – because dry flour streaks can result in a gummy pound cake.
Use cake flour instead of AP flour.
How to ensure a moist pound cake recipe (not dense and very dry)
Pound cake is SUPPOSED to be a little dense. But it’s not supposed to feel heavy or dry. If it’s dry, the cake may have been over-baked. Pound cake can also be too dry if you added too much flour (or not enough butter or sugar).
Solution – You can try lowering the oven temperature.
Or remove the cake from the oven a little earlier.
Or follow the recipe exactly – and refrain from adding extra flour or reducing the amount of sugar or butter. This will make sure your pound cake stays moist and delicious.
Why does my pound cake have a very tough crust?
This usually happens because the oven temperature is too high. Then the crust cooks a lot faster than the inside of the cake, creating a tough crust and a soft middle.
Solution – Lower the temperature of the oven and cook the pound cake for longer.
Using a light colored loaf pan instead of a dark loaf pan also helps.
Why does my pound cake have gummy streaks?
The butter and sugar were creamed too fast and too much! The cake rises, and then collapses while cooling, causing the cake to have dense, gummy (or gluey) spots.
Solution – DON’T increase the speed of your mixer beyond medium speed. And lower the speed to the lowest setting when adding in the flour (or fold in the flour by hand).
My pound cake crust separated from my cake after baking
If you over-beat the eggs, the air in the eggs will cause the cake to rise. It will create a crust that will rise higher than the cake (the same way that eggs can create a crust in brownies, they can create a crust in cakes as well). However, since the rest of the cake did not rise as much (since there is no baking powder etc), the crust will fall as the cake cools down, creating a wrinkled cake crust.
Solution – Make sure to only beat the eggs to the point of incorporating the eggs. If you beat each egg for more than a minute each time, you may run into this issue.
My pound cake crust has little spots on it
These are sugar crystals. As the cake is baking, the unmelted sugar crystals melt with the heat of the oven, causing little spots to appear on the cake crust.
Solution – Use cane sugar that’s a little finer than granulated white sugar.
Caster sugar is even better (super fine sugar – NOT confectioner’s sugar).
If you can’t find caster sugar, you can process the sugar for a few seconds (a few pulses) in your food processor to turn them super fine. If you’re using measuring cups, make sure to WEIGH THE SUGAR FIRST before putting it through the food processor (super fine sugar measures differently than granulated sugar when using cups)
My pound cake sunk in the middle
This classic pound cake should not sink in the middle, unless the cake was under-baked or extra liquid was added.
Solution – If you’re using salted butter, try the cake with unsalted butter, and eliminate all other extra liquids (if you added milk for example)
Bake the cake for longer.
My cake overflowed from the cake pan (8 x 4 inch loaf pan)
If you over-beat the eggs, or beat the butter and sugar too fast, or added too much baking powder, the cake can rise too much and flow over the edges of the pan.
Solution – Reduce the mixing time and don’t use high speed to mix the ingredients.
If you prefer to use baking powder, consider using a 9 x 5 inch loaf pan, instead of a 8 x 4 inch loaf pan.
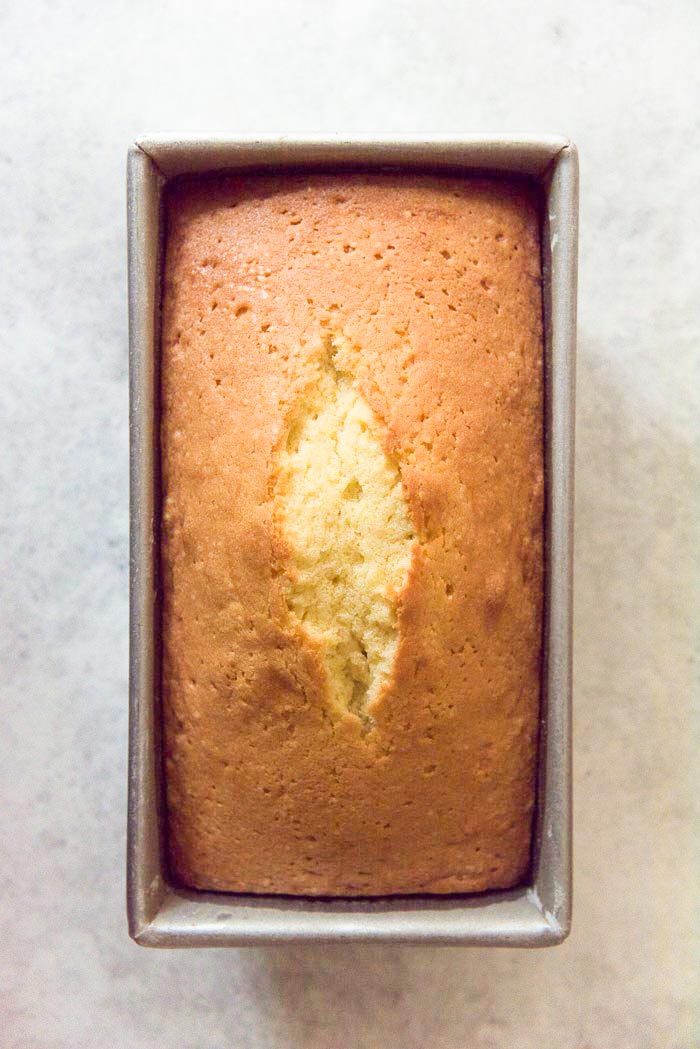
Why does pound cake have a crack on top?
Pound cake is an inherently dense cake, and has no (or very little) chemical leaveners. As such, the cake doesn’t rise much. Also pound cakes are made in pans that are fairly deep that bake a little more unevenly, and take a longer time to cook. This results in a cake where the batter will burst through the middle as it heats slowly, and expands, and has no place to go, which creates this crack on top.
However, this is a desired characteristic of pound cakes! So it’s nothing to worry about!
If you do by chance want to avoid that crack on the surface, then the cake needs to be baked in a larger pan, with a shallow amount of batter, so that it bakes more evenly and faster.
Why is my pound cake wet in the middle?
As previously mentioned, pound cake is baked in a deep pan – which results in a slow bake time and uneven heat transfer (the surface heats a lot faster than the middle).
If the pound cake is baked in an oven that is too hot, the outsides will bake way faster than the middle, and result in a wet, raw middle. This can also happen if the cake is taken out of the oven too soon – in which case the outside will also be lighter in color than desired.
To make sure that the middle is baked through, while the outside is not burnt, you must reduce the heat of your oven and bake it for longer until the pound cake is baked through. And ALWAYS let your cake rest and cool down before cutting into it. A hot cake will have a softer crumb that will become dense if you cut into it too quickly.
What type of pound cake glaze or frosting should I use?
The sky is the limit here, really. Typically, pound cake glaze is a simple confectioner’s sugar glaze made with confectioner’s sugar and a liquid, and then poured over the cake.
The options to mix with confectioner’s sugar include,
Water
Milk
Egg white (for a glaze like royal icing that hardens)
lemon juice or lime juice
Rose water or orange blossom water
Any flavor extracts + water / milk
Spices + water / milk
But if you’re not a glaze person, you can also top your pound cake with,
Chocolate ganache (either pourable or spreadable), whipping cream, buttercream (because, why not?), or just serve it as is!
If you liked this recipe, you may also like,
Recipe
The Best Pound Cake Recipe
US based cup, teaspoon, tablespoon measurements. Weight measurements are recommended for accurate results whenever available.
Common Measurement ConversionsIngredients:
- 1 lb unsalted butter softened at room temperature (4 sticks of butter)
- ½ tsp fine sea salt
- 1 lb cane sugar or caster sugar (about 2 ¼ cups)
- 8 large eggs 1 lb of eggs (with the shell)
- 14 oz AP flour or cake flour roughly 3 ¼ cups AP flour, spooned and leveled
- 1 tsp baking powder (optional)
- 2 tsp good quality vanilla extract you can add almond extract, or any other flavor extract you prefer
Instructions:
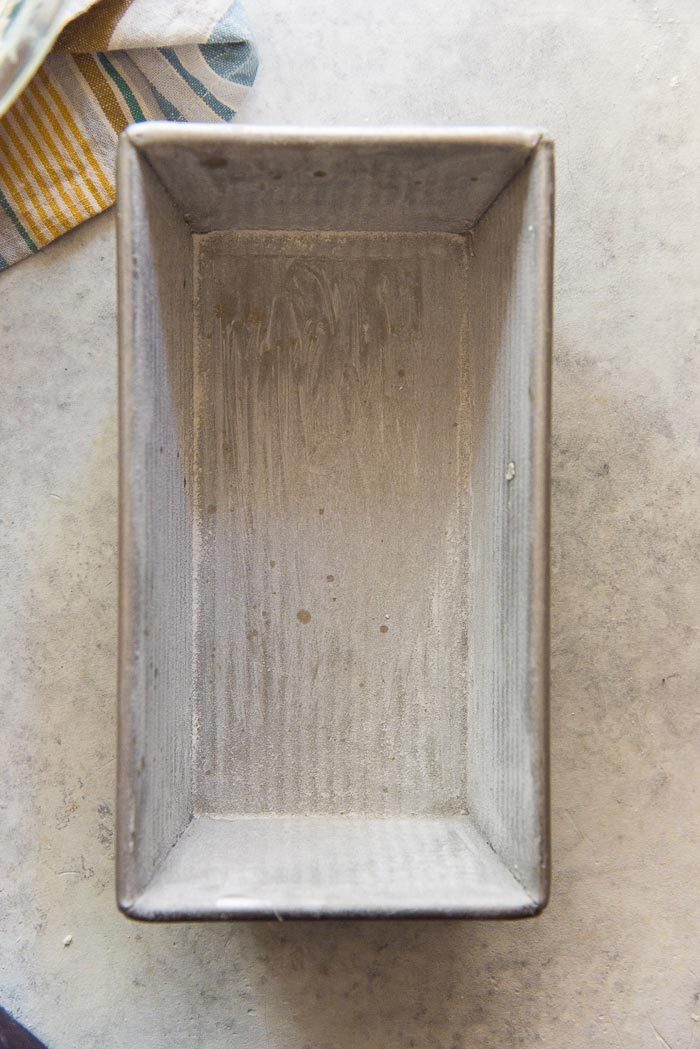
- Butter two 8.5 x 4.5 inch loaf pans, and dust the inside of the pans with flour to coat. Shake off excess flour. Set aside.
- Preheat the oven to 325°F / 170°C.
- Weigh out all the ingredients and keep them close at hand. Sift the flour and baking powder (optional) and set aside in a bowl.14 oz AP flour or cake flour, 1 tsp baking powder
- Optional step – if you're using granulated cane sugar, place the sugar in a food processor and pulse a few times to get a finer sugar texture.
- Place your mixer bowl on a weighing scale and note the weight. Remove the mixing bowl from the weighing scale and place it in your stand mixer with the beater attachment attached.
- Place the softened butter and salt in the bowl and cream the butter until light, creamy, and fluffy (between 3 – 7 minutes), at medium speed (speed 4 – 5 on a kitchen aid mixer). Scrape the sides and bottom of the bowl to make sure you collect all of the butter.1 lb unsalted butter, ½ tsp fine sea salt
- Add the sugar in a thin, steady stream WHILE the butter is being mixed (you can also add the sugar a tablespoon at a time). It should take approximately 1 min to incorporate the sugar into the butter. Stop the mixer and scrape the sides and bottom of the bowl to ensure that the sugar is evenly mixed.1 lb cane sugar
- Cream the butter and sugar for a further 2 – 3 minutes.
- Break an egg into a small bowl, and make sure there are no egg shells. Break the egg yolk, and then pour the egg in a stream into the butter-sugar mix. Mix for about 20 – 30 seconds until the egg has incorporated into the batter, and there are no traces of egg yolk. Repeat with another egg. After 2 eggs have been mixed into the batter, stop the mixer and scrape the sides and the bottom of the bowl.8 large eggs
- Repeat with the rest of the eggs, making sure to scrape the sides and bottom as you go (I do this after every 2 eggs that I add).
- When all the eggs have been added, add the vanilla and mix for a further 30 sec – 1 minute.2 tsp good quality vanilla extract
Mixing in the flour by hand – You will need a long-handled baking spatula to fold the flour into the batter
- Stop the mixer and remove the mixing bowl from your stand mixer. Sift about ¼ of the flour over the batter. Fold the flour into the batter, while rotating the bowl after each fold, until the flour is just incorporated. Repeat 3 more times with the remaining flour, so that you carefully incorporate all of the flour while folding it into the batter (rather than vigorous mixing). This will give you a smooth cake batter.14 oz AP flour or cake flour, 1 tsp baking powder
- Make sure there are no dry bits of flour in your batter.
Mixing in the flour with a stand mixer
- Reduce the speed of the stand mixer to the lowest setting (stir speed in a kitchen aid mixer).
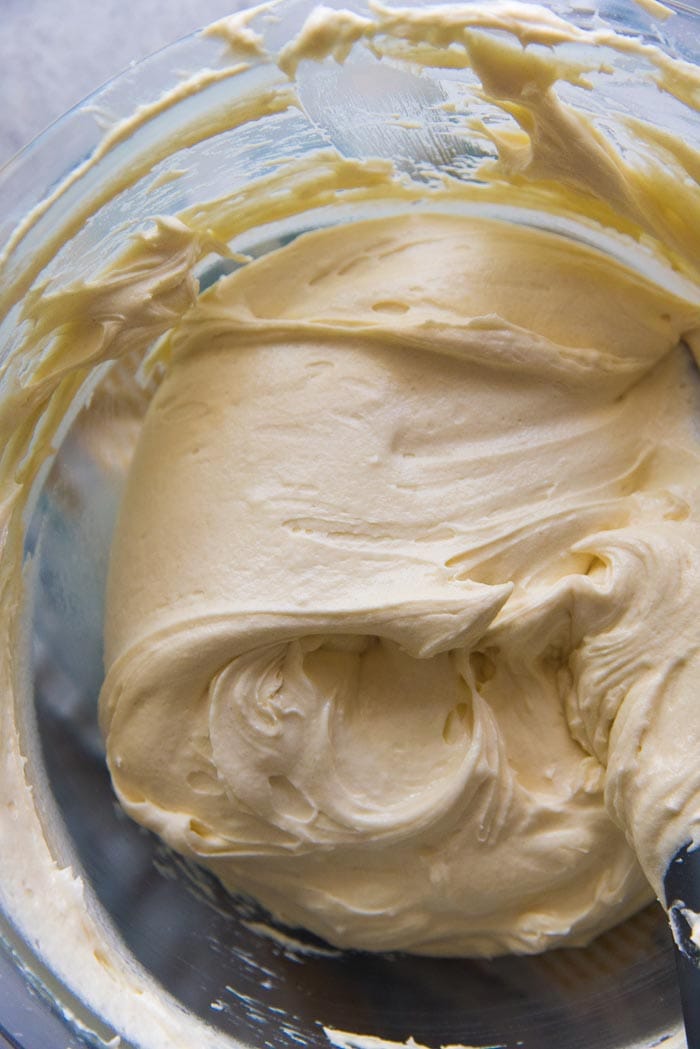
- Add ¼ of the sifted flour into the batter and mix for a few seconds until just incorporated. Repeat with 3 more additions. After the final addition, only mix the batter until you have a smooth batter. Stop immediately.
Baking the pound cakes
- Weigh the mixing bowl with the batter inside. Subtract the weight of the empty bowl to get the weight of the batter. Divide this in two, as this will be the amount of batter needed for each cake pan.
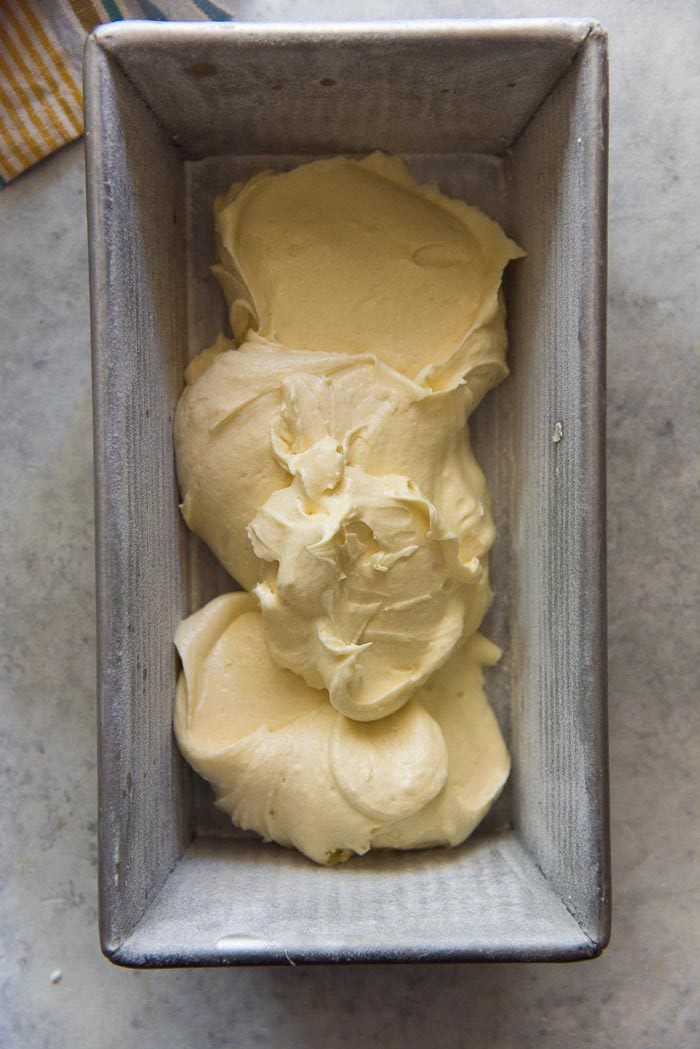
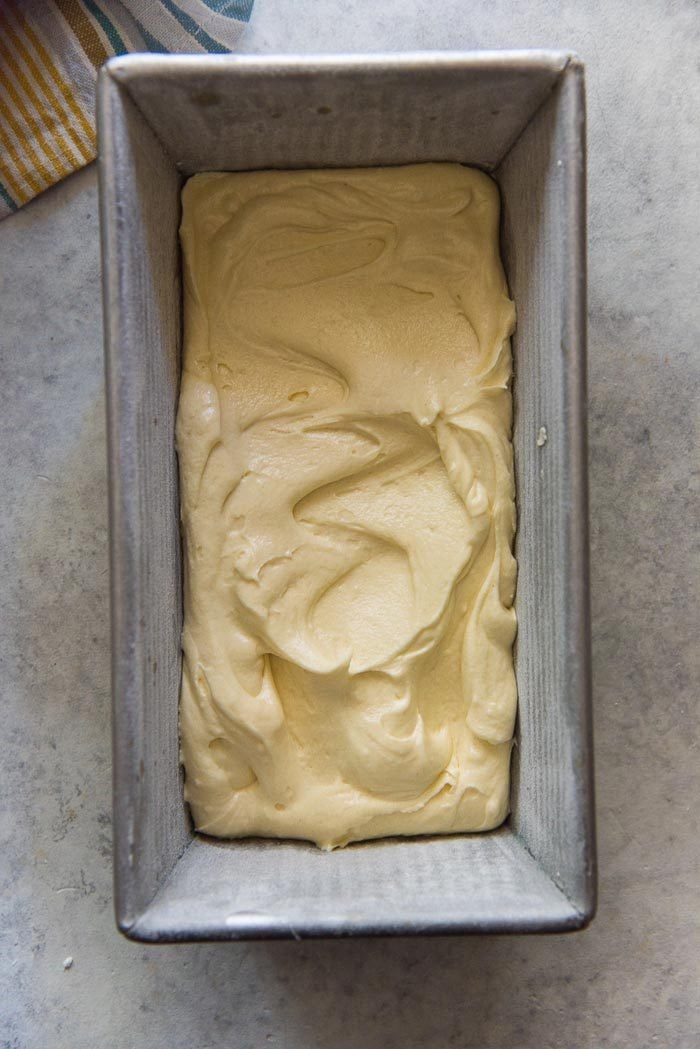
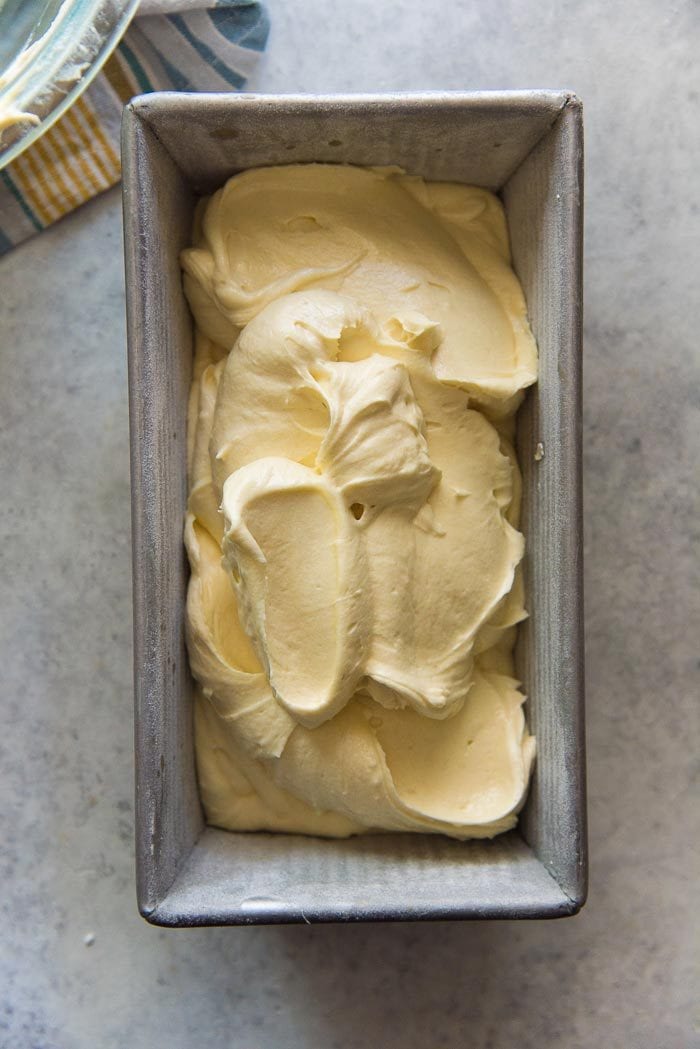
- Add an equal amount of the batter to the bottom of each loaf pan. Using an offset spatula, spread the batter evenly to the corners of the pan. Add the rest of the batter (equally divided between the two loaf pans) to the two loaf pans. Evenly spread on top to have an even surface. Gently shake the pans (just a little) to make sure the batter is evenly spread (don’t knock the cake pans on the counter!).
- Transfer the loaf pans into the oven (ideally in the lower third of the oven, and right in the center of the oven rack). Set the timer for 40 minutes. After 40 minutes, rotate the cake pans, and bake for a further 20 minutes.
- Check the cake after a total of 60 minutes of bake time to test the done-ness of the cake with a clean toothpick or a cake tester. Insert the cake tester into the cake, and if it comes out clean, then the cake is done. In my oven, these cakes take about 67 – 70 minutes to bake.
- Remove the cakes from the oven, and allow them to cool down for about 10 – 15 minutes. Carefully turn the cakes out onto a cooling wire rack to cool down completely.
- Eat warm, or at room temperature.
How to store pound cake
- When the cake is at room temperature, it can be wrapped well with plastic wrap, and stored in an airtight container, and be consumed within a week. If the cake isn’t wrapped properly, it can become stale, BUT stale pound cake will taste even better when toasted or grilled.
- OR you can wrap the cake in plastic wrap, and then foil, and stored in the freezer for up to 3 months.
Recipe Notes
- If you’re using two 9.5 x 5.5 inch pans, check on the cakes after 45 – 50 minutes. This is because this cake can cook much faster in these bigger pans.
- Bundt cake pan – this recipe is enough for 1 large bundt cake. Keep an eye on the cake after 50 minutes of baking time.
Nutrition Information:
“This website provides approximate nutrition information for convenience and as a courtesy only. Nutrition data is gathered primarily from the USDA Food Composition Database, whenever available, or otherwise other online calculators.”


Leave a Reply