About
My Cookbooks
Work With Me
Contact
  • Facebook
  • Instagram
  • Pinterest
  • X
  • YouTube
The Flavor Bender

Master the Science of Delicious

  • Recipe Index
    • All Recipes
    • Desserts
      • Cakes & Cupcakes
      • Candy & Bite Sizes
      • Chocolate
      • Cookies, Brownies & Bars
      • Frozen Desserts
      • Fruit Desserts
      • Puddings & Custards
      • Dessert drinks
      • No Bake
      • Pastries & Breads
      • Sweet Syrups & Spreads
      • Tarts & Pies
      • Cheesecakes
      • Healthy sweets
    • Breakfasts
      • Tarts, Quiches, & Pies
      • Waffles, Pancakes & Crepes
      • Quick Breads, Scones & Muffins
      • Breakfast Sandwiches
      • Breakfast Pastries
      • Eggs
      • Breakfast & Brunch Drinks
      • Make Ahead Breakfasts
      • Healthy Breakfasts
      • Coffee and Tea drinks
      • Breakfast Smoothies & Juices
      • Breakfast Sides
      • Casseroles
      • Jams & Spreads
    • Courses
      • Main Meals
        • Bread, Sandwiches & Burgers
        • Curries
        • Salads
        • Roasts & BBQ
        • Soups & Stews
        • Casseroles
      • Bread
      • Lunch
      • Beverages
      • Appetizers & Tapas
      • Sides
      • Dips & Condiments
      • Tea Time & Snacks
      • Desserts
      • Meal Prep
      • Cocktails
      • Pet Friendly Recipes
    • Cuisines
      • American
      • European
      • Australasian
      • Sri Lankan
      • East Asian
      • Mexican
      • Middle Eastern
      • South Asian
    • Sri Lankan
      • Main Meals
      • Drinks
      • Desserts
      • Breakfasts
      • Snacks
    • Skill Level
      • Easy
        • Easy Desserts
        • Easy Cooking
        • Easy Breads
        • Easy Breakfasts
        • Easy Dinners
      • Intermediate
        • Intermediate Desserts
        • Intermediate Cooking
        • Intermediate Breads
        • Intermediate Breakfasts
        • Intermediate Dinners
      • Advanced
        • Advanced Desserts
        • Advanced Cooking
    • Recipes by Season
      • Christmas
      • Fall & Winter
      • Halloween
      • Spring & Summer
      • Thanksgiving
      • Valentines Day
    • Recipes by Diet
      • Dairy Free
      • Eggless
      • Gluten Free
      • Paleo
      • Vegan & Vegetarian
    • Recipe Basics
      • Baking Basics
      • Cooking Basics
      • Baking & Cooking 101
  • New? Start Here
  • Measurement Conversions
  • How-To Posts
  • About
  • My Cookbooks
  • Work With Me
  • Contact
The Flavor Bender   ›   Recipes   ›   Delicious Desserts   ›   Candy Recipes   ›   The Best Honeycomb Recipe (Easy honeycomb candy)

The Best Honeycomb Recipe (Easy honeycomb candy)

Author:

Dini Kodippili


Jump to Recipe


Updated: 12/9/2023
Total Time1 hour hr 50 minutes mins
Quick and Easy Recipes
{{title}}
Honeycomb toffee social media

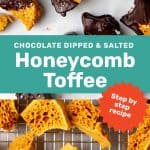
Honeycomb toffee, sponge toffee, cinder toffee, seafoam candy, hokey pokey… Honeycomb candy is a delightful confection and has many names, but we can all agree that it’s one of a kind! Crunchy, light, sweet toffee pieces, guaranteed to take you right back to your childhood!

Crunchy honeycomb candy coated in chocolate. This homemade honeycomb toffee recipe is easy and addictively delicious!

A close up of the honeycomb candy on a btray
Contents
 [hide]
  • What is honeycomb candy?
  • Why this recipe works
  • What you’ll need to make this recipe
  • How do you make honeycomb candy from scratch
  • Honeycomb candy vs sponge candy (vs seafoam candy or cinder toffee or hokey pokey)
  • Serving suggestions
  • How to store honeycomb candy for later
  • Recipe tips
  • Frequently asked questions

Crunchie chocolate bars were my favorite growing up. But now they are a little too sweet for my liking. So, as an alternative, I came up with this dark chocolate coated, homemade honeycomb toffee (aka homemade crunchie), sprinkled with sea salt.

These have the perfect balance of sweet, caramel, crunchy, salty, and bittersweet chocolate!

Honeycomb is of course sugar based, so it’s always going to be sweet, but balancing that sweetness with salt and chocolate is crucial, and helps to take the edge off all that sugar in honeycomb candy.

And this is so easy and fun to make! They make EXCELLENT treats in candy boxes for Christmas. Plus, you can use the same recipe to make either honeycomb toffee or sponge toffee (see below).

What is honeycomb candy?

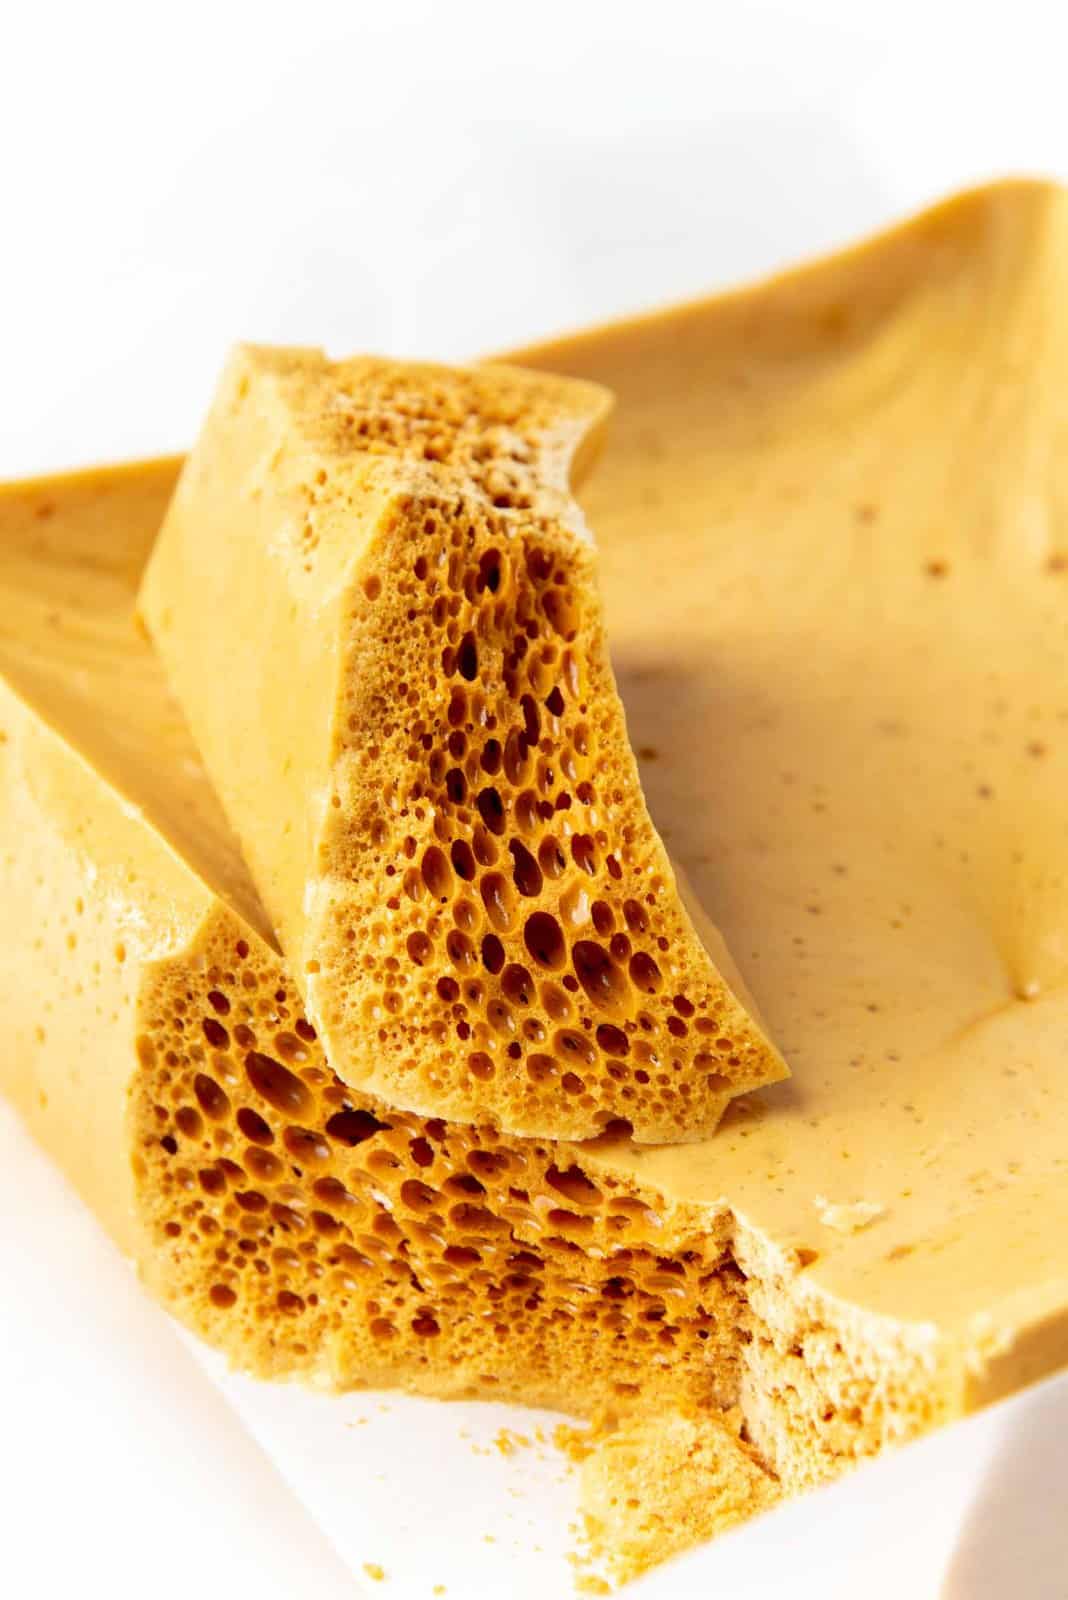
Honeycomb candy is a sweet and airy candy with a very crunchy texture and a lovely golden syrup or honey-like flavor! Most US recipes use honey for a honey-forward honeycomb candy, while in Australia and New Zealand, golden syrup is used for a more unique and delicious flavor.

Honeycomb candy is known for its golden color and porous sponge-like texture.

A single chocolate covered honeycomb toffee held up by a hand

Why this recipe works

  • Made with golden syrup for a more authentic flavor. But I also provide other substitutes.
  • I show two methods to make honeycomb candy – the first creates large honeycomb holes (classic honeycomb), and the second makes smaller sponge like holes (sponge candy).
  • I’ve been making this recipe for years, so it really is foolproof!
  • You can coat them in chocolate to make this candy last longer.
  • Plus, this honeycomb recipe doesn’t require any corn syrup, because corn syrup isn’t traditionally used to make honeycomb candy.

What you’ll need to make this recipe

Equipment

This homemade honeycomb recipe is fast-paced. So, it’s crucial to read the recipe well to know what to expect BEFORE making it. It’s also a good idea to have all the equipment you need, and the ingredients measured and ready to go.

  • A large pot – Since the sugar base will foam and become triple in size, you need to use a large pot that will hold the mixture at its highest volume. Otherwise, the mixture will overflow and even cause burns.
  • A candy thermometer – Absolutely necessary to keep track of the temperature of the sugar syrup. Otherwise, you may end up with soggy honeycomb candy, or burnt candy.
  • Silicone spatula – A heat-resistant spatula will help you to scrape out the candy from the pot.
  • Whisk – A good whisk will help to mix the baking soda into the hot syrup. Make sure to use a whisk with a good-sized handle, so that your hand will not be near the hot syrup.
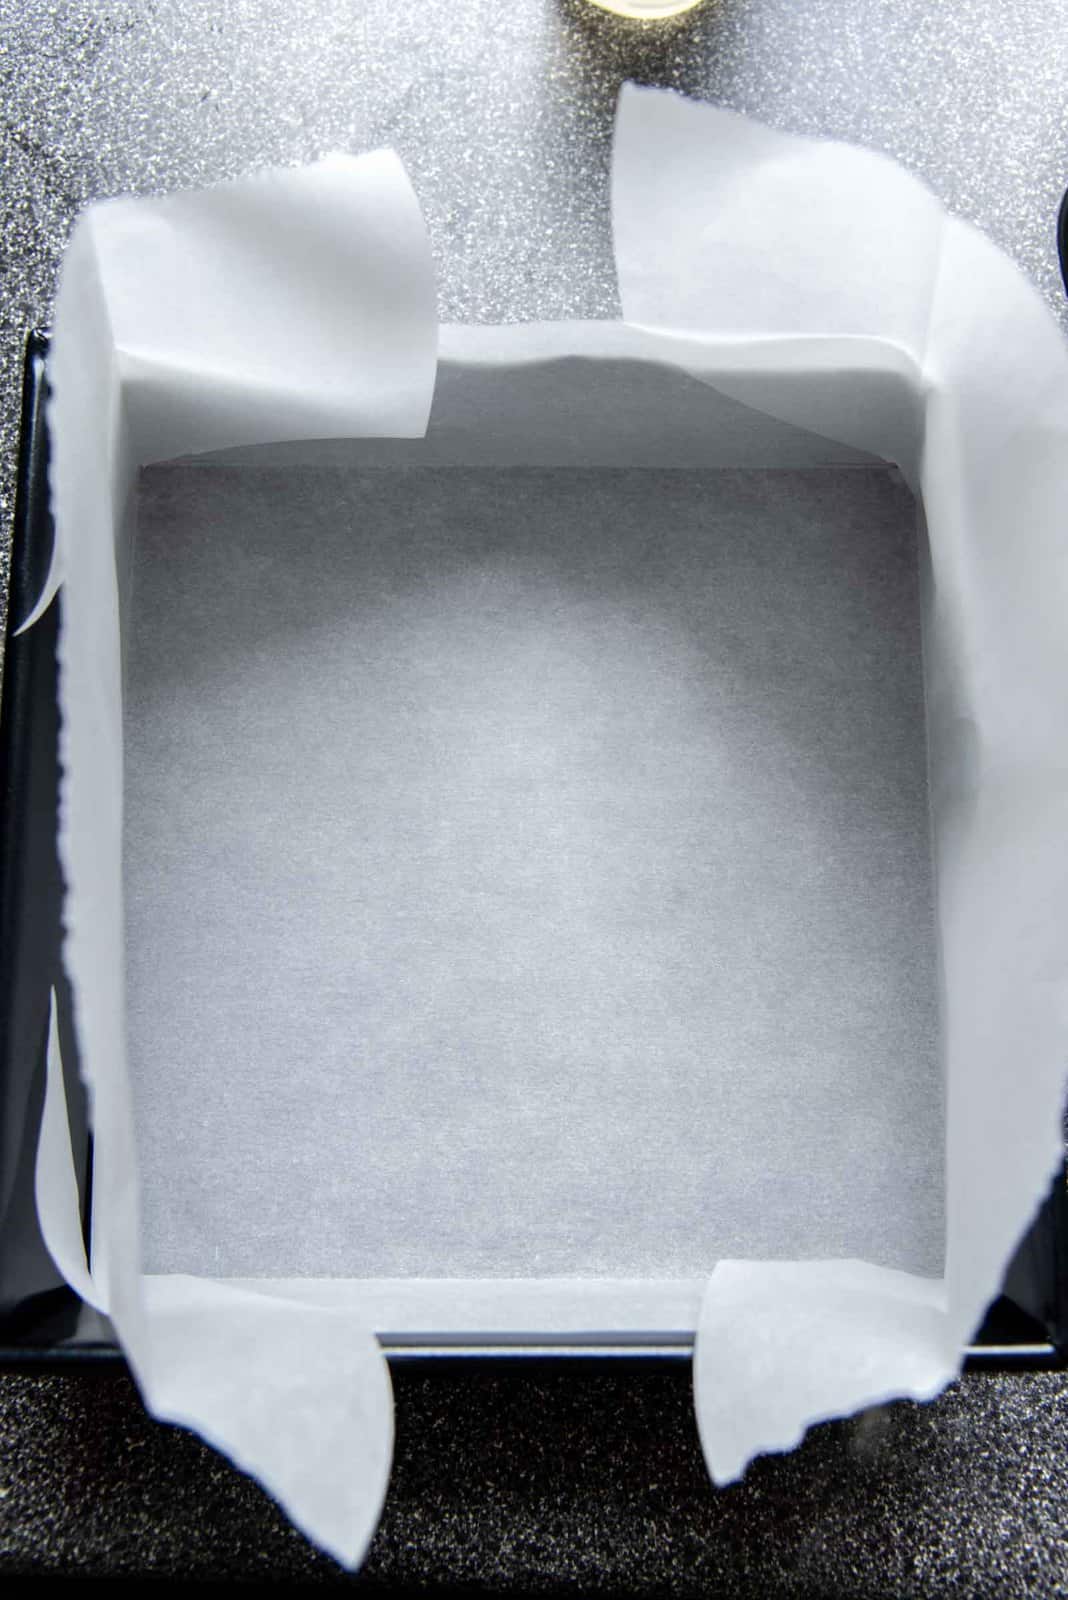
  • A baking pan lined with parchment paper or silpat – You can use a large tray for thinner honeycomb candy, or an 8 – 9 inch cake pan with higher sides for thicker candy. Make sure it’s heat resistant, otherwise it could melt or crack.
  • A trivet or pot insulation pads – The candy mix will make the pan very hot, very quickly. You can use a trivet or insulation pads to keep the baking sheet on them, so that your kitchen countertop won’t get damaged by the heat.

Ingredients

For the honeycomb candy

Overhead view of ingredients needed in individual bowls to make honeycomb candy

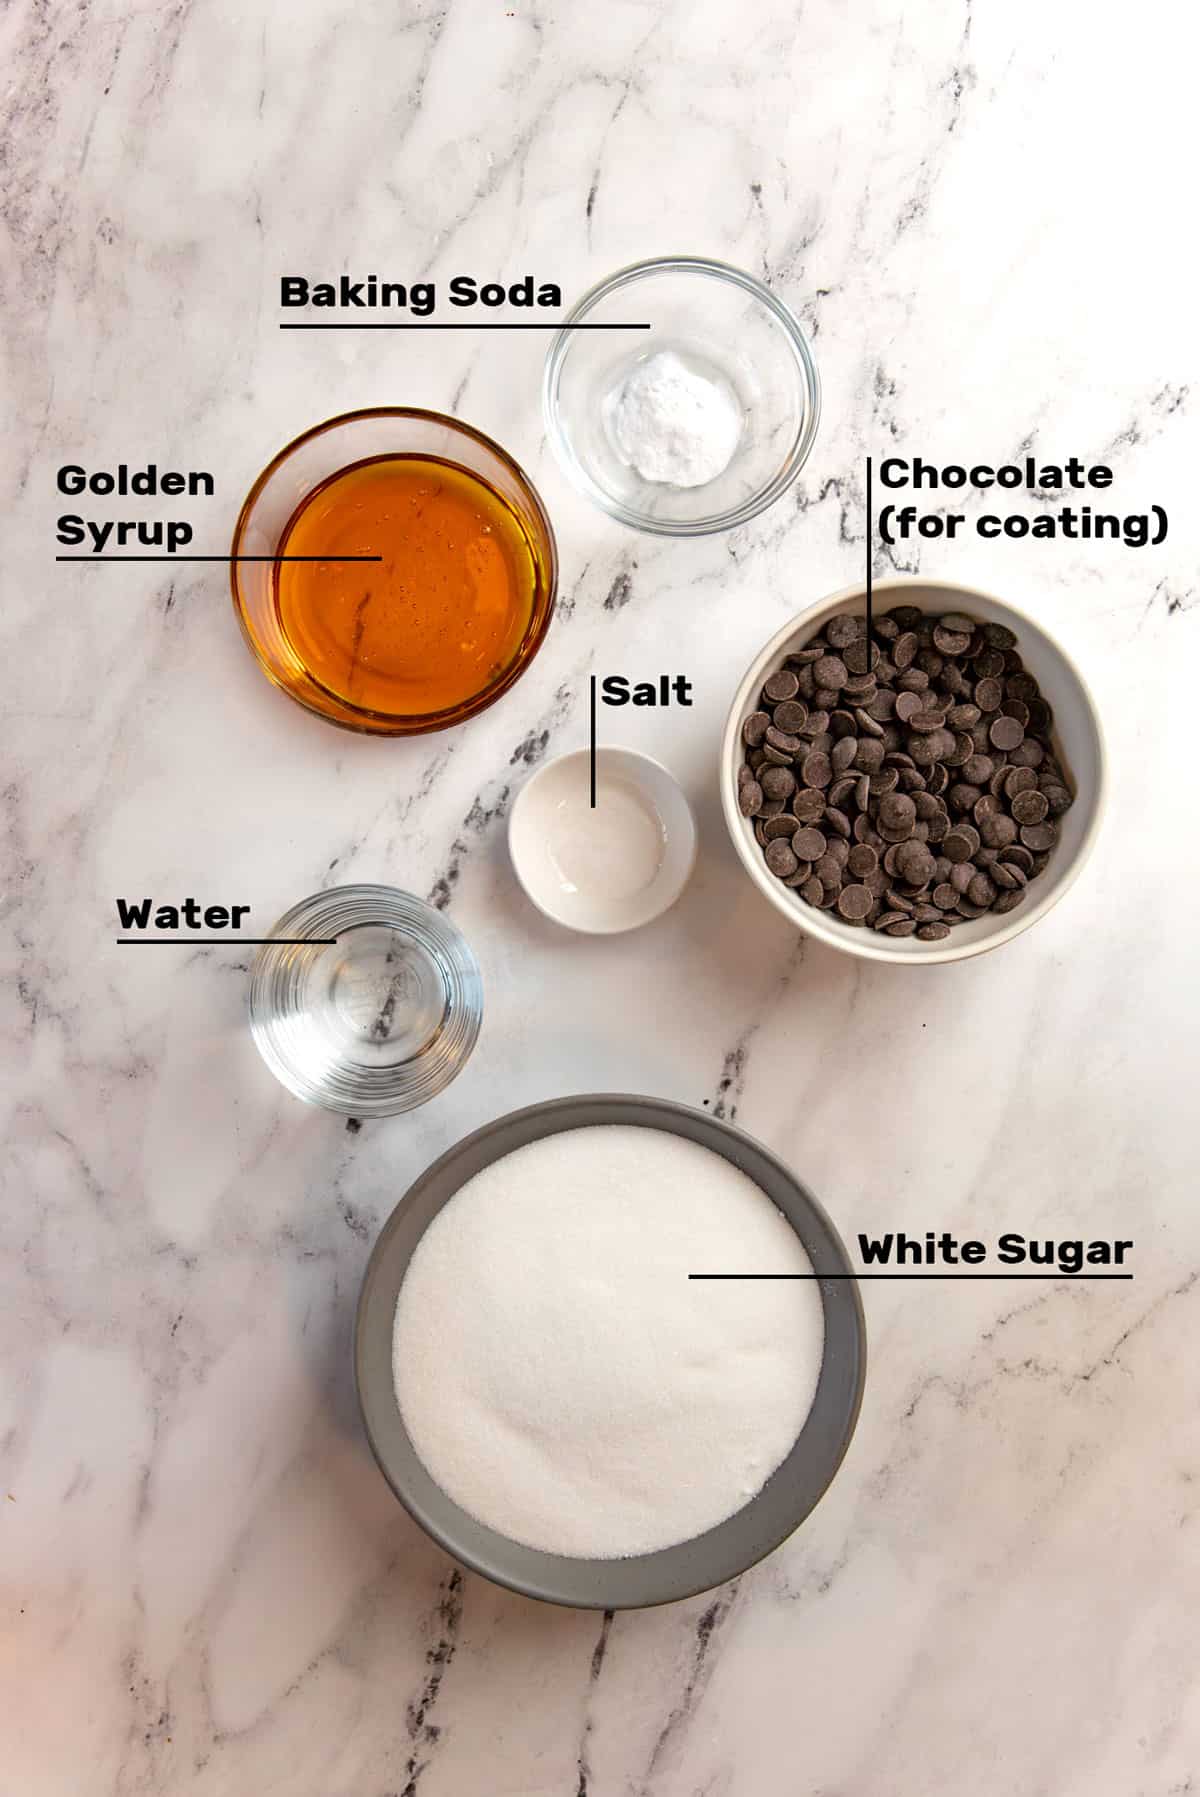
Granulated white sugar – White sugar is absolutely required for this honeycomb recipe. Unfortunately, there is no substitute for this. You could use caster sugar, but it should still be white sugar. Brown sugar has molasses, and has more moisture which can affect the sugar syrup for this recipe. See my guide to types of sugar for more information.

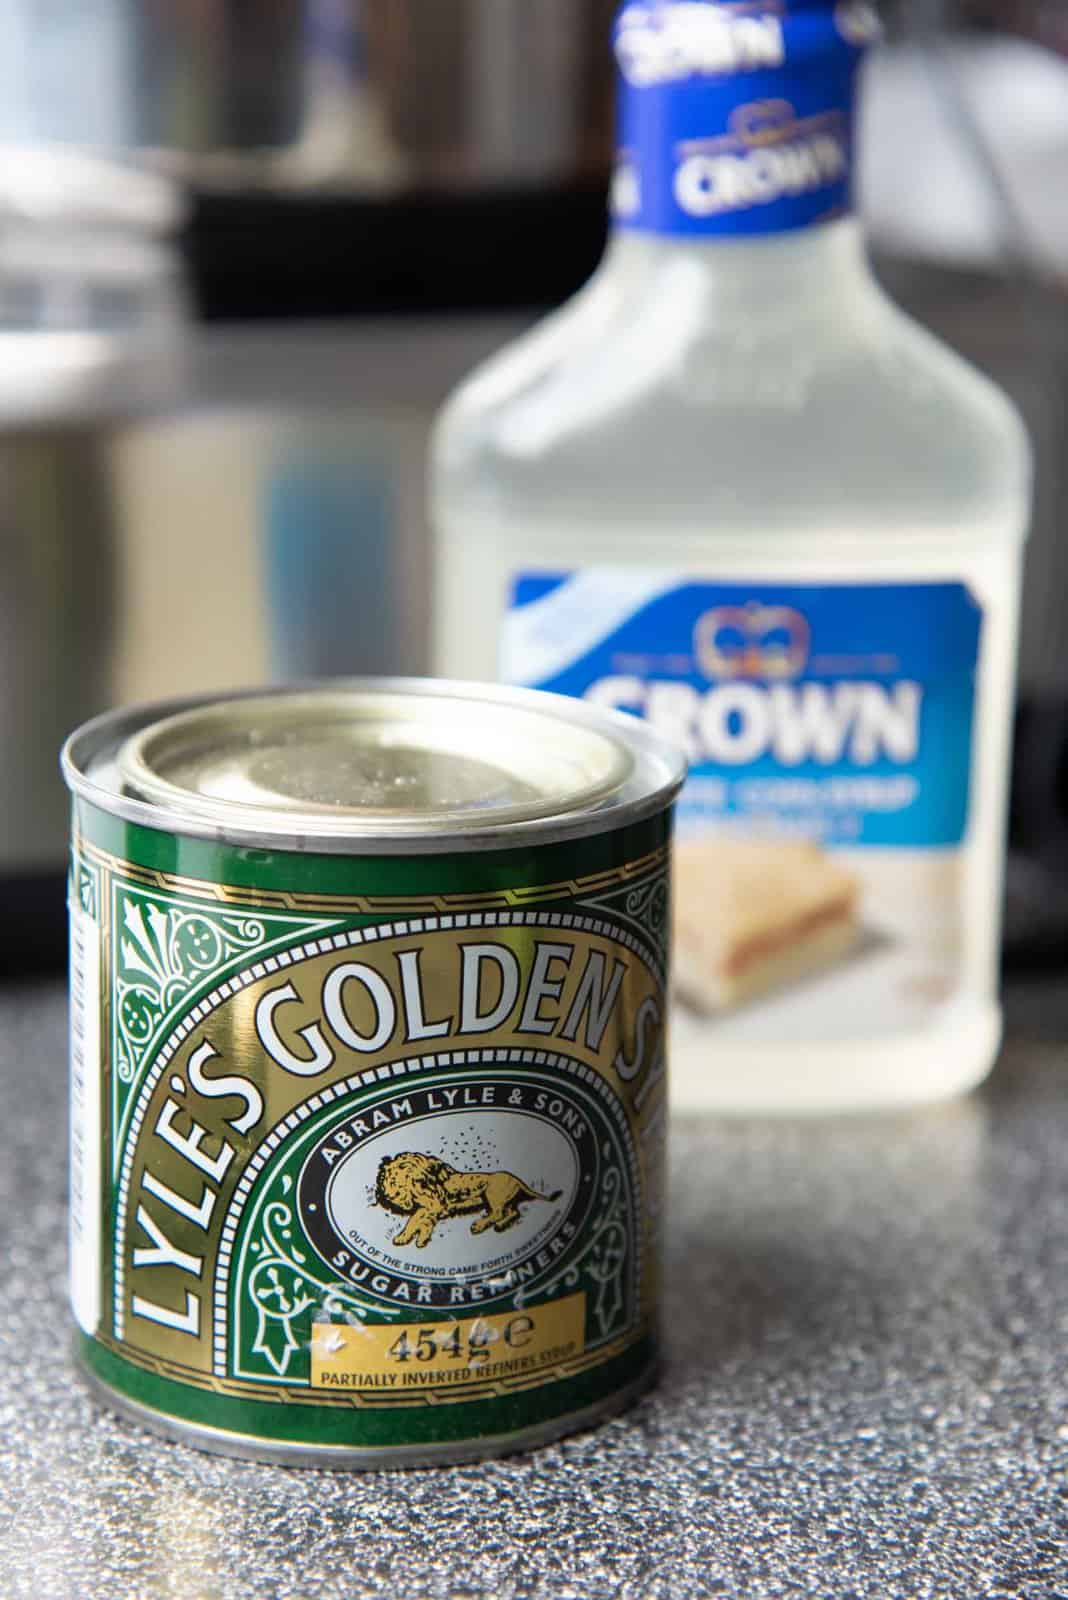
Golden syrup – Golden syrup is the traditional invert sugar syrup that is used in New Zealand and Australia. It’s absolutely delicious, and has a caramelized, buttery flavor with a very light tanginess (from citric acid). It adds a unique flavor, which in my opinion is vital for proper honeycomb candy.

If you cannot find golden syrup, you can use,

  • Corn syrup – This is also an invert sugar, but will not add the same flavor as golden syrup.
  • Honey – Honey is also an invert sugar, and will add flavor to the candy as well. But it’ll still be different from golden syrup. Honey is the best substitute to make this candy in the absence of golden syrup.
  • Glucose syrup – I know from experience that it’s hard to find corn syrup in some countries. The closest alternative is glucose syrup. However, this syrup is much thicker than corn syrup.
  • Maple syrup – Maple syrup is not a strong invert sugar, so you must be careful not to let the syrup recrystallize. But it can be used with care. Maple syrup will also add flavor to the candy.

Water – Just regular room temperature water to make the sugar syrup. Do not substitute with any other liquids, as this will affect the sugar syrup consistency.

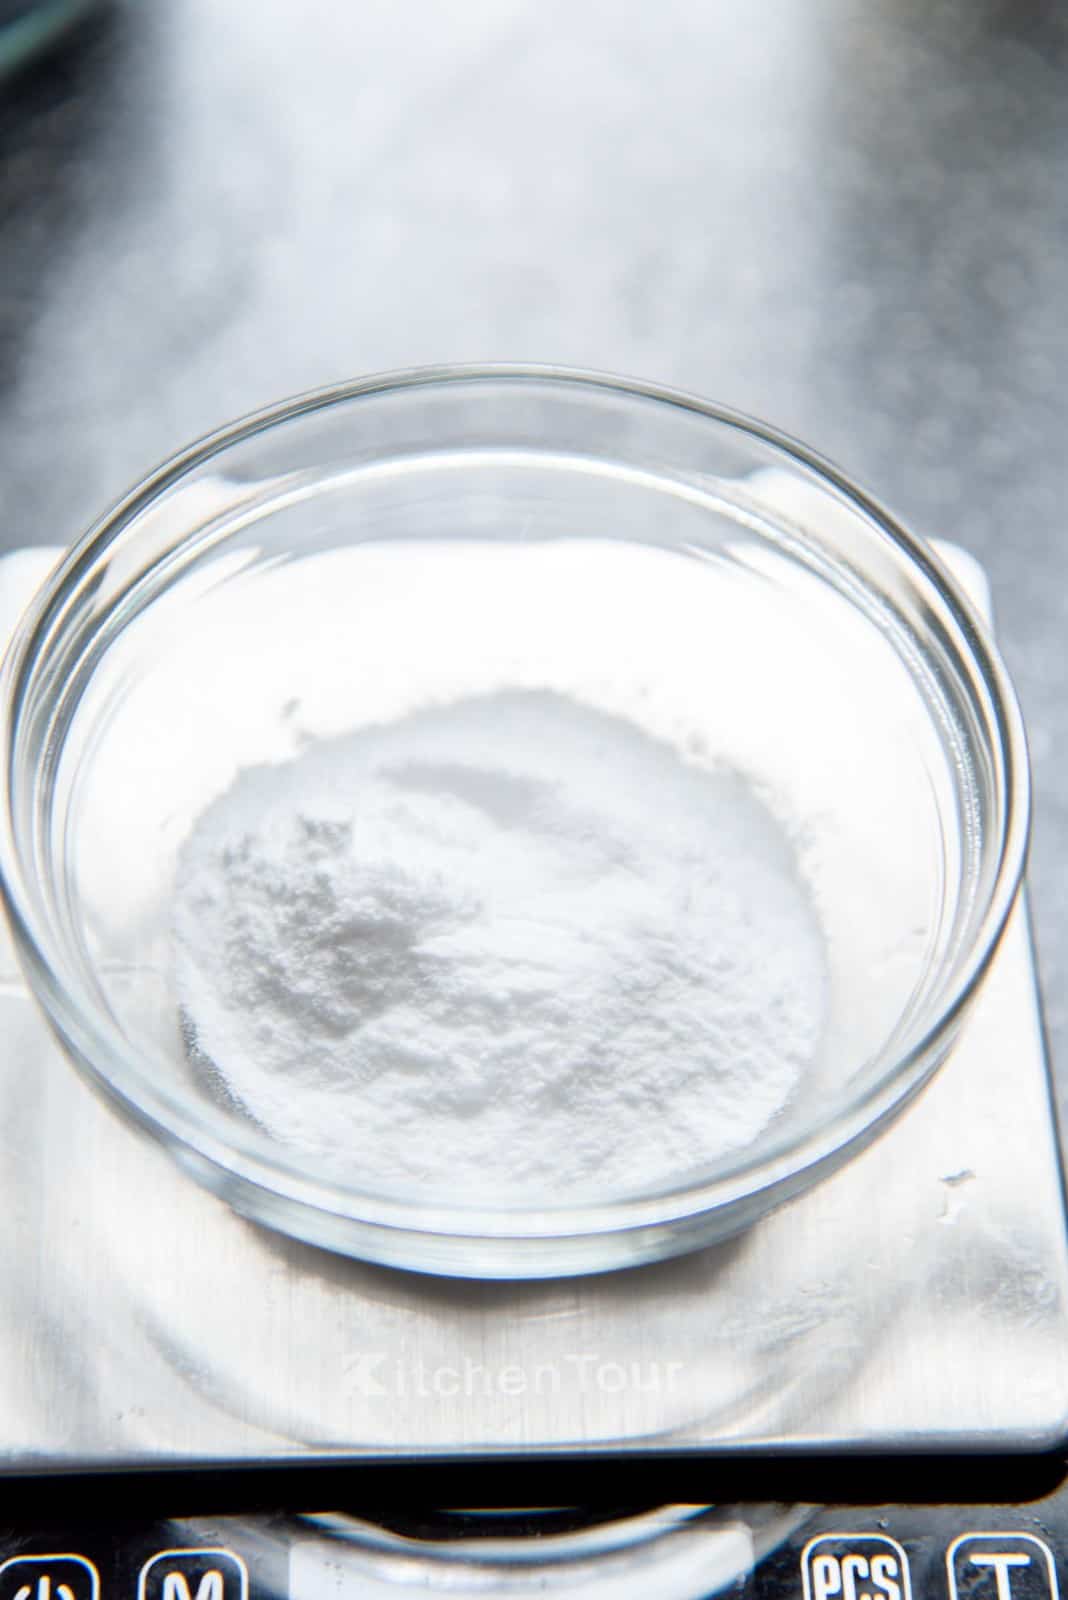
Baking soda – Baking soda will react with the heat and the acidity in golden syrup to make the classic honeycomb texture of the candy. Baking soda is a chemical leavener that reacts with heat and acid to make CO2 that makes the bubbles in the honeycomb toffee.

Salt – Salt is optional, but helps to balance the sweetness a little.

Gelatin and water – Also optional, but the gelatin provides extra structure to the honeycomb candy, and also helps to make the structure more fine and dense / compact, with smaller holes (scroll down to see a side-by-side comparison with regular honeycomb candy).

Golden syrup and corn syrup on a counter top
The baking soda in a small bowl

To coat the candy

Tempered bittersweet chocolate – If you’d like to coat the honeycomb candy (for your own homemade crunchie!), or half dip the candy, then you will need to use tempered bittersweet chocolate. You can also use candy melts, but I find these to be too sweet for this honeycomb recipe. Bittersweet chocolate provides balance to the inherent sweetness of this candy.

Sea salt flakes – Sprinkle some sea salt flakes on the chocolate before it sets. This makes the candy look more impressive! It also adds a salty crunch, which is such a nice contrast to the bitter chocolate and sweet candy.

How do you make honeycomb candy from scratch

  • Line an 8 or 9-inch square pan with parchment paper. You can also use a 9 x 13 inch pan, but then the honeycomb mixture will be thinner.
  • Place all the ingredients, EXCEPT for the baking soda, in a large saucepan.
  • Gently stir the ingredients to saturate all of the sugar with water.
  • Heat the sugar syrup to dissolve the sugar. Swirl the saucepan, instead of stirring, to melt the sugar.
A parchment lined pan ready for the toffee mixxture
The ingredients for the sugar syrup in a saucepan
The sugar dissolved in the pot
The sugar syrup boiling with a candy thermometer in the pot
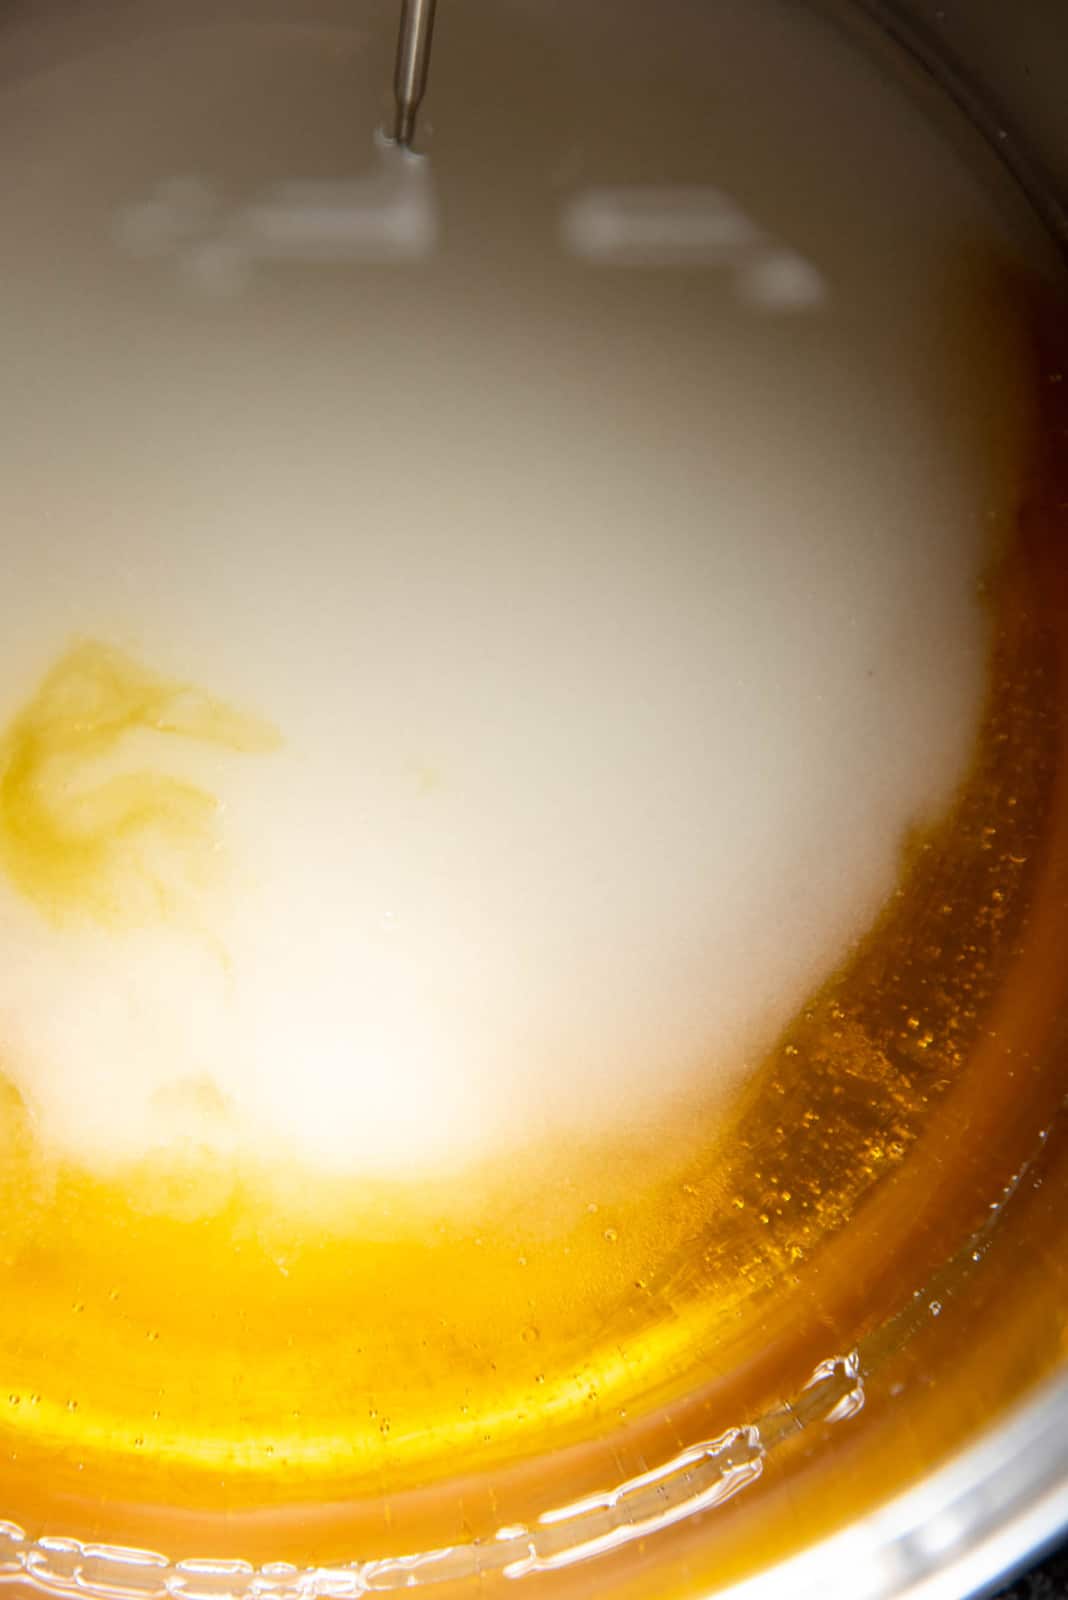
  • Clip on a candy thermometer and heat the sugar syrup until it reaches 300 F (hard crack stage – see my cooked sugar stages article for more information about candy temperatures etc.).
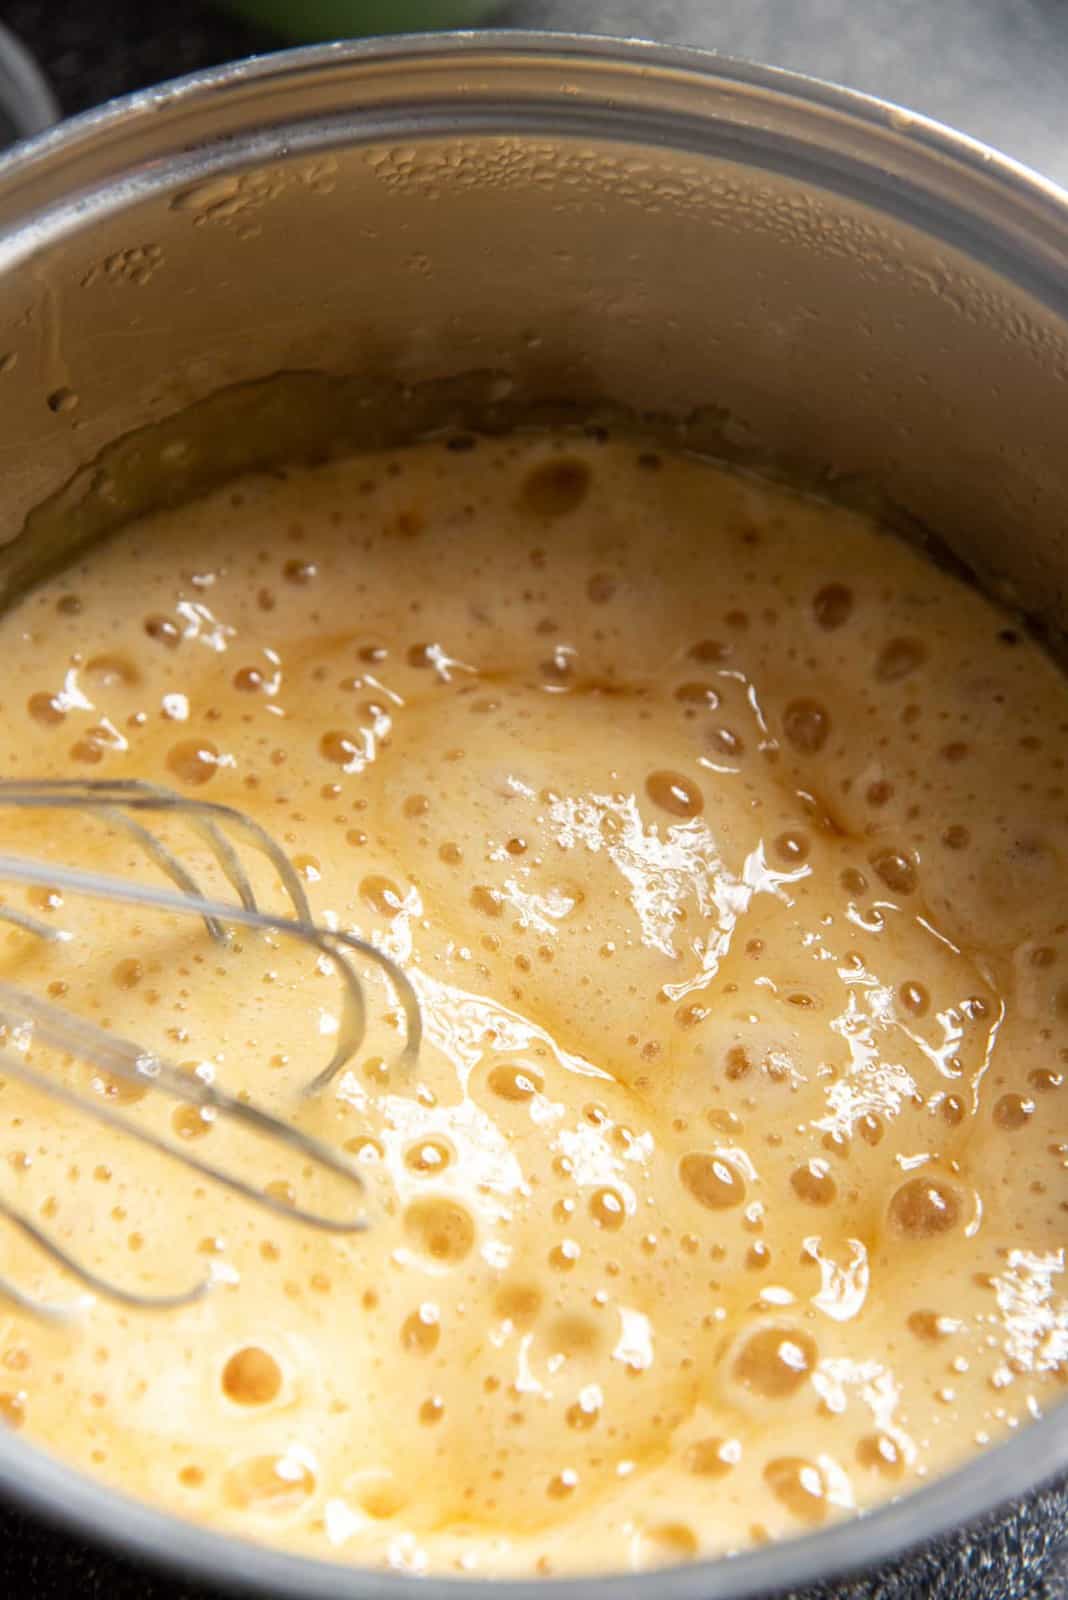
  • As soon as the honeycomb toffee syrup reaches the correct temperature, remove the saucepan from the heat. Immediately add the baking soda, and vigorously whisk it in. Be CAREFUL not to burn your hands!
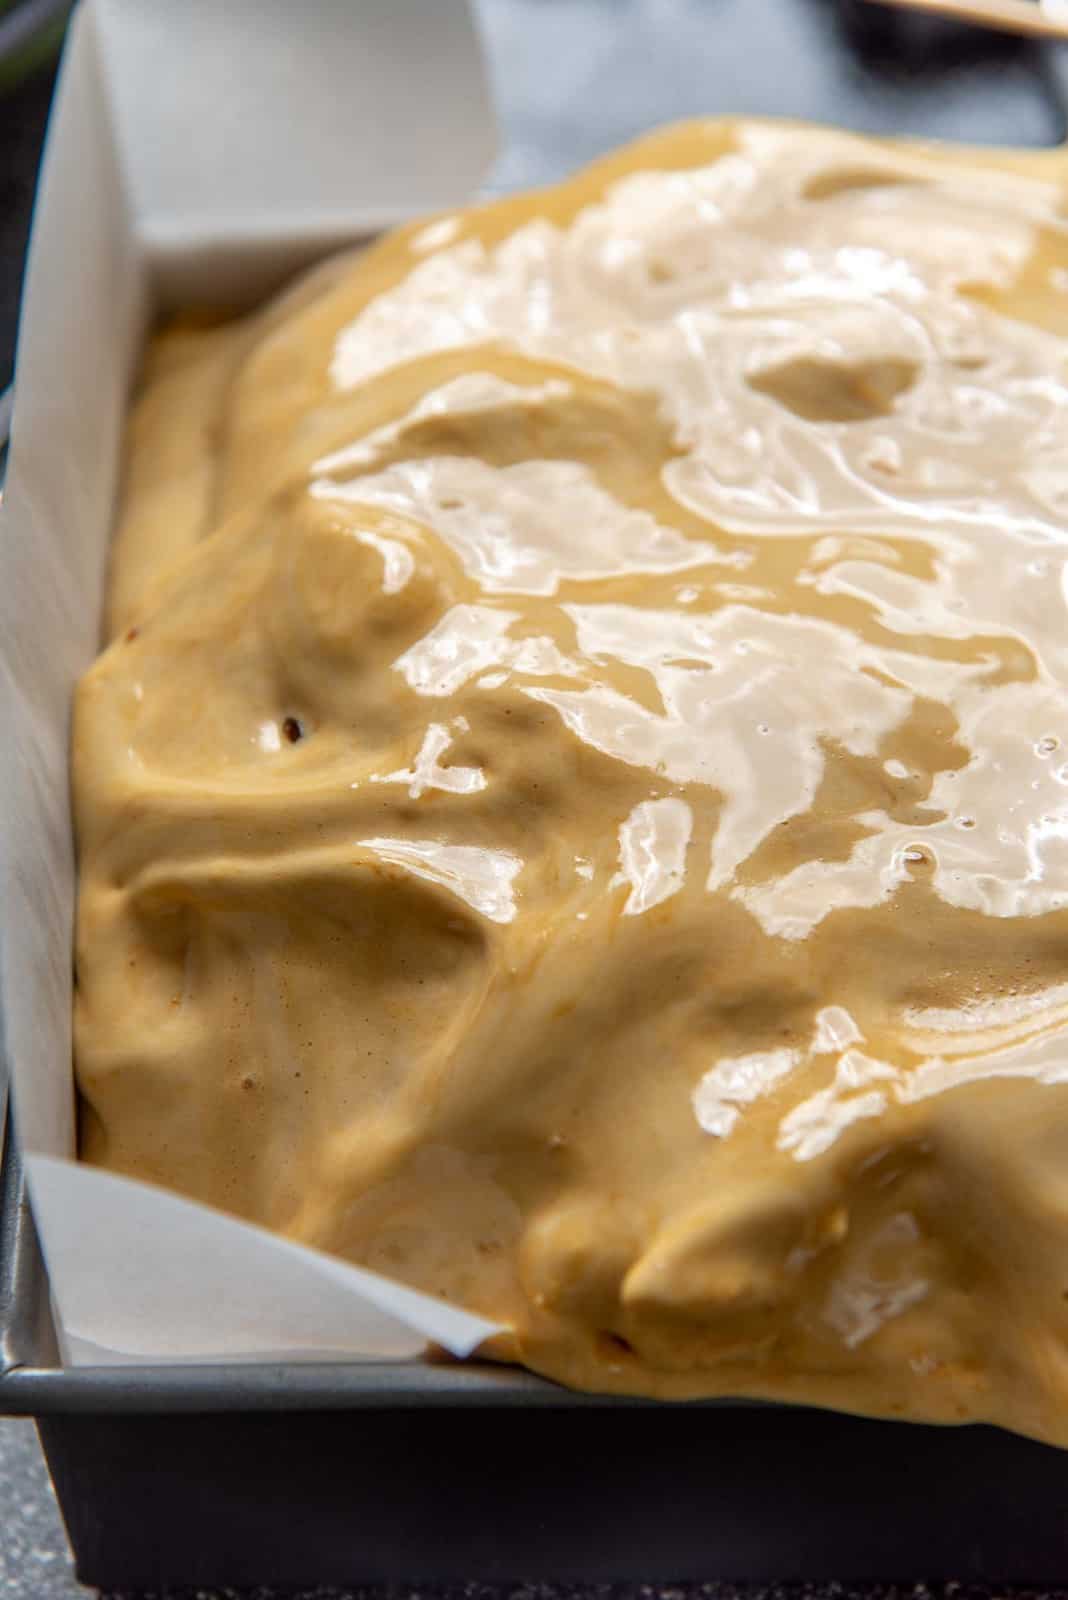
  • The sugar mixture will foam and expand a lot. When the baking soda has been mixed in and the sugar mixture has fully expanded, immediately pour it into the prepared pan.
  • Now let the honeycomb candy mixture completely cool and set.
The color of the sugar syrup when it reaches the right temperature
Adding baking soda to the hot sugar syrup
The foaming sugar syrup after whisking the baking soda
The foamy sugar syrup poured into the baking pan

Honeycomb candy vs sponge candy (vs seafoam candy or cinder toffee or hokey pokey)

Honeycomb candy goes by many other names! Some of these names include hokey pokey, sponge candy, seafoam candy, and cinder toffee (or honeycomb toffee or sponge toffee).

There really isn’t a difference between these, other than the regional origin of said names.

In the US, this candy is usually called honeycomb candy, or sponge candy, or fairy food. Usually this is made with sugar and corn syrup or honey, and baking soda. 

In the UK, they might be better known as cinder toffee or honeycomb toffee or sponge toffee. This version also widely uses golden syrup or honey.

In Canada, they are called sponge toffee or sponge candy.

In Australia and New Zealand, this candy is called honeycomb or honeycomb toffee, but it’s also known as hokey pokey.

Hokey pokey however is mostly reserved as a descriptor for a flavor that uses honeycomb. For example, hokey pokey ice cream, hokey pokey chocolate (honeycomb chocolate), hokey pokey biscuits (golden syrup flavored cookies or chocolate covered cookies with crunchy honeycomb – Squiggles!).

In Korea, honeycomb candy is called dalgona. The famous sweet popularized worldwide by the Netflix show Squid Game. Dalgona is made with sugar and baking soda only.

In the US, seafoam candy can also mean divinity candy which is very different from honeycomb.

However, in my experience of making this candy for years and years, the honeycomb recipe made with golden syrup is so much superior to any other type that’s more common in the US (typically made with honey).

Honeycomb candy vs sponge candy texture

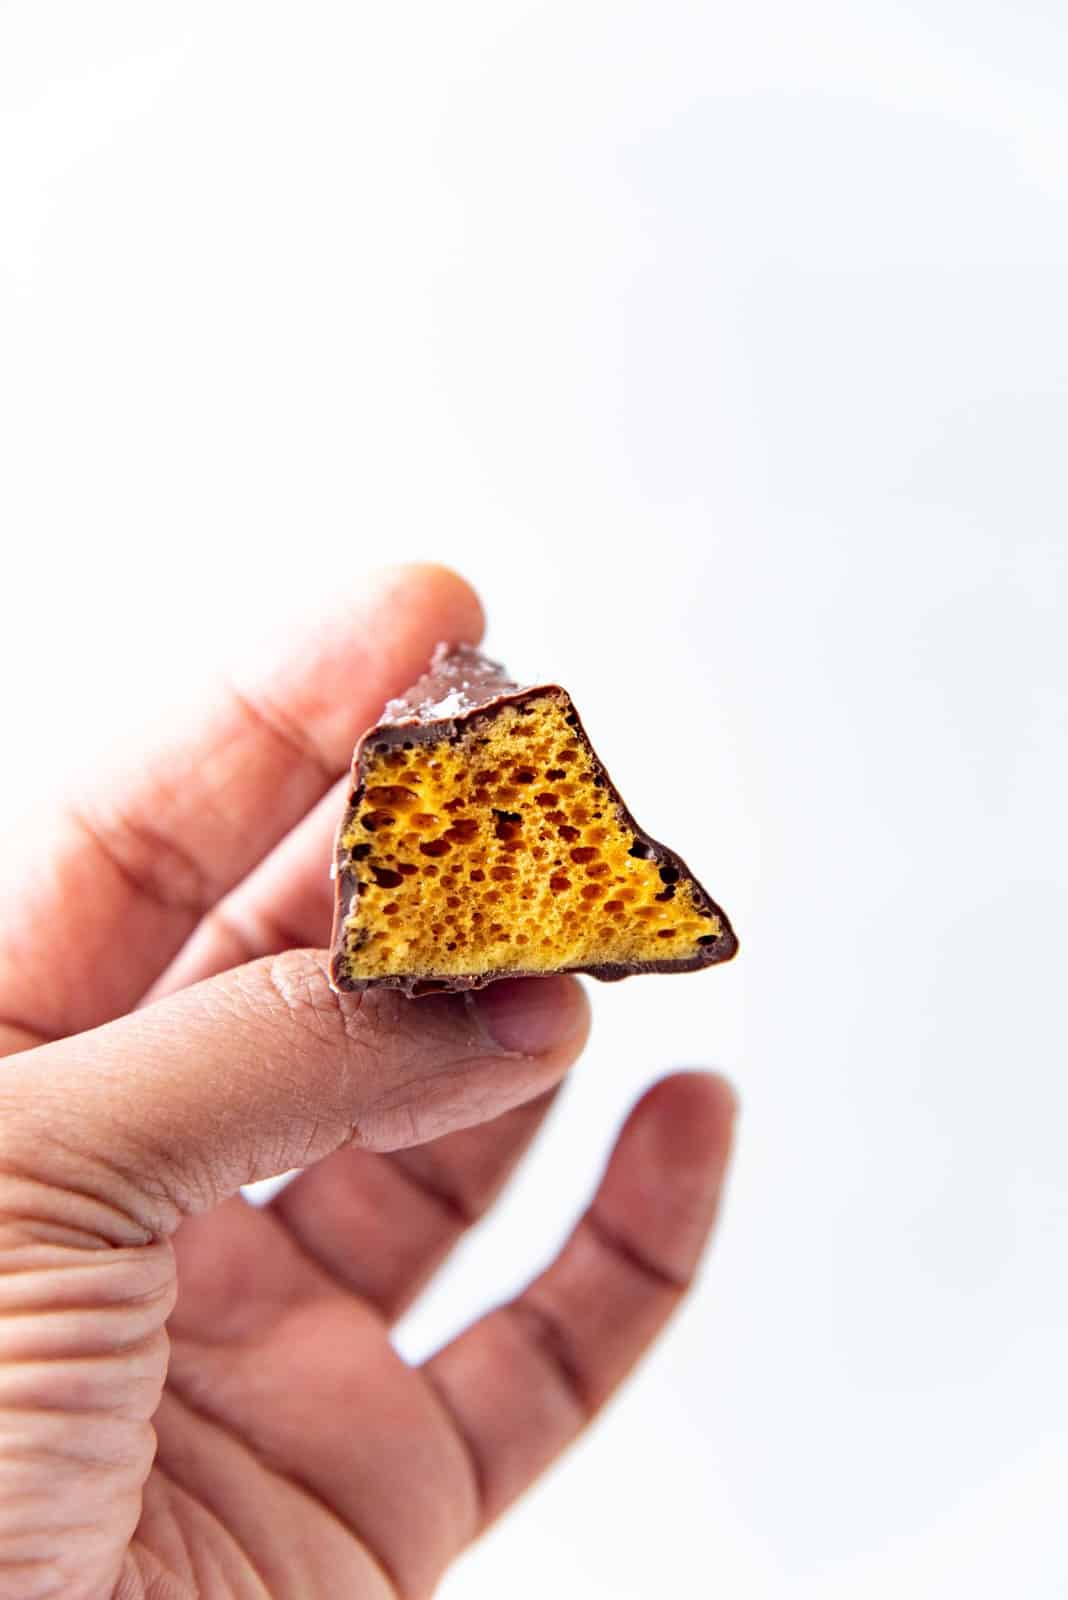
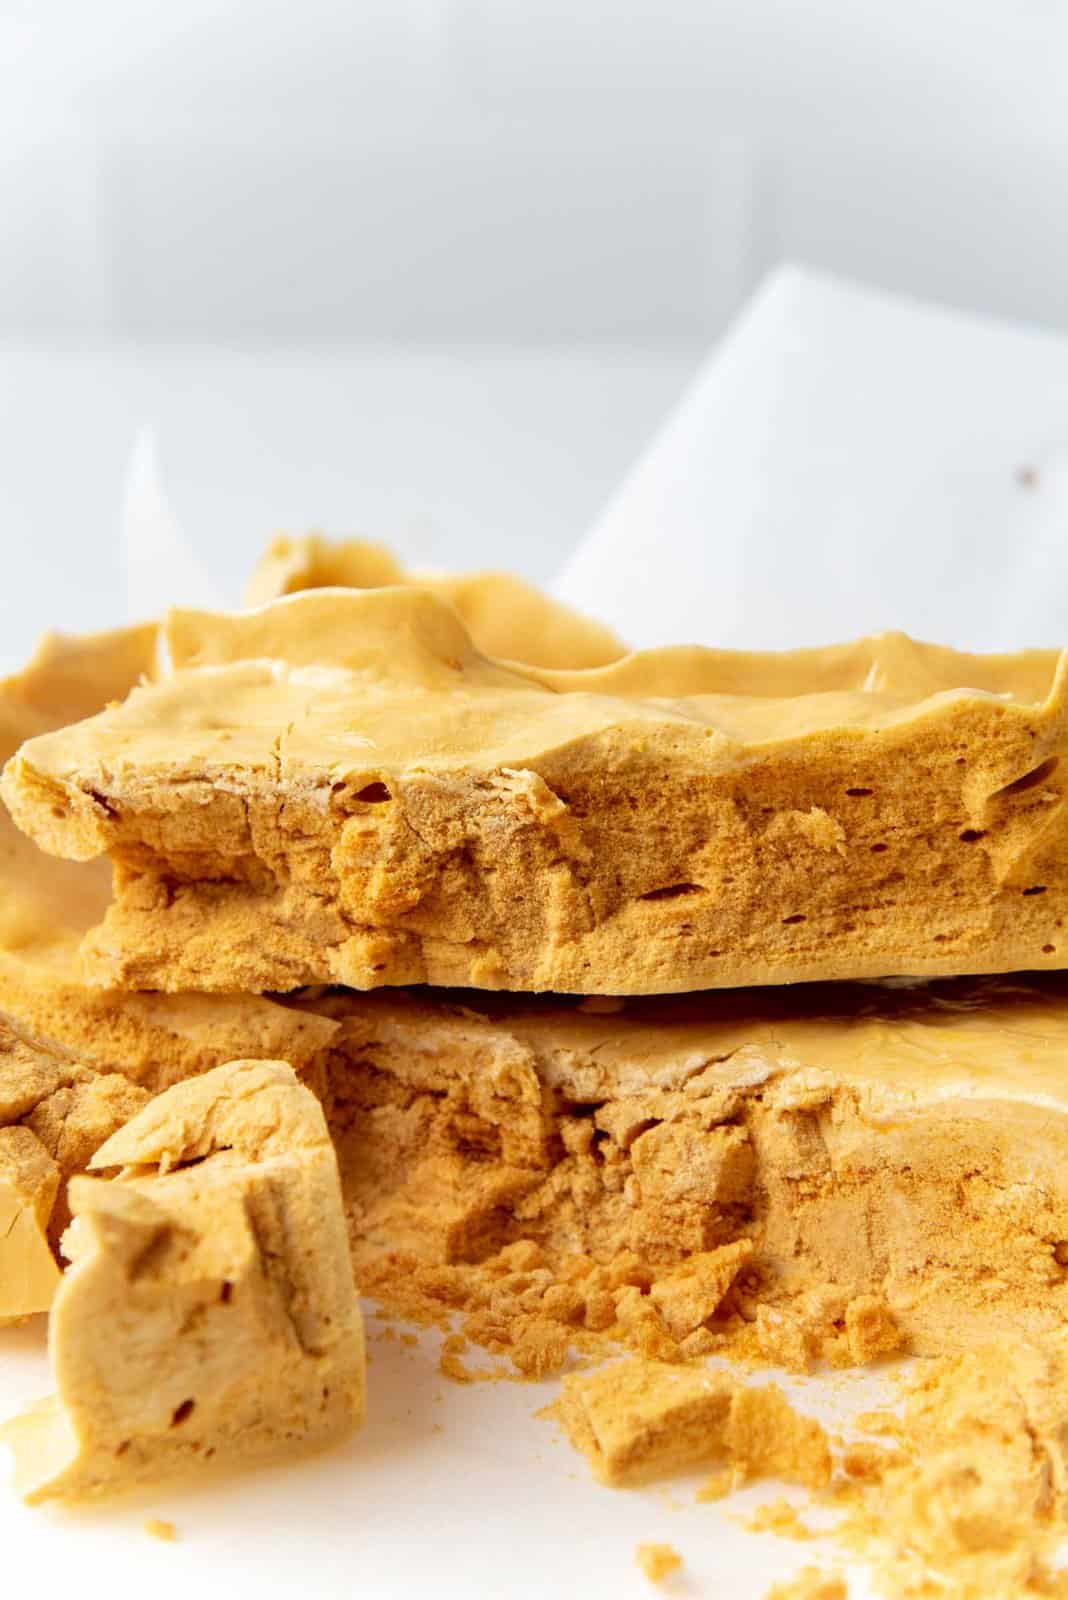
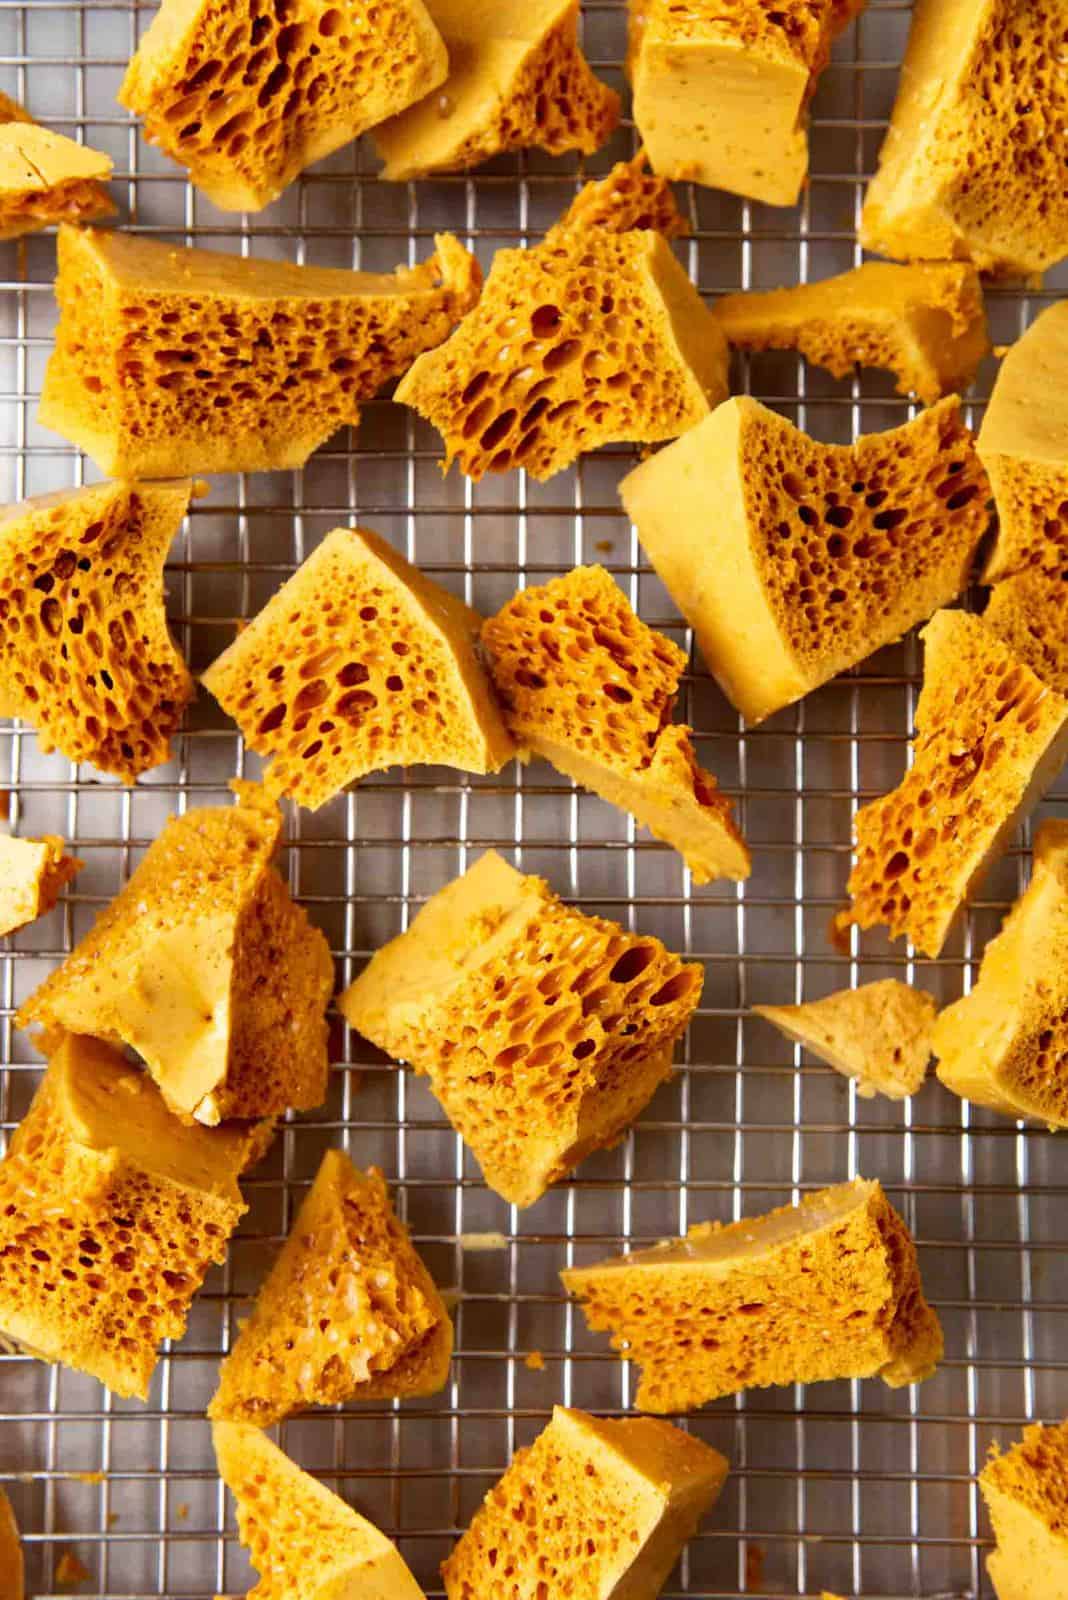
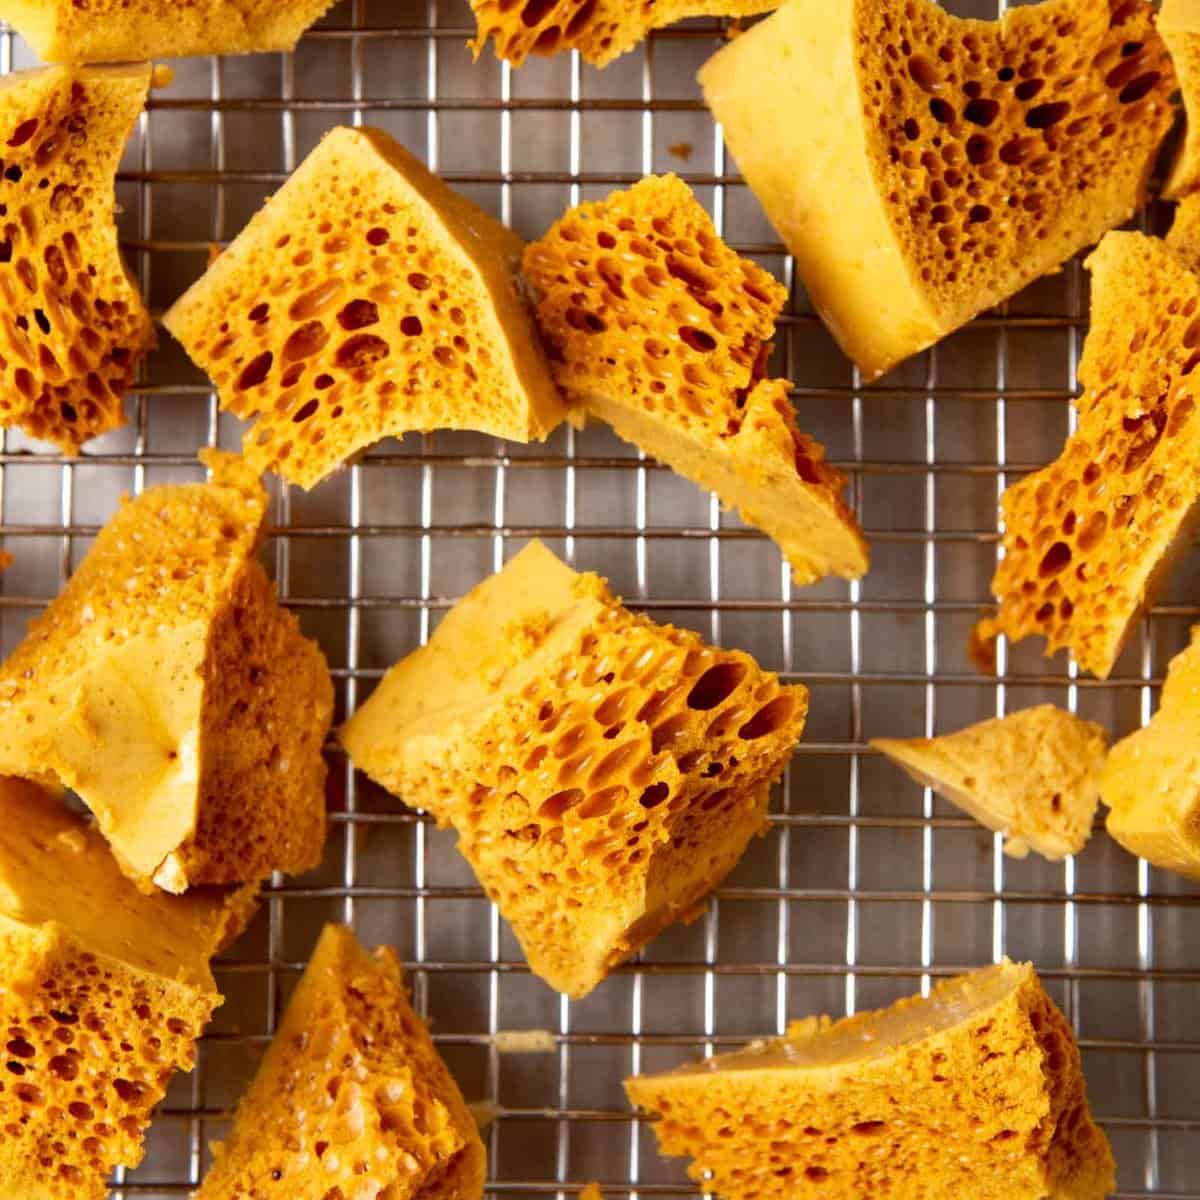
Honeycomb toffee has that beautiful open honeycomb texture (crunchy texture).

Sponge candy, as the name suggests, has more sponge-like texture. This happens because of the addition of the gelatin mixture.

To make sponge candy, you need to bloom the gelatin in a little water. Add this to the sugar syrup after it reaches the correct temperature, followed by the baking soda. Whisk in both, until the mixture foams up.

Pour the mixture into the prepared pan and let it harden.

A large piece of the honeycomb broken off of the larger slab
Classic honeycomb without gelatin
The crosssection of the sponge toffee slab
Dense honeycomb / sponge toffee made with gelatin

Serving suggestions

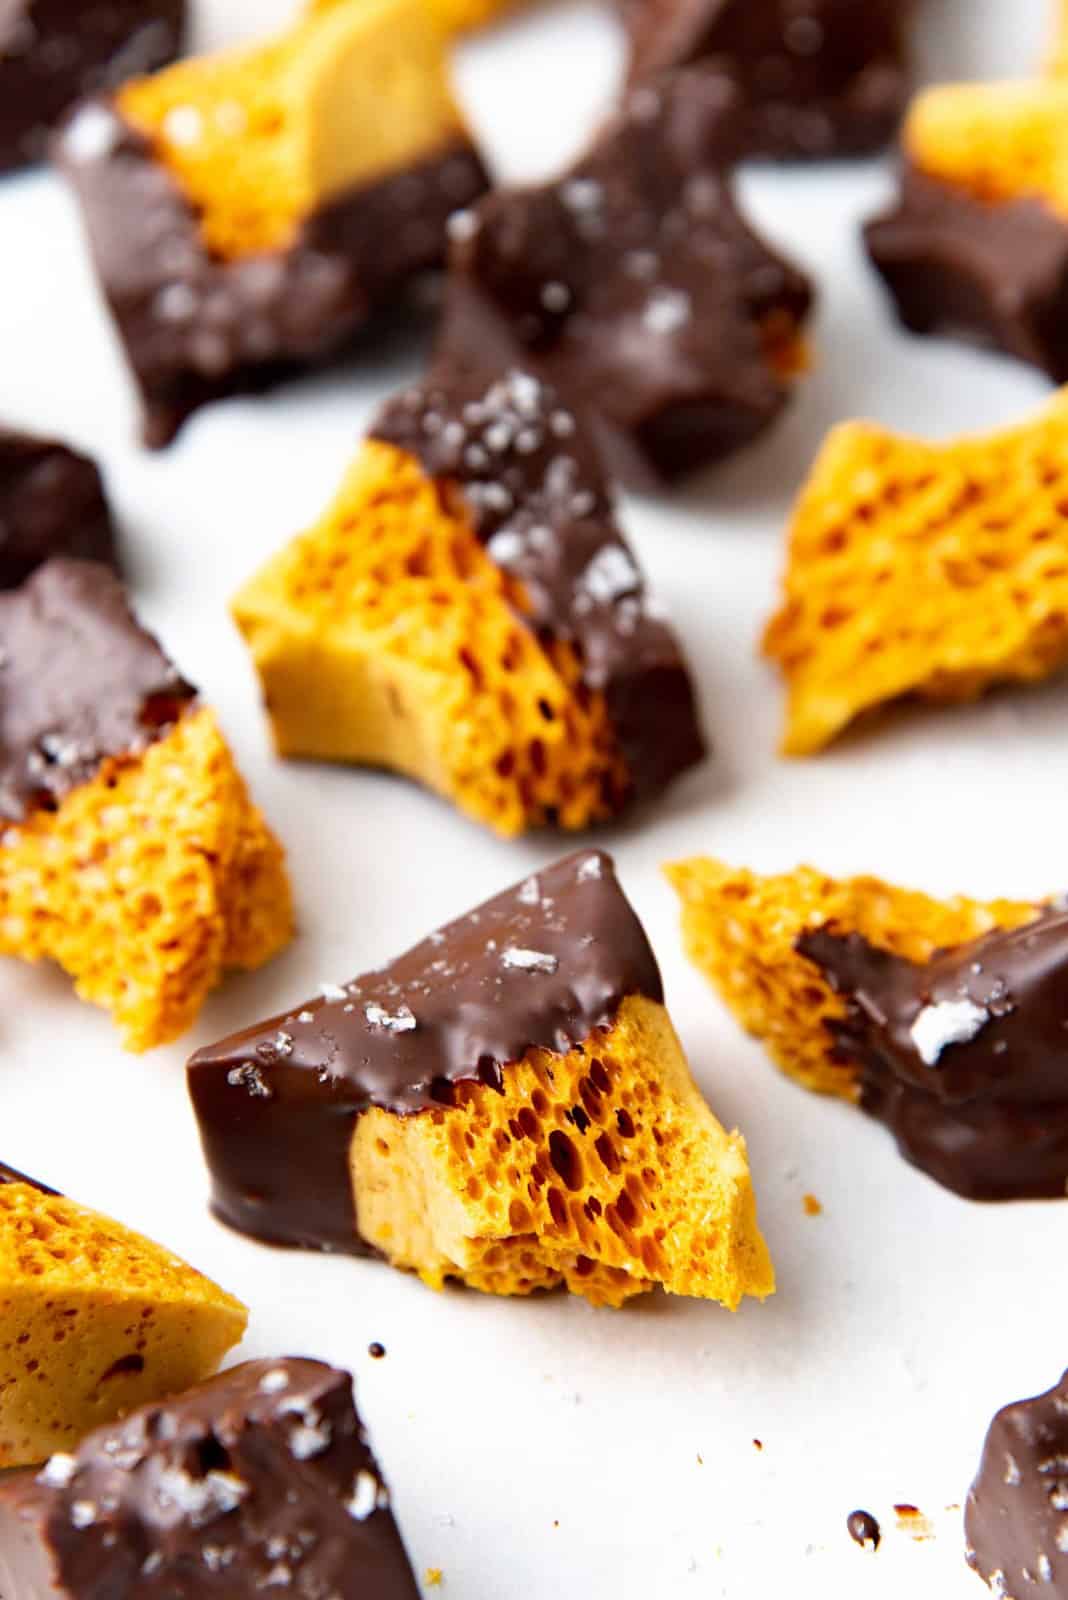
The best way to enjoy honeycomb candy is for sure with a coating of dark chocolate! Like a dark chocolate violet crumble or homemade Cadbury crunchie bar!

But there are lots of other ways to eat/serve this candy too.

Hokey pokey ice cream – Vanilla ice cream with pieces of hokey pokey (honeycomb toffee) in it. So, you can fold through pieces of honeycomb candy in vanilla ice cream to make this delicious ice cream flavor.

This is an ice cream flavor that is unique to New Zealand, and is a much-loved ice cream flavor by kids and adults alike. It was my favorite ice cream flavor as a kid too, and I still wouldn’t ever turn it down if I were to go back and have some!

Dalgona flavored drinks such as dalgona latte – Since honeycomb is essentially “dalgona”, crushed honeycomb toffee is the perfect topping for dalgona flavored coffee or milkshakes.

As a topping for this dalgona pudding, to add crunch and texture.

Pieces of honeycomb toffee can be used to decorate cakes (such as vanilla cake, coffee layer cake, classic white cake, white coconut cake aka winter cake, butter pecan cake, raspberry cake etc.) as well. They add a lovely crunch and flavor, and make the cakes look spectacular with the gold-colored candy pieces on top.

How best to break the candy into pieces

When the honeycomb toffee is hardened, remove it from the pan and place it on a chopping board. Use the tip of a very sharp knife and gently push it into the honeycomb toffee – it’ll shatter into pieces. Then break any large pieces into smaller ones.

Don’t discard any honeycomb toffee pieces that get crushed or are too small. You can add that to your coffee, hot chocolate, or vanilla steamers because they dissolve easily and add incredible flavor!

The honeycomb broken to smaller pieces on a wire rack.

How to coat honeycomb candy in chocolate

I prefer to coat my honeycomb with dark chocolate. Anything between 60 – 70% cocoa content is my favorite option to balance the sweetness of the toffee. But you can choose any chocolate you prefer.

Temper the chocolate using this article as a guide.

You can either brush the melted chocolate on the honeycomb / sponge candy using a clean, dry pastry brush, OR you can dip the candy in the chocolate.

And don’t forget to sprinkle some salt on top. I like to use Maldon sea salt flakes.

An overhead view of the chocolate dipped honeycomb toffee with sea salt

How to store honeycomb candy for later

Uncoated honeycomb

These will keep in an airtight container for about a week (maybe longer depending on the container). Make sure to separate the candy pieces with parchment paper or wax paper in between them.

The more they are exposed to air, the more sticky and soft the candy will become.

Chocolate covered honeycomb

These will last much longer. The chocolate prevents the honeycomb toffee pieces from being exposed to air, so these will stay crisp for much longer. I’ve kept mine for up to a month (could be even longer, but ours usually finish before that).

Honeycomb candy or sponge candy should NOT be stored in the fridge. They last longer at room temperature in a cool, dark place.

Recipe tips

  • Remember to use a large pot to make this honeycomb recipe. Once you add the baking soda, it’ll expand significantly, so all that space will be needed.
  • Have all the ingredients weighed and measured before you start, especially the baking soda. This way, the baking soda is ready to go as soon as the sugar syrup comes to the correct temperature.
  • Wear gloves to whisk the sugar mixture, if available. The mixture releases a lot of steam, and the gloves will provide you protection. You won’t need gloves once you get used to the process though, because you’ll know how to avoid the steam.

This honeycomb candy is incredible! Sweet, yes, but perfectly balanced with the bittersweet chocolate and salt. You’ll be surprised at how much of it you could easily put away!

This homemade candy is perfect for gift giving during the holidays as well, because they are super easy to make and very impressive too!

The chocolate covered honeycomb in a bowl

Frequently asked questions

What does honeycomb candy taste like?

Honeycomb candy is delicious with a unique texture! It tastes like caramel, but not like other caramel candies. Because of the addition of golden syrup, honeycomb toffee has a caramel, buttery flavor!

If you make honeycomb with honey, then the honey flavor will come through in the candy too, and it’ll be the same if you use maple syrup.

Golden syrup adds a lovely and unique flavor to the honeycomb recipe, which makes this version better than that made with honey or maple syrup.

How long does honeycomb candy last?

This entirely depends on where and how you store the candy. Ideally, it should last about 1 week in an airtight container, at room temperature. If the candy is exposed to high humidity, it’ll become soggy (and even dissolve) much faster.

If the honeycomb candy is completely coated in chocolate, it can last longer because the chocolate will protect the candy from moisture in the air.

Do not freeze or refrigerate this candy. The candy will soften and become soggy if you do so.

Why is my honeycomb candy chewy?

If your honeycomb candy is chewy, then the candy has absorbed moisture. Excess moisture in the candy causes the candy to become “soggy”, turning it from a crisp, crunchy candy to one that doesn’t have much crunch, and is more chewy.

Can you make honeycomb with baking powder?

Unfortunately, no. Baking powder and baking soda are very different products. Baking soda is more potent than baking powder, and you will need to add more baking powder to get the same results as baking soda.

This can result in the candy having an undesirable flavor in it. Read more about the difference between baking soda and baking powder here.

Why does my honeycomb taste bitter/burnt?

If the candy tastes bitter or is burnt, it’s very likely that your sugar burned in the process of making honeycomb candy.

This is why it’s so crucial to use a candy thermometer to make sure the candy is heated to the correct temperature.

The sugar syrup can also burn if the stove temperature is too high. Sugar syrup goes through the caramelization stages very quickly. So, this is another reason to have all the ingredients measured and ready to go, so that you’re able to add the baking soda as soon as the right temperature is reached.

Recipe

5 from 24 votes

Honeycomb Candy Recipe

Author: Dini Kodippili
Yield: 9 x 9 inch slab of honeycomb toffee
Cuisine: American, Australasian, British, European, New Zealand, North American
Honeycomb toffee social media

 Difficulty: 

Easy
Homemade crunchy honeycomb toffee, coated in chocolate and sea salt. Easy and deliciously addictive! Perfect sweet treat for any occasion. Learn how to make different versions of this candy with step by step instructions.
EASY – Easy, but requires a candy thermometer. Since you'll be working with hot sugar syrup, you also need to be careful. Possibly the hardest part of the recipe is tempering the chocolate, which can be skipped for convenience, if you like.
US‌ ‌based‌ ‌cup,‌ ‌teaspoon,‌ ‌tablespoon‌ ‌measurements.‌ ‌‌Common‌ ‌Measurement‌ ‌Conversions‌.‌ ‌‌Weight‌ ‌measurements‌ ‌are‌ ‌recommended‌ ‌for‌ ‌accurate‌ ‌results.‌ ‌

US based cup, teaspoon, tablespoon measurements. Weight‌ ‌measurements‌ ‌are‌ ‌recommended‌ ‌for‌ ‌accurate‌ ‌results whenever available.

Common Measurement Conversions
Prep: 50 minutes mins
Cook: 30 minutes mins
Chocolate setting time: 30 minutes mins
Total Time: 1 hour hr 50 minutes mins
Print Recipe Rate SaveSaved!
Makes: 30 small pieces (depending on how you cut/break the toffee slab)

Ingredients:
 

Honeycomb candy base
  • 350 g granulated white sugar or brown sugar (1 ¾ cup)
  • 160 – 170 g golden syrup or honey. Use corn syrup only if neither is available. (½ cup)
  • 120 mL water ½ cup
  • ½ tsp salt use only ¼ tsp if you don’t want to taste the salt flavor
  • 1 tbsp baking soda
Gelatin mix (optional – for a more dense sponge-like texture)
  • 2 tsp water
  • ½ tsp gelatin
To coat
  • 300 g tempered bittersweet chocolate approximate weight, you can also use milk chocolate or semisweet chocolate instead
  • Sea salt flakes (I use maldon sea salt flakes)

Instructions:
 

Honeycomb candy
  • Line a 9 inch square pan with parchment paper (sides and bottom). Set aside until needed. For flatter honeycomb candy, line a half sheet baking pan with parchment paper or silpat.
  • Keep a spatula and a whisk ready, as you will need them towards the end of the cook time.
  • Place the sugar, golden syrup, water, and salt in a large saucepan (this mixture will expand a lot, so use a large pot with enough space). You can use honey if you do not have golden syrup. Or corn syrup if you have neither.
    350 g granulated white sugar, 160 – 170 g golden syrup, 120 mL water, ½ tsp salt
  • Gently stir to saturate the sugar with the water.
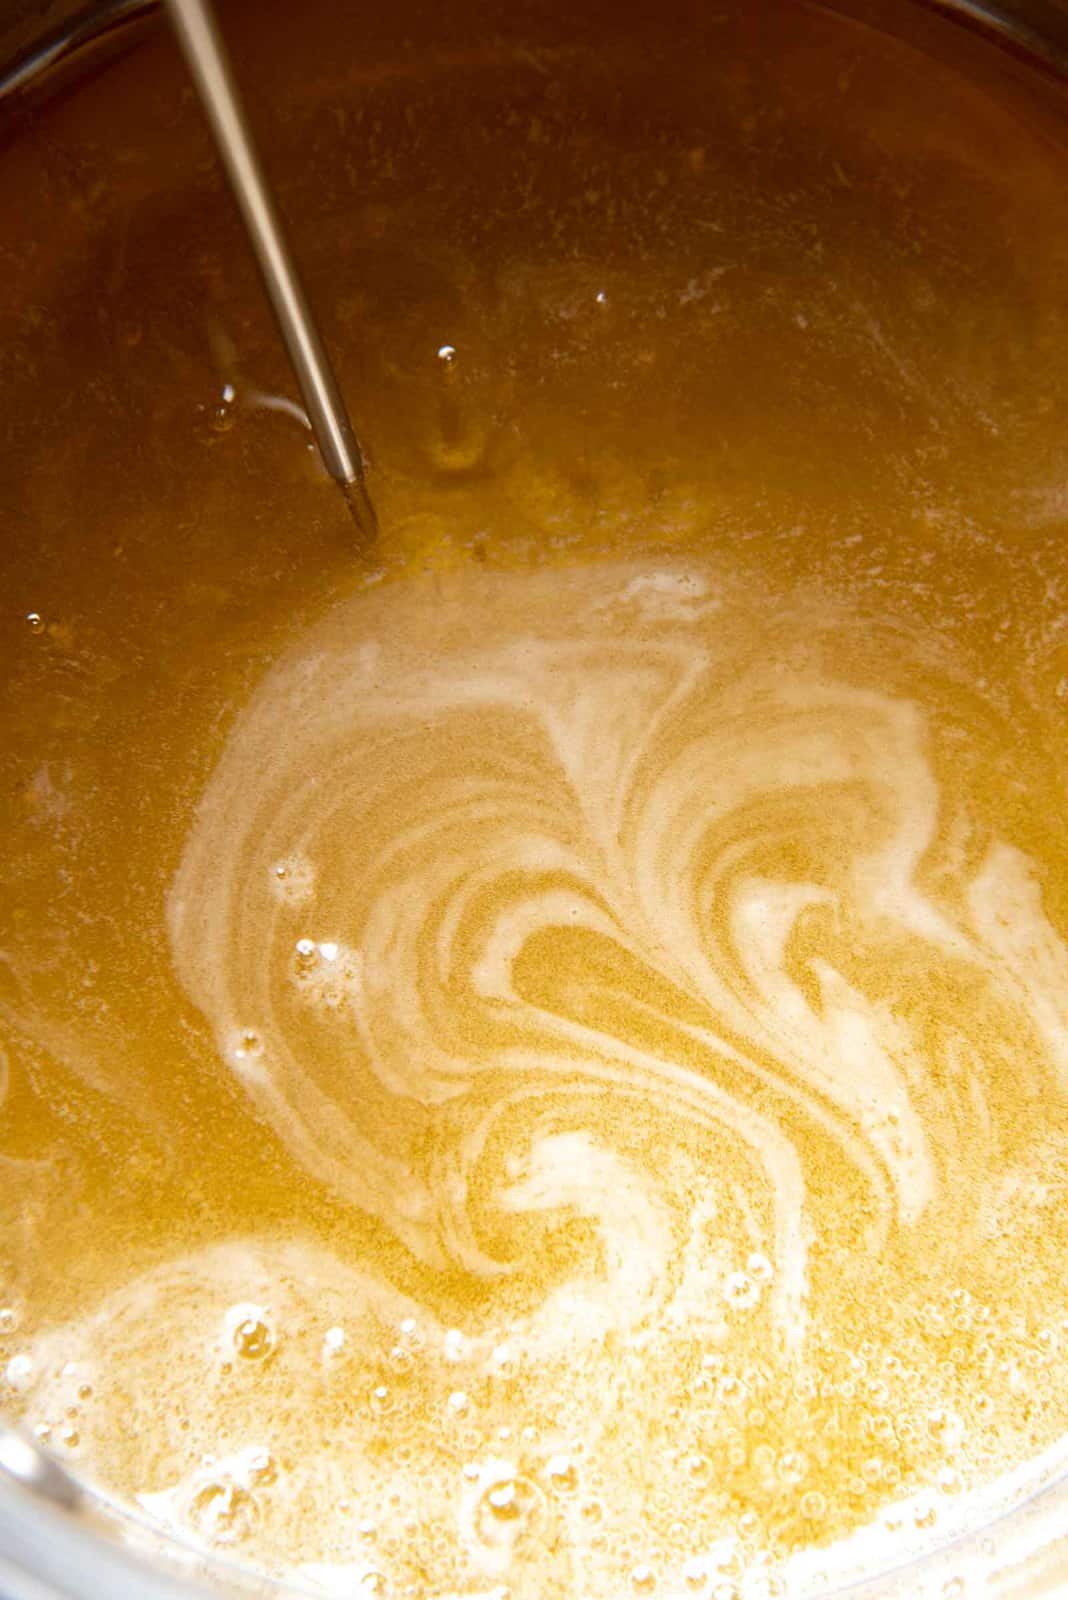
  • Heat over medium high heat, while swirling the pot frequently to ensure the sugar is dissolved.
  • Brush the sides of the pot with a pastry brush dipped in cold water to dissolve the sugar crystals on the side of the pot. Do NOT stir the sugar syrup.
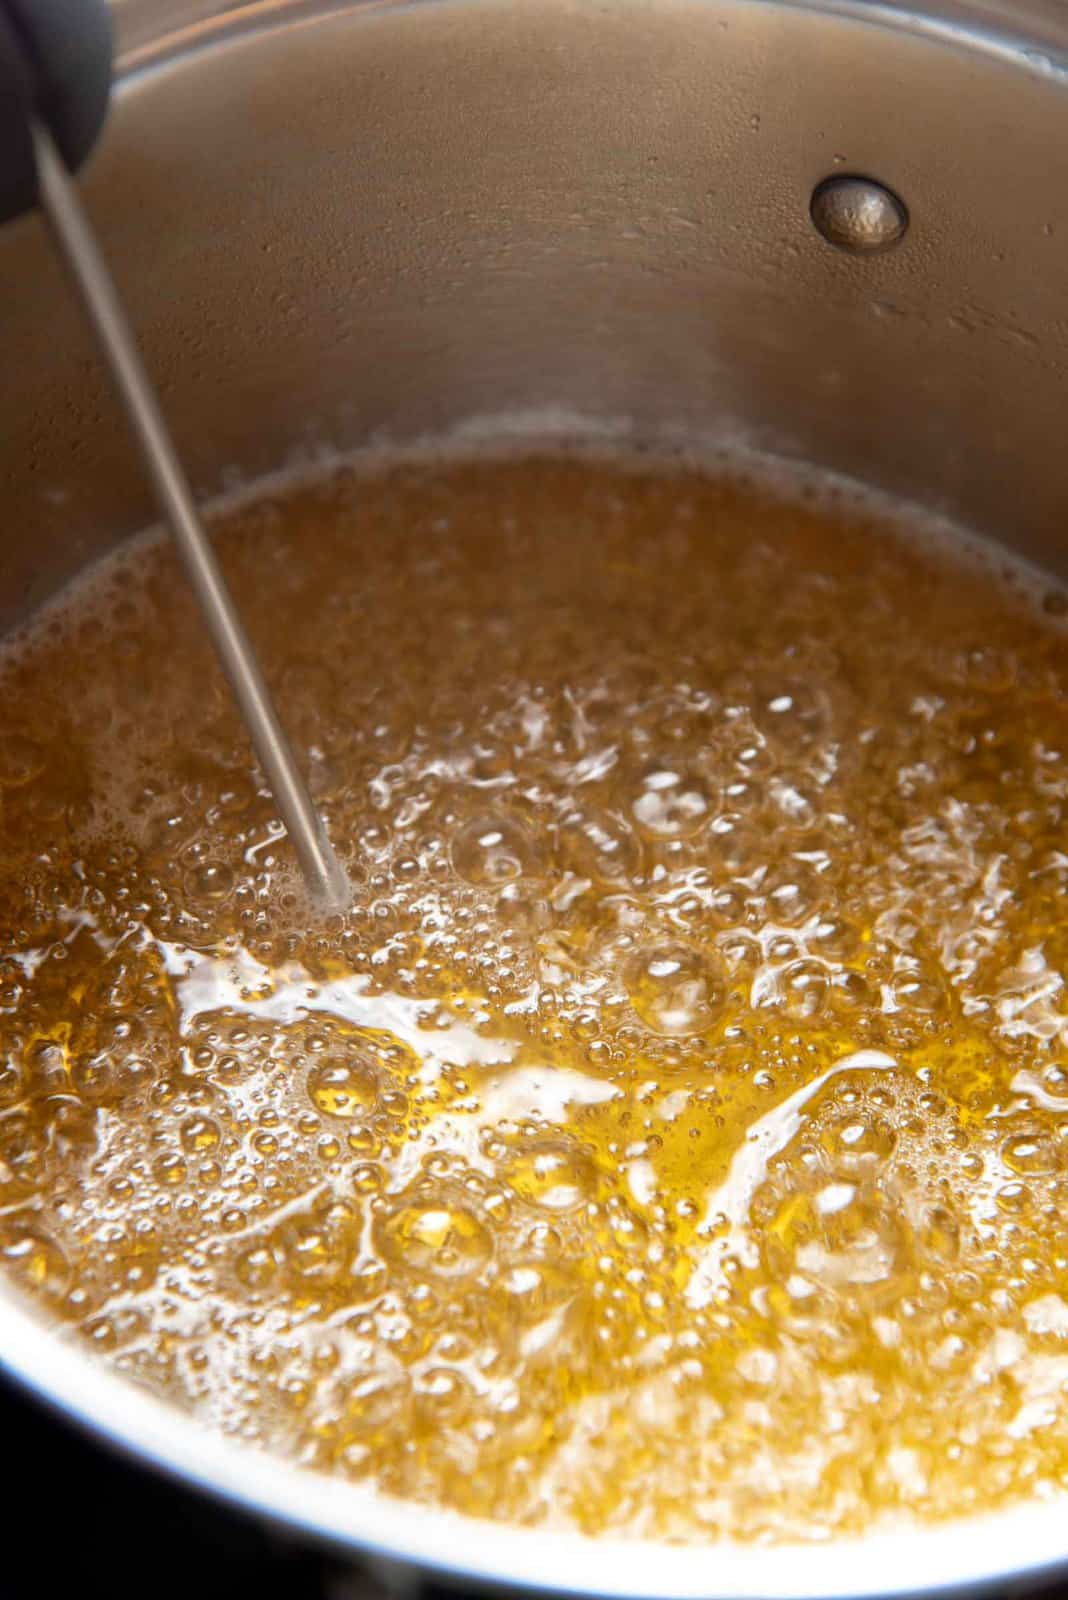
  • When the sugar syrup comes to a boil and all the sugar has dissolved, clip a candy thermometer to the side of the pot.
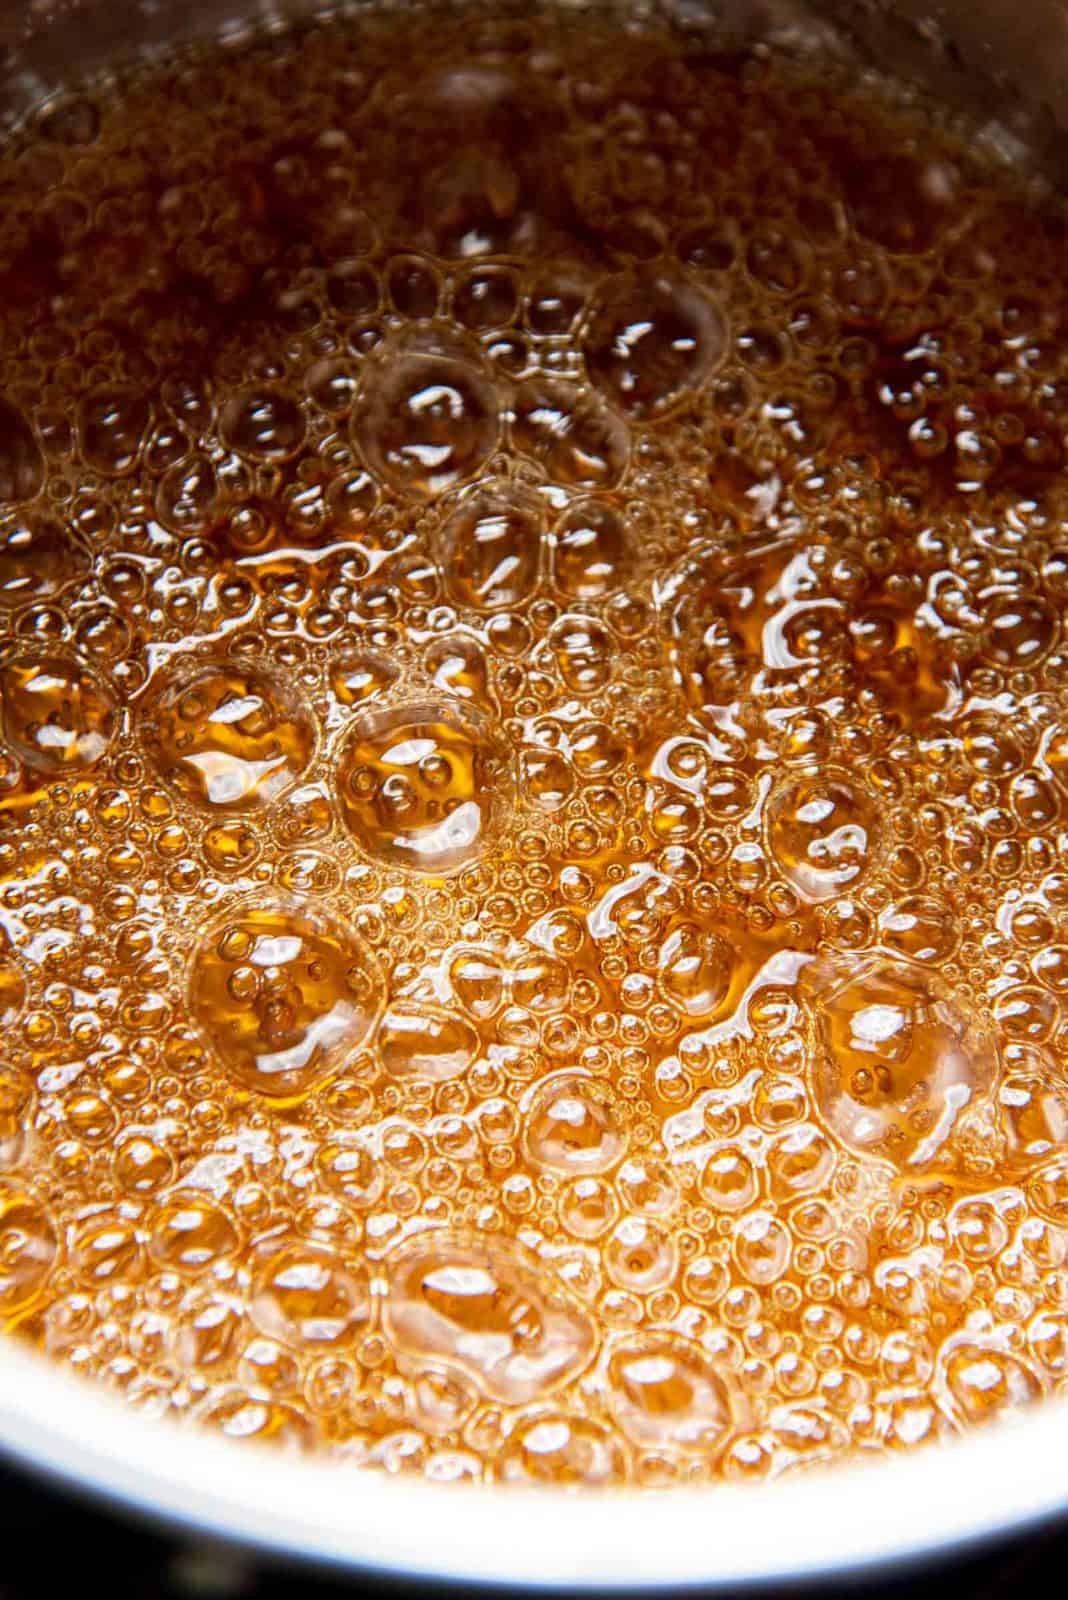
  • Heat the sugar mixture until it reaches 300°F / 150°C. Swirl the pot as you heat the sugar to make sure the syrup is evenly heating (check several spots in the syrup with the candy thermometer to make sure it's evenly heating).
  • Get the prepared pan, whisk, and spatula ready when the sugar syrup is close to 300°F. You can use an oven mitt for whisking the sugar base in the following steps, if you like.
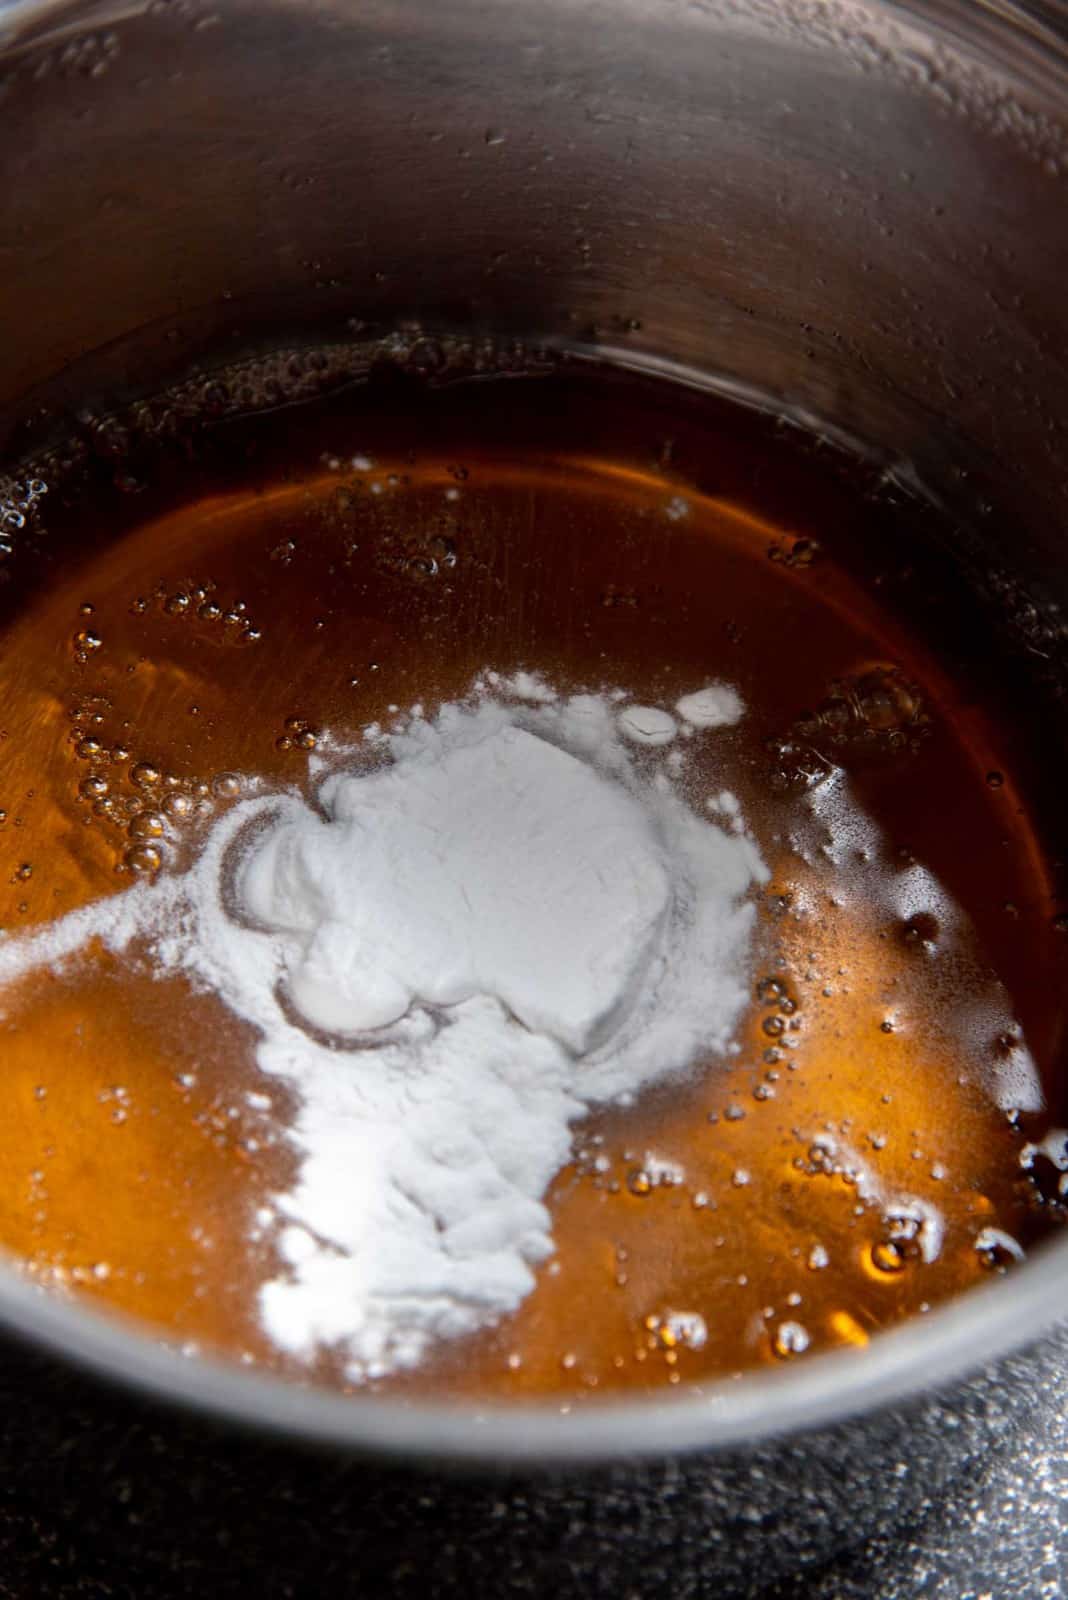
  • When the sugar syrup reaches 300°F, remove the pot from the heat and immediately add all of the baking soda.
    1 tbsp baking soda
  • Whisk the baking soda well into the sugar syrup. Make sure to reach all the corners of the pot. The sugar syrup will expand into a foamy honeycomb mixture.
  • As soon as the baking soda is thoroughly mixed in and the mixture has expanded, scrape the honeycomb mixture into the prepared pan.
  • Allow the mixture to harden for a few hours.
  • Once the candy is hardened, remove it from the pan and peel off the parchment paper. Place it on a cutting board.
  • Use the tip of a sharp knife to break the honeycomb into pieces. These will be uneven pieces.
For more dense, sponge candy texture
  • While the sugar syrup is cooking, bloom the gelatin in the water in a small microwave-safe bowl. Let it bloom for 10 minutes.
    2 tsp water, ½ tsp gelatin
  • Microwave the gelatin for just a few seconds to dissolve the gelatin. Do NOT let it boil.
  • Add the dissolved warm gelatin mixture into the sugar syrup, followed by the baking soda. Whisk vigorously, and then transfer the mix into the prepared pan (as per instructions above).
To coat honeycomb with chocolate
  • Temper the chocolate using this guide.
    300 g tempered bittersweet chocolate
  • Dip the honeycomb candy in tempered chocolate (you can dip them either fully or partially). Alternatively, you can brush the chocolate on the toffee pieces with a clean, dry pastry brush.
  • Place them on a parchment paper-lined baking sheet. Sprinkle salt on top before the chocolate sets.
    Sea salt flakes (I use maldon sea salt flakes)
  • Allow the chocolate to set at room temperature (do not put them in the fridge).

Recipe Notes

Remember to have all the ingredients measured and ready to go prior to starting this recipe. It’s also a good idea to have the equipment needed to make honeycomb candy ready before starting the recipe. 
Do not leave the sugar syrup unattended, as it can burn very quickly once the right temperature is reached. 

Storage instructions

Do NOT store honeycomb in the fridge or freezer.
Uncoated honeycomb toffee – Store these honeycomb pieces in an air-tight container at room temperature for about 1 week (or 2 weeks if it’s not humid). Place parchment paper or wax paper in between layers of the honeycomb to prevent them from sticking to each other.
Chocolate coated honeycomb toffee – These can be stored at room temp for much longer (up to a month) in an air-tight container.

Nutrition Information:

Serving: 11.5 x 2 inch piece Calories: 119kcal (6%) Carbohydrates: 24g (8%) Protein: 1g (2%) Fat: 3g (5%) Saturated Fat: 1g (6%) Cholesterol: 1mg Sodium: 149mg (6%) Potassium: 38mg (1%) Fiber: 1g (4%) Sugar: 23g (26%) Vitamin A: 3IU Calcium: 4mg Iron: 1mg (6%)

“This website provides approximate nutrition information for convenience and as a courtesy only. Nutrition data is gathered primarily from the USDA Food Composition Database, whenever available, or otherwise other online calculators.”

Tag me on Instagram!I love seeing what you’ve made! Tag me on Instagram at @TheFlavorBender or leave me a comment & rating below.
Dini Kodippili Avatar

About

Dini Kodippili

Dini Kodippili is a professional food writer, recipe developer, food photographer, cookbook author, and baker. Dini has been featured on HuffPost, Cosmopolitan, Forbes, Delish, Food & Wine and more. Learn More

I love hearing from you! Submit your question or recipe review here.

5 from 24 votes (4 ratings without comment)

Leave a Reply Cancel reply

Your email address will not be published. Required fields are marked *

Made this? Rate this recipe:


This site uses Akismet to reduce spam. Learn how your comment data is processed.

70 responses

  1. Al
    March 6, 2026

    5 stars
    Just made this! Honestly pretty easy and quick for a candy recipe! It was unexpectedly difficult to try and get it into the pan at the end, as I couldn’t lift the pot and scrape at the same time. I had to call a family member from the other room to grab the other handle to hold it, and it started to burn on the bottom. Still pretty tasty aside from the mild burnt layer on some pieces, but not sure how to avoid this as I don’t have a pot big enough with a long one handed handle. I’ll just resort to having someone on standby next time I guess. User error aside, no gripes! Nice recipe, and much quicker than when I make fudge or caramels 🙂

    Reply
  2. Maliha
    March 5, 2026

    Followed the exact directions but mine is also flat shiny and nothing like honeycomb I’ve had (albeit I’ve only had it a local fancy chocolatier lol). It seems many others gave it 5 stars but had the same problem 🙁
    I’ll try again with less water. Should have read the reviews before attempting. It did look fine for the first half hour but then I stopped staring at it, and I live in a very very dry city. I may still use it as I wanted it crushed to top a rich dark chocolate pudding I made. Or idk can it be blitzed into a graham cracker crust? Or will annoyingly stick in your teeth still? I hate to waste. Help!

    Reply
    1. Dini Kodippili
      March 7, 2026

      Hi Maliha
      the honeycomb will become flat if it’s whisked for too long, or it wasn;t heated to the right temperature. Like dalgona is flat because it is stirred alot, while honey comb isn’t stirred as much, so it has more height.
      You can make this recipe with less water, but at the end, the temperature of the sugar is still the same. The sugar concentration at the right temperature is the same whether you start with more water or less.
      We start with water, to let the sugar syrup heat up slowly so that we have more control. If you remove the water, you will need to keep an eye on the temperature closely to make sure it doesn’t burn too quickly.

      Reply
  3. Teresa
    February 14, 2026

    So, I followed the recipe exactly (except that I used appropriately half and half white and brown sugar because I wanted a bit of that mapley flavor) but mine expanded SO big that I had to pour it into the pan before I could fully whisk it, and my husband had to rush in to help me move the parchment into a 9×13 because it was seconds away from overflowing the 9×9! LOL I’m not sure how the texture will be because it’s still cooling. I live in a high altitude state – could that be why?

    Reply
    1. Dini Kodippili
      February 16, 2026

      Hi Teresa!
      I’m not very familiar with high altitude baking/ cooking unfortunately, but I got curious and did some quick research.
      It turns out that with baking recipes, it is recommended that the amount of chemical leavening be reduced because the lower pressure causes the leavening to be more active.
      So it is very likely that the baking soda was too much for the high altitude! Here’s an article from King arthur, that talks about how to reduce leavening for baking recipes, but maybe it might help for this recipe too?
      I hope that helps!

      Thank you for letting me know! I was able to learn something new!

      Reply
  4. Zuckerplum
    December 23, 2025

    5 stars
    I made the NO gelatine version but replaced 1/4 cup of golden syrup with honey. So yummy and puffy!

    Reply
  5. Mary
    December 22, 2025

    Mine also came out gooey and chewy and did not set up like the hard or even foamy candy I anticipated. They are too chewy to eat as they stick to the teeth sort of like an underdone taffy. IMHO I think it has something to do with the gelatine, which I did measure carefully and did heat in the microwave per instructions. I used a powdered gelatine: Great lakes brand widely used in the US. It is very dry in my home as we used forced air heat and it’s been a cold winter. So it is not the humidity.

    PS: I also used a very accurate digital thermometer, and tested with water to assure I was at the hardball stage. Chewy and will not harden. Love your website.

    Reply
    1. Dini Kodippili
      December 22, 2025

      Hi Mary
      I haven’t had this issue before, so I’m not sure what could be happening. But, I definitely want to figure it out!
      You mentioned that you checked to see if it is at hardball stage, but the syrup should be at hard cracked stage (300 F). Could you double check this? Hardball stage is too low, and the syrup would have too much water to harden. If that’s the case, then heating the syrup to hard crack stage should resolve it.

      However, if you did meant hard crack (and not hard ball stage), then you could try these –
      Could you make sure you check multiple spots in the sugar syrup to ensure that it’s evenly 300 F. I find that sometimes my stove create hot spots, and one area can be higher than the other areas, so the syrup wasn’t uniformly heated to the right temperature.
      The only time honeycomb toffee has never set is when I didn’t check the temperature properly. It would get soft overtime if I made it on a high humidity day, or if I made it on a day where there was high humidity in the kitchen (lots of steam from cooking!).

      Scientifically, sugar syrup should absolutely harden after being heated to 300 F. There’s no reason it won’t, as it is impossible to avoid it. UNLESS, too much water is introduced. This could be steam, humidity etc.
      Please let me know and I hope this is helpful!

      Reply
  6. Jill Christian – Gim
    December 21, 2025

    5 stars
    Turned out perfectly… precise directions and conversions!! I ven include storage tips. Thank you!!

    Reply
  7. Sarah Grosvenor
    December 20, 2025

    Mine came out so chewy and sticky, it’s really hard to eat. Does the glycerin help with that? I went to right about 300 degrees, just a little over.

    Reply
    1. Dini Kodippili
      December 20, 2025

      Hi Sarah
      Im not sure what you mean about glycerin. Could you let me know? I dont use glycerin in the recipe.

      Usually the candy is chewy if there’s too much humidity. It needs to be stored in an air tight container as soon as its cooled down. Especially if its humid where you live.

      You can dip them in a thin layer of cocoa butter as a protective layer too.

      I hope that helps!

      Reply
  8. Nalani
    November 27, 2025

    I’m positive the recipe is good & it’s I that is doing something wrong. That said, while I’m not a professional culinary artist, I’m no novice either. I know how to follow a recipe. This was my 2nd attempt at making honeycomb & it was an epic failure, again. What can you do if you suspect the honey & sugar mixture may be burning but you’re no where near 300° F on the thermometer? I waited until I reached the right temp and it’s definitely ruined. Totally scorched.

    Reply
    1. Dini Kodippili
      November 27, 2025

      Hi Nalani
      Sugar syrup or sugar in general will ONLY start to caramelize at temperatures over 325 F, and burn at temperatures over 350F. So, it is impossible for a sugar syrup to burn before reaching 300 F. I’ve explained it in my cooked sugar stages article here.
      I can think of a few reasons why this might be happening though. It could be either 1 of these reasons or a combination of reasons, so I hope it helps!
      1 – The digital thermometer is not calibrated and the readings are wrong.
      2 – The thermometer is set to celcius and not farenheit.
      2 – A hot spot on the stove, caused the sugar syrup to caramelize and burn in one area only, without evenly heating the sugar syrup. So the thermometer registers cooler in one area, and hot in another area because of the uneven heat.
      3 – The sugar syrup is very shallow in the pot, and the digital thermometer is not being submerged sufficiently to register the temperature.

      Check to make sure that these issues are not causing the sugar syrup to burn. For uneven cooking, it’s important to swirl the pot while heating, to ensure that the heat is distributing properly through the syrup. Using a heavy bottom pot is also great for even heat conduction, than using a thin light pot.
      I hope that helps!

      Reply
  9. Alex
    November 27, 2025

    Skip the water if you don’t have a thermomiter. Mine came out flat. I made it before and it came out perfect without the water.

    Reply
    1. Dini Kodippili
      November 27, 2025

      Hi Alex
      The sugar syrup is heated to 300 F which is essentially that there is no water (99% concentration). If they came out flat, it’s because the syrup wasn’t heated to the right temperature and there was too much water in in the syrup. The temperature of the syrup must be monitored to get it 300 F. It also helps to make sure your digital thermometer is properly calibrated too. Or if you don’t have one – I have provided the water test method to check the temperature WITHOUT a thermometer.
      You can absolutely make this without water, but the water provides some assurance to prevent the sugar syrup from crystallizing or burning too fast. If you start at 100% sugar, then it can get hard to melt the sugar evenly AND you may burn it too fast. If your method works for you, that’s excellent! But this method better control, especially for beginners!
      I hope that helps!

      Reply
  10. Karen
    October 28, 2025

    5 stars
    The honeycomb hardened, but it’s a little chewy

    Reply
    1. Dini Kodippili
      October 30, 2025

      Hi Karen
      Honeycomb does become chewy if it’s left out in a high humid area (or the fridge). It can also become chewy if the sugar syrup isn’t heated evenly to the right temperature. At lower temperatures it can still have too much water in it, that will result in a chewy texture.
      I hope that helps

      Reply
  11. Laura Choy
    October 27, 2025

    Is it possible to double the recipe–perhaps, then, using a 13×9″ pan? Or should I just make two batches?

    Reply
    1. Dini Kodippili
      October 27, 2025

      Hi Laura
      You can double the recipe, provided you have a pot that is large enough to accomodate the amount of honeycomb you will be making.
      Since this expands in the pot, you will need to use a large pot to make double the amount, and be confident in being able to achieve the right temperature uniformly without burning the sugar.
      If you are not familiar with this recipe, or have little experience with candy making, then I recommend starting with a single batch and repeating is again to get another batch to keep it manageable.
      I hope that helps

      Reply
  12. Joanne
    October 15, 2025

    Looked good when complete but tasted slightly burnt. Use the recommended ingredients in cup measurements. Maybe 300 degrees just a tad too high? Dunno, but will try again.

    Reply
    1. Dini Kodippili
      October 16, 2025

      Hi Joanne
      300 F is the hard crack stage, and the sugar should not be burnt at all.
      The sugar has to heat beyond 350 F, to the dark caramel stage (as notes in my candy making stages), for it to be burnt.

      If the sugar did seem burnt at 300 F, then it could be one of the following –
      1 – the candy thermometer needs to be calibrated.
      2 – the sugar syrup wasn’t checked in several places, and wasn’t swirled properly when cooking. This causes some areas of the sugar to heat faster (hot spots), and for the sugar syrup not to be heated evenly. If you only check the temperature in one spot without swirling, you may miss hot spots / cool spots, and have some parts of the sugar burn. This can make the whole candy taste burnt.

      I recommend swirling the pot to ensure even heating, and to check the temperature in several spots as well (as mentioned in the recipe card as well).
      I hope that helps

      Reply
      1. Joanne
        October 16, 2025

        Thanks, I was swirling continuously but will check my thermometer.

        Reply
  13. Heather
    October 13, 2025

    Is the calories really per 11.5” x 2” piece? That seems huge for 120 cals

    Reply
    1. Dini Kodippili
      October 16, 2025

      Hi Heather
      The serving size is 1 – 1.5 ” x 2″ approximately.
      I hope that helps

      Reply
      1. Heather
        October 17, 2025

        It does, thanks!

        Reply
  14. Jess
    October 1, 2025

    I couldn’t get the mixture above 260°. Any tips?

    Reply
    1. Dini Kodippili
      October 1, 2025

      Hi Jess
      The sugar will get to 300 F with some time. If the temperature wasn’t rising at all, then it could be because the thermometer that you are using is limited or isn’t calibrated.
      You can also use the cold water test to check the stage and temperature of the candy. We are looking for the hard crack stage at 300 F. Once the syrup comes to the hard crack stage, you are able to proceed with the recipe.
      I hope that helps

      Reply
  15. Pelin
    September 22, 2025

    I’m confused. First you write that you can’t sub the white sugar for brown sugar, but in the ingredient list you list brown sugar as a substitute?

    Reply
    1. Dini Kodippili
      September 22, 2025

      Hi Pelin
      White sugar is the best option. It’s possible with brown sugar, but white sugar is better.
      Hope that helps

      Reply
  16. beck
    September 20, 2025

    5 stars
    yum yum yum!!! turned out lovely! i panicked a little when it got to the right temp (couldn’t find my oven gloves lol), so took it off the heat at around 315, but it only tastes a little burnt–and luckily i enjoy a burnt edge to toffees anyway :]
    the texture is great as well! super light and crunchy. i’ll definitely be making this again. thanks for the recipe!

    Reply
  17. Lani
    May 28, 2025

    5 stars
    I tried this for the first time, it only took 40 minutes to make, and it’s setting now! It was really easy and fun, I thought it would be hard, but the instructions made sense and I was able to do it- strongly recommend! (I cut the ingredients in half, so 14 tbsp and a bit more of sugar, 1/4 cup honey and water, 1/2 tbsp baking soda, 1/4 tsp salt!

    Reply
  18. Ani
    May 8, 2025

    Hi could i use pieces of honeycomb in the center layer between two cakes – or will they get soggy – either combined with chocolate ganache or hazelnut butter?

    Reply
    1. Dini
      May 9, 2025

      Hi Ani
      Unfortunately, these will dissolve inside the cake because the sugar will dissolve when in contact with anything with moisture. The only way to keep the honeycomb whole inside cake layers, is to individually coat each piece of honeycomb with chocolate or cocoa butter. The coating must coat it 100%, because even a small gap will cause the honeycomb to become soggy and dissolve.
      I hope that helps

      Reply
    2. Mary
      December 14, 2025

      Why not do a meringue Dacquise? That would get a very similar texture and even taste, depending on how you flavor the meringue.

      Reply
  19. Valencia
    April 20, 2025

    5 stars
    I burnt mines but the mixture is really good, just watch your solution

    Reply
    1. Dini
      April 20, 2025

      Hi Valencia
      Yes! This caramelized quickly which is why it’s recommended that you do not leave it unattended and you work quickly to avoid burning the mixture!

      Reply
  20. Megan L
    February 27, 2025

    5 stars
    This is the 3rd Honeycomb recipe I’ve tried to make from home and it’s the first batch that turned out perfect! Wonderful texture and taste plus the recipe is super easy to follow. I made 2 batches the first time and started by dipping half in chocolate ( specifically milk chocolate “almond bark” from target) and the rest plain…after eating two pieces of chocolate the minute they cooled I decided to just dip them all in chocolate and I’m so glad I did…..I honestly could not resist them!! I gifted some to friends and indulged in the rest. I’m typing this because I’m back again making another batch and figured it deserved a review. Try it…you wont be disappointed!

    Reply
    1. Dini
      March 2, 2025

      That’s amazing, I’m so happy to hear that! Thank you so much for your lovely review Megan! 🙂

      Reply
←Older Comments
1 2 3
Newer Comments→

Hey There!

Hi! I’m Dini, a third culture kid by upbringing and a food-geek by nature. I was born in Sri Lanka, grew up in New Zealand and lived in Australia, and then the US, before moving to and settling down in Canada. My food is a reflection of those amazing experiences!

Read More
Front cover of the Secret Layer Cakes cookbook by Dini Kodippili.

The Flavor Bender

Cookbook

Buy now on Amazon!

Recipe Basics

  • How To Make Perfect Choux Pastry

    How To Make Perfect Choux Pastry

  • Flaky All Butter Pie Crust Recipe

    Flaky All Butter Pie Crust Recipe

  • How To Make Homemade Marshmallows (Foolproof Guide)

    How To Make Homemade Marshmallows (Foolproof Guide)

  • The Best Homemade Bread (White Bread Recipe)

    The Best Homemade Bread (White Bread Recipe)

  • Homemade French Croissants (Step By Step Recipe)

    Homemade French Croissants (Step By Step Recipe)

  • The BEST Pavlova Recipe (Step by step recipe and video)

    The BEST Pavlova Recipe (Step by step recipe and video)

Featured On

Master the science of baking!

Get my FREE Printable Cake Pan Conversion Chart!

So you’ll know how to substitute cake pans of different shapes, sizes & volumes in a pinch!

A must have resource for all pro bakers, novice bakers, and aspiring bakers alike!

Download now!

Reader Faves

  • How to make the Best Instant Pot Short Ribs

    How to make the Best Instant Pot Short Ribs

  • Perfect Quick and Easy Rough Puff Pastry

    Perfect Quick and Easy Rough Puff Pastry

  • The Best Spicy Sweet Chili Sauce (Easy Recipe!)

    The Best Spicy Sweet Chili Sauce (Easy Recipe!)

  • The Best Homemade Bread (White Bread Recipe)

    The Best Homemade Bread (White Bread Recipe)

The Flavor Bender

I love baking, cooking, experimenting with flavors and ingredients, and passing on all my tips and tricks to you!

Read More

About

Meet Dini
My Book
Work With Me
Contact

Browse

Recipes
Measurement Guide
Baking How-To’s
Shop My Faves
Privacy
Disclosure
Terms

Branding by MRD

Theme by OC

Back to Top
  • Facebook
  • Instagram
  • Pinterest
  • X
  • YouTube
3371 shares

Rate This Recipe

Your vote:


A rating is required
A name is required
An email is required

Recipe Ratings without Comment

Something went wrong. Please try again.